背景需求
12号小朋友从地上拾到一个兔子的扣子交给我,
不一会儿24号东张西望问我:“我的拉布布找不到了”
“拉布布是什么东西?”
陪他来的15号同学说:“是一只兔子,我鞋子上也有。(他鞋子上有两个咖啡色)。我看到在你手里。”
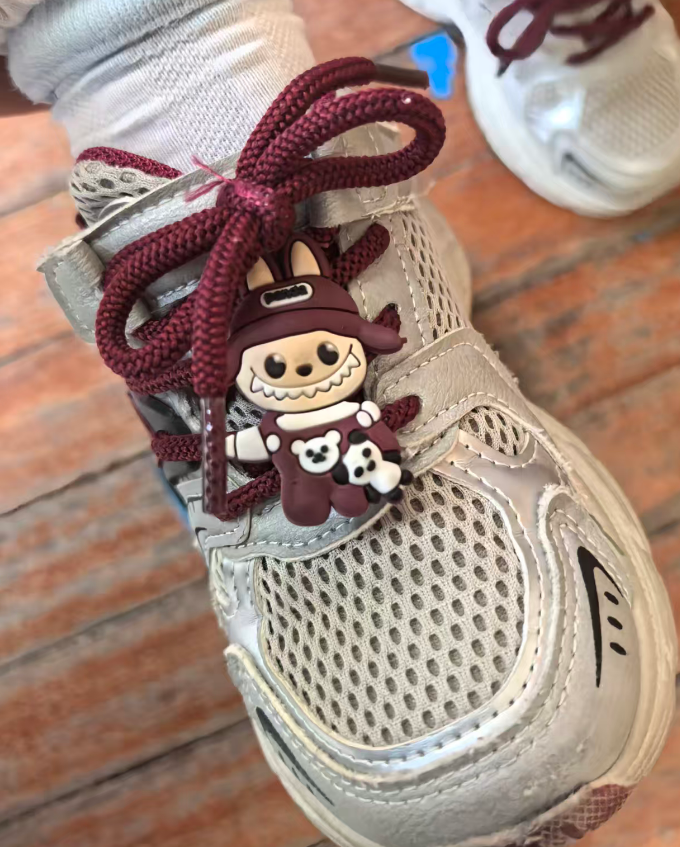
我一看,哦,刚才的那只灰色兔子扣子就是“拉布布”啊
就把这个刚才的那个灰色拉布布还给24号,并扣在鞋子上。
“你只有一个拉布布吗?”
“嗯,”24号说:“还有一个找不到了!”
今天4号哭宝终于来园不嚎哭了,并带来三个玩具(之前她始终不愿意带玩具,就是天天嚎叫“我想奶奶了”“我不要照片,我要真的奶奶”,今天带玩具了,注意力终于转移了)。两个拉布布和一只机械鳄鱼很受同伴们欢迎。

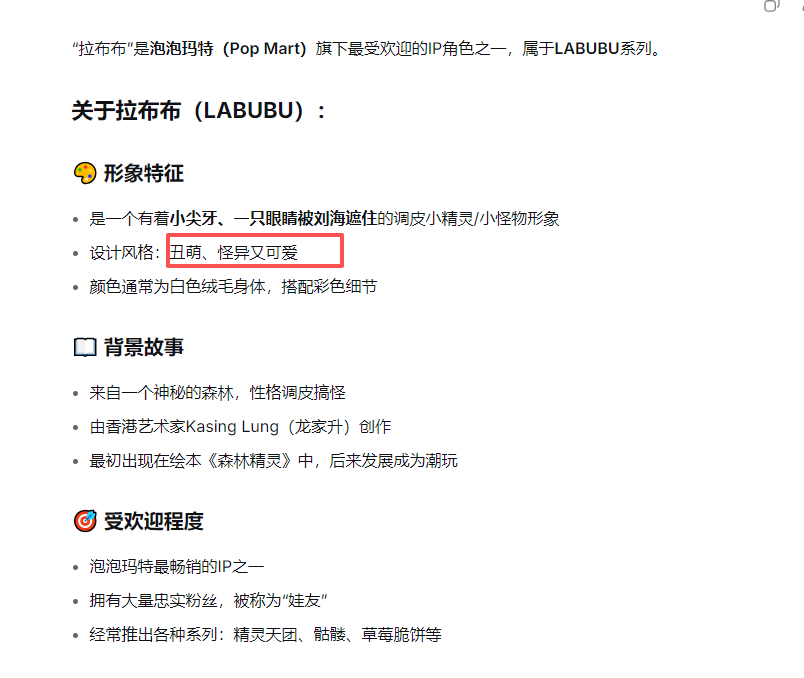
“拉布布”好像是听说过的,我去AI搜索一下

设计需要:
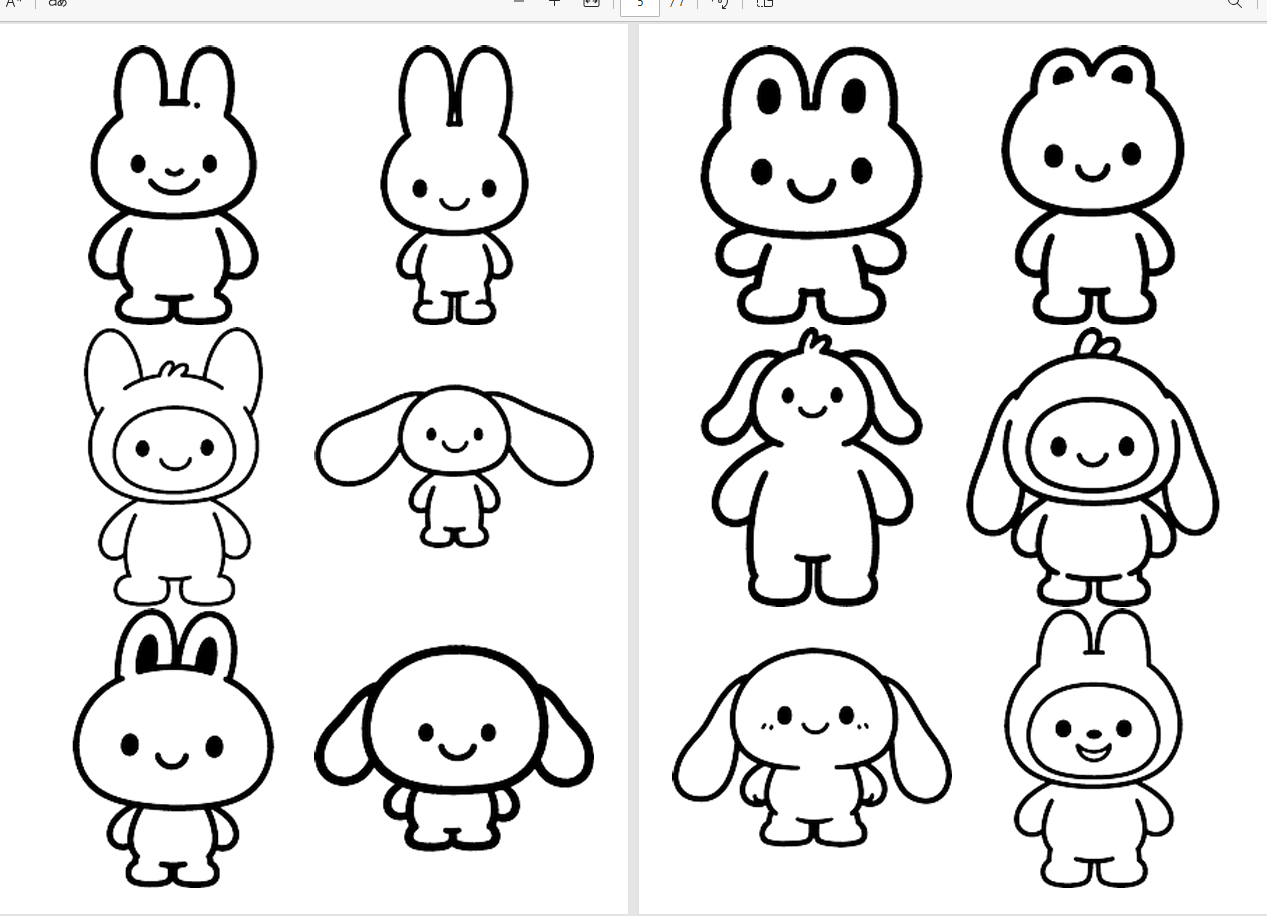
小朋友喜欢拉布布,我设计一个“拉布布”涂色

简笔画,卡通。白色背景,一个拉布布Labubu,Labubu,微笑,正面全身图,

'''
20250802通义万相2.2下载通义照片 copy
Python下载通义万相的图片(存在问题,不能停止,只能默认下载300张,删除多余)
星火讯飞,阿夏
200%
20251003
'''import os,time
import pyautogui
import pyperclip
import re
import win32apiimport win32con
import sys
import ctypesimport timename='20251015拉布布'
# 先打开微信num=1def minimize_active_window():try:if sys.platform == 'win32':# 获取当前活动窗口的句柄hwnd = ctypes.windll.user32.GetForegroundWindow()# 最小化窗口ctypes.windll.user32.ShowWindow(hwnd, 6)  # 6 对应 SW_MINIMIZEreturn Trueelse:print("此功能仅支持Windows系统")return Falseexcept Exception as e:print(f"最小化窗口时出错: {e}")return Falseprint("程序运行中...")
time.sleep(2)  # 等待2秒,让你有时间切换到VS Code窗口# 尝试最小化活动窗口
if minimize_active_window():print("窗口已最小化")
else:print("无法最小化窗口")# 读取文件名称和路径path=fr'D:\{name}'os.makedirs(path,exist_ok=True)# 打开第一图      # pyautogui.moveTo(646, 260)
# pyautogui.click()
# time.sleep(5)D:\20251003钥匙\089# 预设照片数量D:\20250630手套\103for i in range(num,num+300):# 下载按钮     pyautogui.moveTo(1569, 302)pyautogui.click() time.sleep(1)# 点击有,无水印要包月    pyautogui.moveTo(1573, 373)pyautogui.click() time.sleep(2)# 输入图片名称,复制中文内容到剪贴板name=path+fr'\{i:03}'pyperclip.copy(name)# 黏贴图片地址pyautogui.hotkey('ctrl', 'v')time.sleep(1)pyautogui.press('enter')
#     # 图片显示需要时间time.sleep(1)# 模拟按键“右箭头”pyautogui.moveTo (989, 628)pyautogui.click() time.sleep(2)#  'left'(左箭头)# 'up'(上箭头)# 'down'(下箭头)import sys
import ctypes
import timedef minimize_active_window():try:if sys.platform == 'win32':# 获取当前活动窗口的句柄hwnd = ctypes.windll.user32.GetForegroundWindow()# 最小化窗口ctypes.windll.user32.ShowWindow(hwnd, 6)  # 6 对应 SW_MINIMIZEreturn Trueelse:print("此功能仅支持Windows系统")return Falseexcept Exception as e:print(f"最小化窗口时出错: {e}")return Falseprint("程序运行中...")
time.sleep(2)  # 等待2秒,让你有时间切换到VS Code窗口# 尝试最小化活动窗口
if minimize_active_window():print("窗口已最小化")
else:print("无法最小化窗口")
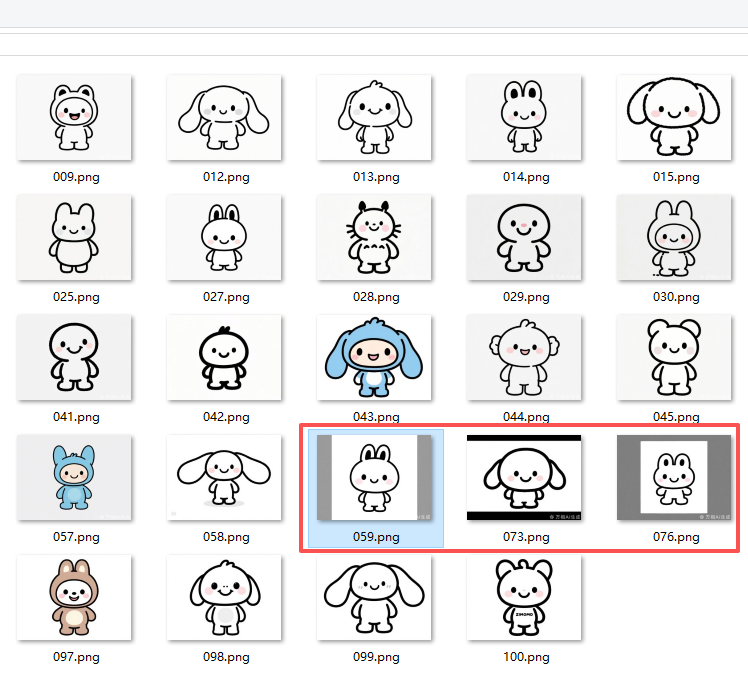
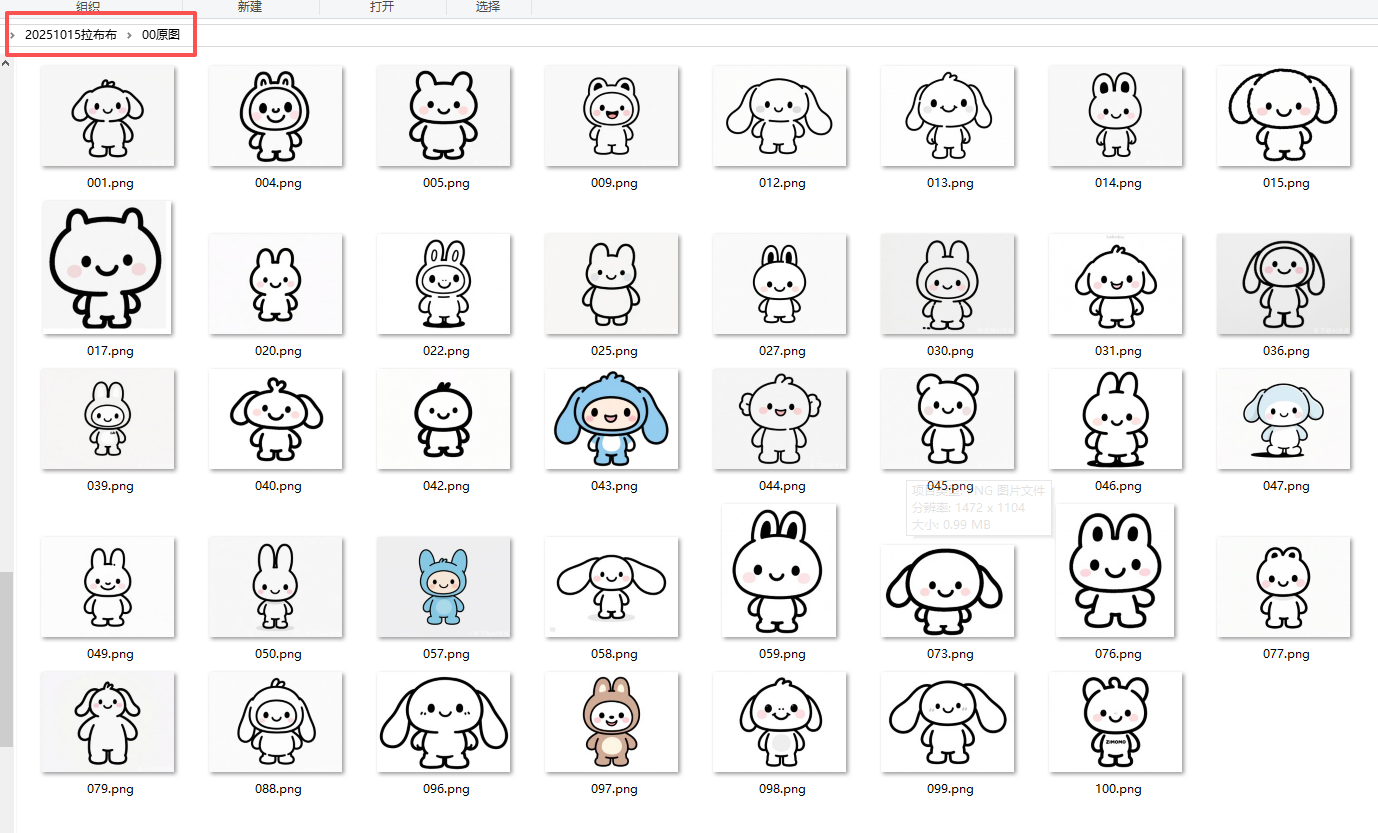
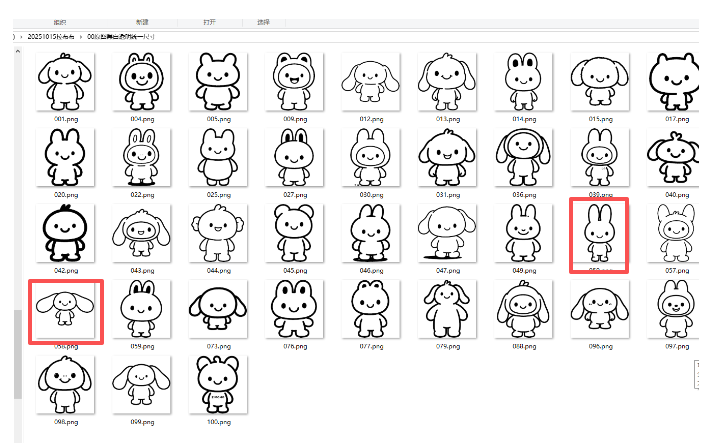
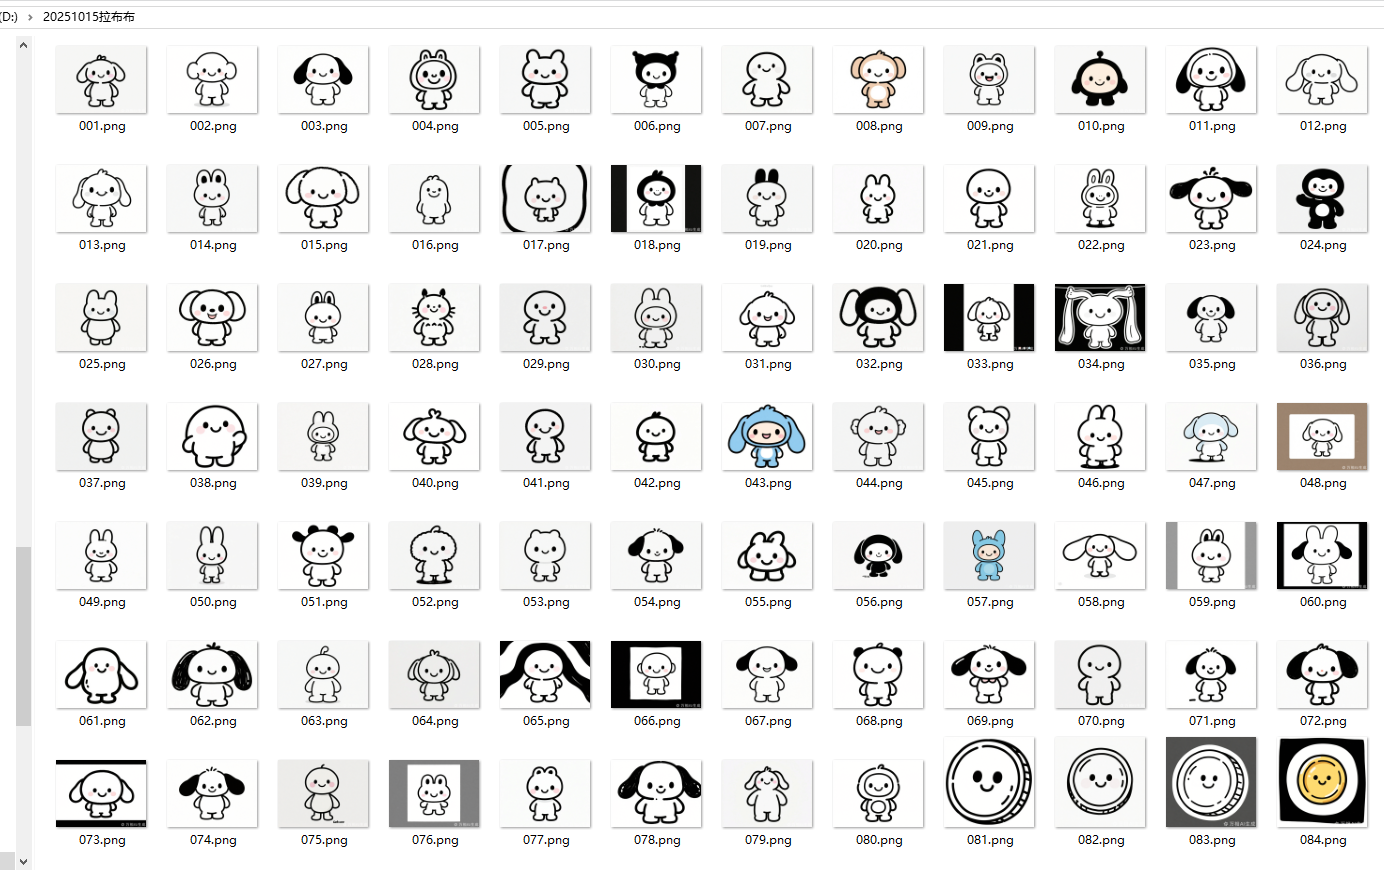 挑选:只要黑白线条的,涂色面积大一点
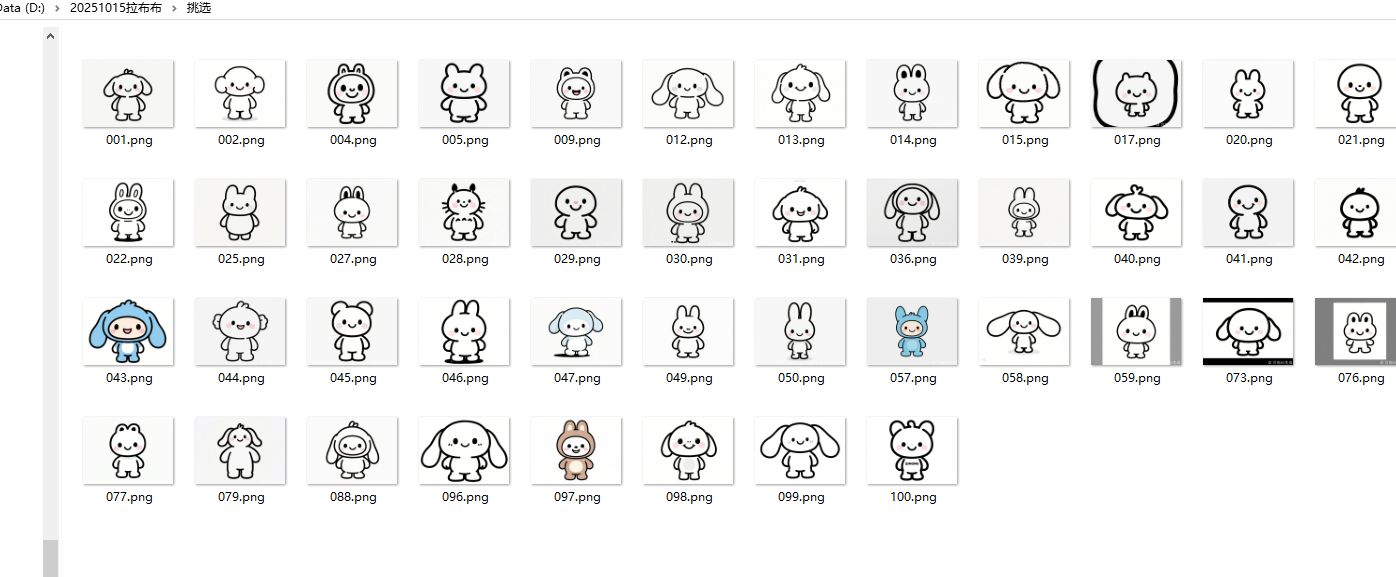 有黑色色块的不要
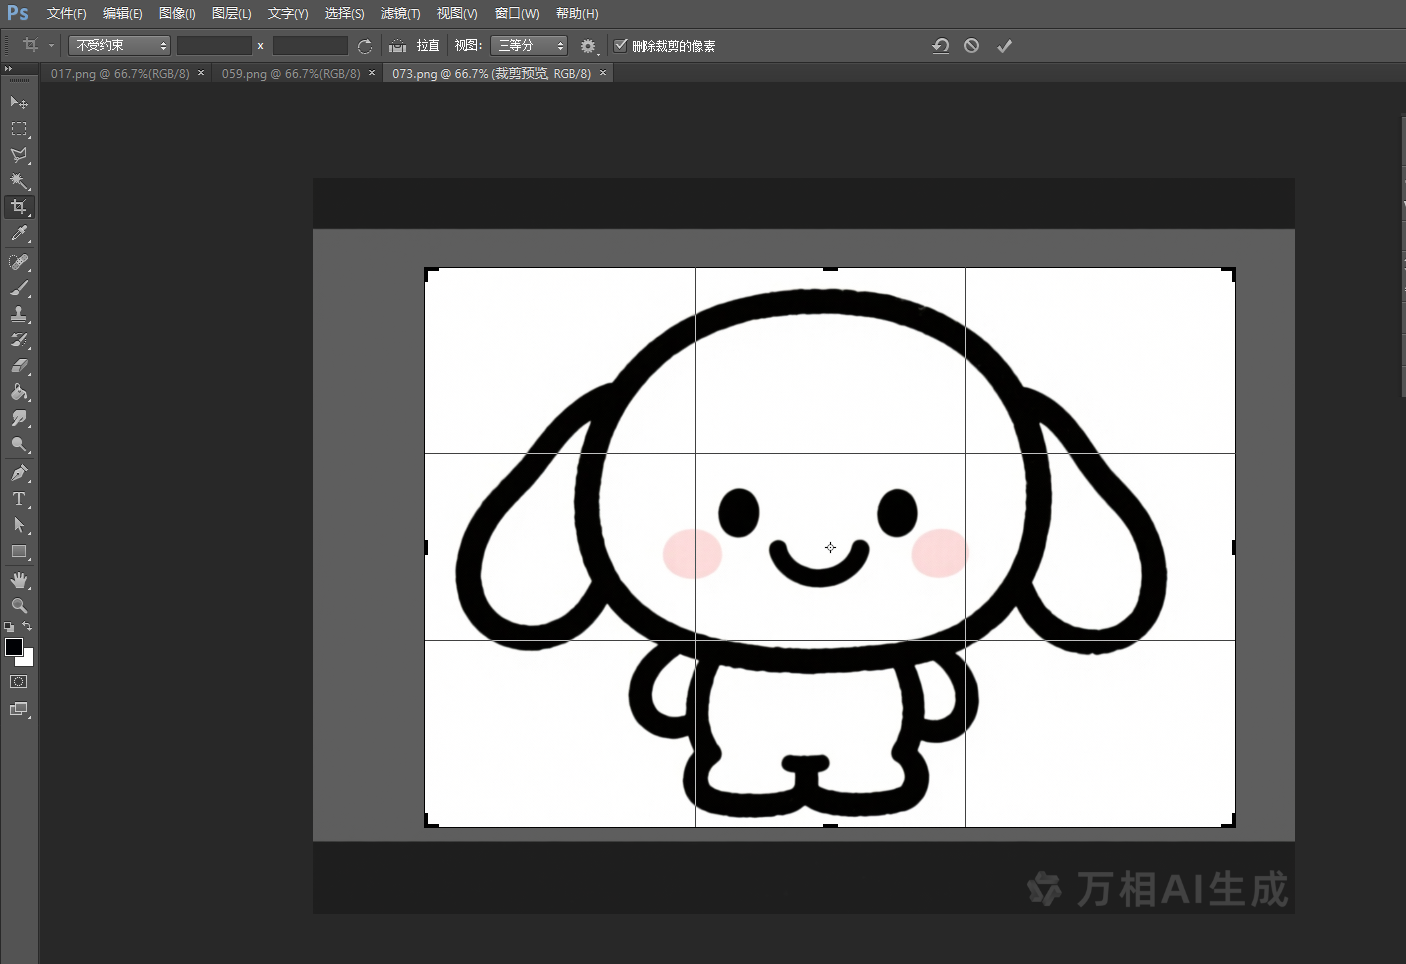
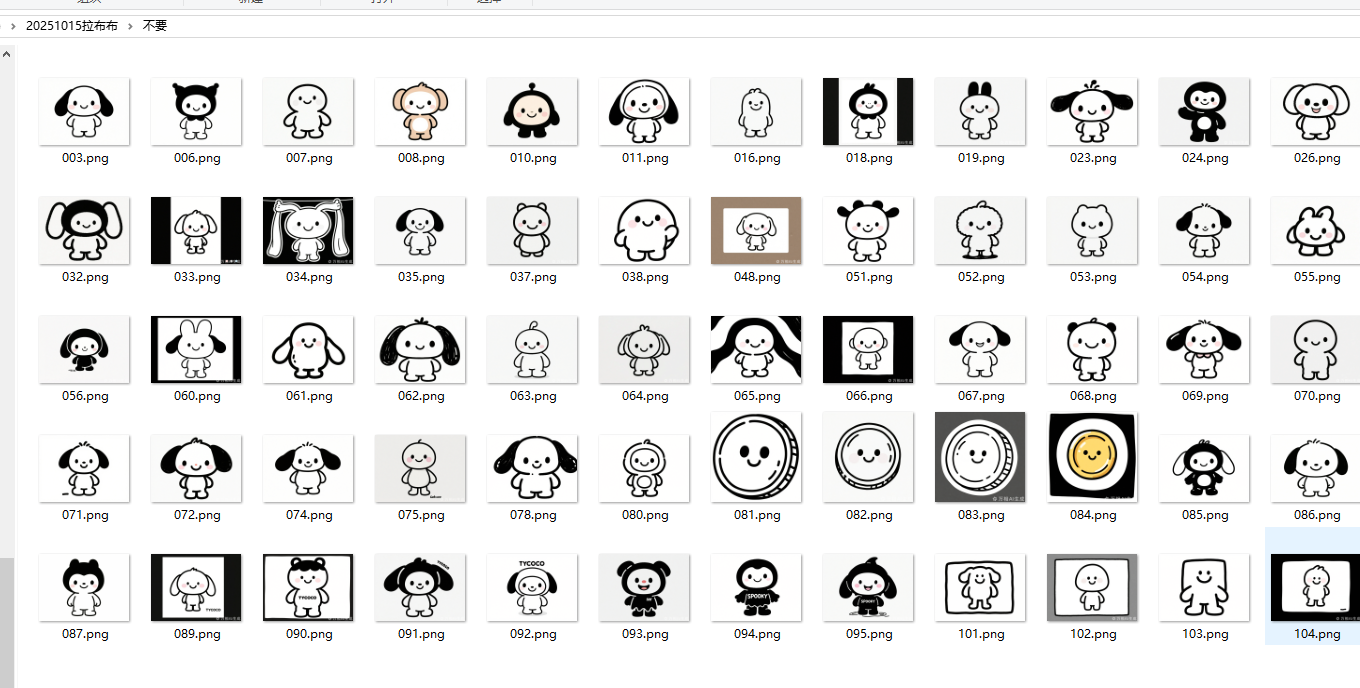 图片需要PS处理
'''
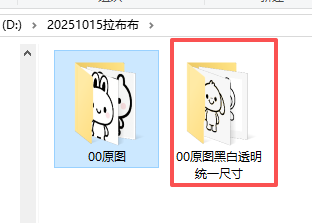
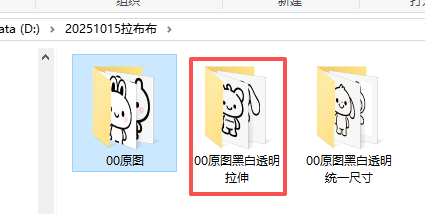
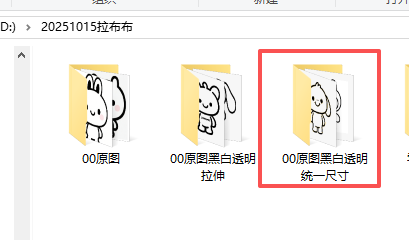
拉布布 图片处理,转黑白色,切边,统一大小(背景一样大,头像扥比例,不撑满)
Deepseek,阿夏
20251015
'''import os
from PIL import Image
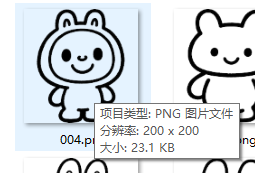
import numpy as npdef convert_to_pure_bw(image_path, output_path, threshold=128):"""将图片转为纯黑白两色(黑色0,0,0和白色255,255,255)参数:image_path: 输入图片路径output_path: 输出图片路径threshold: 二值化阈值"""try:img = Image.open(image_path)img = img.convert('L') # 转为灰度图# 二值化处理binary_img = img.point(lambda x: 0 if x < threshold else 255, '1')binary_img = binary_img.convert('RGB') # 转回RGB模式# 保存黑白图片binary_img.save(output_path)print(f"黑白图生成: {os.path.basename(image_path)}")return output_pathexcept Exception as e:print(f"处理图片 {image_path} 时出错: {str(e)}")return Nonedef crop_transparent_edges(image, margin=0):"""裁剪掉图片的透明边缘,并保留指定的间距参数:image: PIL Image对象(RGBA模式)margin: 要保留的间距(磅/像素)返回:裁剪后的PIL Image对象"""# 转换为numpy数组data = np.array(image)# 获取alpha通道alpha = data[:, :, 3]# 找到非透明像素的位置non_transparent = np.where(alpha > 0)if len(non_transparent[0]) == 0:# 如果全是透明像素,返回原图return image# 获取非透明区域的边界top = np.min(non_transparent[0])bottom = np.max(non_transparent[0])left = np.min(non_transparent[1])right = np.max(non_transparent[1])# 添加间距top = max(0, top - margin)bottom = min(image.height - 1, bottom + margin)left = max(0, left - margin)right = min(image.width - 1, right + margin)# 裁剪图片cropped_image = image.crop((left, top, right + 1, bottom + 1))return cropped_imagedef make_background_transparent(bw_image_path, output_path, tolerance=30, margin=0):"""将黑白图片的白色背景变为透明并裁剪透明边缘参数:bw_image_path: 黑白图片路径output_path: 输出图片路径tolerance: 颜色容差,控制背景识别的灵敏度margin: 裁剪后保留的间距(磅/像素)"""# 打开黑白图片并转换为RGBA模式with Image.open(bw_image_path) as img:# 转换为RGBA模式img = img.convert('RGBA')# 获取图片数据data = np.array(img)red, green, blue, alpha = data.T# 创建白色背景掩码:判断像素是否为白色(在容差范围内)white_mask = ((red >= 255 - tolerance) & (red <= 255) &(green >= 255 - tolerance) & (green <= 255) &(blue >= 255 - tolerance) & (blue <= 255))# 将白色背景像素的alpha通道设为0(透明)data[white_mask.T] = (255, 255, 255, 0)# 转换回Imageresult = Image.fromarray(data)# 裁剪透明边缘并保留间距cropped_result = crop_transparent_edges(result, margin)# 保存结果cropped_result.save(output_path, 'PNG')def resize_to_uniform_size(image_path, output_path, target_size=(200, 200)):"""将图片调整为统一大小,保持宽高比,在空白处填充透明参数:image_path: 输入图片路径output_path: 输出图片路径target_size: 目标尺寸 (宽, 高)"""with Image.open(image_path) as img:if img.mode != 'RGBA':img = img.convert('RGBA')# 创建新的透明背景图片new_img = Image.new('RGBA', target_size, (255, 255, 255, 0))# 计算缩放比例,保持宽高比img_ratio = img.width / img.heighttarget_ratio = target_size[0] / target_size[1]if img_ratio > target_ratio:# 图片较宽,按宽度缩放new_width = target_size[0]new_height = int(target_size[0] / img_ratio)else:# 图片较高,按高度缩放new_height = target_size[1]new_width = int(target_size[1] * img_ratio)# 缩放图片resized_img = img.resize((new_width, new_height), Image.Resampling.LANCZOS)# 计算居中位置x = (target_size[0] - new_width) // 2y = (target_size[1] - new_height) // 2# 将缩放后的图片粘贴到新图片上new_img.paste(resized_img, (x, y), resized_img)# 保存结果new_img.save(output_path, 'PNG')def process_single_image(image_path, output_path, bw_threshold=128, transparency_tolerance=30, margin=0, target_size=(200, 200)):"""完整处理单张图片:黑白化 → 透明化 → 统一尺寸参数:image_path: 输入图片路径output_path: 输出图片路径bw_threshold: 黑白化阈值transparency_tolerance: 透明化容差margin: 裁剪边距target_size: 目标尺寸"""try:# 步骤1: 转为黑白图片(临时文件)temp_bw_path = output_path.replace('.png', '_bw_temp.png')bw_path = convert_to_pure_bw(image_path, temp_bw_path, bw_threshold)if not bw_path:return False# 步骤2: 背景透明化(临时文件)temp_transparent_path = output_path.replace('.png', '_trans_temp.png')make_background_transparent(bw_path, temp_transparent_path, transparency_tolerance, margin)# 步骤3: 统一尺寸resize_to_uniform_size(temp_transparent_path, output_path, target_size)# 清理临时文件if os.path.exists(temp_bw_path):os.remove(temp_bw_path)if os.path.exists(temp_transparent_path):os.remove(temp_transparent_path)return Trueexcept Exception as e:print(f"处理图片 {image_path} 时出错: {str(e)}")# 清理临时文件for temp_path in [temp_bw_path, temp_transparent_path]:if 'temp_path' in locals() and os.path.exists(temp_path):os.remove(temp_path)return Falsedef batch_process_images(input_dir, output_dir, bw_threshold=128, transparency_tolerance=30, margin=0, target_size=(200, 200)):"""批量处理文件夹中的所有图片参数:input_dir: 输入文件夹路径output_dir: 输出文件夹路径bw_threshold: 黑白化阈值transparency_tolerance: 透明化容差margin: 裁剪边距target_size: 目标尺寸"""# 创建输出文件夹(如果不存在)os.makedirs(output_dir, exist_ok=True)# 支持的图片格式supported_formats = ('.png', '.jpg', '.jpeg', '.gif', '.bmp', '.tiff')# 遍历输入文件夹中的所有文件processed_count = 0for filename in os.listdir(input_dir):# 检查文件是否为支持的图片格式if filename.lower().endswith(supported_formats):input_path = os.path.join(input_dir, filename)# 构建输出文件路径,统一保存为PNG格式output_filename = os.path.splitext(filename)[0] + '.png'output_path = os.path.join(output_dir, output_filename)success = process_single_image(input_path, output_path, bw_threshold, transparency_tolerance, margin, target_size)if success:print(f"已处理: {filename} -> {output_filename}")processed_count += 1else:print(f"处理失败: {filename}")print(f"批量处理完成!成功处理 {processed_count} 张图片")if __name__ == "__main__":# 输入文件夹path = r'D:\20251015拉布布'a = '00原图'input_directory = path + fr'\{a}'# 输出文件夹output_directory = os.path.join(path, f"{a}黑白透明统一尺寸")# 检查输入文件夹是否存在if not os.path.exists(input_directory):print(f"错误: 文件夹 '{input_directory}' 不存在")else:# 执行批量处理batch_process_images(input_directory, output_directory, bw_threshold=128, # 黑白化阈值(0-255)transparency_tolerance=30, # 透明化容差margin=0, # 裁剪边距target_size=(200, 200) # 统一尺寸)print("所有图片处理完成!")
彩色都变成黑白了
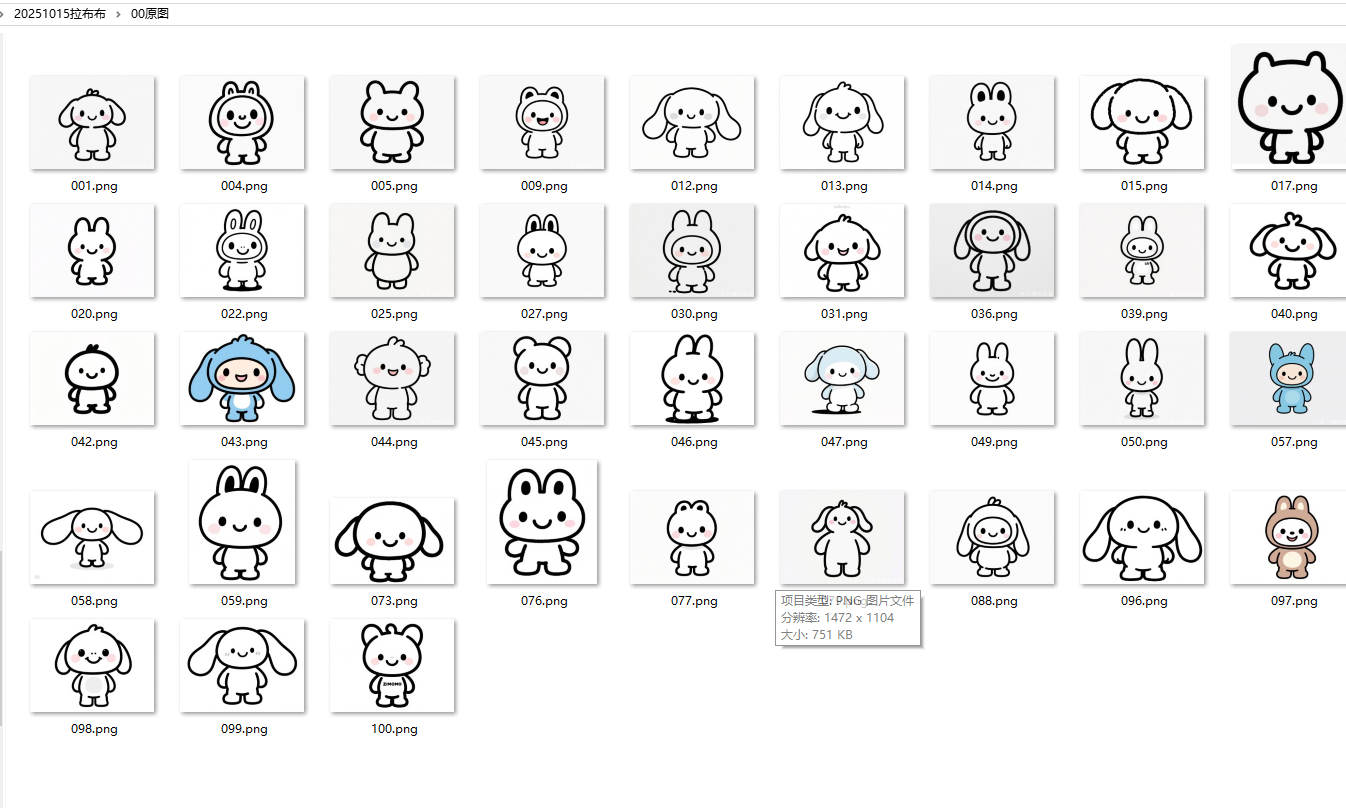
但是没有撑满图片
'''
拉布布 图片处理,转黑白色,切边,统一大小(背景一样大,图像拉伸撑满)
Deepseek,阿夏
20251015
'''
import os
from PIL import Image
import numpy as npdef convert_to_pure_bw(image_path, output_path, threshold=128):"""将图片转为纯黑白两色(黑色0,0,0和白色255,255,255)参数:image_path: 输入图片路径output_path: 输出图片路径threshold: 二值化阈值"""try:img = Image.open(image_path)img = img.convert('L')  # 转为灰度图# 二值化处理binary_img = img.point(lambda x: 0 if x < threshold else 255, '1')binary_img = binary_img.convert('RGB')  # 转回RGB模式# 保存黑白图片binary_img.save(output_path)print(f"黑白图生成: {os.path.basename(image_path)}")return output_pathexcept Exception as e:print(f"处理图片 {image_path} 时出错: {str(e)}")return Nonedef crop_transparent_edges(image, margin=0):"""裁剪掉图片的透明边缘,并保留指定的间距参数:image: PIL Image对象(RGBA模式)margin: 要保留的间距(磅/像素)返回:裁剪后的PIL Image对象"""# 转换为numpy数组data = np.array(image)# 获取alpha通道alpha = data[:, :, 3]# 找到非透明像素的位置non_transparent = np.where(alpha > 0)if len(non_transparent[0]) == 0:# 如果全是透明像素,返回原图return image# 获取非透明区域的边界top = np.min(non_transparent[0])bottom = np.max(non_transparent[0])left = np.min(non_transparent[1])right = np.max(non_transparent[1])# 添加间距top = max(0, top - margin)bottom = min(image.height - 1, bottom + margin)left = max(0, left - margin)right = min(image.width - 1, right + margin)# 裁剪图片cropped_image = image.crop((left, top, right + 1, bottom + 1))return cropped_imagedef make_background_transparent(bw_image_path, output_path, tolerance=30, margin=0):"""将黑白图片的白色背景变为透明并裁剪透明边缘参数:bw_image_path: 黑白图片路径output_path: 输出图片路径tolerance: 颜色容差,控制背景识别的灵敏度margin: 裁剪后保留的间距(磅/像素)"""# 打开黑白图片并转换为RGBA模式with Image.open(bw_image_path) as img:# 转换为RGBA模式img = img.convert('RGBA')# 获取图片数据data = np.array(img)red, green, blue, alpha = data.T# 创建白色背景掩码:判断像素是否为白色(在容差范围内)white_mask = ((red >= 255 - tolerance) & (red <= 255) &(green >= 255 - tolerance) & (green <= 255) &(blue >= 255 - tolerance) & (blue <= 255))# 将白色背景像素的alpha通道设为0(透明)data[white_mask.T] = (255, 255, 255, 0)# 转换回Imageresult = Image.fromarray(data)# 裁剪透明边缘并保留间距cropped_result = crop_transparent_edges(result, margin)# 保存结果cropped_result.save(output_path, 'PNG')def resize_to_exact_size(image_path, output_path, target_size=(200, 200)):"""将图片拉伸到精确的200×200尺寸参数:image_path: 输入图片路径output_path: 输出图片路径target_size: 目标尺寸 (宽, 高)"""with Image.open(image_path) as img:if img.mode != 'RGBA':img = img.convert('RGBA')# 直接拉伸到目标尺寸resized_img = img.resize(target_size, Image.Resampling.LANCZOS)# 保存结果resized_img.save(output_path, 'PNG')def process_single_image(image_path, output_path, bw_threshold=128, transparency_tolerance=30, margin=0, target_size=(200, 200)):"""完整处理单张图片:黑白化 → 透明化 → 精确拉伸到200×200参数:image_path: 输入图片路径output_path: 输出图片路径bw_threshold: 黑白化阈值transparency_tolerance: 透明化容差margin: 裁剪边距target_size: 目标尺寸"""try:# 步骤1: 转为黑白图片(临时文件)temp_bw_path = output_path.replace('.png', '_bw_temp.png')bw_path = convert_to_pure_bw(image_path, temp_bw_path, bw_threshold)if not bw_path:return False# 步骤2: 背景透明化(临时文件)temp_transparent_path = output_path.replace('.png', '_trans_temp.png')make_background_transparent(bw_path, temp_transparent_path, transparency_tolerance, margin)# 步骤3: 精确拉伸到目标尺寸resize_to_exact_size(temp_transparent_path, output_path, target_size)# 清理临时文件if os.path.exists(temp_bw_path):os.remove(temp_bw_path)if os.path.exists(temp_transparent_path):os.remove(temp_transparent_path)return Trueexcept Exception as e:print(f"处理图片 {image_path} 时出错: {str(e)}")# 清理临时文件for temp_path in [temp_bw_path, temp_transparent_path]:if 'temp_path' in locals() and os.path.exists(temp_path):os.remove(temp_path)return Falsedef batch_process_images(input_dir, output_dir, bw_threshold=128, transparency_tolerance=30, margin=0, target_size=(200, 200)):"""批量处理文件夹中的所有图片参数:input_dir: 输入文件夹路径output_dir: 输出文件夹路径bw_threshold: 黑白化阈值transparency_tolerance: 透明化容差margin: 裁剪边距target_size: 目标尺寸"""# 创建输出文件夹(如果不存在)os.makedirs(output_dir, exist_ok=True)# 支持的图片格式supported_formats = ('.png', '.jpg', '.jpeg', '.gif', '.bmp', '.tiff')# 遍历输入文件夹中的所有文件processed_count = 0for filename in os.listdir(input_dir):# 检查文件是否为支持的图片格式if filename.lower().endswith(supported_formats):input_path = os.path.join(input_dir, filename)# 构建输出文件路径,统一保存为PNG格式output_filename = os.path.splitext(filename)[0] + '.png'output_path = os.path.join(output_dir, output_filename)success = process_single_image(input_path, output_path, bw_threshold, transparency_tolerance, margin, target_size)if success:print(f"已处理: {filename} -> {output_filename}")processed_count += 1else:print(f"处理失败: {filename}")print(f"批量处理完成!成功处理 {processed_count} 张图片")if __name__ == "__main__":# 输入文件夹path = r'D:\20251015拉布布'a = '00原图'input_directory = path + fr'\{a}'# 输出文件夹output_directory = os.path.join(path, f"{a}黑白透明拉伸")# 检查输入文件夹是否存在if not os.path.exists(input_directory):print(f"错误: 文件夹 '{input_directory}' 不存在")else:# 执行批量处理batch_process_images(input_directory, output_directory, bw_threshold=128,           # 黑白化阈值(0-255)transparency_tolerance=30,  # 透明化容差margin=0,                   # 裁剪边距target_size=(200, 200)      # 精确拉伸到200×200)print("所有图片处理完成!所有图片已拉伸到200×200像素")
头像拉伸撑满画布,长耳兔子就会变苗条
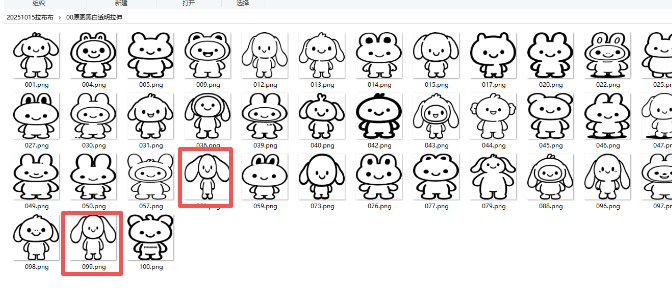
还是用等比例压缩的拉布布图片
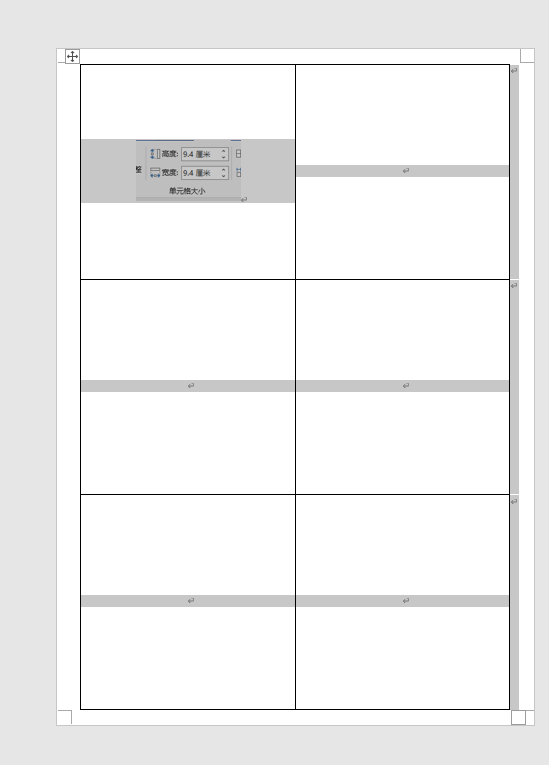
word样式,一页6张
'''
把拉布布做成一页6张
AI对话大师,阿夏
2025年10月10日
'''import random
import math
from PIL import Image, ImageDraw, ImageFont
import os
import time
from docx import Document
from docx.shared import Cm
from docx2pdf import convert
from PyPDF2 import PdfMerger
import shutil# 测试图片59张
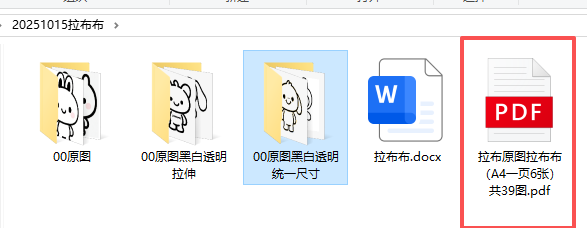
path = r'D:\20251015拉布布'
# 格子一共有几个
sl = 6
names = f'00原图黑白透明统一尺寸'
input_path = path + fr'\{names}'
mb = '拉布布'
# 表格有2列
L = 2
# 高度和宽度是多少厘米
h = 9.35
w = 9.35def check_and_repair_image(image_path):"""检查并修复图片文件"""try:with Image.open(image_path) as img:img.verify() # 验证图片完整性return Trueexcept (IOError, SyntaxError, Exception) as e:print(f"图片文件损坏: {image_path}, 错误: {e}")return Falsedef get_valid_image_files(input_path):"""获取有效的图片文件列表"""valid_files = []for file in os.listdir(input_path):if file.lower().endswith(('.png', '.jpg', '.jpeg', '.bmp', '.gif')):file_path = os.path.join(input_path, file)if check_and_repair_image(file_path):valid_files.append(file_path)else:print(f"跳过损坏的图片: {file}")return valid_filesprint('----1、检查图片文件------------')
file_paths = get_valid_image_files(input_path)
print(f"找到 {len(file_paths)} 张有效图片")if len(file_paths) == 0:print("没有找到有效的图片文件,程序退出")exit()grouped_files = [file_paths[i:i+sl] for i in range(0, len(file_paths), sl)]
print(f"分成 {len(grouped_files)} 组")print('----2、创建临时文件夹------------')
new_folder = path + r'\零时文件夹'
if os.path.exists(new_folder):shutil.rmtree(new_folder)
os.makedirs(new_folder, exist_ok=True)print('----3、插入docx,制作pdf------------')def create_document_with_images(group, group_index):"""在已有模板中插入图片"""try:# 检查模板文件是否存在template_path = path + fr'\{mb}.docx'if not os.path.exists(template_path):print(f"模板文件不存在: {template_path}")return False# 打开模板文档doc = Document(template_path)# 检查文档中是否有表格if len(doc.tables) == 0:print("模板文档中没有找到表格")return False# 获取第一个表格table = doc.tables[0]# 计算表格的行列数rows = len(table.rows)cols = len(table.columns)total_cells = rows * colsprint(f"表格大小: {rows}行 x {cols}列, 共{total_cells}个单元格")# 遍历每个单元格,并插入图片for cell_index, image_file in enumerate(group):if not image_file or not os.path.exists(image_file):print(f"图片文件不存在: {image_file}")continue# 如果单元格索引超出表格范围,跳过if cell_index >= total_cells:print(f"图片数量超过表格容量,跳过第{cell_index + 1}张图片")break# 计算行和列的位置row = cell_index // colscol = cell_index % cols# 获取单元格cell = table.cell(row, col)# 清除单元格内容for paragraph in cell.paragraphs:p = paragraph._elementp.getparent().remove(p)# 添加新段落并插入图片cell_paragraph = cell.add_paragraph()cell_paragraph.alignment = 1 # 居中对齐run = cell_paragraph.add_run()try:run.add_picture(image_file, width=Cm(w), height=Cm(h))print(f"成功插入图片到表格位置({row+1},{col+1}): {os.path.basename(image_file)}")except Exception as e:print(f"插入图片失败 {image_file}: {e}")continue# 保存Word文档docx_path = os.path.join(new_folder, f'{group_index + 1:03d}.docx')doc.save(docx_path)print(f"创建文档成功: {group_index + 1:03d}.docx")return Trueexcept Exception as e:print(f"创建文档失败 组{group_index + 1}: {e}")return False# 处理每一组图片
success_count = 0
for group_index, group in enumerate(grouped_files):if create_document_with_images(group, group_index):success_count += 1print(f"成功创建 {success_count} 个Word文档")print('----4、转换为PDF------------')
pdf_files = []
if success_count > 0:# 获取所有DOCX文件并按数字排序docx_files = [f for f in os.listdir(new_folder) if f.endswith('.docx')]docx_files.sort()for docx_file in docx_files:docx_path = os.path.join(new_folder, docx_file)pdf_path = docx_path.replace('.docx', '.pdf')try:convert(docx_path, pdf_path)pdf_files.append(pdf_path)print(f"转换成功: {docx_file} -> {os.path.basename(pdf_path)}")time.sleep(0.5) # 短暂等待避免冲突except Exception as e:print(f"转换失败 {docx_file}: {e}")print('----5、合并PDF------------')
if pdf_files:# 按文件名排序pdf_files.sort()# 合并PDFmerger = PdfMerger()for pdf_file in pdf_files:try:merger.append(pdf_file)print(f"添加PDF: {os.path.basename(pdf_file)}")except Exception as e:print(f"添加PDF失败 {pdf_file}: {e}")# 保存合并后的PDFpdf_output_path = path + fr'\{mb[:2]}{names[2:4]}{mb}(A4一页{sl}张)共{len(file_paths)}图.pdf'try:merger.write(pdf_output_path)merger.close()print(f"PDF合并完成: {pdf_output_path}")except Exception as e:print(f"PDF合并失败: {e}")
else:print("没有可合并的PDF文件")print('----6、清理临时文件------------')
try:shutil.rmtree(new_folder)print("临时文件夹已清理")
except Exception as e:print(f"清理临时文件夹失败: {e}")print('----程序执行完成------------')
模版去掉边框,再生成过一次