Vue 脚手架(Vue CLI)
提示:文章写完后,目录可以自动生成,如何生成可参考右边的帮助文档
文章目录
- 一、使用步骤
- 二、render函数
- 三、脚手架的配置项(一般使用默认的)
- 四、语法检查
- 五、ref属性
- 六、props属性
- 七、mixin混入
- 八、插件
- 九、scoped样式
- 十、组件自定义事件
- 1. 传递数据:子组件-->父组件
- 2. 给组件自定义事件
- 2.1 第一种写法:使用v-on:
- 2.2 第二种写法:使用@符号
- 2.3 第三种写法:使用ref(更灵活)
- 十一、全局事件总线(ClobalEventBus)
- 1. 定义:
- 2. 安装全局事件总线
- 3. 使用全局事件总线
- 4. 解绑事件
- 十二、消息订阅与发布
- 1. 定义
- 2. 使用步骤
- 十三、Vue封装的过渡与动画
- 1. 作用
- 2. 图示
- 3. 动画写法
- 4. 过渡写法
- 方法1
- 方法2
- 十四、插槽
- 1. 作用
- 2. 分类
- 生活感悟
- 学习计划
全新版本是5,全称:Vue Command-Line Interface Vue命令行界面
Vue2 项目首选 Vue CLI 4.x
Vue3 项目可以用 Vue CLI 5.x
一、使用步骤
- (仅第一次执行)全局安装@vue/cli
npm install -g @vue/cli
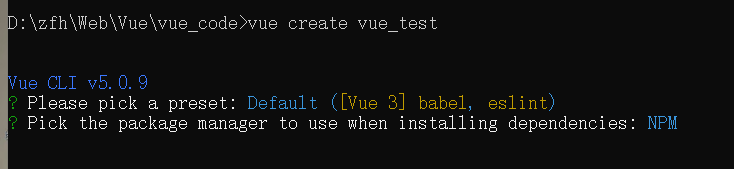
- 切换到你要创建项目的目录,然后使用命令创建项目
vue create xxxx(项目名)
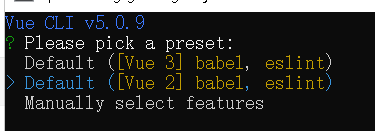
- 第一个是选择vue版本的
- 出现Successfully表示创建成功
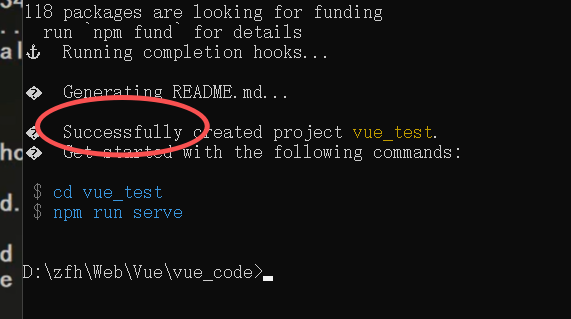
- 进入所创建的项目目录
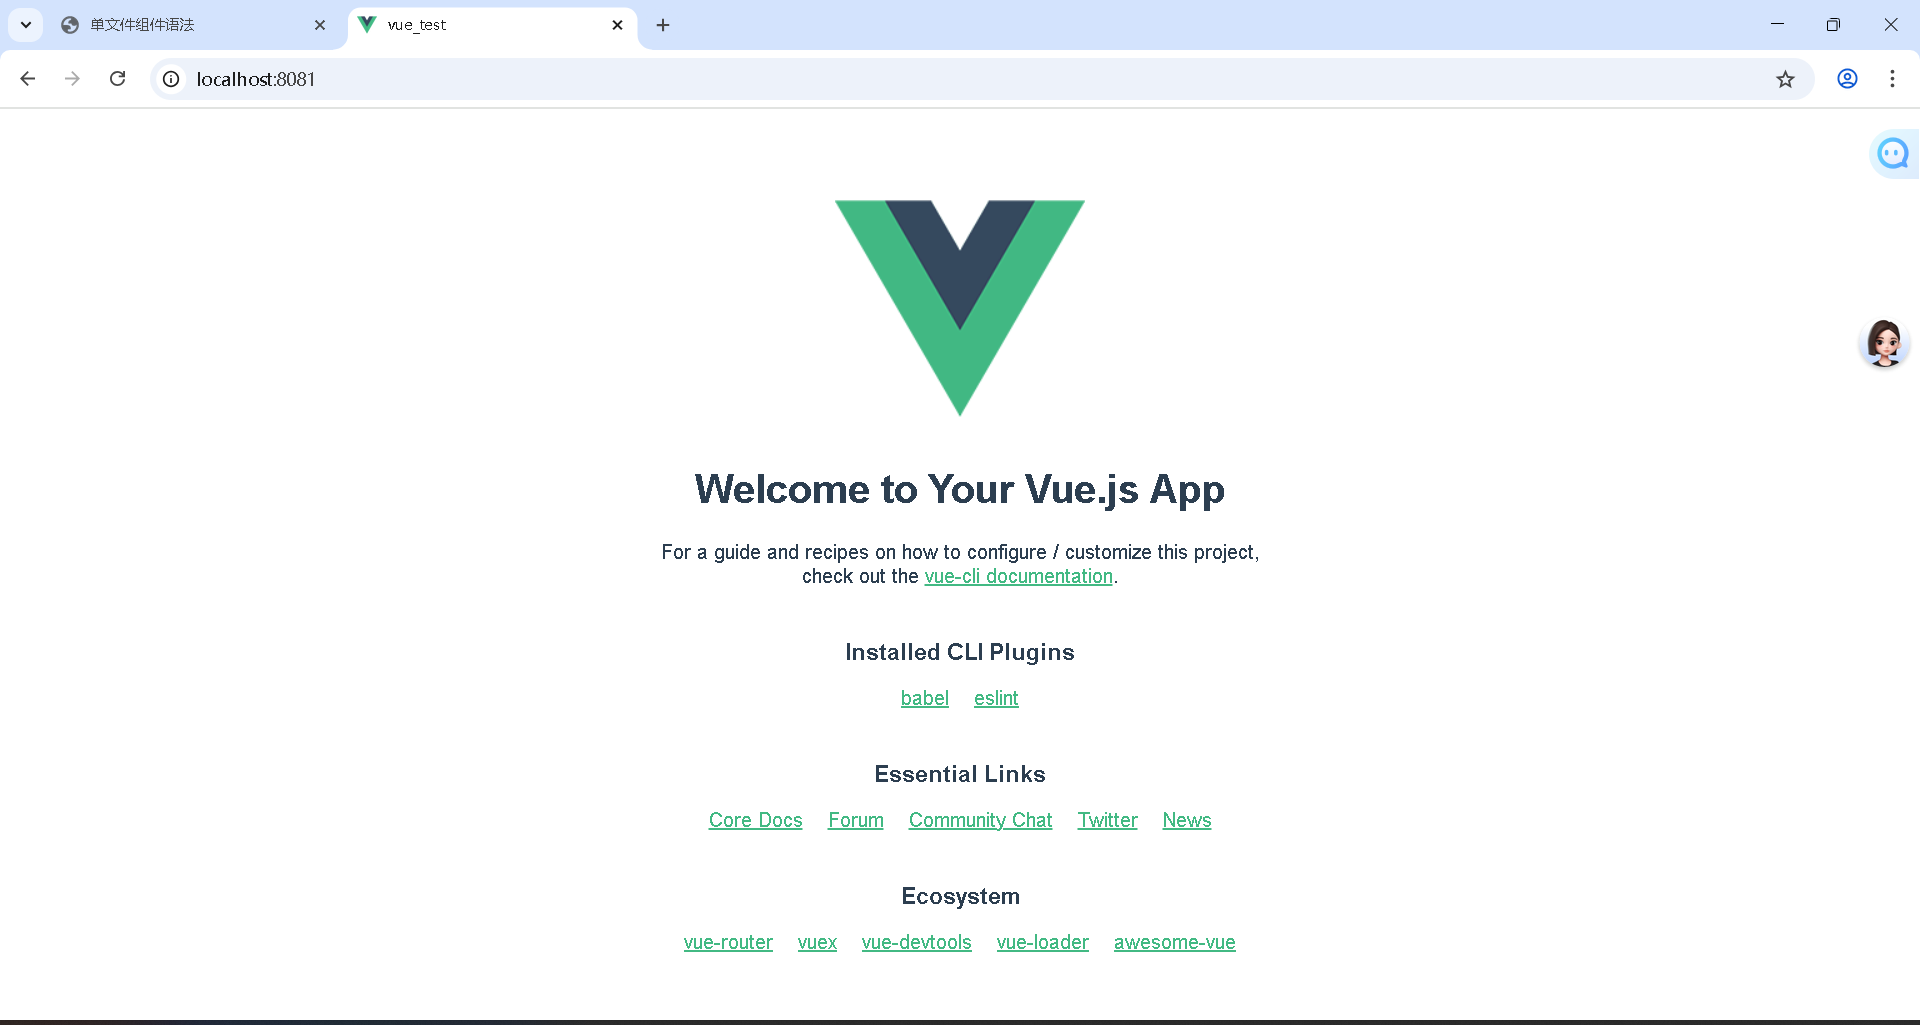
- 启动项目
npm run serve
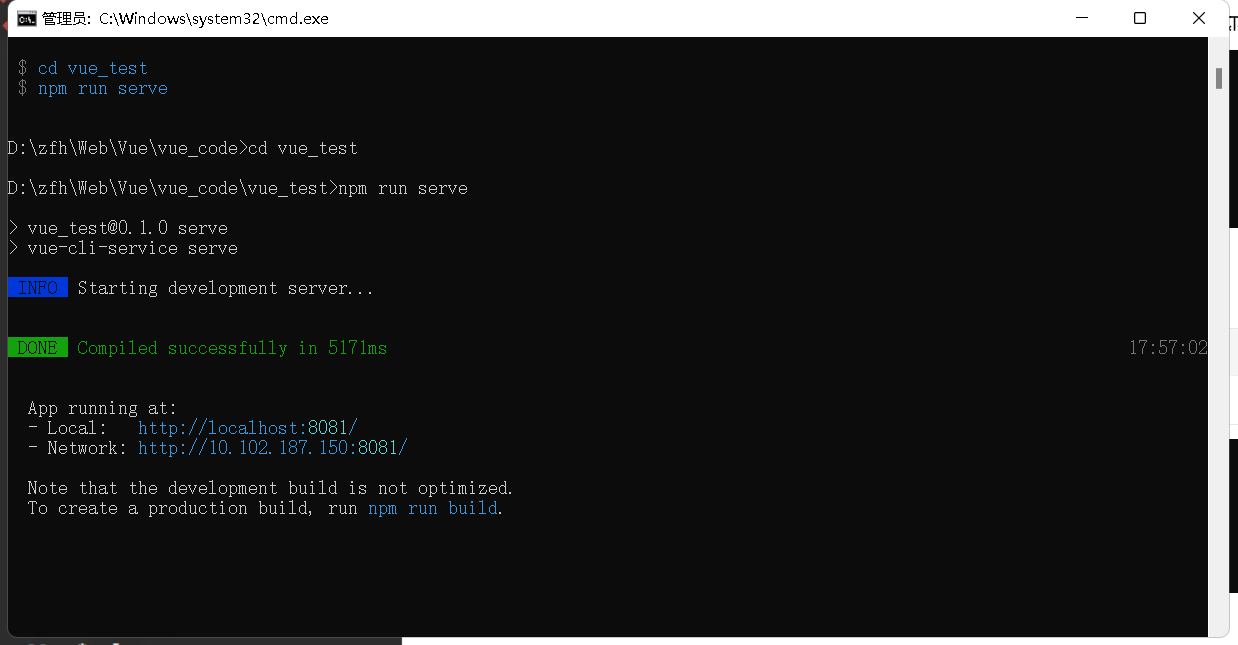
- 打开localhost:8081
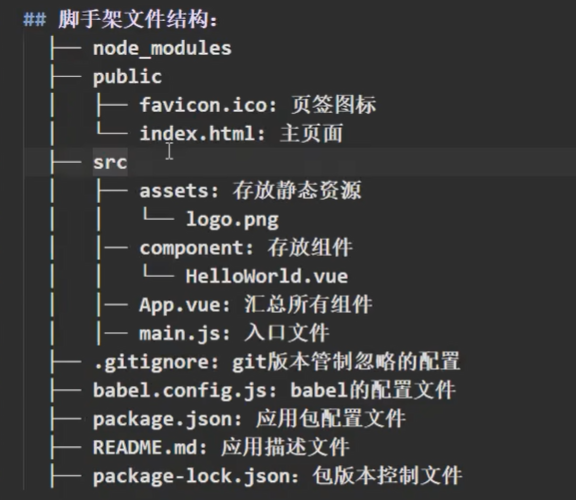
- 脚手架文件结构
备注:
- 如果下载缓慢要配置npm淘宝镜像
npm config set registry http://registry.npm.taobao.org
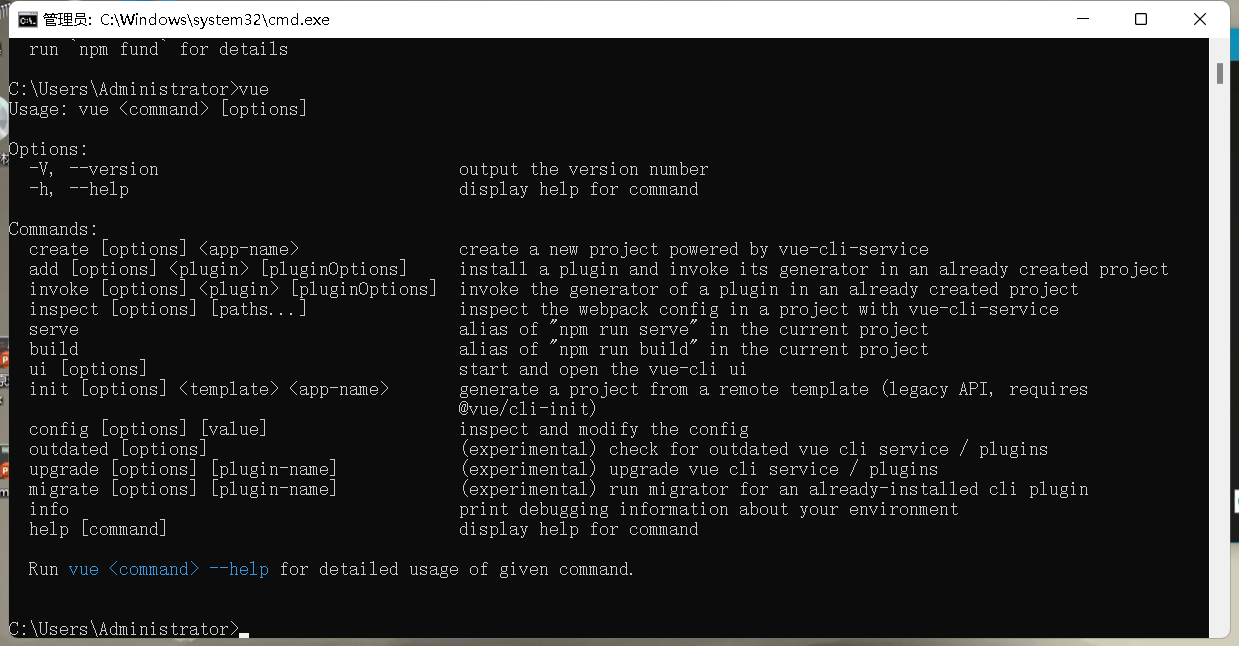
- 安装完后重开一个命令行,输入vue,出现如图表示安装成功
二、render函数
生成的项目中有一个入口文件main.js
import Vue from 'vue'
import App from './App.vue'Vue.config.productionTip = falsenew Vue({//这里使用render来渲染模板是因为上面引入的vue是不包含模板编译器,//运行版的vue.runtime.js文件,它只包含核心功能//所以只能使用render,而不能使用template//完整写法// render: function (createElement) {//   return createElement(App)// },//如果引入完整版的:vue/dist/vue.js,那么就可以使用templaterender: h => h(App),}).$mount('#app')
三、脚手架的配置项(一般使用默认的)
使用vue inspect > output.js可以查看Vue脚手架的默认配置
如果想要修改某一项配置,需要再新建一个vue.config.js文件
比如想要修改入口文件,再把默认的main.js名字改为peiqi.js,在执行npm run serve就可以成功启动
module.exports = {pages: {index: {entry: 'src/peiqi.js',},}
}
四、语法检查
如果在js文件中定义了一个变量但是并没有使用,启动项目就会报错
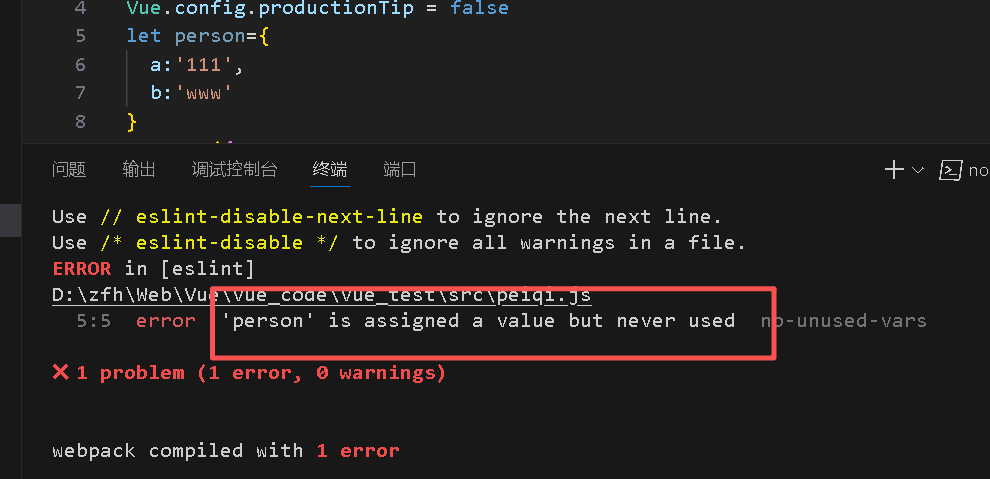
解决办法,在配置文件中添加下面代码,与pages平级
lintOnSave:false
五、ref属性
- 被用来给元素(h,button等)或子组件注册引用信息(相当于id)
- 应用在html标签时获取的是真实的DOM,应用在组件上获取的是组件实例对象
<template><div><h1 v-text="msg" ref="title"></h1><button ref="btn" @click="showDOM">点我输出上方的Dom元素</button><School ref="school"/></div>
</template>
<script>
import School from './components/School'export default{name:'App',data(){return{msg:'Hello World'}},components:{School},methods:{showDOM(){console.log(this.$refs.title)console.log(this.$refs.btn)console.log(this.$refs.school)}}
}
</script>

六、props属性
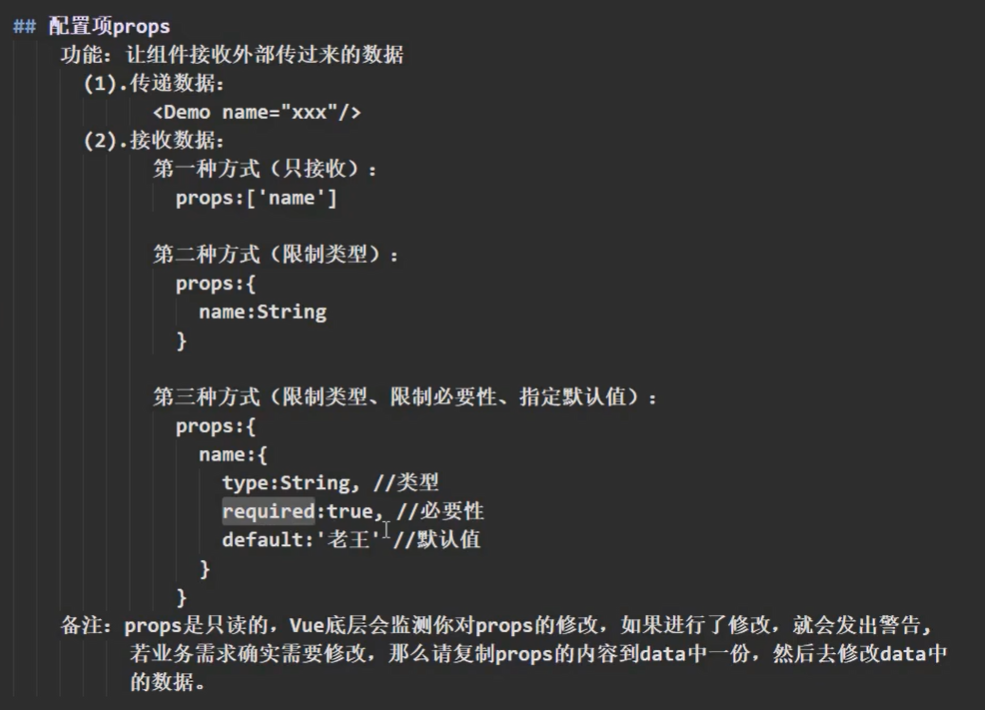
<template><div class="school"><h1>{{ msg }}</h1><div class="qwe">学生名字:{{ name }}</div><div>学生性别:{{ sex }}</div><div>学生年龄:{{ myAge }}</div><button @click="updateAge">点我年龄+1</button></div>
</template>
<script>
export default {name: "Student",data() {return {msg: "Hello World!!!!!",myAge: this.age,};},methods:{showHello(){this.hello();}},//接收传过来的数据,放到了vc上,比data优先//1. 简单接收// props:['name','sex','age']//2. 接受的同时对数据进行类型限制// props:{//   name:String,//   sex:String,//   age:Number// }//3. 接受的同时对数据类型+必要性的限制props: {name: {type: String,required: true, //必传},sex: {type: String,default: "女",},age: {type: Number,default: 18,},},
};
</script>
<template><div><!-- 这样传入的都是字符串 --><Student name="李四" sex="男" age="18" /><!-- 属性前加上冒号,则双引号中的内容会变成js表达式被解析,18+1会被解析成19 --><!-- <Student name="李四" sex="男" :age="18+1" /> --></div>
</template>
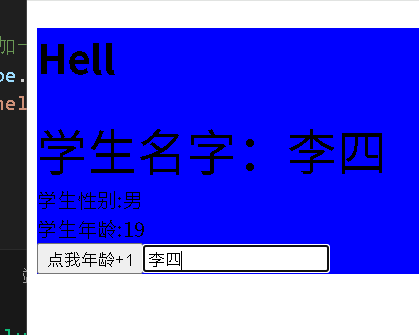
七、mixin混入
- 新建mixin.js文件,与main.js平级
export const hunhe = {methods: {updateAge() {this.myAge++;console.log("`1111111")}}
}
export const hunhe2={data() {return {msg: "Hello World",myAge: this.age,};}
}
- 在组件中局部引入
<template><div class="school"><h1>{{ msg }}</h1><div>学生年龄:{{ myAge }}</div><button @click="updateAge">点我年龄+1</button></div>
</template>
<script>import { hunhe, hunhe2 } from "../mixin";
export default {name: "Student",//混入的东西与自己原有的有冲突,以自己原有的为主//如果混入的有生命周期函数,则二者都用,执行顺序为代码编写顺序data() {return {msg: "Hello World!!!!!",myAge: this.age,};},mixins: [hunhe,hunhe2],props:['name','sex','age']
}
这个方法也能用
- 还可以使用全局引入混用
//全局混合,在这里写了后在组建里就不用写了
Vue.mixin(hunhe)
Vue.mixin(hunhe2)
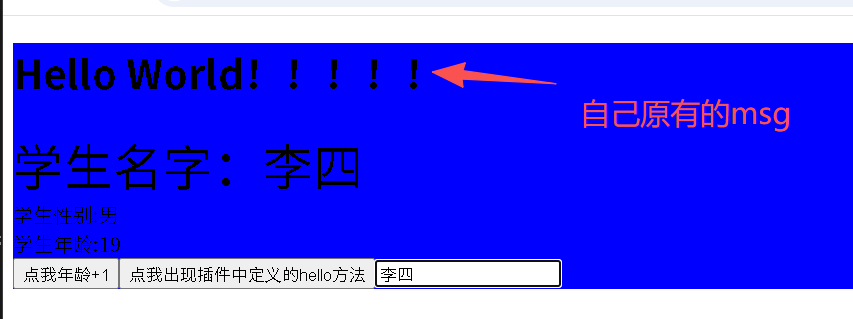
八、插件
- 创建plugins.js文件
export default {install(Vue,x,y,z){console.log("插件被安装了",x,y,z,Vue)//定义全局过滤器Vue.filter('slice', function (value) {return value.slice(0,4)})//定义全局指令Vue.directive('fbind', {bind(element, binding) {element.value = binding.value},inserted(element, binding) {element.focus()},update(element, binding) {element.value = binding.value}})//定义混入Vue.mixin({data() {return {msg: "我是在插件中混入的msg",}}})//给原型上添加一个方法,vc和vm都能用了Vue.prototype.hello = function () {alert('hello')}}
}
- 在main.js中引入并应用
//引入插件
import plugins from './plugins'
//应用插件
Vue.use(plugins,1,2,3)
- 在组件中使用
<template><div class="school">//这里使用了插件里面的全局过滤器<h1>{{ msg | slice}}</h1><div class="qwe">学生名字:{{ name }}</div><div>学生性别:{{ sex }}</div><div>学生年龄:{{ myAge }}</div><button @click="updateAge">点我年龄+1</button><button @click="showHello">点我出现插件中定义的hello方法</button><input type="text" v-fbind:value="name"></div>
</template>
<script>
export default {name: "Student",//接收传过来的数据,放到了vc上,比data优先props:['name','sex','age']//简单接收};
</script>
<style lang="less" scoped>
.school {background-color: blue;.qwe{font-size:40px;}
}
</style>
九、scoped样式
- 每一个组将中的style中的样式最后在App中会汇总到一起,就可能出现类名冲突,加上scoped就可以将style设置为局部作用域,只在这一个组件中生效
- lang属性,可以指定style中的语言,默认是css
<style lang="less" scoped>
.school {background-color: blue;.qwe{font-size:40px;}
}
</style>
十、组件自定义事件
1. 传递数据:子组件–>父组件
核心流程:父组件给子组件传递函数,子组件通过props接受这个函数,并调用这个函数将自己的数据传递给父组件
<template><div class="school"><div>学校名称{{ SchoolName }}</div>//有个点击事件<button @click="sendSchoolName">把学校名字给App</button></div>
</template>
<script>
export default {name: "School",//使用props接受父组件传递过来的函数类型的propsprops:['getSchoolName'],data() {return {SchoolName:'北京大学',  };},methods:{sendSchoolName(){//使用这个函数,传递参数,将名字传给父组件this.getSchoolName(this.SchoolName)}}};
</script>
<template><div class="app"><h1>{{ msg }}</h1><h2>学生名字是{{ StudentName }}</h2><!-- 通过父组件给子组件传递函数类型的props实现:子给父传递数据 -->// 第一个getSchoolName表示子组件(School组件)内部 “接收父组件数据” 时用的变量名// 第二个getSchoolName表示父组件自己定义的一个函数的名字<School :getSchoolName="getSchoolName" /></div>
</template>
<script>
import Student from "./components/Student";
import School from "./components/School";
export default {name: "App",components: { Student, School },data() {return {msg: "我是外面的大标题",StudentName: "",};},methods: {//回调函数在父组件里面,因此也可以收到子组件传给父组件的数据getSchoolName(name) {console.log("App收到了学校名字,", name);},// getStudentName(name, ...params) {//   //params是数组//   console.log("收到了学生的名字:", name, params);//   this.StudentName = name;// },},mounted() {// 当App挂载完毕执行//可以通过this.$refs.student访问Student组件实例对象//这个this是Student组件实例对象,//但是getStudentName写在了methods中,他的this就是App组件实例对象this.$refs.student.$on("atfenghui", this.getStudentName);//相比另外两种更灵活//     setTimeout(() => {//         // 绑定自定义事件//         //   this.$refs.student.$on("atfenghui", this.getStudentName);// // 只执行一次//           this.$refs.student.$once("atfenghui", this.getStudentName);//     }, 5000);},
</script>
2. 给组件自定义事件
2.1 第一种写法:使用v-on:
- 在子组件的实例对象vc上绑定自定义atfenghui事件
<!-- <Student v-on:atfenghui="getSchoolName" /> -->
//回调函数留在父组件中
getSchoolName(name) {console.log("App收到了学校名字,", name);
},
//传多个参数形式
//getStudentName(name, ...params) {
//params是数组
//   console.log("收到了学生的名字:", name, params);
// },
- 在methods中触发子组件实例对象身上的aifenghui事件
<button @click="sendStudentName">把学生名字给App</button>
data(){return{name:"小王"}
}
methods: {sendStudentName() {//触发Student组件实例身上的aifenghui事件//传参形式// this.$emit("atfenghui", this.name, 666, 888, 999);this.$emit("atfenghui", this.name);}},
2.2 第二种写法:使用@符号
另外在事件名称后面加上native修饰符,表示这个时间哎是原生DOM事件,而不是自定义的
解析时就把这个事件放在了最外层的DOM元素上(这也是为什么tmplate标签里只能有一个根元素的原因)
比如这个click事件,在子组件中就不用专门触发了,直接点击整个子组件,就可以出发show回调函数,show方法写在父组件里面
 <Student @atfenghui="getStudentName" @demo="m1" @click.native="show" />methods:{show() {alert("这是原生事件");},
}
2.3 第三种写法:使用ref(更灵活)
<Student ref="student" />
十一、全局事件总线(ClobalEventBus)
1. 定义:
一种任意组件间通信的方式,适用于任意组件间通信
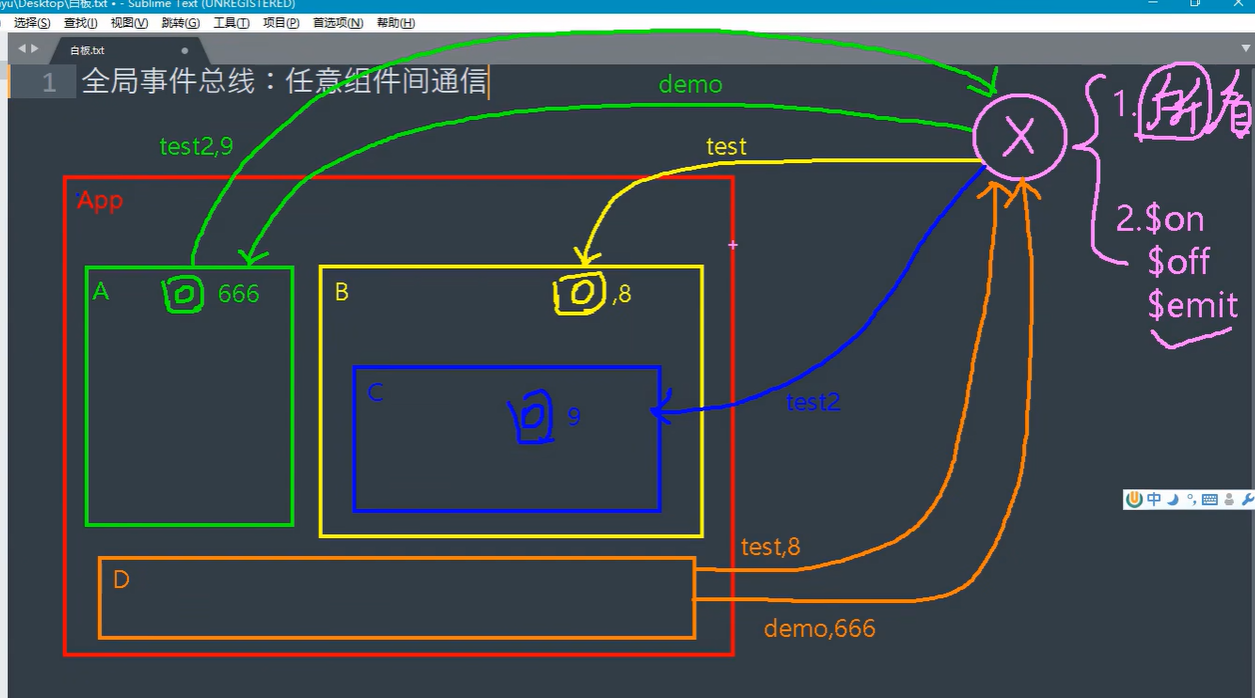
2. 安装全局事件总线
  new Vue({..........//安装全局事件总线beforeCreate(){console.log("执行了")Vue.prototype.$bus=this;//生命周期函数里面的this就是vm(当前实例对象)}.........
})
3. 使用全局事件总线
接收数据
methods(){demo(data){......}
}
mounted(){console.log(this.$bus)this.$bus.$on('hello',this.demo)
},
beforeDestroy() {//用完了把这个事件解绑this.$bus.$off('hello');
},
传数据
methods: {sendStudentName() {this.$bus.$emit("hello", this.name);},},
4. 解绑事件
beforeDestroy() {//用完了把这个事件解绑this.$bus.$off('hello');
},
十二、消息订阅与发布
1. 定义
一种组件间通信的方式,适用于任意组件间通信
2. 使用步骤
- 安装pubsub
npm i pubsub-js
- 引入
import pubsub from 'pubsub-js'
- 接收数据
A组件想接受数据,则在A组件中订阅消息,订阅的回调留在A组件自身
mounted(){this.pubId=pubsub.subscribe('hello',function(msg,data){console.log('有人发布了hello消息,hello消息的回调执行了',msg,data)})},beforeDestroy(){pubsub.unsubscribe(this.pubId)}
或者
methods(){demo(data){....}
},mounted(){this.pubId=pubsub.subscribe('xxx',this.demo)},
- 提供数据
pubsub.publish("xxx",数据);
- 最好在beforeDestroy钩子中取消订阅
beforeDestroy(){pubsub.unsubscribe(this.pubId)}
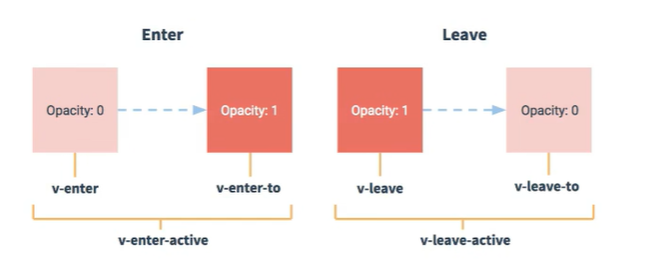
十三、Vue封装的过渡与动画
1. 作用
在插入,更新或移除DOM元素时,再合适的时候给元素添加样式类名
2. 图示
3. 动画写法
- 准备好样式
.v-enter-active{animation:comFrame 1s ease;
}
.v-leave-active{animation:comFrame 1s ease reverse;
}
@keyframes comFrame {from {transform: translateX(-100%);}to {transform: translateX(0px);}
}
- 用transition标签包裹要实现动画的元素
appear表示一开始就应用动画,默认值时true
<transition :appear="true"><h3 v-show="isShow" class="move">你好啊</h3>
</transition>
如果给标签加上了name属性
<transition name="hello" appear><h3 v-show="isShow" class="move">你好啊</h3>
</transition>
则样式类名要变成
.hello-enter-active {animation: comFrame 1s ease;
}
.hello-leave-active {animation: comFrame 1s ease reverse;
}
4. 过渡写法
- 准备好样式
元素进入:
- v-enter:进入的起点
- v-enter-active:进入的过程
- v-enter-to:进入的终点
元素离开:
- v-leave:离开的起点
- v-leave-active:离开的过程
- v-leave-to:离开的终点
/* 进入的起点,离开的终点 */
.hello-enter,
.hello-leave-to {transform: translateX(-100%);
}
/* 下面这个过渡代码可以放在过渡元素本身上 */
.hello-enter-active,
.hello-leave-active {transition: 0.5s linear;
}
/* 进入的终点,离开的起点 */
.hello-enter-to,
.hello-leave {transform: translateX(0px);
}
- 使用transition标签包裹要过渡的元素,并配置name属性
<transition :appear="true"><h3 v-show="isShow" class="move">你好啊</h3>
</transition>
备注:如果有多个元素需要过度,需要使用标签,并且给每个元素指定唯一的key值
Vue脚手架配置代理
如果你的前端应用和后端 API 服务器没有运行在同一个主机上,你需要在开发环境下将 API 请求代理到 API 服务器。这个问题可以通过 vue.config.js 中的 devServer.proxy 选项来配置。
方法1
在vue.config.js中添加如下配置,这会告诉开发服务器将任何未知请求 (没有匹配到静态文件的请求) 代理到http://localhost:4000。
module.exports = {devServer: {proxy: 'http://localhost:4000'}
}
说明:
- 优点:配置简单,请求资源时直接发给前端即可
- 缺点:不能配置多个代理,不能灵活的控制请求是否走代理(如果当前项目根目录下有与接口重名的静态资源,则会直接请求静态资源里面的数据,不会访问后端数据)
- 工作方式:若按照上述配置代理,当请求了不存在的资源时,那么该请求会转发给服务器(优先请求前端资源)
方法2
配置具体代理规则,解决上述缺点
module.exports = {devServer: {proxy: {'/api': {  //匹配所有以/api开头的请求路径target: '<url>',//代理目标的路径ws: true,changeOrigin: true,//将从前端请求过来的以/api开头的路径中的/api去掉,然后向后端服务器发请求pathReerite:{'^/api':''} },'/foo': {target: '<other_url>'}}}
}
changeOrigin(默认值true):
- changeOrigin作用:控制请求头中host字段的值,
changeOrigin为true时代理服务器会把请求头的 Host 改为目标后端服务器的地址(比如目标是 http://localhost:5000,则 Host: localhost:5000);
当 changeOrigin: false 时,Host 会保持前端开发服务器的地址(即 localhost:8080
- 为什么要开启?
很多后端服务器会校验 Host 字段(判断请求是否来自 “合法的源”)。如果 Host 是前端的 8080,后端可能认为是 “跨域非法请求” 而拒绝;但将 Host 改为目标服务器的地址(如 5000)后,后端会误以为 “请求来自自身域内”,从而允许处理请求。
十四、插槽
1. 作用
让父组件可以向子组件指定位置插入html结构,适用于父组件–>子组件
2. 分类
- 默认插槽
<MyCategory title="美食">html结构
</MyCategory>
<template><div class="category"><!-- 定义一个挖槽,等着组件使用者及进行填充 --><slot>默认插槽内容</slot></div>
</template>
- 具名插槽
<MyCategory title="电影"><template slot=”center“>html结构1</template><template v-slot:footer>html结构2</template>
</MyCategory>
<template><div class="category"><slot name="center">我是默认值,当使用者没有传递具体结构是,我才会出现</slot><slot name="footer">我是默认值,当使用者没有传递具体结构是,我才会出现</slot></div>
</template>
- 作用域插槽
理解:数据在组件的自身,但根据数据生成的结构需要组建的使用者来决定
<MCategory title="游戏"><template scope="atfenghui">//生成ul列表<ul><li v-for="(g, index) in atfenghui.names" :key="index">{{ g }}</li></ul></template></MCategory><MCategory title="游戏"><template slot-scope="{names}">//生成ol列表<ol><li v-for="(g, index) in names" :key="index">{{ g }}</li></ol></template></MCategory>
<template><div class="category"><h3>{{ title }}分类</h3><!-- 定义一个挖槽,等着组件使用者及进行填充 --><slot :names="names"></slot></div>
</template>data(){return {names:['张三','李四','王五']}}
生活感悟
这周就是很平淡的一周吧,像往常一样按部就班的上课和学习,周末迎来了大一的第一次java考核,监考的时候仿佛看到了一年前的自己啊,写了两行基础的固定代码就开始发呆,不禁感慨时间过的好快, 学java的崩溃好像就在昨日,还好也是熬过来了。这周办公室部门聚餐,和部门的人聊了趣事,好喜欢这样的八卦局
学习计划
学完路由,vue3,