微信小程序学习(五)
中间的几章过于简单,就不给出示例,直接从第八节开始:
导航与路由跳转![]() https://blog.csdn.net/qq_38060125/article/details/149579894
https://blog.csdn.net/qq_38060125/article/details/149579894
一、实现两个页面之间相互跳转,并携带用户信息(如用户名、ID)
使用 navigateBack 返回上一页并刷新数据
这里有两个页面
WXML
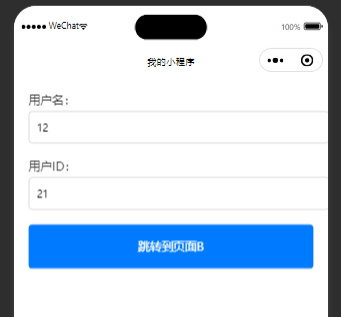
页面一:
<view class="container"><!-- 用户名输入 --><view class="form-item"><text class="form-label">用户名:</text><input class="form-input" placeholder="请输入用户名" bindinput="onUsernameInput" /></view><!-- 用户ID输入 --><view class="form-item"><text class="form-label">用户ID:</text><input class="form-input" type="number" placeholder="请输入用户ID" bindinput="onIdInput" /></view><!-- 跳转到页面B --><button class="submit-button" bindtap="goToPageB">跳转到页面B</button>
</view>
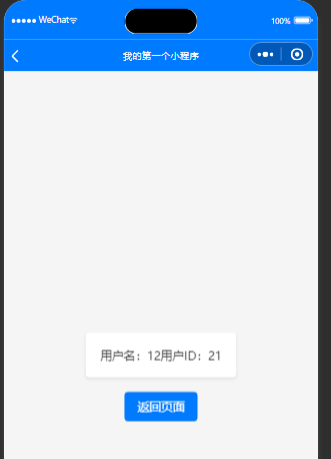
页面二:
<view class="container"><view class="user-info"><text class="info-item">用户名:{{username}}</text><text class="info-item">用户ID:{{userId}}</text></view><!-- 返回首页 --><button class="back-button" bindtap="goBackToPageA">返回页面A</button>
</view>
WXSS
页面一:
.container {display: flex;flex-direction: column;padding: 20px;
}.form-item {margin-bottom: 20px;
}.form-label {font-size: 16px;color: #333;margin-bottom: 5px;display: block;
}.form-input {width: 100%;padding: 10px;font-size: 14px;border: 1px solid #ccc;border-radius: 5px;
}.submit-button {width: 100%;padding: 10px;background-color: #007aff;color: white;font-size: 16px;border: none;border-radius: 5px;text-align: center;
}
页面二:
.container {display: flex;flex-direction: column;justify-content: center;align-items: center;height: 100vh;background-color: #f5f5f5;
}.user-info {background-color: #fff;padding: 20px;border-radius: 5px;box-shadow: 0 2px 5px rgba(0, 0, 0, 0.1);margin-bottom: 20px;
}.info-item {font-size: 16px;color: #333;margin-bottom: 10px;
}.back-button {width: 100px;height: 40px;background-color: #007aff;color: white;font-size: 16px;border: none;border-radius: 5px;text-align: center;
}
JS
页面一:
Page({data: {username: '', // 用户名userId: ''    // 用户ID},// 获取用户名输入onUsernameInput(e) {this.setData({username: e.detail.value});},// 获取ID输入onIdInput(e) {this.setData({userId: e.detail.value});},// 跳转到页面B并传递用户数据goToPageB() {const { username, userId } = this.data;if (!username || !userId) {wx.showToast({title: '请输入用户名和用户ID',icon: 'none'});return;}wx.navigateTo({url: `/pages/index2/index2?username=${username}&userId=${userId}`});}
});
页面二:
Page({data: {username: '', // 用户名userId: ''    // 用户ID},// 获取用户名输入onUsernameInput(e) {this.setData({username: e.detail.value});},// 获取ID输入onIdInput(e) {this.setData({userId: e.detail.value});},// 跳转到页面B并传递用户数据goToPageB() {const { username, userId } = this.data;if (!username || !userId) {wx.showToast({title: '请输入用户名和用户ID',icon: 'none'});return;}wx.navigateTo({url: `/pages/index2/index2?username=${username}&userId=${userId}`});}
});
效果
剩下的感觉大差不差,就是api的调用,就不做重复介绍。
网络请求与异步处理![]() https://blog.csdn.net/qq_38060125/article/details/149580041
https://blog.csdn.net/qq_38060125/article/details/149580041
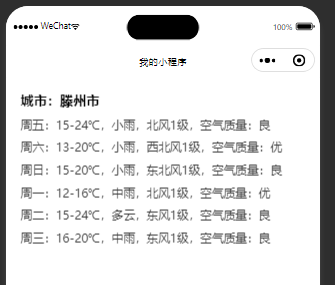
二、网络请求与异步处理(获取天气为例)
首先跟着文章,加入函数request.js。我的是创建了一个function文件夹, 放在里边。
request.js
// utils/request.js
function request(options) {const { url, method = 'GET', data = {}, showLoading = true } = options;if (showLoading) {wx.showLoading({ title: '加载中...' });}return new Promise((resolve, reject) => {wx.request({url,method,data,header: {'content-type': 'application/json','Authorization': wx.getStorageSync('token') || ''},success(res) {if (res.statusCode === 200) {resolve(res.data);} else {wx.showToast({ title: '请求异常', icon: 'none' });reject(res);}},fail(err) {wx.showToast({ title: '网络错误', icon: 'none' });reject(err);},complete() {if (showLoading) {wx.hideLoading();}}});});
}export default request;
WXML
<view class="container"><!-- 显示城市名称 --><view class="city-name">城市:{{city}}</view><!-- 天气列表 --><view class="weather-list"><!-- 遍历解析后的天气数据 --><view wx:for="{{weatherData}}" wx:key="index" class="weather-item"><text>{{item.date}}:{{item.temperature}},{{item.weather}},{{item.wind}},空气质量:{{item.air_quality}}</text></view></view>
</view>
WXSS
.container {padding: 20px;
}.city-name {font-size: 18px;font-weight: bold;margin-bottom: 10px;
}.weather-list {margin-top: 10px;
}.weather-item {margin-bottom: 10px;color: #333;
}
JS
这里加载的时候,从本js文件出发,我的目录层级为
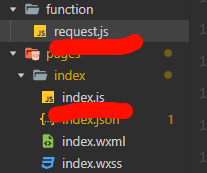
所以为../../function/request
import request from '../../function/request';Page({data: {city: '',            // 城市名称weatherData: []      // 天气数据列表},async onLoad() {try {// 发起请求const res = await request({url: 'https://v2.xxapi.cn/api/weather?city=枣庄滕州',method: 'GET'});// 检查请求是否成功if (res.code === 200) {// 解析城市名称和天气数据this.setData({city: res.data.city,weatherData: res.data.data});} else {wx.showToast({ title: '数据请求失败', icon: 'none' });}} catch (err) {console.error('接口调用失败:', err);}}
});
效果
后续可以切换为ai对话的api。
三、async 和 await
介绍一下这两个的作用:
async 和 await 是配套使用的,await 必须出现在 async 标记的函数内部。
1. 基础概念:为什么需要 async/await?
在 JavaScript 中,异步操作是常见的,比如:
- 向服务器发起 HTTP 请求。
- 数据库查询。
- 读取文件的内容。
- 定时操作(
setTimeout())等。
问题在于:异步操作不会立即完成,因此它们无法直接返回结果,而是需要依赖回调或者 Promise。
回调的问题:阅读和维护困难
假如我们要做一系列的异步任务,比如依次获取用户数据、获取订单数据、获取支付信息。如果都用回调函数,会导致代码如下:
getUserDetails((user) => {getOrderDetails(user.id, (order) => {getPaymentInfo(order.id, (payment) => {console.log("最终的支付信息:", payment);});});
});
这样一层层的嵌套非常难以维护和阅读。
使用 Promise 解决
为了解决嵌套过深的问题,JavaScript 提供了 Promise,让我们可以这样写:
getUserDetails().then((user) => getOrderDetails(user.id)).then((order) => getPaymentInfo(order.id)).then((payment) => console.log("最终的支付信息:", payment)).catch((err) => console.error("出错了:", err));
逻辑不再嵌套,也易于理解。然而,问题是即便如此,Promise 的链式风格还是不够直观,特别是当你有很多分支逻辑时,代码会变得凌乱。
async/await 是什么?解决了什么问题?
async/await 是基于 Promise 的语法糖,它使异步代码看起来就像是同步代码 —— 逻辑更清晰、更直观、更易于维护。
async function fetchAllData() {try {const user = await getUserDetails();                 // 等待用户数据const order = await getOrderDetails(user.id);        // 等待订单数据const payment = await getPaymentInfo(order.id);      // 等待支付信息console.log("最终的支付信息:", payment);} catch (err) {console.error("出错了:", err);}
}
看上去就像是普通同步代码的执行顺序:
- 获取用户信息。
- 根据用户信息获取订单信息。
- 根据订单信息获取支付信息。
2. 如果没有 async 会发生什么?
如果在一个普通函数中使用 await,会报错如下:
function myFunction() {const result = await somePromise(); // Error: await is only valid in async functionsconsole.log(result);
}
为什么必须用 async?
async 标记告诉 JavaScript:
- 这个函数内部是异步的,可能会有
await操作来暂停代码执行。 - 异步函数总是返回一个 Promise,这是它的核心特点。
await只能在异步上下文中工作,而普通函数本身是同步的,不支持异步控制流。