Elasticsearch:使用推理端点及语义搜索演示
在今天的文章中,我来详细描述如上在 Elasticsearch 中使用推理端点,并展示进行语义搜索的。更多阅读,请参阅 “Elasticsearch:Semantic text 字段类型”。在本次展示中,我讲使用 Elastic Stack 9.1.4 版本来进行展示。
安装
Elasticsearch 及 Kibana
如果你还没有安装好你自己的 Elasticsearch 及 Kibana,那么请参考如下的文章来进行安装:
-
如何在 Linux,MacOS 及 Windows 上进行安装 Elasticsearch
-
Kibana:如何在 Linux,MacOS 及 Windows 上安装 Elastic 栈中的 Kibana
在安装的时候,请参考 Elastic Stack 8.x/9.x 的安装指南来进行。在本次安装中,我将使用 Elastic Stack 9.1.2 来进行展示。
首次安装 Elasticsearch 的时候,我们可以看到如下的画面:
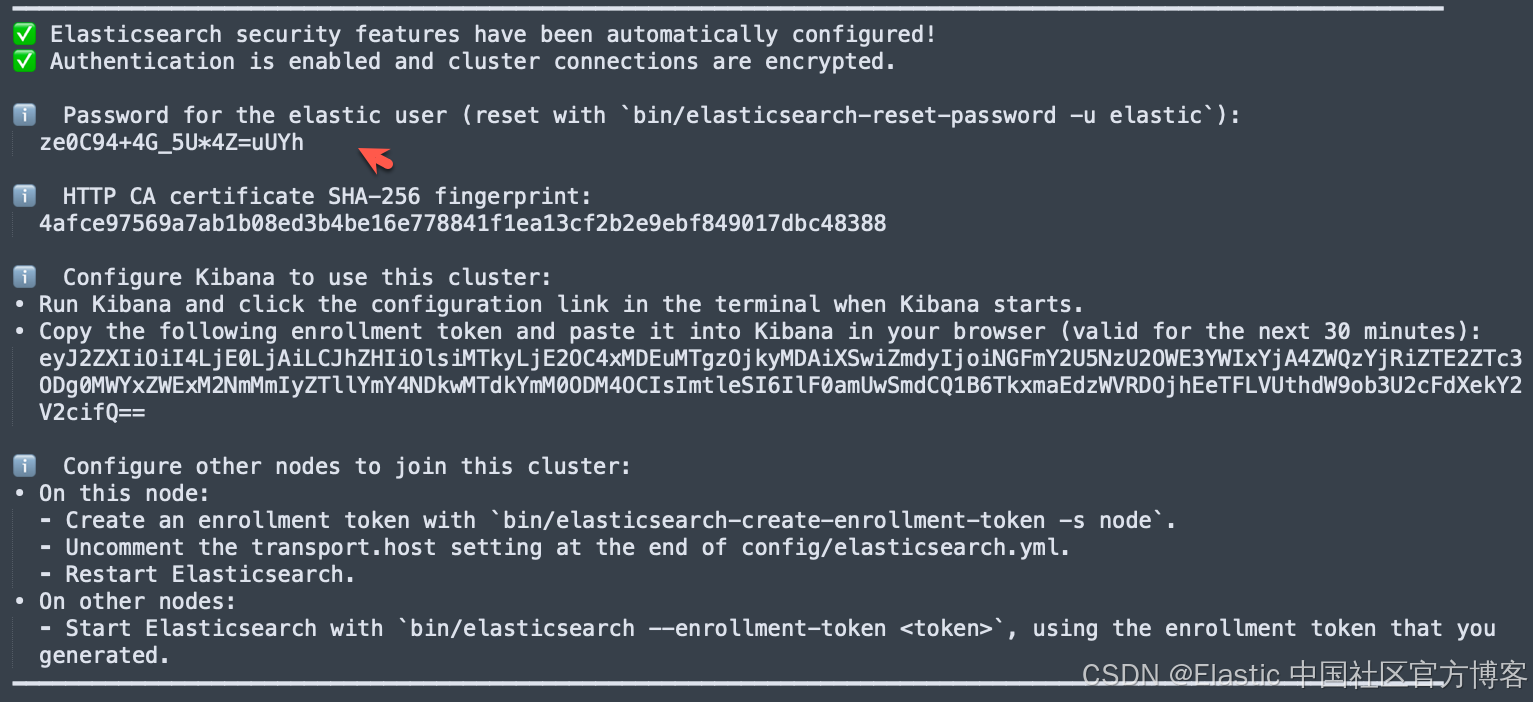
我们按照上面的链接把 Elasticsearch 及 Kibana 安装好。
下周 ELSER 及 E5 模型
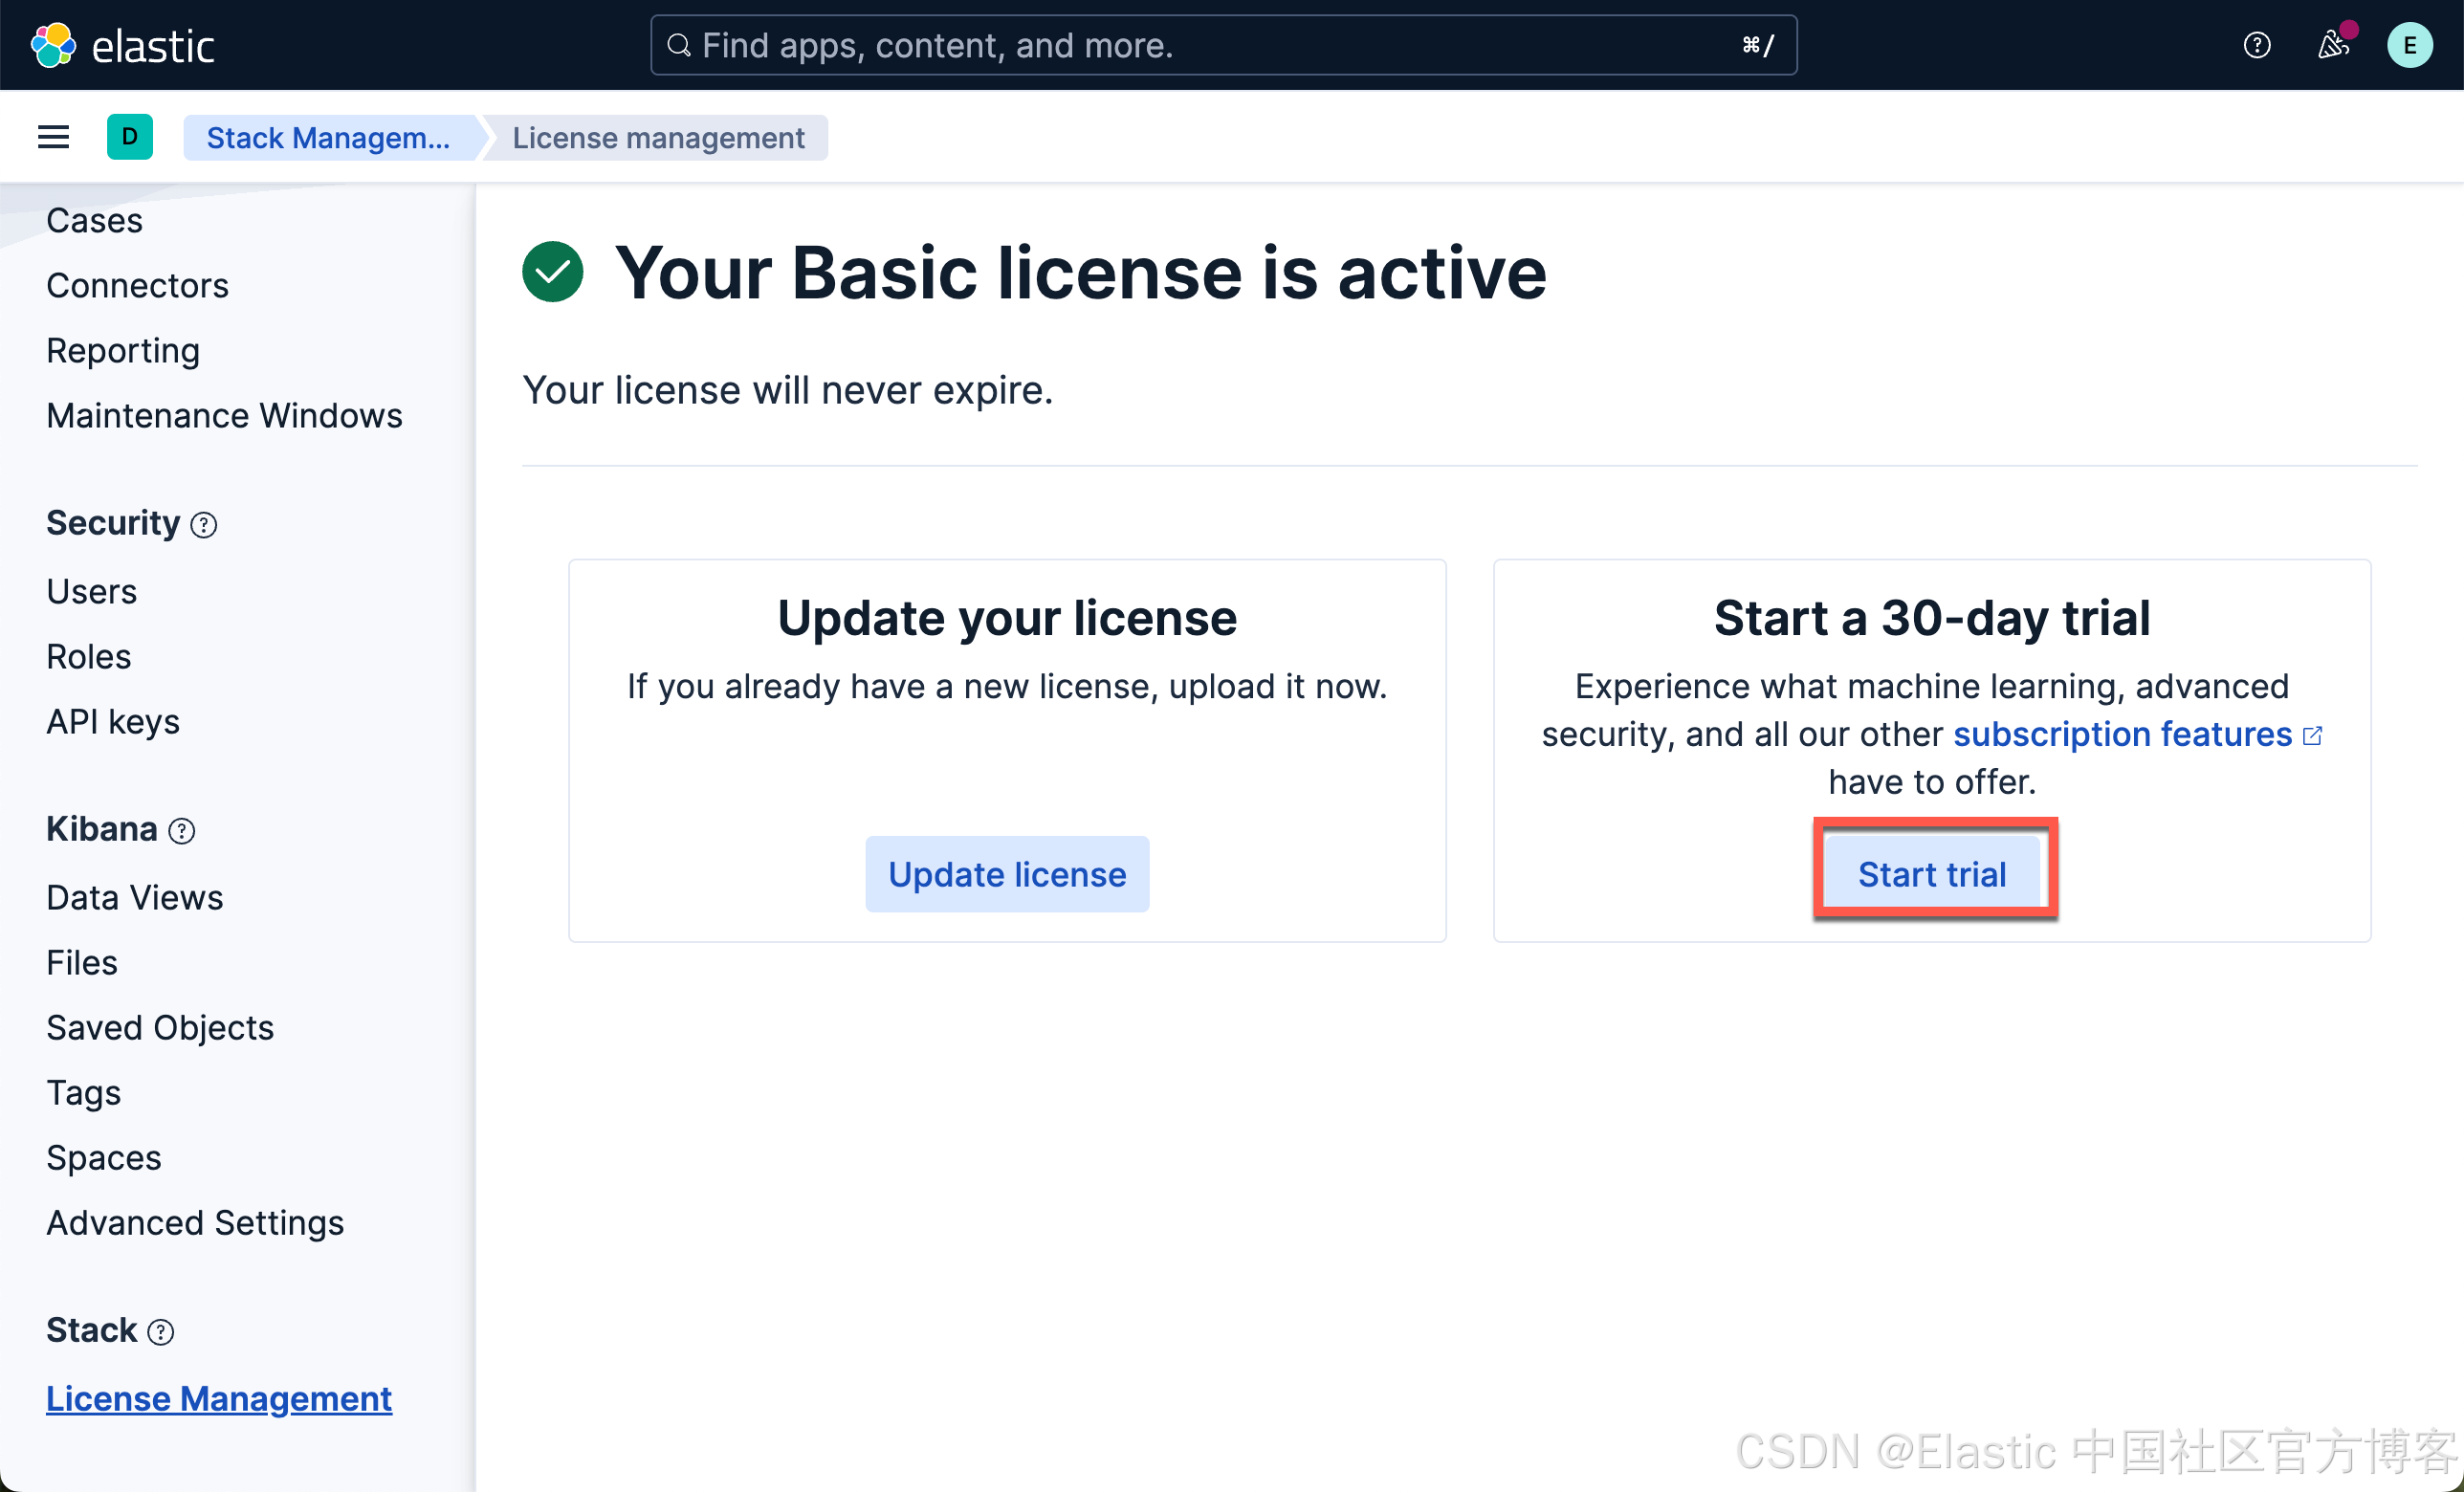
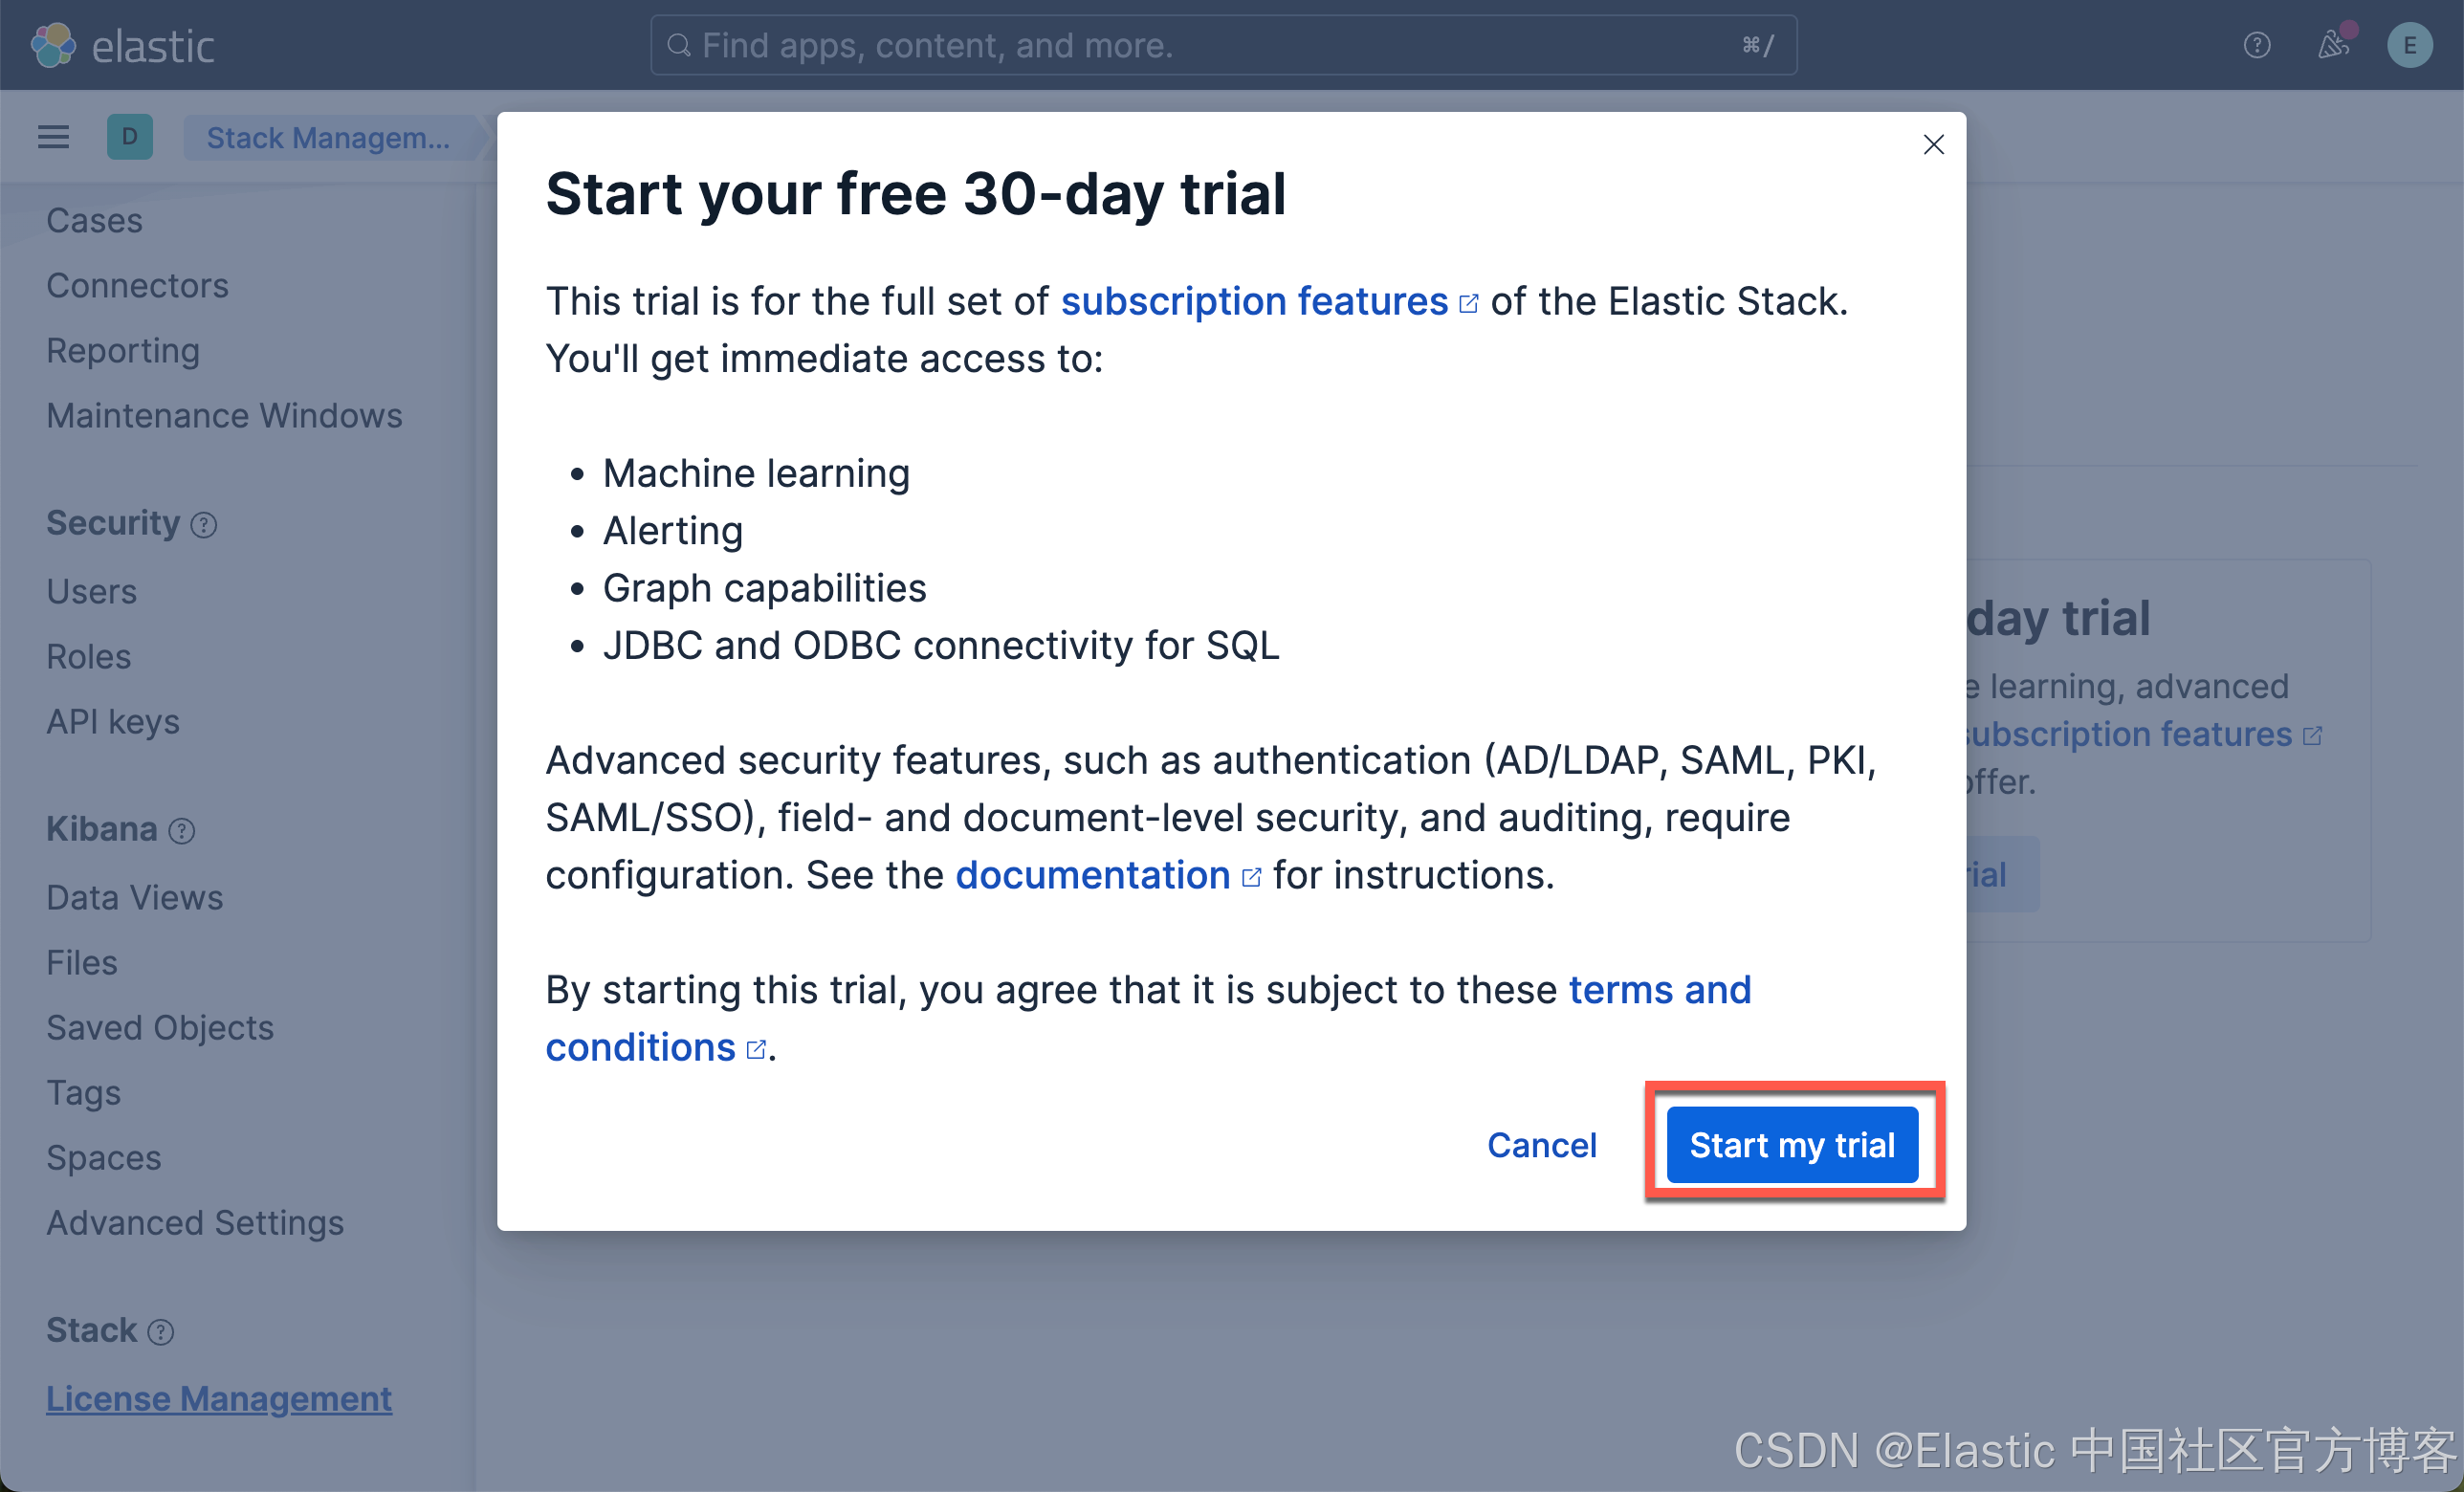
在我们如下的练习中,我们将下载 Elastic 自带的模型:ELSER(稀疏向量) 及 E5(密集向量)。由于这两个嵌入模型是安装在 Elasticsearch 的机器学习节点上的,我们需要启动白金试用。特别值得指出的是:如果你不使用 Elasticsearch 机器学习节点来向量化你的语料,那么你不必启动白金试用。你可以在 Python 代码里实现数据的向量化,或者使用第三方的端点来进行向量化,而只把 Elasticsearch 当做一个向量数据库来使用!
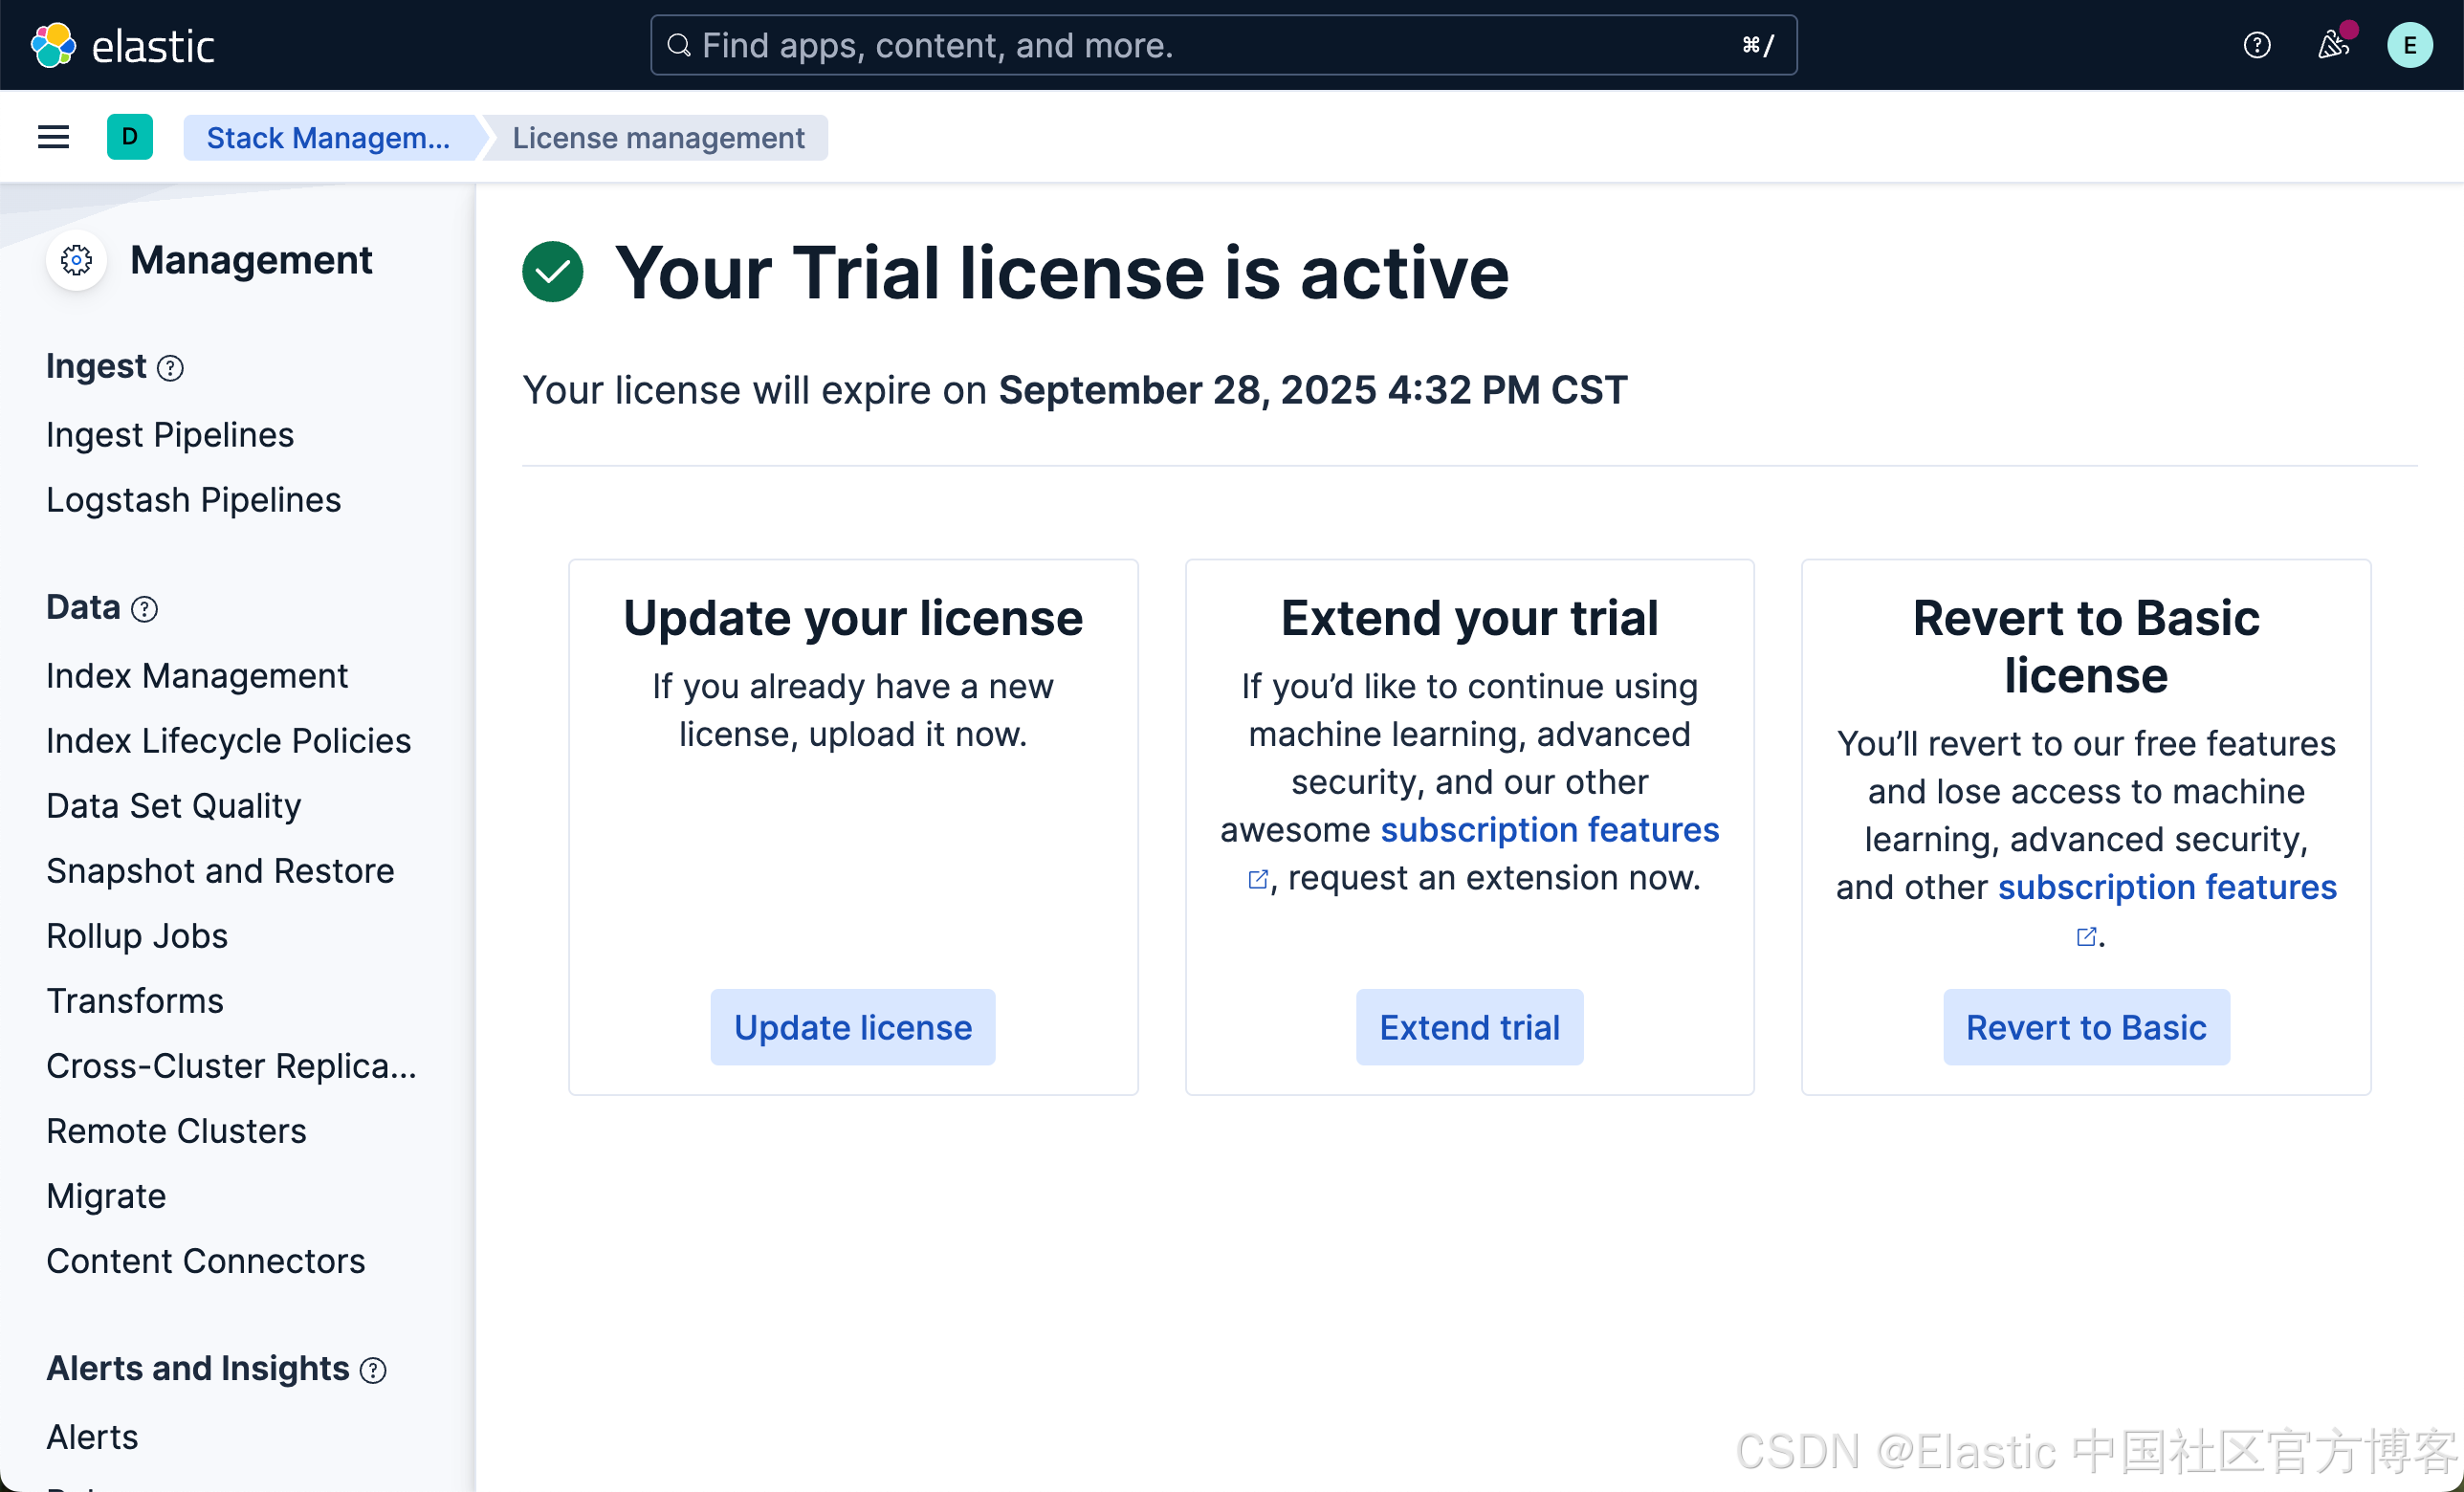
这样我们就启动了白金试用。
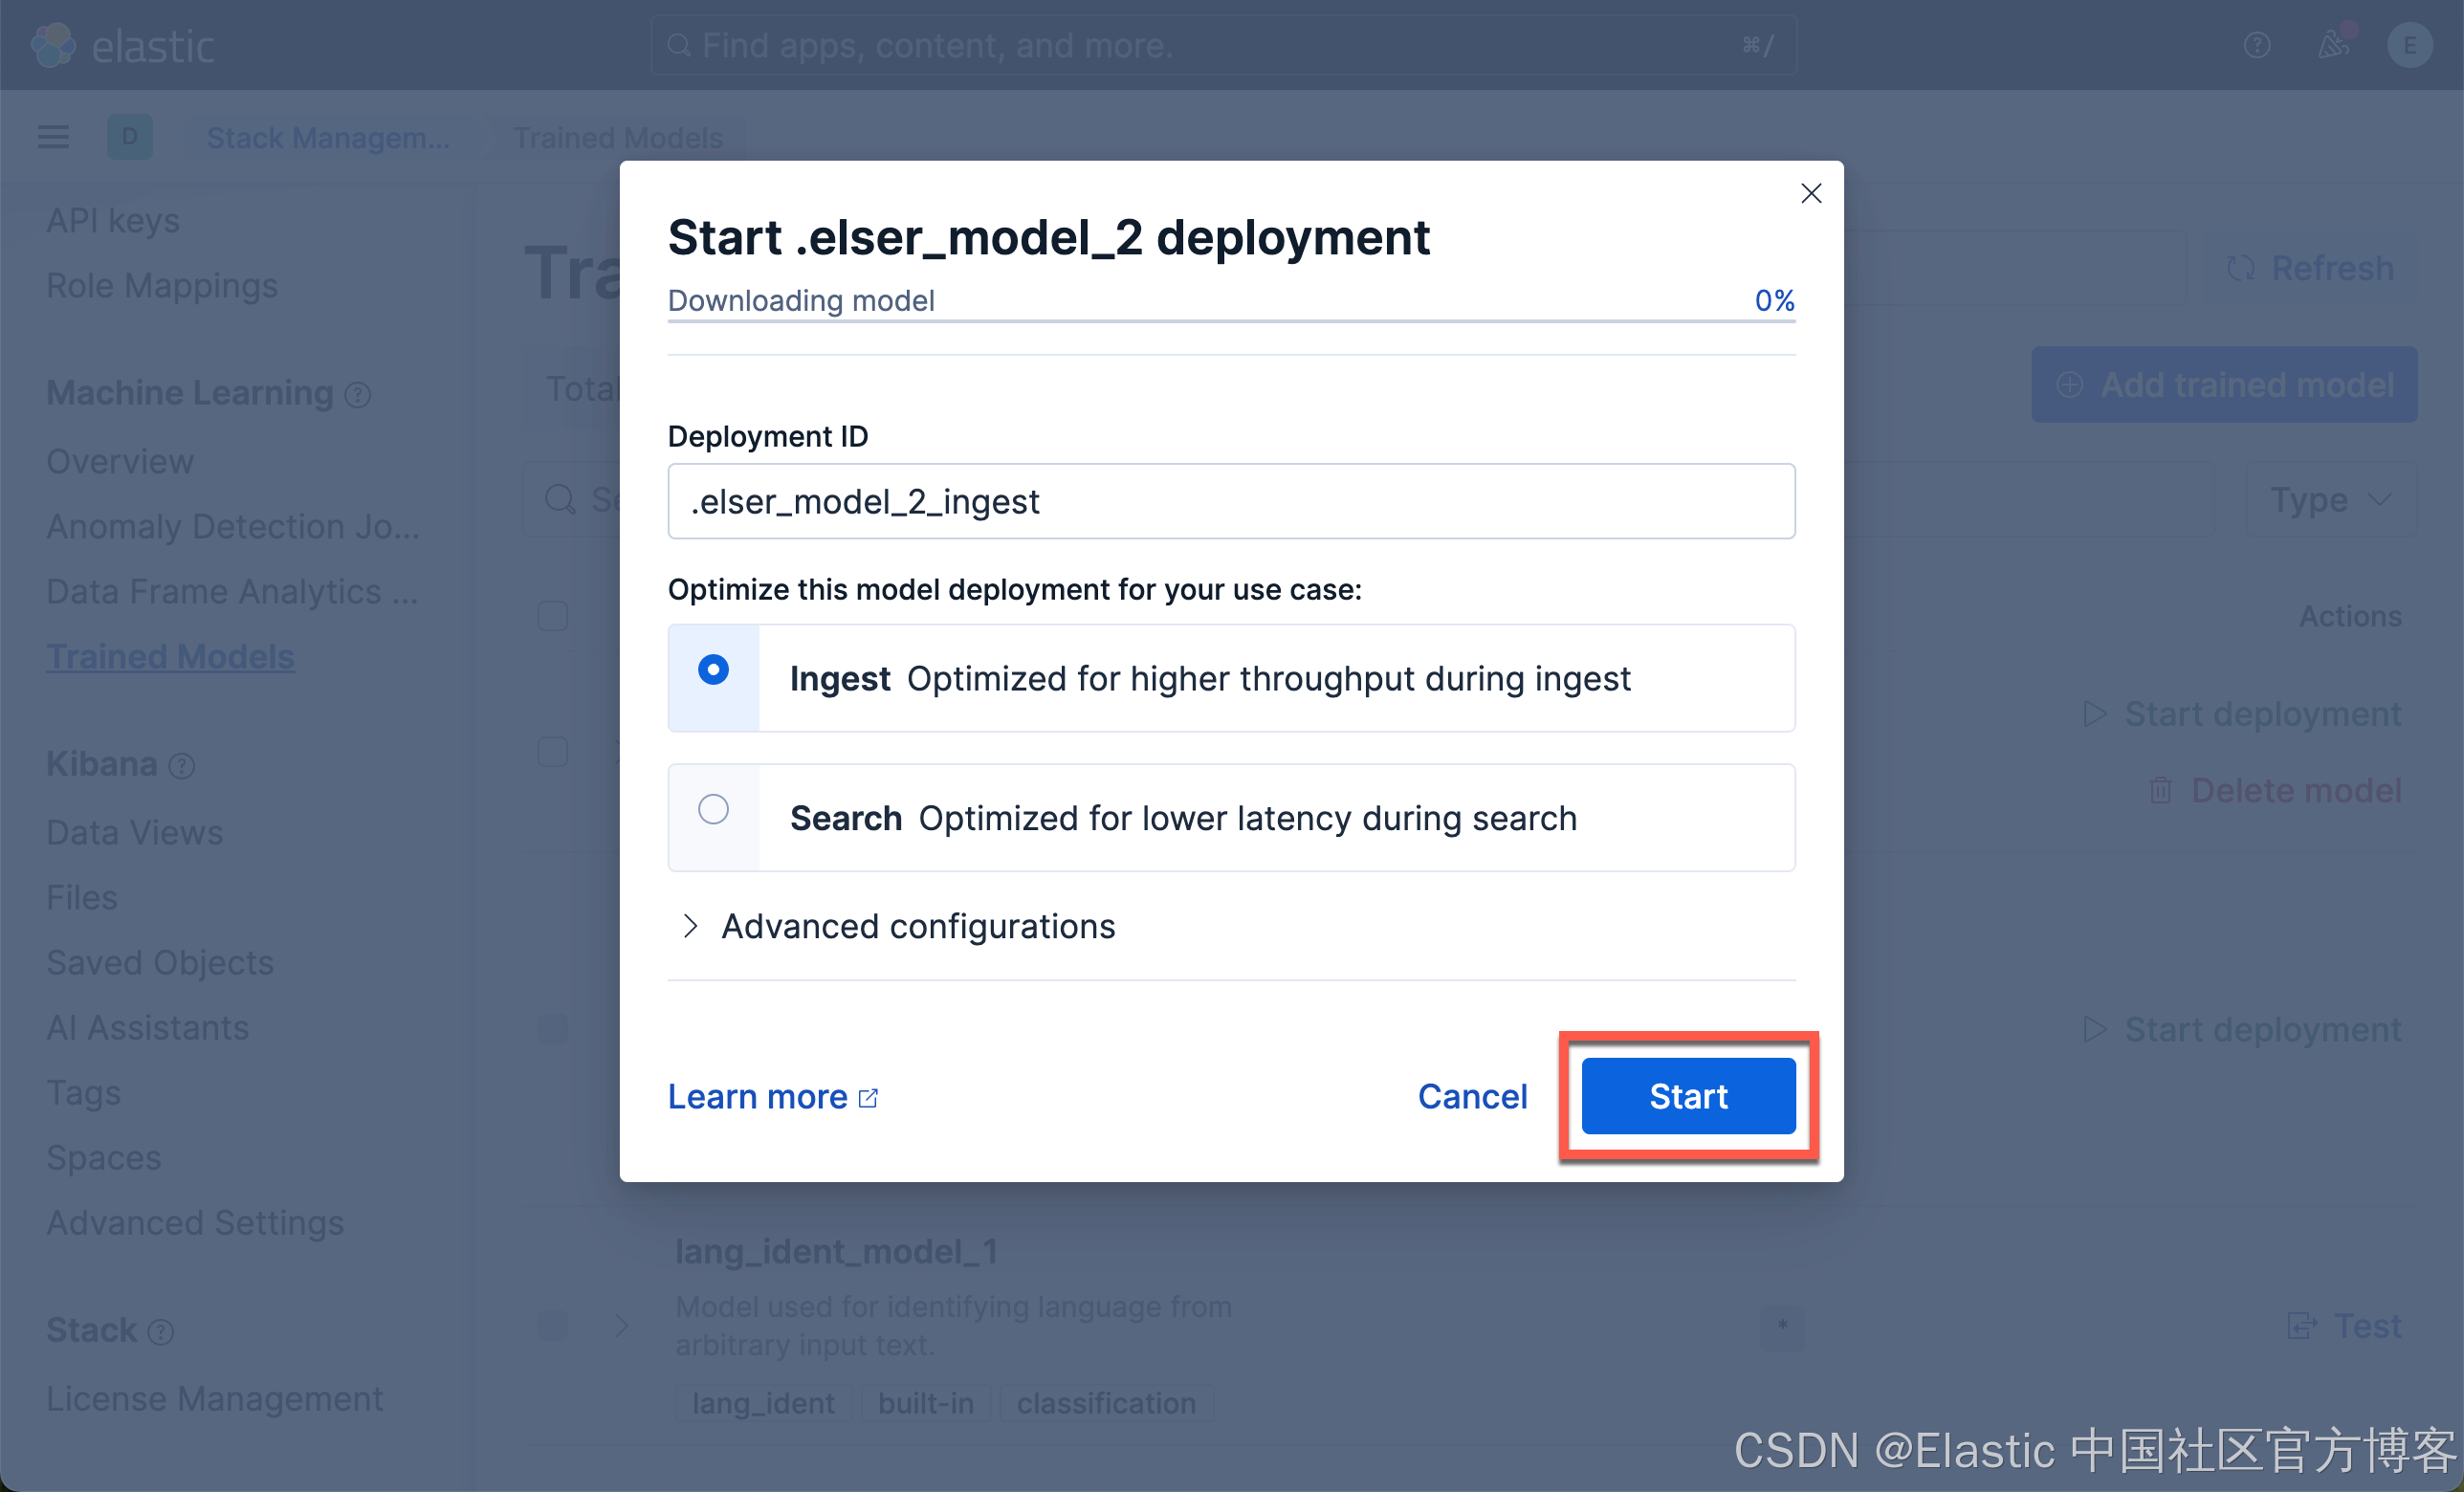
我们现在下载 ELSER 及 E5 嵌入模型:

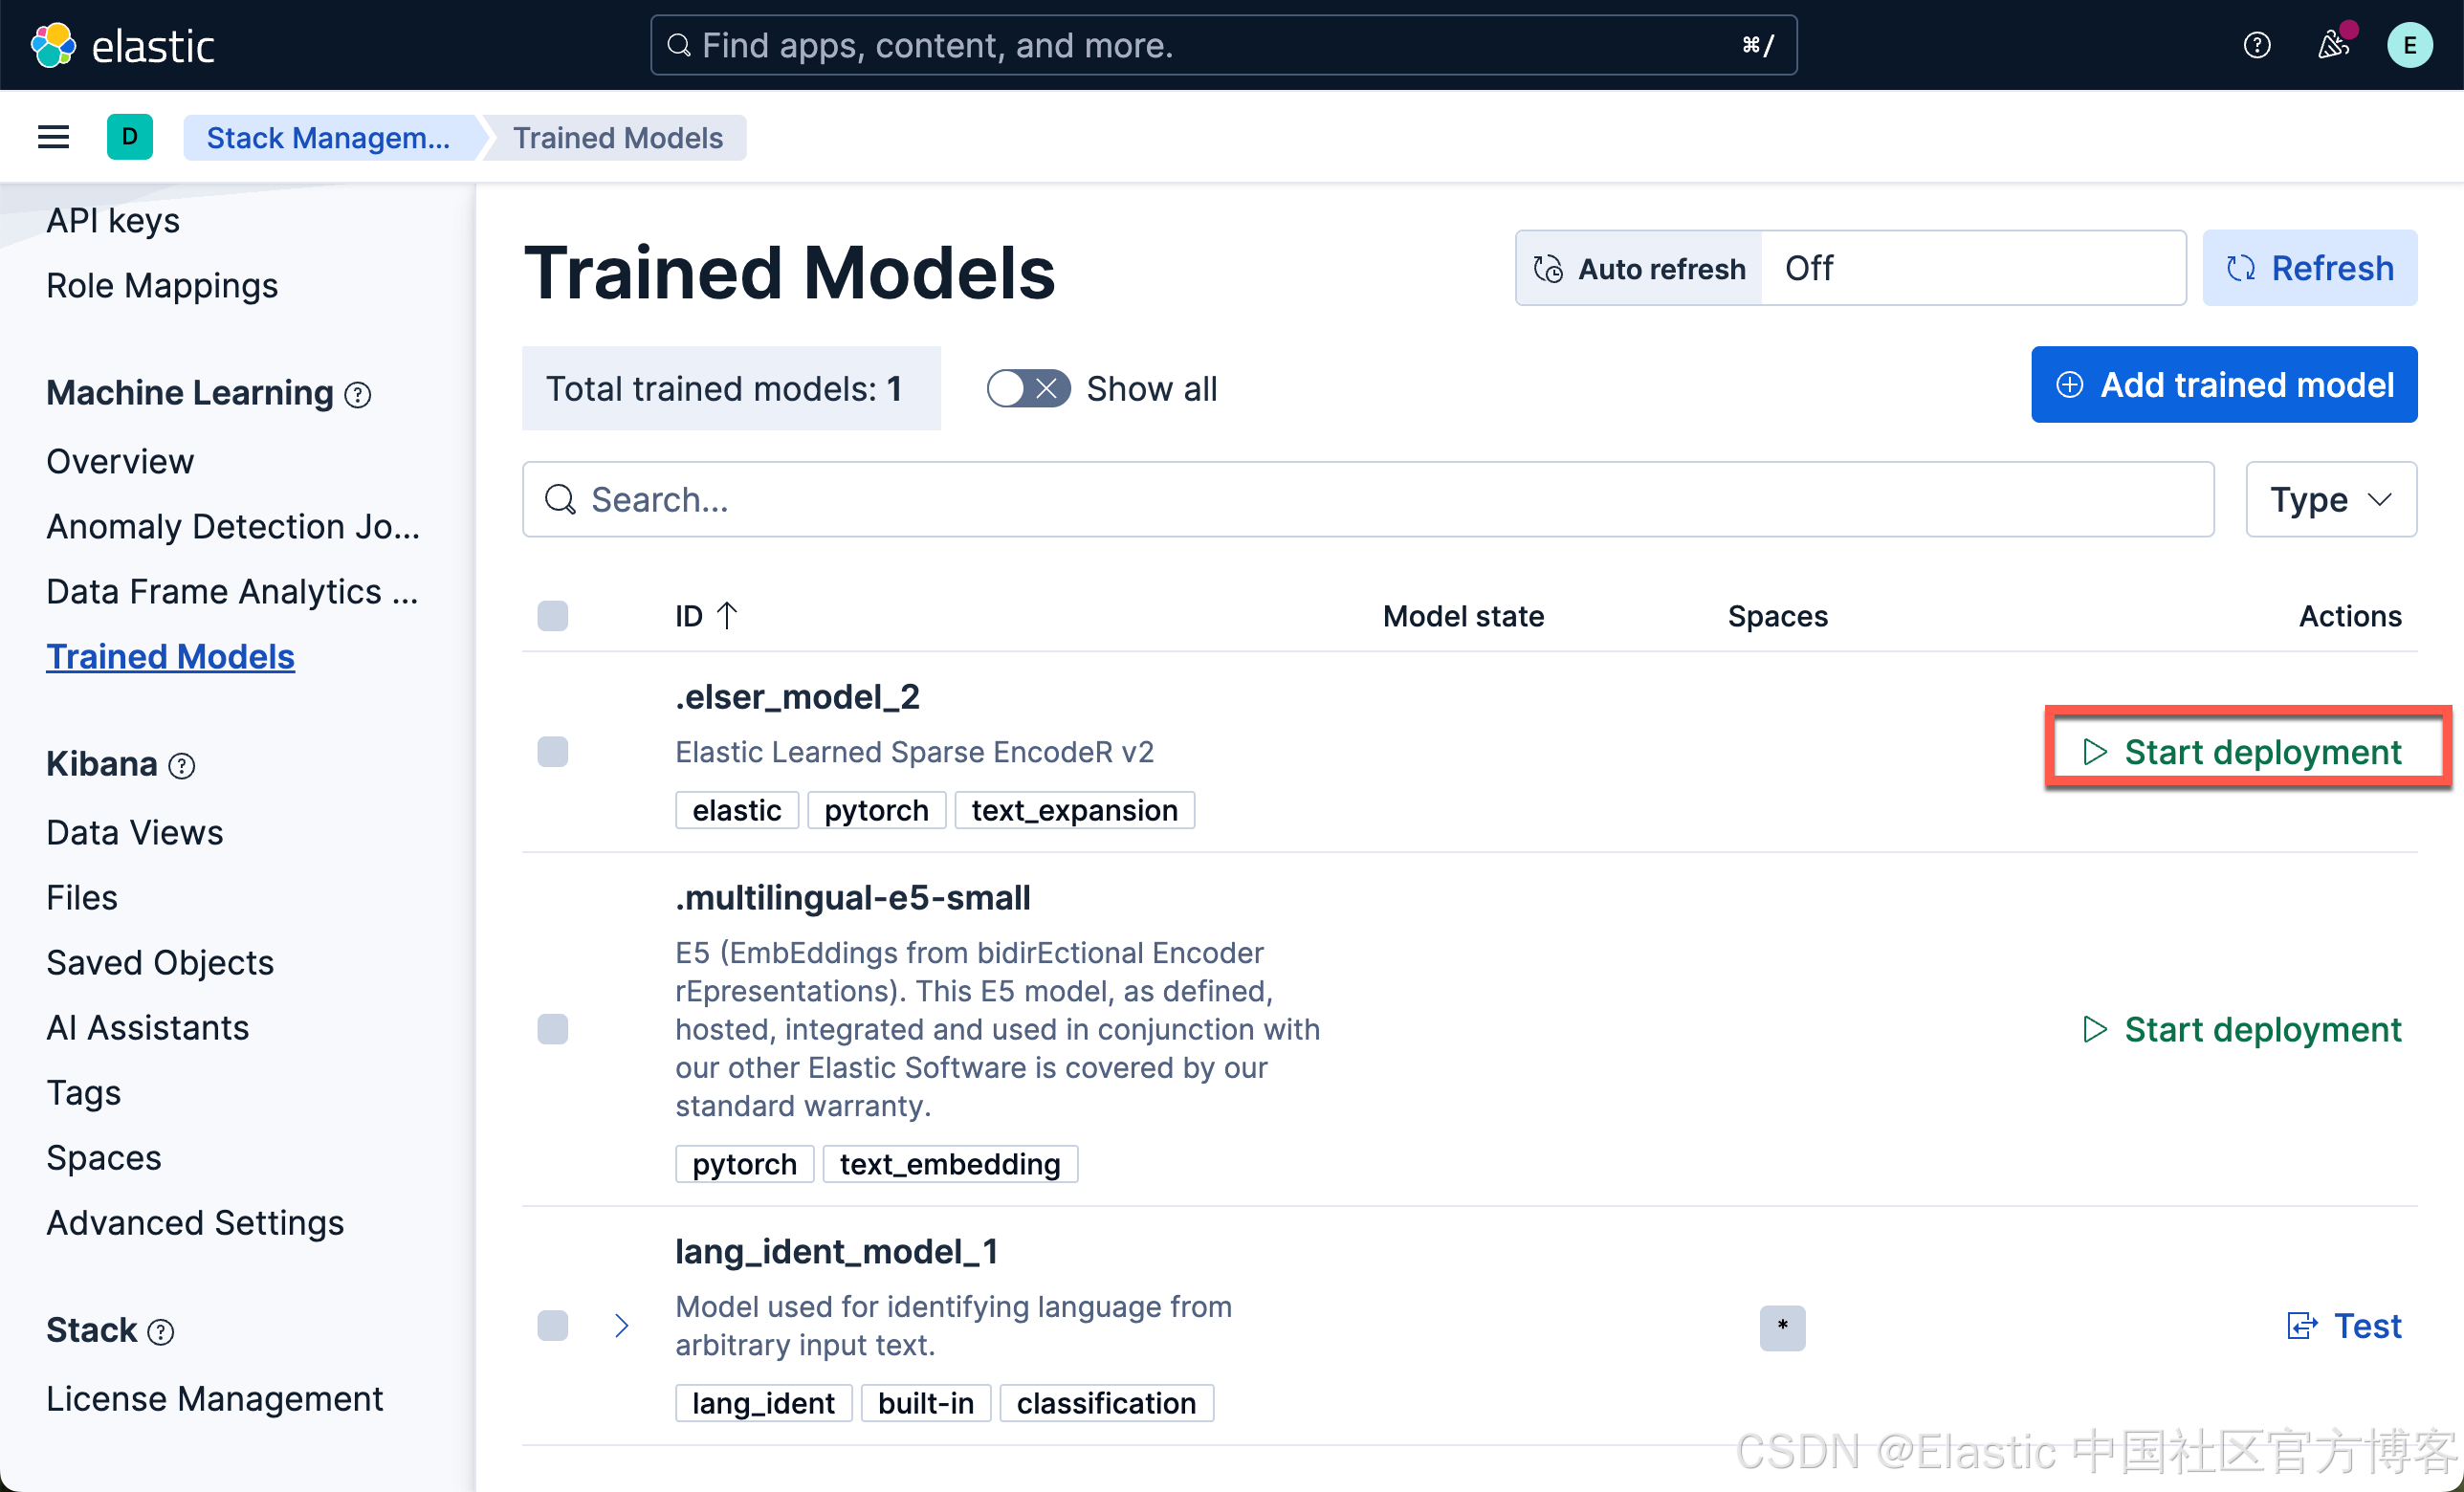
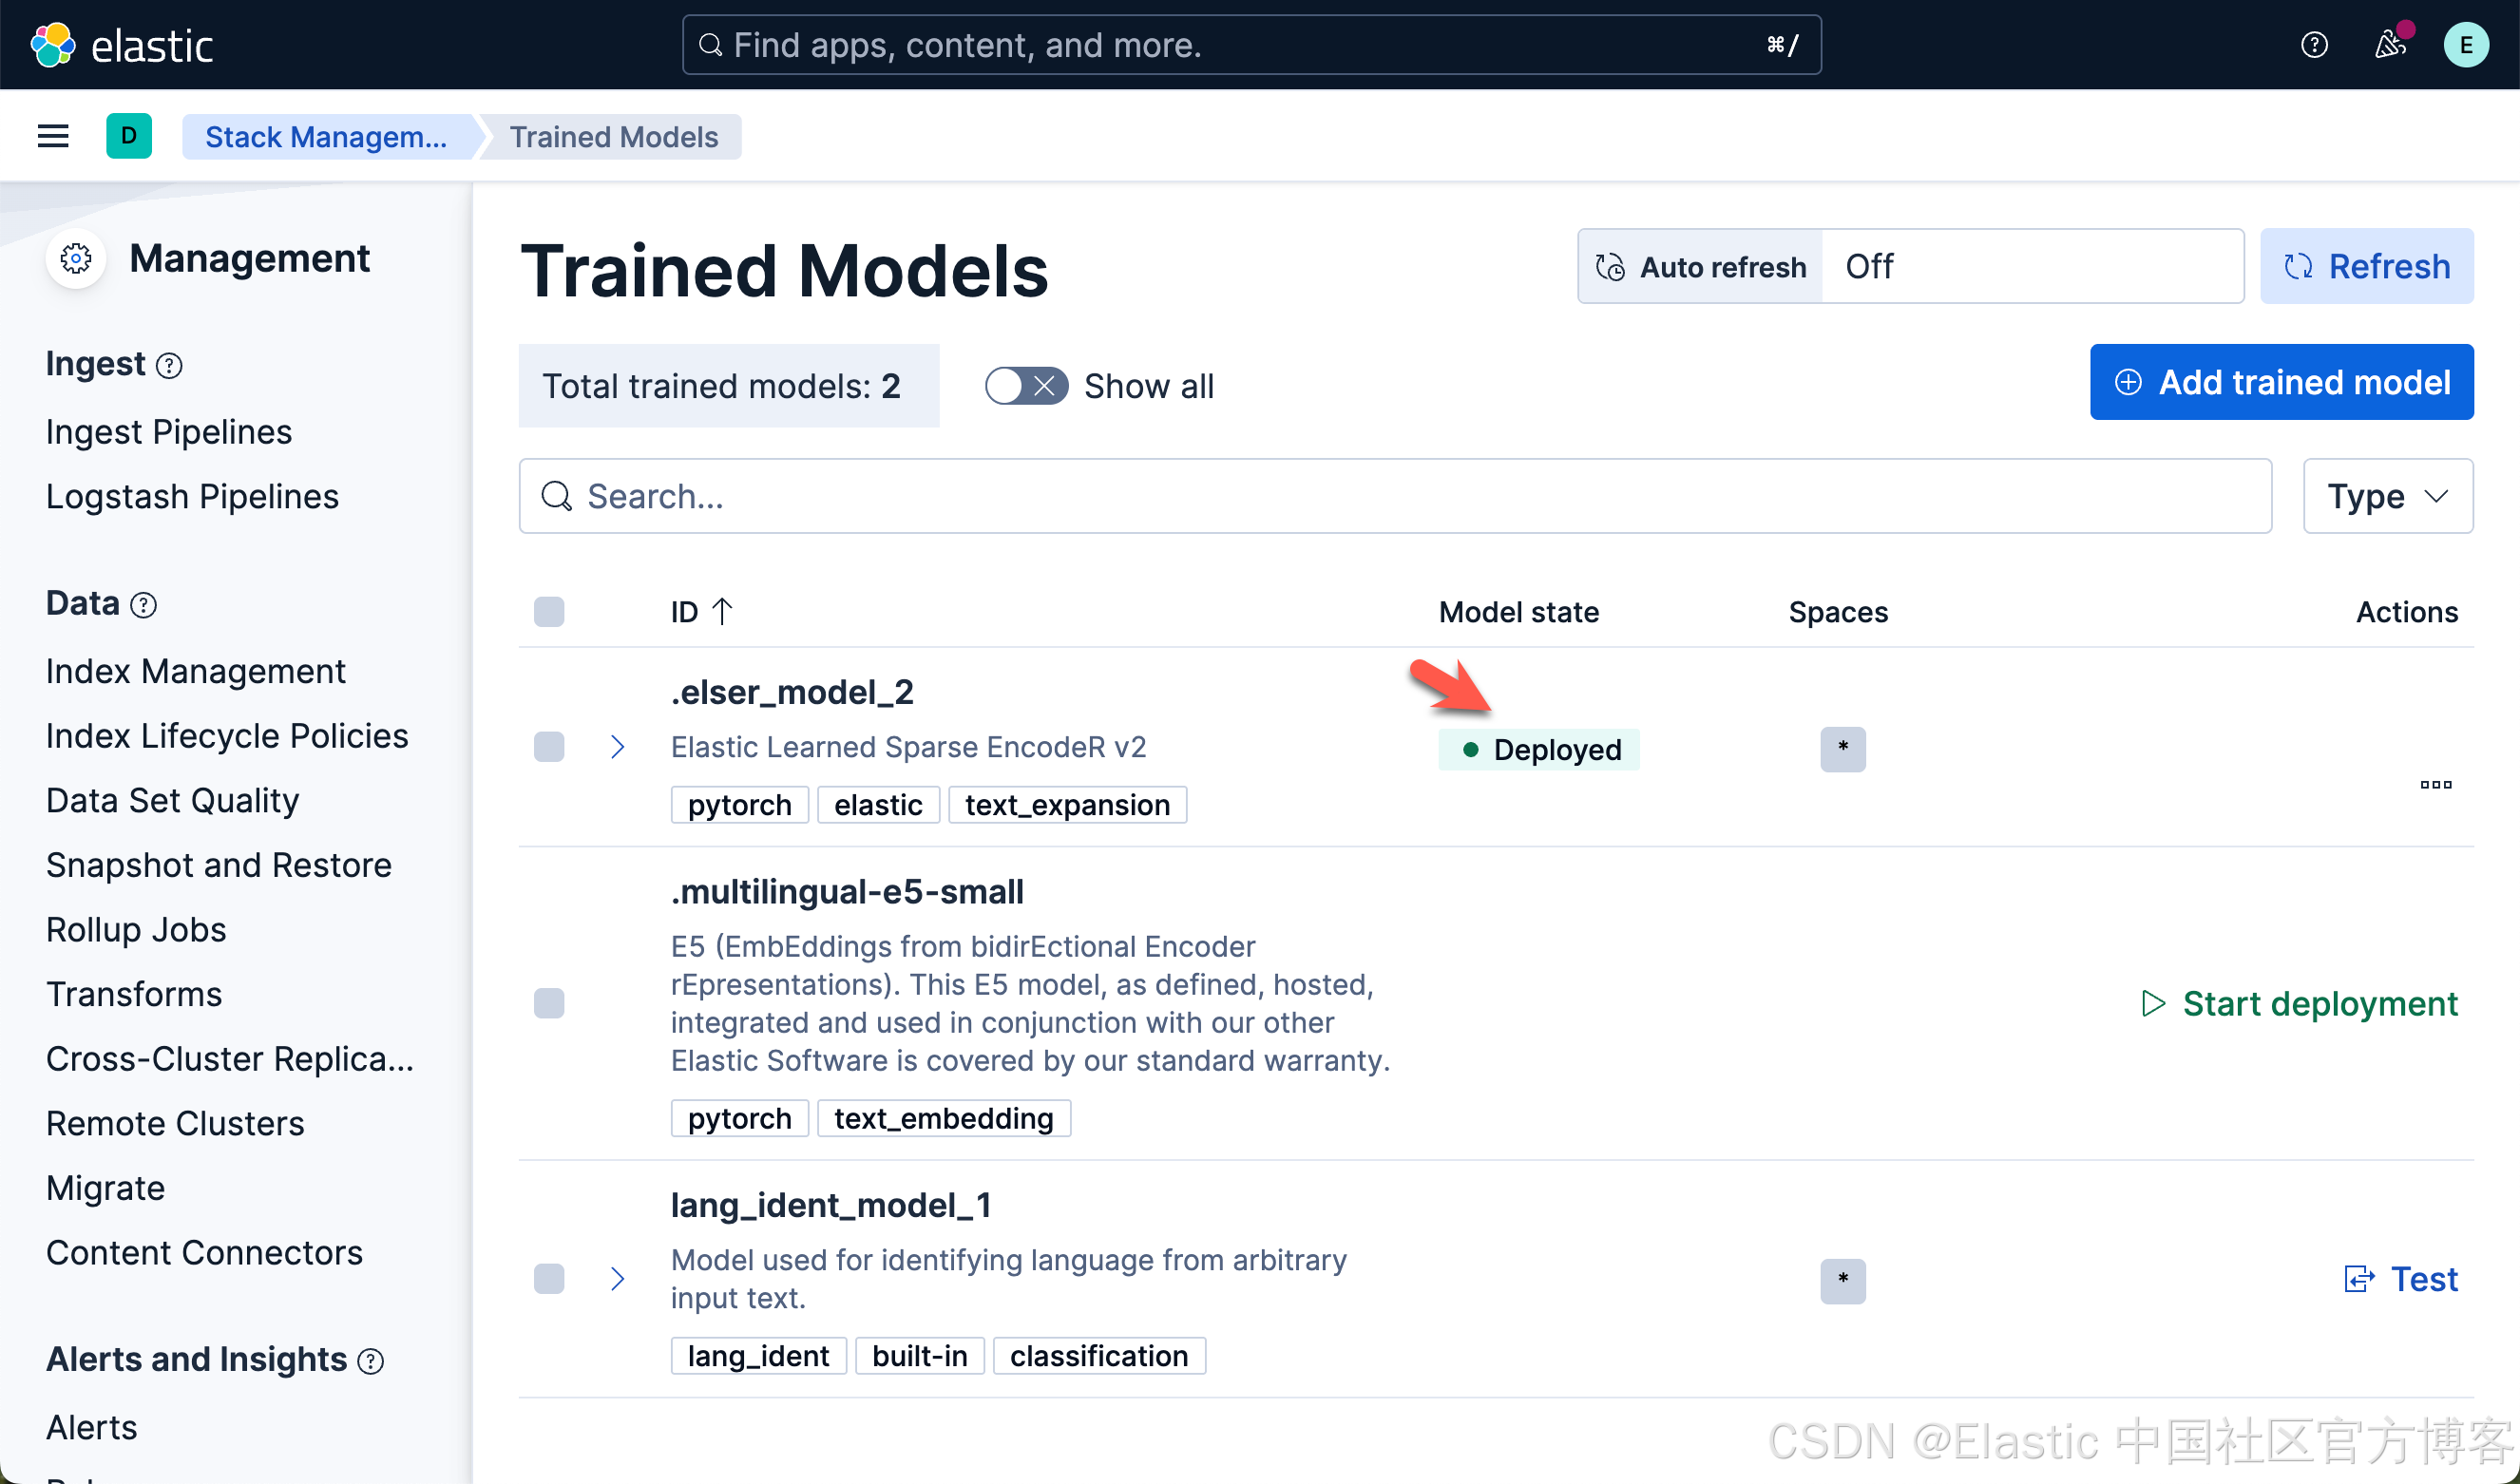
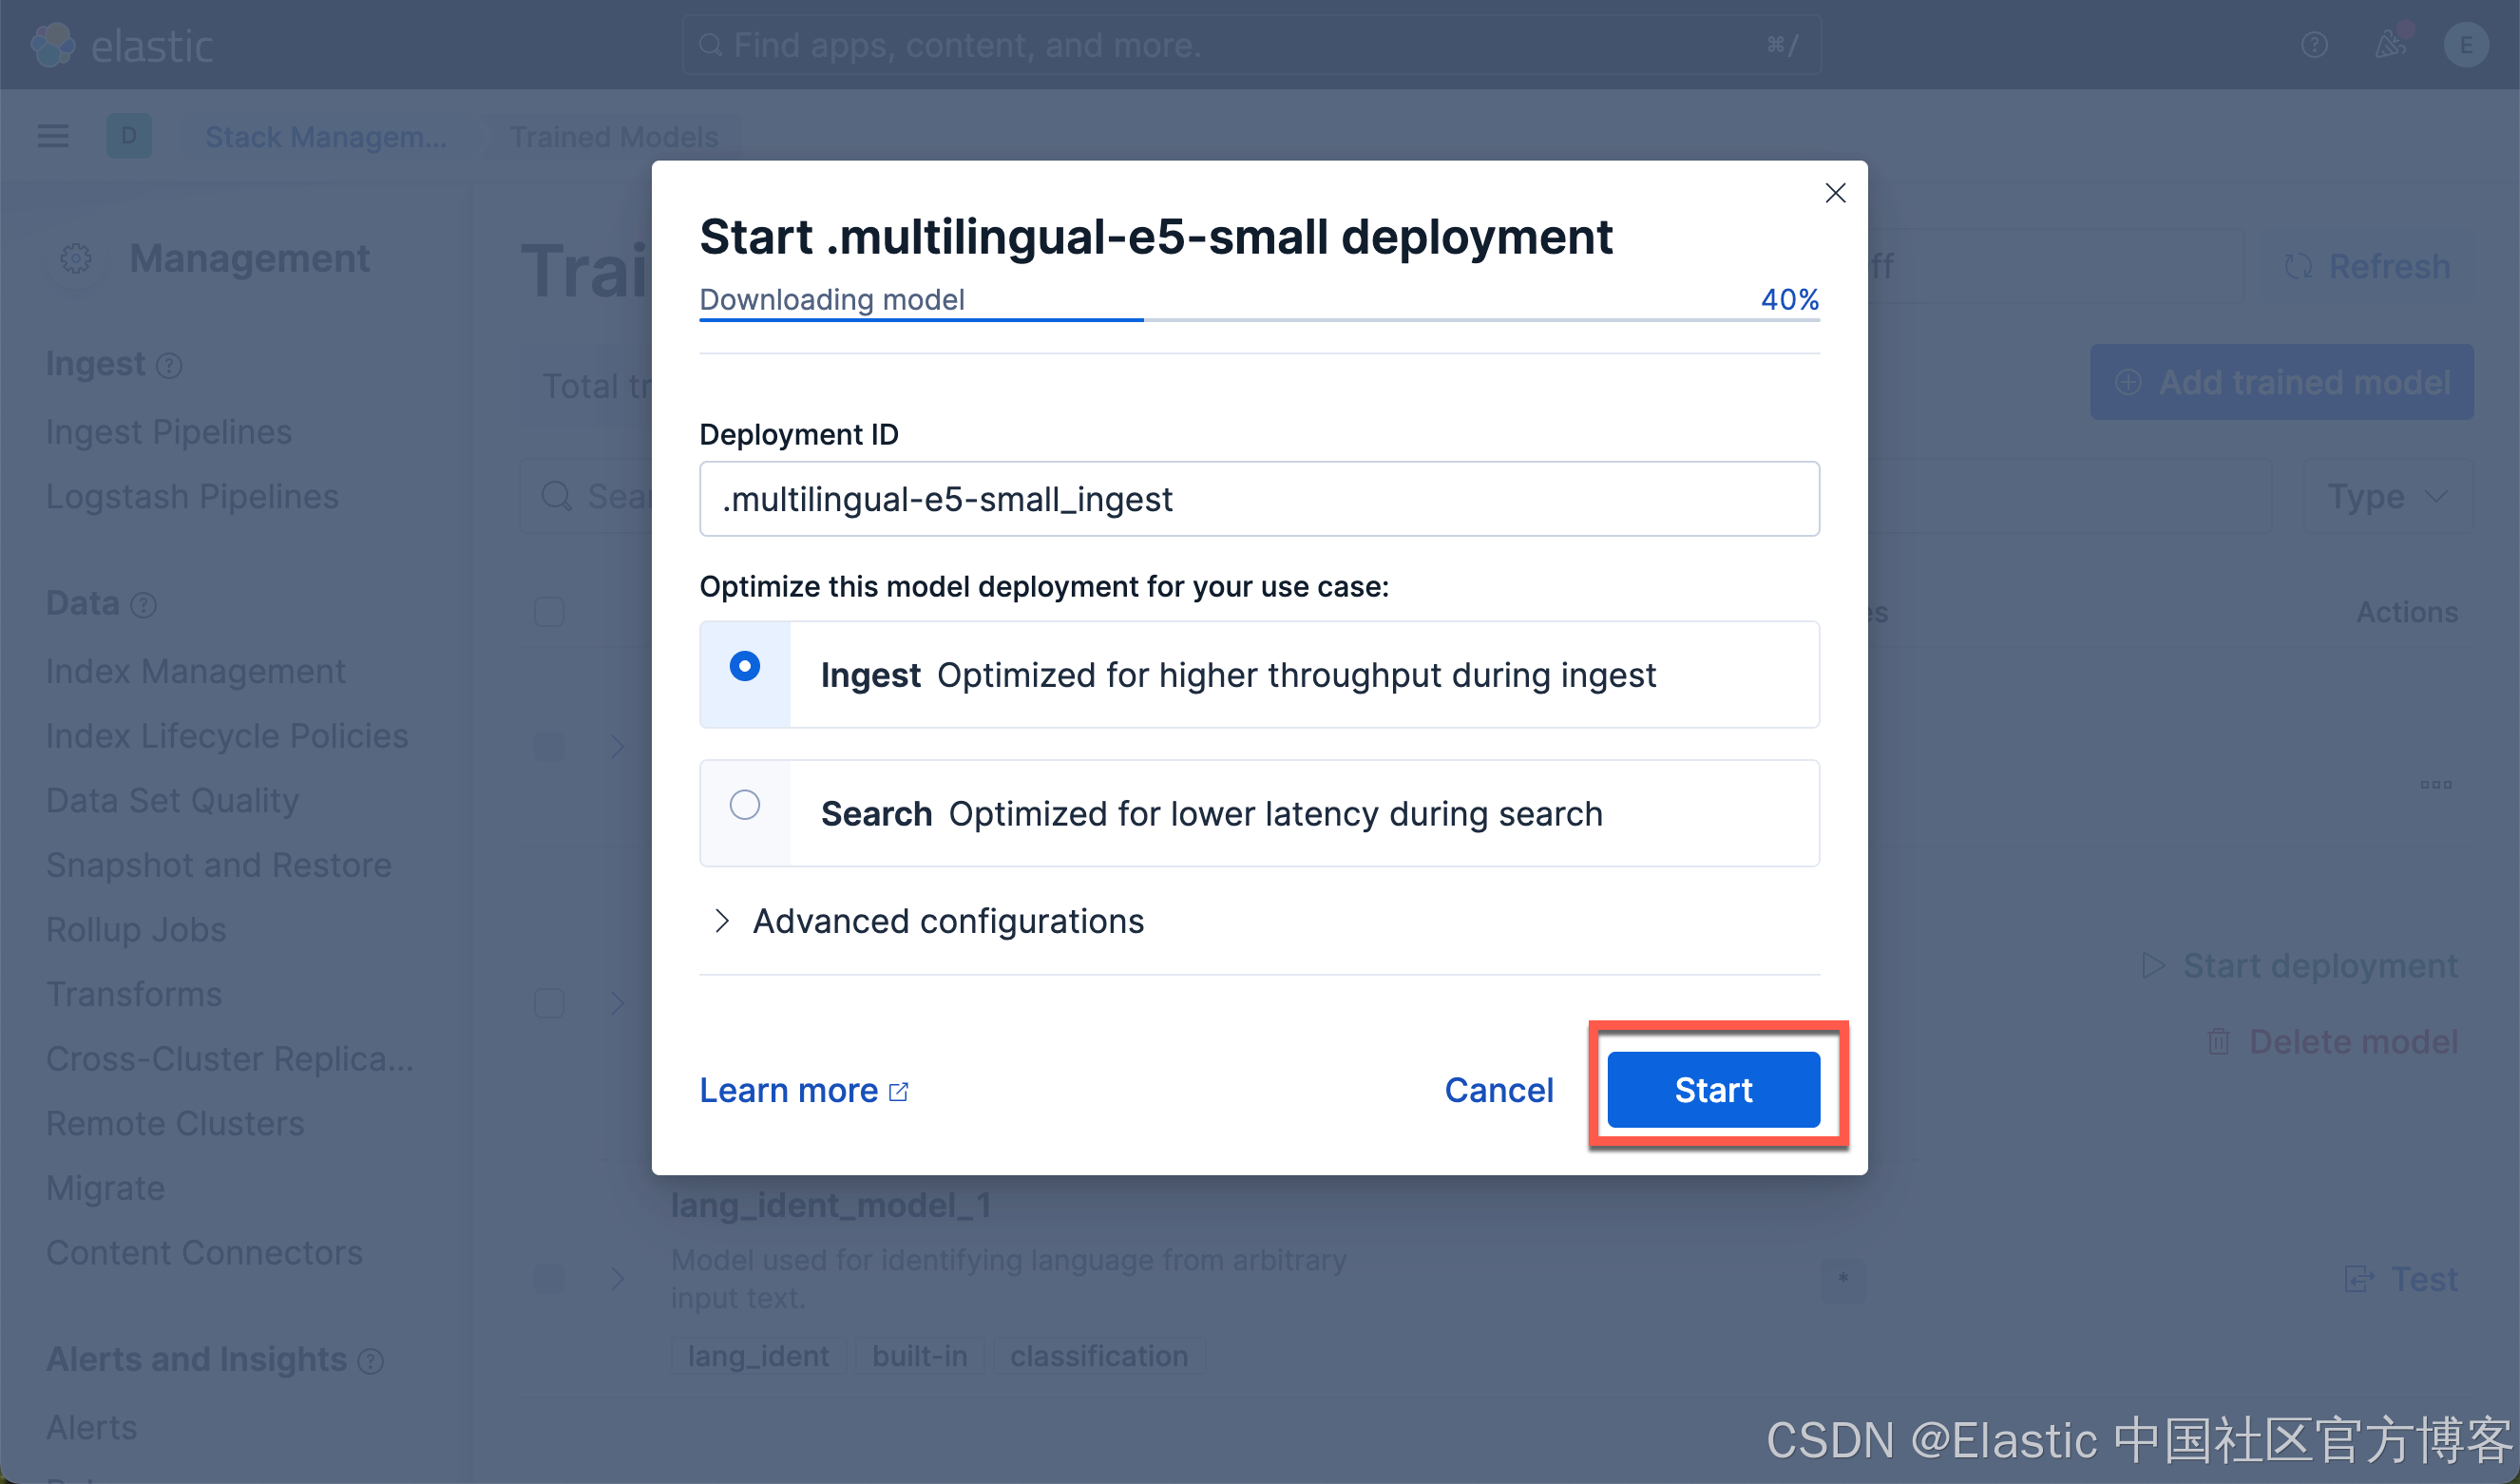
我们按照同样的方法来部署 E5 模型:
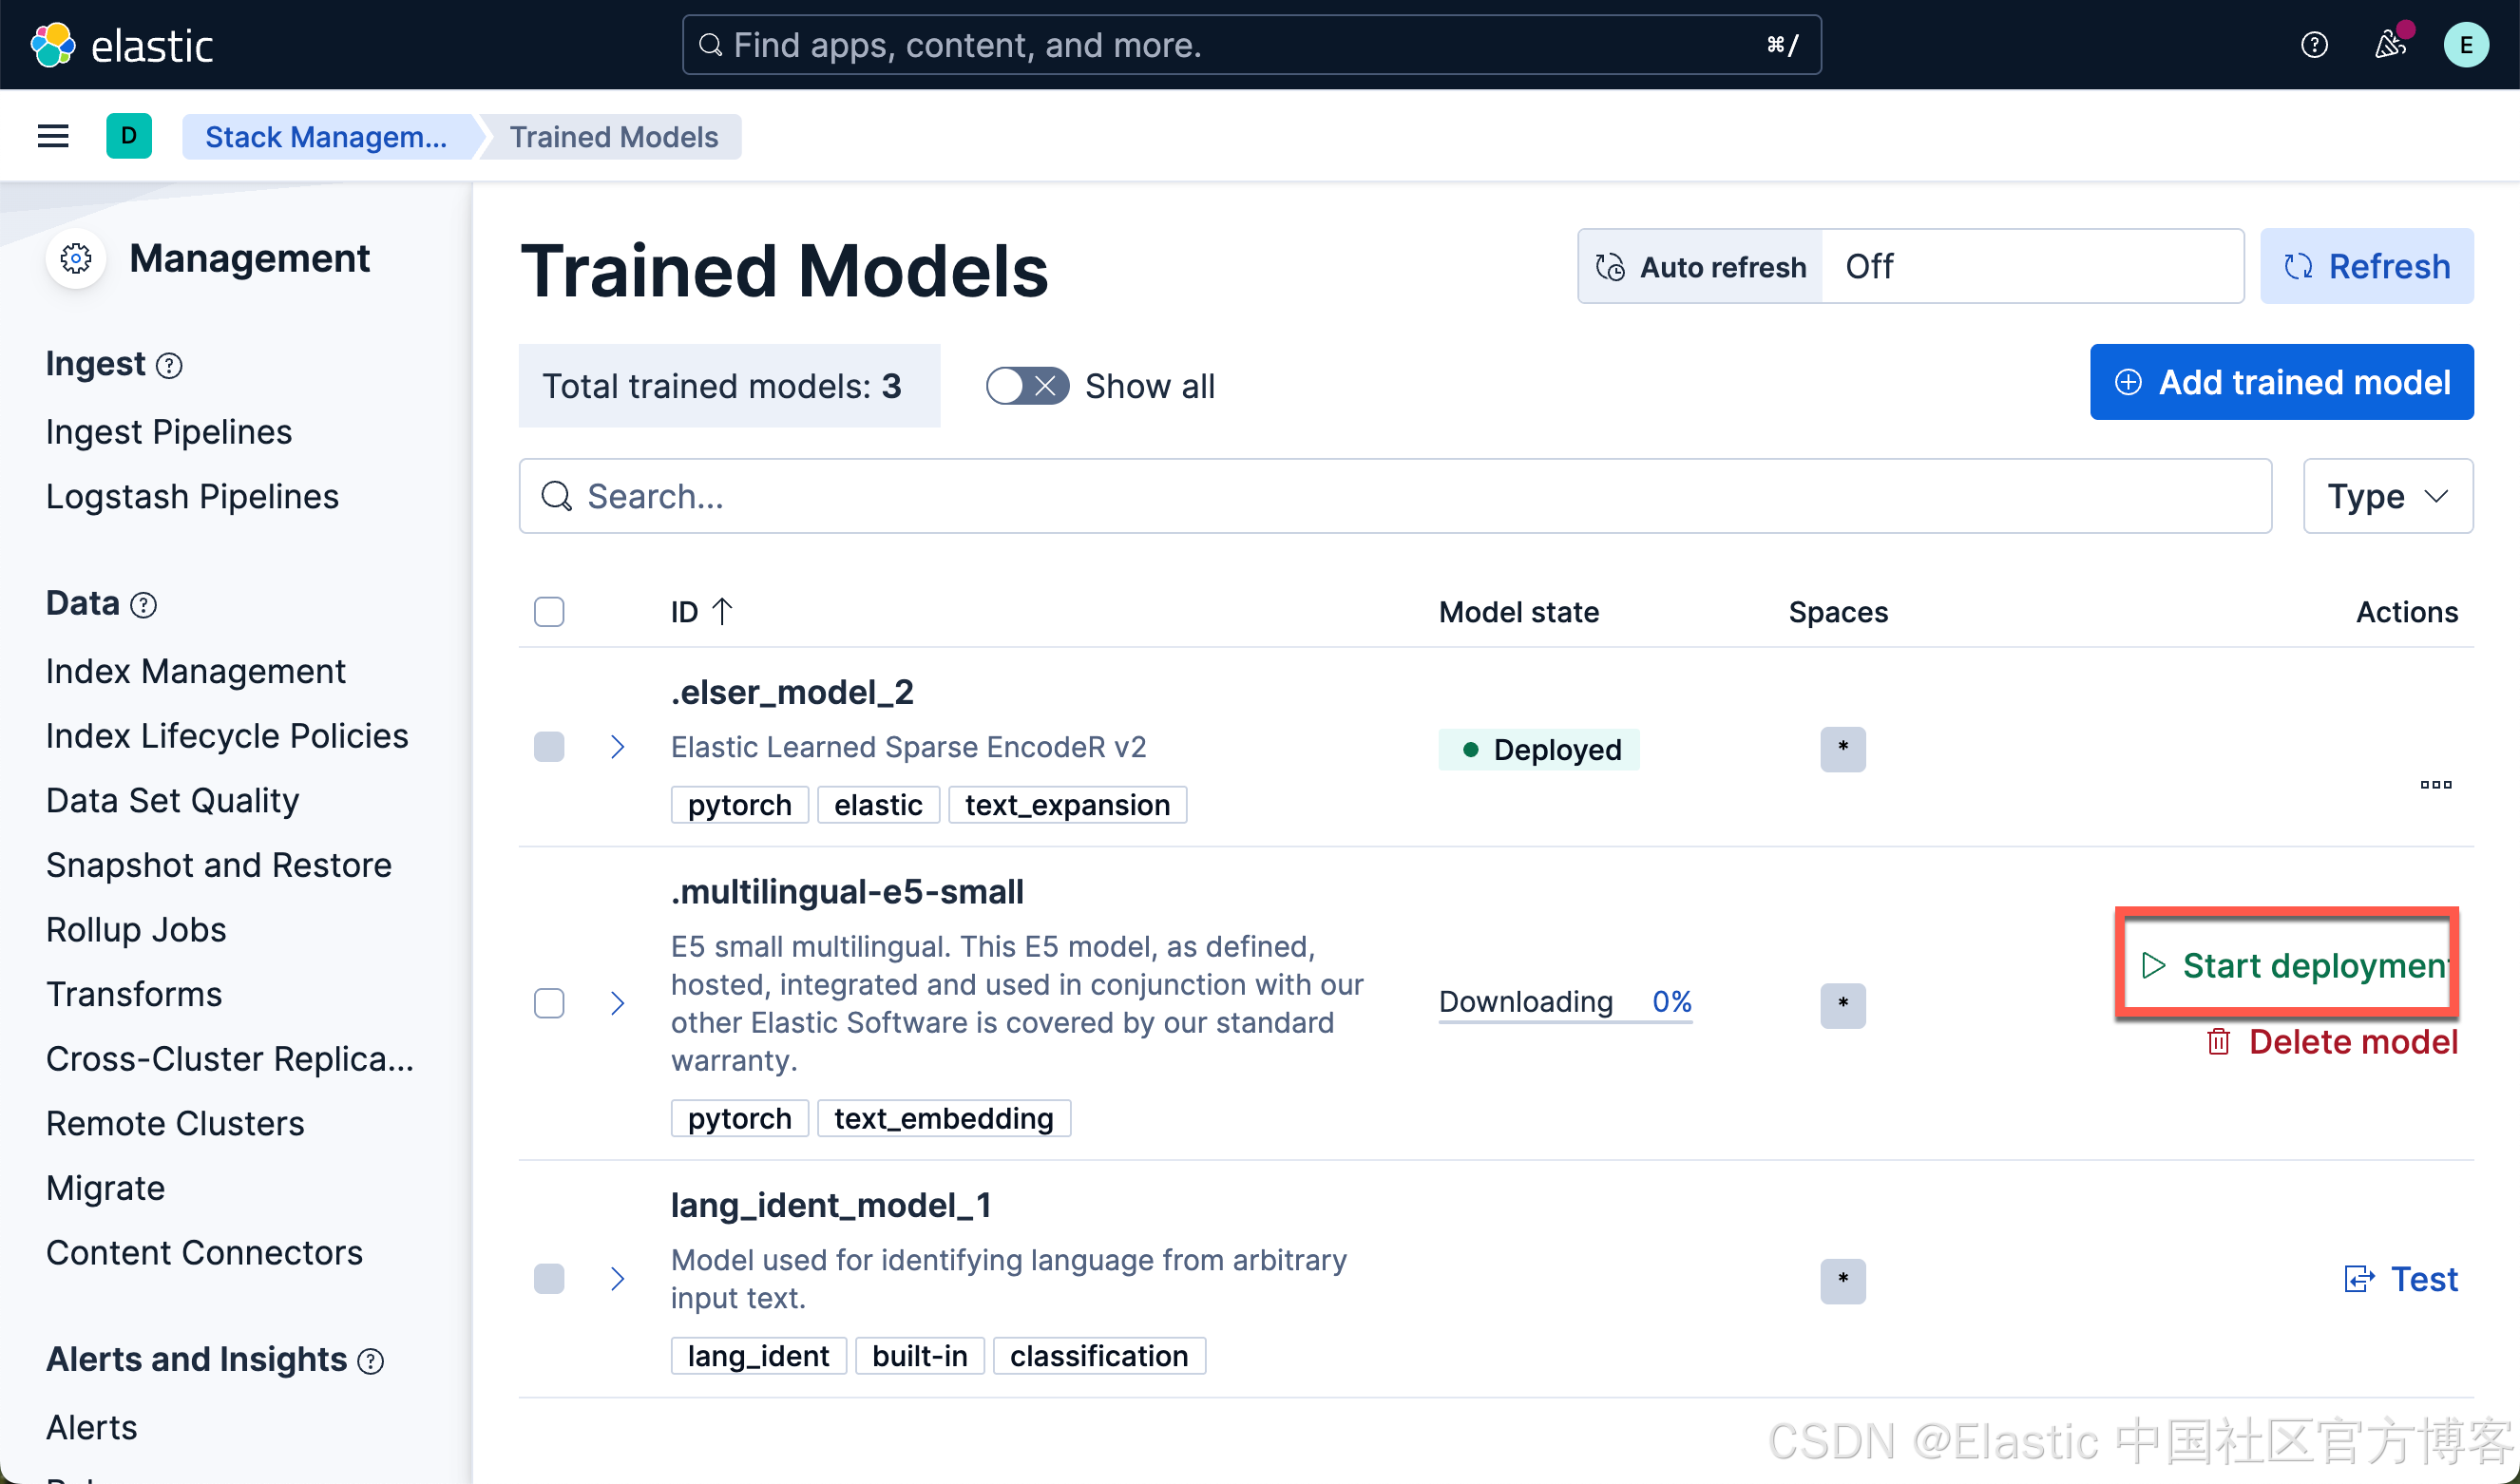
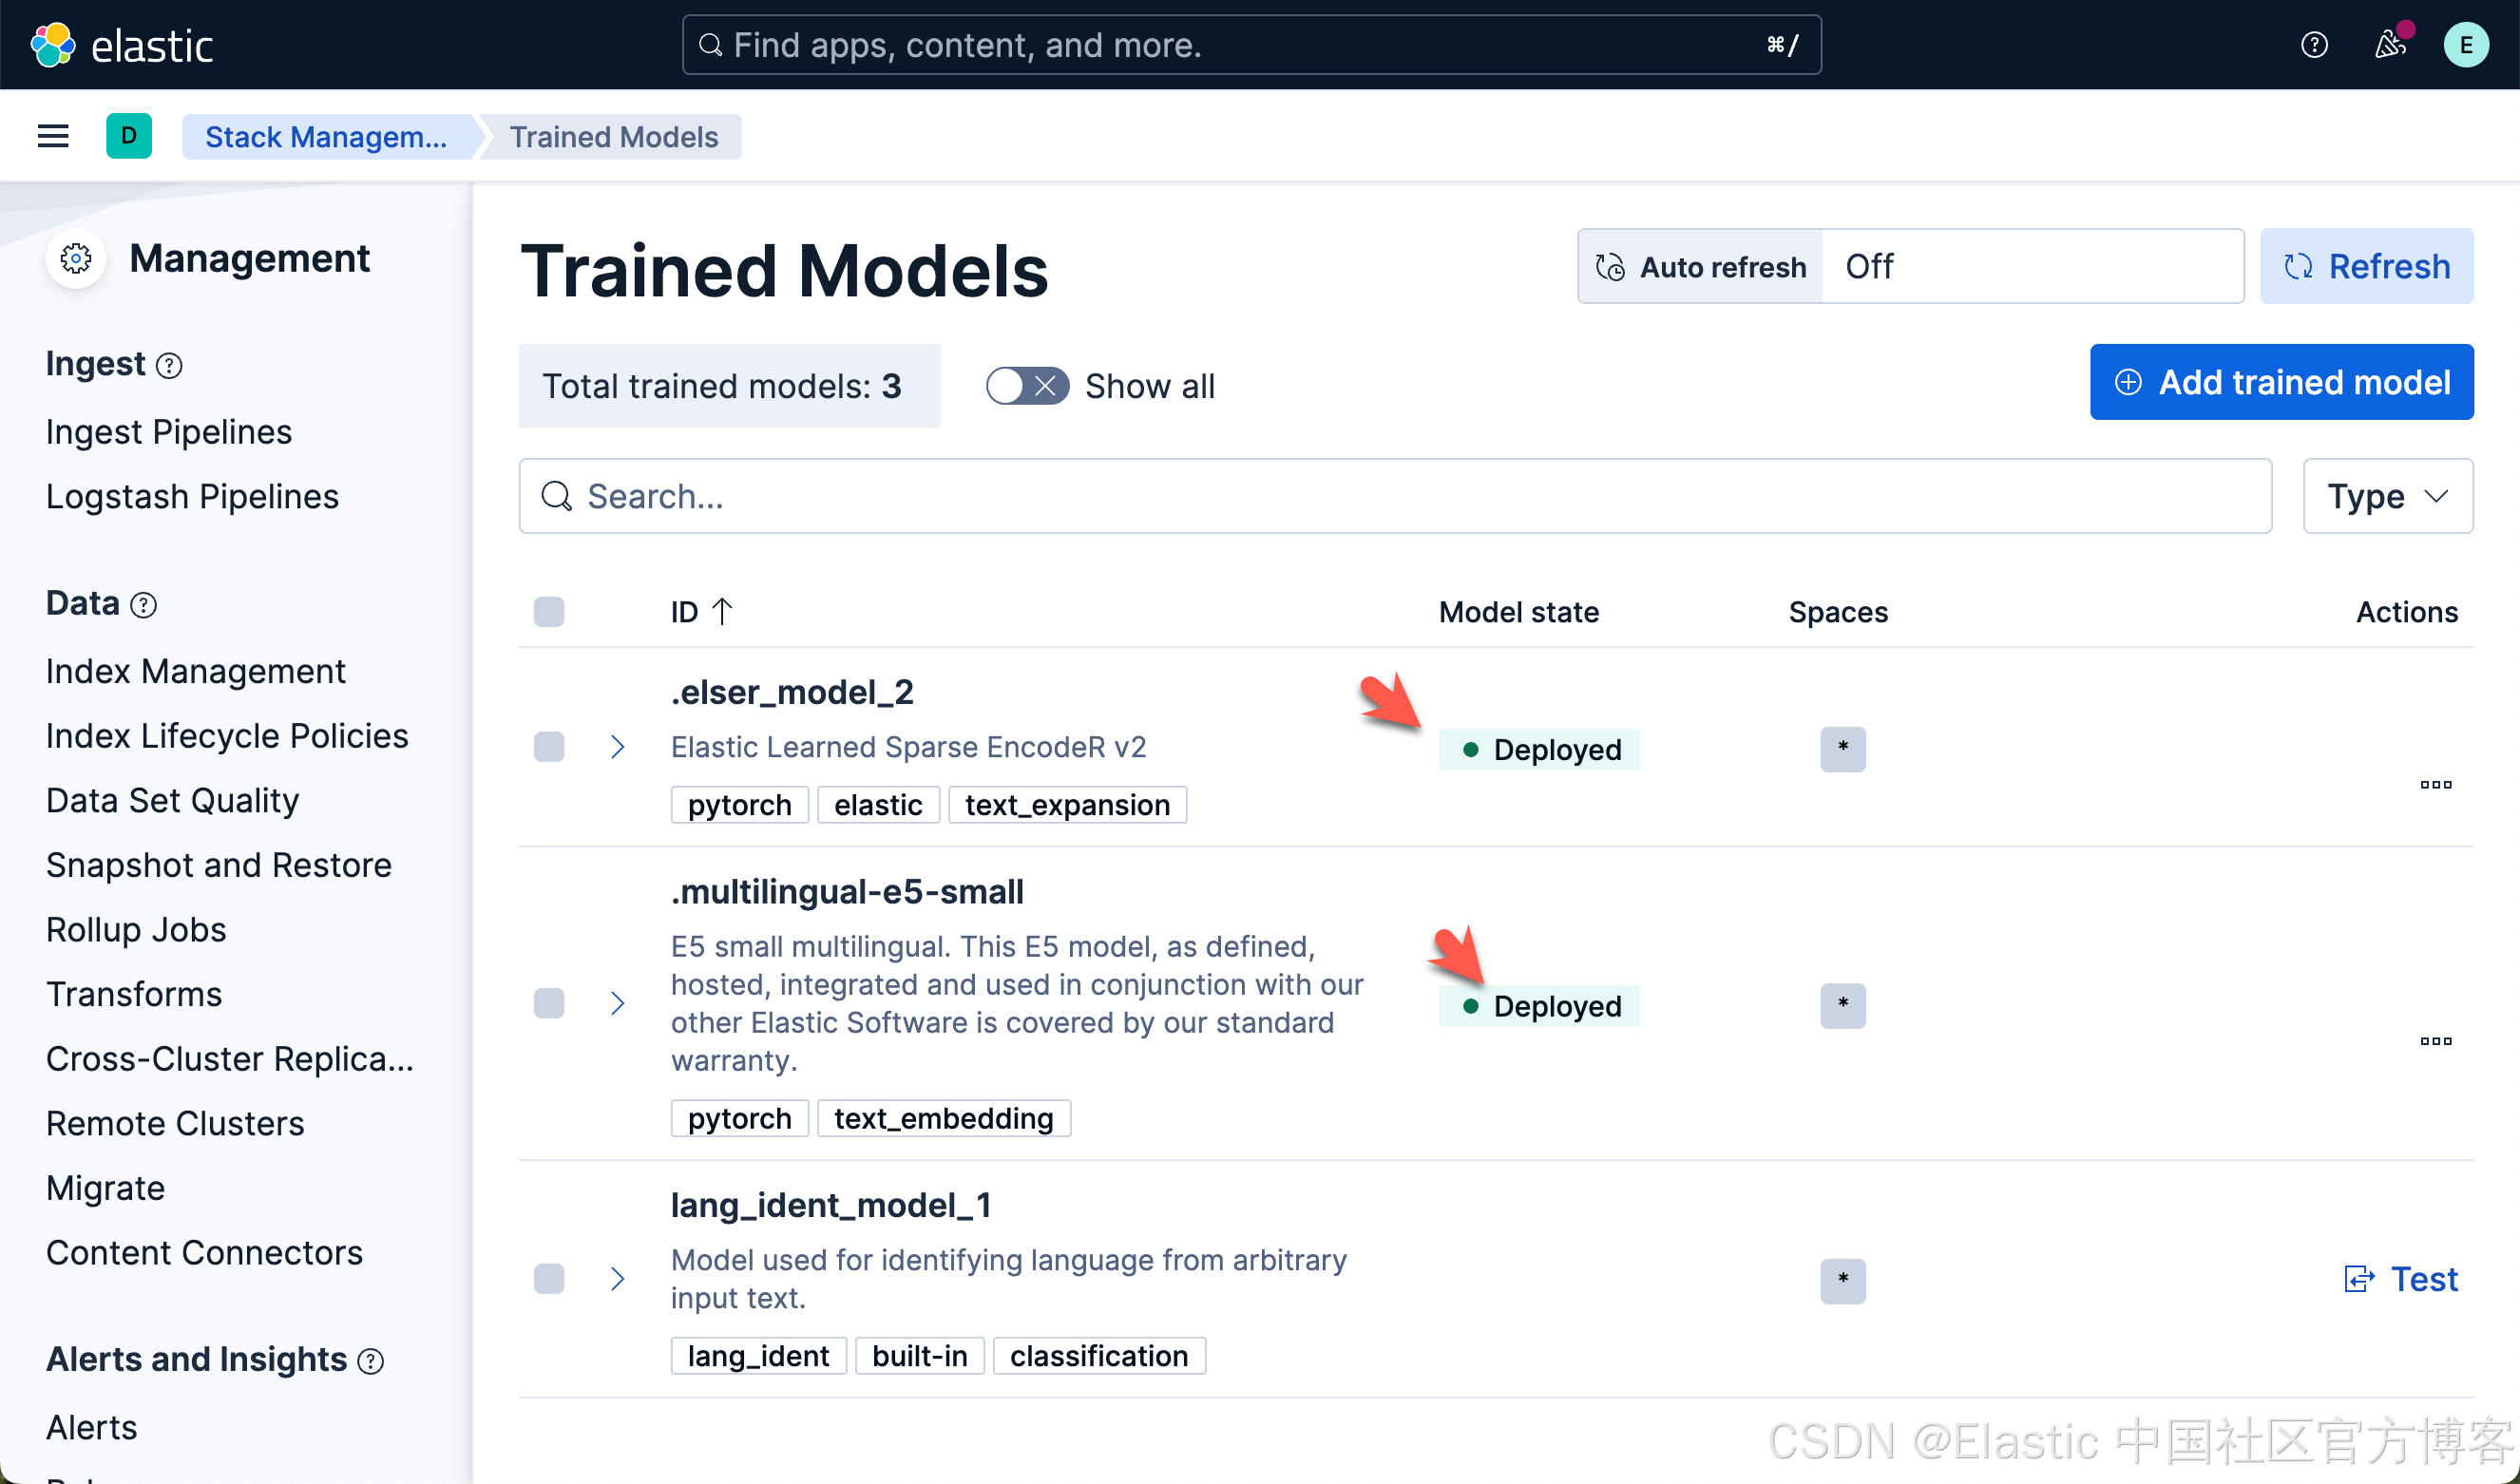
我们可以看到上面的两个模型都已经部署好了。如果你想部署其它的模型,可以参考文章 “Elasticsearch:如何部署 NLP:文本嵌入和向量搜索” 使用 eland 来上传模型。
我们可以通过如下的命令来查看已经创建好的 inference endpoints:
GET _inference/_all{"endpoints": [{"inference_id": ".elser-2-elasticsearch","task_type": "sparse_embedding","service": "elasticsearch","service_settings": {"num_allocations": 0,"num_threads": 1,"model_id": ".elser_model_2","adaptive_allocations": {"enabled": true,"min_number_of_allocations": 0,"max_number_of_allocations": 32}},"chunking_settings": {"strategy": "sentence","max_chunk_size": 250,"sentence_overlap": 1}},{"inference_id": ".multilingual-e5-small-elasticsearch","task_type": "text_embedding","service": "elasticsearch","service_settings": {"num_threads": 1,"model_id": ".multilingual-e5-small","adaptive_allocations": {"enabled": true,"min_number_of_allocations": 0,"max_number_of_allocations": 32}},"chunking_settings": {"strategy": "sentence","max_chunk_size": 250,"sentence_overlap": 1}},{"inference_id": ".rerank-v1-elasticsearch","task_type": "rerank","service": "elasticsearch","service_settings": {"num_threads": 1,"model_id": ".rerank-v1","adaptive_allocations": {"enabled": true,"min_number_of_allocations": 0,"max_number_of_allocations": 32}},"task_settings": {"return_documents": true}}]
}从上面的输出中,我们可以看到有几个已经被预置的 endpoints。我们可以使用如下的命令来创建我们自己的 endpoint:
PUT _inference/text_embedding/multilingual_embeddings
{"service": "elasticsearch","service_settings": {"model_id": ".multilingual-e5-small","num_allocations": 1,"num_threads": 1}
}
在上面,我们创建了一个叫做 multilingual_embeddings 的 endpoint。如果不是特别要求,我们可以使用系统为我们提供的 .multilingual-e5-small-elasticsearch 端点。
我们可以使用如下的方法来创建一个 ESLER 的 endpoint:
PUT _inference/sparse_embedding/my-elser-model
{"service": "elasticsearch","service_settings": {"model_id": ".elser_model_2","num_allocations": 1,"num_threads": 1}
}
我们可以通过如下的方式来删除一个已经创建好的推理端点:
DELETE _inference/my-elser-model定义变量
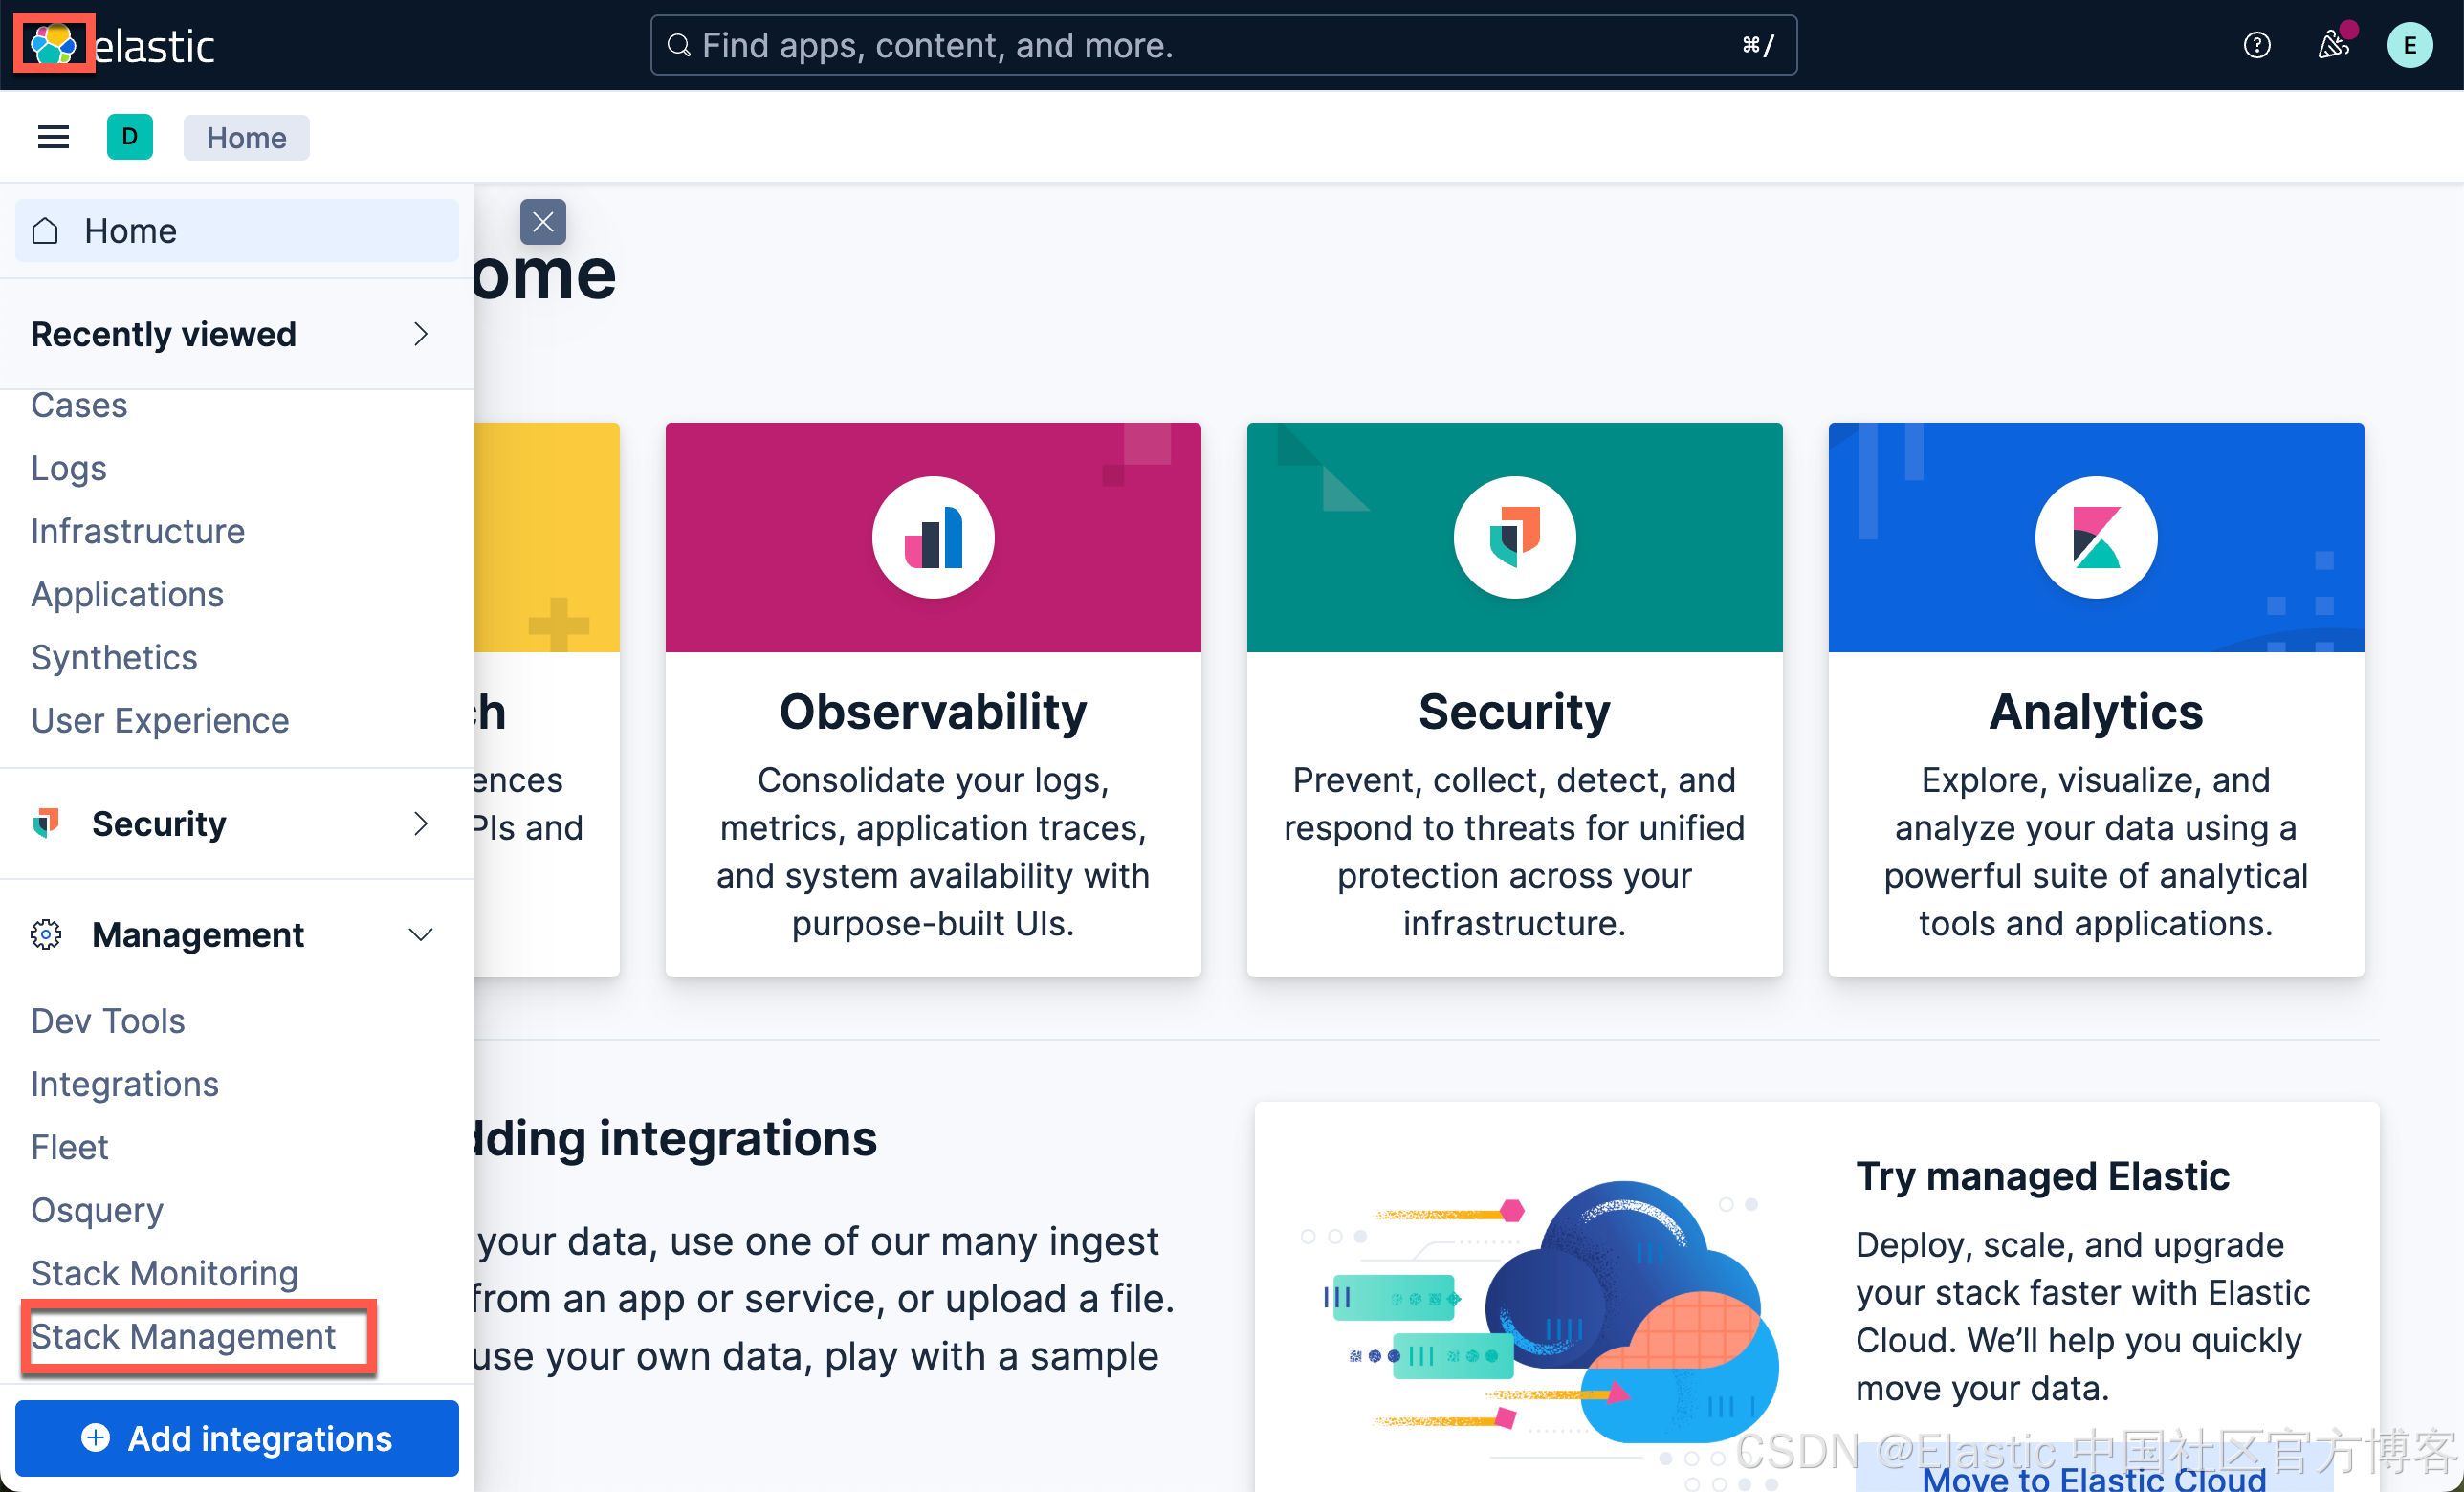
我们可以参考 “Kibana:如何设置变量并应用它们” 来定义变量:
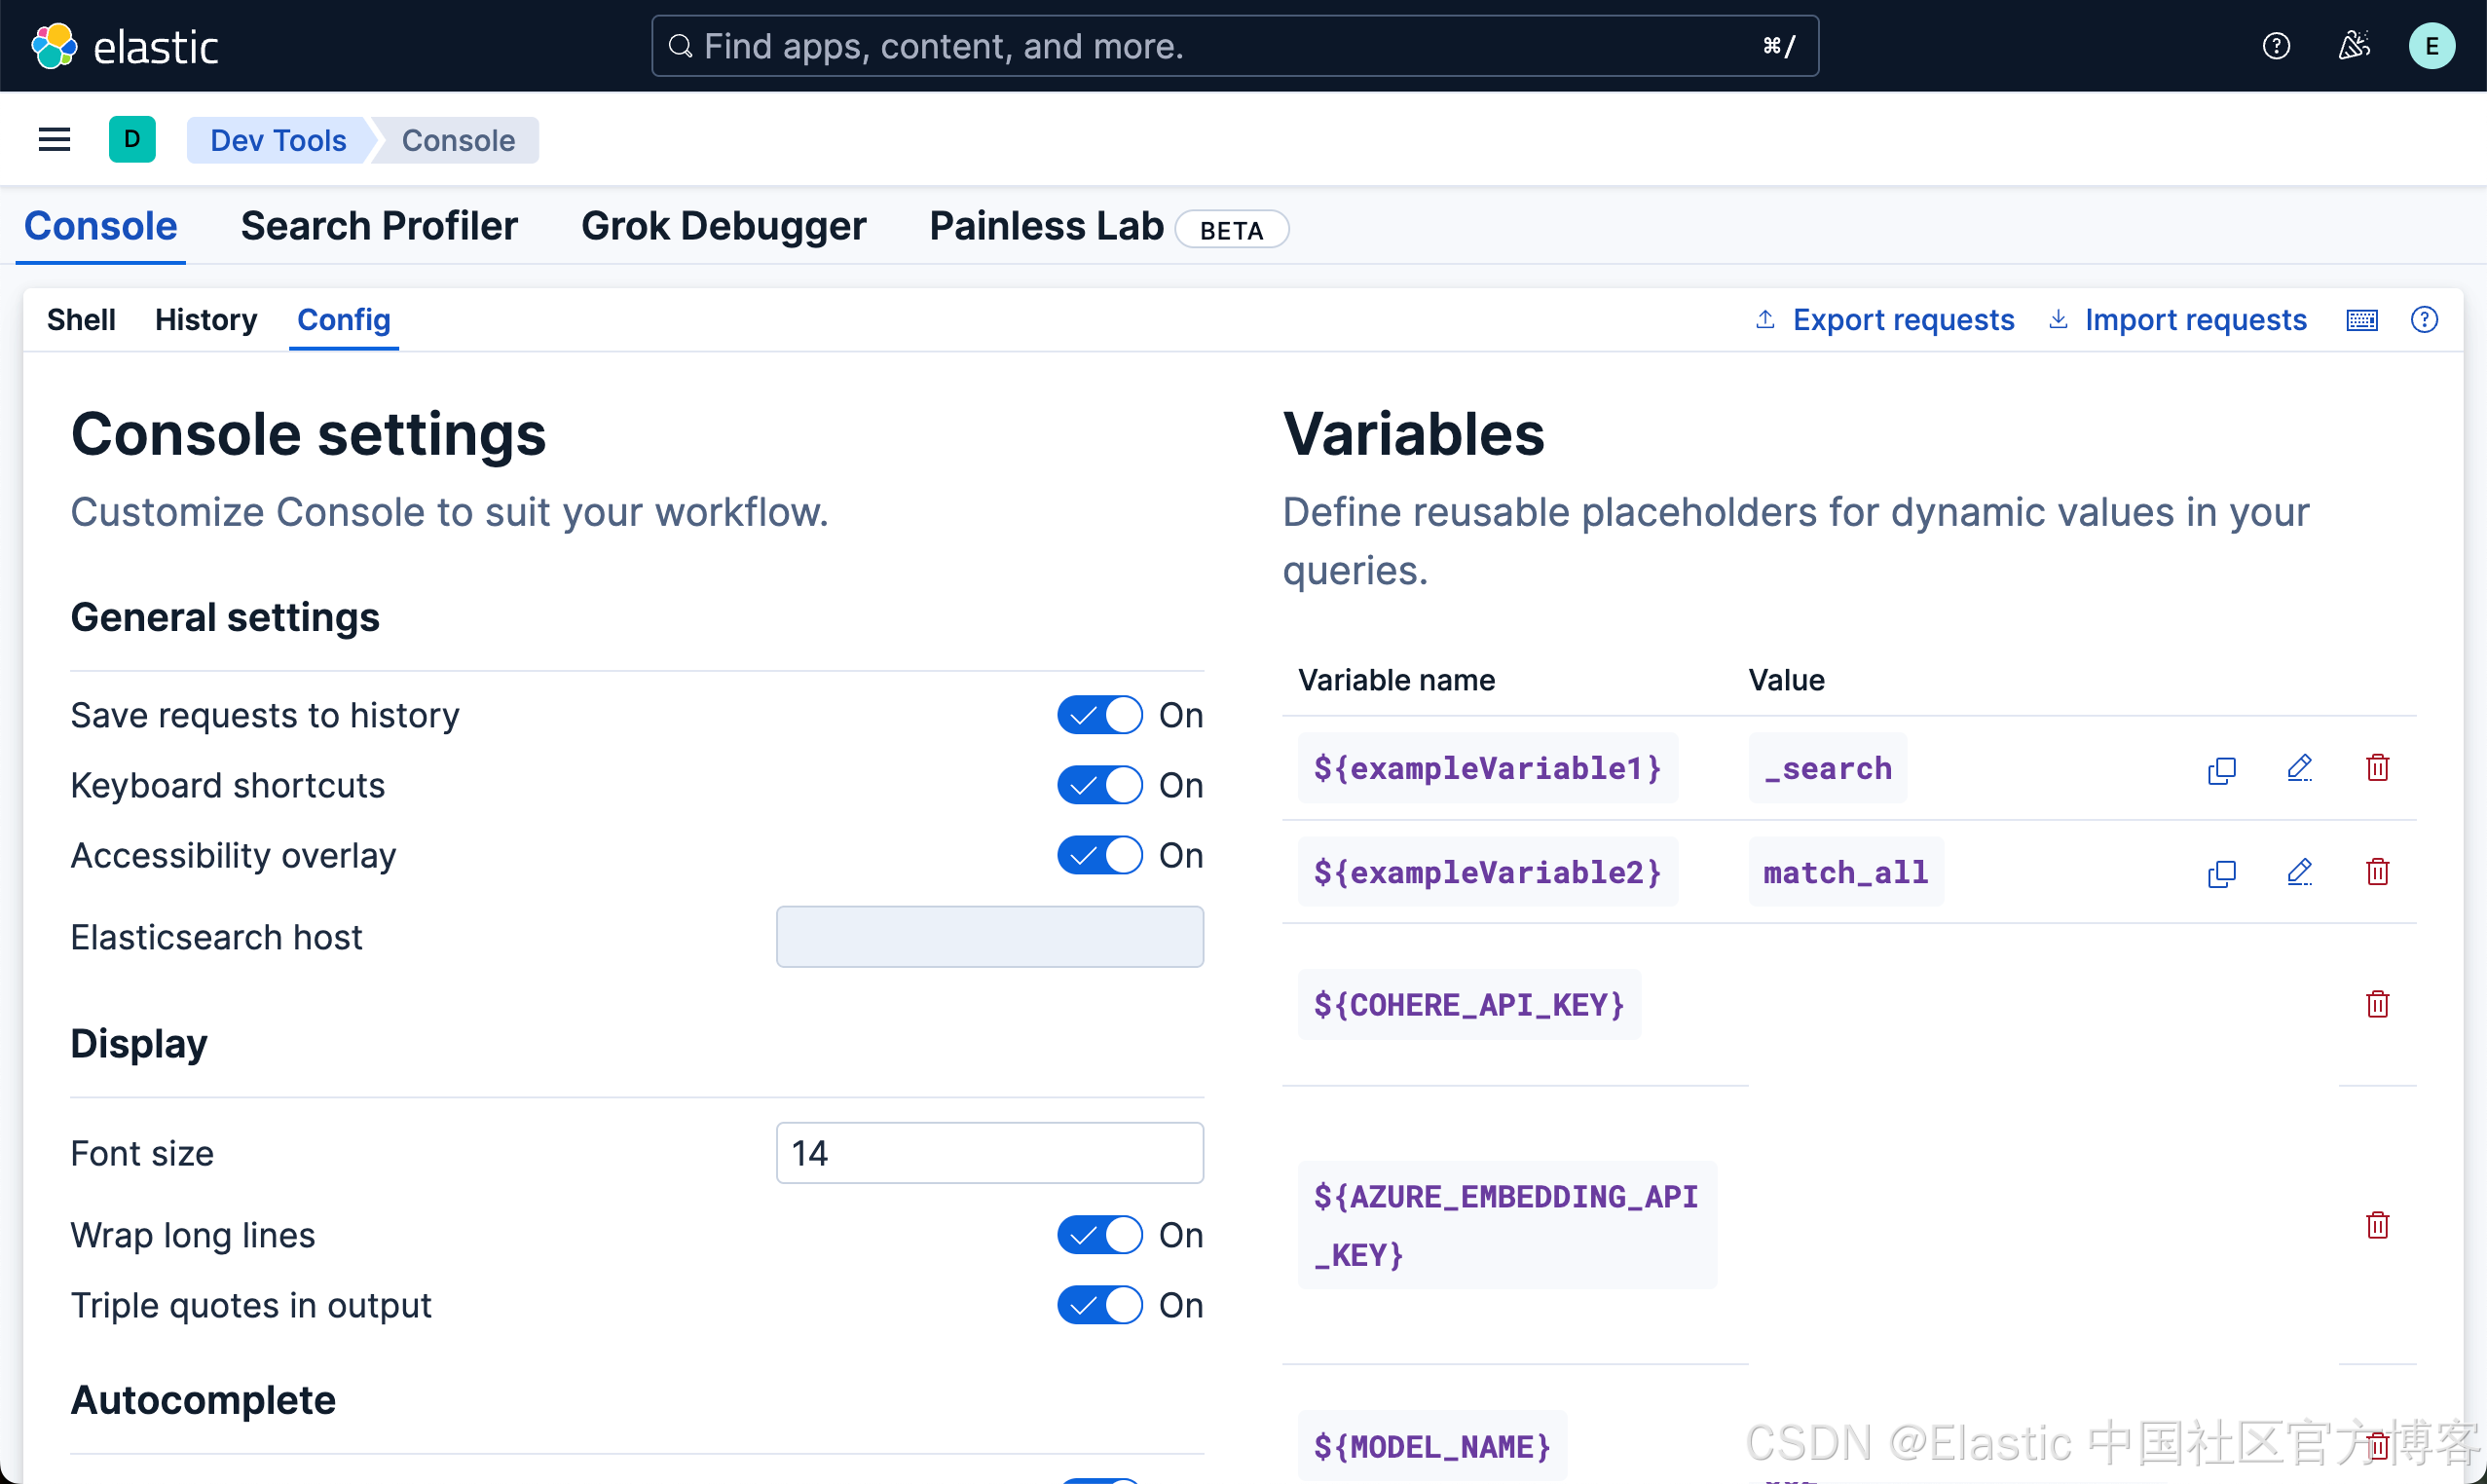
如上所示,我们在 “Config” 中定义如上所示的变量。
默认和自定义 endpoints
你可以在 semantic_text 字段中使用预配置的 endpoints,这对大多数用例很理想,或者创建自定义 endpoints 并在字段映射中引用它们。
展示
ELSER
我们可以按照如下的命令来创建一个叫做 my-elser-model 的 ELSER 推理端点。
PUT _inference/sparse_embedding/my-elser-model
{"service": "elasticsearch","service_settings": {"model_id": ".elser_model_2","num_allocations": 1,"num_threads": 1}
}
运行完上面的命令后,我们可以使用如下的命令来查看:
GET _inference/_all{"endpoints": [{"inference_id": ".elser-2-elasticsearch","task_type": "sparse_embedding","service": "elasticsearch","service_settings": {"num_threads": 1,"model_id": ".elser_model_2","adaptive_allocations": {"enabled": true,"min_number_of_allocations": 0,"max_number_of_allocations": 32}},"chunking_settings": {"strategy": "sentence","max_chunk_size": 250,"sentence_overlap": 1}},{"inference_id": ".multilingual-e5-small-elasticsearch","task_type": "text_embedding","service": "elasticsearch","service_settings": {"num_threads": 1,"model_id": ".multilingual-e5-small","adaptive_allocations": {"enabled": true,"min_number_of_allocations": 0,"max_number_of_allocations": 32}},"chunking_settings": {"strategy": "sentence","max_chunk_size": 250,"sentence_overlap": 1}},{"inference_id": ".rerank-v1-elasticsearch","task_type": "rerank","service": "elasticsearch","service_settings": {"num_threads": 1,"model_id": ".rerank-v1","adaptive_allocations": {"enabled": true,"min_number_of_allocations": 0,"max_number_of_allocations": 32}},"task_settings": {"return_documents": true}},{"inference_id": "elser-endpoint","task_type": "sparse_embedding","service": "elasticsearch","service_settings": {"num_allocations": 1,"num_threads": 1,"model_id": ".elser_model_2"},"chunking_settings": {"strategy": "sentence","max_chunk_size": 250,"sentence_overlap": 1}},{"inference_id": "my-elser-model","task_type": "sparse_embedding","service": "elasticsearch","service_settings": {"num_allocations": 1,"num_threads": 1,"model_id": ".elser_model_2"},"chunking_settings": {"strategy": "sentence","max_chunk_size": 250,"sentence_overlap": 1}}]
}如上所示,我们可以看到已经创建的 my-elser-model 推理端点。我们也可以采用带有参数的方法来创建推理端点:
PUT _inference/sparse_embedding/my-elser-model
{"service": "elasticsearch","service_settings": {"adaptive_allocations": { "enabled": true,"min_number_of_allocations": 1,"max_number_of_allocations": 10},"num_threads": 1,"model_id": ".elser_model_2" }
}
我们也可以使用如下的命令来确认推理端点已经被成功创建:
GET _inference/my-elser-model或者:
GET _inference/sparse_embedding/my-elser-model{"endpoints": [{"inference_id": "my-elser-model","task_type": "sparse_embedding","service": "elasticsearch","service_settings": {"num_allocations": 1,"num_threads": 1,"model_id": ".elser_model_2"},"chunking_settings": {"strategy": "sentence","max_chunk_size": 250,"sentence_overlap": 1}}]
}因为 .elser_model_2 本身的 metadata 数据含有信息表面它是 sparse vector,上面不含 sparse_embedding 路径的 API 接口更加方便简捷。
接下来,我们使用如下的命令来进行测试我们刚才创建的 ELSER 推理端点:
POST _inference/sparse_embedding/my-elser-model
{"input": "The sky above the port was the color of television tuned to a dead channel."
}
上面的命令返回的结果是:
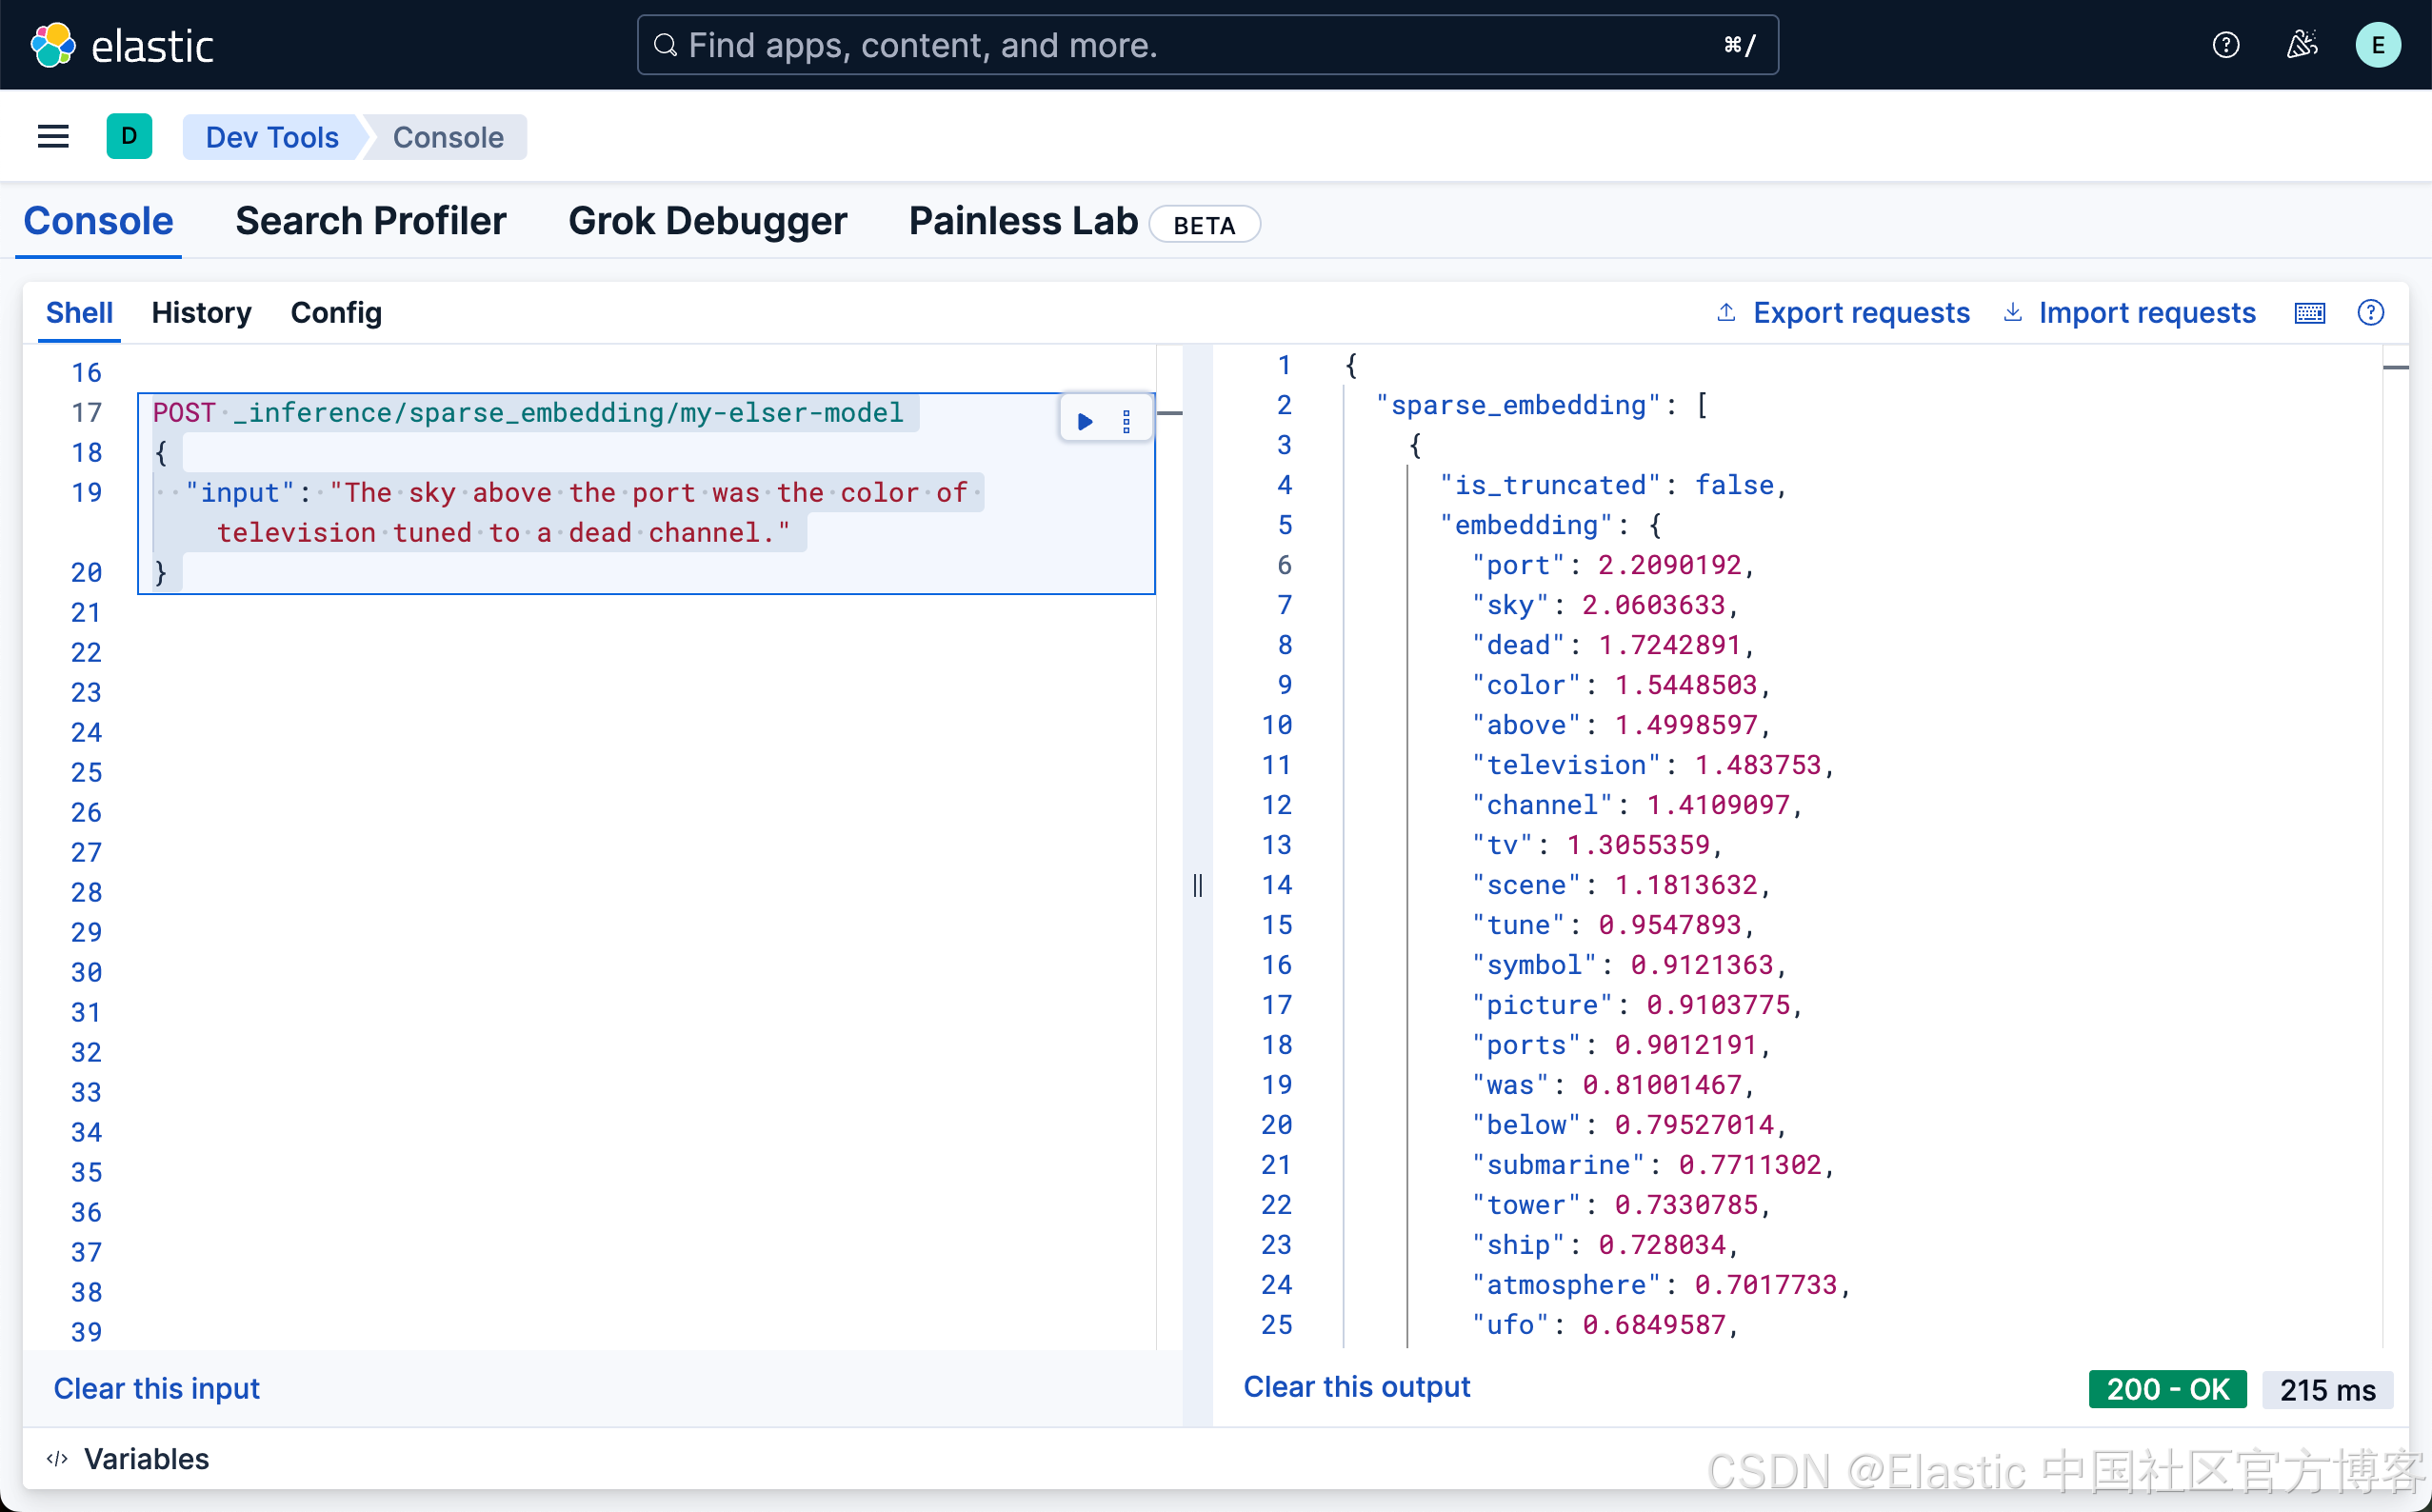
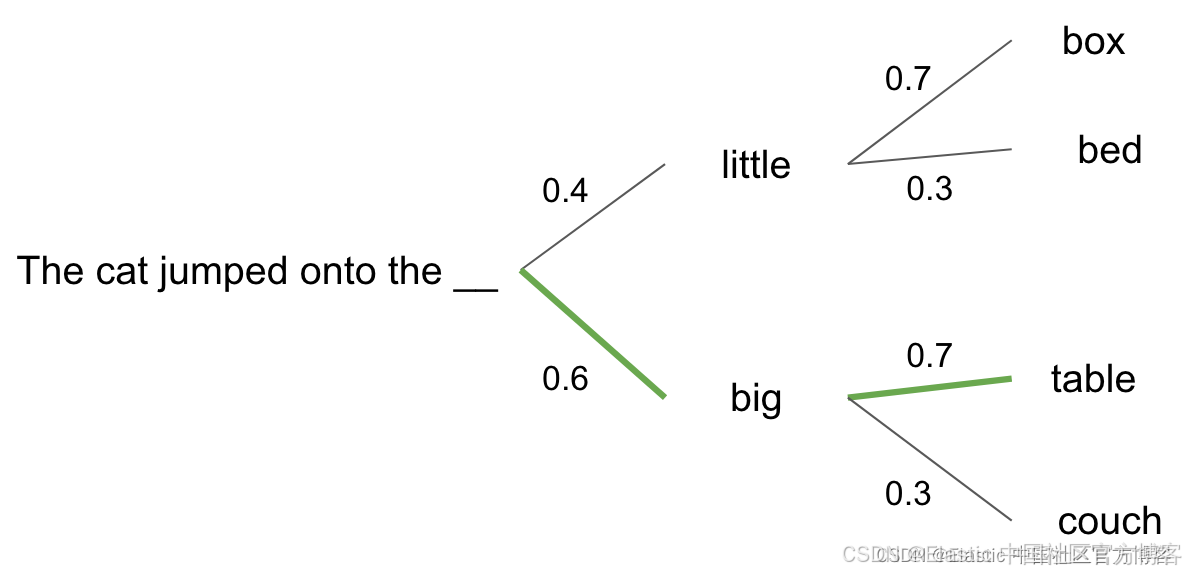
从上面的输出结果,我们可以看出来,ELSER 是通过文本扩展来完成向量的输出,比如 television 通过文字扩展的方法可以联系到 tv,甚至和 channel 也有关联。每个词的关联度,还有一个系数。
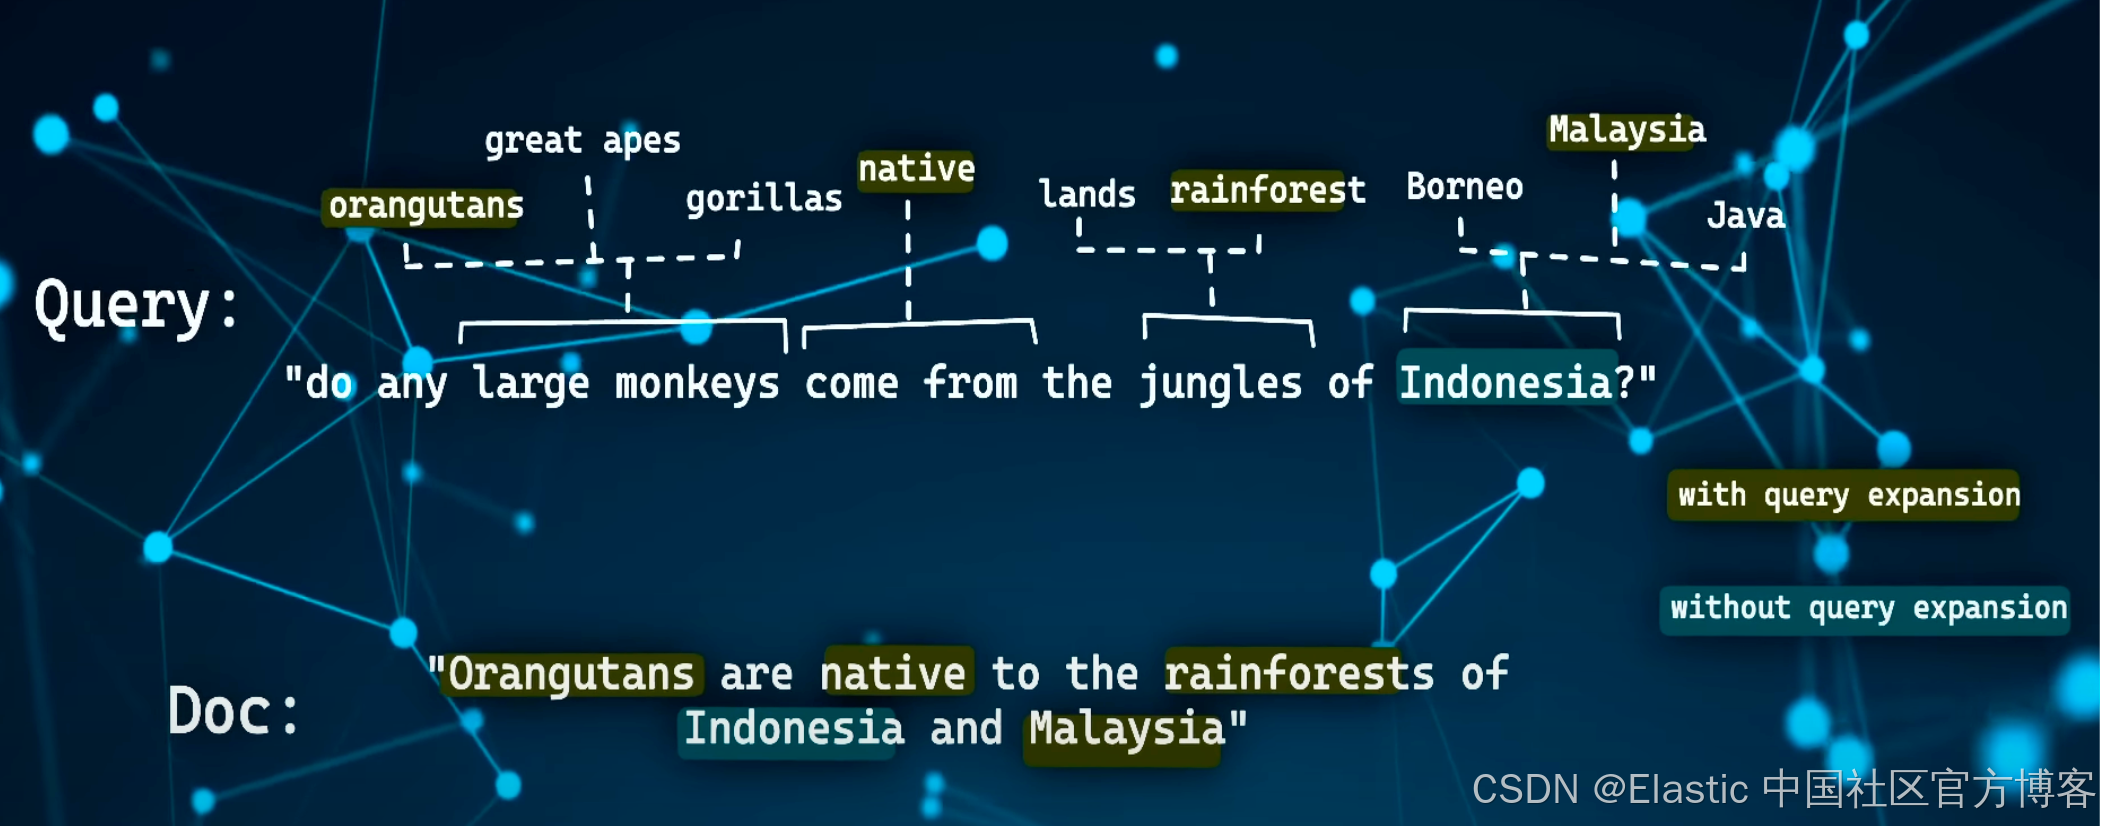
通过这样的文字扩展,我们可以实现文字的语义搜索。为了简便搜索,我们也可以省去路径中的 sparse_embedding:
POST _inference/my-elser-model
{"input": "The sky above the port was the color of television tuned to a dead channel."
}值得注意的是:目前 ELSER 模型针对英文工作的非常好,但是它不适合中文的文章扩展。目前国内的阿里已经支持稀疏向量的嵌入。它不需要针对任何的领域进行微调:开箱即用!
Cohere
我们可以使用如下的方式来创建一个 Cohere 嵌入推理端点:
PUT _inference/text_embedding/cohere_embeddings
{"service": "cohere","service_settings": {"api_key": "${COHERE_API_KEY}","model_id": "embed-english-light-v3.0","embedding_type": "byte"}
}
在上面,我们定义了 embedding_type 为 byte,也就是 8-bit。这也是一种标量量化。
我们可以使用如下的方式来获取 embedding:
POST _inference/text_embedding/cohere_embeddings
{"input": "The sky above the port was the color of television tuned to a dead channel.","task_settings": {"input_type": "ingest"}
}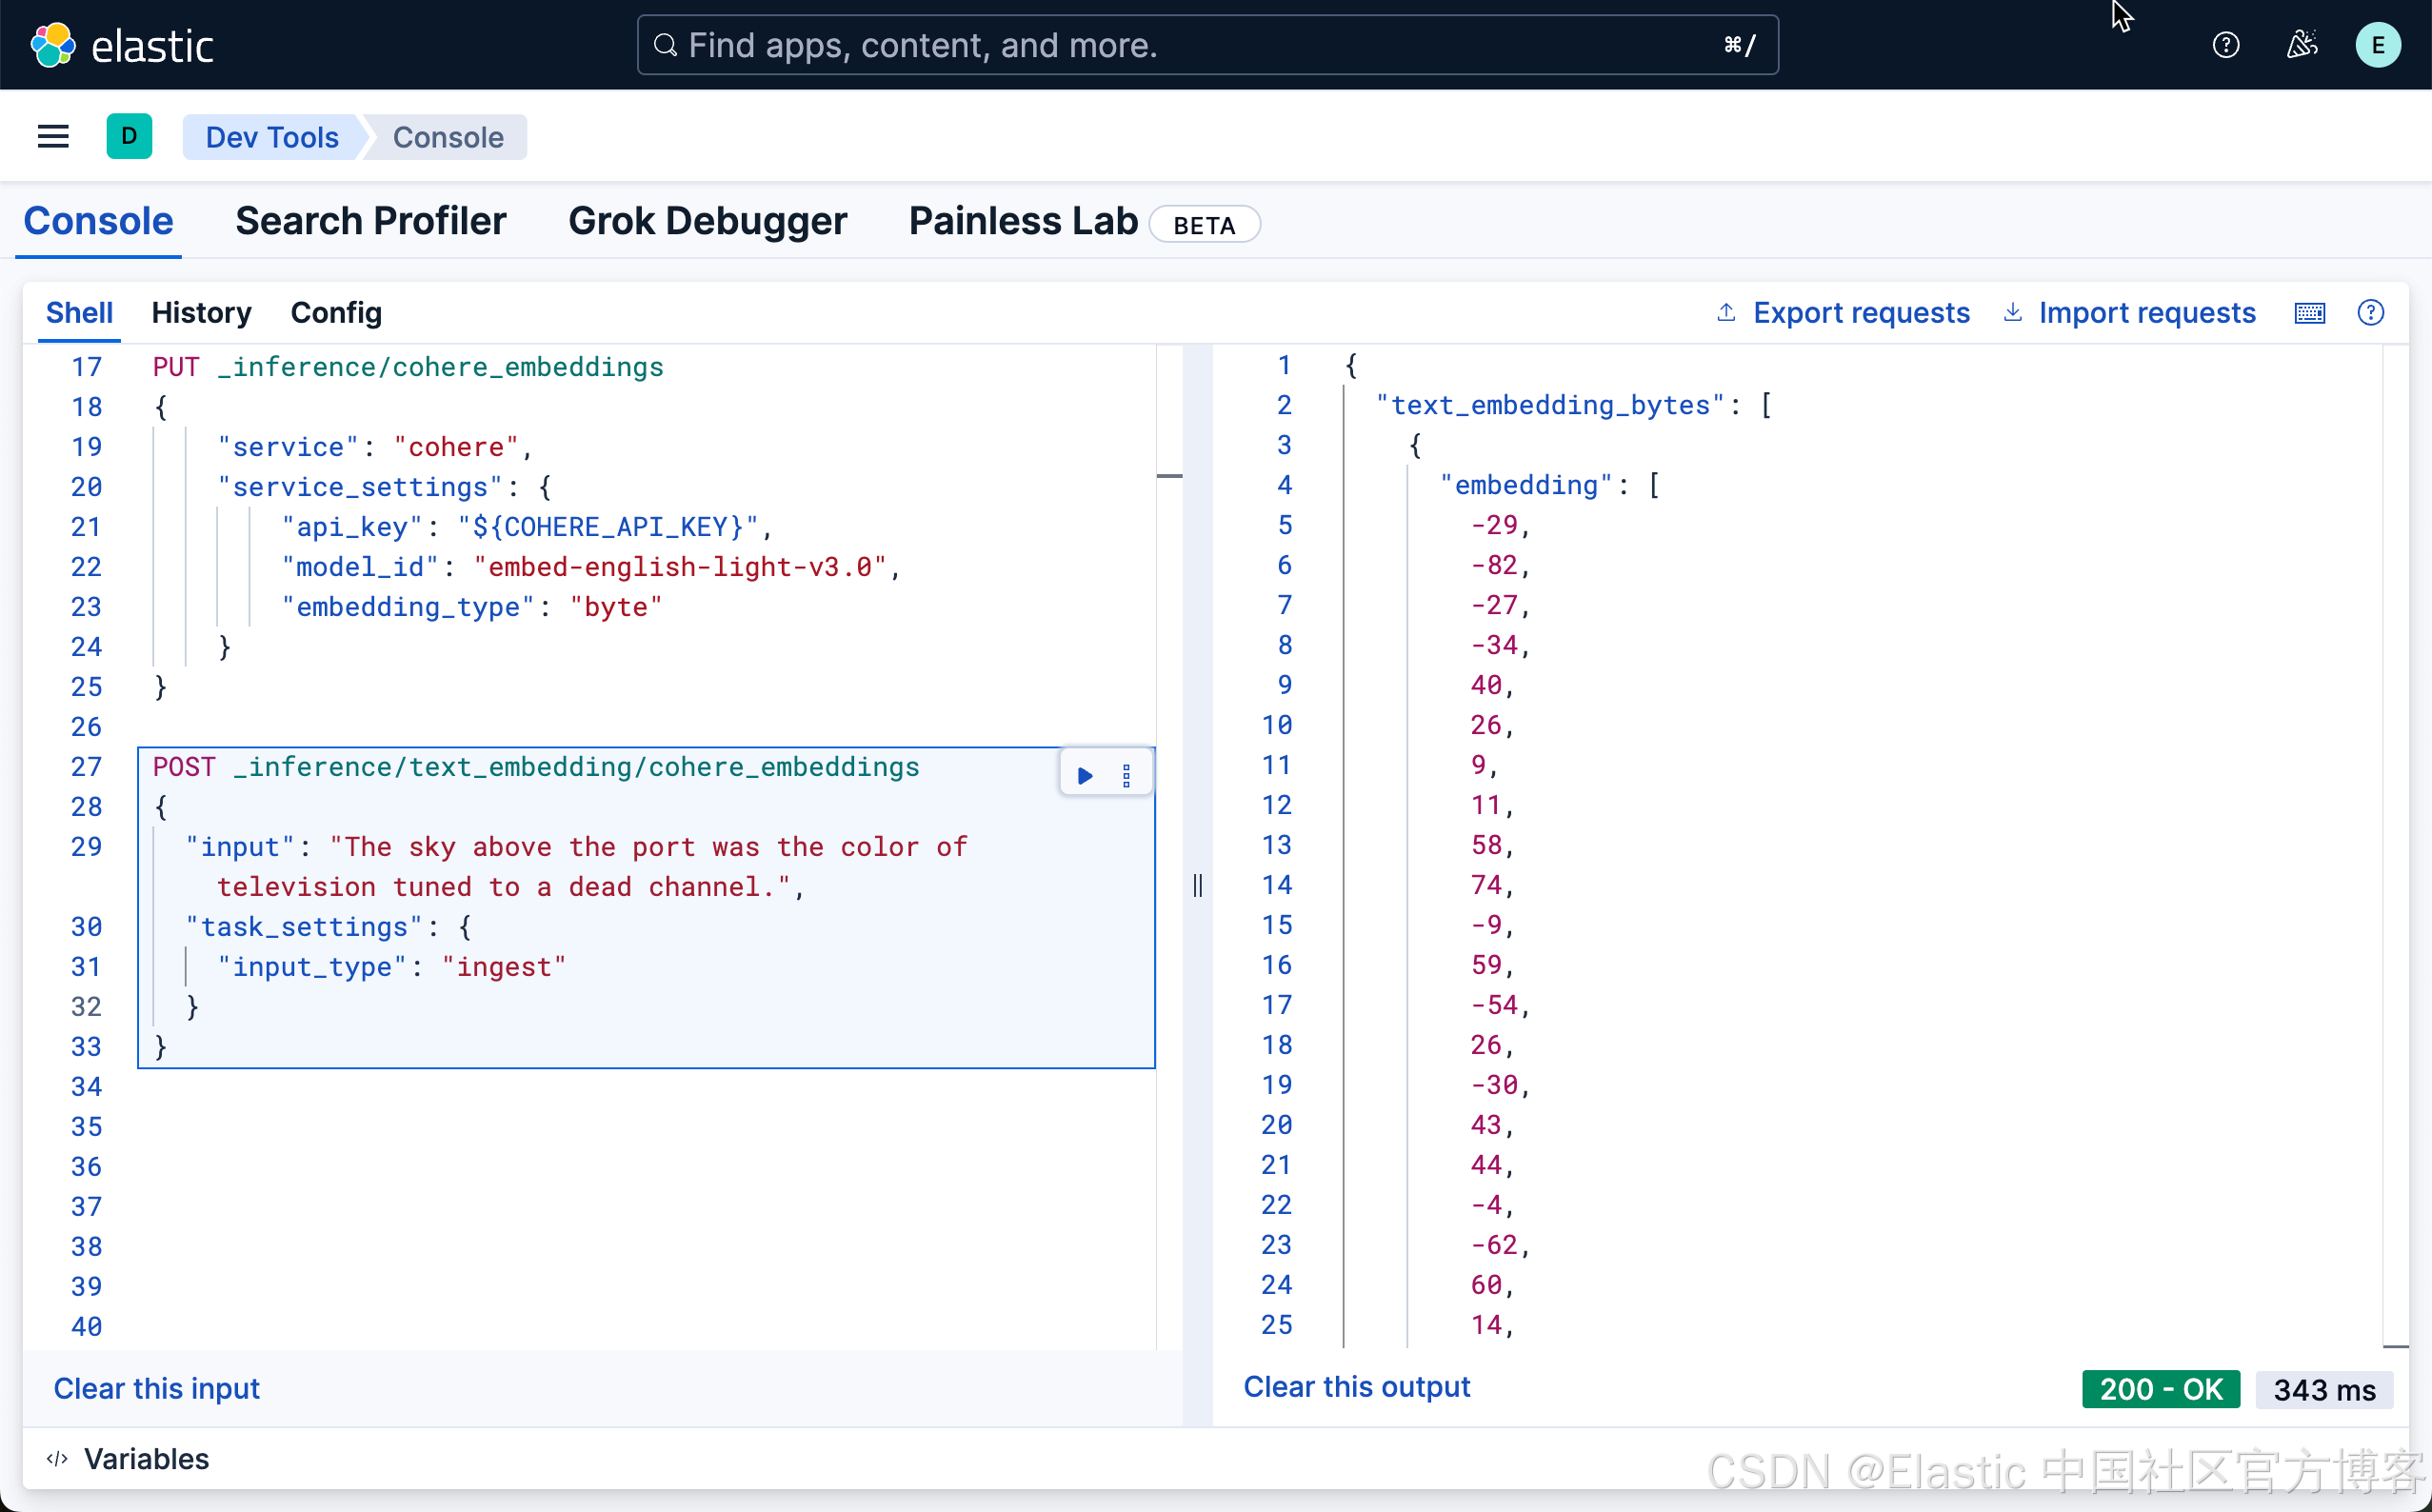
我们可以看到一个 byte 的输出。我们也可以使用如下的方式来获取:
POST _inference/cohere_embeddings
{"input": "The sky above the port was the color of television tuned to a dead channel.","task_settings": {"input_type": "ingest"}
}
在上面,我们省去了路径中的 text_embedding,这是因为 model_id 的元数据里本身就含有这个信息。
Azure OpenAI
我们可以参考之前的文章俩创建 Azure OpenAI 的账号及嵌入模型:
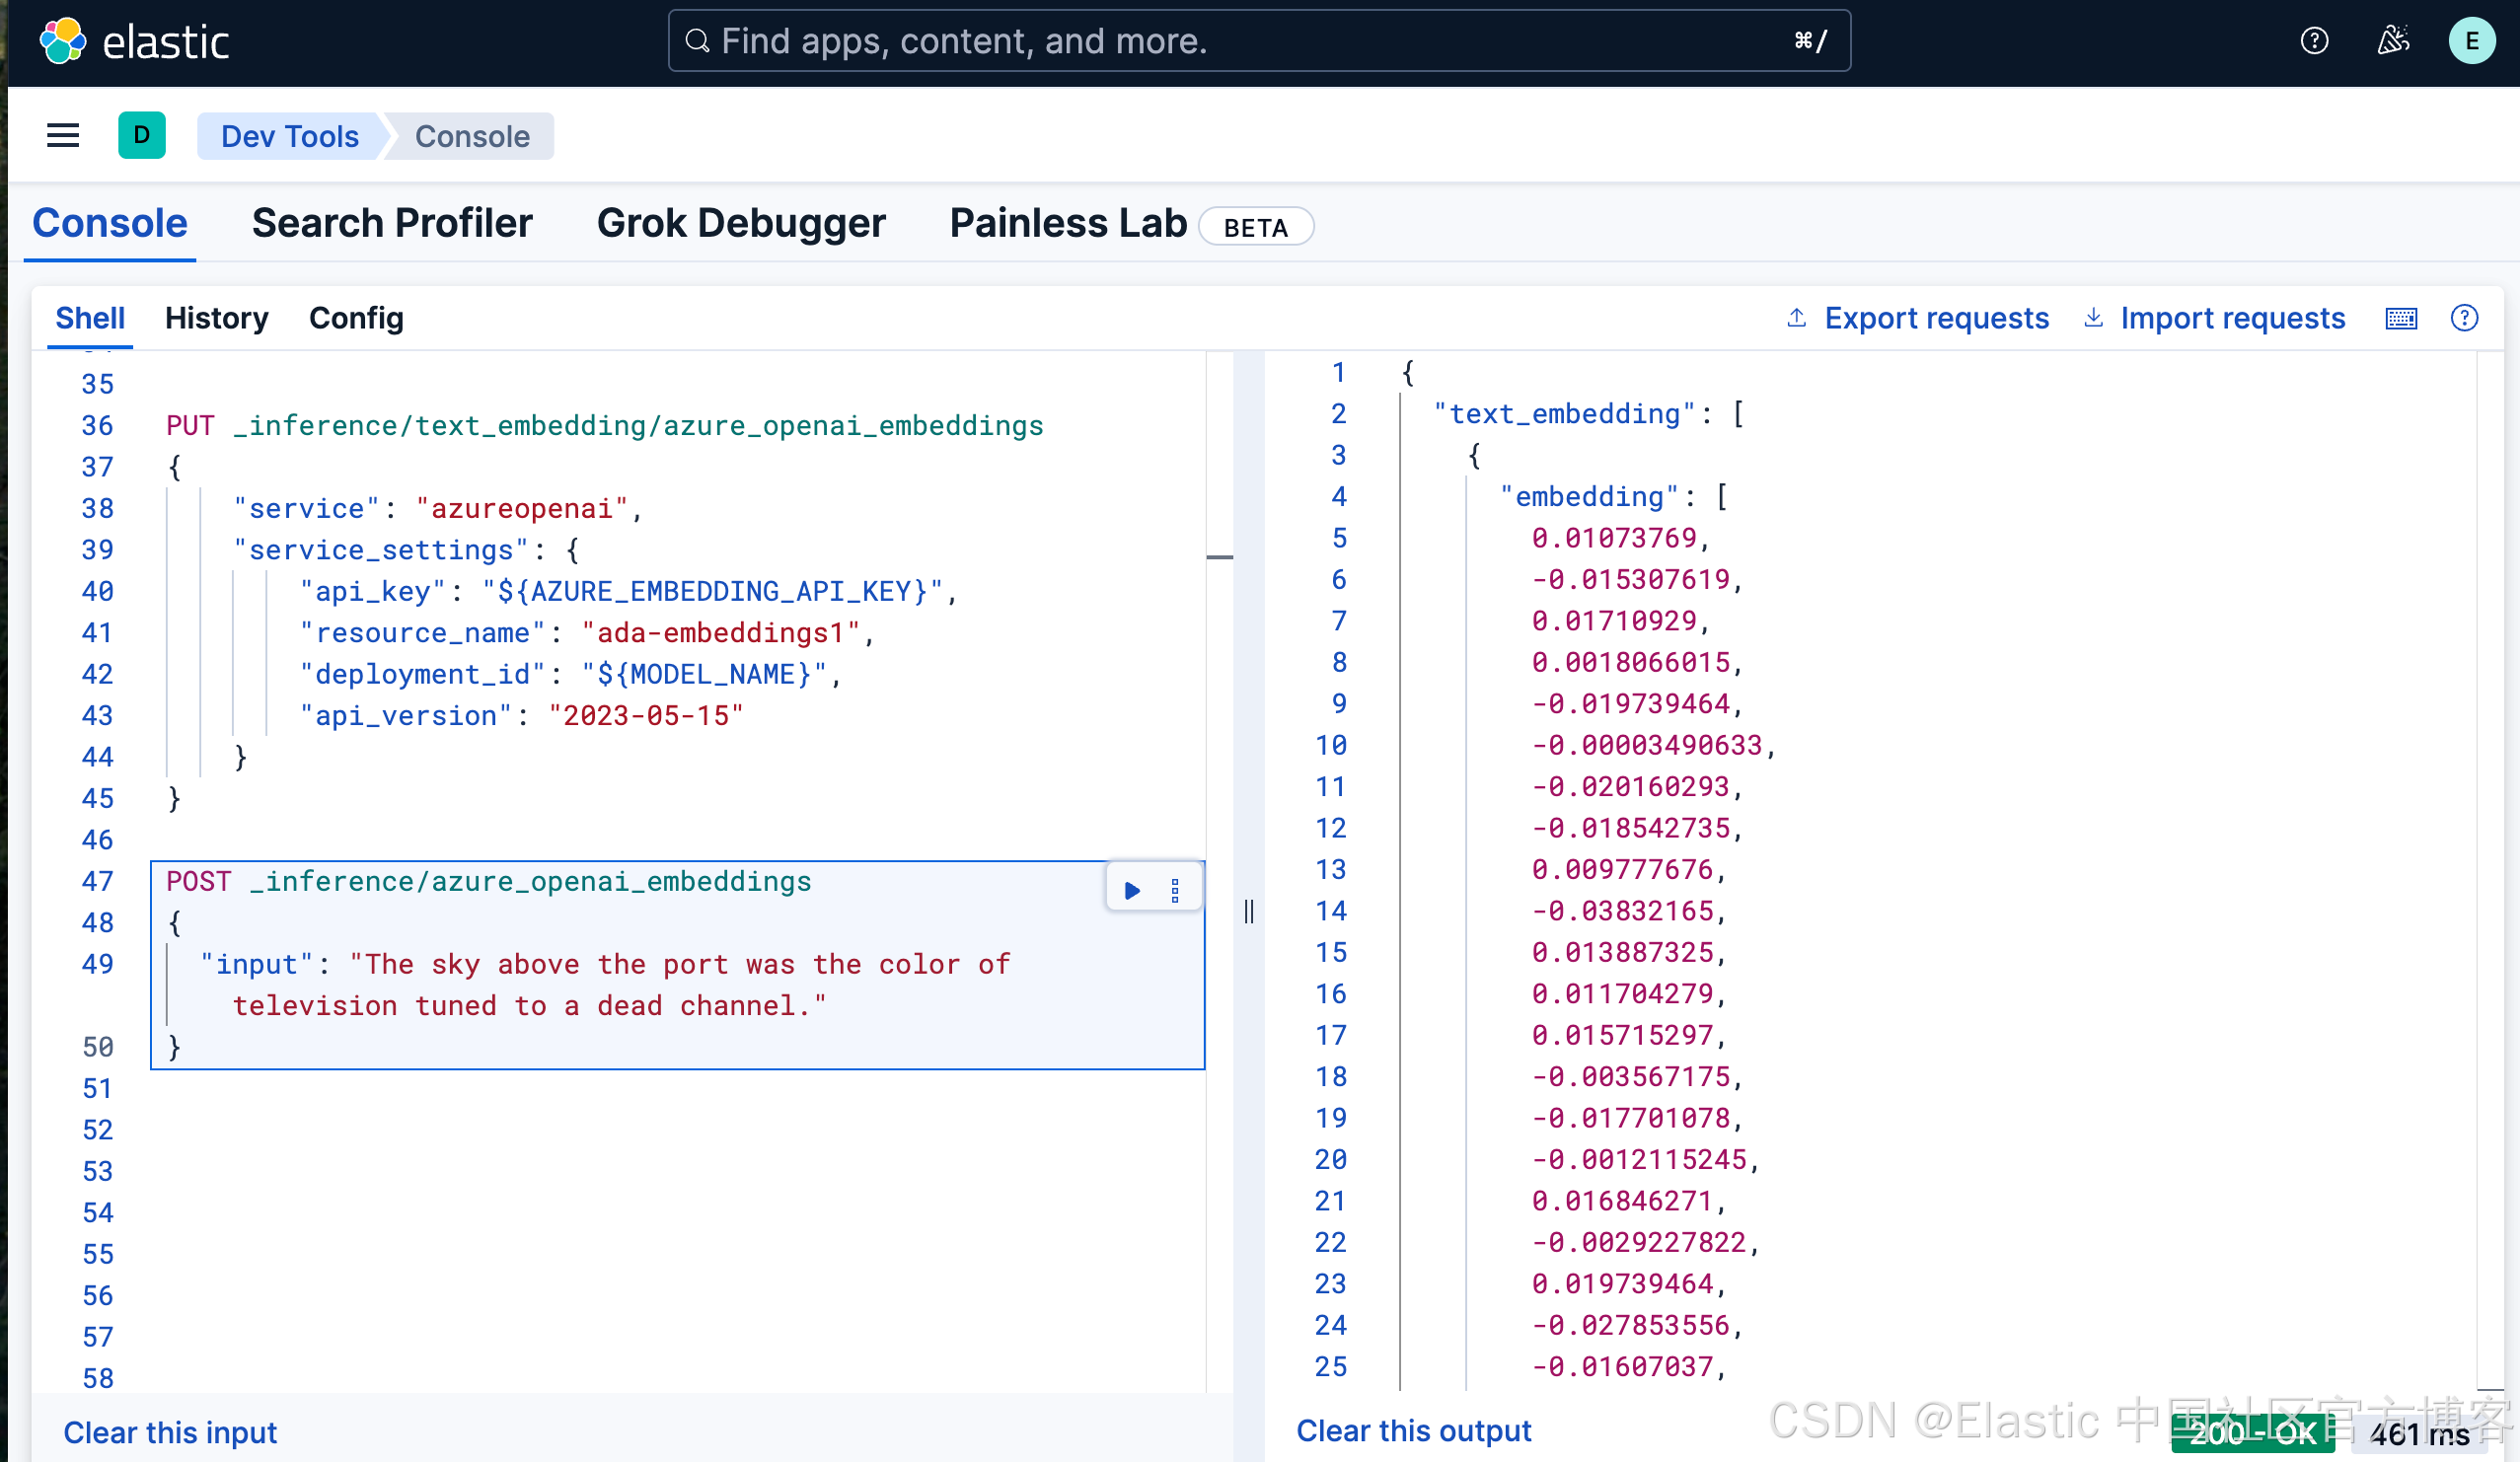
PUT _inference/text_embedding/azure_openai_embeddings
{"service": "azureopenai","service_settings": {"api_key": "${AZURE_EMBEDDING_API_KEY}","resource_name": "ada-embeddings1","deployment_id": "${MODEL_NAME}","api_version": "2023-05-15"}
}
一旦创建成功,我们可以使用如下的命令来创建 Aure OpenAI 的嵌入:
POST _inference/azure_openai_embeddings
{"input": "The sky above the port was the color of television tuned to a dead channel."
}
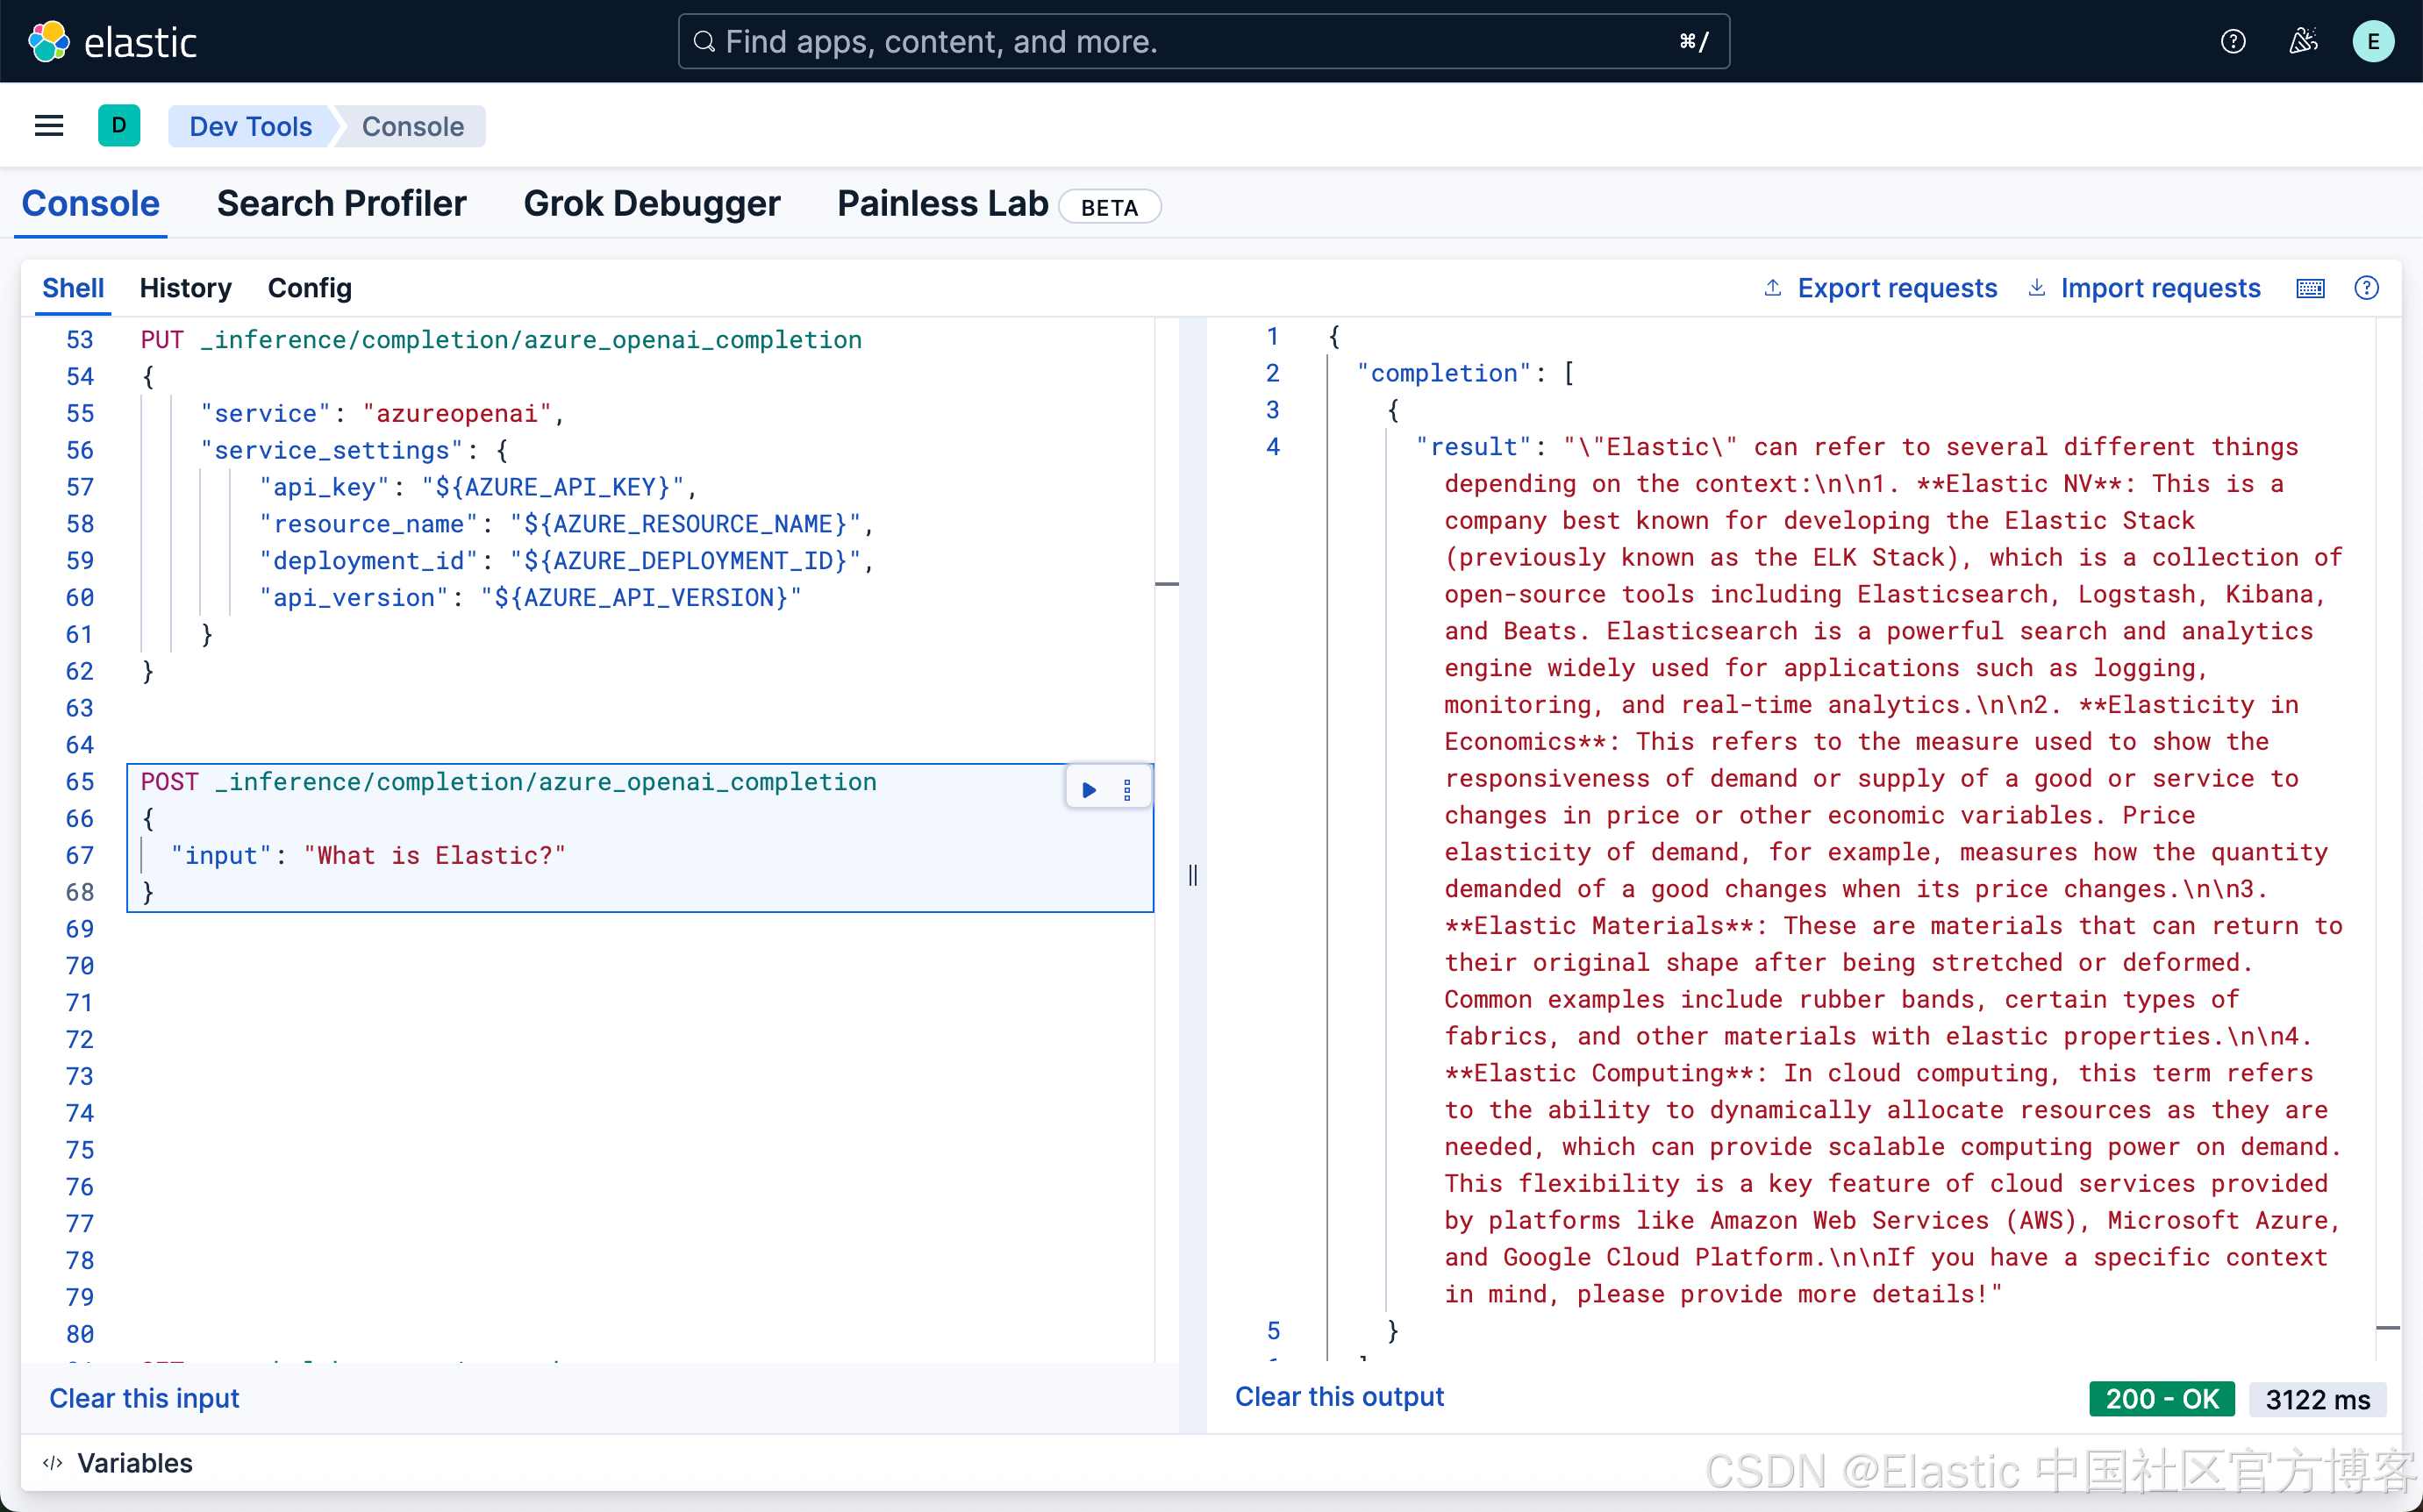
我们可以使用如下的方式来创建一个 Azure OpenAI 的 chat completion 推理端点:
PUT _inference/completion/azure_openai_completion
{"service": "azureopenai","service_settings": {"api_key": "${AZURE_API_KEY}","resource_name": "${AZURE_RESOURCE_NAME}","deployment_id": "${AZURE_DEPLOYMENT_ID}","api_version": "${AZURE_API_VERSION}"}
}
我们可以使用如下的方法来使用这个 chat completion 推理端点:
POST _inference/completion/azure_openai_completion
{"input": "What is Elastic?"
}
E5
在上面我们已经部署了 E5 small 模型。我们可以事业如下的方式来创建一个端点:
PUT _inference/text_embedding/multilingual_embeddings
{"service": "elasticsearch","service_settings": {"model_id": ".multilingual-e5-small","num_allocations": 1,"num_threads": 1}
}
我们可以使用如下的方式来获取嵌入:
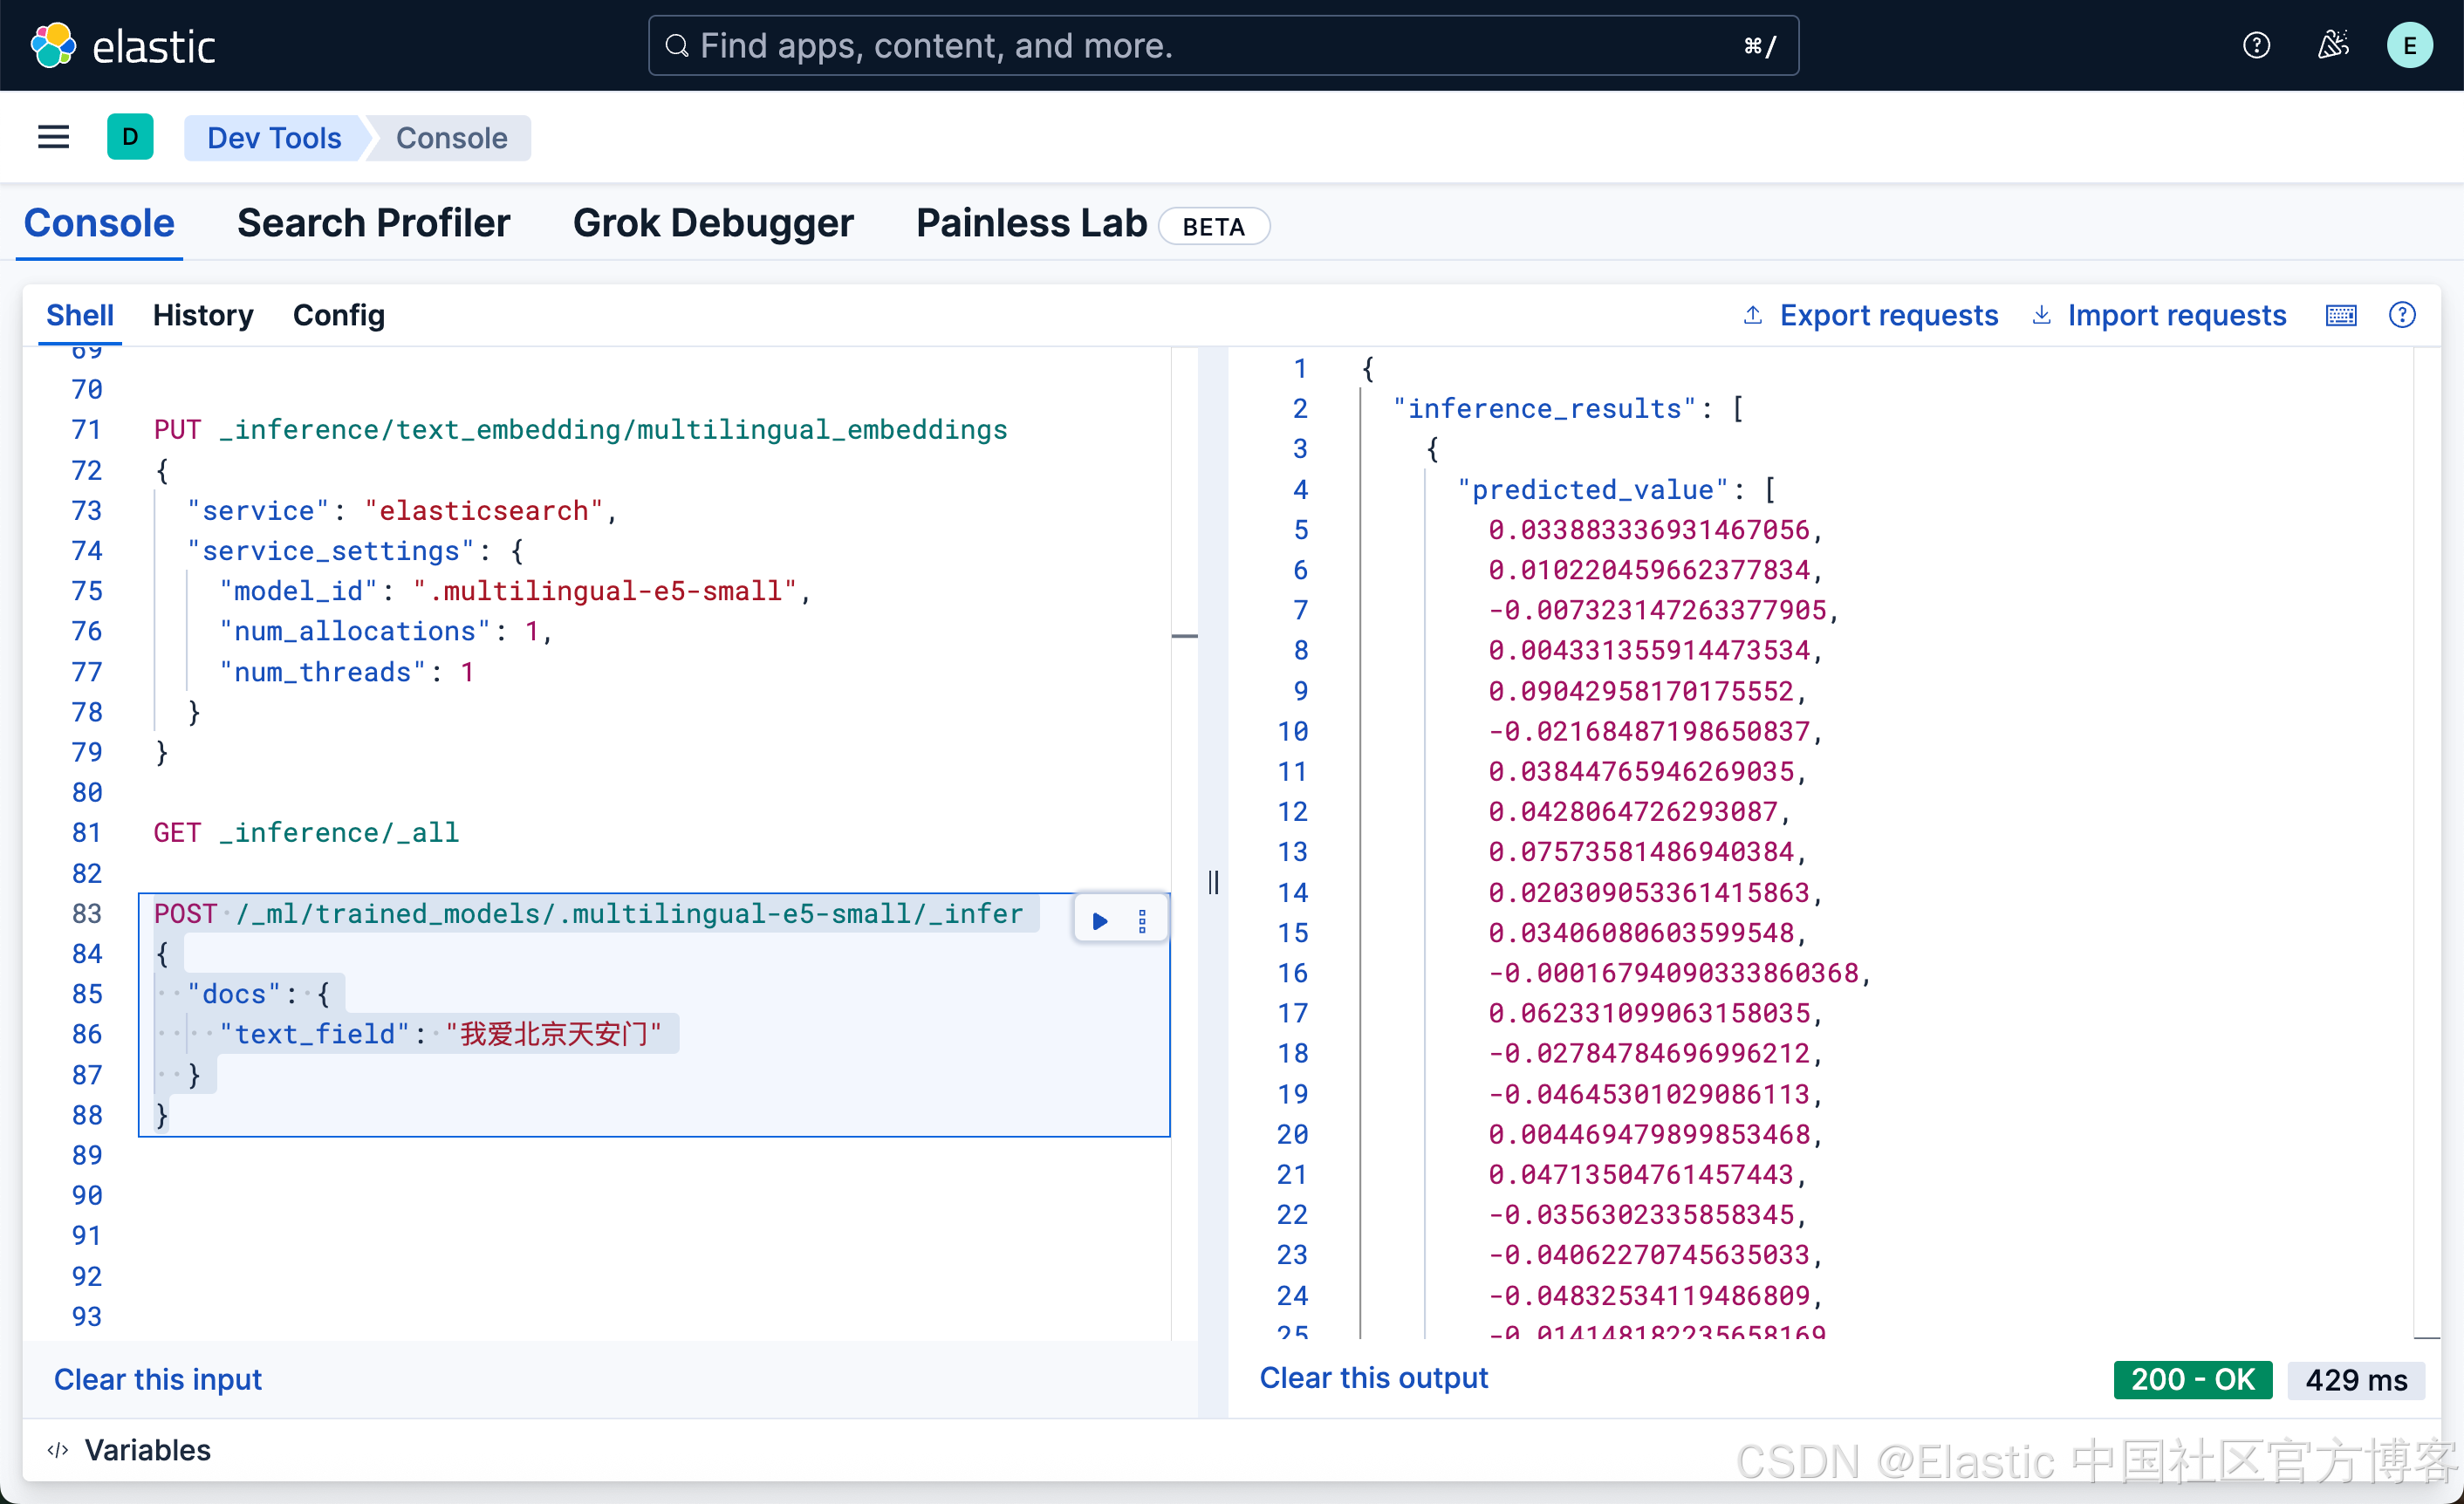
POST /_ml/trained_models/.multilingual-e5-small/_infer
{"docs": {"text_field": "我爱北京天安门"}
}
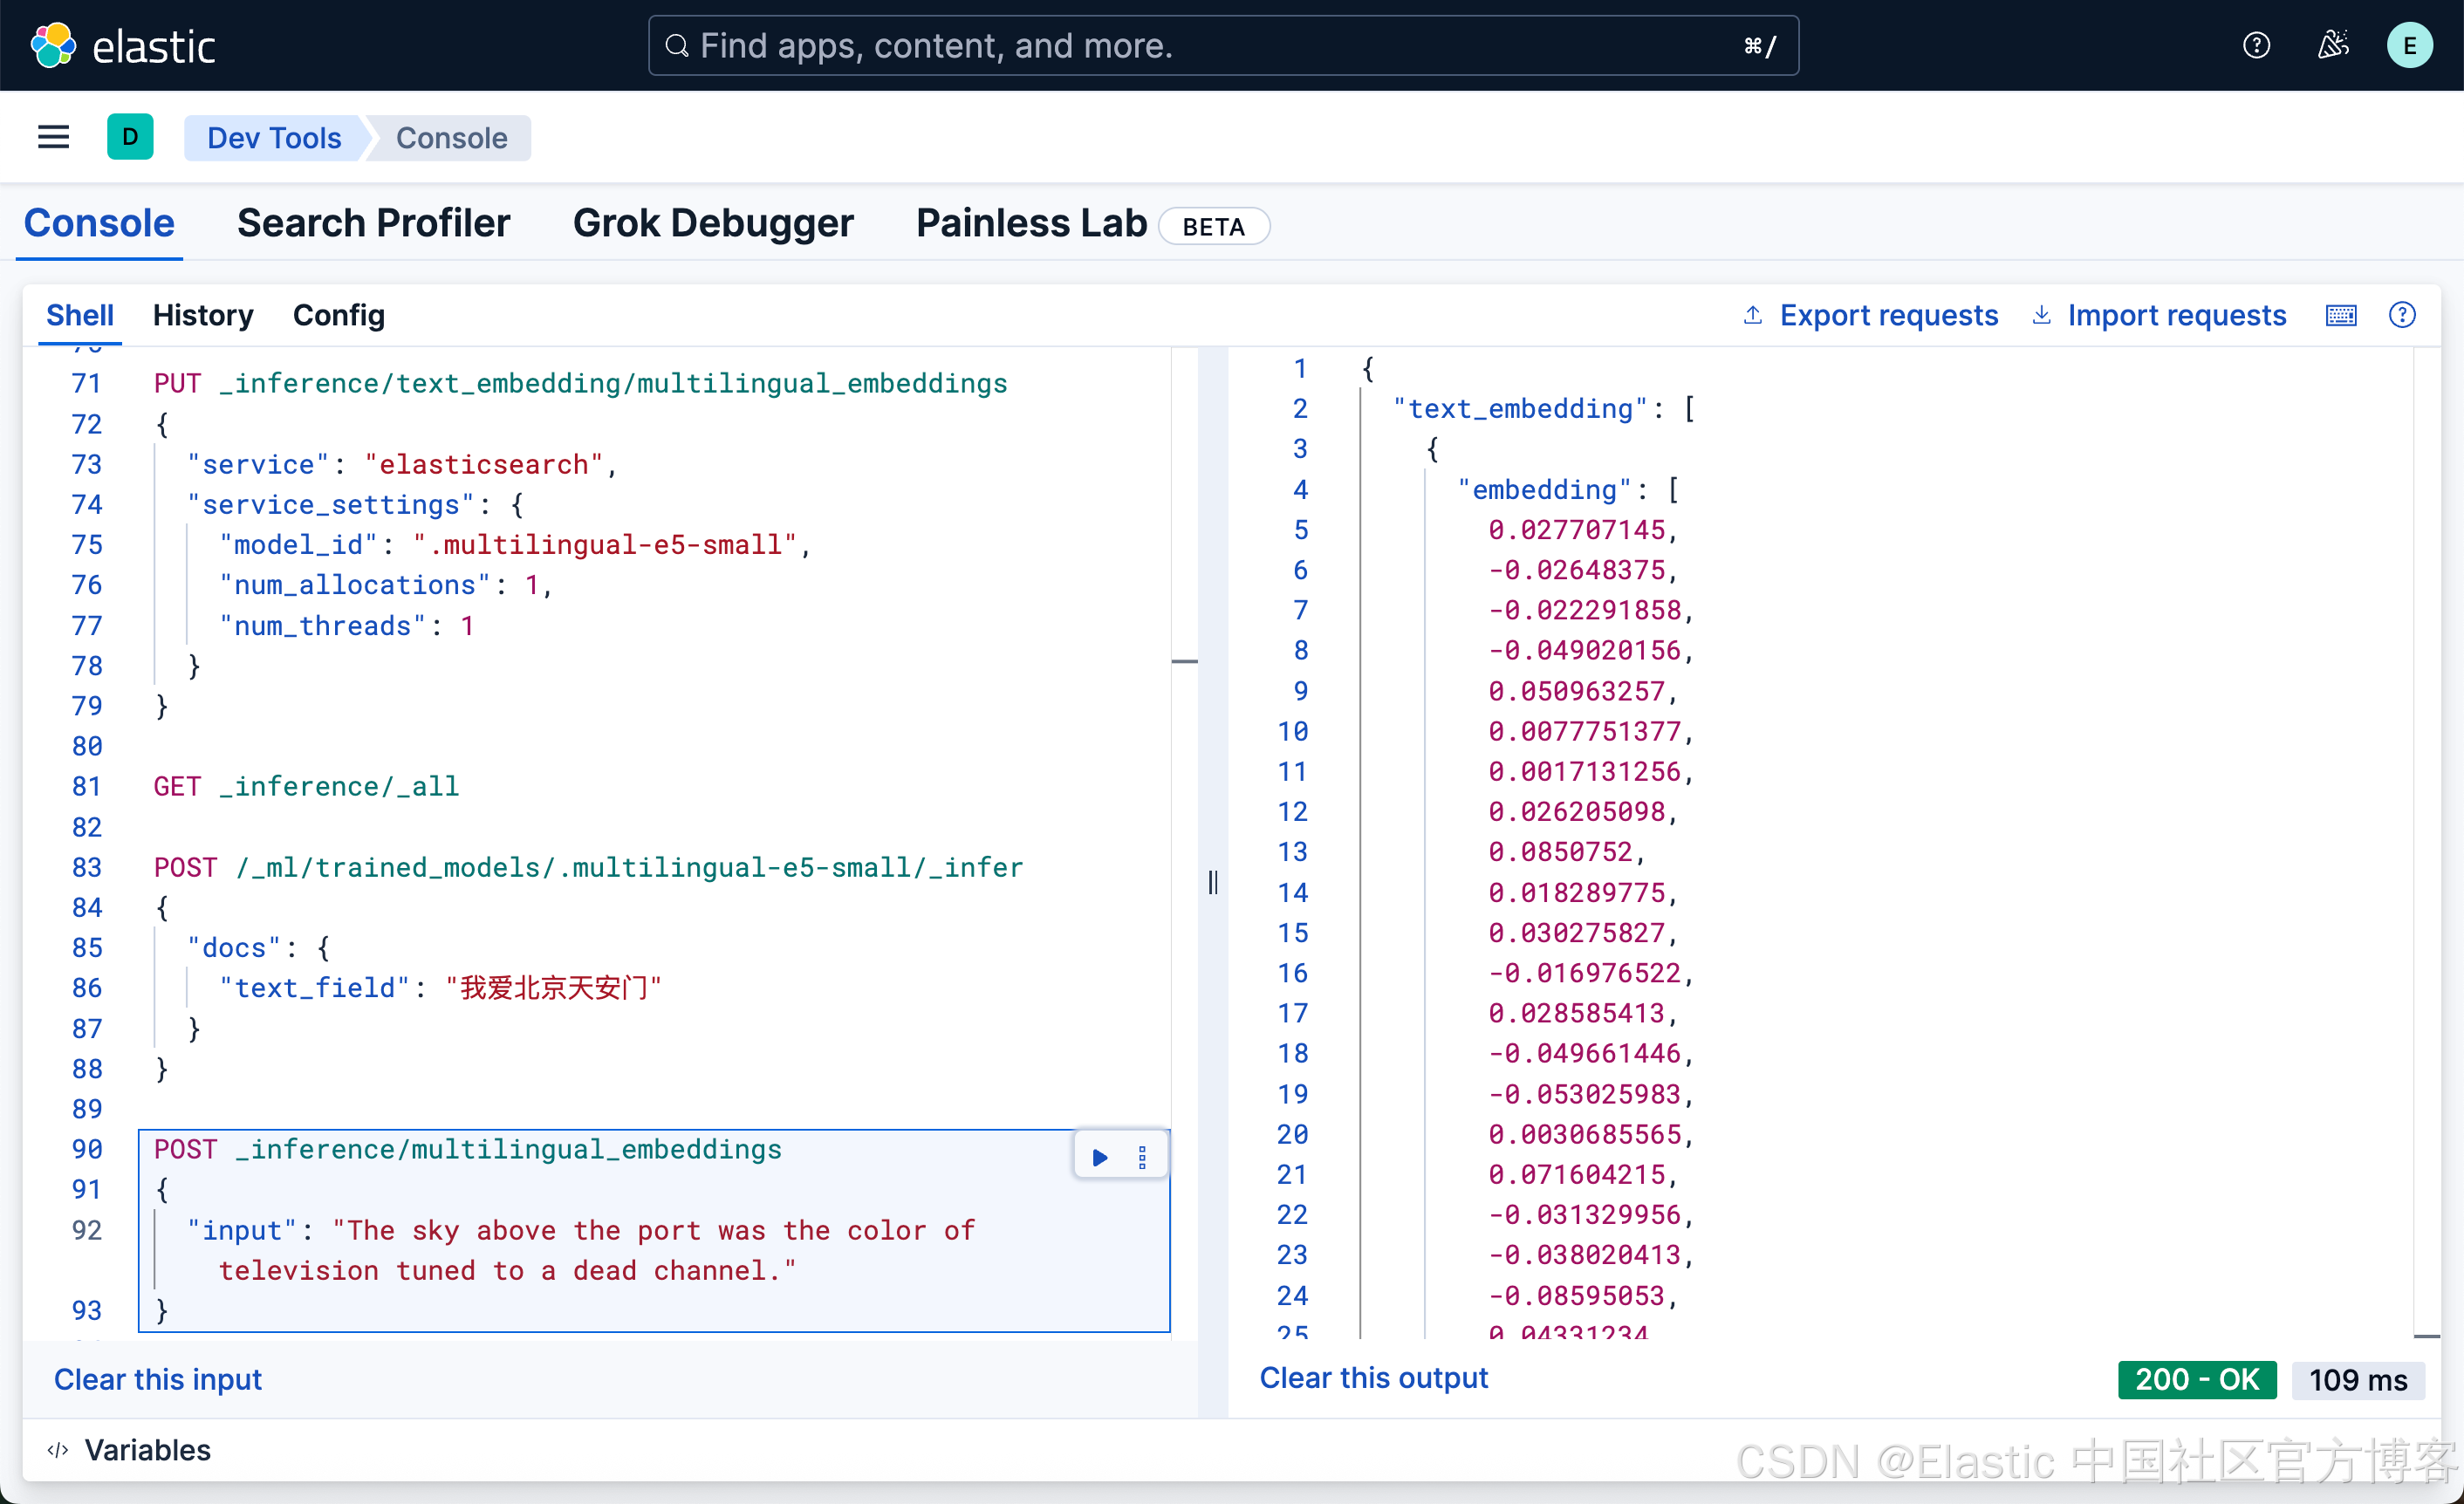
我们也可以使用我们刚才已经创建好的端点 multilingual_embeddings 来创建:
第三方模型
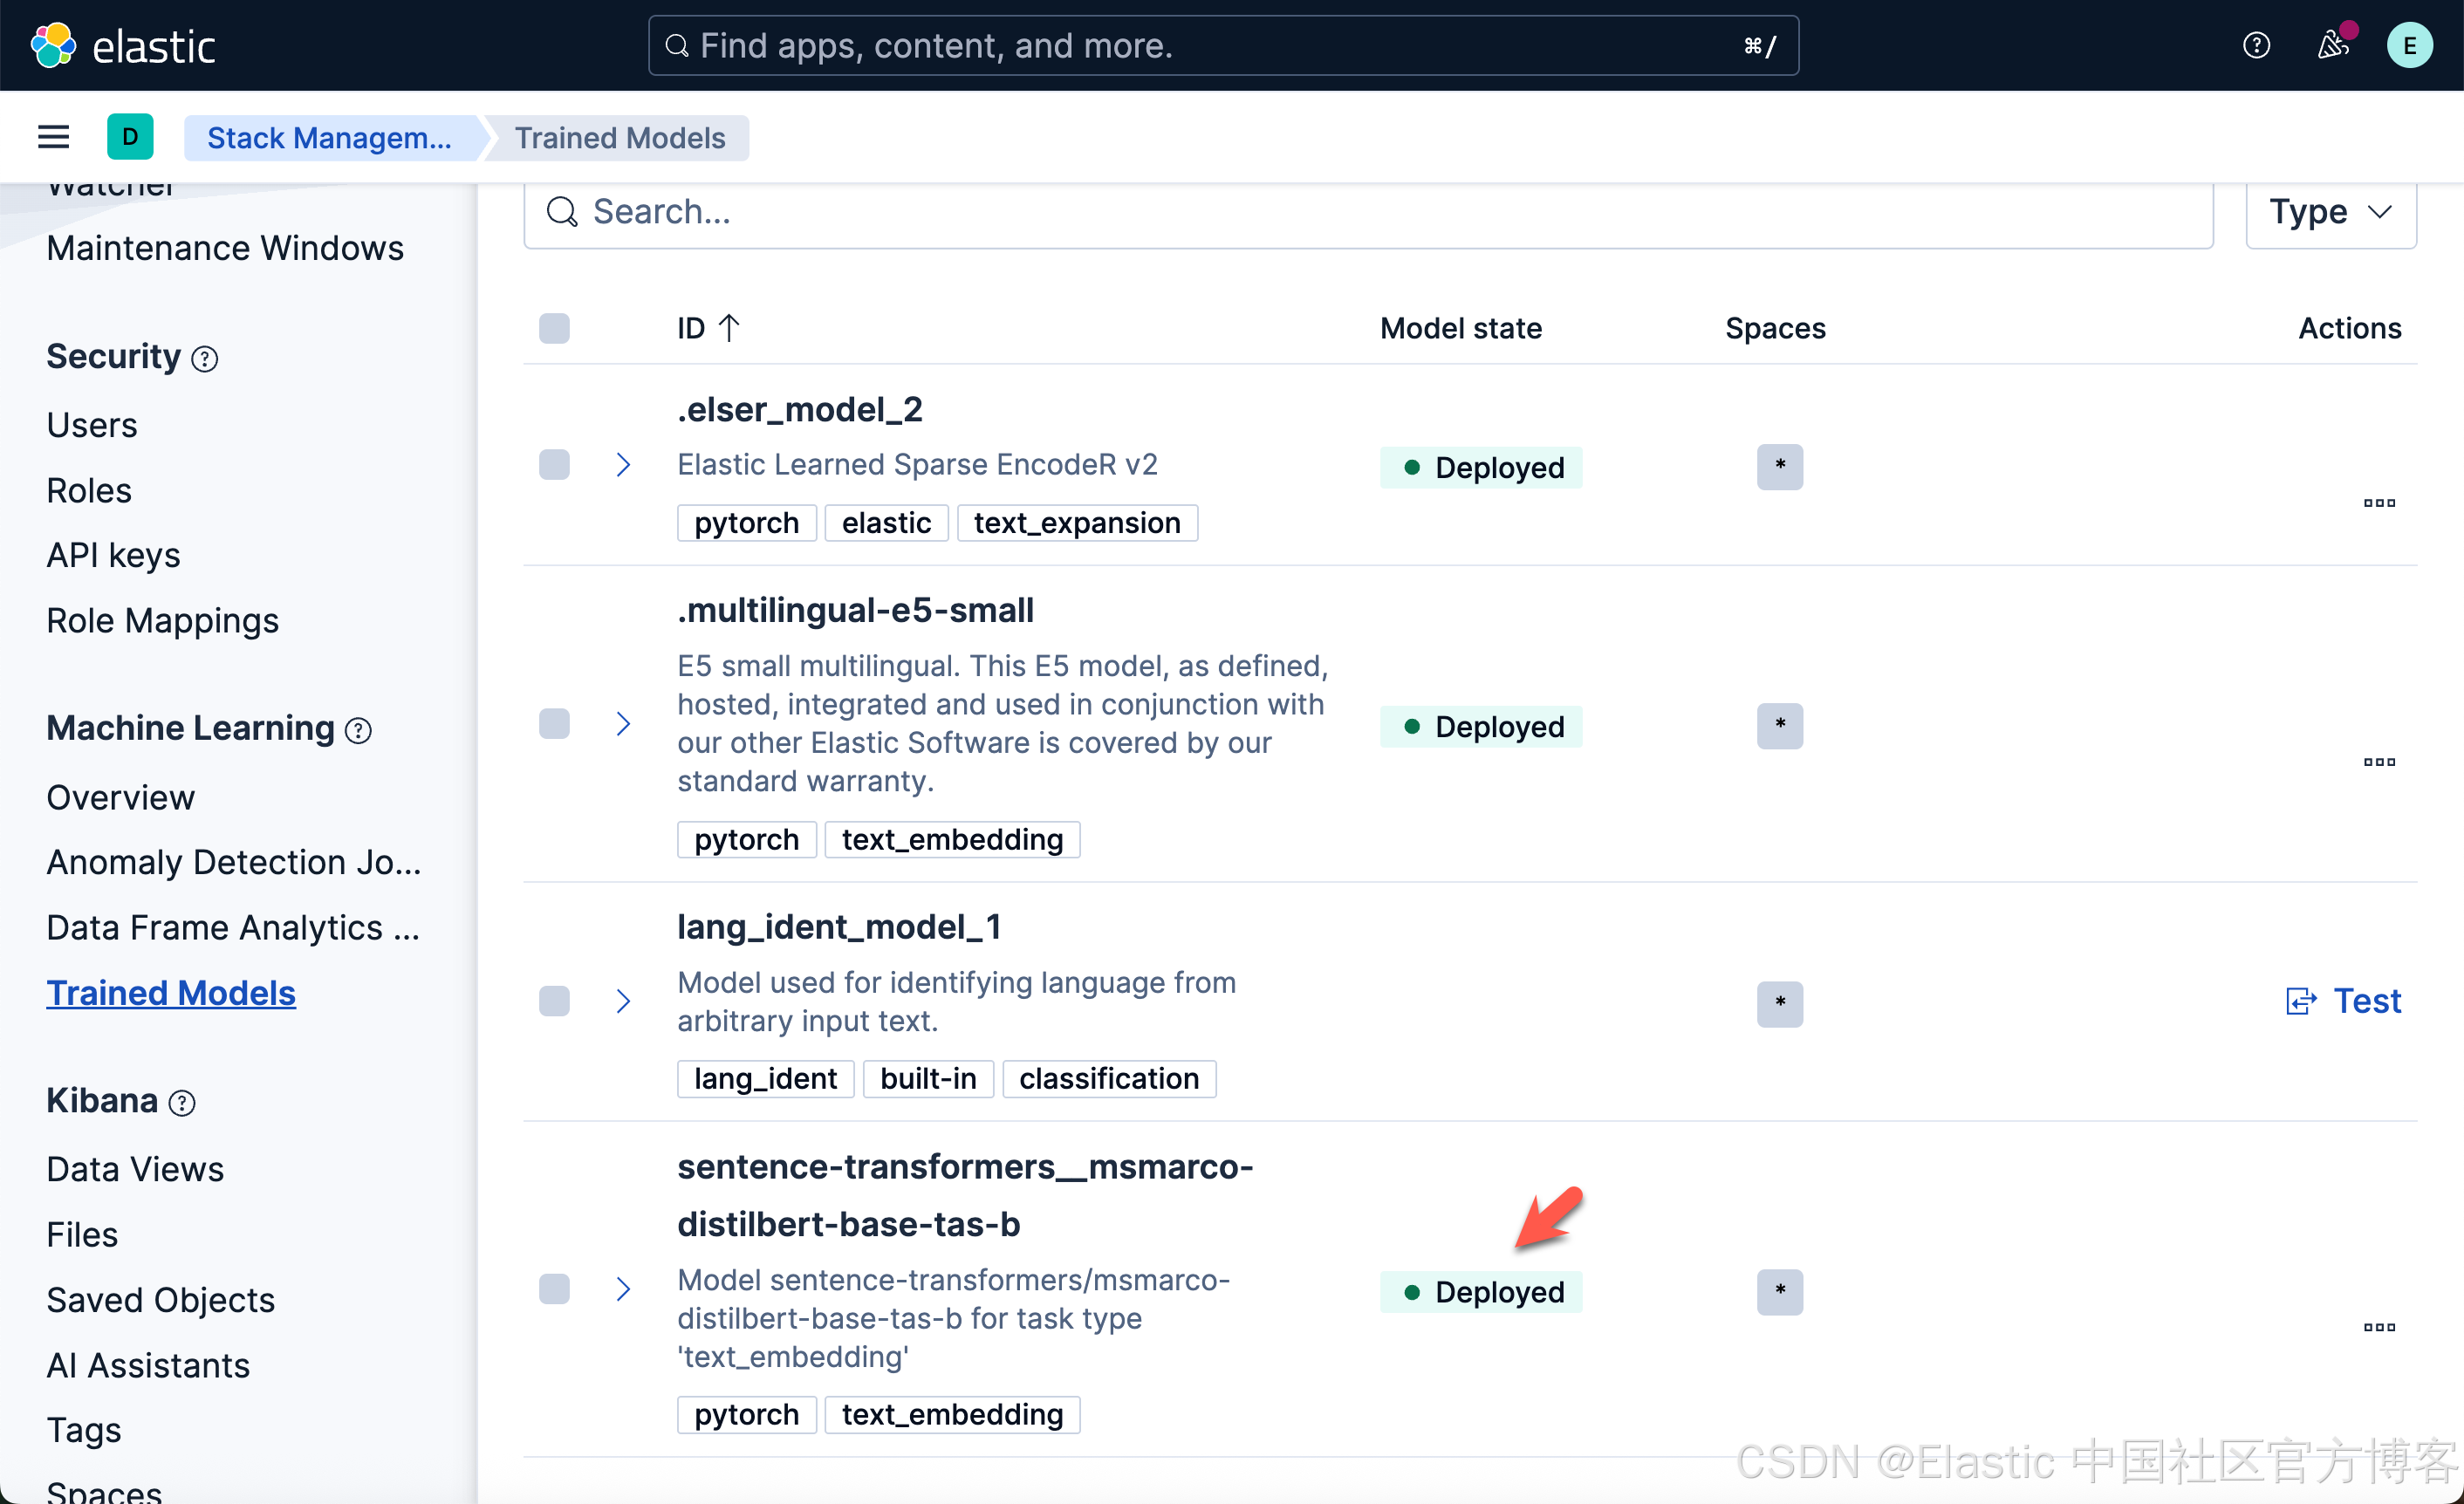
我们可以参考之前的文章 “Elasticsearch:如何部署 NLP:文本嵌入和向量搜索” 来部署一个第三方的模型,比如 sentence-transformers__msmarco-distilbert-base-tas-b。
eland_import_hub_model --url https://elastic:GK1JT0+tbYQV02R9jVP*@localhost:9200 \--hub-model-id sentence-transformers/msmarco-distilbert-base-tas-b \--task-type text_embedding \--insecure \--start在运行完上面的命令后,我们可以在 Trained models 界面看到如下已经部署的模型:
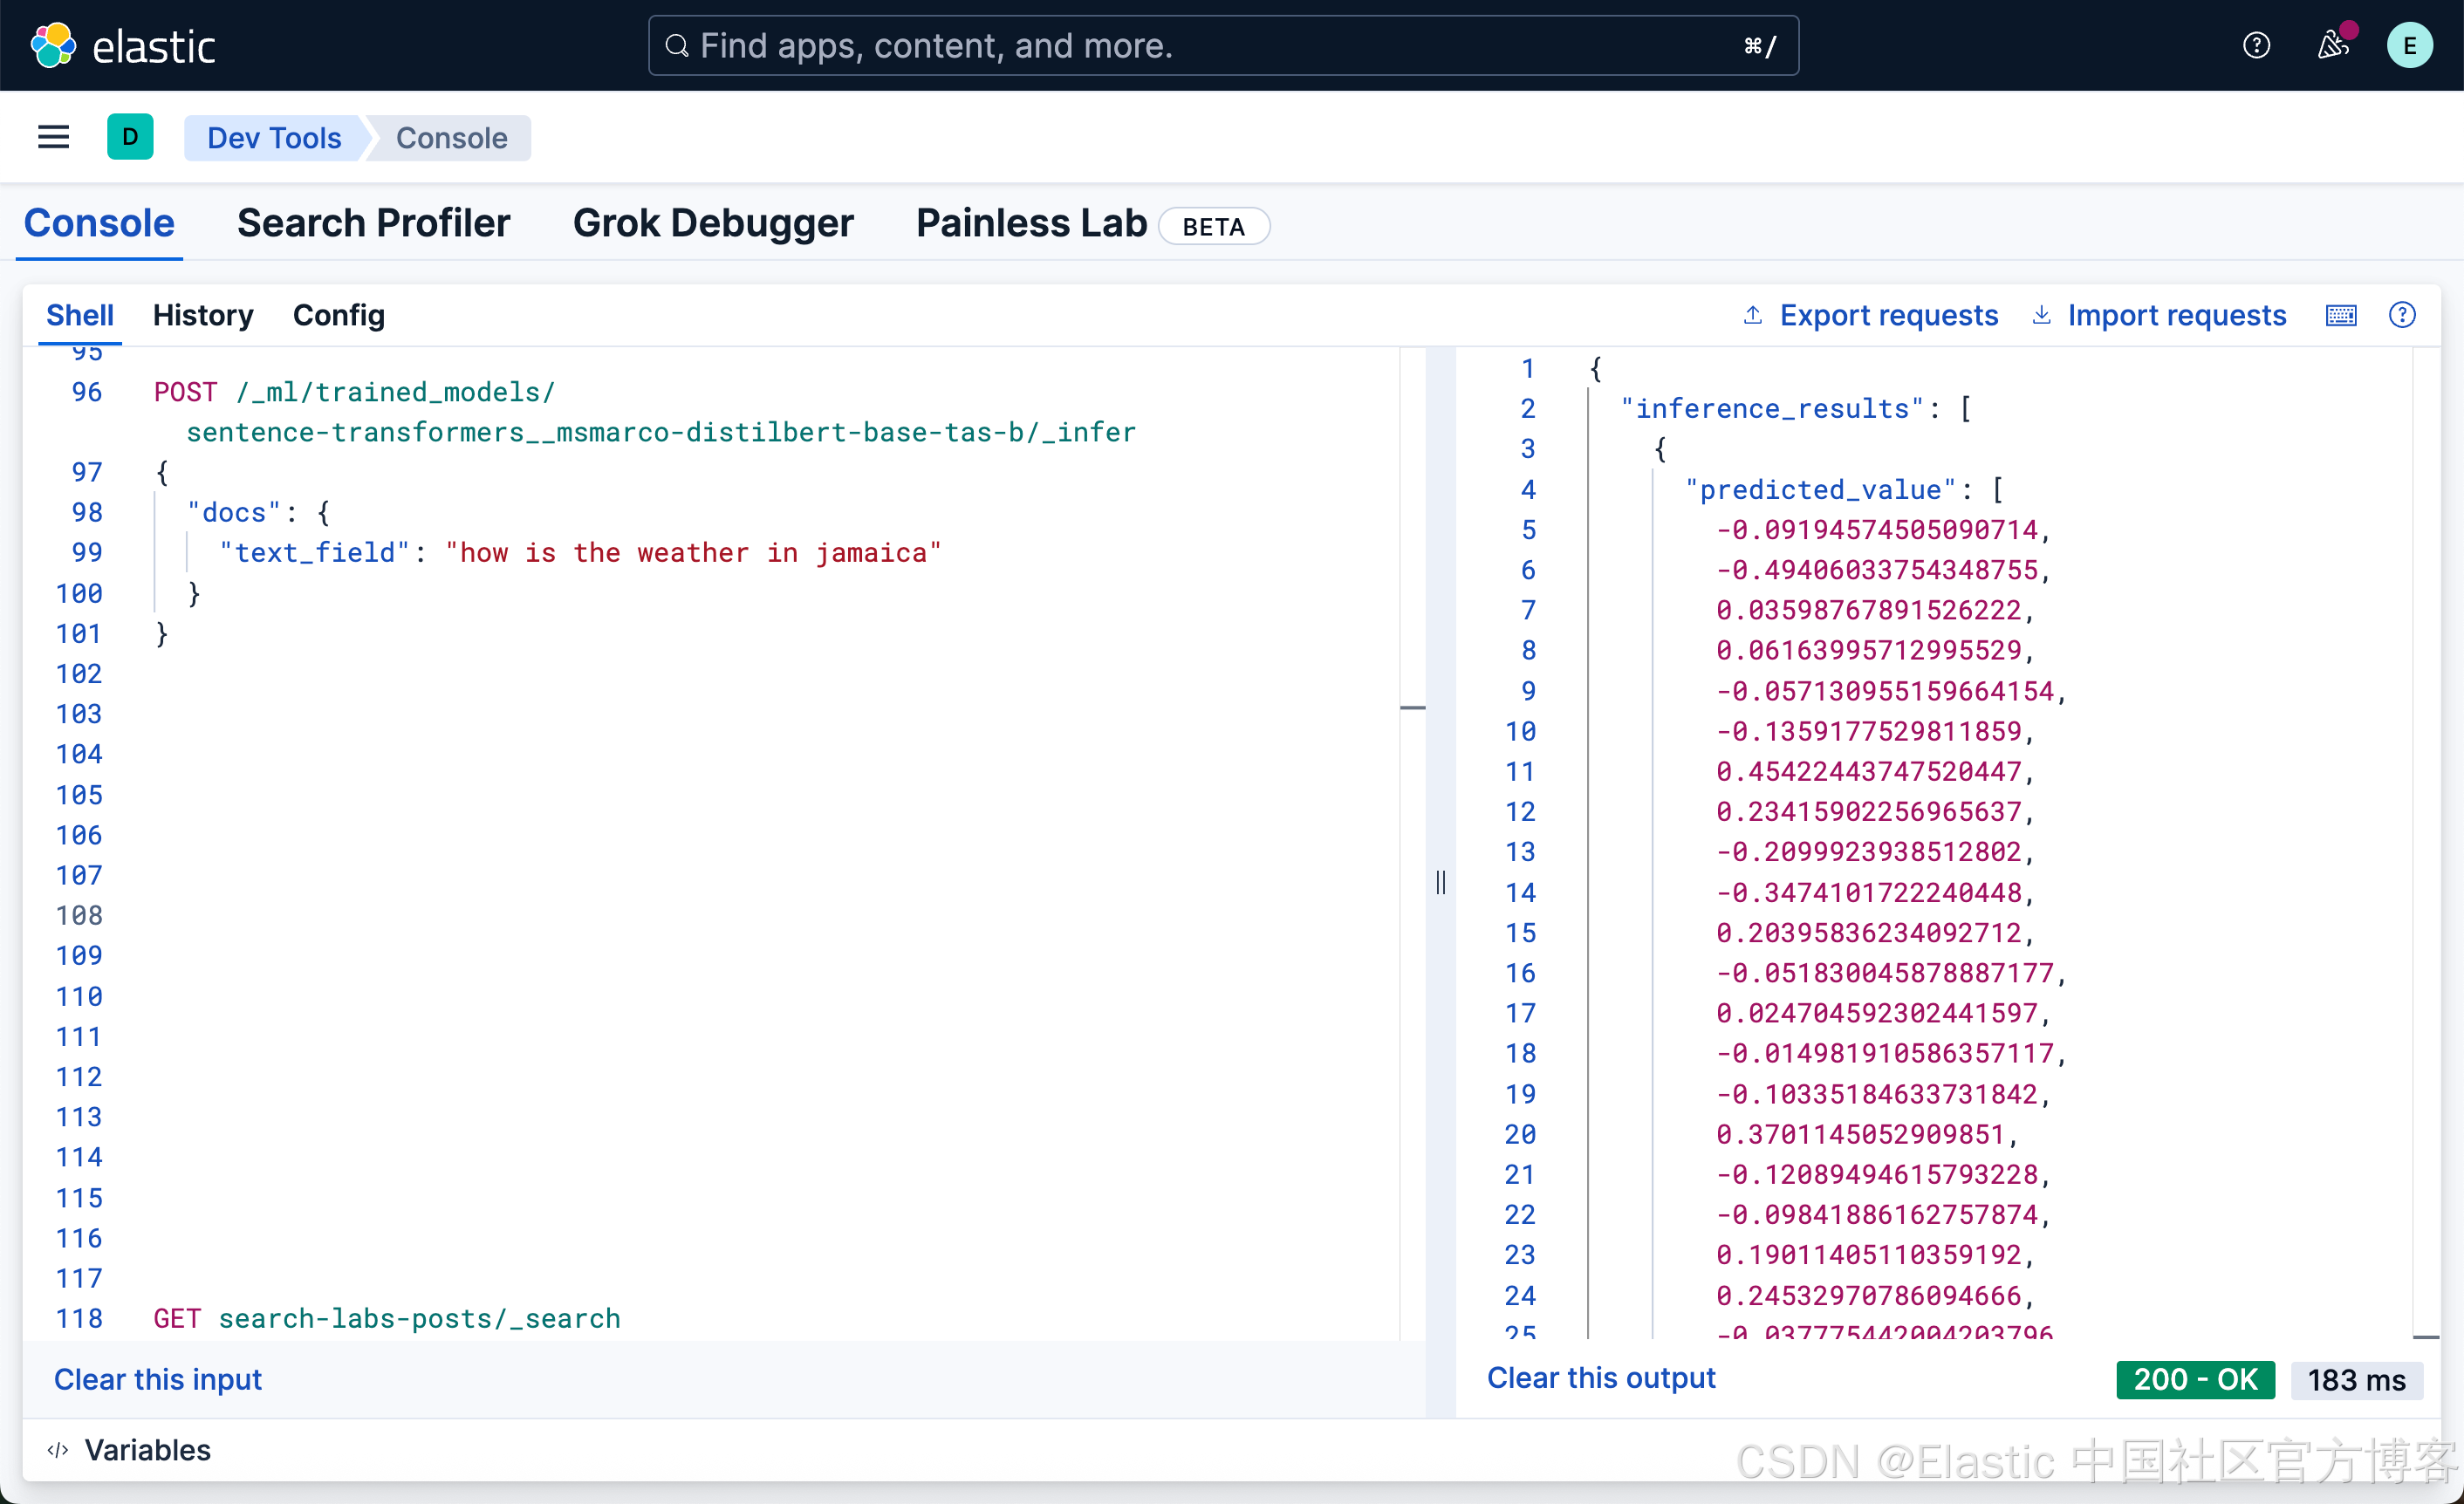
我们可以使用的如下的命令来生成嵌入:
POST /_ml/trained_models/sentence-transformers__msmarco-distilbert-base-tas-b/_infer
{"docs": {"text_field": "how is the weather in jamaica"}
}
我们也可以创建一个推理端点来实现:
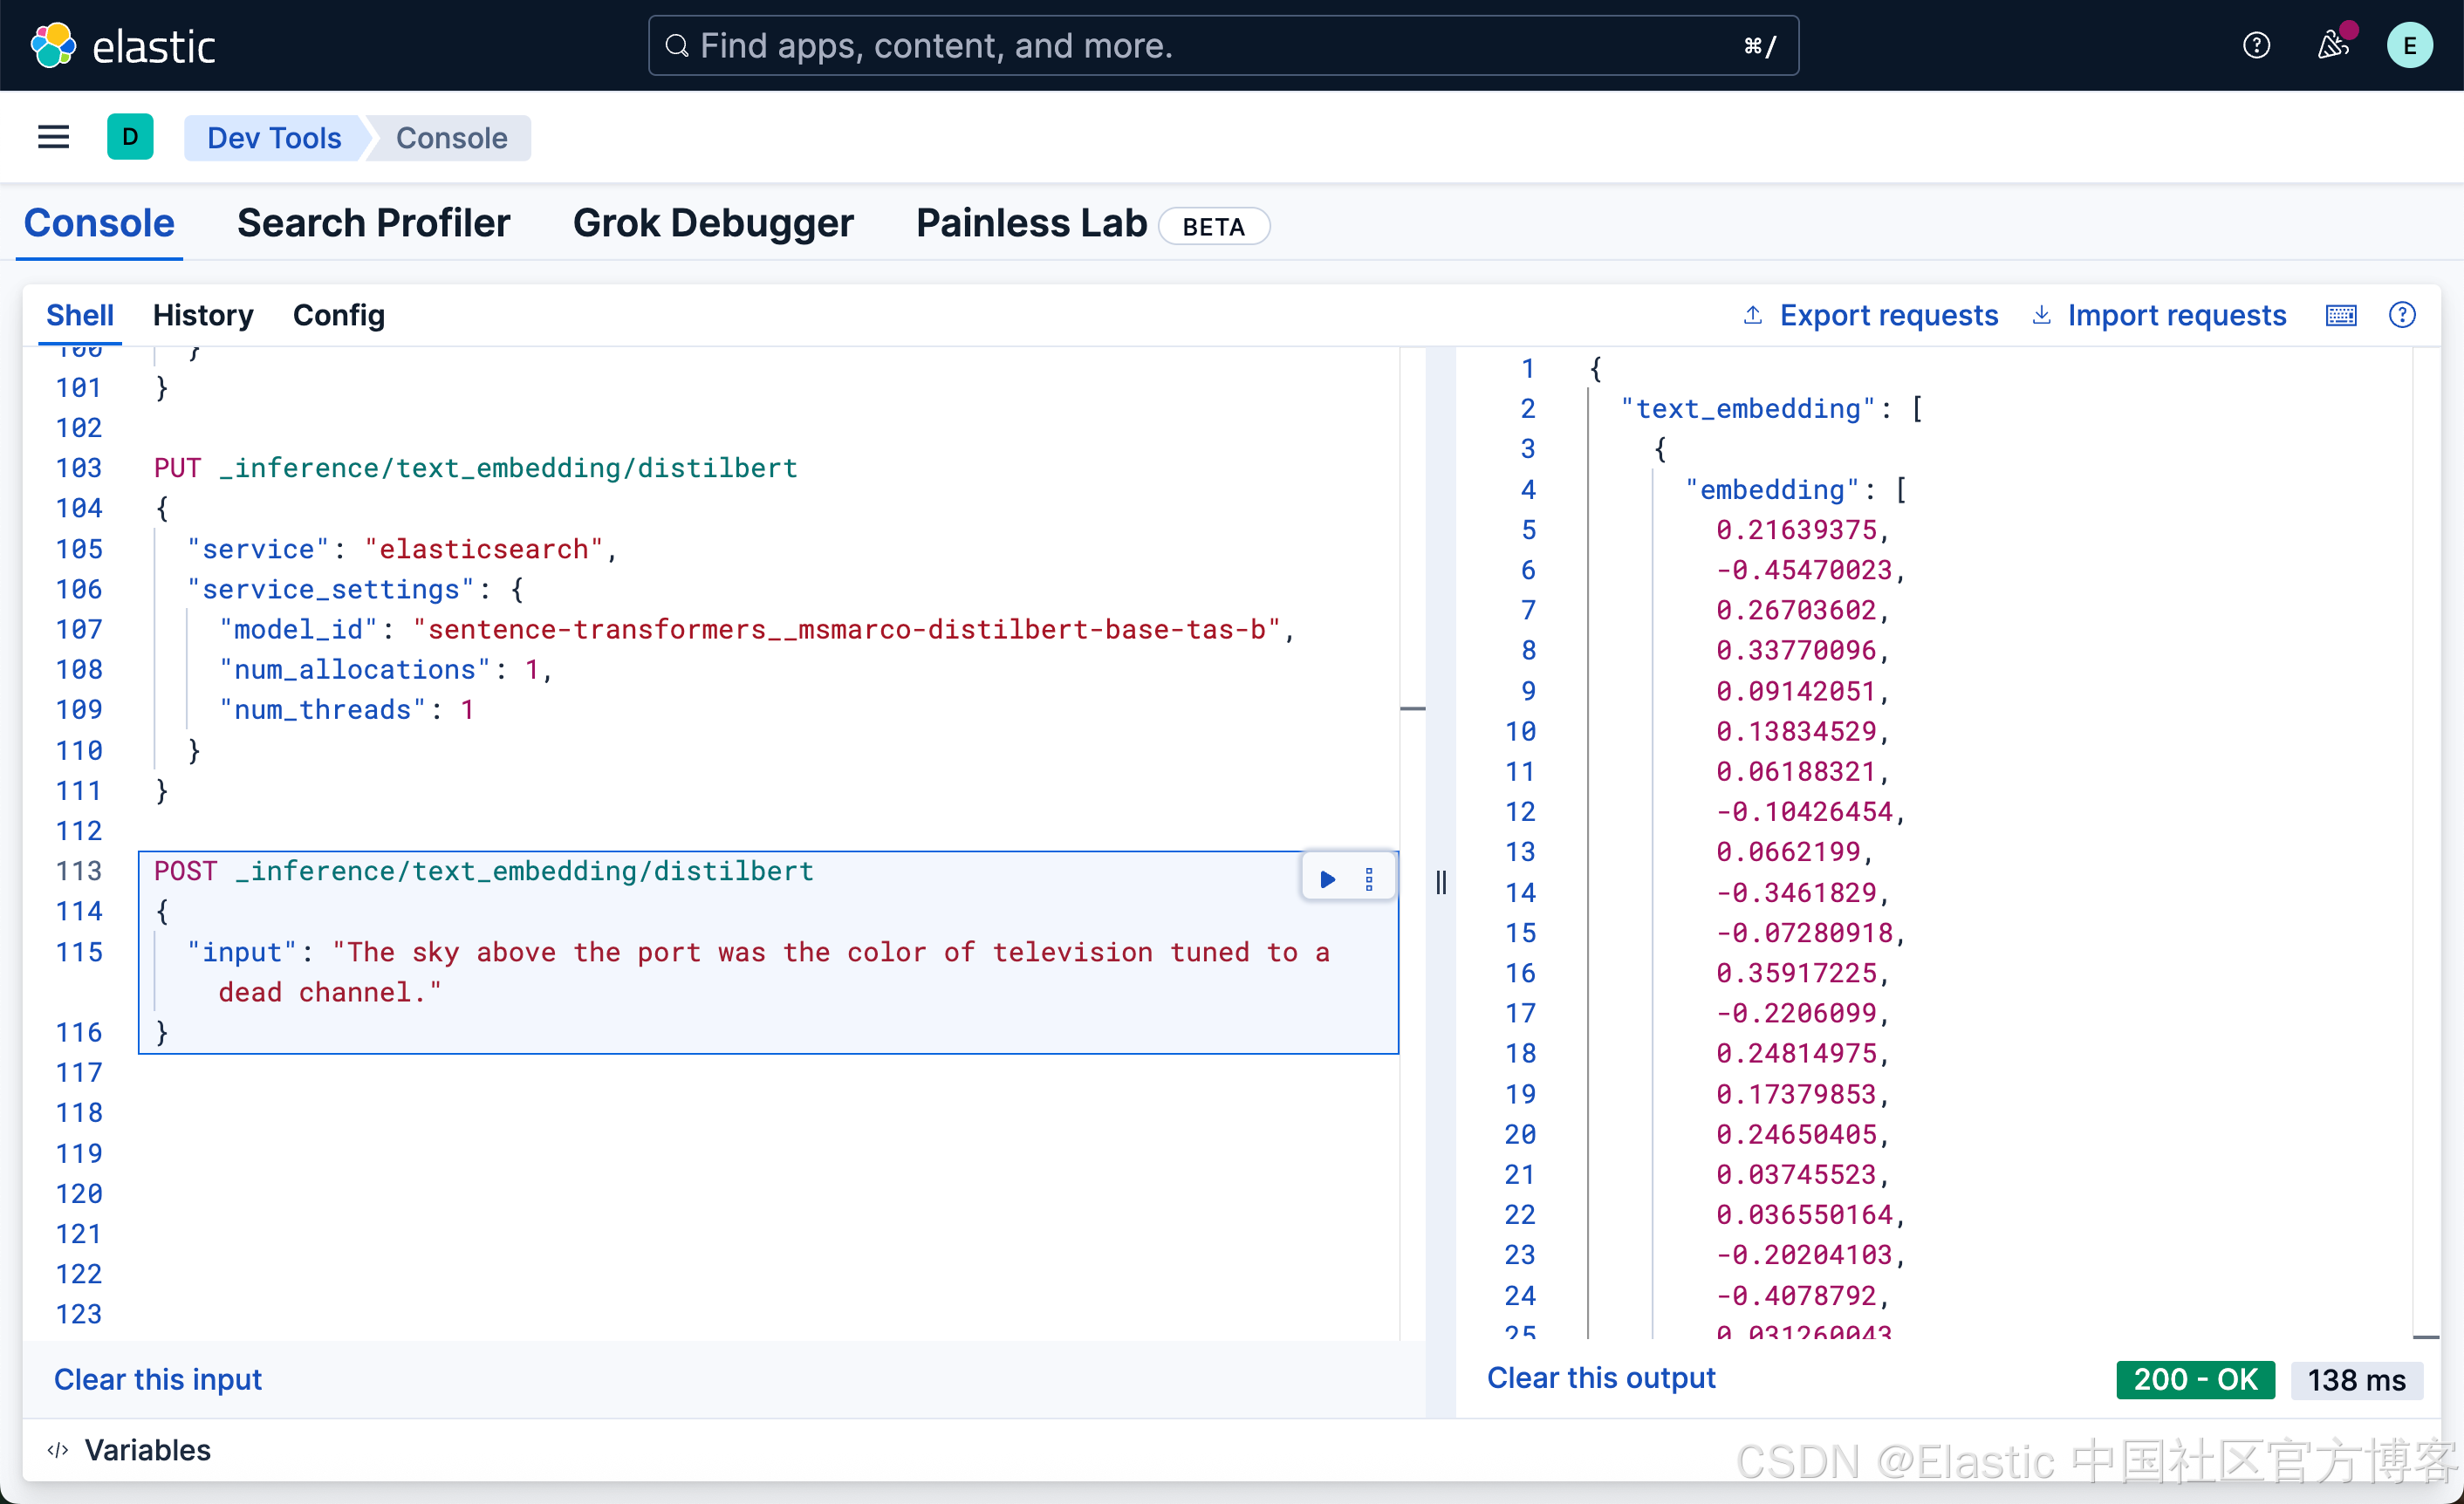
PUT _inference/text_embedding/distilbert
{"service": "elasticsearch","service_settings": {"model_id": "sentence-transformers__msmarco-distilbert-base-tas-b","num_allocations": 1,"num_threads": 1}
}
然后,我们使用如下的方法来创建嵌入:
Huggingface
你需要在 huggingface 网站上使用自己的信用卡来创建一个端点,并且获取在该网站上的 API key。我们可以使用如下的方式来创建一个端点:
PUT _inference/text_embedding/hugging-face-embeddings
{"service": "hugging_face","service_settings": {"api_key": "Your Huggingface key", "url": "Your endpoint" }
}
Alibaba
我在之前的文章 “Elasticsearch:使用阿里 infererence API 及 semantic text 进行向量搜索” 详述了如何创建阿里的嵌入及 completion 端点。这里就不再赘述了。
语义搜索示例
我们使用如下的命令来创建一个叫做 dense_vectors 的索引:
PUT dense_vectors
{"mappings": {"properties": {"inference_field": {"type": "semantic_text","inference_id": ".multilingual-e5-small-elasticsearch"}}}
}
我们使用如下的命令来创建两个文档:
PUT dense_vectors/_bulk
{"index": {"_id": "1"}}
{"inference_field": "腾讯(Tencent)是一家1998年成立于深圳的全球领先互联网科技公司,核心业务涵盖社交,游戏,金融科技,云计算等领域,旗下拥有微信,QQ等知名产品"}
{"index": {"_id": "2"}}
{"inference_field": "百度是拥有强大互联网基础的领先AI公司。百度愿景是:成为最懂用户,并能帮助人们成长的全球顶级高科技公司。于2000年1月1日在中关村创建了百度公司"}
我们使用如下的方式来进行搜索:
GET dense_vectors/_search
{"query": {"semantic": {"field": "inference_field","query": "腾讯是什么样的一家公司?"}}
}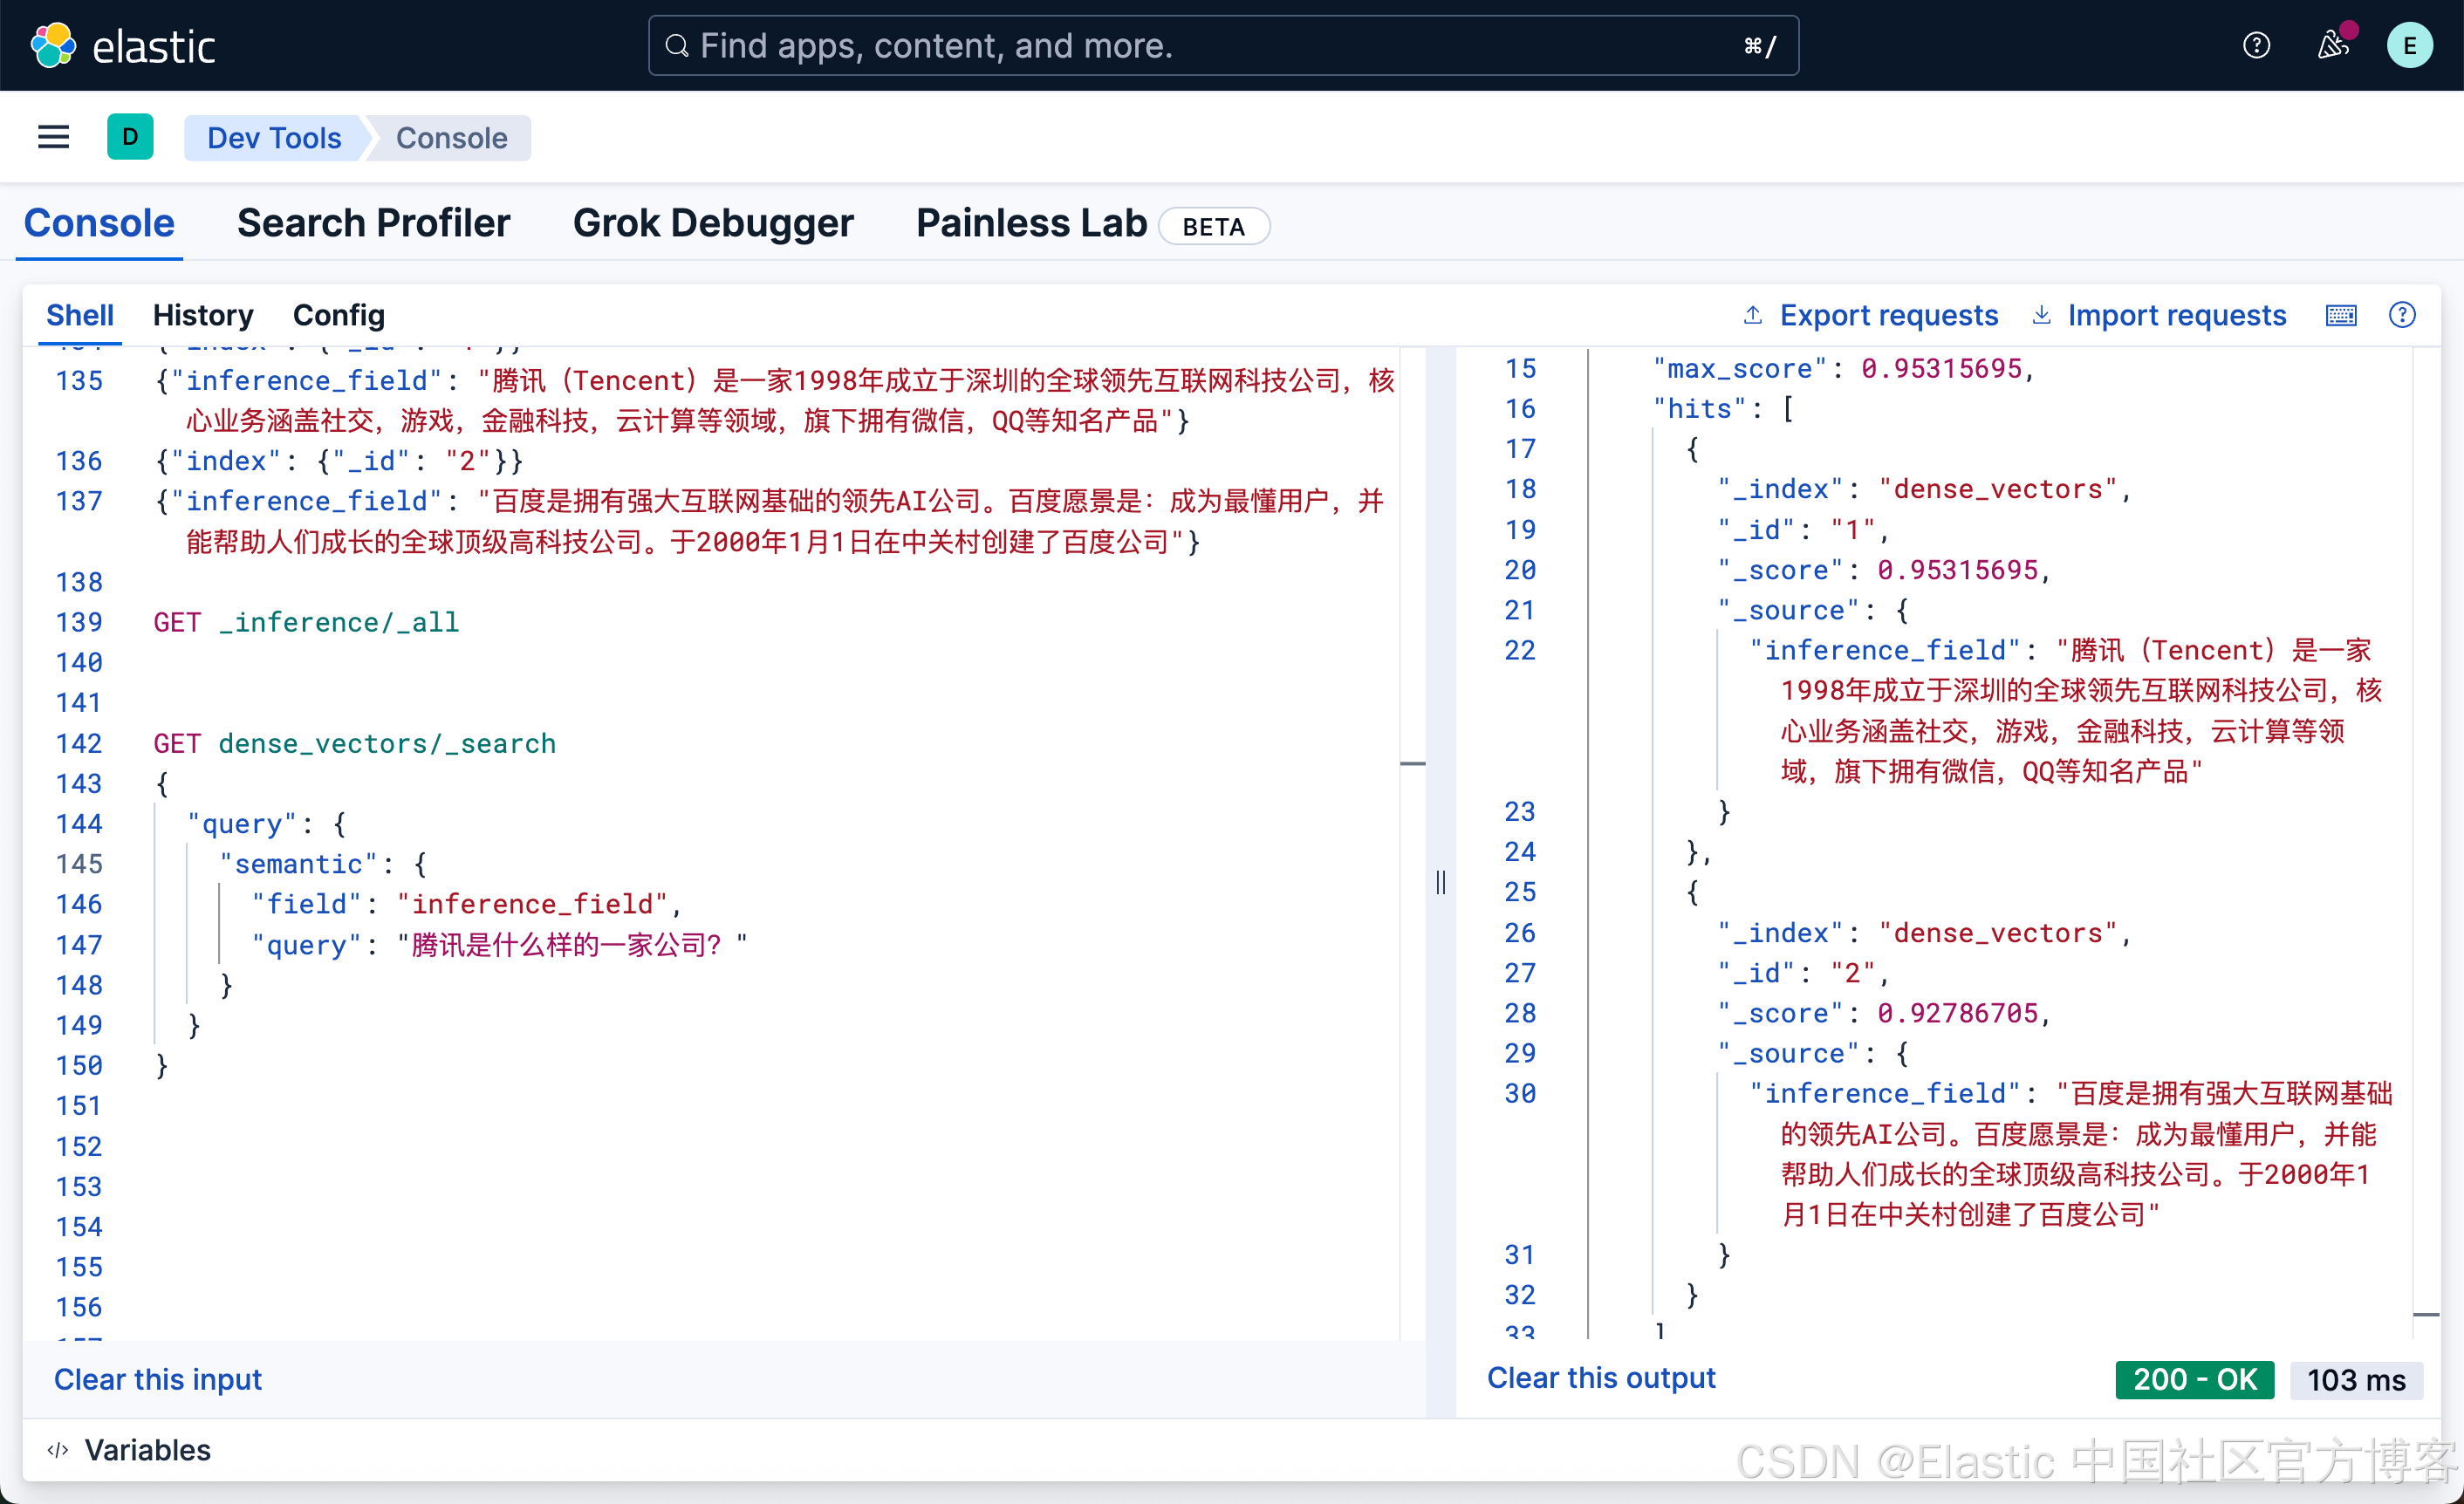
很显然,含有腾讯的文档排名是第一的,尽管百度的结果也出现了。因为我们只有两个文档,含有百度的文档的得分没有腾讯的高,所以排在第二位。
我们也可以使用如下的命令来进行搜索:
GET dense_vectors/_search
{"query": {"match": {"inference_field": "腾讯是什么样的一家公司?"}}
}
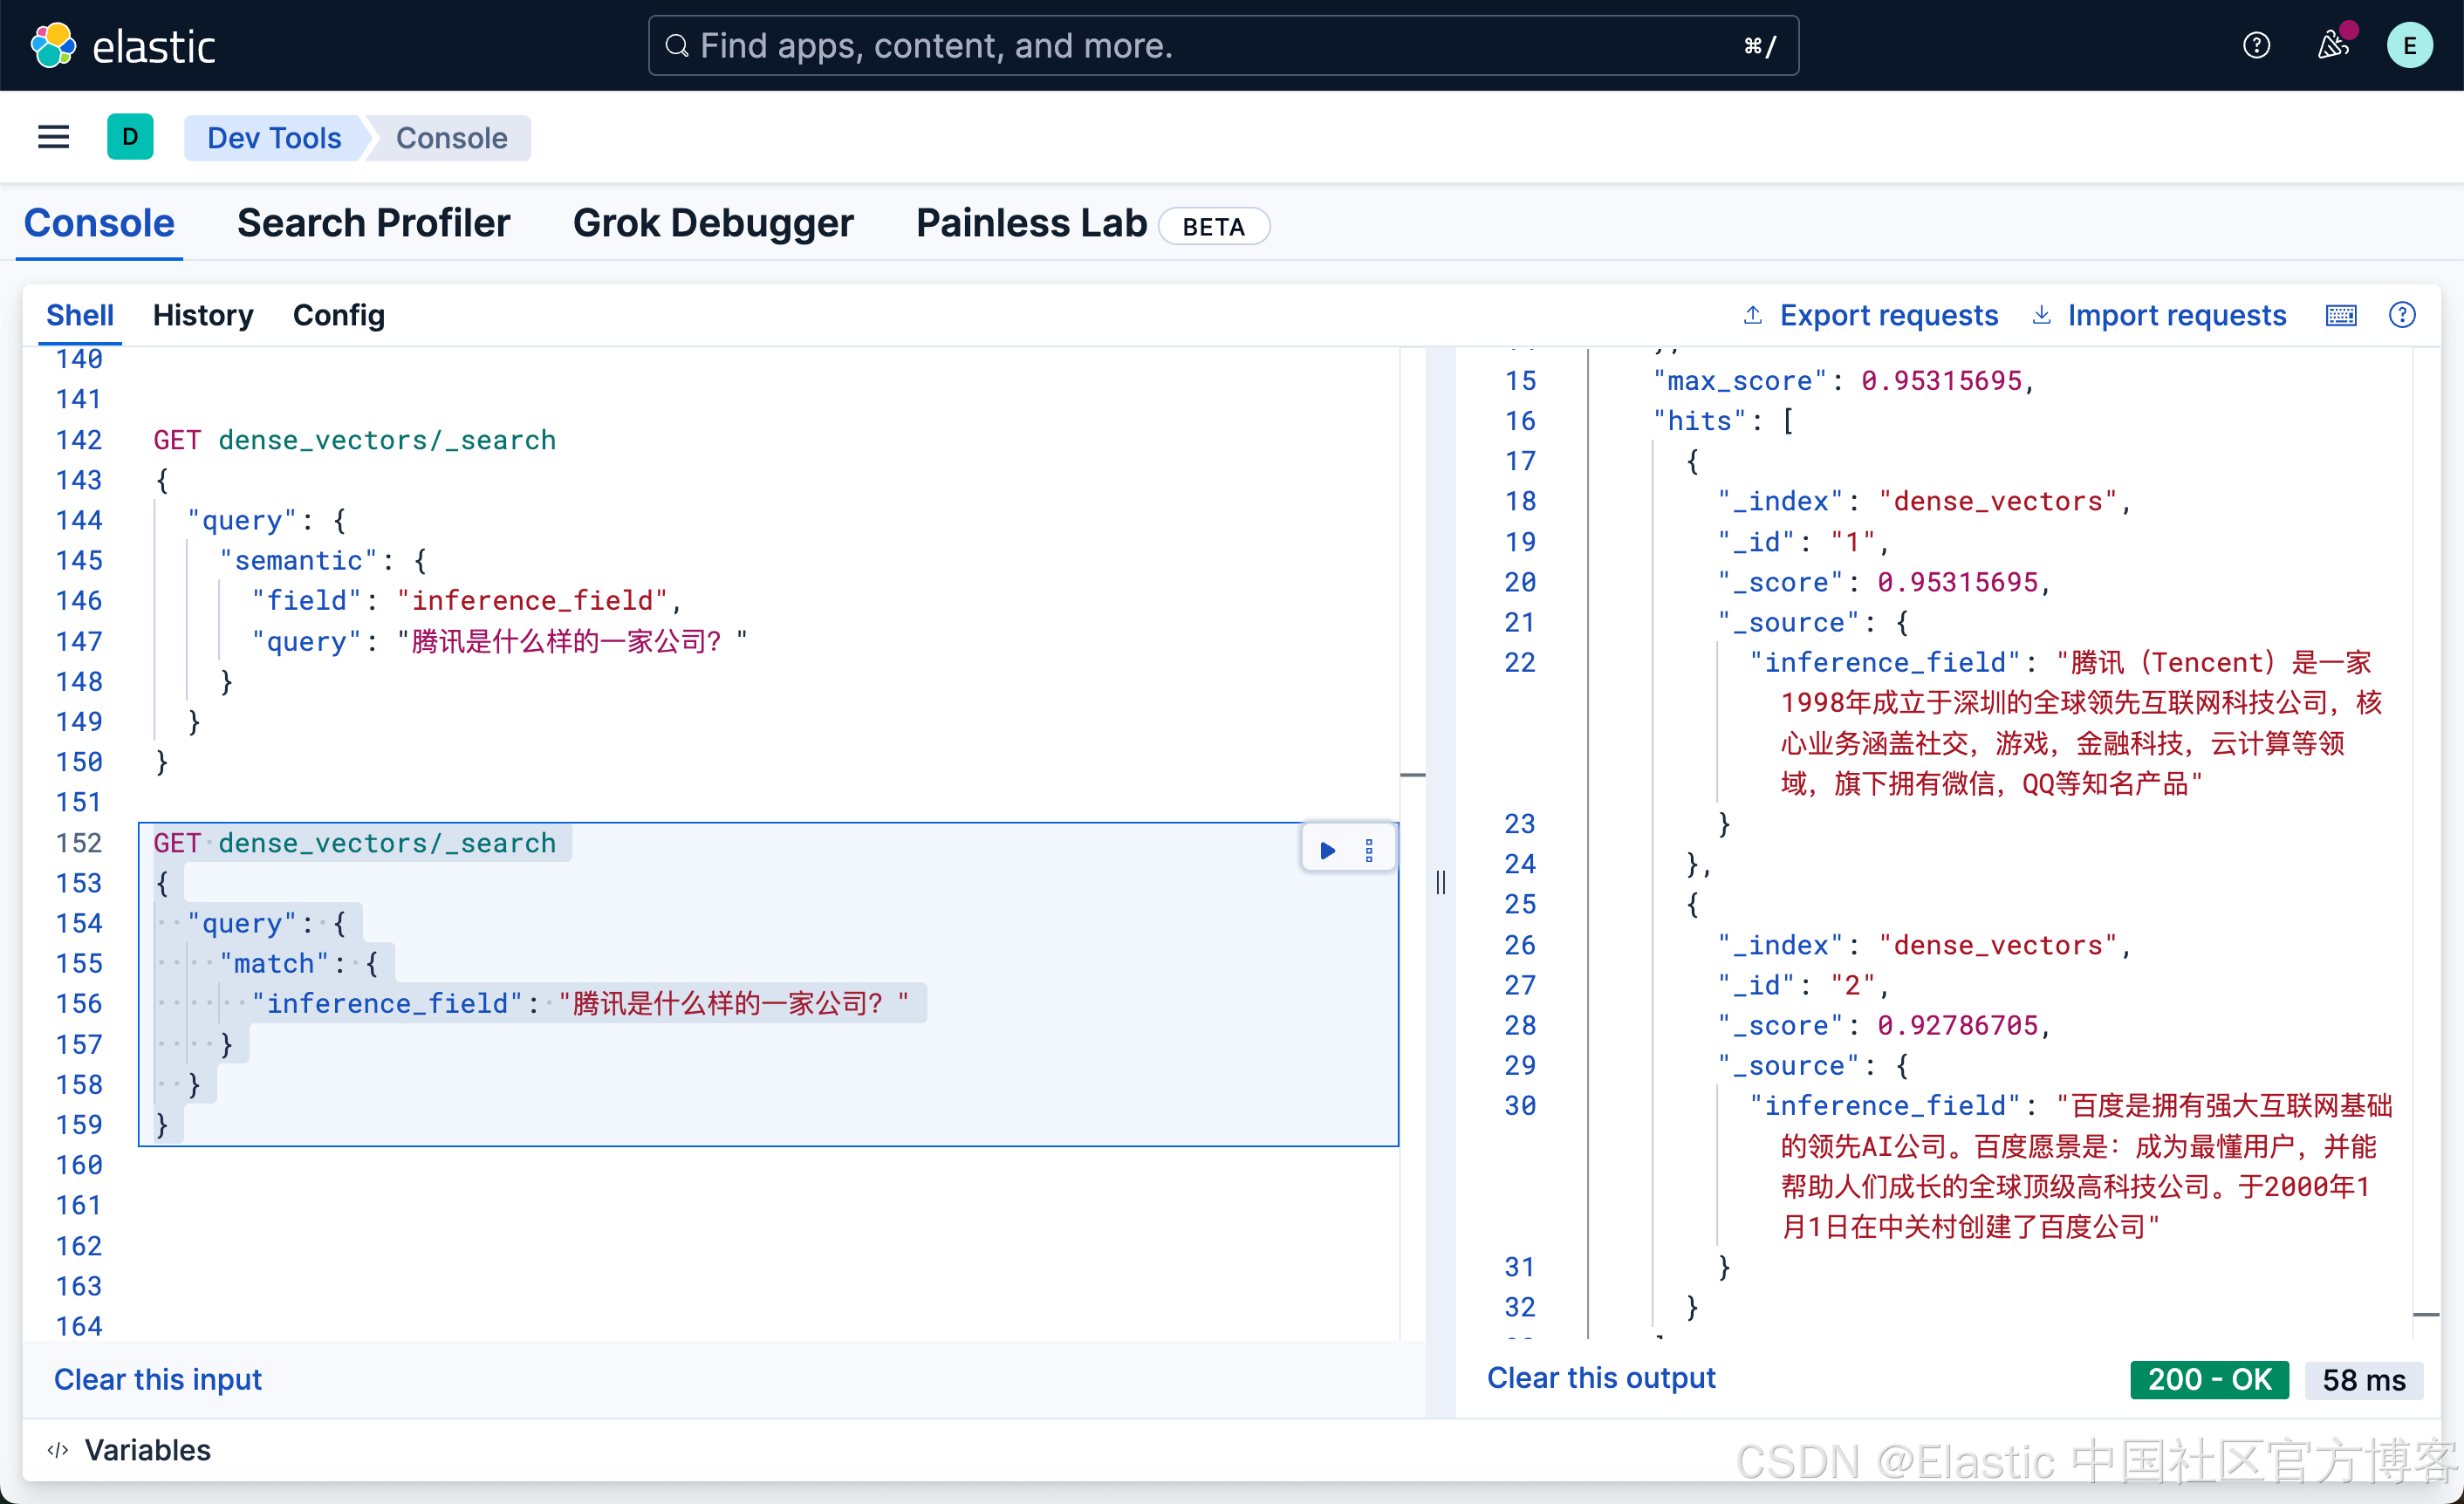
很显然,这种写法和我们之前的 DSL 的 match 写法没有任何的区别,尽管 inference_field 是一个向量字段。相比较之前的词汇搜索:
PUT lexical_index/_bulk
{"index": {"_id": "1"}}
{"text": "腾讯全称“深圳腾讯计算机系统有限公司”,由马化腾,张志东等五位创始人于1998年11月创立,总部位于中国深圳南山区。2004年数据显示,腾讯年营业额达6090亿元,员工超10.5万人,位列《财富》世界500强第141位"}
{"index": {"_id": "2"}}
{"text": "百度拥有数万名研发工程师,这是中国乃至全球都顶尖的技术团队。这支队伍掌握着世界上领先的搜索引擎技术,使百度成为美国,俄罗斯和韩国之外,全球仅有的4个拥有搜索引擎核心技术的国家之一"}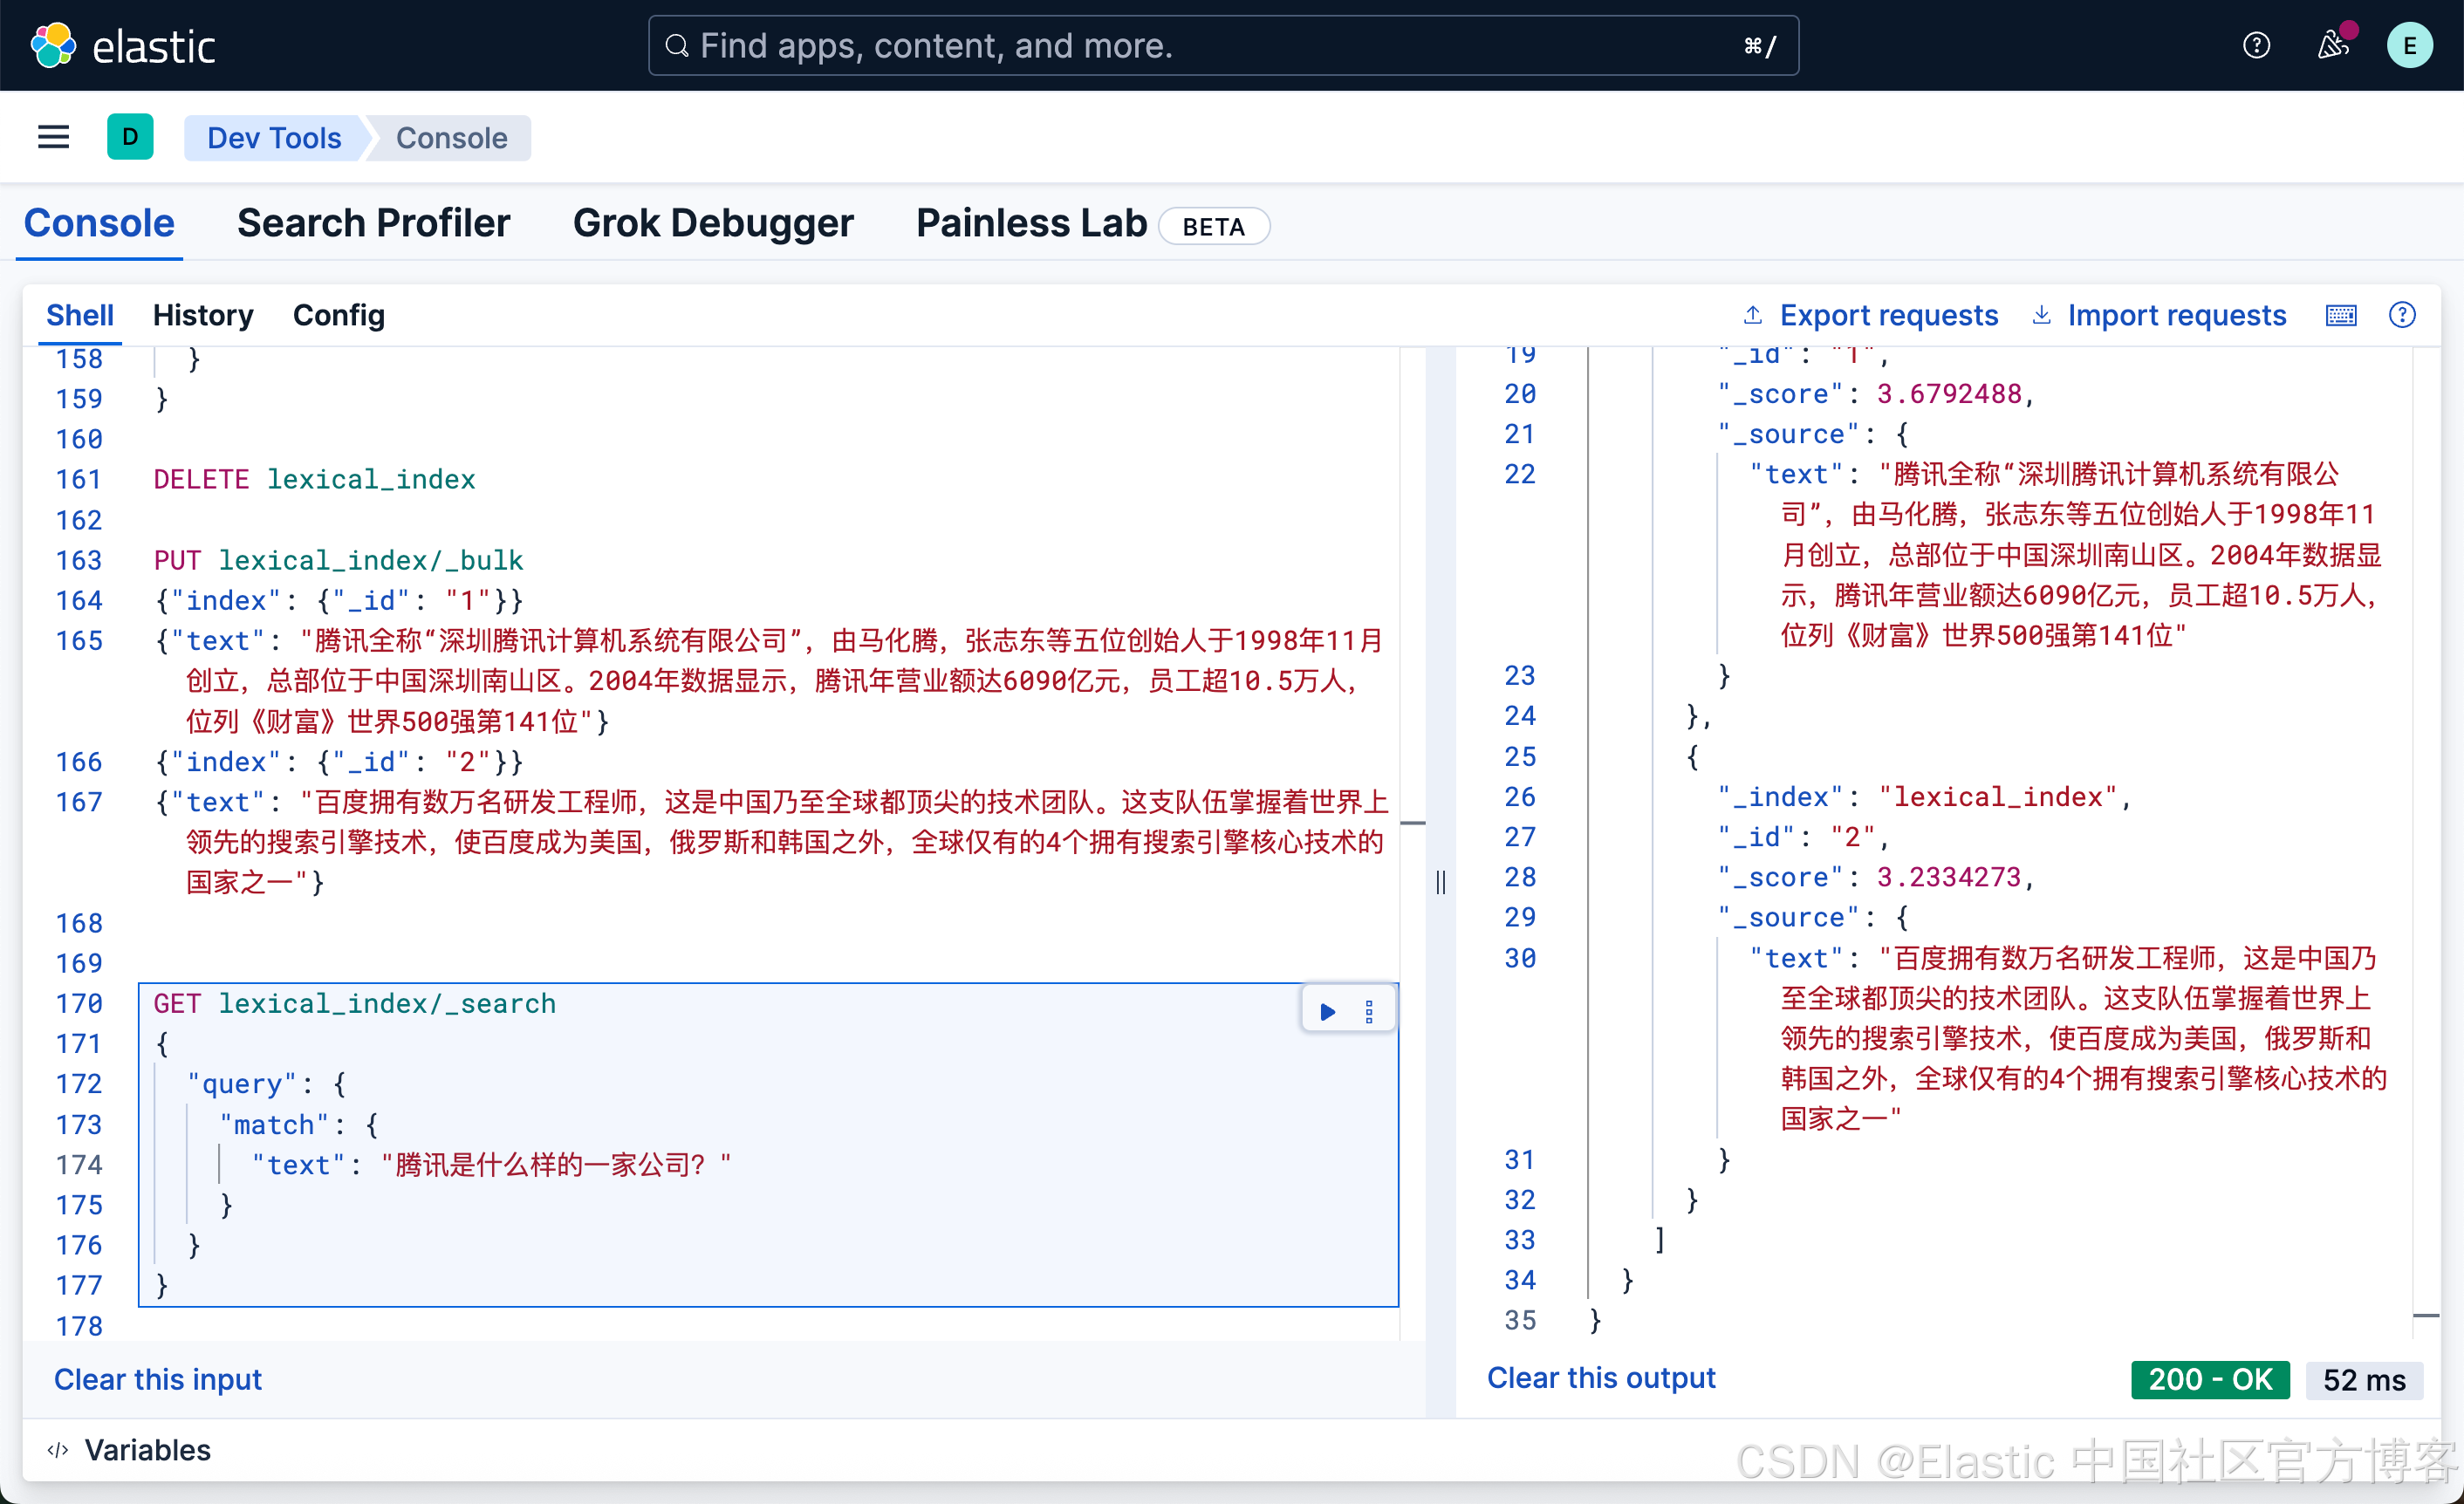
我们还可以使用 ES|QL 来实现向量字段的搜索:
POST _query?format=txt
{"query": """FROM dense_vectors METADATA _score| WHERE  inference_field : "Baidu 是什么样的公司?" | SORT _score DESC"""
}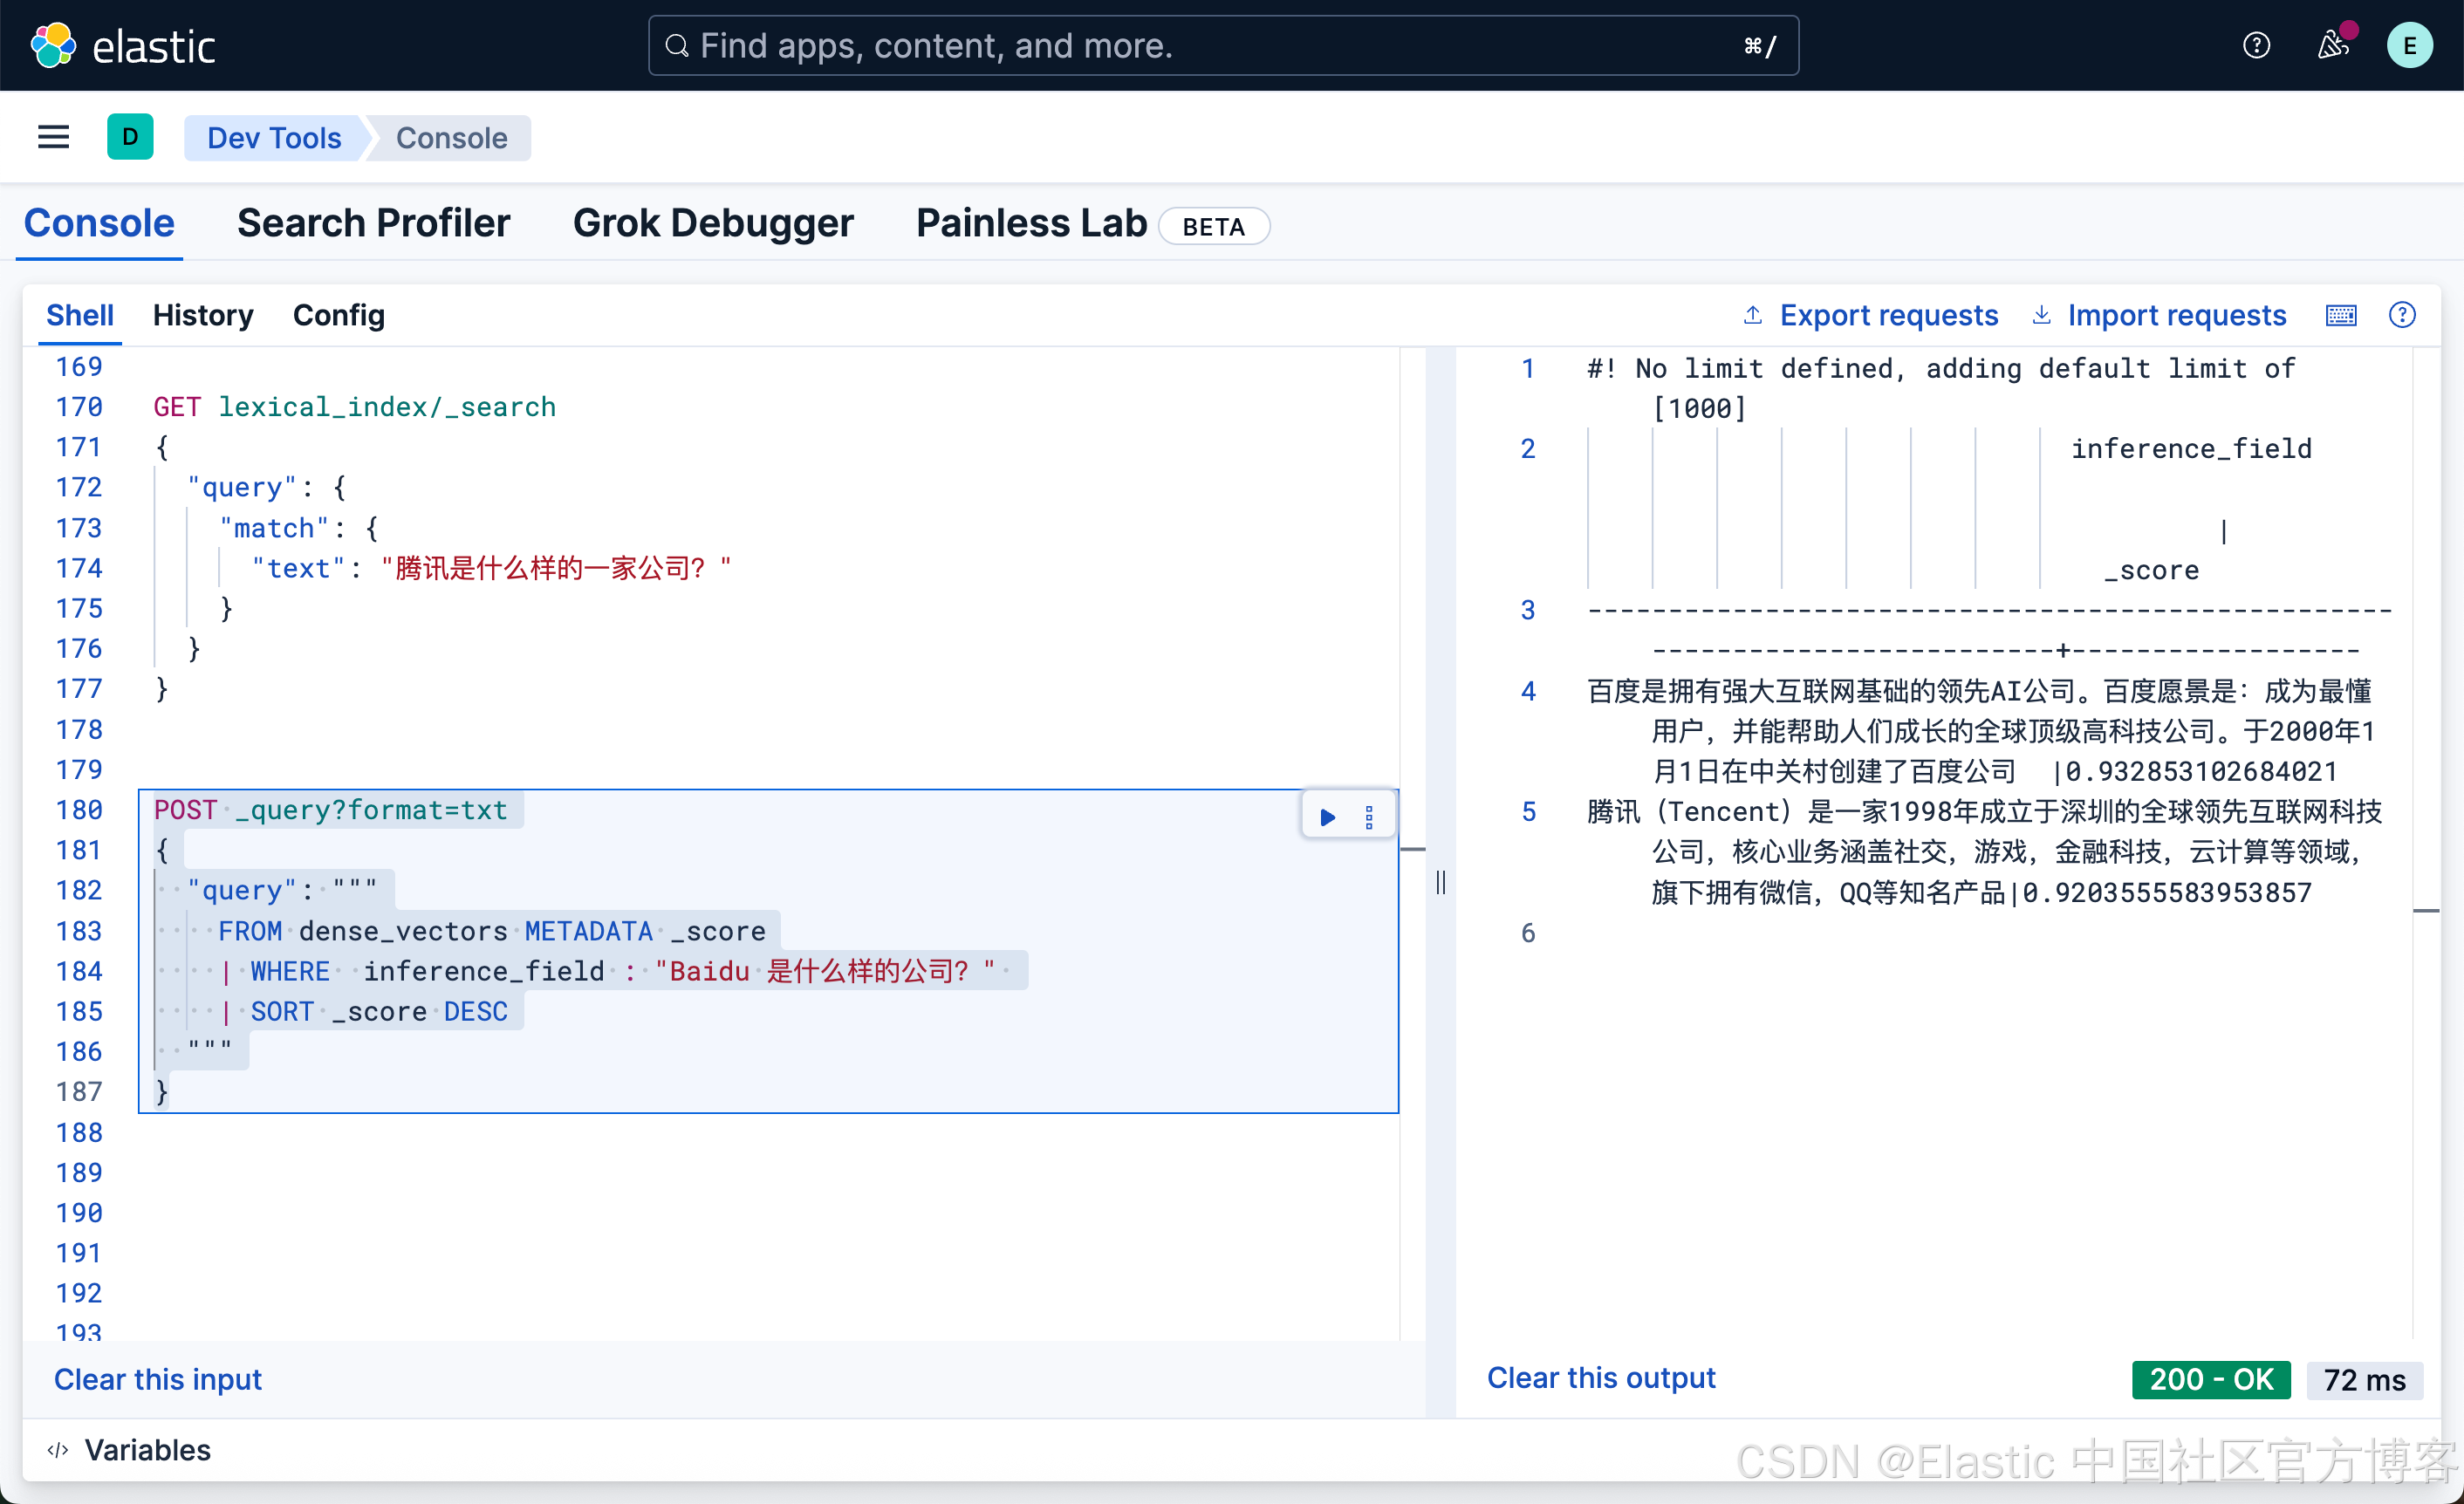
这次我们搜索的结果,百度排名第一,但是细心的开发者可能会发现我们原来的文本中并不含有 Baidu 这样的英文单词?那么它是怎么做到的呢?其实 E5 模型是一个多语言的模型,它可以针对多国语言进行搜索。
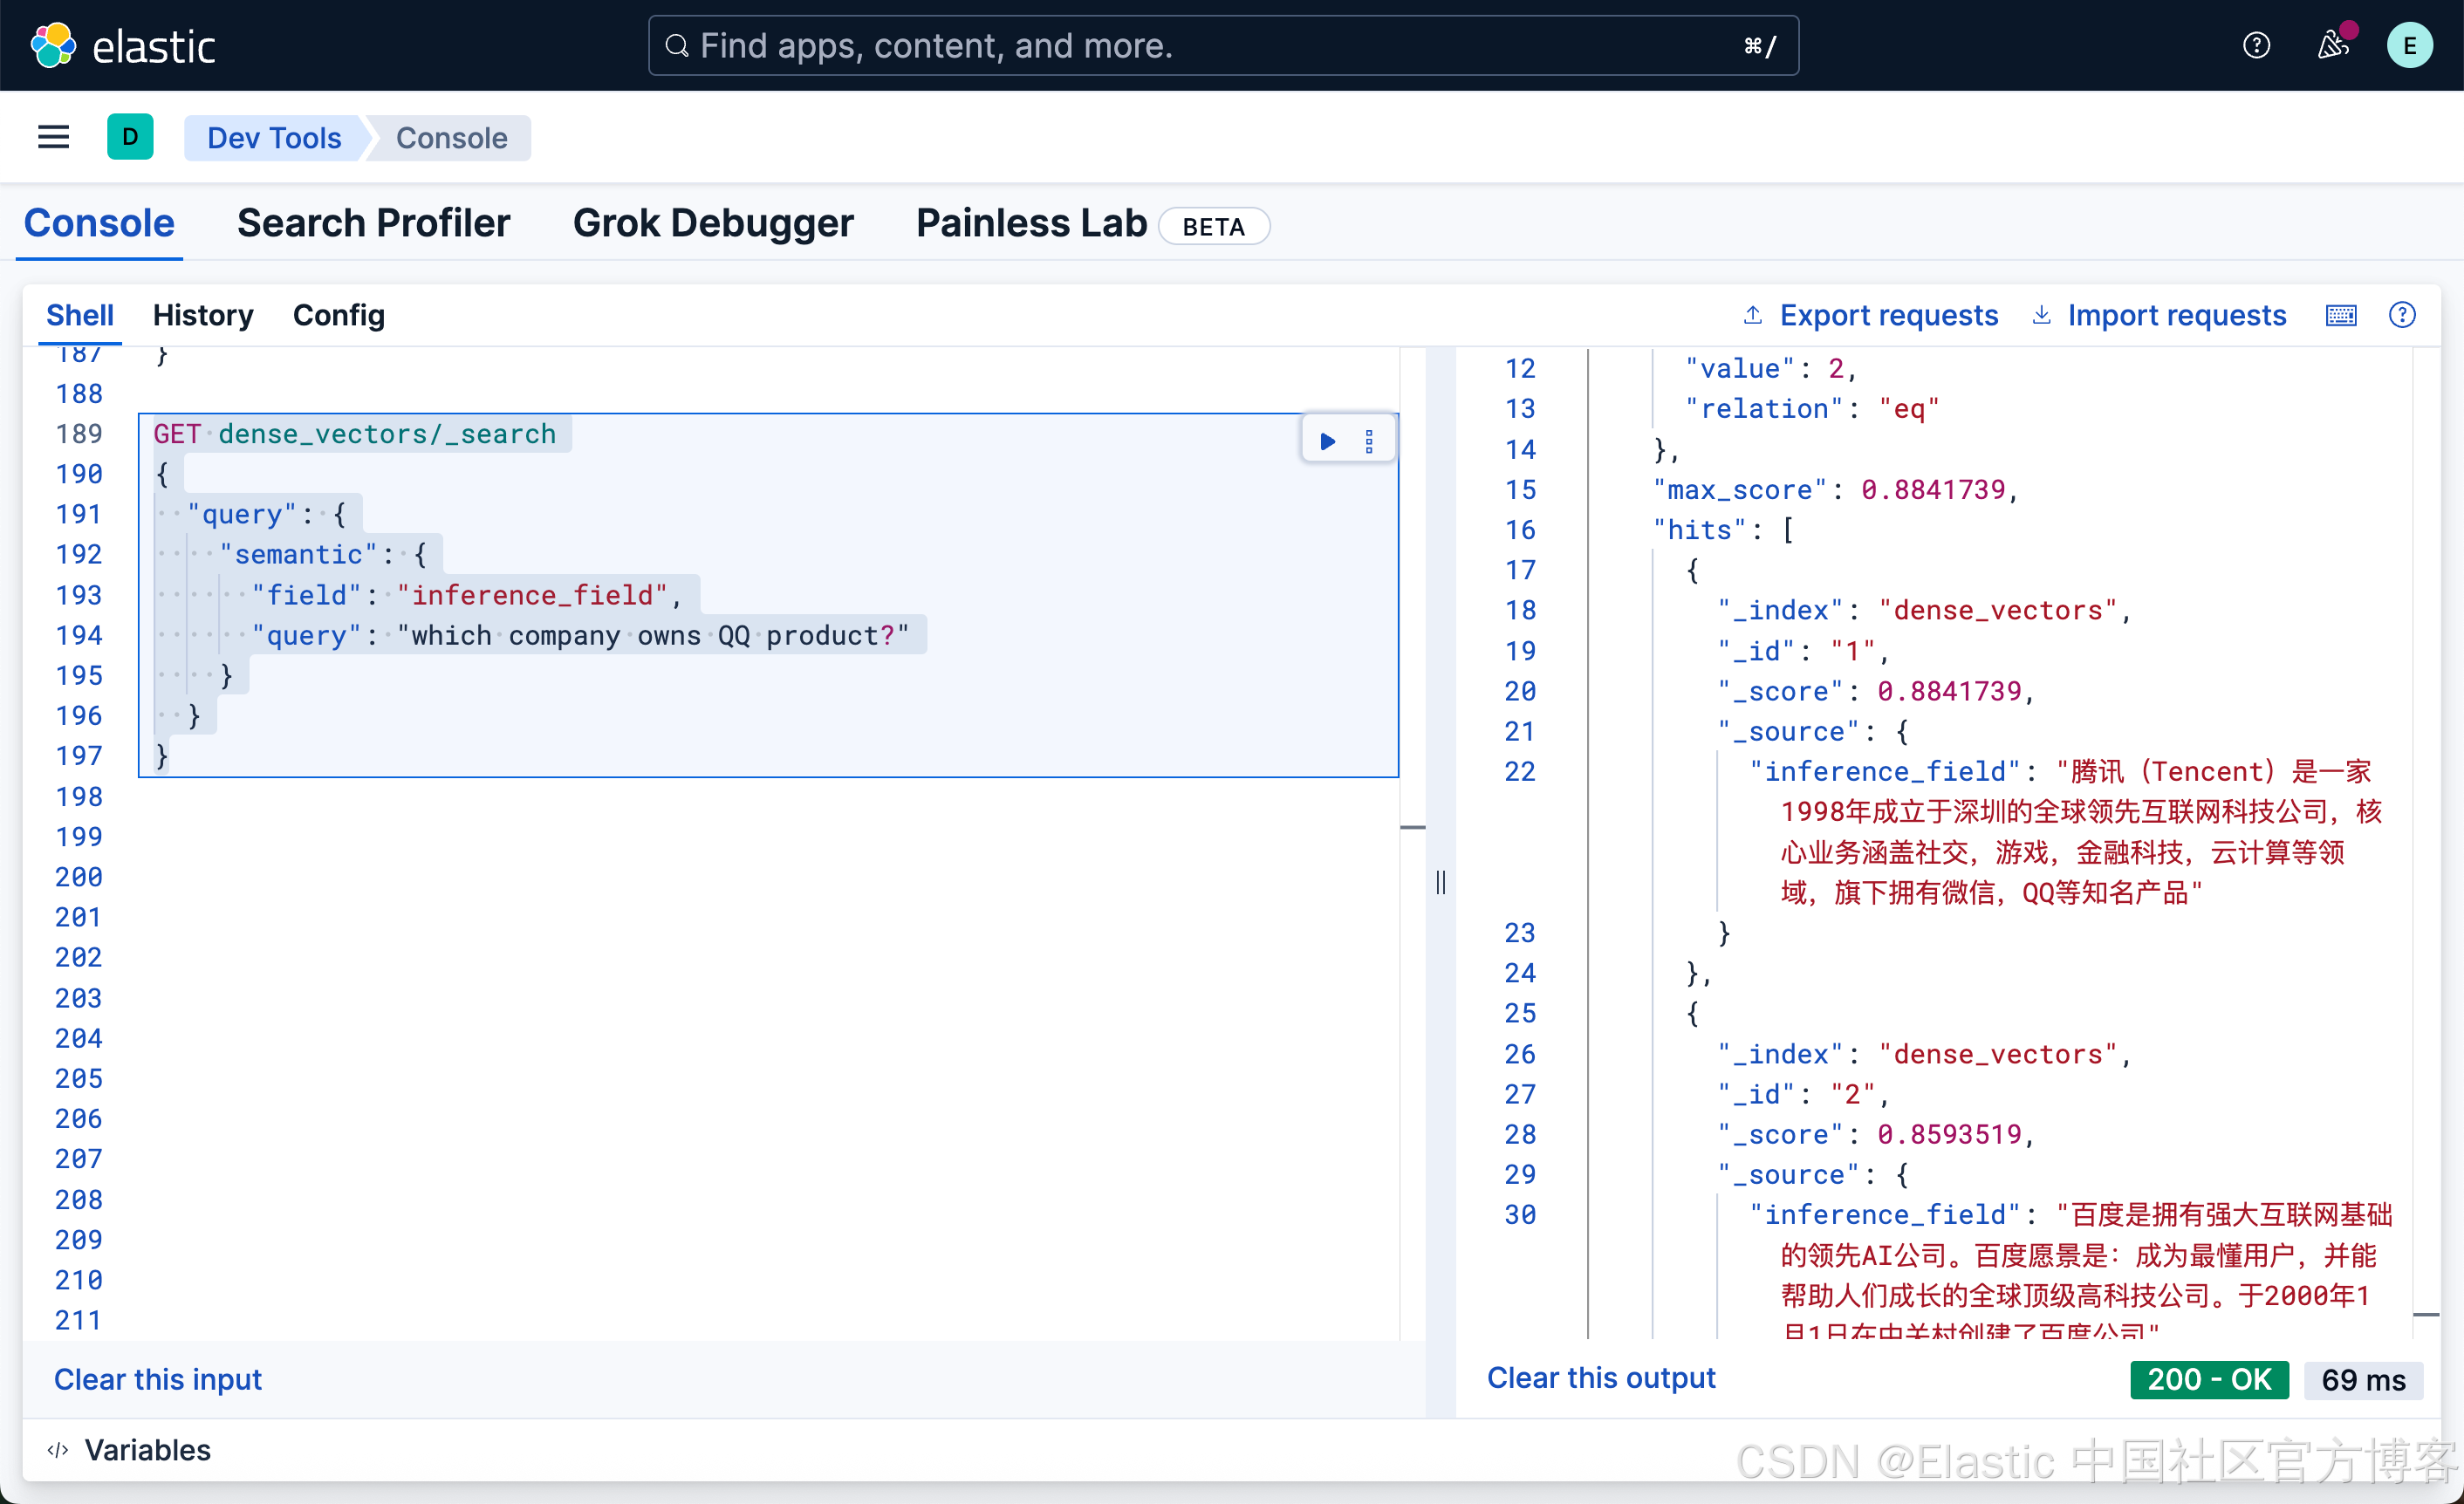
我们还可以尝试如下的搜:
GET dense_vectors/_search
{"query": {"semantic": {"field": "inference_field","query": "which company owns QQ product?"}}
}
GET dense_vectors/_search
{"query": {"semantic": {"field": "inference_field","query": "which company has the chat product?"}}
}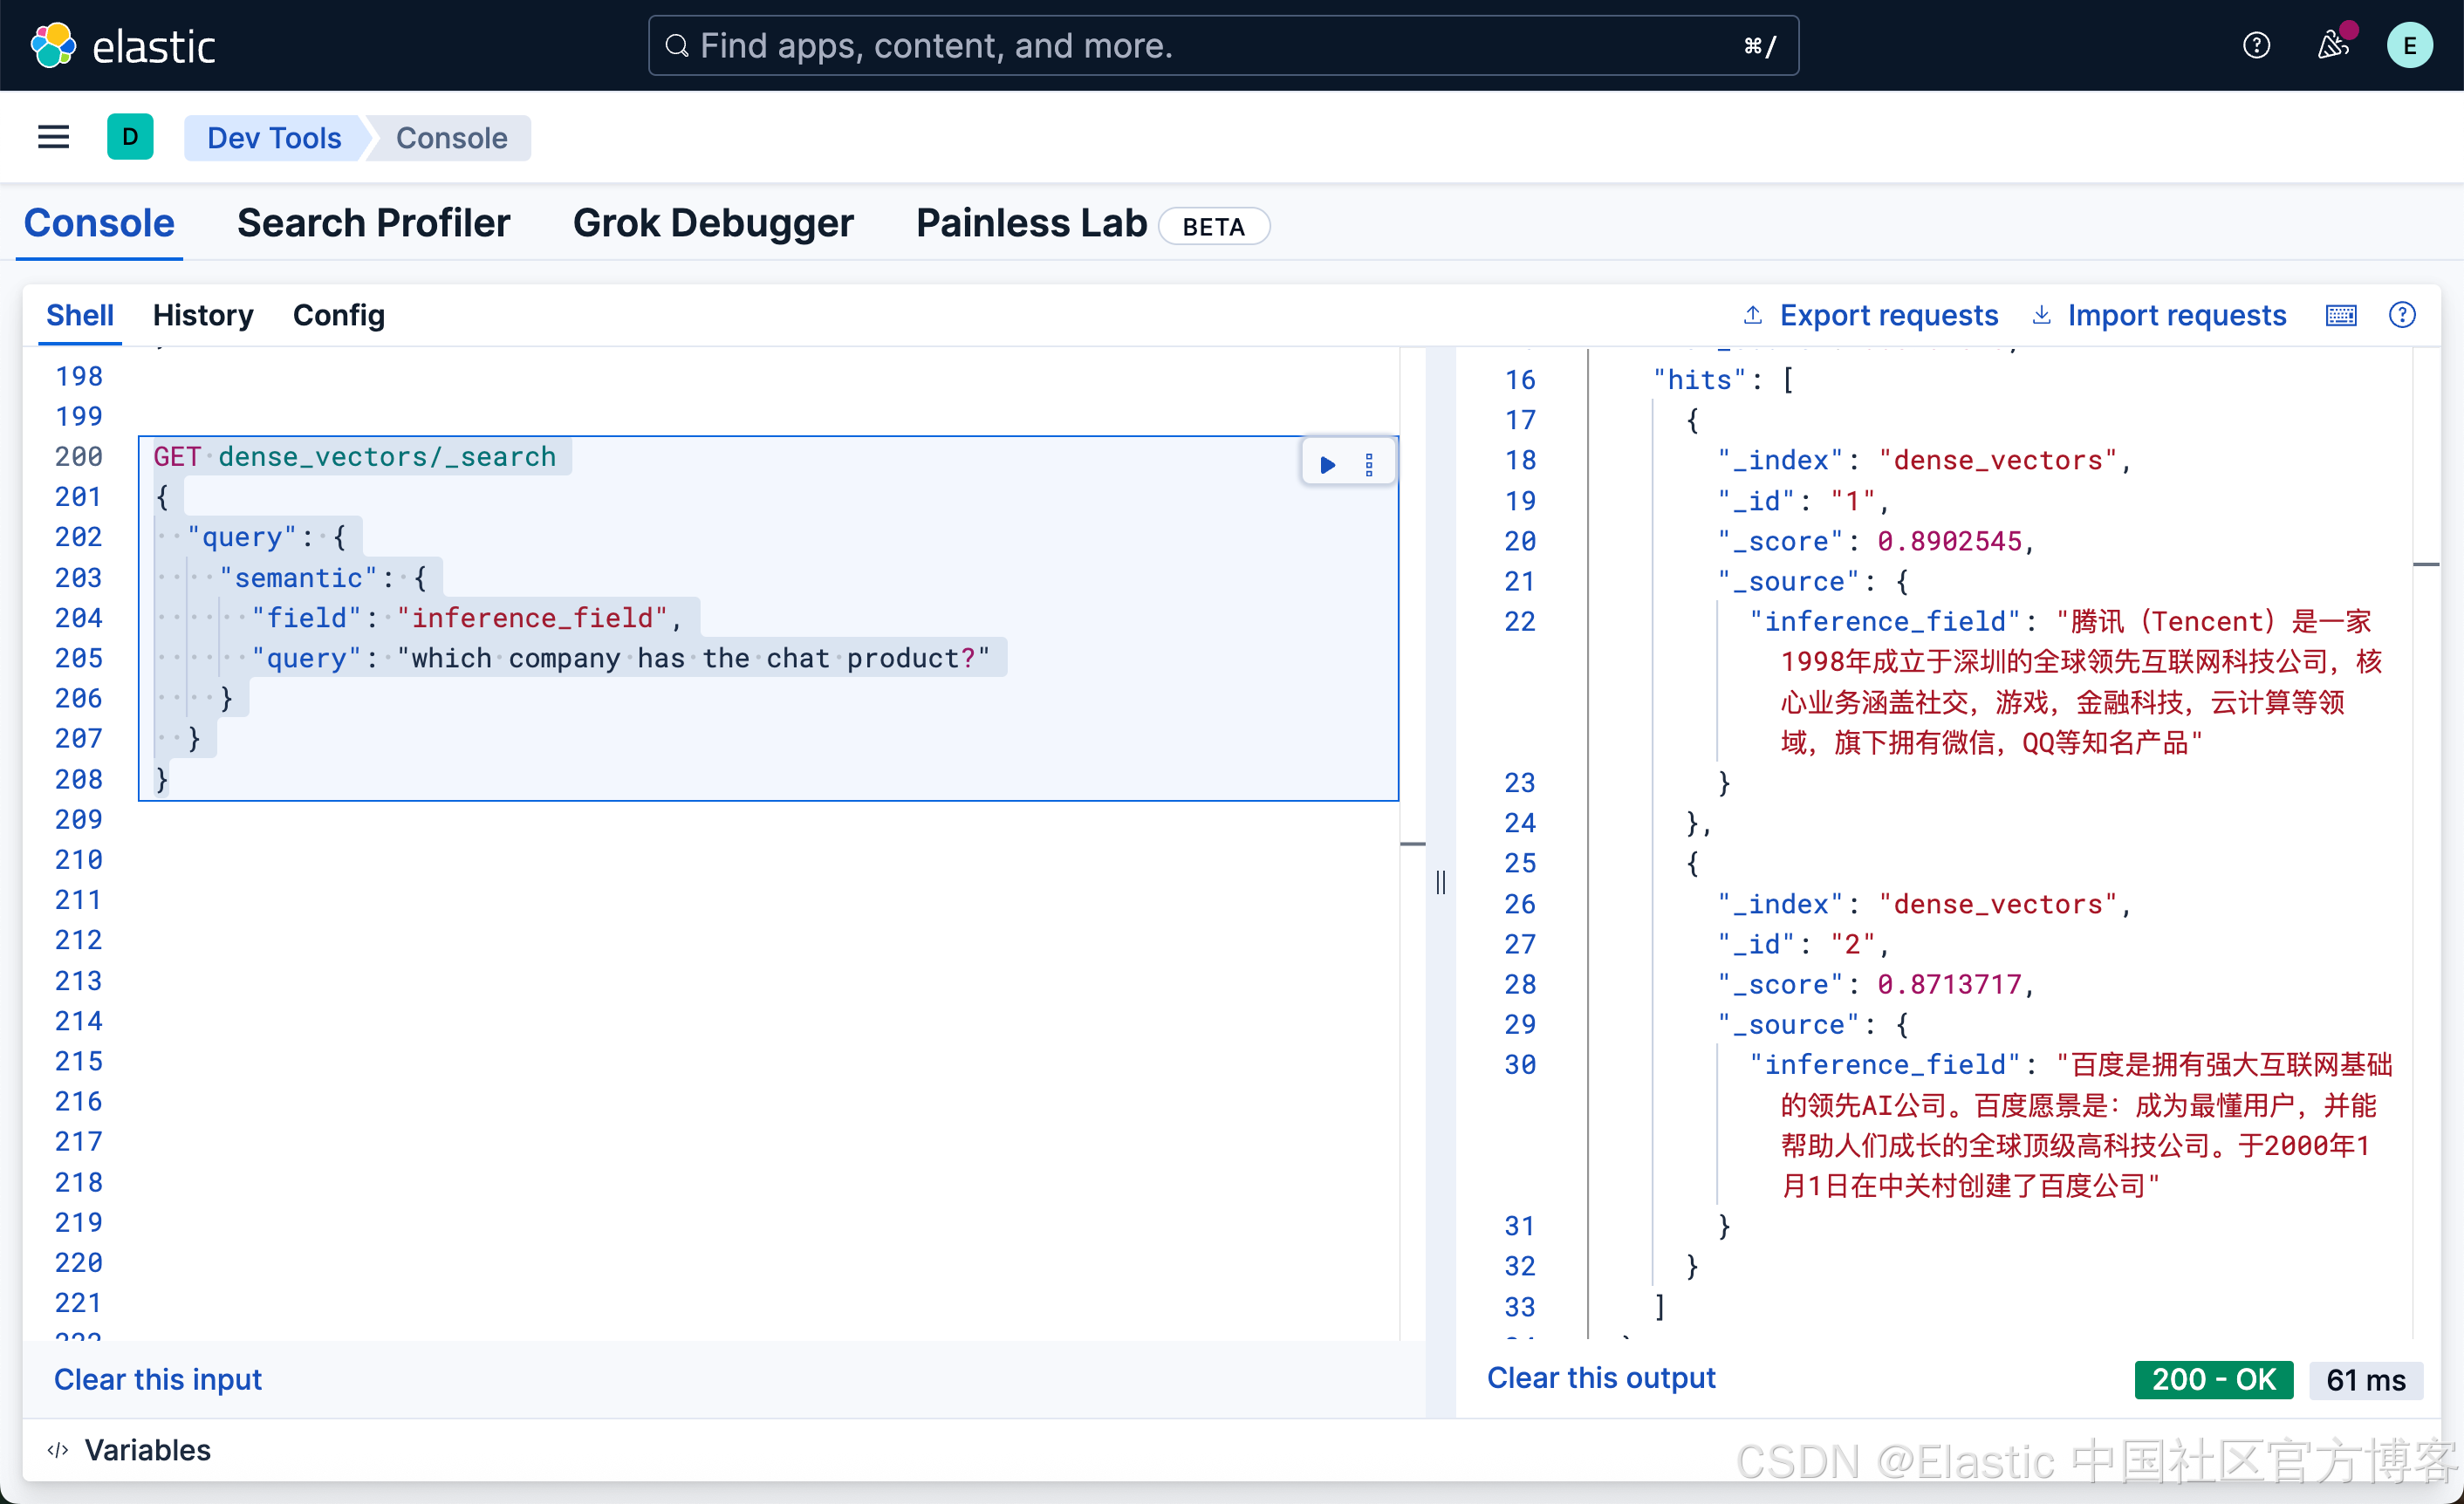
很显然,我们的文档中并没有含有聊天这样的词汇,但是我们使用英文搜索 chat 这样的词,它也能帮我们找到腾讯微第一。我们甚至可以使用日文来进行搜索:
GET dense_vectors/_search
{"query": {"semantic": {"field": "inference_field","query": "チャット製品を提供している会社はどれですか?"}}
}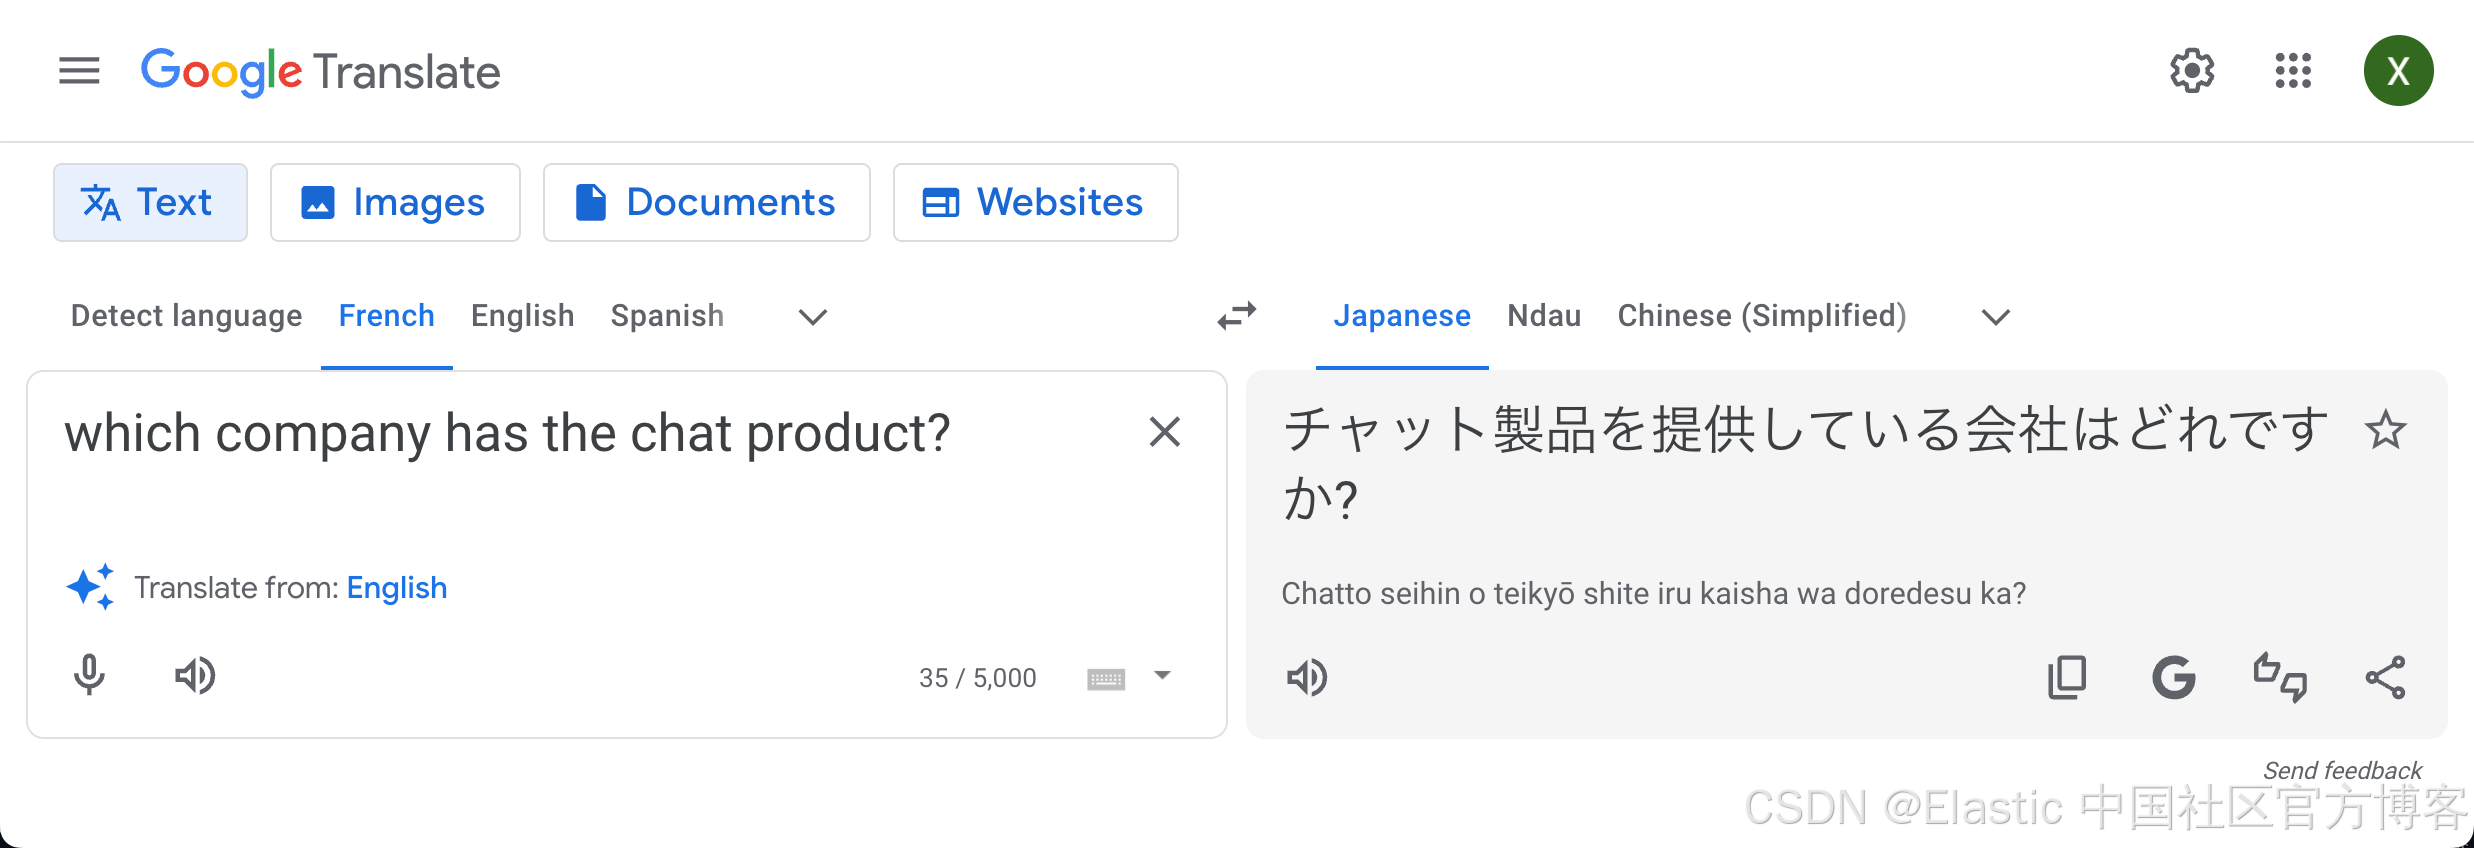
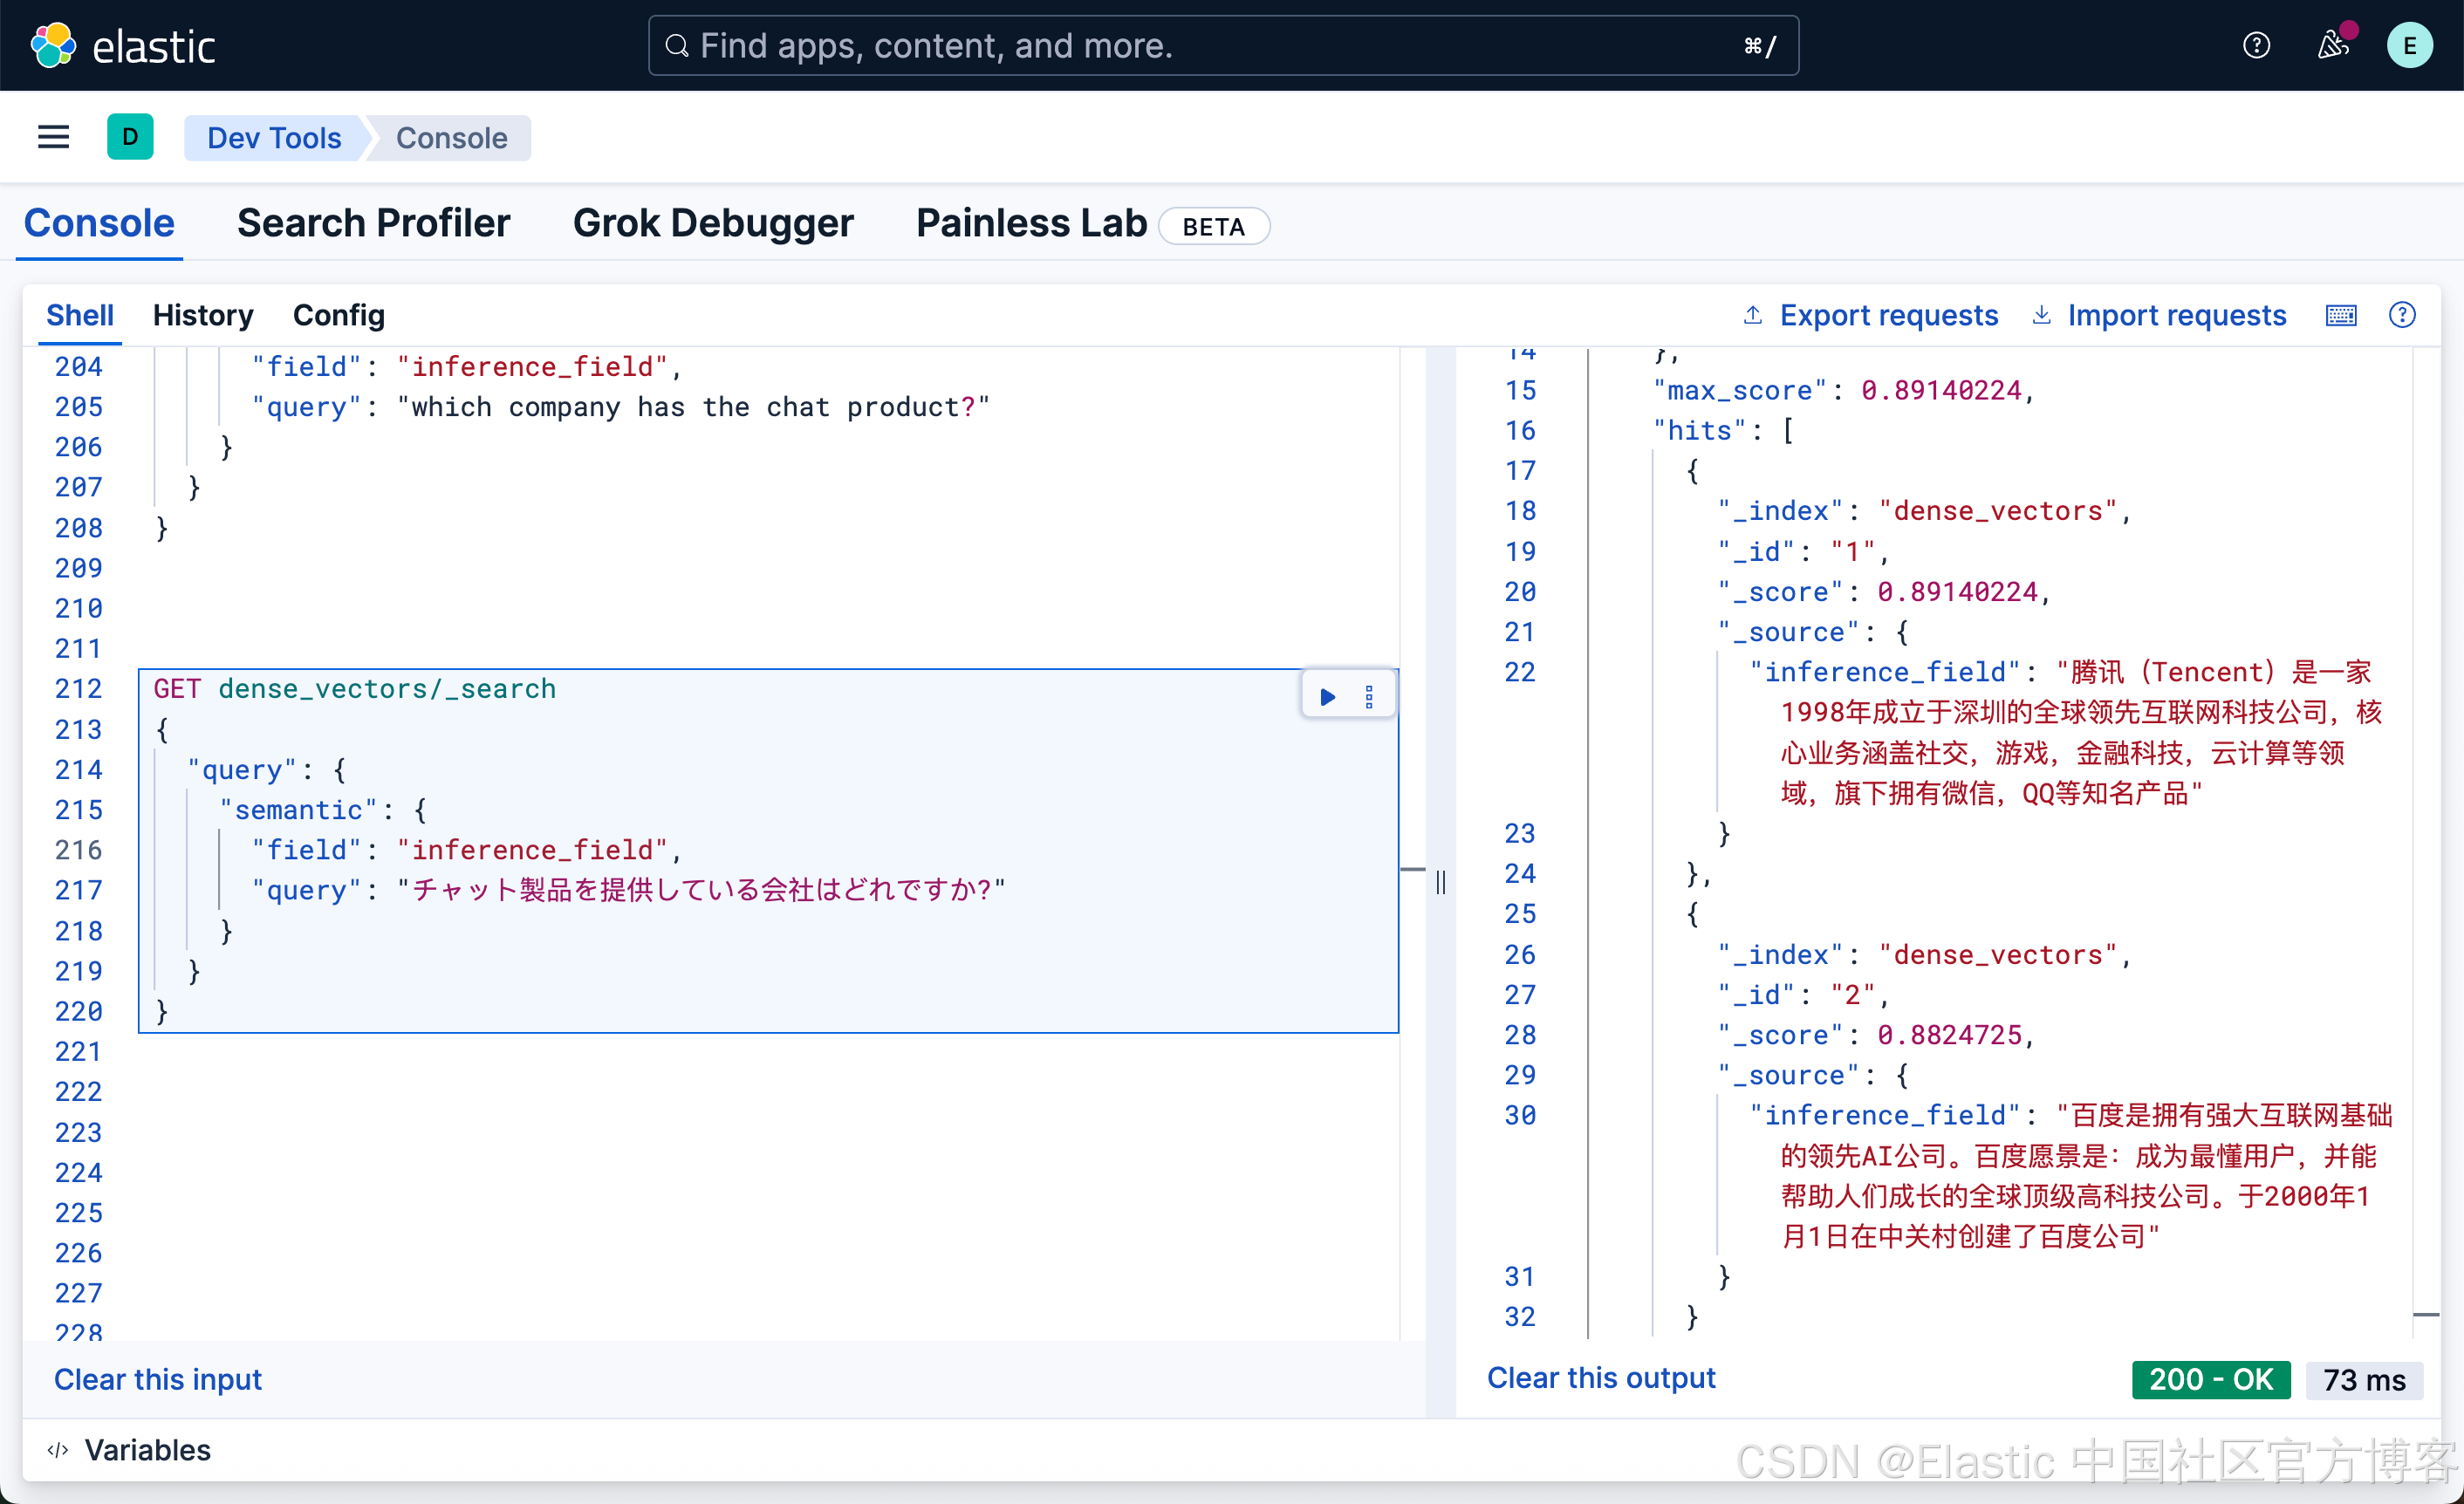
我们可以看出来,使用日文也可以搜素出我们想要的结果。
我们再看看如下的搜索结果:
GET dense_vectors/_search
{"query": {"match": {"inference_field": "中国的搜索公司是哪个?"}}
}
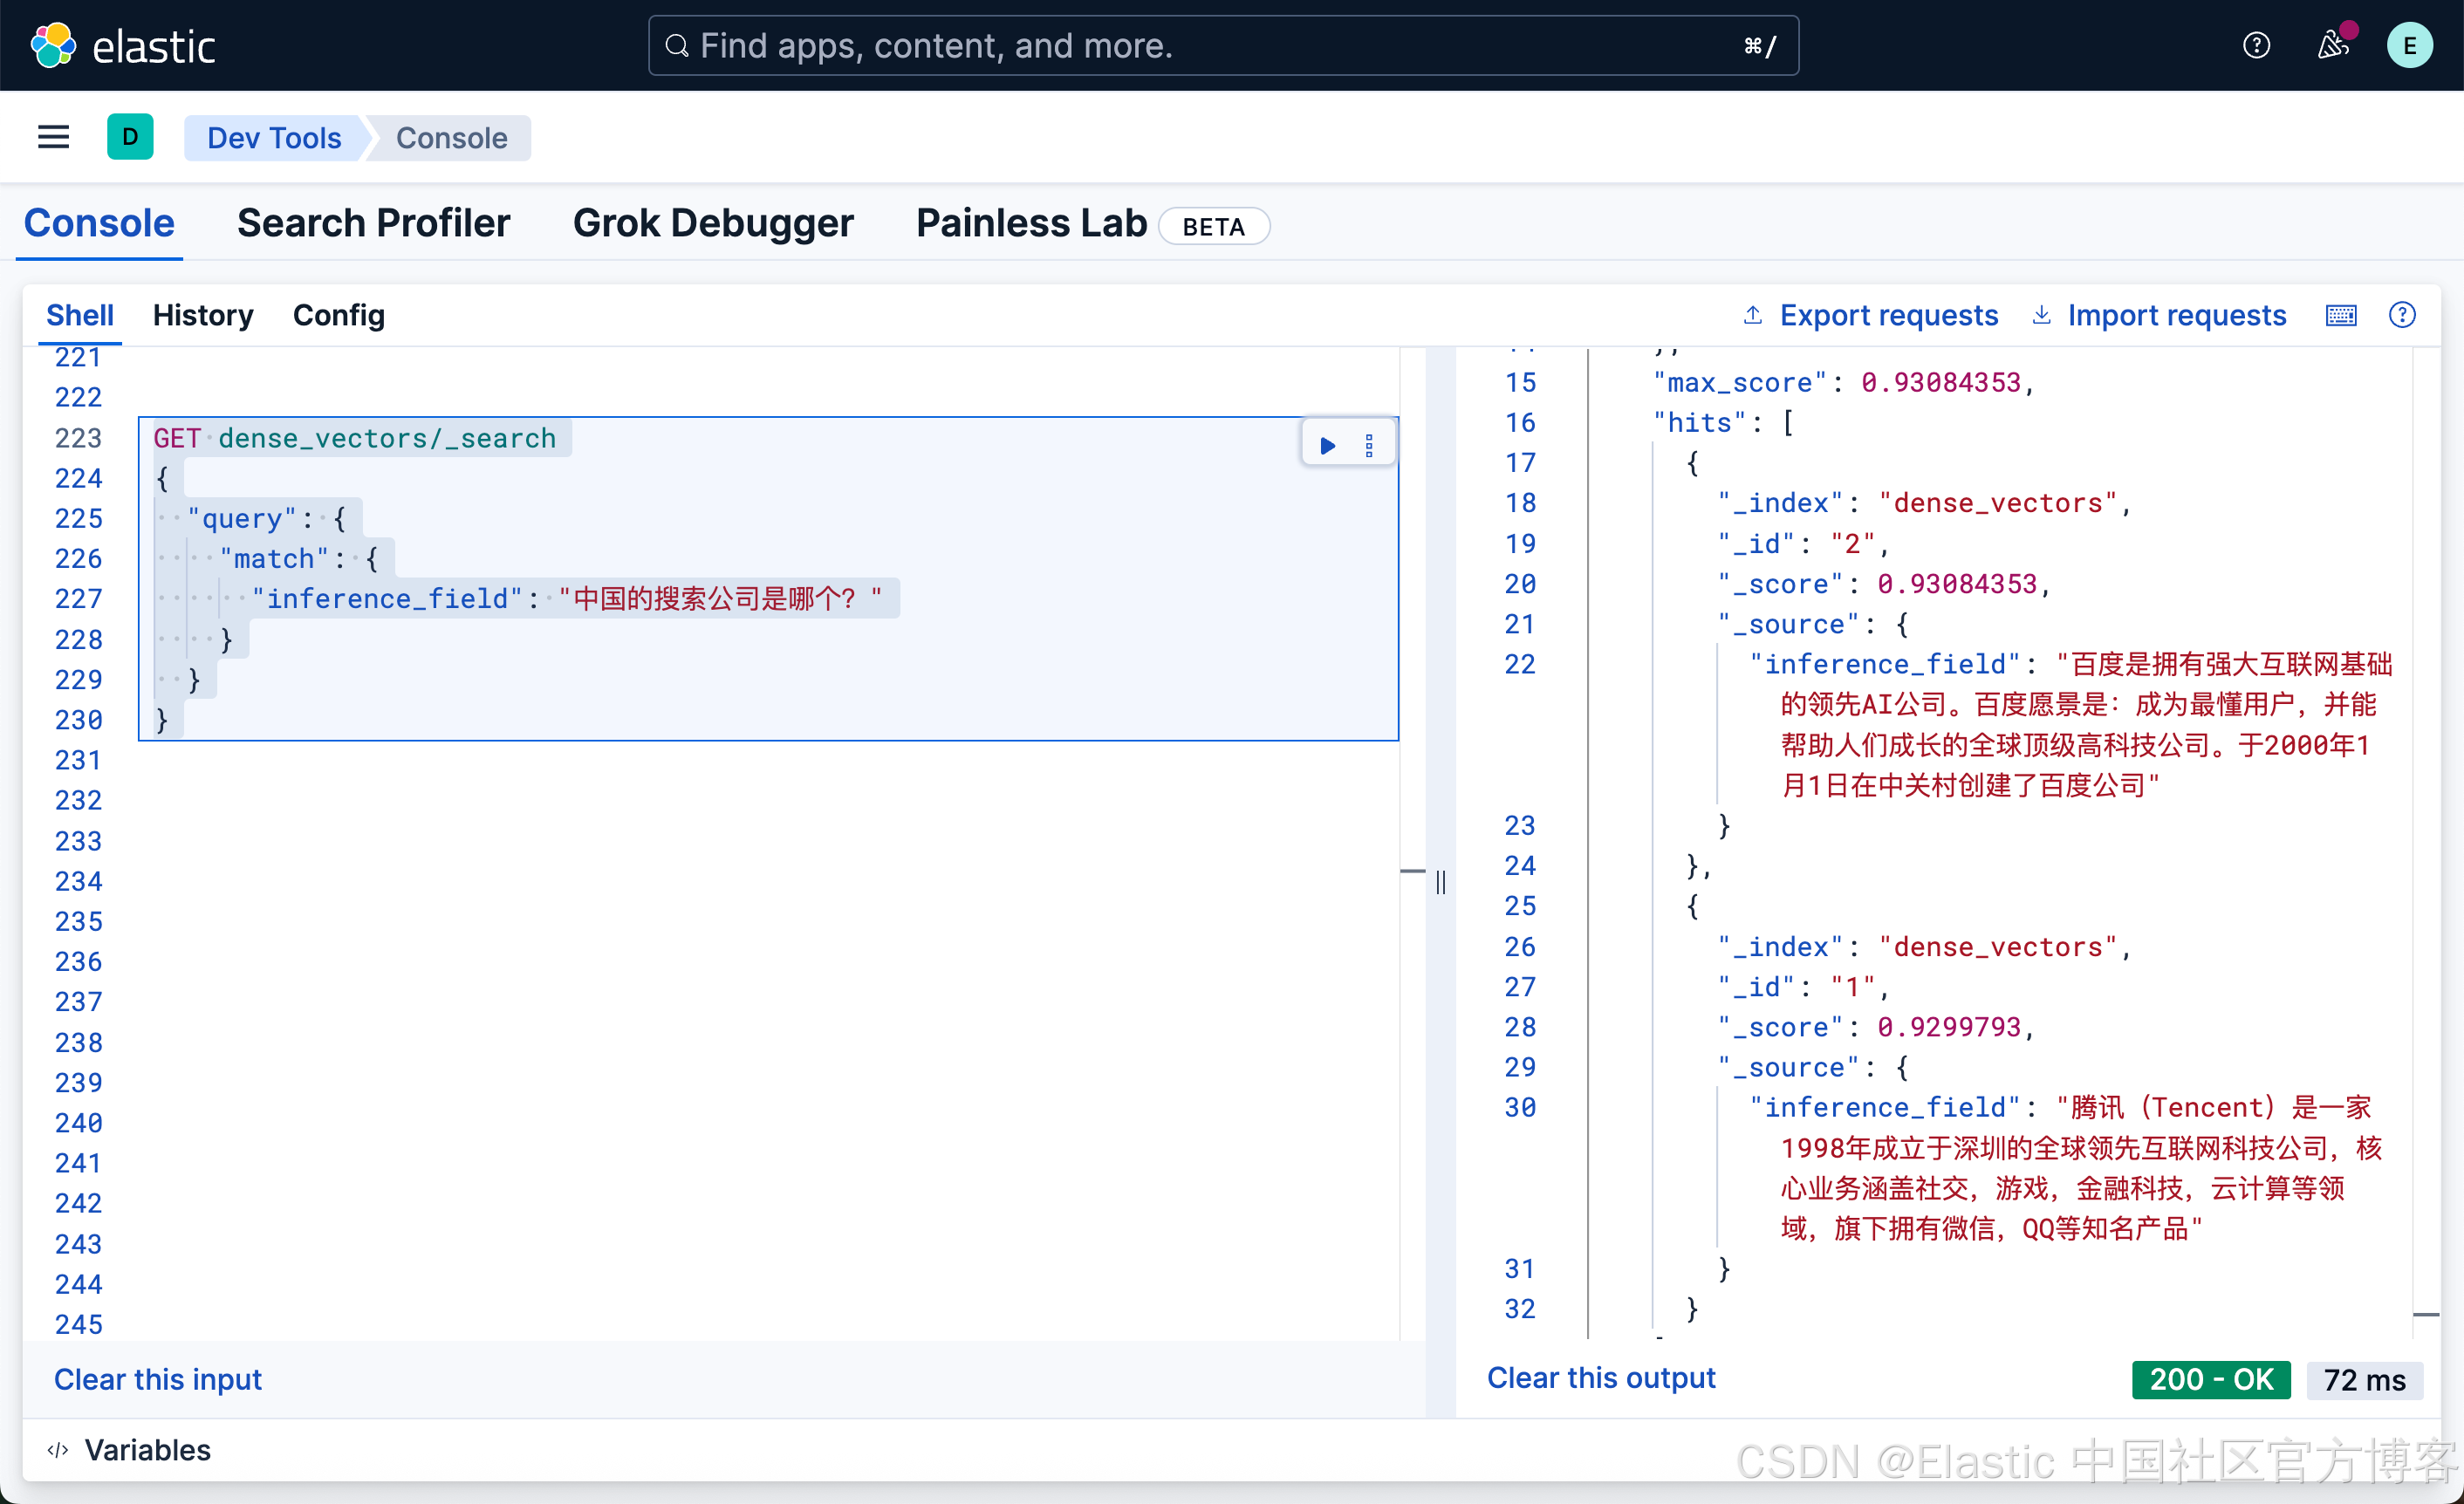
大家如果查看我们的文档,有关百度的文档中 “百度是拥有强大互联网基础的领先AI公司。百度愿景是:成为最懂用户,并能帮助人们成长的全球顶级高科技公司。于2000年1月1日在中关村创建了百度公司”,它并不含有任何的搜索关键词,但是我们提问 “中国的搜索公司是哪个”,百度的结果排名为第一。这个也许就是语义搜索的魅力吧!
GET dense_vectors/_search
{"query": {"match": {"inference_field": "中国的游戏公司是哪个?"}}
}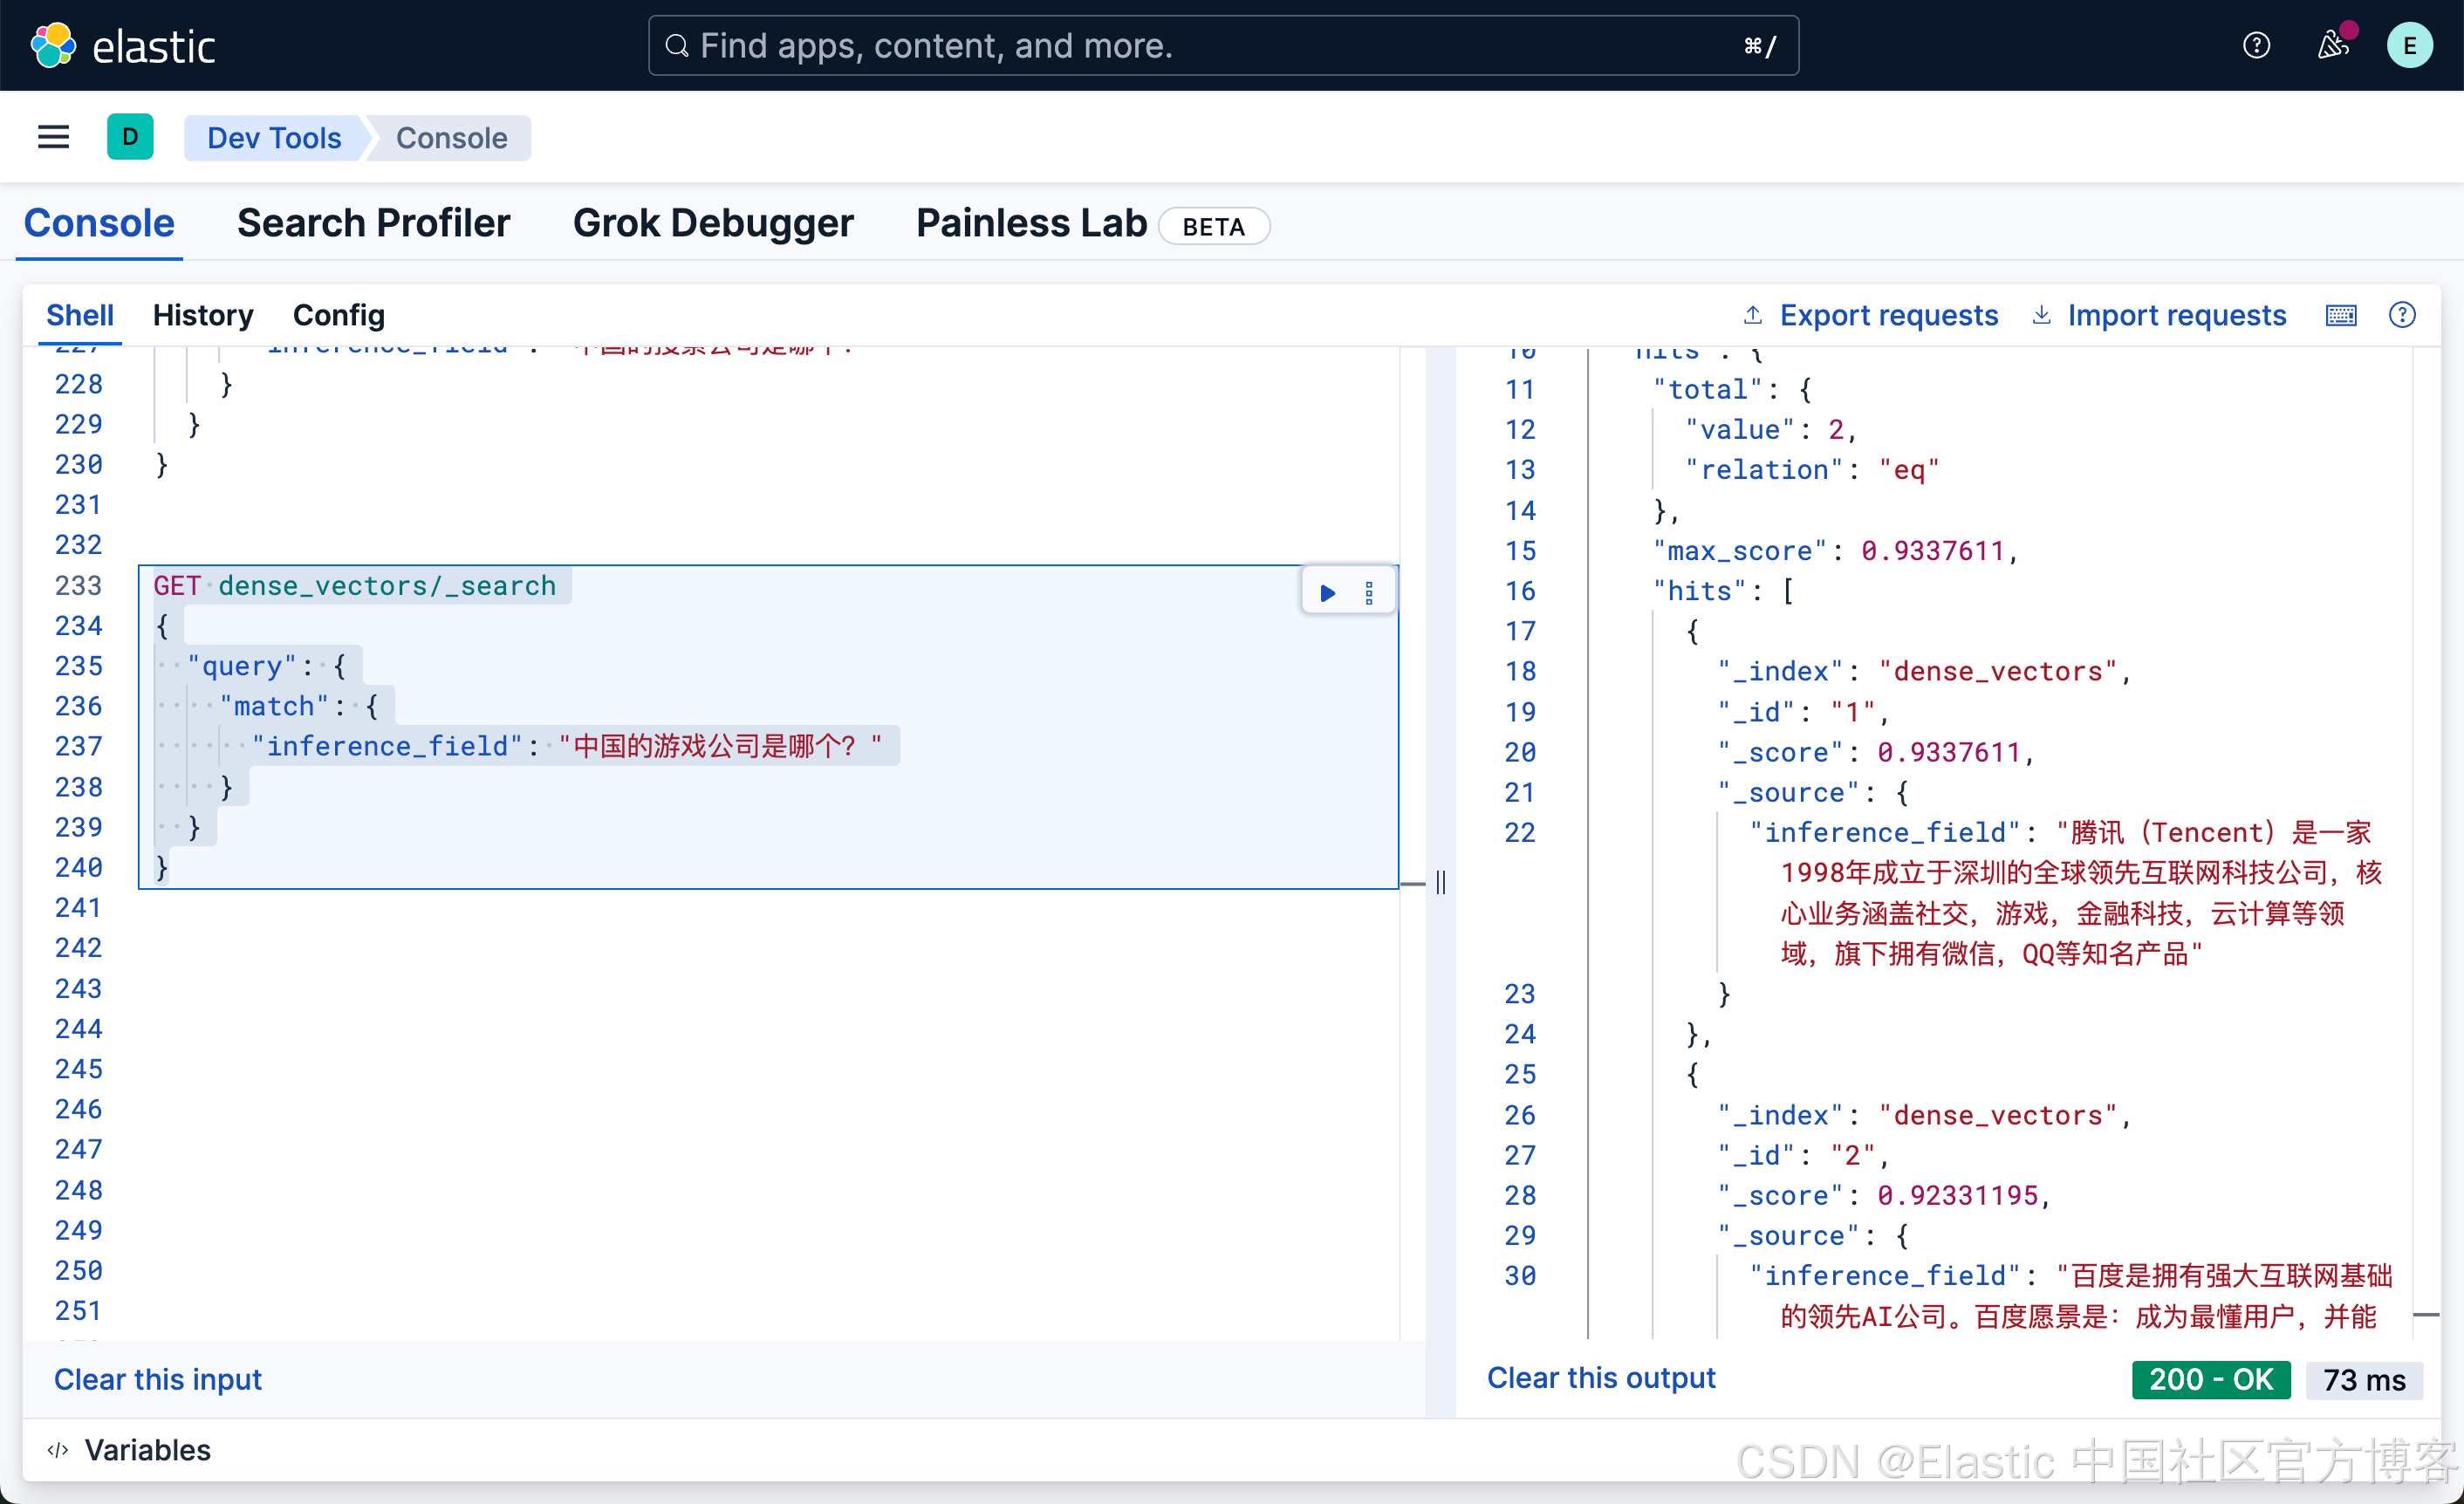
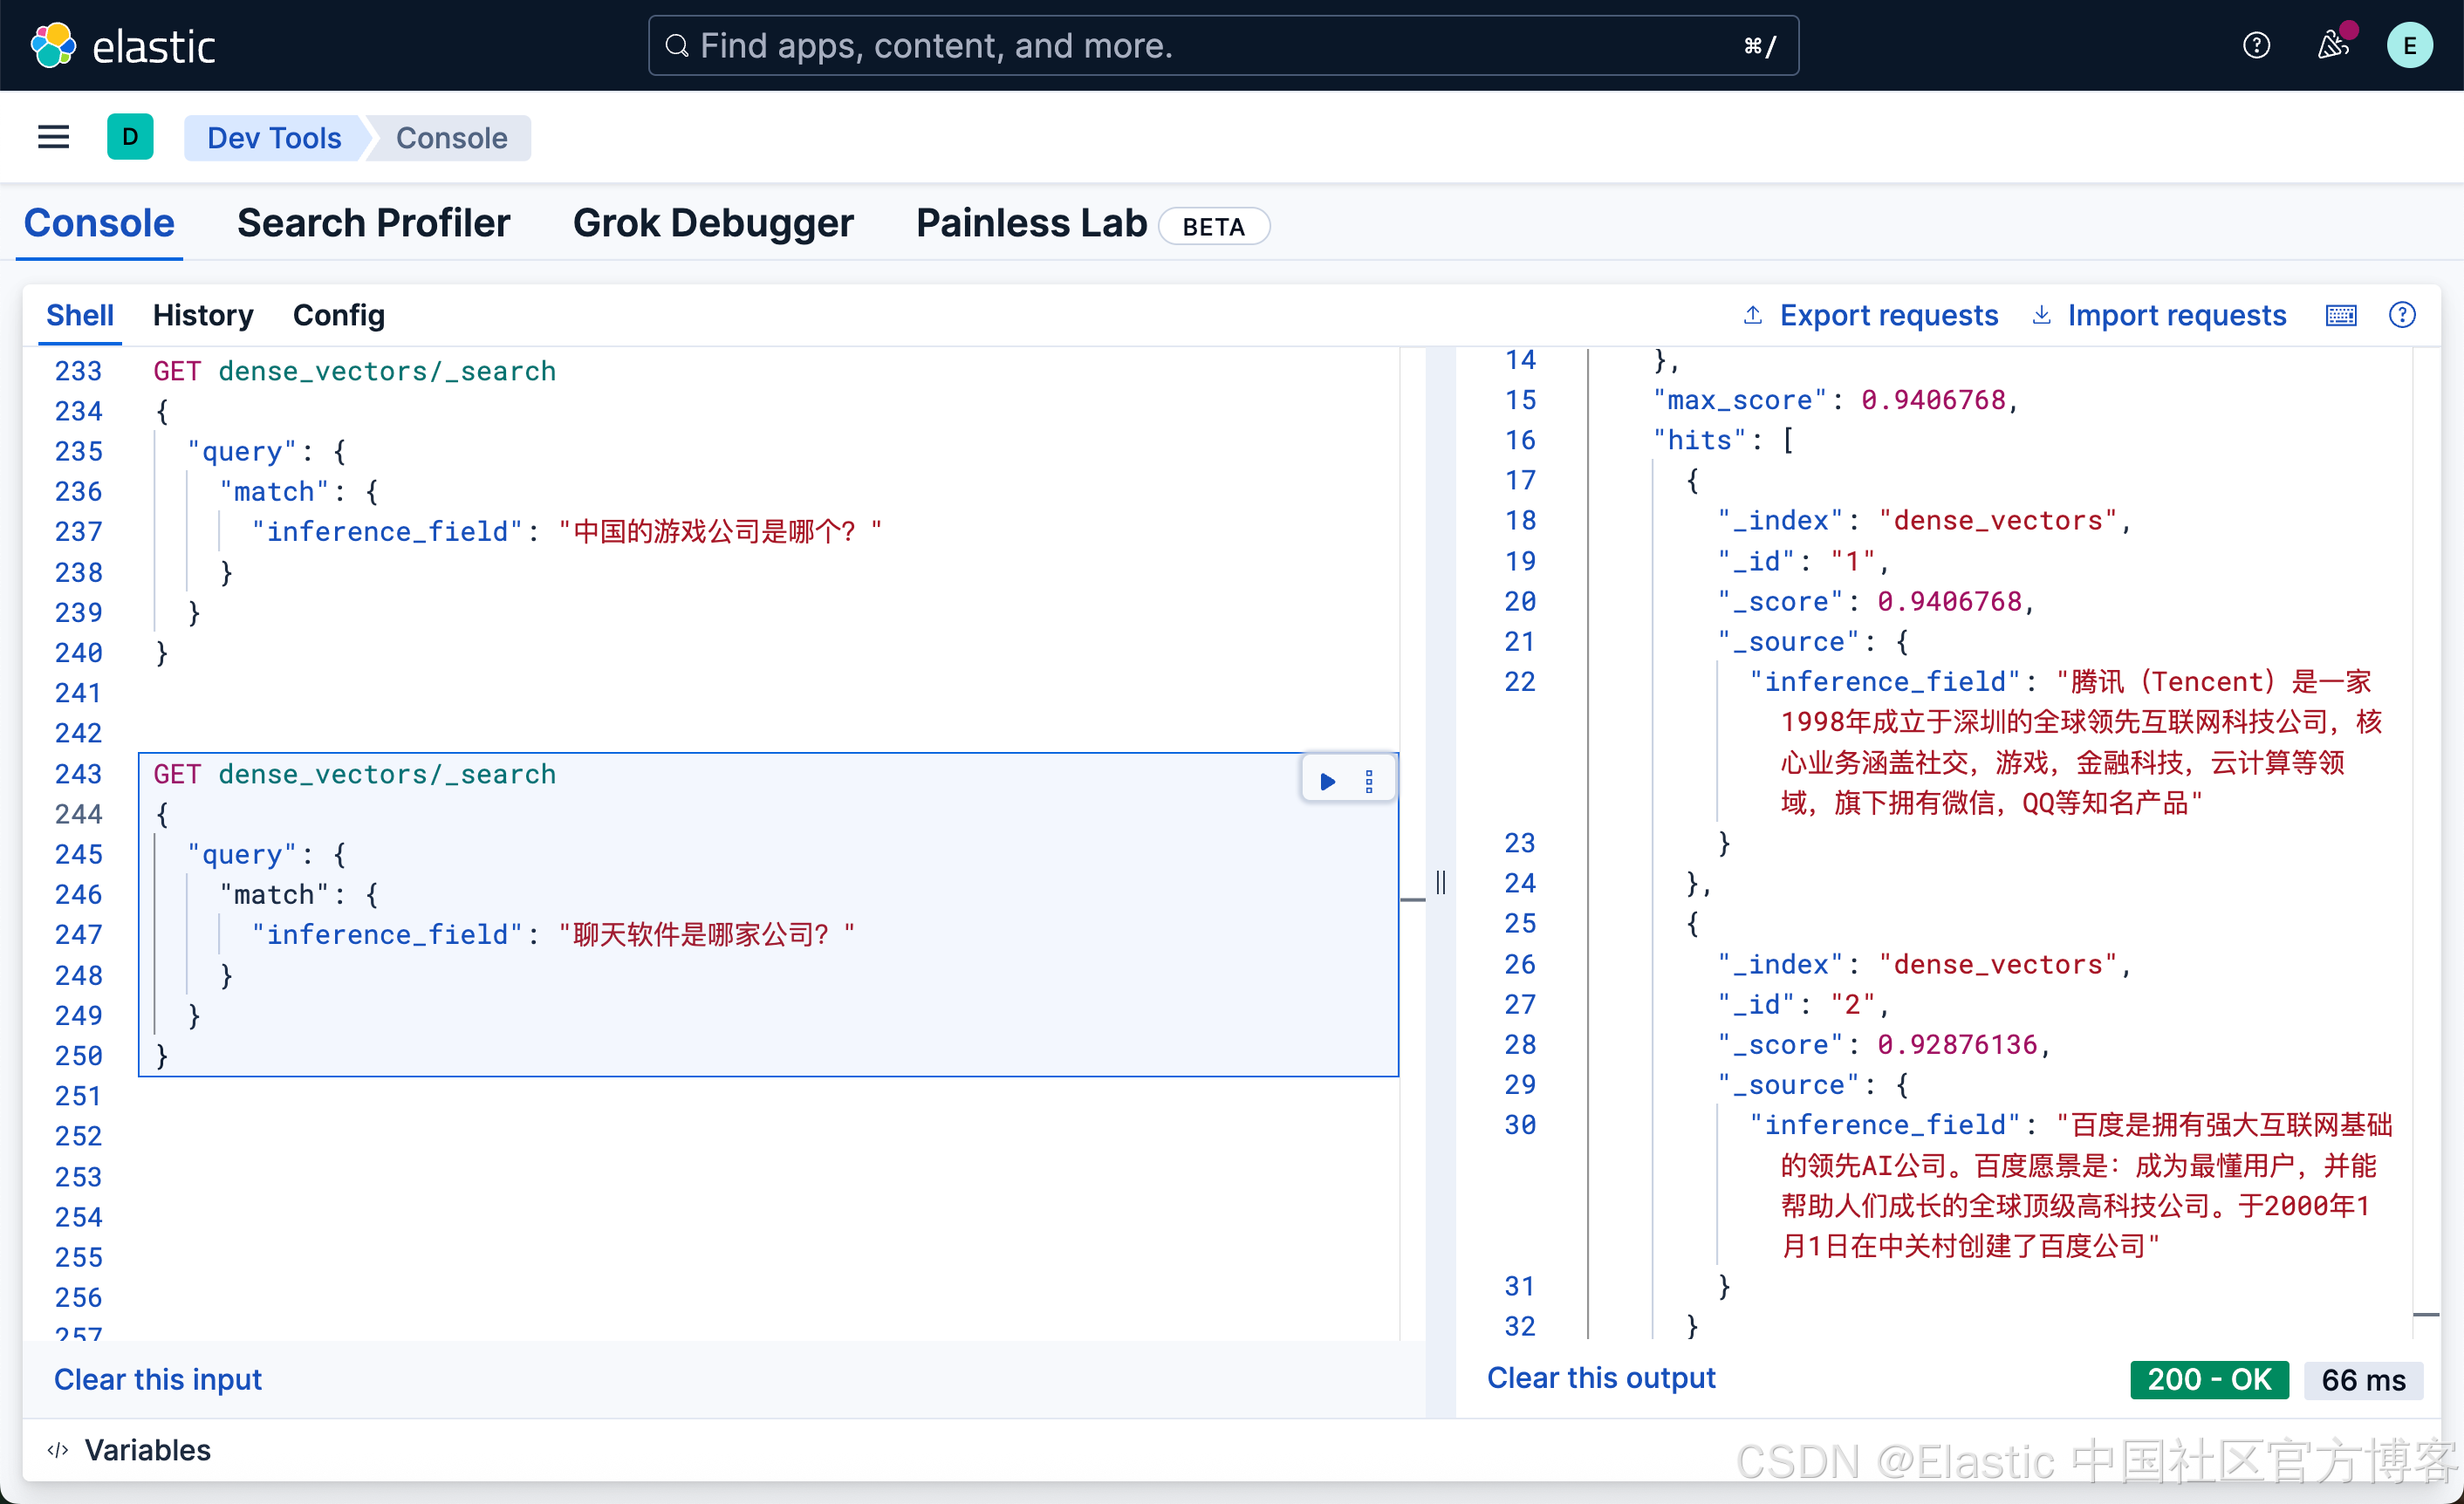
GET dense_vectors/_search
{"query": {"match": {"inference_field": "聊天软件是哪家公司?"}}
}
混合搜索
我们知道,单纯的语义搜索有时并不能完全提高我们的召回率及相关性,甚至有时搜索的结果不具有可解释性。我们可以使用混合搜索的方法来提高相关性及召回率。
方法一
我们可以定义如下的索引:
PUT my_index
{"mappings": {"properties": {"text": {"type": "text" // raw document text},"embedding.predicted_value": {"type": "dense_vector","dims": 384,      // E5-small output dim is 384"index": true,    // enable ANN search"similarity": "cosine" // consine similarity for semantic search}}}
}
然后我们定义一个如下的 pipeline:
PUT _ingest/pipeline/e5-embedding-pipeline
{"processors": [{"inference": {"model_id": ".multilingual-e5-small-elasticsearch","target_field": "embedding","field_map": {"text": "text_field"}}}]
}
我们为 my_index 创建索引文档:
PUT my_index/_bulk?pipeline=e5-embedding-pipeline
{"index": {"_id": "1"}}
{"text": "腾讯(Tencent)是一家1998年成立于深圳的全球领先互联网科技公司,核心业务涵盖社交,游戏,金融科技,云计算等领域,旗下拥有微信,QQ等知名产品"}
{"index": {"_id": "2"}}
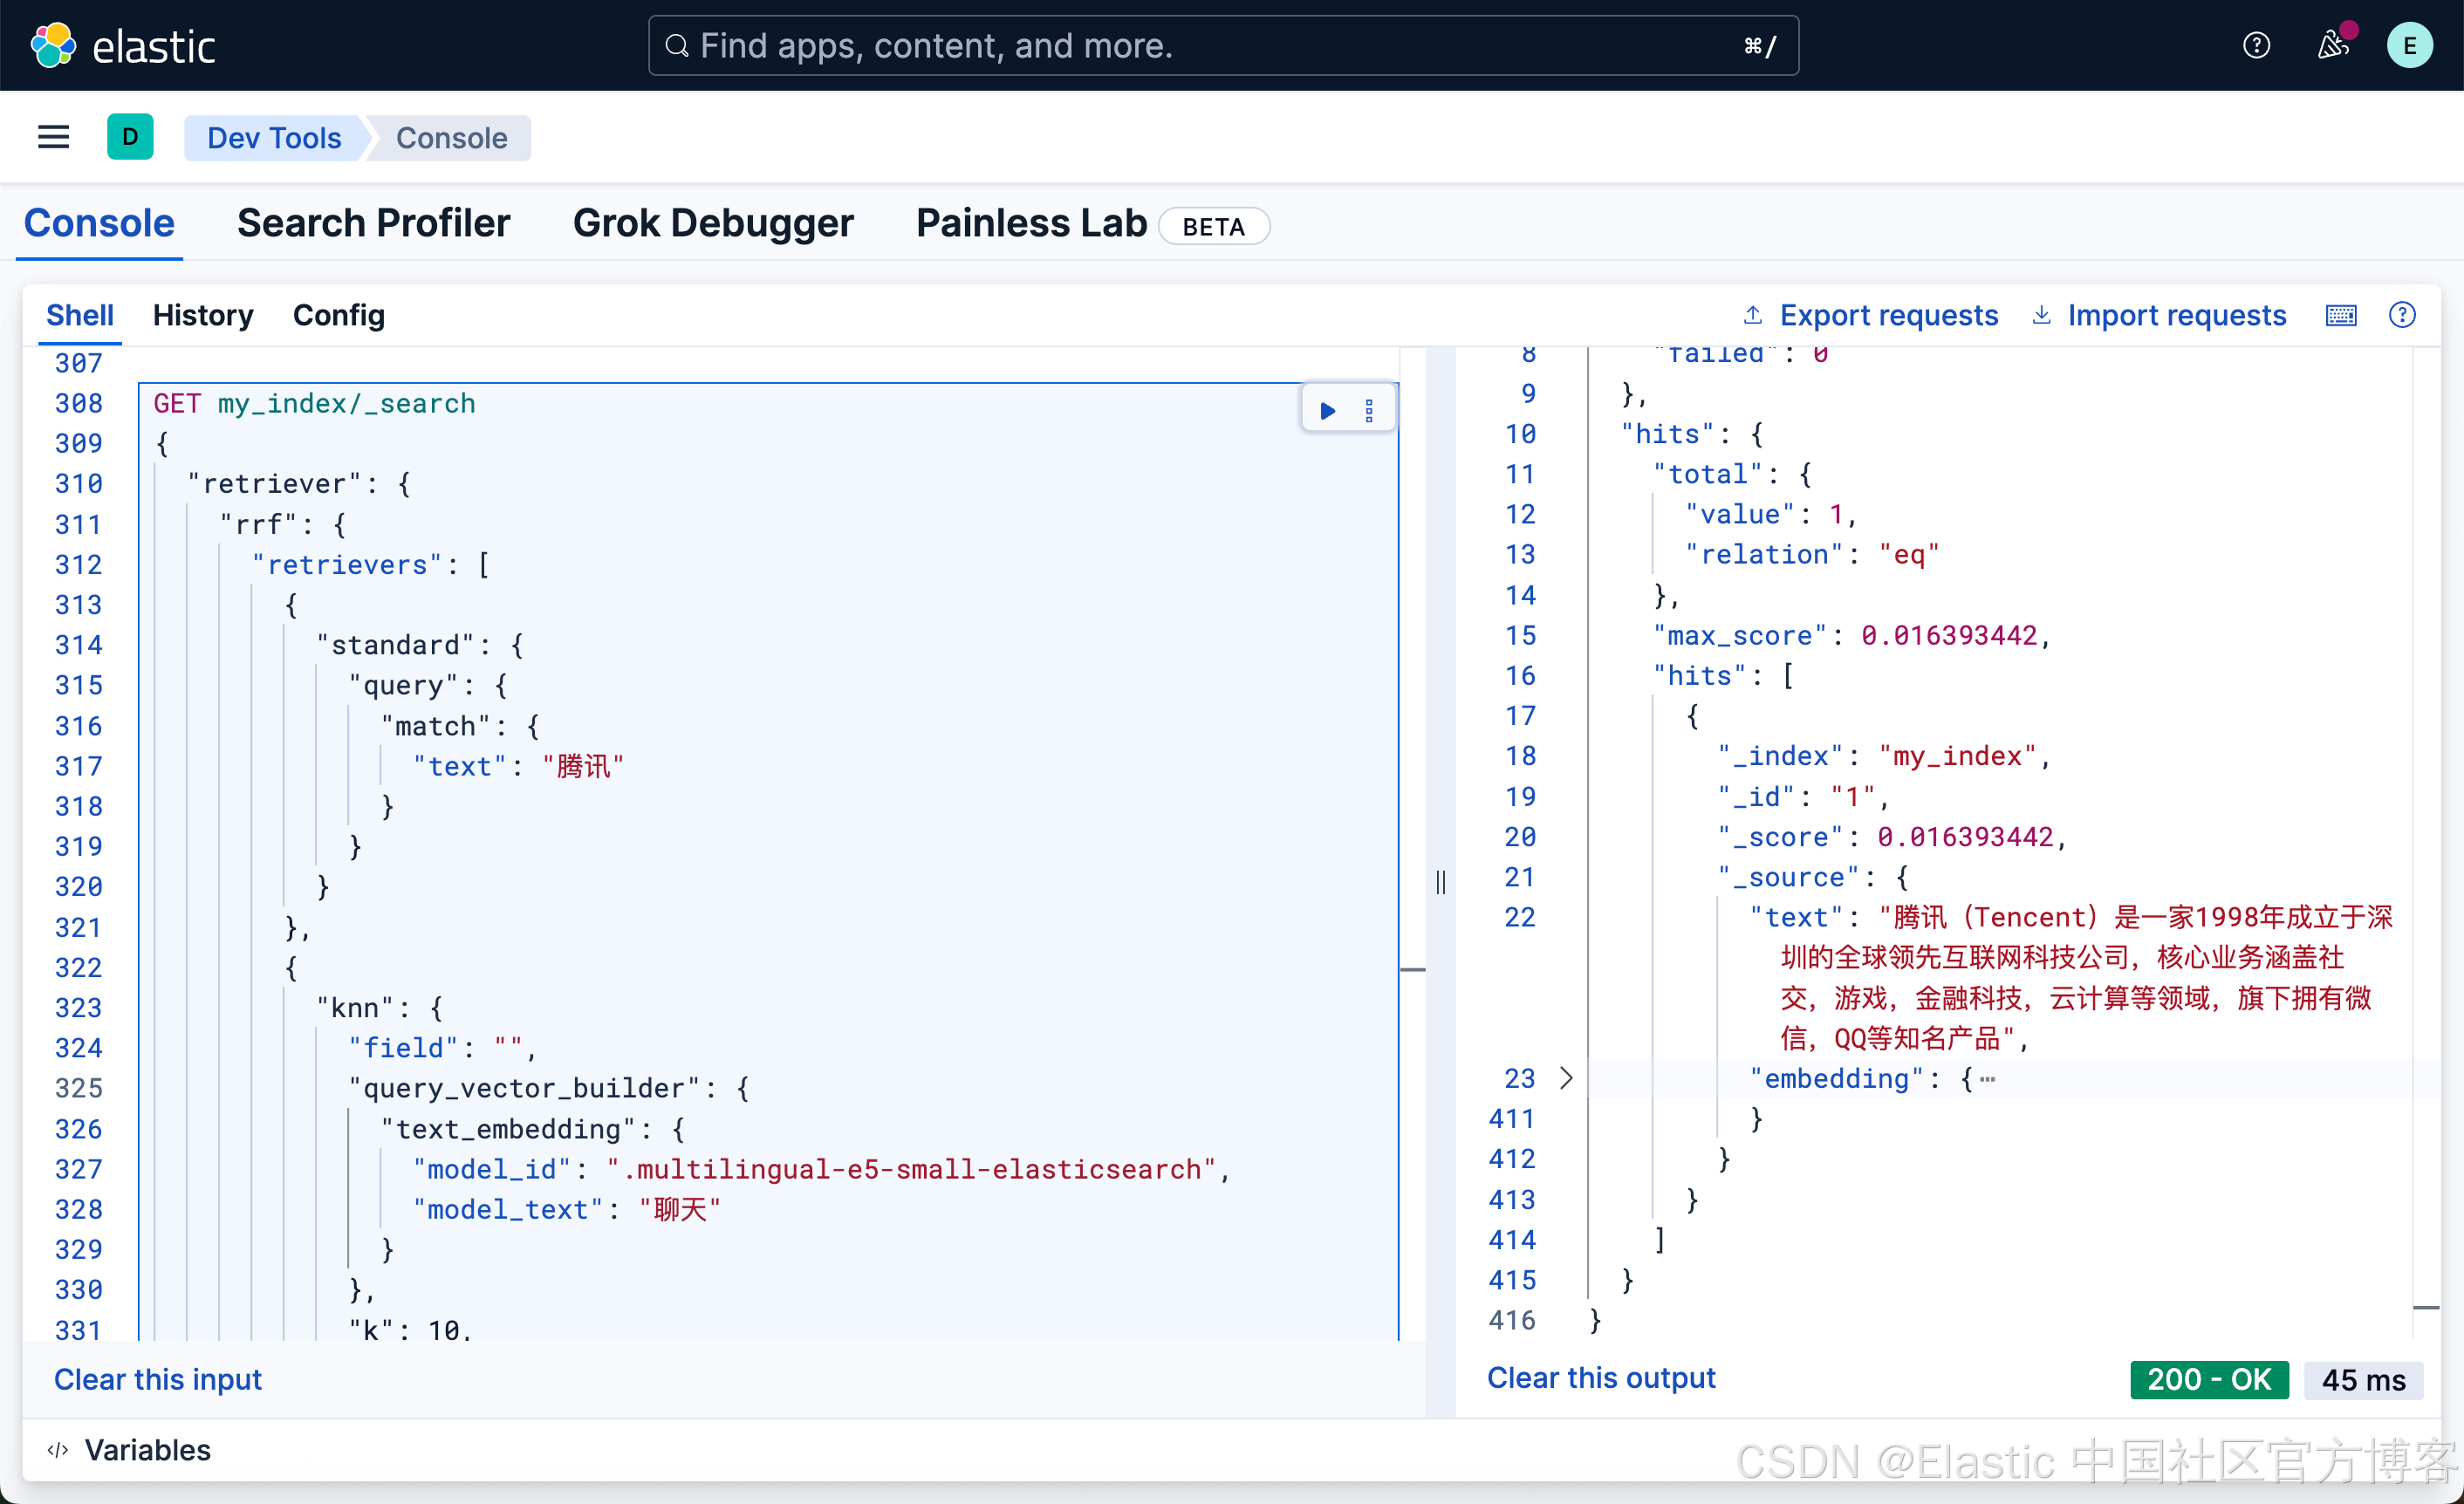
{"text": "百度是拥有强大互联网基础的领先AI公司。百度愿景是:成为最懂用户,并能帮助人们成长的全球顶级高科技公司。于2000年1月1日在中关村创建了百度公司"}我们可以使用如下的方法来进行混合搜索:
GET my_index/_search
{"retriever": {"rrf": {"retrievers": [{"standard": {"query": {"match": {"text": "腾讯"}}}},{"knn": {"field": "","query_vector_builder": {"text_embedding": {"model_id": ".multilingual-e5-small-elasticsearch","model_text": "聊天"}},"k": 10,"num_candidates": 100}}]}}
}
方法二
这个方法更为简单。我们定义如下的一个索引:
PUT hybrid_vectors
{"mappings": {"properties": {"inference_field": {"type": "semantic_text","inference_id": ".multilingual-e5-small-elasticsearch"},"content":{"type": "text","copy_to": "interence_field"}}}
}
我们使用如下的命令来写入文档:
PUT hybrid_vectors/_bulk
{"index": {"_id": "1"}}
{"content": "腾讯(Tencent)是一家1998年成立于深圳的全球领先互联网科技公司,核心业务涵盖社交,游戏,金融科技,云计算等领域,旗下拥有微信,QQ等知名产品"}
{"index": {"_id": "2"}}
{"content": "百度是拥有强大互联网基础的领先AI公司。百度愿景是:成为最懂用户,并能帮助人们成长的全球顶级高科技公司。于2000年1月1日在中关村创建了百度公司"}
我们使用如下的方法来做混合搜索:
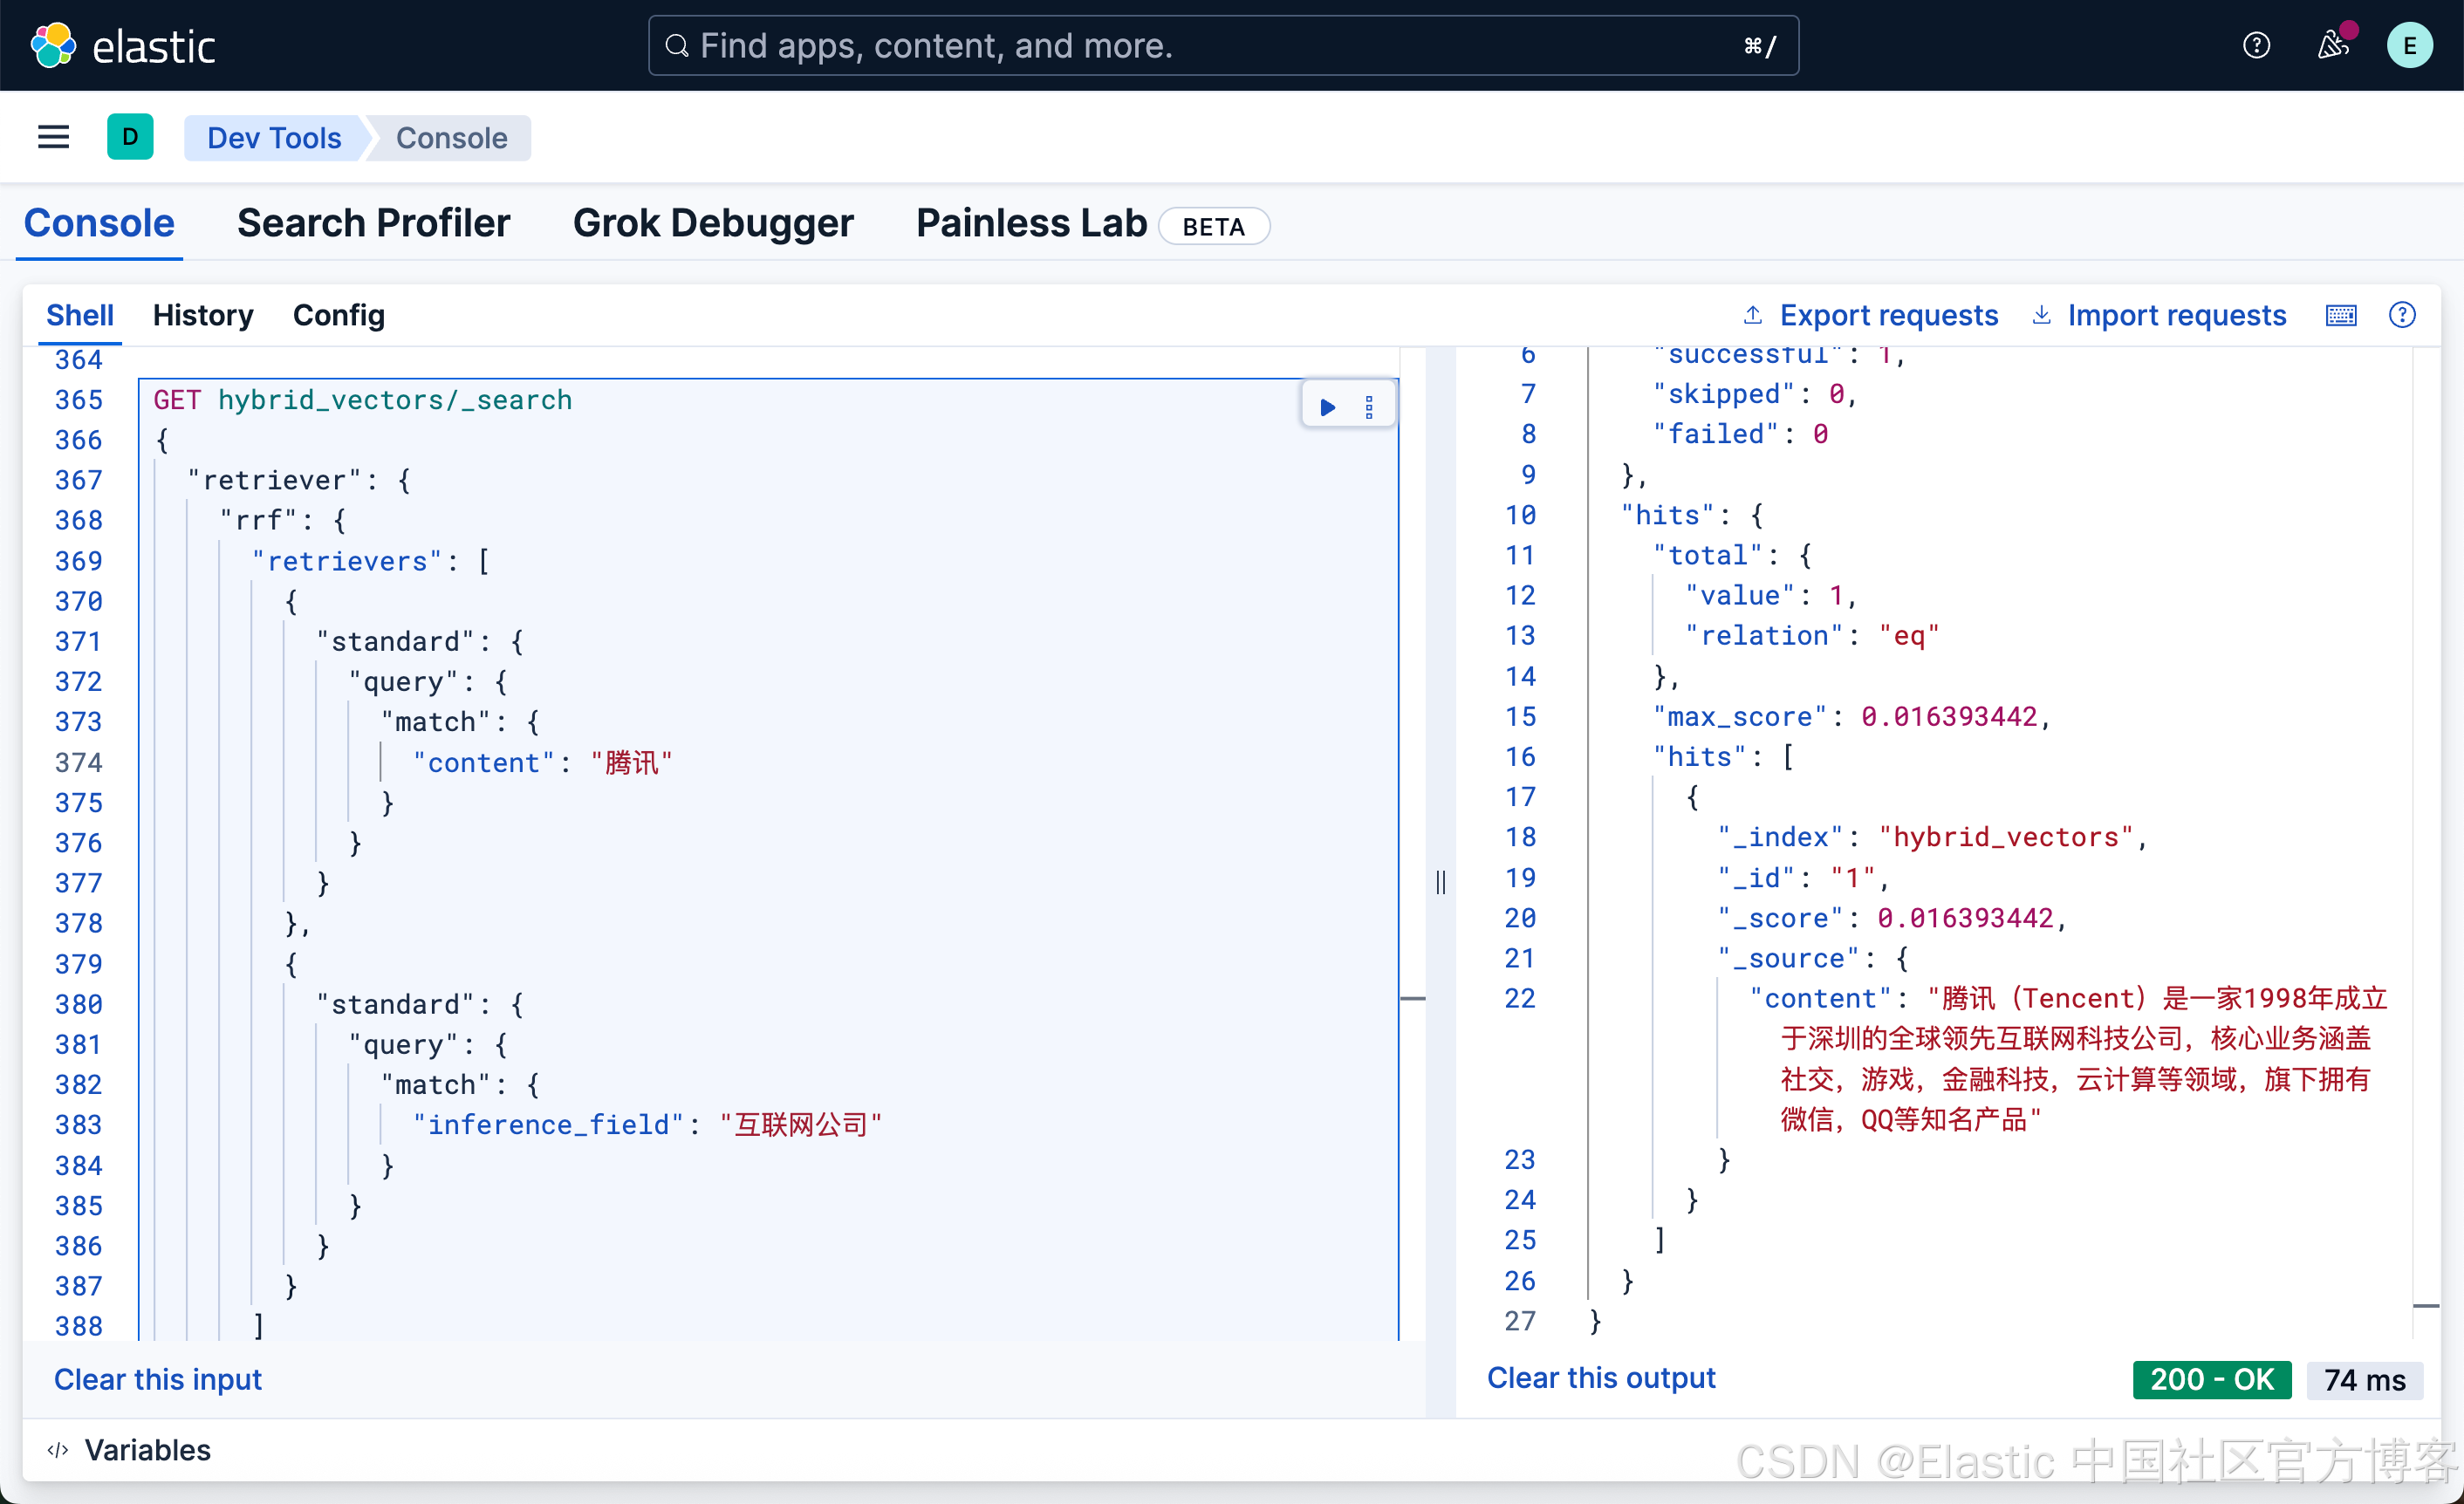
GET hybrid_vectors/_search
{"retriever": {"rrf": {"retrievers": [{"standard": {"query": {"match": {"content": "腾讯"}}}},{"standard": {"query": {"match": {"inference_field": "互联网公司"}}}}]}}
}