【C++】list的使用与模拟实现

list的使用与模拟实现
✨前言:在C++ STL的旅程中,我们已经掌握了string和vector这两个重要容器。现在,让我们迎来第三个核心容器——list。与基于动态数组的vector不同,list以其独特的双向链表结构为我们打开了新的编程视角。
📖专栏:【C++成长之旅】
目录
- list的使用与模拟实现
- 一、list的介绍与使用
- 迭代器分类
- list的迭代器失效
- 二、list的模拟实现
- 三、list与vector的比较
一、list的介绍与使用
我们对于list的学习和前面string与vector类似,先看官方文档:【list的文档介绍】:

可见,list也是一个类模板。
list的底层其实是一个带有头结点的双向循环链表:

在有了前面string与vector的基础,我们这里对于list的学习就直接采用文档来学习,不在一一列举了。
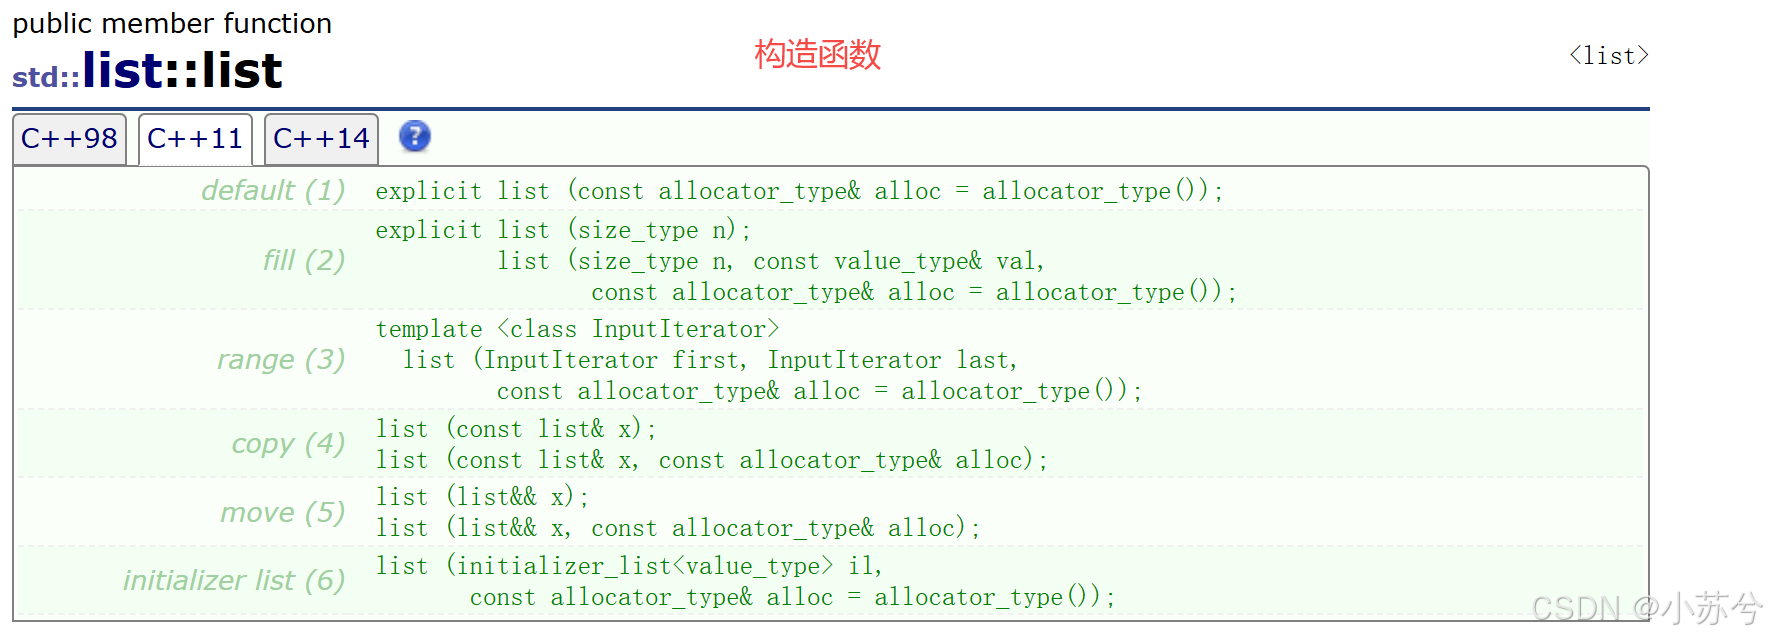
示例:
#include<list>
#include<vector>
using namespace std;int main()
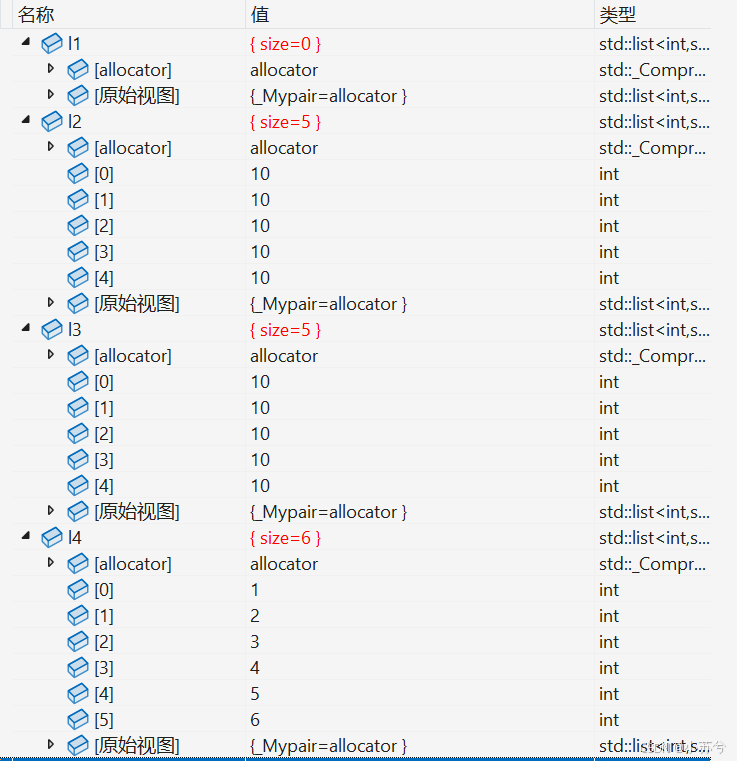
{list<int> l1;       //不初始化list<int> l2(5, 10);//用5个10来初始化list<int> l3(l2);	//拷贝构造vector<int> v = { 1,2,3,4,5,6 };list<int> l4(v.begin(), v.end());//用迭代器区间来初始化return 0;
}
调试:


用法与前面的容器基本相同,我们就不过多阐述了,这里主要对迭代器的分类说明一下,拓展:
迭代器分类
在list这里,我们就要对迭代器的分类有一定了解了,
- 按功能分类:

这个我们都好理解,但是,今天,我们按性质分。 - 按性质分类:
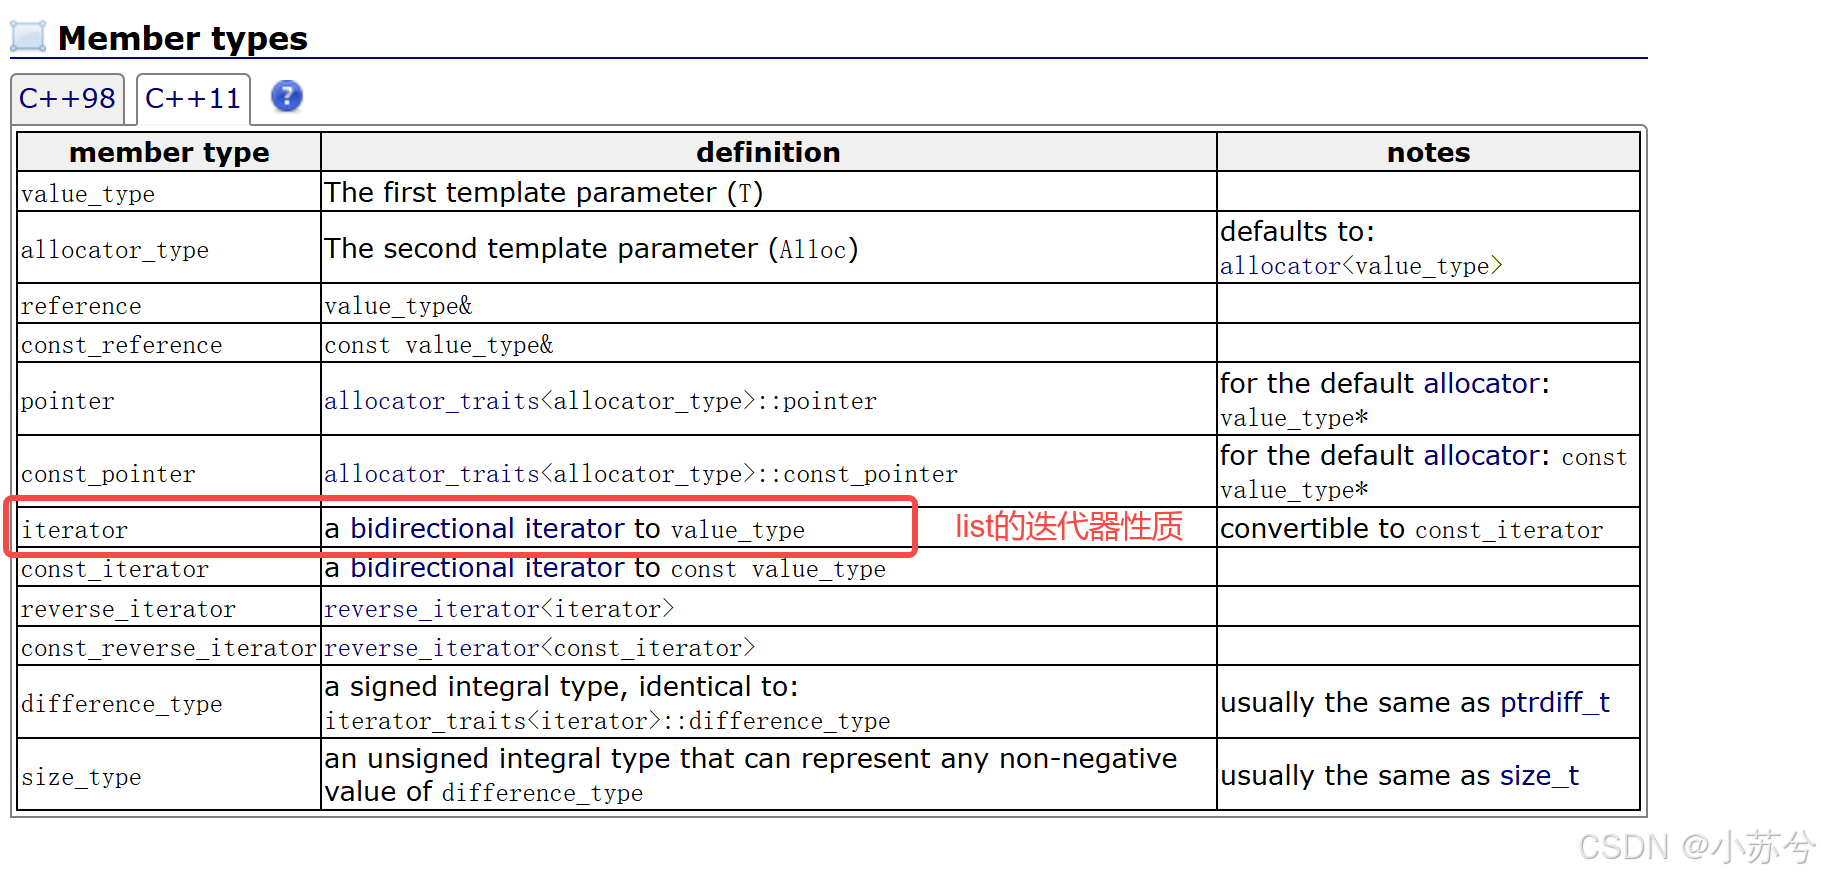
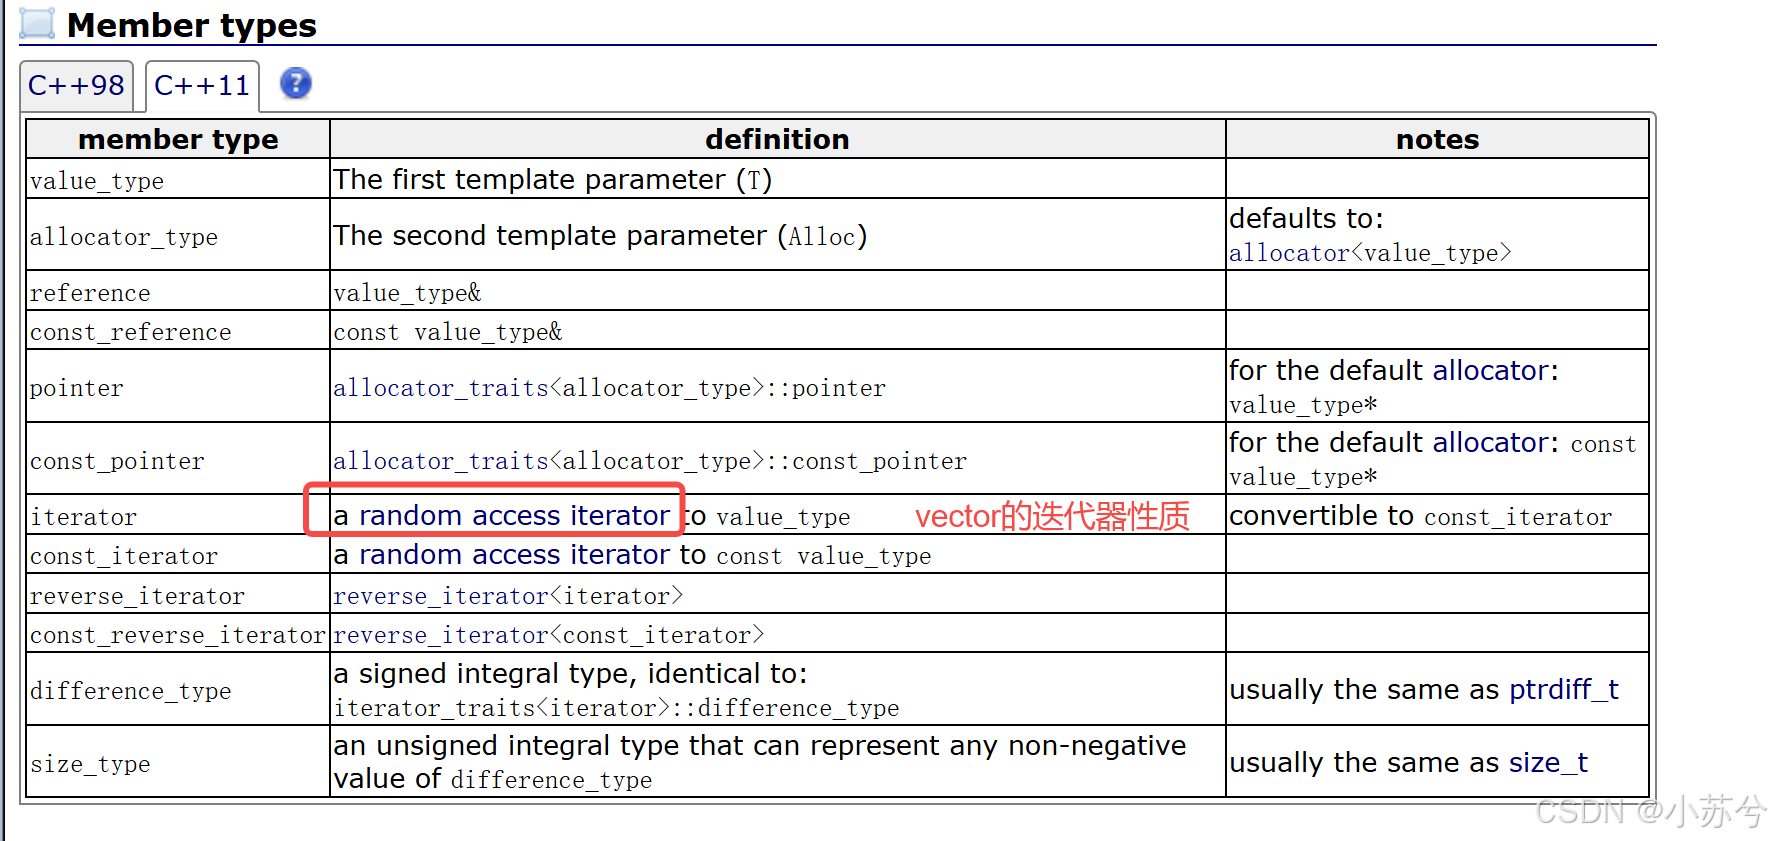
可见,list为双向迭代器,vector为随机迭代器,那有什么区别呢,为什么会有这样的分类?
迭代器按性质分有以下:
几者的关系为继承。先行了解就行。
它们之间的区别为:
有区别的原因就在于其底层的实现不同,还会导致它们适用的算法不同:
在 C++ 标准库的容器中,没有"纯 Input 迭代器"。至少都是 Forward 迭代器,后续随着对容器的学习会了解。


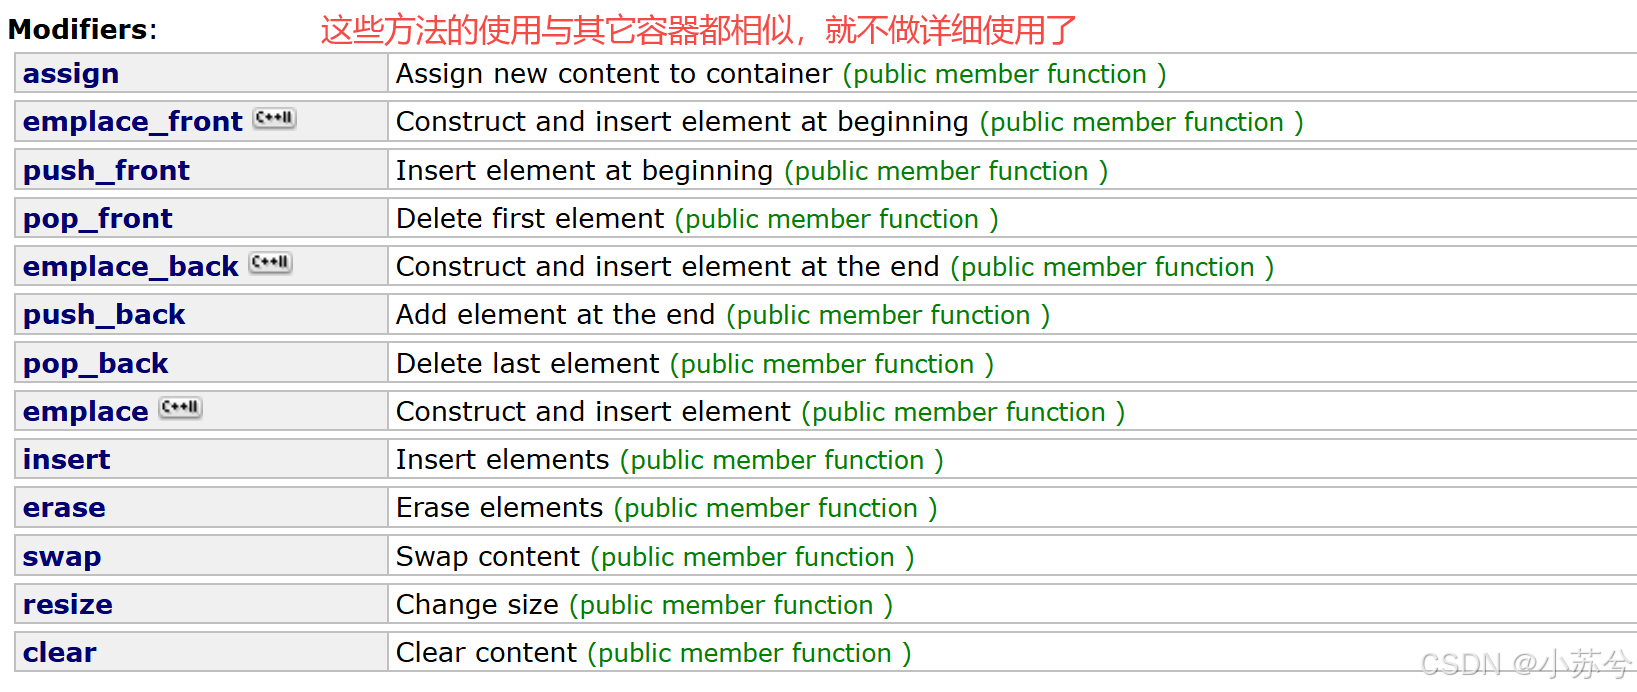
与vector相同, list的迭代器失效问题我们需要注意。
list的迭代器失效
前面说过,我们可将迭代器暂时理解成类似于指针,迭代器失效即迭代器所指向的节点的无效,即该节点被删除了。因为list的底层结构为带头结点的双向循环链表,因此在list中进行插入时是不会导致list的迭代器失效的,只有在删除时才会失效,并且失效的只是指向被删除节点的迭代器,其他迭代器不会受到影响。
void Test1()
{int array[] = { 1, 2, 3, 4, 5, 6, 7, 8, 9, 0 };list<int> l(array, array + sizeof(array) / sizeof(array[0]));auto it = l.begin();while (it != l.end()){// erase()函数执行后,it所指向的节点已被删除,因此it无效,在下一次使用it时,必须先给其赋值l.erase(it);++it;}
}
// 改正
void Test()
{int array[] = { 1, 2, 3, 4, 5, 6, 7, 8, 9, 0 };list<int> l(array, array + sizeof(array) / sizeof(array[0]));auto it = l.begin();while (it != l.end()){l.erase(it++); // it = l.erase(it);}
}
对于list的使用,我们就到此为止,因为与string与vector相似,所以我们就简单的演示就没有做。
我们重点来进行list的模拟实现。
二、list的模拟实现
list的底层:
首先我们先来对结点进行封装:
//节点
template<class T>
struct list_node
{T _data;list_node* _next;list_node* _prev;list_node(T data = T()){_data = data;_next = _prev = this;}
};
这里我们要说一个点:
答案是:int() = 0
解释:对于用户自定义的类,如果定义了默认构造函数,调用 MyClass() 会初始化对象。对于基本类型,int() 可以看作是这种模式的一种延伸,将其初始化为一个合理的“空”状态。这样就会使得自定义类型与内置类型共用同一个模版了。
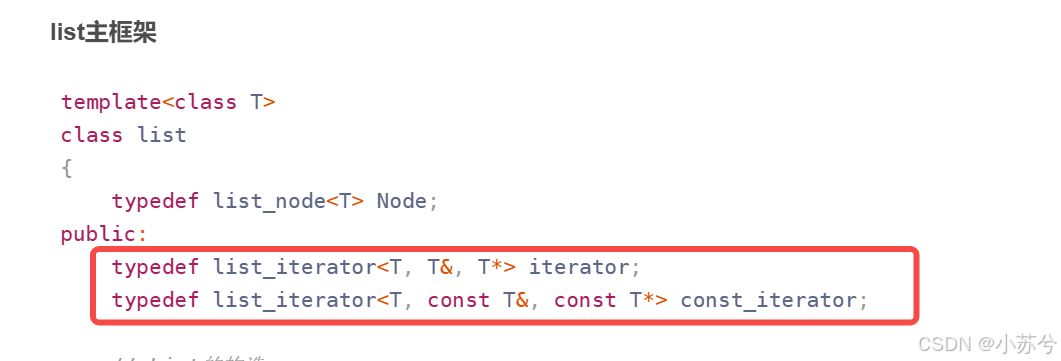
由于list的迭代器不再是原生指针,所以我们对list的迭代器进行封装,那么对于iterator与const_iterator我们岂不是要封装两次吗,但是,我们可以这样做,设置三个模板参数(结合最下面list的主框架实现来看)
//迭代器
template<class T, class Ref, class Ptr>
struct list_iterator
{typedef list_node<T> Node;typedef list_iterator<T, Ref, Ptr> Self;Node* _node;list_iterator(Node* node = nullptr):_node(node){}Ref operator*(){return _node->_data;}Ptr operator->(){return &(_node->_data);}//前置Self& operator++(){_node = _node->_next;return *this;}Self& operator--(){_node = _node->_prev;return *this;}//后置Self& operator++(int){_node = _node->_next;return _node->prev;}Self& operator--(int){_node = _node->_prev;return _node->_next;}bool operator!=(const Self& it)const{return _node != it._node;}bool operator==(const Self& it)const{return _node == it._node;}
};
list主框架
template<class T>
class list
{typedef list_node<T> Node;
public:typedef list_iterator<T, T&, T*> iterator;typedef list_iterator<T, const T&, const T*> const_iterator;// List的构造void init_head(){_head = new Node;}list(){init_head();}list(int n, const T& value = T()){init_head();while (n--){push_back(value);}}template <class Iterator>list(Iterator first, Iterator last){init_head();while (first != last){push_back(*first);++first;}}list(list<T>& ls):_head(new Node){for (auto i : ls){push_back(i);}}//赋值重载/*list<T>& operator=(list<T>& ls){for (iterator it = begin();it!=end();){it = erase(it);}for (auto i : ls){push_back(i);}return *this;}*/list<T>& operator=(list<T> ls){swap(ls);return *this;}~list(){clear();delete _head;_head = nullptr;}// List Iteratoriterator begin(){return iterator(_head->_next);}iterator end(){return iterator(_head);}const_iterator begin()const{return const_iterator(_head->_next);}const_iterator end()const{//return iterator(_head);return const_iterator(_head);}// List Capacitysize_t size()const{size_t cnt = 0;for (auto i : *this){++cnt;}return cnt;}bool empty()const{return _head->_next == _head;}// List AccessT& front(){return _head->_next->_data;}const T& front()const{return _head->_next->_data;}T& back(){return _head->_prev->_data;}const T& back()const{return _head->_prev->_data;}// List Modifyvoid push_back(T data){/*Node* cur = new Node(data);cur->_next = _head;cur->_prev = _head->_prev;_head->_prev = cur;cur->_prev->_next = cur;*/insert(end(), data);}void pop_back(){erase(--end());}void push_front(const T& val){insert(begin(), val);}void pop_front(){erase(begin());}// 在pos位置前插入值为val的节点iterator insert(iterator pos, const T& val){Node* newnode = new Node(val);newnode->_next = pos._node;newnode->_prev = pos._node->_prev;newnode->_next->_prev = newnode;newnode->_prev->_next = newnode;return newnode;}// 删除pos位置的节点,返回该节点的下一个位置iterator erase(iterator pos){//assert(end());pos._node->_prev->_next = pos._node->_next;pos._node->_next->_prev = pos._node->_prev;iterator it = pos._node->_next;delete pos._node;return it;}void clear(){for (iterator it = begin(); it != end();){it = erase(it);}}void swap(list<T>& ls){std::swap(this->_head, ls._head);}private:Node* _head;
};iterator解释:
在三个模版参数的作用下,就会使得iterator与const_iterator共用同一个模版的情况下实现。当然,也可以写成两个模版,效果是一样的。
还需注意:模板只有在被使用时才会实例化。单纯的typedef声明只是创建了一个类型别名,并不会触发实例化。
我们这里只是实现正向迭代器,反向迭代器简单说明一下:
反向迭代器的++就是正向迭代器的–,反向迭代器的–就是正向迭代器的++,因此反向迭代器的实现可以借助正向迭代器,即:反向迭代器内部可以包含一个正向迭代器,对正向迭代器的接口进行包装即可。
三、list与vector的比较
vector 与 list 都是 STL 中非常重要的序列式容器,由于两个容器的底层结构不同,导致其特性以及应用场景不同,其主要不同如下:
| 特性 | vector | list |
|---|---|---|
| 底层结构 | 动态顺序表,一段连续空间 | 带头结点的双向循环链表 |
| 随机访问 | 支持随机访问,访问某个元素效率 O(1) | 不支持随机访问,访问某个元素效率 O(N) |
| 插入和删除 | 任意位置插入和删除效率低,需要搬移元素,时间复杂度为 O(N),插入时有可能需要增容,导致效率更低 | 任意位置插入和删除效率高,不需要搬移元素,时间复杂度为 O(1) |
| 空间利用率 | 底层为连续空间,不容易造成内存碎片,空间利用率高,缓存利用率高 | 底层节点动态开辟,小节点容易造成内存碎片,空间利用率低,缓存利用率低 |
| 迭代器 | 原生态指针 | 对原生态指针(节点指针)进行封装 |
| 迭代器失效 | 插入元素时,要给所有的迭代器重新赋值,因为插入元素有可能会导致重新扩容,致使原来迭代器失效;删除操作会使指向被删除元素及之后所有元素的迭代器失效。需要重新赋值 | 插入元素不会导致迭代器失效,删除元素时,只会导致当前迭代器失效,其他迭代器不受影响 |
| 使用场景 | 需要高效存储,支持随机访问,不关心插入删除效率 | 大量插入和删除操作,不关心随机访问 |
如果本文对您有启发:
✅ 点赞 - 让更多人看到这篇硬核技术解析 !
✅ 收藏 - 实战代码随时复现
✅ 关注 - 获取数据结构系列深度更新
您的每一个[三连]都是我们持续创作的动力!✨


