用 【C# + Winform + MediaPipe】 实现人脸468点识别
目录
开发环境
尝试 MediaPipe.NET 失败
封装 Python + MediaPipe
Winform 调用 Python
动态服务端口
模拟实时图像
最终程序目录
行云,我想你了
开发环境
VS2022、C#、Winform、.NetFramework 4.6.2、Python 3.9.13、MediaPipe 0.10.21
完整的程序源码:https://download.csdn.net/download/LateFrames/92063664
尝试 MediaPipe.NET 失败
我尝试使用 MediaPipe.NET 来进行人脸468点的 功能实现,但是遇到了各种问题,MediaPipe.NET 对 vector<NormalizedLandmarkList>类型的支持有限,导致加载模型后也没能成功识别,遇到的问题有点多,因此没再继续尝试,更换了思路,直接把 Python 嵌入到软件目录下来进行完全隔离的调用,因此以Python的识别作为服务,来进行数据交换的识别,统一封装在一个软件中,通过一个按钮来 一键启动,进行实时识别。该演示进行了这种使用方式的尝试。
封装 Python + MediaPipe
python_embedded 这个目录是嵌入的python完整环境的目录,同时里面也包含了MediaPipe的相关依赖。MediaPipe 包含的模型分类有:face_detection、face_geometry、face_landmark、hand_landmark、holistic_landmark、iris_landmark、palm_detection、pose_detection、pose_landmark、selfie_segmentation,如下图:
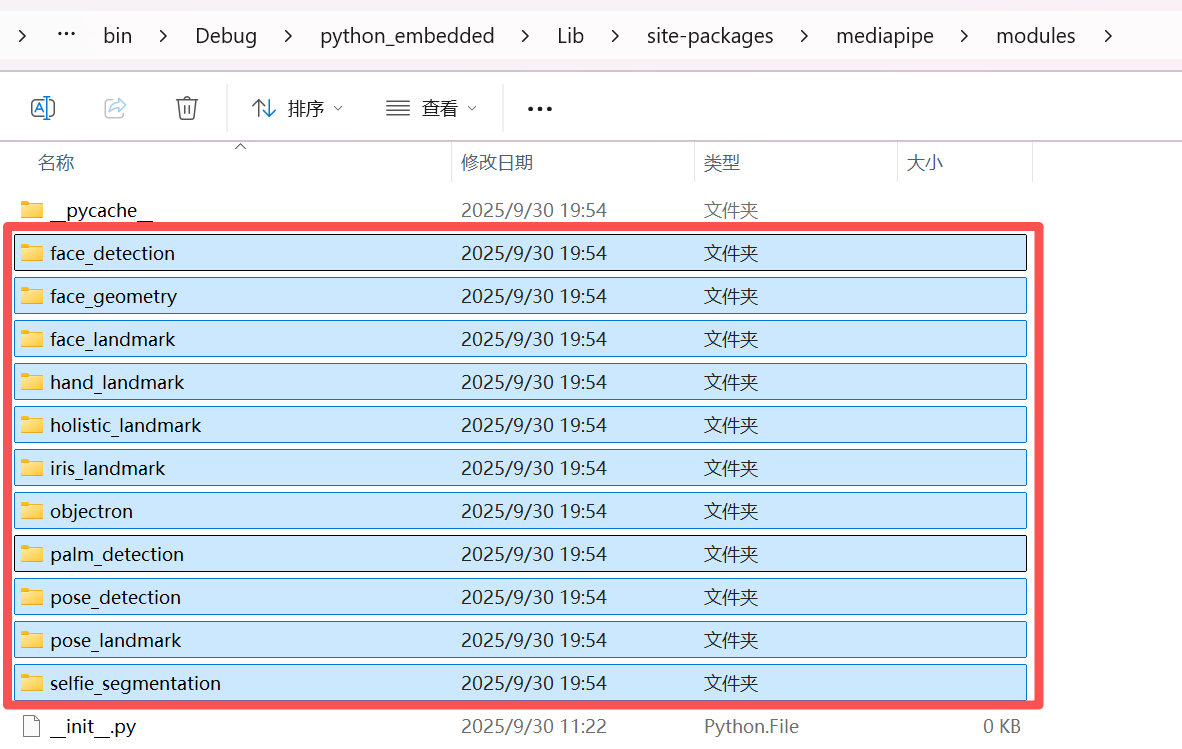
这里要注意, 程序的存放路径一定是纯英文的路径, 否则会导致模型加载失败,无法成功启动服务
,python_embedded 这个目录就是所有的服务内容。
Winform 调用 Python
Winform的主窗口程序启动Python进程:
public async Task<bool> StartServiceAsync()
{try{ var baseDir = AppDomain.CurrentDomain.BaseDirectory;Console.WriteLine(string.Format("[Client] Base directory: {0}", baseDir));var pythonExePath = Path.Combine(baseDir, "python_embedded", "python.exe");if (!File.Exists(pythonExePath)){throw new FileNotFoundException("Python not found: " + pythonExePath);}var scriptPath = Path.Combine(baseDir, "mediapipe_service.py");if (!File.Exists(scriptPath)){throw new FileNotFoundException("Script not found: " + scriptPath);}// 直接启动Python,隐藏窗口,重定向输出var startInfo = new ProcessStartInfo{FileName = pythonExePath,Arguments = string.Format("\"{0}\" {1}", scriptPath, port),WorkingDirectory = baseDir,UseShellExecute = false,  // 必须false才能重定向输出CreateNoWindow = true,    // 隐藏窗口RedirectStandardOutput = true,  // 重定向标准输出RedirectStandardError = true    // 重定向错误输出};Console.WriteLine(string.Format("[Client] Launching Python in background..."));pythonProcess = Process.Start(startInfo);if (pythonProcess == null){throw new Exception("Failed to start process");}pythonProcess.BeginOutputReadLine();pythonProcess.BeginErrorReadLine();Console.WriteLine("[Client] Process started in background, waiting 5 seconds...");await Task.Delay(5000);return await ConnectAsync();}catch (Exception ex){Console.WriteLine(string.Format("[Client] Error: {0}", ex.Message));return false;}
}
进程启动后 通过 Tcp 连接到 服务:
public async Task<bool> ConnectAsync()
{try{Console.WriteLine(string.Format("[Client] Connecting to {0}:{1}...", host, port));tcpClient = new TcpClient();await tcpClient.ConnectAsync(host, port);stream = tcpClient.GetStream();isConnected = true;var pingResponse = await SendCommandAsync(new { command = "ping" });if (pingResponse != null && pingResponse["status"].ToString() == "ok"){Console.WriteLine("[Client] Connected!");return true;}return false;}catch (Exception ex){Console.WriteLine(string.Format("[Client] Connection failed: {0}", ex.Message));isConnected = false;return false;}
}
动态服务端口
注意:服务端使用的端口有可能会被其他进程占用,因此这里动态检测端口是否可用,如果不可用 则自动切换为其他可用端口,来确保服务可以成功启动:
Python服务端动态检测可用的动态端口,处理如下 :
def find_available_port(start_port=9999, max_attempts=10):"""查找可用端口 - 从9999开始尝试10个端口"""for port in range(start_port, start_port + max_attempts):# 测试端口是否可用if port_is_available(port):return portreturn Nonedef main():# 检查默认端口9999if not port_available(9999):# 自动查找10000-10008范围内的可用端口alternative_port = find_available_port(10000, 10)if alternative_port:port = alternative_port# 保存到文件供C#读取with open('service_port.txt', 'w') as f:f.write(str(port))Winform客户端获取实时的有效端口,处理如下:
// 启动Python服务后
await Task.Delay(5000);// 读取Python实际使用的端口
var portFilePath = Path.Combine(baseDir, "service_port.txt");
if (File.Exists(portFilePath))
{var portText = File.ReadAllText(portFilePath).Trim();if (int.TryParse(portText, out int actualPort)){Console.WriteLine($"Service using alternative port: {actualPort}");port = actualPort;  // 更新客户端端口}File.Delete(portFilePath);  // 读取后删除
}return await ConnectAsync();  // 使用正确的端口连接
模拟实时图像
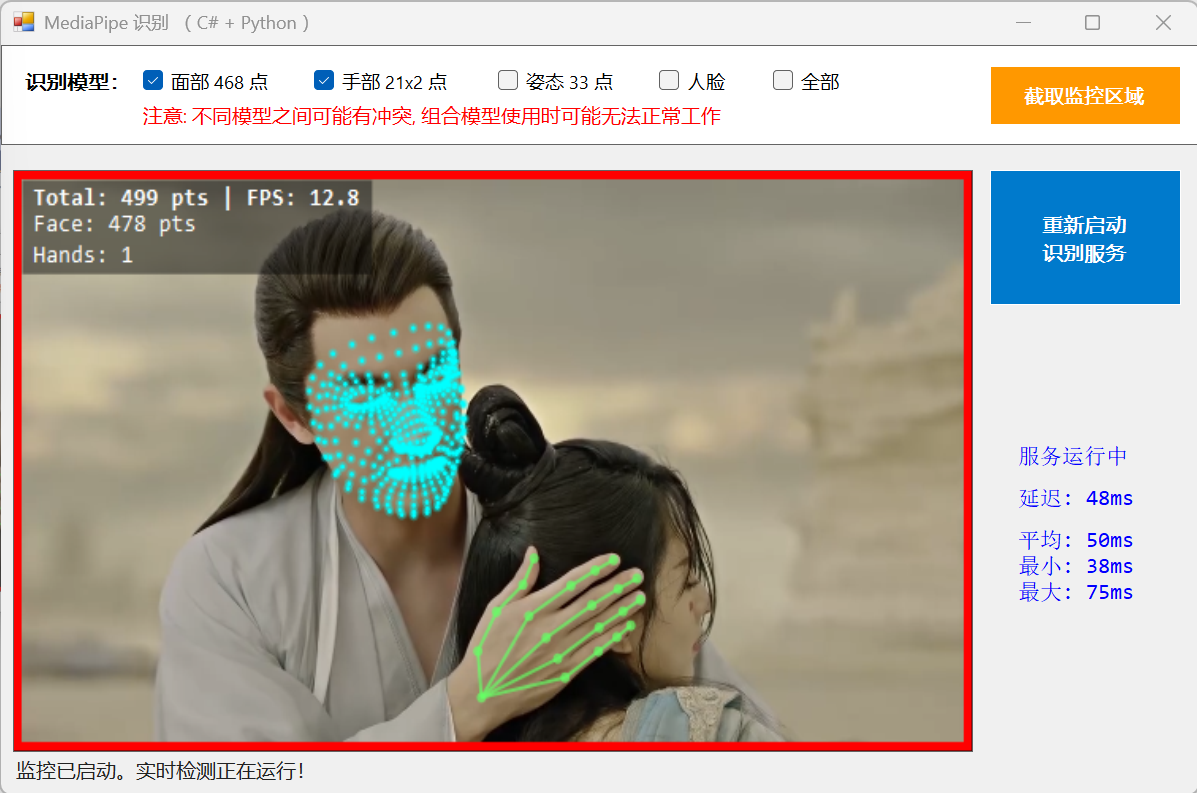
Winform 截取实时图像
然后截取屏幕指定区域播放的视频来作为图像任务流,截取目标区域的图像 ,发送给服务端:
public async Task<DetectionResult> DetectFaceMeshAsync(string imagePath, List<string> enabledModels = null)
{var result = new DetectionResult();if (!isConnected){result.Success = false;result.Message = "Service not connected";return result;}try{var stopwatch = Stopwatch.StartNew();// Default to face_mesh if no models specifiedif (enabledModels == null || enabledModels.Count == 0){enabledModels = new List<string> { "face_mesh" };}var request = new{command = "detect",image_path = imagePath,enabled_models = enabledModels};var response = await SendCommandAsync(request);if (response != null && response["status"].ToString() == "ok"){// Store all models dataif (response.ContainsKey("models")){result.Models = response["models"].ToObject<Dictionary<string, object>>();// Legacy support - extract face_mesh landmarks to Landmarks propertyif (response["models"]["face_mesh"] != null){var faceMesh = response["models"]["face_mesh"] as JObject;if (faceMesh != null && faceMesh.ContainsKey("landmarks")){var landmarksArray = faceMesh["landmarks"] as JArray;if (landmarksArray != null){foreach (JObject landmark in landmarksArray){var x = landmark["x"].Value<float>();var y = landmark["y"].Value<float>();var z = landmark["z"].Value<float>();result.Landmarks.Add(new System.Drawing.PointF(x, y));result.LandmarksZ.Add(z);}}}}}if (response.ContainsKey("process_time")){result.ProcessTimeMs = response["process_time"].Value<double>();}if (response.ContainsKey("image_width")){result.ImageWidth = response["image_width"].Value<int>();}if (response.ContainsKey("image_height")){result.ImageHeight = response["image_height"].Value<int>();}result.Success = true;result.Message = string.Format("Detection completed for {0} model(s)", enabledModels.Count);}else{result.Success = false;result.Message = response != null && response.ContainsKey("message") ?response["message"].ToString() : "Detection failed";}result.TotalTimeMs = stopwatch.ElapsedMilliseconds;return result;}catch (Exception ex){Console.WriteLine(string.Format("[Client] Error: {0}", ex.Message));result.Success = false;result.Message = ex.Message;return result;}
}
将服务端返回的识别结果绘制到窗口:
private void DrawMultiModelResults(Bitmap frame, MediaPipeServiceClient.DetectionResult result)
{using (var g = Graphics.FromImage(frame)){g.SmoothingMode = SmoothingMode.AntiAlias;int totalPoints = 0;var infoLines = new List<string>();try{// Draw Face Mesh - 使用更明显的颜色和大小if (result.Models.ContainsKey("face_mesh")){var faceMeshData = Newtonsoft.Json.JsonConvert.DeserializeObject<dynamic>(result.Models["face_mesh"].ToString());if (faceMeshData.landmarks != null){int faceMeshPoints = 0;// 使用渐变色和发光效果using (var outerBrush = new SolidBrush(Color.FromArgb(80, 0, 255, 255))) // 外圈发光using (var innerBrush = new SolidBrush(Color.FromArgb(255, 0, 255, 255))) // 内圈亮青色{foreach (var landmark in faceMeshData.landmarks){float x = landmark.x;float y = landmark.y;float visibility = landmark.visibility != null ? (float)landmark.visibility : 1.0f;{// 绘制外圈发光效果g.FillEllipse(outerBrush, x - 3f, y - 3f, 6, 6);// 绘制内圈亮点g.FillEllipse(innerBrush, x - 1.5f, y - 1.5f, 3, 3);faceMeshPoints++;totalPoints++;}}}infoLines.Add(string.Format("Face: {0} pts", faceMeshPoints));}}  }catch (Exception ex){Console.WriteLine(string.Format("Draw error: {0}", ex.Message));} }
}注意:这里需要注意2点:当对多个模型同时进行识别的时候,有的模型之间可能会有冲突;在组合模型使用的时候,使用的模型越多,识别速度也会越慢 。
最终程序目录
winform 程序编译后的目录:

该目录下包含了全部运行需要的文件,软件启动后选取一个图像画面,然后直接启动服务识别即可。
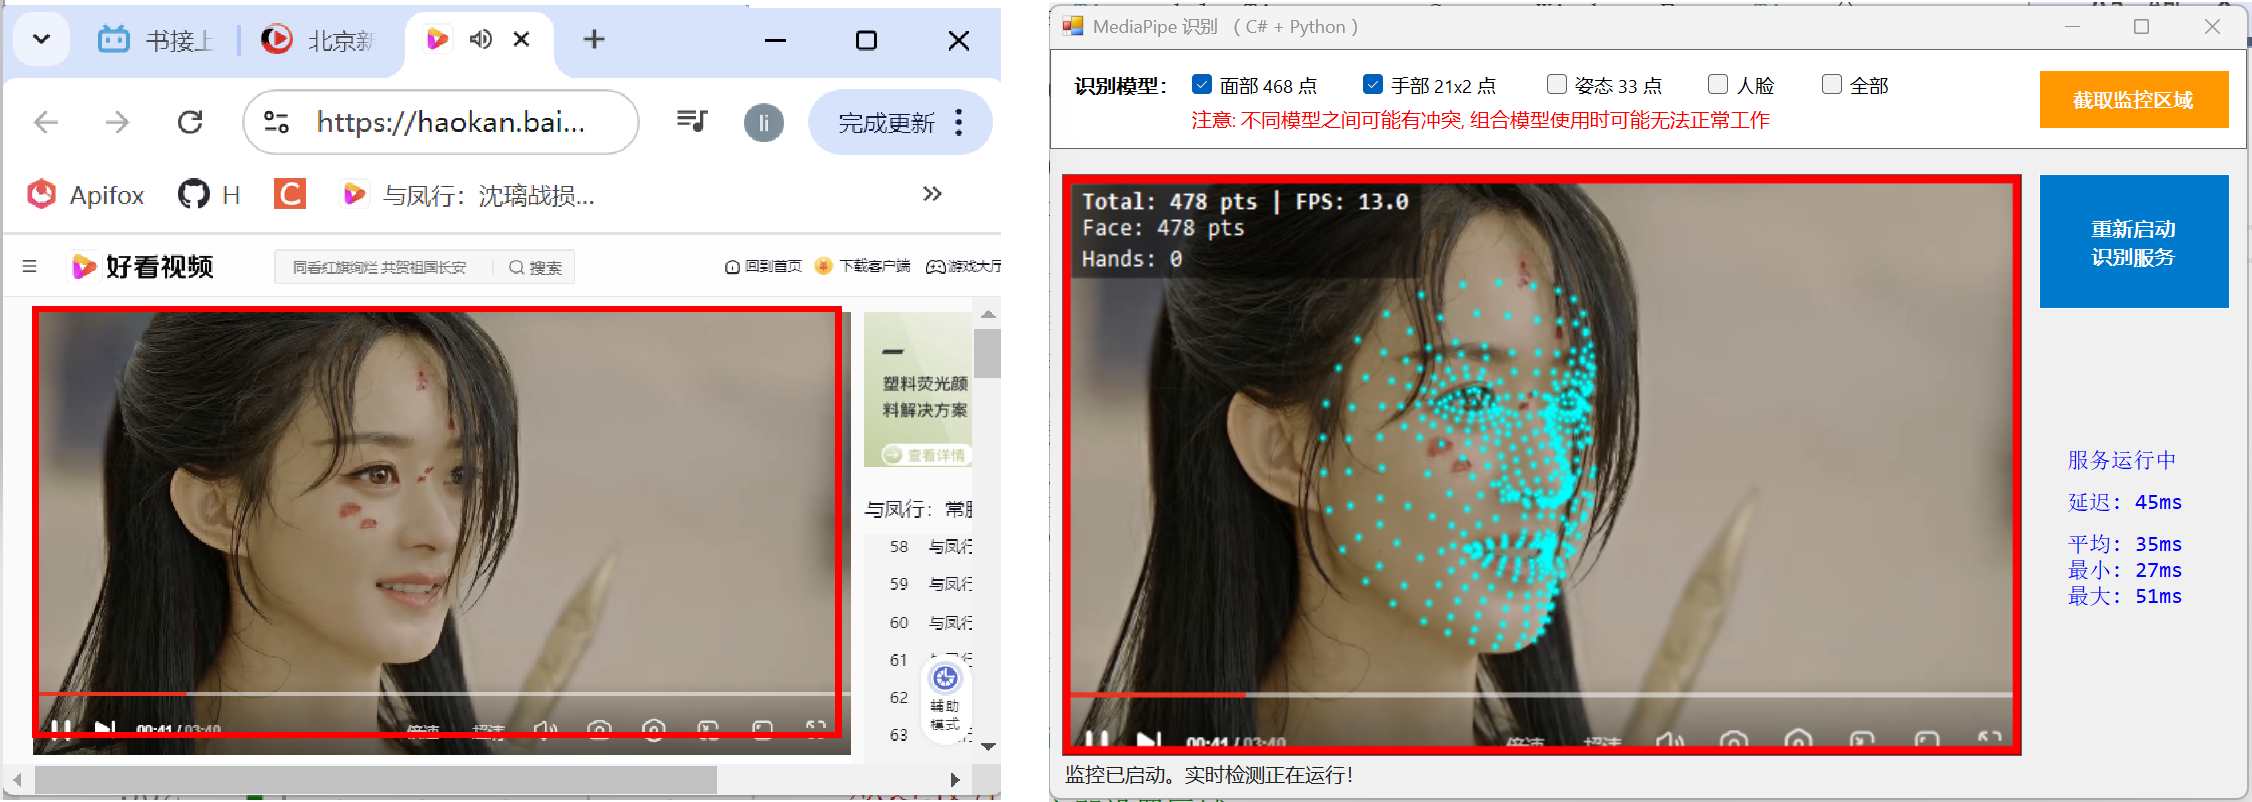
行云,我想你了
“行云,我想吃你做的饭,我想你了”,太喜欢这段了,以这段为识别素材,进行演示:

完整的程序源码:https://download.csdn.net/download/LateFrames/92063664