gRPC从0到1系列【8】
文章目录
- 二、一元rpc使用
- 2.1 工作创建、配置
- ✅ 2.2 一元RPC使用示例
- 2.2.1 阻塞式客户端调用
- 2.2.2 服务器
- 2.2.3 测试
- 2.2.4 异步方式客户端调用
- 2.2.5 Future模式客户端调用
- 2.2.6 一元rpc应用场景
- 2.3 gRPC一元RPC调用方式
- 2.3.1 阻塞式调用 (Synchronous/Blocking)
- 2.3.2 异步方式 (Asynchronous)
- 2.3.3 Future模式 (Future/Promise)
- 2.4 选择指南
- 2.5 最佳实践
- 2.5.1 资源管理
- 2.5.2 错误处理
- 2.5.3 线程配置
二、一元rpc使用
2.1 工作创建、配置
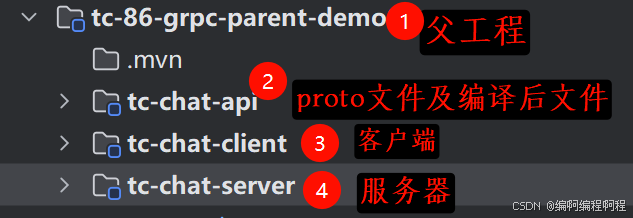
✅ 1. 在父工程当中引入依赖文件:
<properties><maven.compiler.source>17</maven.compiler.source><maven.compiler.target>17</maven.compiler.target><project.build.sourceEncoding>UTF-8</project.build.sourceEncoding><grpc.version>1.75.0</grpc.version><annotations.version>6.0.53</annotations.version><slf4j.version>2.0.17</slf4j.version><logback.version>1.5.18</logback.version>
</properties><dependencies><dependency><groupId>io.grpc</groupId><artifactId>grpc-netty-shaded</artifactId><version>${grpc.version}</version><scope>runtime</scope></dependency><dependency><groupId>io.grpc</groupId><artifactId>grpc-protobuf</artifactId><version>${grpc.version}</version></dependency><dependency><groupId>io.grpc</groupId><artifactId>grpc-stub</artifactId><version>${grpc.version}</version></dependency><dependency> <!-- necessary for Java 9+ --><groupId>org.apache.tomcat</groupId><artifactId>annotations-api</artifactId><version>${annotations.version}</version><scope>provided</scope></dependency><dependency><groupId>org.projectlombok</groupId><artifactId>lombok</artifactId><version>1.18.40</version></dependency><dependency><groupId>org.slf4j</groupId><artifactId>slf4j-api</artifactId><version>${slf4j.version}</version></dependency><dependency><groupId>ch.qos.logback</groupId><artifactId>logback-classic</artifactId><version>${logback.version}</version></dependency>
</dependencies>
✅ 2. 在tc-chat-api模块,引入proto插件
<properties><maven.compiler.source>17</maven.compiler.source><maven.compiler.target>17</maven.compiler.target><project.build.sourceEncoding>UTF-8</project.build.sourceEncoding></properties><build><extensions><extension><groupId>kr.motd.maven</groupId><artifactId>os-maven-plugin</artifactId><version>1.7.1</version></extension></extensions><plugins><plugin><groupId>org.xolstice.maven.plugins</groupId><artifactId>protobuf-maven-plugin</artifactId><version>0.6.1</version><configuration><!--suppress UnresolvedMavenProperty --><protocArtifact>com.google.protobuf:protoc:3.25.5:exe:${os.detected.classifier}</protocArtifact><pluginId>grpc-java</pluginId><!--suppress UnresolvedMavenProperty --><pluginArtifact>io.grpc:protoc-gen-grpc-java:1.75.0:exe:${os.detected.classifier}</pluginArtifact><!-- grpc java插件默认会将文件生成在target目录下,这里可以修改我们自己定义的目录 --><outputDirectory>${basedir}/src/main/java</outputDirectory><!-- 是否清除生成目录,这里必须设置为false,否则重新生成一次,会清空原来已经生成好的文件 --><clearOutputDirectory>false</clearOutputDirectory></configuration><executions><execution><goals><goal>compile</goal><goal>compile-custom</goal></goals></execution></executions></plugin></plugins></build>
前置条件:
- 配置好maven的goal即可.
- 导入proto文件到tc-chat-api模块
✅ 3. 编写proto文件.如下所示.
存放位置: src/main/proto/chat_service.proto
syntax = "proto3";package cn.tcmeta.chat.grpc;
option java_multiple_files = true;
option java_package = "cn.tcmeta.chat.grpc";
option java_outer_classname = "ChatServiceProto";// 定义四种通信方式的服务
service ChatService {// 一元RPC: 简单请求-响应模式rpc SimpleChat (ChatMessage) returns (ChatResponse);// 服务器流式RPC: 客户端发送一个请求,服务器返回流式响应rpc ServerStreamChat (ChatMessage) returns (stream ChatResponse);// 客户端流式RPC: 客户端发送流式请求,服务器返回一个响应rpc ClientStreamChat (stream ChatMessage) returns (ChatResponse);// 双向流式RPC: 客户端和服务器都可以发送流式消息rpc BidirectionalChat (stream ChatMessage) returns (stream ChatResponse);
}// 聊天消息
message ChatMessage {string user_id = 1;          // 用户IDstring message = 2;          // 消息内容int64 timestamp = 3;         // 时间戳MessageType type = 4;        // 消息类型enum MessageType {TEXT = 0;IMAGE = 1;FILE = 2;SYSTEM = 3;}
}// 聊天响应
message ChatResponse {string message_id = 1;       // 消息IDstring status = 2;           // 状态string response_message = 3; // 响应消息int64 timestamp = 4;         // 时间戳ResponseCode code = 5;       // 响应码enum ResponseCode {SUCCESS = 0;ERROR = 1;WARNING = 2;INFO = 3;}
}// 用户信息
message User {string id = 1;string name = 2;UserStatus status = 3;enum UserStatus {ONLINE = 0;OFFLINE = 1;BUSY = 2;AWAY = 3;}
}
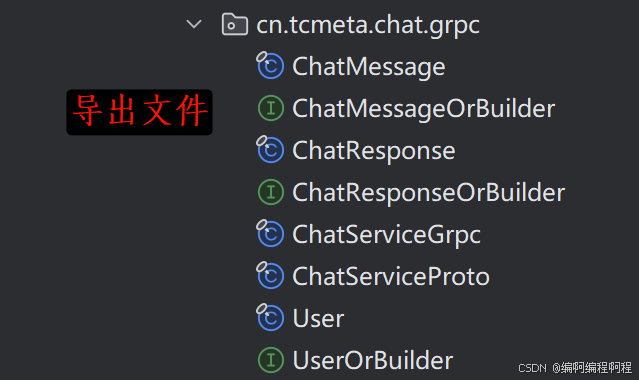
将proto文件导出到指定目录:
✅ 4. 将tc-chat-api模块分别引入到tc-chat-server和tc-chat-client模块当中.
✅ 2.2 一元RPC使用示例
2.2.1 阻塞式客户端调用
✅ 客户端处理封装
package cn.tcmeta.chat.grpc;import io.grpc.ManagedChannel;
import io.grpc.ManagedChannelBuilder;
import io.grpc.StatusRuntimeException;import java.util.concurrent.TimeUnit;/*** @author: laoren* @description: 一元rpc, 简单的请求响应* @version: 1.0.0*/
public class UnaryChatClient {private final ManagedChannel channel;private final ChatServiceGrpc.ChatServiceBlockingStub blockingStub;public UnaryChatClient(String host, int port) {channel = ManagedChannelBuilder.forAddress(host, port).usePlaintext().build();// 创建, 阻塞式blockingStub = ChatServiceGrpc.newBlockingStub(channel);}/*** 关闭连接*/public void shutdown() throws InterruptedException {channel.shutdown().awaitTermination(5, TimeUnit.SECONDS);}/*** 同步调用示例 - 客户端阻塞,直到收到响应* @param userId 用户ID* @param message 消息*/public void synchronousCall(String userId, String message){System.out.println("=== 同步调用开始 ===");ChatMessage request = ChatMessage.newBuilder().setUserId(userId).setMessage(message).setTimestamp(System.currentTimeMillis()).setType(ChatMessage.MessageType.TEXT).build();try {// 设置超时时间ChatServiceGrpc.ChatServiceBlockingStub stubWithTimeout= blockingStub.withDeadlineAfter(5, TimeUnit.SECONDS);System.out.println("发送请求 -- " + message);long start = System.currentTimeMillis();// 同步阻塞调用ChatResponse response = stubWithTimeout.simpleChat(request);long end = System.currentTimeMillis();System.out.println("耗时: " +  (end - start));System.out.println("收到消息: " + response.getResponseMessage());System.out.println("状态: " + response.getStatus());System.out.println("消息ID: " + response.getMessageId());}catch (StatusRuntimeException e){System.err.println("RPC调用失败: " + e.getStatus());System.err.println("错误信息: " + e.getMessage());}}
}
✅ 客户端启动
/*** @author: laoren* @description: 客户端* @version: 1.0.0*/
public class SimpleChatClient {public static void main(String[] args) throws InterruptedException {UnaryChatClient client =new UnaryChatClient("localhost", 8080);try {client.synchronousCall("user001", "你好,我的朋友!");} finally {client.shutdown();}}
}
2.2.2 服务器
✅ 服务器处理封装
package cn.tcmeta.chat.grpc;import io.grpc.stub.StreamObserver;import java.util.concurrent.ConcurrentHashMap;
import java.util.concurrent.atomic.AtomicLong;/*** @author: laoren* @description: 一元RPC服务实现,特点: 一个请求对应一个响应,同步阻塞模式* @version: 1.0.0*/
public class UnaryChatServiceImpl extends ChatServiceGrpc.ChatServiceImplBase {private final ConcurrentHashMap<String, User> users = new ConcurrentHashMap<>();private final AtomicLong messageIdGenerator = new AtomicLong(1000);@Overridepublic void simpleChat(ChatMessage request, StreamObserver<ChatResponse> responseObserver) {System.out.println("=== 一元RPC调用开始 ===");System.out.println("收到消息: " + request.getMessage());System.out.println("用户ID: " + request.getUserId());System.out.println("消息类型: " + request.getType());try {// 1. 参数验证validateRequest(request);// 2. 业务逻辑处理String processedMessage = processMessage(request);// 3. 构建响应ChatResponse response = buildSuccessResponse(processedMessage);// 4. 发送响应responseObserver.onNext(response);// 5. 标记完成responseObserver.onCompleted();System.out.println("=== 一元RPC调用完成 ===");} catch (Exception e) {// 错误处理handleError(responseObserver, e);}}/*** 请求参数验证*/private void validateRequest(ChatMessage request) {if (request.getUserId().isEmpty()) {throw new IllegalArgumentException("用户ID不能为空");}if (request.getMessage().isEmpty()) {throw new IllegalArgumentException("消息内容不能为空");}if (request.getMessage().length() > 1000) {throw new IllegalArgumentException("消息长度超过限制");}}/*** 消息处理逻辑*/private String processMessage(ChatMessage request) {String originalMessage = request.getMessage();// 模拟业务处理String processedMessage = switch (request.getType()) {case TEXT -> "[文本处理] " + originalMessage;case IMAGE -> "[图片处理] 已接收图片消息";case FILE -> "[文件处理] 文件上传成功";case SYSTEM -> "[系统消息] " + originalMessage;default -> "[未知类型] " + originalMessage;};// 模拟处理延迟simulateProcessingDelay();return processedMessage;}/*** 构建成功响应*/private ChatResponse buildSuccessResponse(String message) {return ChatResponse.newBuilder().setMessageId("MSG_" + messageIdGenerator.incrementAndGet()).setStatus("SUCCESS").setResponseMessage(message).setTimestamp(System.currentTimeMillis()).setCode(ChatResponse.ResponseCode.SUCCESS).build();}/*** 构建错误响应*/private ChatResponse buildErrorResponse(String errorMessage) {return ChatResponse.newBuilder().setMessageId("ERR_" + messageIdGenerator.incrementAndGet()).setStatus("ERROR").setResponseMessage(errorMessage).setTimestamp(System.currentTimeMillis()).setCode(ChatResponse.ResponseCode.ERROR).build();}/*** 错误处理*/private void handleError(StreamObserver<ChatResponse> responseObserver, Exception e) {System.err.println("处理请求时发生错误: " + e.getMessage());ChatResponse errorResponse = buildErrorResponse("服务器错误: " + e.getMessage());responseObserver.onNext(errorResponse);responseObserver.onCompleted();}/*** 模拟处理延迟*/private void simulateProcessingDelay() {try {// 模拟100-500ms的处理延迟Thread.sleep(100 + (long)(Math.random() * 400));} catch (InterruptedException e) {Thread.currentThread().interrupt();}}/*** 用户管理相关方法*/public void addUser(User user) {users.put(user.getId(), user);}public User getUser(String userId) {return users.get(userId);}
}
✅ 服务器启动
package cn.tcmeta.chat.grpc;import io.grpc.Server;
import io.grpc.ServerBuilder;import java.util.concurrent.TimeUnit;/*** @author: laoren* @description: 服务器端* @version: 1.0.0*/
public class SimpleChatServer {public static void main(String[] args) {ServerBuilder<?> builder = ServerBuilder.forPort(8080).addService(new UnaryChatServiceImpl());Server server = builder.build();try {server.start();System.out.println("✅✅✅✅ 服务启动成功, 监听端口号 8080~~~~");// 3. 等待服务server.awaitTermination();} catch (Exception e) {e.printStackTrace();}}
}
2.2.3 测试
启动服务器日志输出:

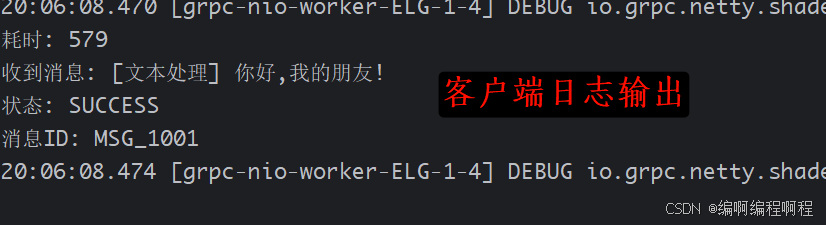
启动客户端,直接发送消息到服务器,分别查看日志输出情况:
客户端日志输出:
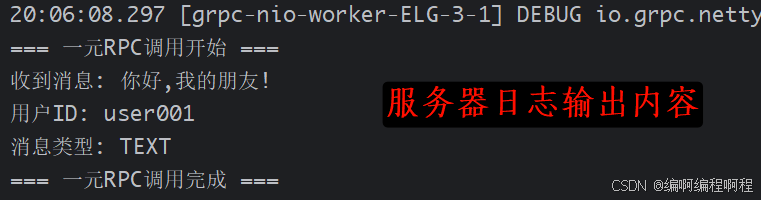
服务器日志输出:
2.2.4 异步方式客户端调用
🪟 在客户端业务封装的类中, 添加异步调用方式, 如下所示:
/*** 异步调用示例 - 【非阻塞、使用回调函数】** @param userId  用户id* @param message 发送的消息内容*/
public void asynchronousCall(String userId, String message) {System.out.println("\n======== 异步一元RPC请求=============");ChatMessage request = ChatMessage.newBuilder().setUserId(userId).setMessage(message).setTimestamp(System.currentTimeMillis()).setType(ChatMessage.MessageType.IMAGE).build();System.out.println("发送异步请求");long start = System.currentTimeMillis();asyncStub.simpleChat(request, new io.grpc.stub.StreamObserver<ChatResponse>() {@Overridepublic void onNext(ChatResponse response) {long end = System.currentTimeMillis();System.out.printf("异步请求收到响应 -> 耗时:  %s%n", (end - start));System.out.printf("响应状态: %s%n", response.getStatus());System.out.printf("响应消息ID: %s%n", response.getMessageId());System.out.printf("响应消息: %s%n", response.getResponseMessage());}@Overridepublic void onError(Throwable t) {System.err.println("异步请求失败: " + t.getMessage());t.printStackTrace();}@Overridepublic void onCompleted() {System.out.println("异步请求完成");}});// 注意: 异步调用会立即返回,响应在回调中处理System.out.println("异步调用已发送,继续执行其他操作...");// 模拟执行时间实际开发当中,不必如此try {TimeUnit.MILLISECONDS.sleep(2000);} catch (InterruptedException e) {e.printStackTrace();}System.out.println("\n ========= 异步调用结束 ===========");
}
在客户端启动类中添加执行调用代码:
client.asynchronousCall("user002", "好好学习天天向上!");
服务器输出日志:
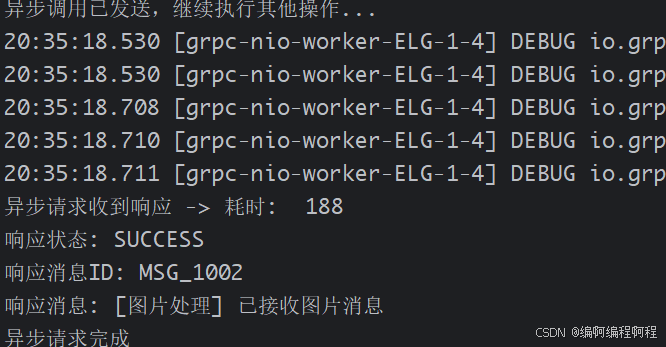
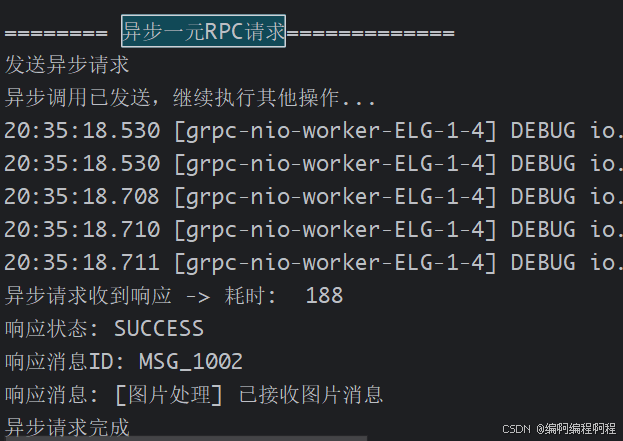
客户端日志输出:
2.2.5 Future模式客户端调用
🪟 在客户端业务封装的类中, 添加Future模式调用方式, 如下所示:
/*** future模式调用示例** @param userId 用户ID* @param message 发送的消息内容*/
public void futureCall(String userId, String message) throws ExecutionException, InterruptedException, TimeoutException {System.out.println("\n =============== Future模式之一元RPC调用 ============");ChatMessage request = ChatMessage.newBuilder().setUserId(userId).setMessage(message).setTimestamp(System.currentTimeMillis()).setType(ChatMessage.MessageType.FILE).build();System.out.println("发送future请求~~~");long start = System.currentTimeMillis();try {ListenableFuture<ChatResponse> future = futureStub.withDeadlineAfter(5, TimeUnit.SECONDS).simpleChat(request);// 可以在这里处理其它业务System.out.println("Future已经调用,可以做其它事情了~~~");ChatResponse response = future.get(10, TimeUnit.SECONDS);long end = System.currentTimeMillis();System.out.printf("Future收到响应 -- 总耗时: %s%n", (end - start));assert response != null;System.out.printf("响应状态: %s%n", response.getStatus());System.out.printf("收到响应消息: %s%n", response.getResponseMessage());} catch (Exception e) {e.printStackTrace();}System.out.println("\n ========= Future模式调用完成 ===========");
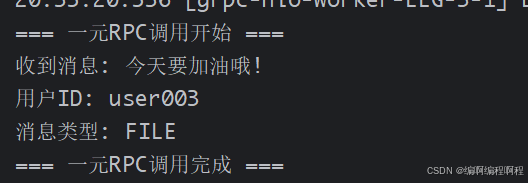
}📌 服务器日志输出:
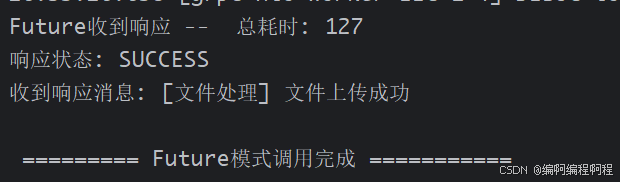
📌 客户端日志输出
2.2.6 一元rpc应用场景
✅ 数据查询场景, 譬如: 用户信息查询、产品详情获取、订单状态查询、配置信息获取等.
✅ 业务操作场景, 譬如: 订单创建与更新、用户注册/登录、支付处理、文件上传等
✅ 状态检查场景, 譬如: 服务健康检查、系统状态监控、资源可用性检查等
✅ 认证授权场景, 譬如: JWT token检查、权限检查、会话验证、API密钥验证
✅ 配置管理场景, 譬如: 应用配置获取、功能开关管理、参数调整、版本信息查询
2.3 gRPC一元RPC调用方式
2.3.1 阻塞式调用 (Synchronous/Blocking)
阻塞式调用是最简单的调用方式,客户端发起请求后会阻塞等待,直到收到响应或发生错误。
📄 优缺点分析
✅优点:
- 代码简单易懂
- 调试方便
- 适合简单业务逻辑
❌ 缺点:
- 阻塞线程,资源利用率低
- 不适合高并发场景
- 可能导致线程饥饿
2.3.2 异步方式 (Asynchronous)
异步调用不会阻塞当前线程,通过回调函数处理响应结果。
📌 优缺点分析
✅ 优点:
- 不阻塞调用线程
- 提高并发处理能力
- 资源利用率高
❌ 缺点:
- 代码复杂度增加
- 回调地狱问题
- 错误处理复杂
2.3.3 Future模式 (Future/Promise)
Future模式提供了一个未来结果的占位符,可以在需要时获取结果,结合了同步和异步的优点。
2.4 选择指南
✅ 阻塞式调用适用场景
- 简单的同步业务逻辑
- 低并发的应用场景
- 对性能要求不高的服务
- 原型开发和测试
✅ 异步调用适用场景
- 高并发的Web服务
- 需要处理大量并发请求
- I/O密集型操作
- 实时性要求高的应用
✅ Future模式适用场景
- 需要更好的编程模型
- 复杂的异步处理逻辑
- 需要结果组合和链式处理
- 既想要异步性能又想要同步便利性
2.5 最佳实践
2.5.1 资源管理
// 确保通道正确关闭
try (ManagedChannel channel = ManagedChannelBuilder.forTarget(target).usePlaintext().build()) {UserServiceGrpc.UserServiceBlockingStub stub = UserServiceGrpc.newBlockingStub(channel);// 执行调用
}
2.5.2 错误处理
public void handleErrors() {try {Future<GetUserResponse> future = getUserFuture("123");GetUserResponse response = future.get(5, TimeUnit.SECONDS);// 处理响应} catch (TimeoutException e) {// 超时处理} catch (ExecutionException e) {// 业务异常处理} catch (InterruptedException e) {Thread.currentThread().interrupt();// 中断处理}
}
2.5.3 线程配置
// 为异步调用配置合适的线程池
ExecutorService executor = Executors.newFixedThreadPool(Runtime.getRuntime().availableProcessors() * 2
);// 在gRPC客户端中使用
ManagedChannel channel = ManagedChannelBuilder.forTarget(target).executor(executor).usePlaintext().build();