【iOS】MVC设计模式
文章目录
- 前言
- MVC各层级
- Model层
- View层
- Controller层
- 优缺点
- 示例代码
- 运行结果
- 总结
前言
之前写程序的时候我们都是自己随意的进行文件的划分与完成,对整个项目的结构的设计没有成熟且完整的结构。今天就来说一下一个最经典的架构模式。MVC(Model-View-Controller)架构模式。
MVC各层级
由名字我们就能知道,MVC一共有三层,即Model,View和Controller
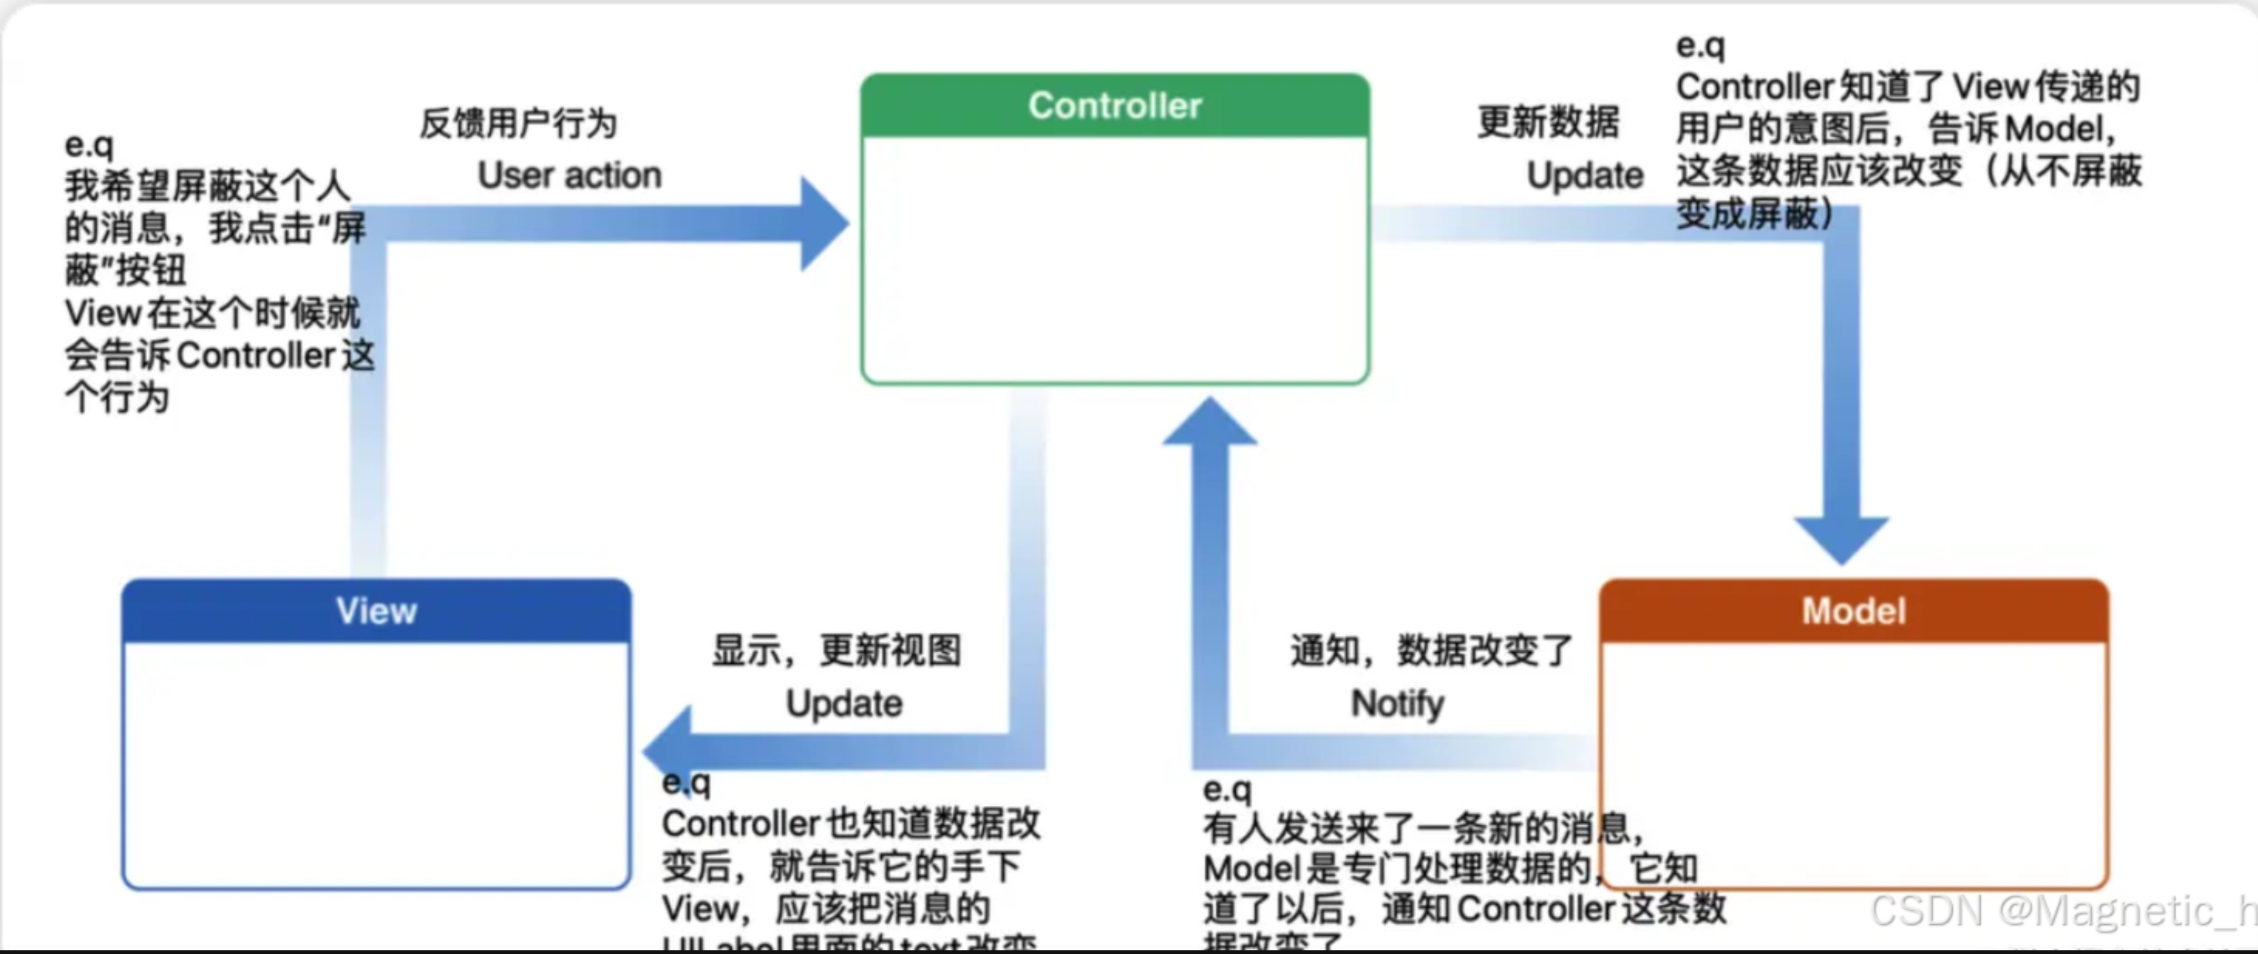
在这种模式中的交互的流程:
- 用户点击View - 视图响应事件
- 用代理传递事件到Controller - 发起网络请求更新数据层Model
- Model处理完数据 - 代理或通知给Controller
- 最后改变视图的样式,整个流程结束
Model层
模型层,负责处理数据以及处理部分的业务逻辑,如存放数据结构,网络请求等
常见自定义类或进行网络请求结果的封装对象
View层
即视图层,负责对数据的展示和事件的捕捉,一般来说,在屏幕上看到的各种组件都可以归类为View
Controller层
例如典型的UIViewController,主要负责协调Model和View,处理大部分的逻辑
- 从Model取数据 - 更新View
- 接受用户操作 - 更新数据层Model
各个层级的关系图示:
优缺点
优点:有了明确的组织方式,用Controller来控制全局,同时把View与Model的变化分隔开
缺点:会有大量逻辑方面的代码放进Controller层,导致其会越来越臃肿,后期维护成本高
示例代码
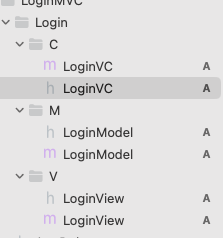
下面是一个非常简单的一个用MVC模式写的登录界面,文件部分
#import "LoginVC.h"
#import "LoginModel.h"
#import "LoginView.h"@interface LoginVC ()@property(nonatomic, strong)LoginModel *loginModel;
@property(nonatomic, strong)LoginView *loginView;
@property(nonatomic, strong)UIAlertController *alert;@end@implementation LoginVC- (void)viewDidLoad {[super viewDidLoad];self.loginView = [[LoginView alloc] initWithFrame: self.view.frame];[self.loginView initView];[self.view addSubview: self.loginView];self.loginModel = [[LoginModel alloc] init];[self.loginModel initLoginModel];[self.loginView.loginBtn addTarget: self action: @selector(login) forControlEvents: UIControlEventTouchUpInside];}- (void)login {BOOL islogin = NO;for (int i = 0; i < self.loginModel.accountArray.count; i++) {if ([self.loginModel.accountArray[i] isEqualToString:self.loginView.acctextfield.text] &&[self.loginModel.passwordArray[i] isEqualToString:self.loginView.passtextfield.text]) {islogin = YES;break;}}if (islogin == YES) {self.alert = [UIAlertController alertControllerWithTitle: @"提示" message: @"登录成功" preferredStyle:UIAlertControllerStyleAlert];UIAlertAction *defaultAction = [UIAlertAction actionWithTitle: @"确认" style: UIAlertActionStyleDefault handler: nil];[self.alert addAction: defaultAction];[self presentViewController: self.alert animated: YES completion: nil];} else {self.alert = [UIAlertController alertControllerWithTitle: @"提示" message: @"用户名或者密码错误" preferredStyle:UIAlertControllerStyleAlert];UIAlertAction *defaultAction = [UIAlertAction actionWithTitle: @"确认" style: UIAlertActionStyleDefault handler: nil];[self.alert addAction: defaultAction];[self presentViewController: self.alert animated: YES completion: nil];}
}
#import "LoginModel.h"@implementation LoginModel- (void)initLoginModel {self.accountArray = [[NSMutableArray alloc] init];self.passwordArray = [[NSMutableArray alloc] init];[self.accountArray addObject: @"123456"];[self.passwordArray addObject: @"654321"];
}
@end
#import "LoginView.h"@implementation LoginView- (void)initView {self.backgroundColor = [UIColor whiteColor];self.acctextfield = [[UITextField alloc] init];self.acctextfield.frame = CGRectMake(50, 80, 300, 40);self.acctextfield.placeholder = @"请输入账号";self.acctextfield.borderStyle = UITextBorderStyleRoundedRect;[self.acctextfield becomeFirstResponder];[self addSubview: self.acctextfield];self.passtextfield = [[UITextField alloc] init];self.passtextfield.frame = CGRectMake(50, 130, 300, 40);self.passtextfield.placeholder = @"请输入密码";self.passtextfield.borderStyle = UITextBorderStyleRoundedRect;[self.passtextfield becomeFirstResponder];[self addSubview: self.passtextfield];self.loginBtn = [UIButton buttonWithType: UIButtonTypeSystem];self.loginBtn.frame = CGRectMake(140, 190, 80, 30);[self.loginBtn setTitle: @"登录" forState: UIControlStateNormal];[self addSubview: self.loginBtn];}@end
运行结果

总结
-
MVC模式(官方推荐,缺点是Controller容易臃肿)
Model:数据和业务逻辑
View:界面展示
Controller:桥梁,负责把 Model 的数据提供给 View,同时处理用户输入
-
MVP模式(Model - View - Presenter)
Model:数据和业务逻辑
View:只负责显示,不处理逻辑
Presenter:从 Model 获取数据,处理后再交给 View 显示;View 的交互也通过 Presenter 处理(整理好再显示
特点:把 UI 逻辑从 Controller 中抽出来,Controller 更轻,View 更可测试
-
MVVM模式(Model–View–ViewModel)
Model:数据和业务逻辑
View:界面展示
ViewModel:包装 Model,处理好数据并与View 自动同步
因为才刚刚学习架构模式这方面相关内容,对MVP与MVVM都只是简单了解,若以后深入学习后会再重新进行细节的介绍