Spring框架入门:从IoC到AOP
Spring框架的设计初衷是解决企业级Java开发中的复杂性问题,通过简化配置、降低组件耦合度,为开发者提供高效、灵活的开发体验。Spring框架的核心思想是控制反转和面向切面编程,控制反转颠覆了传统开发中开发者主动创建对象的模式,也就是不再需要去new对象了,将对象的创建、依赖管理等工作交给Spring容器负责——开发者只需通过注解(如@Component)或XML配置定义组件,容器便会在应用启动时自动初始化对象,并根据依赖关系如@Autowired完成组件注入,极大降低了代码间的耦合度。例如,在开发订单管理系统时,订单服务(OrderService)依赖用户服务(UserService),无需手动创建,Spring会自动将UserService实例注入到OrderService中,让开发者更专注于业务逻辑实现。
面向切面编程则解决了横切关注点的复用问题——对于日志记录、事务管理、权限校验等需要在多个模块中重复执行的功能,AOP可将其封装为切面,通过配置指定在哪些方法切入点的执行前后通知Advice自动触发,避免了代码冗余。以事务管理为例,只需在Service层方法上添加@Transactional注解,Spring就会通过AOP自动在方法执行前开启事务、执行后提交事务,若出现异常则回滚,无需手动编写事务控制代码。 除了核心的IoC和AOP,Spring还提供了丰富的子项目和扩展模块,覆盖开发全流程:Spring MVC是用于开发Web应用的MVC框架,支持RESTful API设计,可快速构建前后端分离的Web系统;Spring Data 简化了数据访问层开发,通过统一接口封装JPA、MyBatis等持久层技术,开发者无需编写复杂的SQL操作代码;Spring Security 专注于身份认证与授权,提供OAuth2.0、JWT等主流安全方案,保障应用的访问安全;Spring Boot则进一步简化了Spring应用的搭建与部署,通过“自动配置”消除大量XML配置,支持“一键打包”为可执行JAR包,大幅提升开发效率;而Spring Cloud则基于Spring Boot实现了微服务架构的核心能力,提供服务注册发现、配置中心等组件,助力企业构建分布式系统。
接下来从设计一个最简单的spring框架开始:有一个person类,里面有个穿衣服wear方法,但是需要穿什么衣服暂时还不确定,只有动态运行时才知道。穿衣服有sweater和shirt两种选择,那么就可以来个衣服cloth接口,sweater和shirt两个类分别实现了这个接口,同时都加上@Component,放入到容器中。Component顾名思义就是成为容器里面的一个组成部分
@Component
public class Sweater implements Cloth{public void wear(){System.out.println("穿毛衣");}
}
@Component
public class Shirt implements Cloth{public void wear(){System.out.println("穿T恤");}
}
@Component
public interface Cloth {void wear();
}
在person类里面衣服是不确定的,可以通过注解@Autowired自动装配。同时也要避免产生二义性,可以暂时先只让一个实现接口,如果两个都实现编译器就不知道自动装配哪个,就会报错。为了测试是否完成自动装配,先在主函数中定义容器AnnotationConfigApplicationContext ,里面的参数是所在的包名,它会根据这个包名将所有加上@Component注解的类都放到容器中,今后想要用这个类,就可以直接从容器中拿,而且它还可以自动装配。那么这里就拿person类,看看里面是不是真的帮我们装配好了。
@Component
public class Person {@Autowiredprivate Cloth cloth;public void play(){System.out.println("出去玩");cloth.wear();}
}
public class demo {public static void main(String[] args) {AnnotationConfigApplicationContext context =new AnnotationConfigApplicationContext("demo");Person person = context.getBean(Person.class);person.play();}
}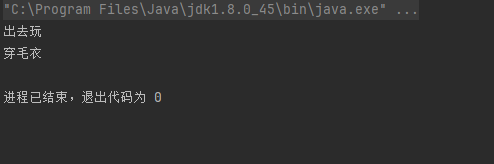
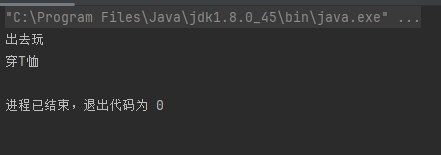
这里先只让sweater实现了接口,那么一看,确实是装配好了。但是以后也许会遇到这样的问题:可能sweater和shirt都要实现接口,那肯定会产生二义性。解决这个问题的方式也很简单,@Component()里面说明这个类的特性,然后在自动装配的时候给出这个特性就行了。比如在毛衣中加上winter作为特性,在衬衫中加上summer作为特性。在person中装配时就给出这个特性@Qualifier()
@Component
public class Person {@Autowired@Qualifier("summer")private Clouth clouth;public void play(){System.out.println("出去玩");clouth.wear();}
}
除了@Component注解,@Repository、@Service、@Controller也是与@Component的功能类似,核心作用是将类标识为 Spring 容器管理的 Bean,同时还具有特定的语义和附加功能。但因为@Component是@Repository、@Service、@Controller的父类,所以平时用的更多。
容器如此强大,那它到底是怎样管理的呢,如果我创建两次person它真的会在内存中创建两个person对象吗?下面来进行验证:
public class Demo {public static void main(String[] args) {AnnotationConfigApplicationContext context =new AnnotationConfigApplicationContext("demo");Person p1=context.getBean(Person.class);Person p2=context.getBean(Person.class);System.out.println(p1==p2);}
}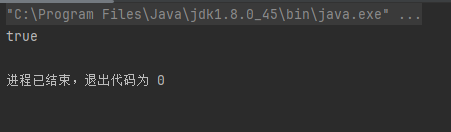
答案是不会。Spring 容器管理的 Bean 的默认作用域是单例,即容器中只会创建一个person实例,每次调用getBean()获取的都是同一个对象。但如果就是想要不同的实体对象,也是可以做到的,将person类被标注为@Scope("prototype"),则每次调用getBean()时,Spring 都会创建一个新的person实例。
还有一个问题,那么容器中每个Bean的生命周期是怎样的?或者说如何才能在合适的时机做到想做的事情,举个例子:在客户端与服务端的连接中,需要先得到url和port两个值,而连接想要断开的时候希望能够自动调用socket.close
对此,spring框架提供了两个接口InitializingBean和DisposableBean,InitializingBean接口中只包含了抽象方法void afterPropertiesSet() throws Exception,其调用时机是Bean 实例化且依赖注入完成后,它一般用于执行初始化逻辑,如参数校验、资源预加载等。而DisposableBean接口中仅包含抽象方法void destroy() throws Exception,其调用时机是Bean 被容器销毁前。常常用于执行资源释放,如关闭连接、释放文件等。
真正要连接客户端和服务端,还需要通过@PropertySource注解指定配置文件的路径(这里是("classpath:config.properties")),Spring 会在启动时自动读取该文件中的配置项,并将其添加到 Spring 的环境变量中。加载后的配置项可以通过@Value注解注入到 Bean 的属性中,实现 “配置与代码分离”,避免硬编码。
@Component
@PropertySource("classpath:config.properties")
public class Client implements InitializingBean, DisposableBean {private Socket socket;private int port;private String url;public int getPort() {return port;}@Value("${demo7.client.port}")public void setPort(int port) {this.port = port;}public String getUrl() {return url;}@Value("${demo7.client.url}")public void setUrl(String url) {this.url = url;}@Overridepublic void afterPropertiesSet() throws Exception {System.out.println("正在连接服务器");socket=new Socket(url,port);System.out.println("连接服务器成功");}@Overridepublic void destroy() throws Exception {socket.close();System.out.println("socket close");}
}
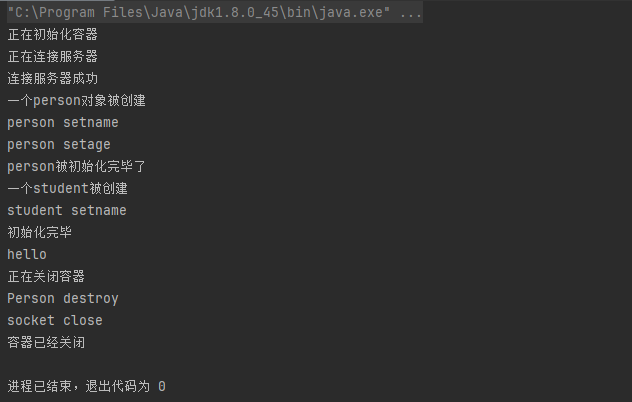
public class Demo {public static void main(String[] args) {System.out.println("正在初始化容器");AnnotationConfigApplicationContext context =new AnnotationConfigApplicationContext("demo7");System.out.println("初始化完毕");Person person = context.getBean(Person.class);person.sayHello();System.out.println("正在关闭容器");context.close();System.out.println("容器已经关闭");}
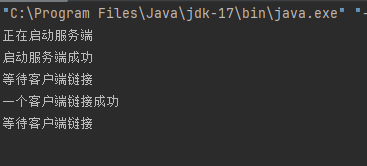
}同时也在config.properties文件下设置好url和port来确保能连接成功。完成后先启动服务端然后启动客户端(顺序不能反)观察是否能连接成功。