Spring Boot 常用注解有哪些?
以下是 Spring Boot 常用注解的详细说明,结合具体场景+代码示例,帮助你直观理解每个注解的用法:
一、核心启动与自动配置
1. @SpringBootApplication
- 作用:Spring Boot 应用的主启动类注解,组合了
@Configuration(配置类)、@ComponentScan(组件扫描)、@EnableAutoConfiguration(自动配置)三大核心功能。 - 示例:
import org.springframework.boot.SpringApplication;
import org.springframework.boot.autoconfigure.SpringBootApplication;// 主启动类必须标注此注解,Spring Boot 会自动扫描当前包及子包下的组件
@SpringBootApplication
public class DemoApplication {public static void main(String[] args) {// 启动 Spring Boot 应用SpringApplication.run(DemoApplication.class, args);}
}
2. @EnableAutoConfiguration(显式启用自动配置)
- 作用:显式启用 Spring Boot 的自动配置机制(通常被
@SpringBootApplication间接包含)。 - 示例(自定义配置类中启用):
import org.springframework.boot.autoconfigure.EnableAutoConfiguration;
import org.springframework.context.annotation.Configuration;// 单独为一个配置类启用自动配置(一般不需要,除非需要隔离配置)
@Configuration
@EnableAutoConfiguration
public class CustomAutoConfig {// 可选:自定义自动配置逻辑
}
3. @ConditionalOnClass(条件装配:类路径存在时生效)
- 作用:仅当类路径中存在指定类时,才将当前 Bean 注入容器。
- 示例(仅在 MySQL 驱动存在时注册数据源):
import com.zaxxer.hikari.HikariDataSource;
import org.springframework.boot.autoconfigure.condition.ConditionalOnClass;
import org.springframework.boot.context.properties.ConfigurationProperties;
import org.springframework.context.annotation.Bean;
import org.springframework.context.annotation.Configuration;@Configuration
public class DataSourceConfig {// 当类路径存在 HikariDataSource 时,才创建此 Bean@Bean@ConditionalOnClass(HikariDataSource.class)@ConfigurationProperties(prefix = "spring.datasource.hikari") // 绑定 Hikari 配置public HikariDataSource hikariDataSource() {return new HikariDataSource();}
}
二、Web 开发(Spring MVC)
1. @RestController + @RequestMapping 衍生注解
- 作用:
@RestController是@Controller+@ResponseBody的组合,标记 REST 接口;@GetMapping/@PostMapping等简化请求映射。 - 示例(用户信息接口):
import org.springframework.web.bind.annotation.*;@RestController // 声明为 REST 控制器,返回值自动转为 JSON
@RequestMapping("/api/user") // 类级别路径前缀
public class UserController {// GET /api/user/123@GetMapping("/{userId}")public String getUser(@PathVariable Long userId) {return "用户 ID: " + userId;}// POST /api/user (接收 JSON 参数)@PostMappingpublic String addUser(@RequestBody User user) { // @RequestBody 自动反序列化 JSON 为 User 对象return "添加用户:" + user.getName();}
}// 用户实体类(需无参构造器 + getter/setter,推荐 Lombok @Data)
class User {private Long id;private String name;// getter/setter 省略
}
2. @PathVariable(路径变量)
- 作用:从 URL 路径中提取变量(如
/user/{id}中的id)。 - 示例(同上
UserController中的@GetMapping("/{userId}"))。
3. @RequestParam(请求参数)
- 作用:从请求的 Query String 或 Form Data 中获取参数(如
?name=张三&age=20)。 - 示例:
@GetMapping("/search")
public String search(@RequestParam String keyword,       // 对应 ?keyword=xxx@RequestParam(defaultValue = "1") int page, // 默认值@RequestParam(required = false) Integer size // 可选参数
) {return "搜索关键词:" + keyword + ",页码:" + page;
}
三、配置绑定
1. @ConfigurationProperties(批量绑定配置)
-
作用:将
application.yml中的配置批量绑定到一个 POJO 类(需配合@EnableConfigurationProperties启用)。 -
示例:
步骤 1:在application.yml中添加配置app:name: demo-appversion: 1.0.0mail:host: smtp.qq.comport: 465步骤 2:定义配置类绑定属性
import org.springframework.boot.context.properties.ConfigurationProperties;
import org.springframework.stereotype.Component;// 声明前缀为 app,自动绑定 app 下的所有属性
@Component // 必须注册为 Bean
@ConfigurationProperties(prefix = "app")
public class AppConfig {private String name;    // 对应 app.nameprivate String version; // 对应 app.version// 嵌套对象:对应 app.mailprivate MailConfig mail;// getter/setter 必须提供!public static class MailConfig {private String host;private Integer port;// getter/setter}// getter/setter 省略...
}
步骤 3:在需要的地方注入使用
import org.springframework.beans.factory.annotation.Autowired;
import org.springframework.web.bind.annotation.GetMapping;
import org.springframework.web.bind.annotation.RestController;@RestController
public class ConfigController {@Autowiredprivate AppConfig appConfig;@GetMapping("/config")public String getConfig() {return "应用名称:" + appConfig.getName() + ",邮件主机:" + appConfig.getMail().getHost();}
}
2. @Value(单个属性绑定)
- 作用:直接读取配置文件中的单个属性值(适合简单配置)。
- 示例:
import org.springframework.beans.factory.annotation.Value;
import org.springframework.web.bind.annotation.GetMapping;
import org.springframework.web.bind.annotation.RestController;@RestController
public class ValueController {// 读取 application.yml 中的 server.port@Value("${server.port}")private Integer port;// 读取不存在的属性时设置默认值(${} 中用 : 分隔)@Value("${app.description:这是一个默认描述}")private String description;@GetMapping("/info")public String getInfo() {return "服务端口:" + port + ",描述:" + description;}
}
四、依赖注入
1. @Autowired(自动注入)
- 作用:Spring 容器自动注入匹配类型的 Bean(默认按类型匹配,多个同类型 Bean 时报错)。
- 示例(多个同类型 Bean 时冲突):
import org.springframework.beans.factory.annotation.Autowired;
import org.springframework.stereotype.Service;// 接口
interface MessageService {String send();
}// 实现类 1
@Service("emailService")
class EmailService implements MessageService {@Overridepublic String send() {return "邮件发送成功";}
}// 实现类 2
@Service("smsService")
class SmsService implements MessageService {@Overridepublic String send() {return "短信发送成功";}
}// 使用 @Autowired 注入(此时报错:No qualifying bean of type...)
@Service
class MessageSender {// 错误:存在两个 MessageService 类型的 Bean(EmailService 和 SmsService)@Autowiredprivate MessageService messageService;
}
2. @Qualifier(指定 Bean 名称)
- 作用:配合
@Autowired指定要注入的 Bean 名称(解决同类型 Bean 冲突)。 - 修正示例:
@Service
class MessageSender {// 指定注入名称为 "emailService" 的 Bean@Autowired@Qualifier("emailService") private MessageService messageService;
}
3. @Primary(优先注入)
- 作用:标记一个 Bean 为优先候选(当存在多个同类型 Bean 时,
@Autowired优先选择它)。 - 示例:
@Service
@Primary // 优先注入此实现
class EmailService implements MessageService {@Overridepublic String send() {return "邮件发送成功";}
}@Service
class SmsService implements MessageService {@Overridepublic String send() {return "短信发送成功";}
}@Service
class MessageSender {// 无需 @Qualifier,自动选择 @Primary 的 EmailService@Autowiredprivate MessageService messageService;
}
五、AOP(面向切面编程)
1. @Aspect(切面类)
- 作用:标记一个类为切面,内部定义切点(
@Pointcut)和通知(@Before/@After等)。 - 示例(记录方法执行时间):
import org.aspectj.lang.ProceedingJoinPoint;
import org.aspectj.lang.annotation.*;
import org.springframework.stereotype.Component;@Aspect // 声明为切面类
@Component // 注册为 Spring Bean
public class TimeCostAspect {// 定义切点:匹配 com.example.service 包下所有类的所有方法@Pointcut("execution(* com.example.service.*.*(..))")public void servicePointcut() {}// 环绕通知:在方法执行前后计时@Around("servicePointcut()")public Object recordTime(ProceedingJoinPoint joinPoint) throws Throwable {long start = System.currentTimeMillis();Object result = joinPoint.proceed(); // 执行目标方法long end = System.currentTimeMillis();System.out.println("方法 " + joinPoint.getSignature().getName() + " 执行耗时:" + (end - start) + "ms");return result;}
}
六、数据访问与事务
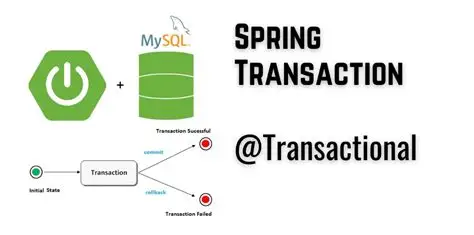
1. @Transactional(事务管理)
- 作用:标记方法或类需要开启事务(默认回滚
RuntimeException,可通过rollbackFor自定义)。 - 示例(转账事务):
import org.springframework.stereotype.Service;
import org.springframework.transaction.annotation.Transactional;@Service
public class AccountService {// 依赖注入两个账户 DAOprivate final AccountDao accountDao;public AccountService(AccountDao accountDao) {this.accountDao = accountDao;}// 转账方法:开启事务(默认 required 传播行为)@Transactional(rollbackFor = Exception.class, // 所有异常都回滚timeout = 10 // 事务超时时间(秒))public void transfer(Long fromId, Long toId, Double amount) {accountDao.decreaseBalance(fromId, amount); // 扣减余额// 模拟异常(测试回滚)if (amount > 10000) {throw new RuntimeException("转账金额过大");}accountDao.increaseBalance(toId, amount); // 增加余额}
}
七、测试相关
1. @SpringBootTest(集成测试)
- 作用:启动完整的 Spring Boot 上下文,用于集成测试(加载所有 Bean 和配置)。
- 示例(测试 Controller):
import org.junit.jupiter.api.Test;
import org.springframework.beans.factory.annotation.Autowired;
import org.springframework.boot.test.autoconfigure.web.servlet.AutoConfigureMockMvc;
import org.springframework.boot.test.context.SpringBootTest;
import org.springframework.test.web.servlet.MockMvc;import static org.springframework.test.web.servlet.request.MockMvcRequestBuilders.get;
import static org.springframework.test.web.servlet.result.MockMvcResultMatchers.content;
import static org.springframework.test.web.servlet.result.MockMvcResultMatchers.status;@SpringBootTest // 启动完整上下文
@AutoConfigureMockMvc // 自动配置 MockMvc
public class UserControllerTest {@Autowiredprivate MockMvc mockMvc; // 模拟 HTTP 请求@Testpublic void testGetUser() throws Exception {mockMvc.perform(get("/api/user/123")) // 发送 GET 请求.andExpect(status().isOk()) // 断言状态码 200.andExpect(content().string("用户 ID: 123")); // 断言响应内容}
}
2. @WebMvcTest(仅测试 MVC 层)
- 作用:仅加载 Web MVC 相关组件(如 Controller),适合单独测试接口(需配合
@MockBean模拟依赖)。 - 示例:
import org.junit.jupiter.api.Test;
import org.springframework.beans.factory.annotation.Autowired;
import org.springframework.boot.test.autoconfigure.web.servlet.WebMvcTest;
import org.springframework.boot.test.mock.mockito.MockBean;
import org.springframework.test.web.servlet.MockMvc;import static org.mockito.Mockito.when;
import static org.springframework.test.web.servlet.request.MockMvcRequestBuilders.get;
import static org.springframework.test.web.servlet.result.MockMvcResultMatchers.content;
import static org.springframework.test.web.servlet.result.MockMvcResultMatchers.status;@WebMvcTest(UserController.class) // 仅加载 UserController 相关组件
public class UserControllerMvcTest {@Autowiredprivate MockMvc mockMvc;// 模拟 UserService(因为 UserController 依赖它)@MockBeanprivate UserService userService;@Testpublic void testGetUser() throws Exception {// 模拟 userService.getUser(123) 返回 "用户123"when(userService.getUser(123L)).thenReturn("用户123");mockMvc.perform(get("/api/user/123")).andExpect(status().isOk()).andExpect(content().string("用户123"));}
}
总结
通过以上示例可以看出,Spring Boot 注解的核心是简化配置和快速集成。实际开发中:
- Web 层用
@RestController+@RequestMapping定义接口; - 配置管理用
@ConfigurationProperties(批量)或@Value(单个); - 依赖冲突用
@Primary或@Qualifier; - AOP 用
@Aspect+@Pointcut实现通用逻辑(如日志、事务); - 测试用
@SpringBootTest或@WebMvcTest验证功能。