k230 canMV 单路、双路、三路摄像头高清显示源代码
一、使用canMV k230开发板的默认板载摄像头CSI2,显示单路高清画面
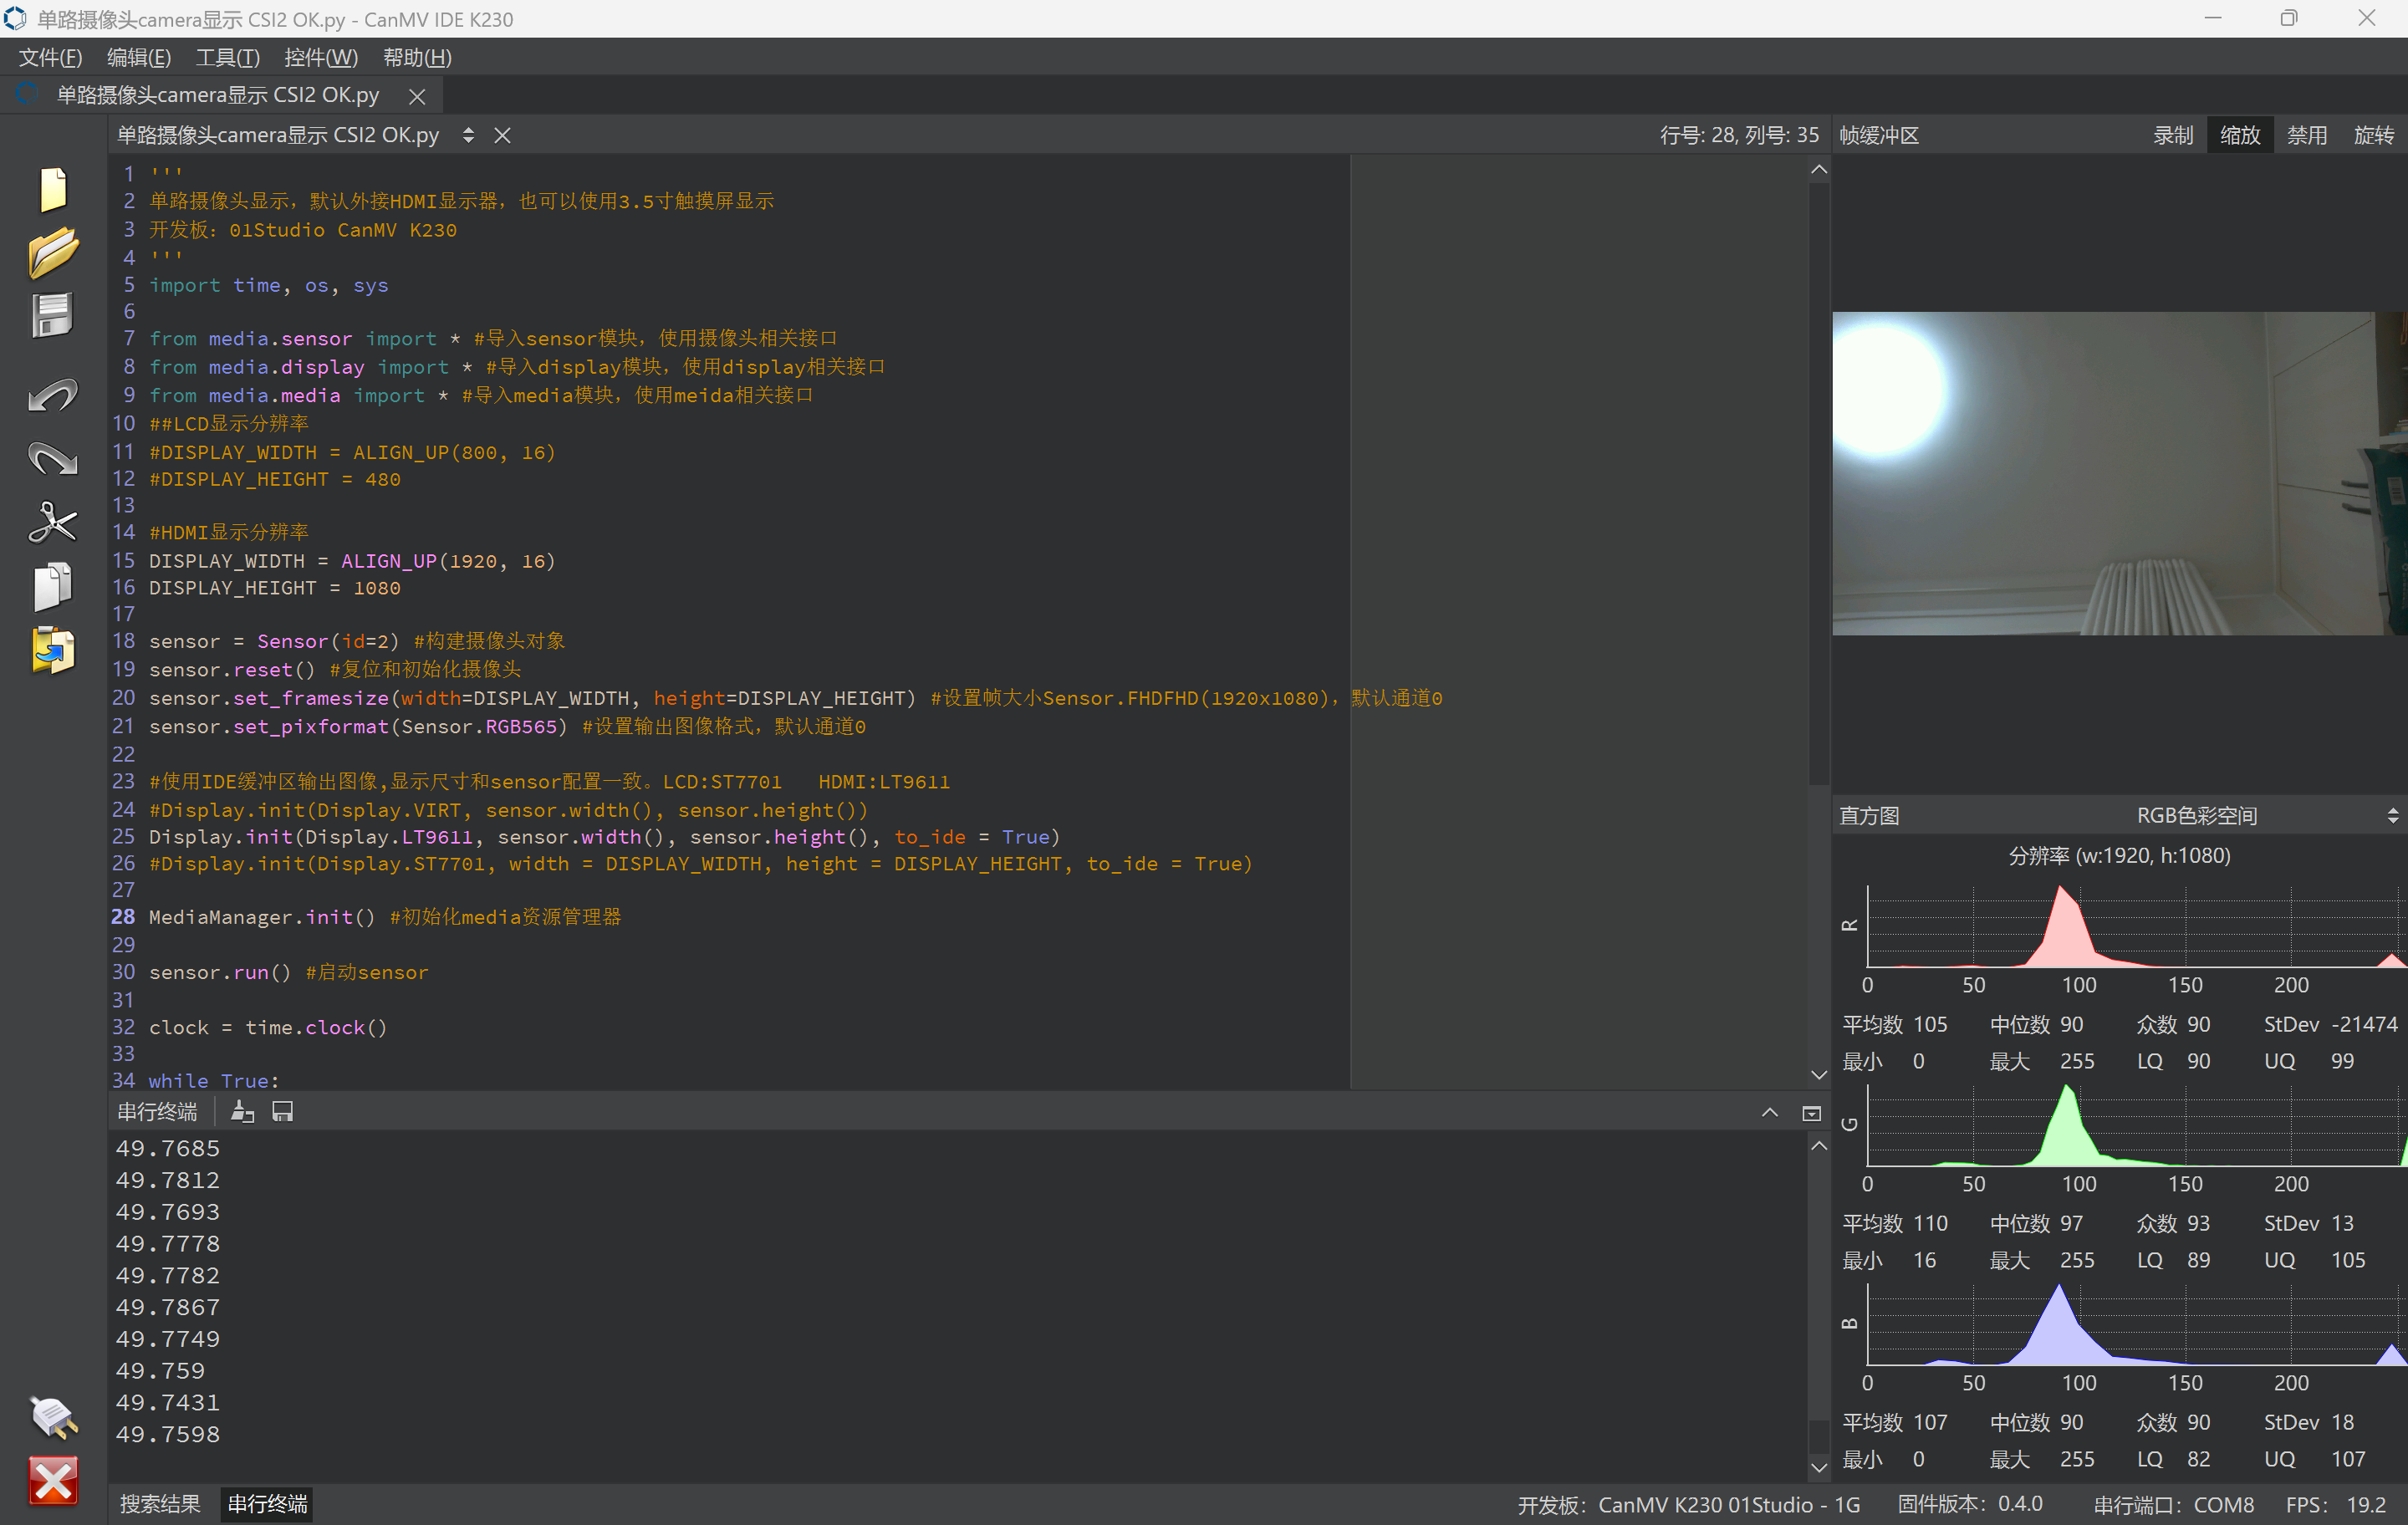
使用canMV k230开发板的默认板载摄像头CSI2,显示单路高清画面源代码:
'''
单路摄像头显示,默认外接HDMI显示器,也可以使用3.5寸触摸屏显示
开发板:01Studio CanMV K230
'''
import time, os, sysfrom media.sensor import * #导入sensor模块,使用摄像头相关接口
from media.display import * #导入display模块,使用display相关接口
from media.media import * #导入media模块,使用meida相关接口
##LCD显示分辨率
#DISPLAY_WIDTH = ALIGN_UP(800, 16)
#DISPLAY_HEIGHT = 480#HDMI显示分辨率
DISPLAY_WIDTH = ALIGN_UP(1920, 16)
DISPLAY_HEIGHT = 1080sensor = Sensor(id=2) #构建摄像头对象
sensor.reset() #复位和初始化摄像头
sensor.set_framesize(width=DISPLAY_WIDTH, height=DISPLAY_HEIGHT) #设置帧大小Sensor.FHDFHD(1920x1080),默认通道0
sensor.set_pixformat(Sensor.RGB565) #设置输出图像格式,默认通道0#使用IDE缓冲区输出图像,显示尺寸和sensor配置一致。LCD:ST7701   HDMI:LT9611
#Display.init(Display.VIRT, sensor.width(), sensor.height())
Display.init(Display.LT9611, sensor.width(), sensor.height(), to_ide = True)
#Display.init(Display.ST7701, width = DISPLAY_WIDTH, height = DISPLAY_HEIGHT, to_ide = True)MediaManager.init() #初始化media资源管理器sensor.run() #启动sensorclock = time.clock()while True:#################处理主程序################clock.tick()img = sensor.snapshot() #拍摄一张图Display.show_image(img) #显示图片print(clock.fps()) #打印FPStime.sleep_ms(20)
二、使用canMV k230开发板的板载摄像头CSI2和CSI1,显示双路高清画面
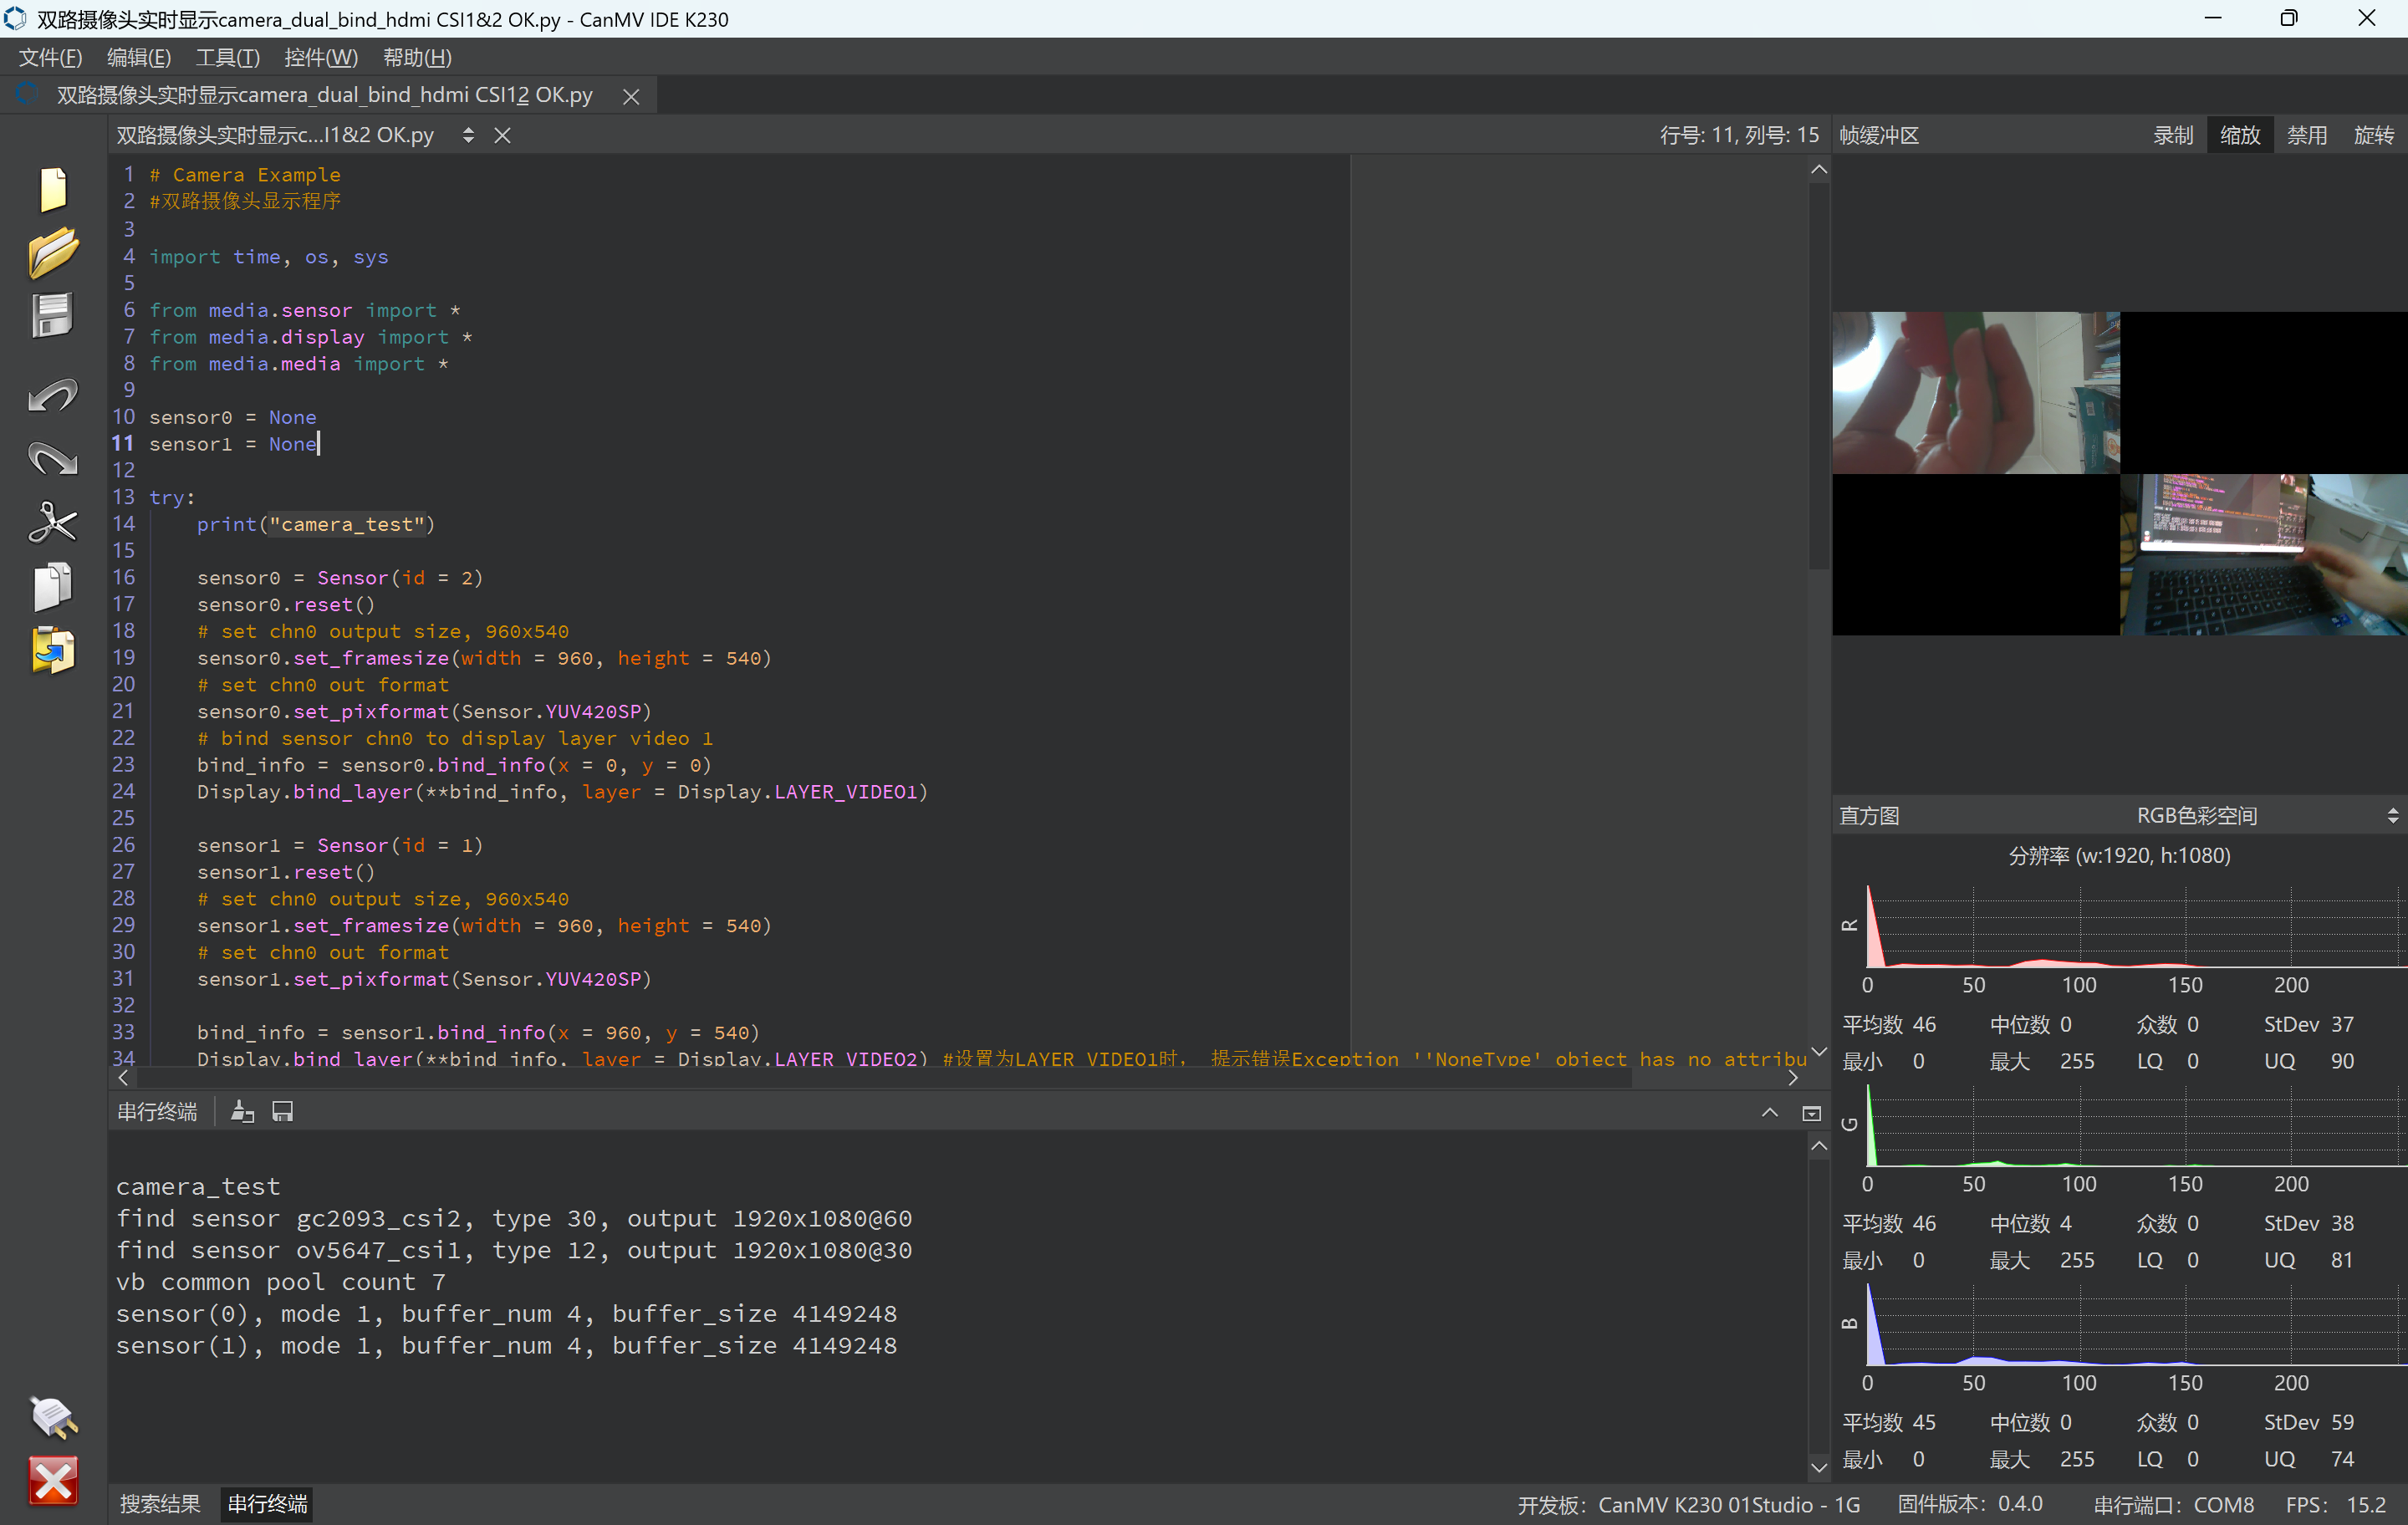
使用canMV k230开发板的板载摄像头CSI2和CSI1,显示双路高清画面源代码:
# Camera Example
#双路摄像头显示程序import time, os, sysfrom media.sensor import *
from media.display import *
from media.media import *sensor0 = None
sensor1 = Nonetry:print("camera_test")sensor0 = Sensor(id = 2)sensor0.reset()# set chn0 output size, 960x540sensor0.set_framesize(width = 960, height = 540)# set chn0 out formatsensor0.set_pixformat(Sensor.YUV420SP)# bind sensor chn0 to display layer video 1bind_info = sensor0.bind_info(x = 0, y = 0)Display.bind_layer(**bind_info, layer = Display.LAYER_VIDEO1)sensor1 = Sensor(id = 1)sensor1.reset()# set chn0 output size, 960x540sensor1.set_framesize(width = 960, height = 540)# set chn0 out formatsensor1.set_pixformat(Sensor.YUV420SP)bind_info = sensor1.bind_info(x = 960, y = 540)Display.bind_layer(**bind_info, layer = Display.LAYER_VIDEO2) #设置为LAYER_VIDEO1时, 提示错误Exception ''NoneType' object has no attribute 'destroy''# use hdmi as display outputDisplay.init(Display.LT9611, to_ide = True,osd_num=2)# init media managerMediaManager.init()# multiple sensor only need one excute run()sensor0.run()while True:os.exitpoint()time.sleep(1)
except KeyboardInterrupt as e:print("user stop")
except BaseException as e:print(f"Exception '{e}'")
finally:# multiple sensor all need excute stop()if isinstance(sensor0, Sensor):sensor0.stop()if isinstance(sensor1, Sensor):sensor1.stop()# or call Sensor.deinit()# Sensor.deinit()# deinit displayDisplay.deinit()os.exitpoint(os.EXITPOINT_ENABLE_SLEEP)time.sleep_ms(100)# deinit media bufferMediaManager.deinit()
三、使用canMV k230开发板的板载摄像头CSI2以及两个外接摄像头CSI0和CSI1,显示三路高清画面
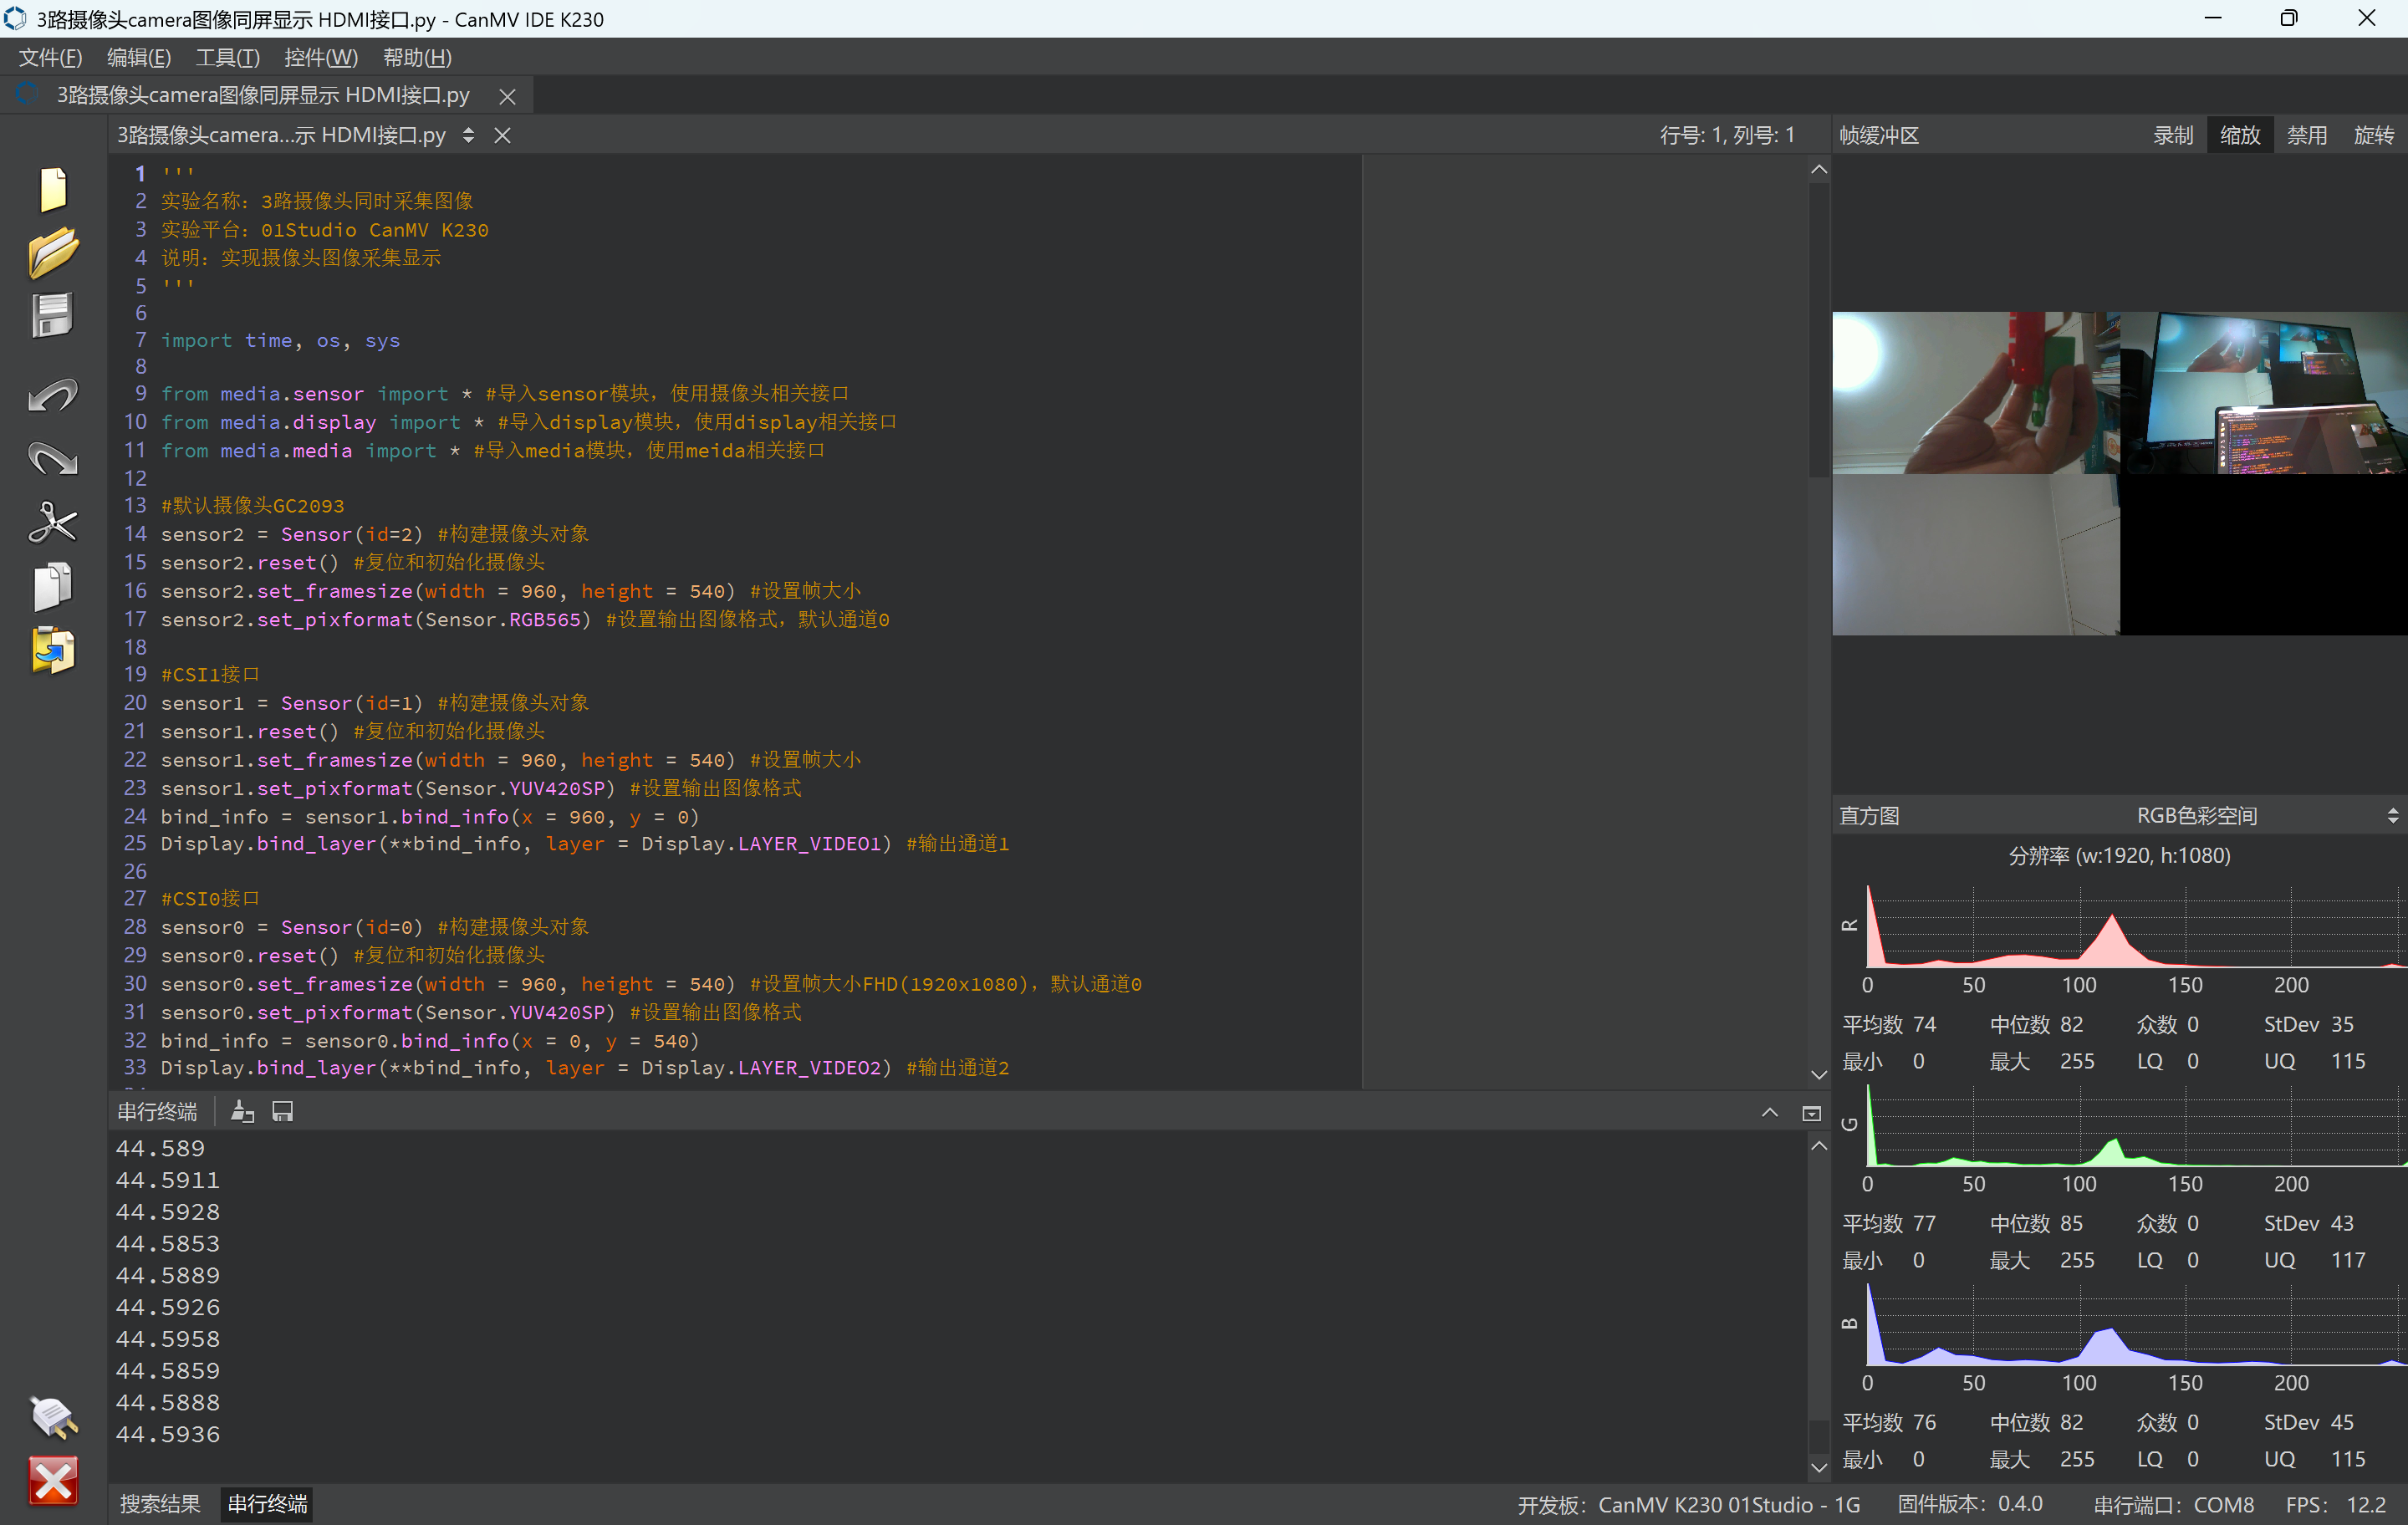 使用canMV k230开发板的板载摄像头CSI2以及两个外接摄像头CSI0和CSI1,显示三路高清画面源代码:
'''
实验名称:3路摄像头同时采集图像
说明:实现三路摄像头图像采集显示
'''import time, os, sysfrom media.sensor import * #导入sensor模块,使用摄像头相关接口
from media.display import * #导入display模块,使用display相关接口
from media.media import * #导入media模块,使用meida相关接口#默认摄像头GC2093
sensor2 = Sensor(id=2) #构建摄像头对象
sensor2.reset() #复位和初始化摄像头
sensor2.set_framesize(width = 960, height = 540) #设置帧大小
sensor2.set_pixformat(Sensor.RGB565) #设置输出图像格式,默认通道0#CSI1接口
sensor1 = Sensor(id=1) #构建摄像头对象
sensor1.reset() #复位和初始化摄像头
sensor1.set_framesize(width = 960, height = 540) #设置帧大小
sensor1.set_pixformat(Sensor.YUV420SP) #设置输出图像格式
bind_info = sensor1.bind_info(x = 960, y = 0)
Display.bind_layer(**bind_info, layer = Display.LAYER_VIDEO1) #输出通道1#CSI0接口
sensor0 = Sensor(id=0) #构建摄像头对象
sensor0.reset() #复位和初始化摄像头
sensor0.set_framesize(width = 960, height = 540) #设置帧大小FHD(1920x1080),默认通道0
sensor0.set_pixformat(Sensor.YUV420SP) #设置输出图像格式
bind_info = sensor0.bind_info(x = 0, y = 540)
Display.bind_layer(**bind_info, layer = Display.LAYER_VIDEO2) #输出通道2#使用IDE缓冲区输出图像,显示尺寸和sensor配置一致。
Display.init(Display.LT9611, to_ide = True)MediaManager.init() #初始化media资源管理器sensor2.run() #启动sensor
sensor1.run() #启动sensor
sensor0.run() #启动sensorclock = time.clock()while True:################## 这里编写代码 ##################clock.tick()img = sensor2.snapshot() #拍摄一张图Display.show_image(img) #显示图片print(clock.fps()) #打印FPS'''
实际输出:
find sensor gc2093_csi2, type 30, output 1920x1080@60
find sensor ov5647_csi1, type 12, output 1920x1080@30
find sensor ov5647_csi0, type 7, output 1920x1080@30
vb common pool count 9
sensor(0), mode 1, buffer_num 4, buffer_size 4149248
sensor(1), mode 1, buffer_num 4, buffer_size 4149248
sensor(2), mode 1, buffer_num 4, buffer_size 4149248
52.6316
64.5161
41.0959
46.5116
49.5049'''