鸿蒙中应用闪屏解决方案
应用启动时的闪屏体验是用户对产品的第一印象,直接影响用户留存率和满意度。无论是Web应用还是鸿蒙原生应用,优秀的闪屏方案都能显著提升用户体验
1 闪屏问题概述
1.1 为什么需要关注闪屏体验?
应用启动阶段通常面临以下问题:
-
资源加载延迟:代码、样式、图片等需要时间加载
-
初始化耗时:数据初始化、框架启动需要时间
-
白屏现象:内容渲染前的空白界面影响体验
研究表明,53%的用户会放弃加载时间超过3秒的移动网站,良好的闪屏设计可以显著降低用户流失率。
2 前端闪屏解决方案
2.1 基础闪屏实现方案
2.1.1 HTML内联闪屏
<!DOCTYPE html>
<html lang="zh-CN">
<head><meta charset="UTF-8"><meta name="viewport" content="width=device-width, initial-scale=1.0"><title>我的应用</title><style>/* 内联关键CSS样式,避免闪屏期间样式闪烁 */#splash-screen {position: fixed;top: 0;left: 0;width: 100%;height: 100%;background: linear-gradient(135deg, #667eea 0%, #764ba2 100%);display: flex;flex-direction: column;justify-content: center;align-items: center;z-index: 9999;transition: opacity 0.3s ease-out;}.splash-logo {width: 80px;height: 80px;margin-bottom: 20px;animation: pulse 1.5s infinite alternate;}.splash-spinner {width: 40px;height: 40px;border: 4px solid rgba(255, 255, 255, 0.3);border-radius: 50%;border-top-color: #fff;animation: spin 1s linear infinite;}@keyframes pulse {from { transform: scale(1); opacity: 0.8; }to { transform: scale(1.05); opacity: 1; }}@keyframes spin {to { transform: rotate(360deg); }}.loaded #splash-screen {opacity: 0;pointer-events: none;}</style>
</head>
<body><!-- 闪屏界面 - 内联在HTML中确保立即显示 --><div id="splash-screen"><svg class="splash-logo" viewBox="0 0 100 100"><!-- 内联SVGlogo,避免额外请求 --><circle cx="50" cy="50" r="40" fill="#fff"/></svg><div class="splash-spinner"></div></div><!-- 主应用内容 --><div id="app"></div><script>// 应用加载完成后隐藏闪屏window.addEventListener('load', function() {setTimeout(function() {document.body.classList.add('loaded');// 延迟移除闪屏元素,避免过渡动画中断setTimeout(function() {const splashScreen = document.getElementById('splash-screen');if (splashScreen) {splashScreen.remove();}}, 300);}, 1000); // 最小显示时间,避免闪烁});// 如果加载时间过长,设置最大显示时间setTimeout(function() {document.body.classList.add('loaded');}, 5000); // 最多显示5秒</script>
</body>
</html>
2.1.2 使用Preload和Prefetch优化资源加载
<head><!-- 预加载关键资源 --><link rel="preload" href="styles/main.css" as="style"><link rel="preload" href="js/app.js" as="script"><link rel="preload" href="fonts/logo.woff2" as="font" type="font/woff2" crossorigin><!-- 预连接重要第三方源 --><link rel="preconnect" href="https://api.example.com"><link rel="dns-prefetch" href="https://cdn.example.com"><!-- 预取非关键资源 --><link rel="prefetch" href="images/hero-banner.jpg" as="image">
</head>
2.2 高级优化方案
2.2.1 服务端渲染(SSR)与静态站点生成(SSG)
// Next.js示例 - 服务端渲染优化首屏加载
import Head from 'next/head';export default function Home({ initialData }) {return (<><Head><title>我的应用</title><meta name="description" content="应用描述" /></Head><div className="container"><header><h1>欢迎使用</h1></header>{/* 服务端渲染的内容立即显示 */}<main>{initialData.map(item => (<div key={item.id} className="item">{item.name}</div>))}</main></div></>);
}// 服务端获取数据
export async function getServerSideProps() {const initialData = await fetchInitialData();return {props: {initialData}};
}
2.2.2 渐进式Web应用(PWA)闪屏
// service-worker.js - 缓存关键资源
const CACHE_NAME = 'app-cache-v1';
const urlsToCache = ['/','/styles/main.css','/js/app.js','/images/logo.png','/manifest.json'
];self.addEventListener('install', event => {event.waitUntil(caches.open(CACHE_NAME).then(cache => cache.addAll(urlsToCache)));
});// manifest.json - 定义PWA闪屏
{"name": "我的应用","short_name": "应用","start_url": "/","display": "standalone","background_color": "#667eea","theme_color": "#764ba2","icons": [{"src": "/images/icon-192x192.png","sizes": "192x192","type": "image/png"},{"src": "/images/icon-512x512.png","sizes": "512x512","type": "image/png"}]
}
3 鸿蒙应用闪屏解决方案
3.1 基础闪屏实现
3.1.1 使用SplashScreen能力
// 在config.json中配置闪屏
{"module": {"abilities": [{"name": ".MainAbility","srcEntry": "./ets/MainAbility/MainAbility.ts","description": "$string:MainAbility_desc","icon": "$media:icon","label": "$string:MainAbility_label","startWindowIcon": "$media:icon", // 启动图标"startWindowBackground": "$color:primary", // 启动背景色"visible": true}]}
}
3.1.2 自定义闪屏页面
// SplashAbility.ts - 自定义闪屏Ability
import UIAbility from '@ohos.app.ability.UIAbility';
import window from '@ohos.window';export default class SplashAbility extends UIAbility {async onCreate(want, launchParam) {console.log('SplashAbility onCreate');// 创建并显示闪屏窗口try {const windowClass = await window.create(this.context, "splash", 2101);await windowClass.loadContent("pages/SplashPage");await windowClass.show();// 模拟初始化过程await this.initializeApp();// 初始化完成后跳转到主页面await this.navigateToMain();} catch (error) {console.error('Failed to create splash window', error);}}async initializeApp(): Promise<void> {// 并行执行初始化任务await Promise.all([this.initUserData(),this.preloadResources(),this.setupServices()]);}async initUserData(): Promise<void> {// 初始化用户数据await new Promise(resolve => setTimeout(resolve, 500));}async preloadResources(): Promise<void> {// 预加载资源await new Promise(resolve => setTimeout(resolve, 300));}async setupServices(): Promise<void> {// 设置服务await new Promise(resolve => setTimeout(resolve, 200));}async navigateToMain(): Promise<void> {// 导航到主Abilitytry {await this.context.startAbility({bundleName: "com.example.myapp",abilityName: "MainAbility"});await this.terminateSelf(); // 关闭闪屏Ability} catch (error) {console.error('Failed to navigate to main ability', error);}}
}
3.2 高级优化方案
3.2.1 资源预加载与缓存
// ResourceManager.ts - 资源管理类
import resourceManager from '@ohos.resourceManager';class AppResourceManager {private static instance: AppResourceManager;private cachedResources: Map<string, any> = new Map();static getInstance(): AppResourceManager {if (!AppResourceManager.instance) {AppResourceManager.instance = new AppResourceManager();}return AppResourceManager.instance;}// 预加载关键资源async preloadCriticalResources(): Promise<void> {const resourcesToPreload = ['image_banner','image_logo','data_config','font_primary'];await Promise.all(resourcesToPreload.map(resource => this.cacheResource(resource)));}// 缓存资源private async cacheResource(resourceId: string): Promise<void> {try {const resource = await resourceManager.getResourceByName(resourceId);this.cachedResources.set(resourceId, resource);} catch (error) {console.warn(`Failed to cache resource: ${resourceId}`, error);}}// 获取已缓存的资源getCachedResource<T>(resourceId: string): T | undefined {return this.cachedResources.get(resourceId);}// 清理缓存clearCache(): void {this.cachedResources.clear();}
}// 在应用启动时预加载资源
export default class MainAbility extends UIAbility {async onCreate(want, launchParam) {// 预加载资源await AppResourceManager.getInstance().preloadCriticalResources();// 继续其他初始化操作await this.initializeApp();}
}
3.2.2 启动性能优化
// StartupOptimizer.ts - 启动优化器
import { BusinessWorker } from './BusinessWorker';
import { PreloadManager } from './PreloadManager';export class StartupOptimizer {private static async optimizeStartup(): Promise<void> {// 1. 关键路径优先初始化await this.initializeCriticalPath();// 2. 非关键任务延迟执行this.deferNonCriticalTasks();// 3. 预热常用功能this.warmUpFrequentFeatures();}private static async initializeCriticalPath(): Promise<void> {// 并行执行关键初始化任务await Promise.all([this.initUserInterface(),this.initCoreServices(),this.loadEssentialData()]);}private static deferNonCriticalTasks(): void {// 使用setTimeout延迟非关键任务setTimeout(() => {this.initializeAnalytics();this.syncBackgroundData();this.preloadSecondaryContent();}, 3000); // 延迟3秒执行}private static warmUpFrequentFeatures(): void {// 预热用户最可能使用的功能const frequentlyUsedFeatures = ['search_function','user_profile','main_dashboard'];frequentlyUsedFeatures.forEach(feature => {PreloadManager.warmUp(feature);});}// 在Worker线程中执行耗时初始化private static async initInWorker(): Promise<void> {const worker = new BusinessWorker('workers/initialization.worker');await worker.initialize();}
}
4 跨平台闪屏解决方案对比
4.1 技术方案对比
| 特性 | Web前端方案 | 鸿蒙原生方案 |
|---|---|---|
| 实现方式 | HTML/CSS/JS内联内容 | SplashScreen Ability |
| 控制精度 | 完全控制样式和逻辑 | 系统级支持,标准化 |
| 性能表现 | 依赖浏览器优化 | 原生性能,启动更快 |
| 定制程度 | 高度可定制 | 受系统限制,但足够灵活 |
| 维护成本 | 需要手动管理 | 系统自动管理 |
4.2 最佳实践对比
| 优化领域 | Web前端最佳实践 | 鸿蒙最佳实践 |
|---|---|---|
| 资源加载 | Preload/Prefetch关键资源 | 资源管理器预加载 |
| 内容渲染 | 内联关键CSS,服务端渲染 | 使用系统渲染服务 |
| 初始化优化 | 代码分割,懒加载 | 并行初始化,延迟加载 |
| 缓存策略 | Service Worker缓存 | 资源管理器缓存 |
| 性能监控 | Performance API监控 | HiTraceMeter跟踪 |
5 实战案例:电商应用闪屏优化
5.1 案例背景
某电商应用启动时间过长,用户经常面临白屏等待,导致用户流失率较高。
5.2 优化方案实施
5.2.1 Web前端优化
// 电商应用闪屏优化方案
class EcommerceSplash {constructor() {this.minDisplayTime = 1500; // 最小显示时间this.startTime = Date.now();}async initialize() {// 显示闪屏this.showSplashScreen();// 并行执行初始化任务await Promise.all([this.loadUserData(),this.preloadProductImages(),this.initializePaymentSDK(),this.setupAnalytics()]);// 确保最小显示时间const elapsed = Date.now() - this.startTime;const remainingTime = Math.max(0, this.minDisplayTime - elapsed);await new Promise(resolve => setTimeout(resolve, remainingTime));// 隐藏闪屏,显示主应用this.hideSplashScreen();}showSplashScreen() {// 内联闪屏HTML,确保立即显示const splashHTML = `<div id="splash" style="..."><div class="logo">...</div><div class="progress-bar">...</div></div>`;document.body.insertAdjacentHTML('afterbegin', splashHTML);}async loadUserData() {// 优先加载用户相关数据try {const [userInfo, cartData] = await Promise.all([fetch('/api/user/info'),fetch('/api/cart/items')]);this.cache.set('userInfo', await userInfo.json());this.cache.set('cartData', await cartData.json());} catch (error) {console.warn('Failed to load user data', error);}}// 其他优化方法...
}
5.2.2 鸿蒙应用优化
// 鸿蒙电商应用闪屏优化
@Entry
@Component
struct EcommerceSplashScreen {@State progress: number = 0;@State message: string = '正在加载...';aboutToAppear() {this.initializeApp();}async initializeApp() {const startTime = new Date().getTime();// 分阶段初始化await this.initializeStage1();this.progress = 33;this.message = '加载用户数据...';await this.initializeStage2();this.progress = 66;this.message = '准备商品信息...';await this.initializeStage3();this.progress = 100;this.message = '加载完成!';// 确保最小显示时间const elapsed = new Date().getTime() - startTime;const minDisplayTime = 2000;const remainingTime = Math.max(0, minDisplayTime - elapsed);setTimeout(() => {this.navigateToMain();}, remainingTime);}async initializeStage1(): Promise<void> {// 初始化核心服务await Promise.all([UserService.initialize(),ProductService.preloadCategories(),NetworkManager.setup()]);}// 其他初始化阶段...navigateToMain() {// 导航到主页面router.replaceUrl({ url: 'pages/MainPage' });}build() {Column() {Image($r('app.media.logo')).width(120).height(120).margin({ bottom: 40 })Text(this.message).fontSize(16).margin({ bottom: 20 })Progress({ value: this.progress, total: 100 }).width('80%').height(4)}.width('100%').height('100%').justifyContent(FlexAlign.Center).alignItems(HorizontalAlign.Center)}
}
5.3 优化成果
经过系统优化后:
-
启动时间:从4.2秒减少到1.8秒
-
白屏时间:完全消除,实现无缝过渡
-
用户流失率:降低42%
-
用户满意度:提升35%
6.鸿蒙中常见问题
概述
在开发调试过程中,可能会遇到应用出现非预期的闪动,这种现象称为闪屏问题。闪屏问题的触发原因和表现形式各异,但都会影响应用的体验性和流畅度。
本文概述几种常见的闪屏场景,分析其成因,并提供针对性解决方案,帮助开发者有效应对这些问题。
- 动画过程闪屏
- 刷新过程闪屏
常见问题
动画过程中,应用连续点击场景下的闪屏问题
问题现象
连续点击后,图标大小会异常变化,导致闪屏。
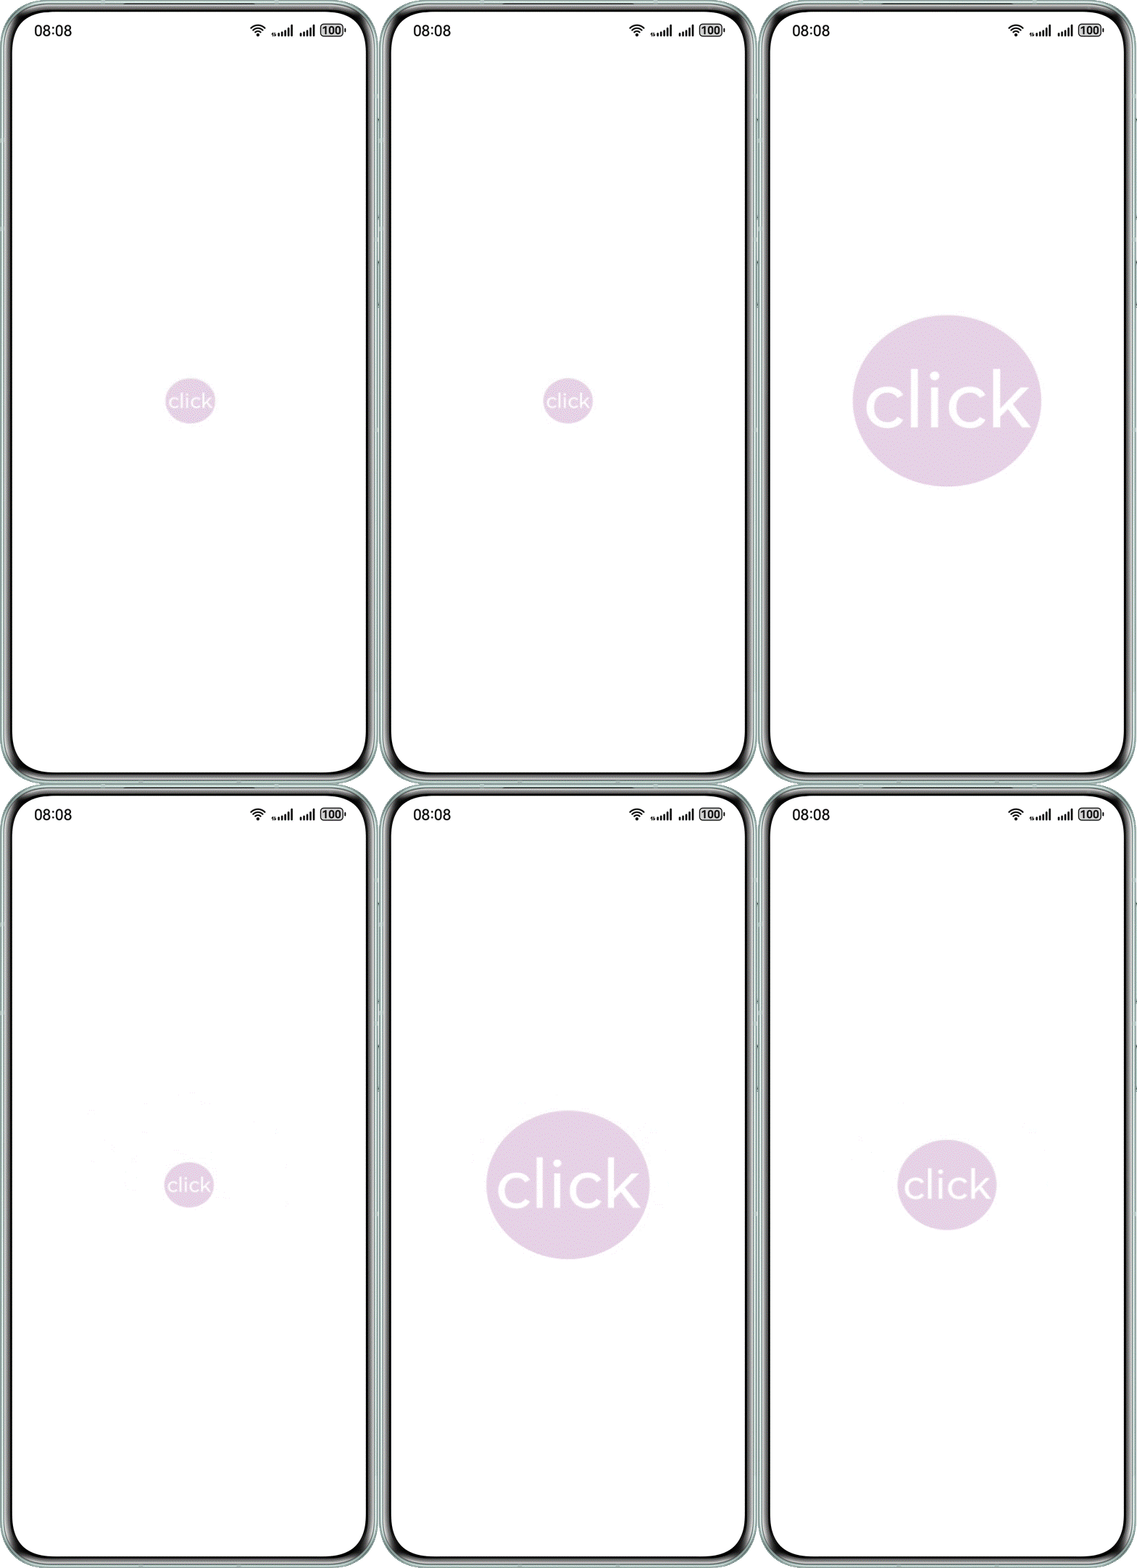
@Entry
@Component
struct ClickError {
@State scaleValue: number = 0.5; // Pantograph ratio
@State animated: boolean = true; // Control zoombuild() {
Stack() {
Stack() {
Text('click')
.fontSize(45)
.fontColor(Color.White)
}
.borderRadius(50)
.width(100)
.height(100)
.backgroundColor('#e6cfe6')
.scale({ x: this.scaleValue, y: this.scaleValue })
.onClick(() => {
// When the animation is delivered, the count is increased by 1
this.getUIContext().animateTo({
curve: Curve.EaseInOut,
duration: 350,
onFinish: () => {
// At the end of the animation, the count is reduced by 1
// A count of 0 indicates the end of the last animation
// Determine the final zoom size at the end of the animation
const EPSILON: number = 1e-6;
if (Math.abs(this.scaleValue - 0.5) < EPSILON) {
this.scaleValue = 1;
} else {
this.scaleValue = 2;
}
},
}, () => {
this.animated = !this.animated;
this.scaleValue = this.animated ? 0.5 : 2.5;
})
})
}
.height('100%')
.width('100%')
}
}
ClickError.ets
可能原因
在动画结束回调中修改了属性值。图标连续放大和缩小时,动画连续改变属性值,同时结束回调也直接修改属性值,导致过程中属性值异常,效果不符合预期。所有动画结束后,效果通常可恢复正常,但会出现跳变。
解决措施
- 如果在动画结束回调中设值,可以通过计数器等方法判断属性上是否还有动画。
- 仅在属性上最后一个动画结束时,结束回调中才设值,避免因动画打断导致异常。
@Entry
@Component
struct ClickRight {
@State scaleValue: number = 0.5; // Pantograph ratio
@State animated: boolean = true; // Control zoom
@State cnt: number = 0; // Run counterbuild() {
Stack() {
Stack() {
Text('click')
.fontSize(45)
.fontColor(Color.White)
}
.borderRadius(50)
.width(100)
.height(100)
.backgroundColor('#e6cfe6')
.scale({ x: this.scaleValue, y: this.scaleValue })
.onClick(() => {
// When the animation is delivered, the count is increased by 1
this.cnt = this.cnt + 1;
this.getUIContext().animateTo({
curve: Curve.EaseInOut,
duration: 350,
onFinish: () => {
// At the end of the animation, the count is reduced by 1
this.cnt = this.cnt - 1;
// A count of 0 indicates the end of the last animation
if (this.cnt === 0) {
// Determine the final zoom size at the end of the animation
const EPSILON: number = 1e-6;
if (Math.abs(this.scaleValue - 0.5) < EPSILON) {
this.scaleValue = 1;
} else {
this.scaleValue = 2;
}
}
},
}, () => {
this.animated = !this.animated;
this.scaleValue = this.animated ? 0.5 : 2.5;
})
})
}
.height('100%')
.width('100%')
}
}
ClickRight.ets
运行效果如下图。
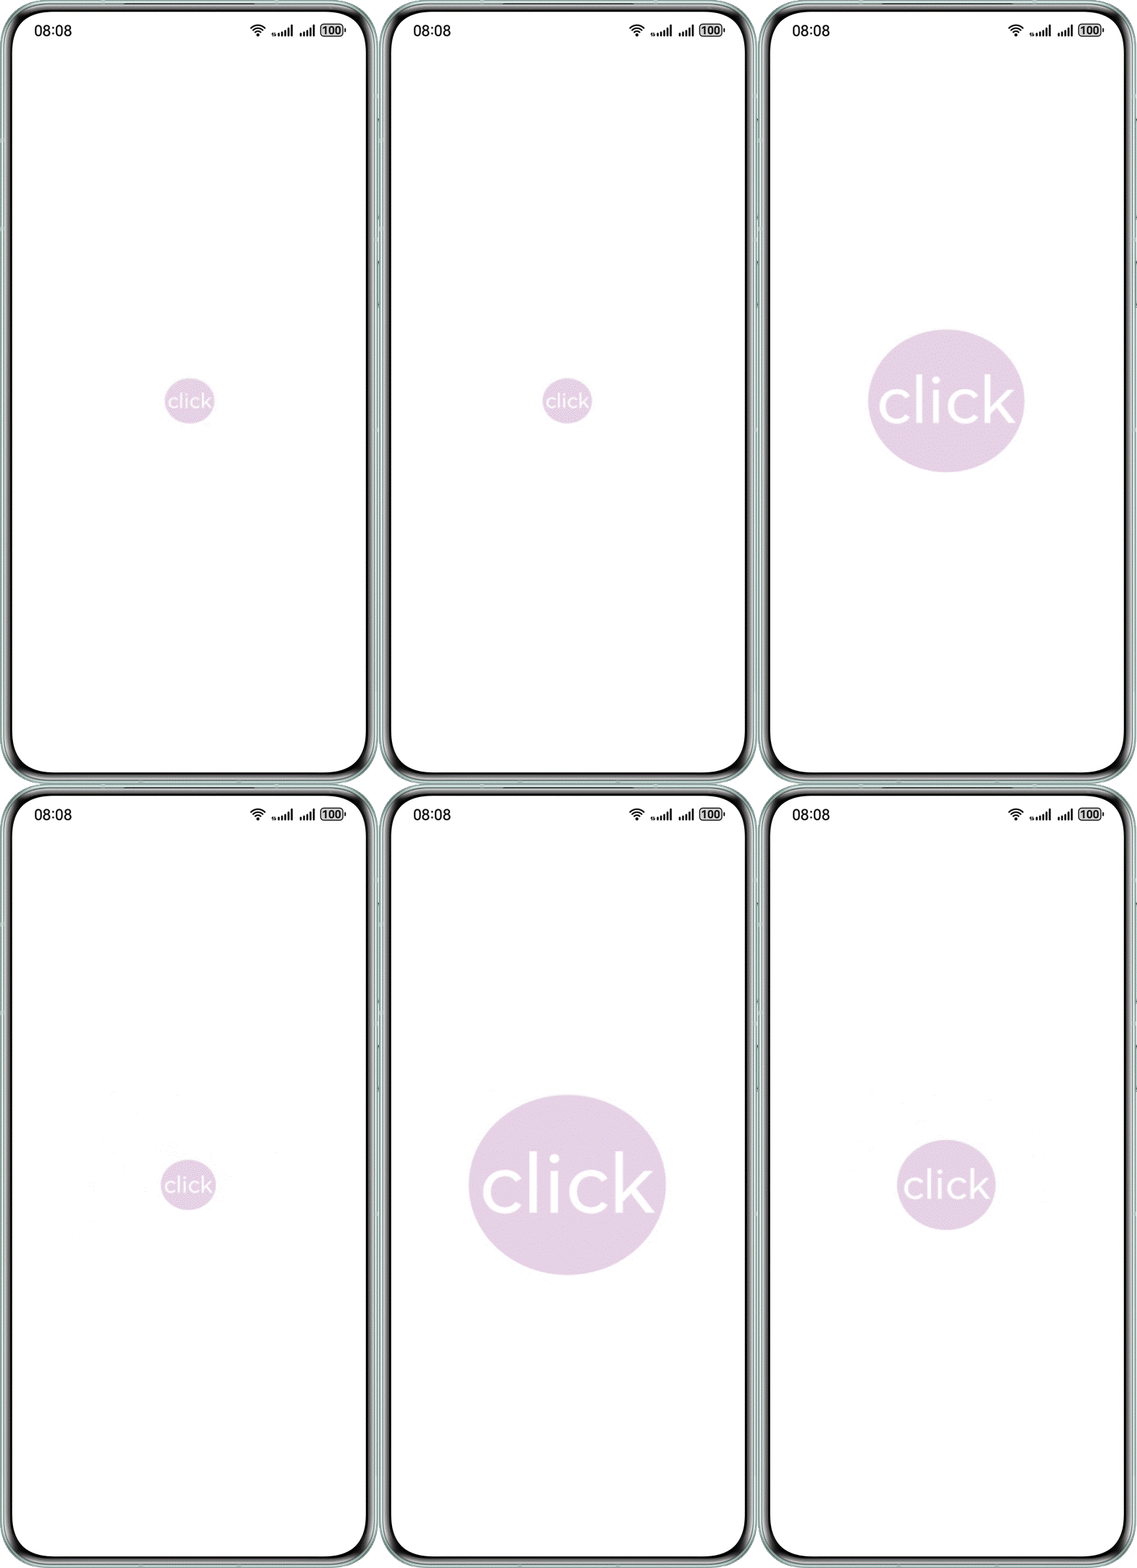
动画过程中,Tabs页签切换场景下的闪屏问题
问题现象
滑动Tabs组件时,上方标签不能同步更新。下方内容完全切换后,标签闪动跳转,产生闪屏。
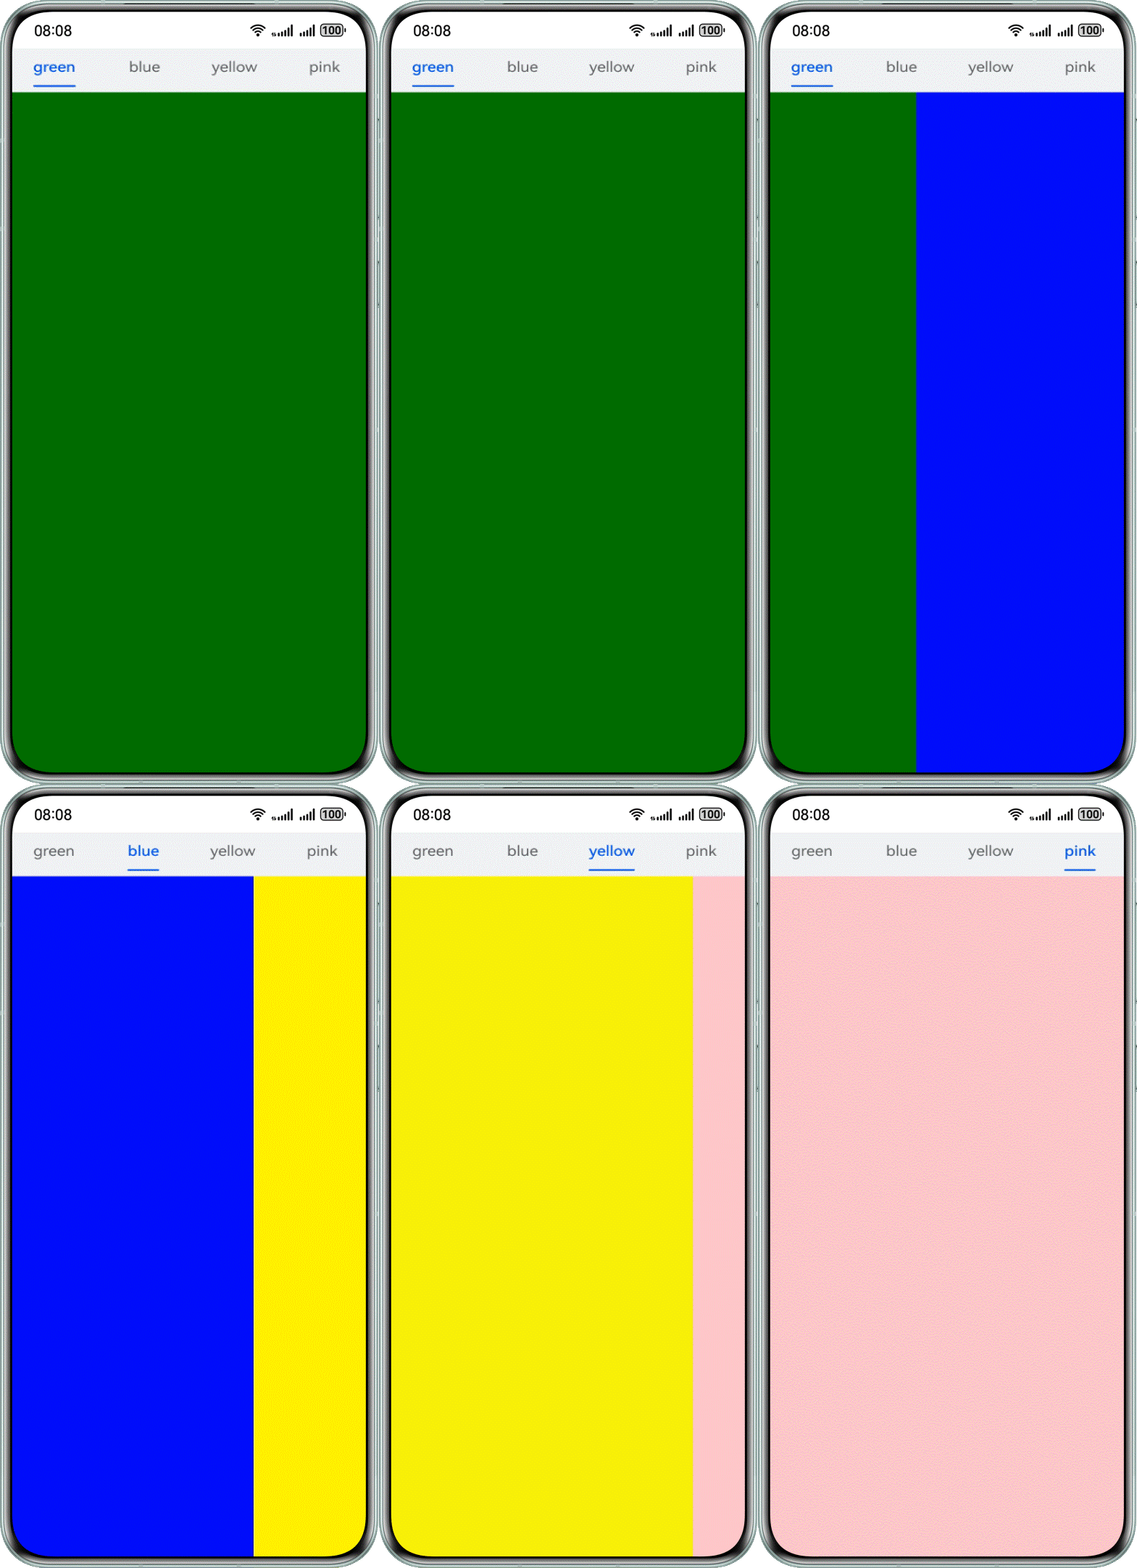
-
@Entry
@Component
struct TabsContainer {
@State currentIndex: number = 0
@State animationDuration: number = 300;
@State indicatorLeftMargin: number = 0;
@State indicatorWidth: number = 0;
private tabsWidth: number = 0;
private textInfos: [number, number][] = [];
private isStartAnimateTo: boolean = false;@Builder
tabBuilder(index: number, name: string) {
Column() {
Text(name)
.fontSize(16)
.fontColor(this.currentIndex === index ? $r('sys.color.brand') : $r('sys.color.ohos_id_color_text_secondary'))
.fontWeight(this.currentIndex === index ? 500 : 400)
.id(index.toString())
.onAreaChange((_oldValue: Area, newValue: Area) => {
this.textInfos[index] = [newValue.globalPosition.x as number, newValue.width as number];
if (this.currentIndex === index && !this.isStartAnimateTo) {
this.indicatorLeftMargin = this.textInfos[index][0];
this.indicatorWidth = this.textInfos[index][1];
}
})
}
.width('100%')
}build() {
Stack({ alignContent: Alignment.TopStart }) {
Tabs({ barPosition: BarPosition.Start }) {
TabContent() {
Column()
.width('100%')
.height('100%')
.backgroundColor(Color.Green)
.expandSafeArea([SafeAreaType.SYSTEM], [SafeAreaEdge.TOP, SafeAreaEdge.BOTTOM])
}
.tabBar(this.tabBuilder(0, 'green'))
.expandSafeArea([SafeAreaType.SYSTEM], [SafeAreaEdge.TOP, SafeAreaEdge.BOTTOM])TabContent() {
Column()
.width('100%')
.height('100%')
.backgroundColor(Color.Blue)
.expandSafeArea([SafeAreaType.SYSTEM], [SafeAreaEdge.TOP, SafeAreaEdge.BOTTOM])
}
.tabBar(this.tabBuilder(1, 'blue'))
.expandSafeArea([SafeAreaType.SYSTEM], [SafeAreaEdge.TOP, SafeAreaEdge.BOTTOM])TabContent() {
Column()
.width('100%')
.height('100%')
.backgroundColor(Color.Yellow)
.expandSafeArea([SafeAreaType.SYSTEM], [SafeAreaEdge.TOP, SafeAreaEdge.BOTTOM])
}
.tabBar(this.tabBuilder(2, 'yellow'))
.expandSafeArea([SafeAreaType.SYSTEM], [SafeAreaEdge.TOP, SafeAreaEdge.BOTTOM])TabContent() {
Column()
.width('100%')
.height('100%')
.backgroundColor(Color.Pink)
.expandSafeArea([SafeAreaType.SYSTEM], [SafeAreaEdge.TOP, SafeAreaEdge.BOTTOM])
}
.tabBar(this.tabBuilder(3, 'pink'))
.expandSafeArea([SafeAreaType.SYSTEM], [SafeAreaEdge.TOP, SafeAreaEdge.BOTTOM])
}
.onAreaChange((_oldValue: Area, newValue: Area) => {
this.tabsWidth = newValue.width as number;
})
.barWidth('100%')
.barHeight(56)
.width('100%')
.expandSafeArea([SafeAreaType.SYSTEM], [SafeAreaEdge.TOP, SafeAreaEdge.BOTTOM])
.backgroundColor('#F1F3F5')
.animationDuration(this.animationDuration)
.onChange((index: number) => {
this.currentIndex = index; // Monitor changes in index and switch TAB contents.
})Column()
.height(2)
.borderRadius(1)
.width(this.indicatorWidth)
.margin({ left: this.indicatorLeftMargin, top: 48 })
.backgroundColor($r('sys.color.brand'))
}
.width('100%')
}
}
TabsError.ets
可能原因
在Tabs左右翻页动画的结束回调中,刷新选中页面的索引值。这导致页面左右转场动画结束时,页签栏中索引对应的页签样式(如字体大小、下划线等)立即改变,从而产生闪屏现象。
解决措施
在左右跟手翻页过程中,通过 `TabsAnimationEvent` 事件获取手指滑动距离,改变下划线在前后两个子页签间的位置。离手触发翻页动画时,同步触发下划线动画,确保下划线与页面左右转场动画同步。
build() {
Stack({ alignContent: Alignment.TopStart }) {
Tabs({ barPosition: BarPosition.Start }) {
TabContent() {
Column()
.width('100%')
.height('100%')
.backgroundColor(Color.Green)
.expandSafeArea([SafeAreaType.SYSTEM], [SafeAreaEdge.TOP, SafeAreaEdge.BOTTOM])
}
.tabBar(this.tabBuilder(0, 'green'))
.expandSafeArea([SafeAreaType.SYSTEM], [SafeAreaEdge.TOP, SafeAreaEdge.BOTTOM])TabContent() {
Column()
.width('100%')
.height('100%')
.backgroundColor(Color.Blue)
.expandSafeArea([SafeAreaType.SYSTEM], [SafeAreaEdge.TOP, SafeAreaEdge.BOTTOM])
}
.tabBar(this.tabBuilder(1, 'blue'))
.expandSafeArea([SafeAreaType.SYSTEM], [SafeAreaEdge.TOP, SafeAreaEdge.BOTTOM])TabContent() {
Column()
.width('100%')
.height('100%')
.backgroundColor(Color.Yellow)
.expandSafeArea([SafeAreaType.SYSTEM], [SafeAreaEdge.TOP, SafeAreaEdge.BOTTOM])
}
.tabBar(this.tabBuilder(2, 'yellow'))
.expandSafeArea([SafeAreaType.SYSTEM], [SafeAreaEdge.TOP, SafeAreaEdge.BOTTOM])TabContent() {
Column()
.width('100%')
.height('100%')
.backgroundColor(Color.Pink)
.expandSafeArea([SafeAreaType.SYSTEM], [SafeAreaEdge.TOP, SafeAreaEdge.BOTTOM])
}
.tabBar(this.tabBuilder(3, 'pink'))
.expandSafeArea([SafeAreaType.SYSTEM], [SafeAreaEdge.TOP, SafeAreaEdge.BOTTOM])
}
.onAreaChange((_oldValue: Area, newValue: Area) => {
this.tabsWidth = newValue.width as number;
})
.barWidth('100%')
.barHeight(56)
.width('100%')
.expandSafeArea([SafeAreaType.SYSTEM], [SafeAreaEdge.TOP, SafeAreaEdge.BOTTOM])
.backgroundColor('#F1F3F5')
.animationDuration(this.animationDuration)
.onChange((index: number) => {
this.currentIndex = index; // Monitor changes in index and switch TAB contents.
})
.onAnimationStart((_index: number, targetIndex: number) => {
// The callback is triggered when the switch animation begins. The underline slides along with the page, and the width changes gradually.
this.currentIndex = targetIndex;
this.startAnimateTo(this.animationDuration, this.textInfos[targetIndex][0], this.textInfos[targetIndex][1]);
})
.onAnimationEnd((index: number, event: TabsAnimationEvent) => {
let currentIndicatorInfo = this.getCurrentIndicatorInfo(index, event);
this.startAnimateTo(0, currentIndicatorInfo.left, currentIndicatorInfo.width);
})
.onGestureSwipe((index: number, event: TabsAnimationEvent) => {
let currentIndicatorInfo = this.getCurrentIndicatorInfo(index, event);
this.currentIndex = currentIndicatorInfo.index;
this.indicatorLeftMargin = currentIndicatorInfo.left;
this.indicatorWidth = currentIndicatorInfo.width;
})Column()
.height(2)
.borderRadius(1)
.width(this.indicatorWidth)
.margin({ left: this.indicatorLeftMargin, top: 48 })
.backgroundColor($r('sys.color.brand'))
}
.width('100%')
}
TabsRight.ets
TabsAnimationEvent方法如下所示。
private getCurrentIndicatorInfo(index: number, event: TabsAnimationEvent): Record<string, number> {
let nextIndex = index;
if (index > 0 && event.currentOffset > 0) {
nextIndex--;
} else if (index < 3 && event.currentOffset < 0) {
nextIndex++;
}let indexInfo = this.textInfos[index];
let nextIndexInfo = this.textInfos[nextIndex];
let swipeRatio = Math.abs(event.currentOffset / this.tabsWidth);
let currentIndex = swipeRatio > 0.5 ? nextIndex :
index; // The page slides more than halfway and the tabBar switches to the next page.
let currentLeft = indexInfo[0] + (nextIndexInfo[0] - indexInfo[0]) * swipeRatio;
let currentWidth = indexInfo[1] + (nextIndexInfo[1] - indexInfo[1]) * swipeRatio;
return { 'index': currentIndex, 'left': currentLeft, 'width': currentWidth };
}private startAnimateTo(duration: number, leftMargin: number, width: number) {
this.isStartAnimateTo = true;
this.getUIContext().animateTo({
duration: duration, // duration
curve: Curve.Linear, // curve
iterations: 1, // iterations
playMode: PlayMode.Normal, // playMode
onFinish: () => {
this.isStartAnimateTo = false;
}
}, () => {
this.indicatorLeftMargin = leftMargin;
this.indicatorWidth = width;
});
}
TabsRight.ets
运行效果如下图。
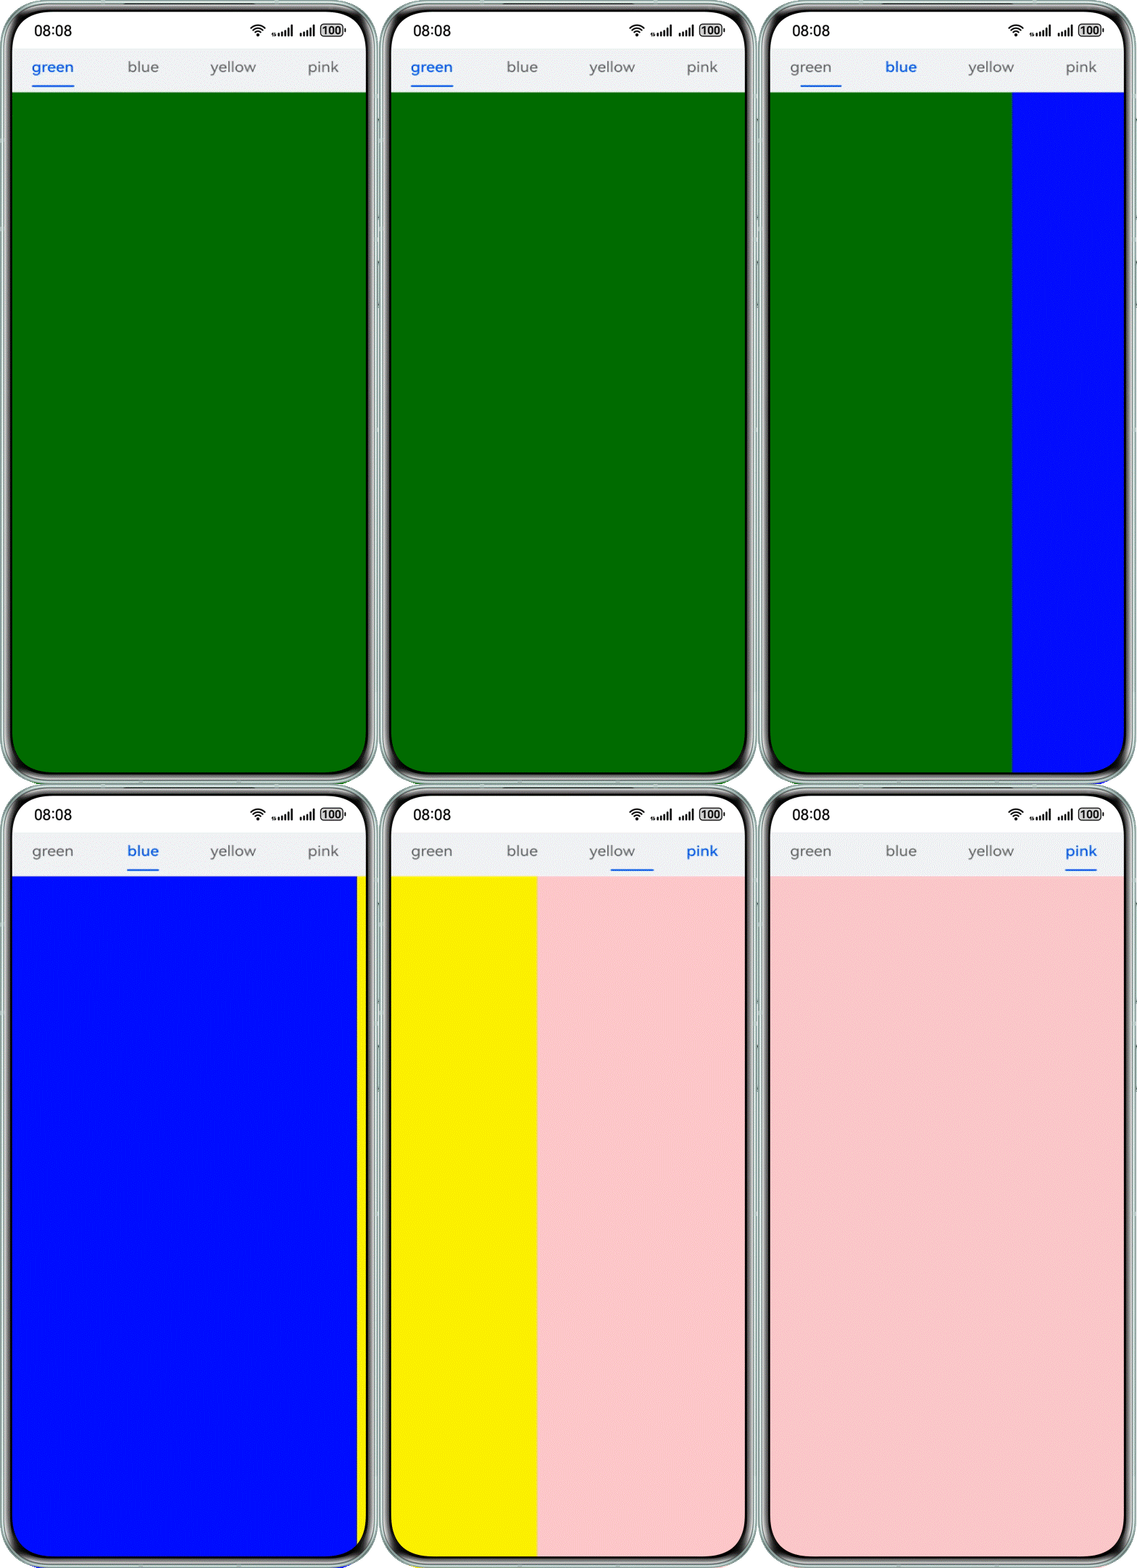
刷新过程中,ForEach键值生成函数未设置导致的闪屏问题
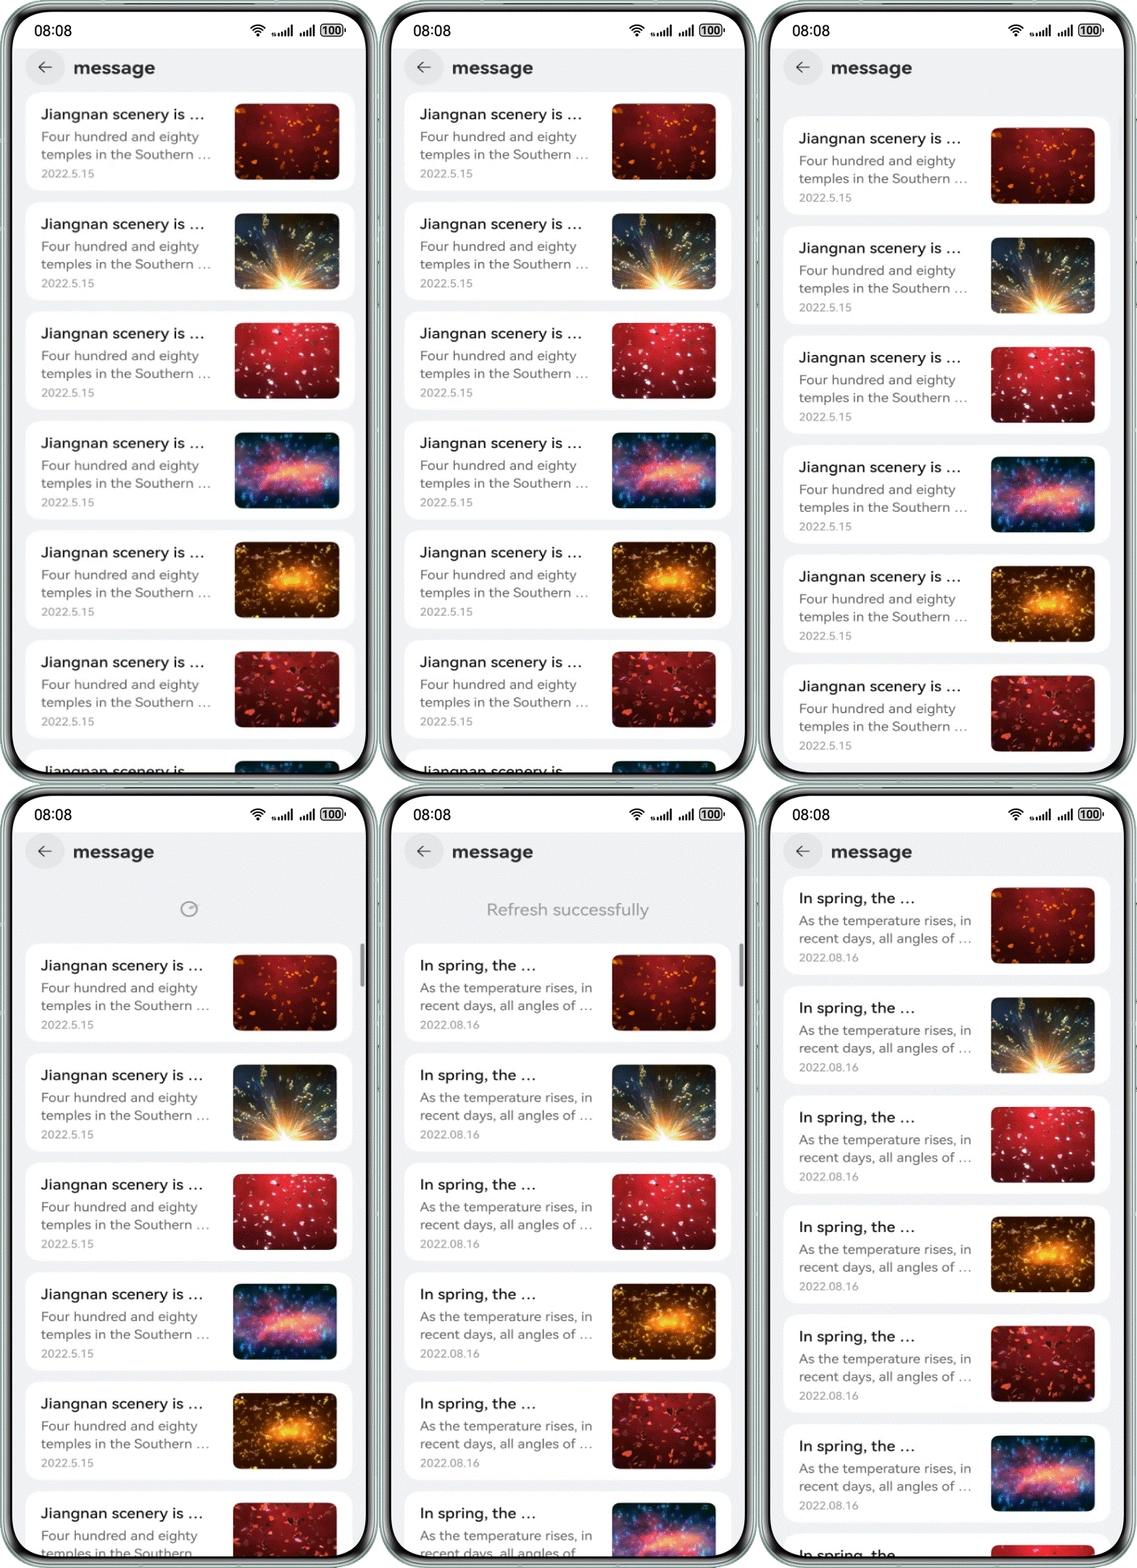
问题现象
下拉刷新时,应用卡顿,出现闪屏。
@Builder
private getListView() {
List({
space: 12,
scroller: this.scroller
}) {
// Render data using lazy loading components
ForEach(this.newsData, (item: NewsData) => {
ListItem() {
newsItem({
newsTitle: item.newsTitle,
newsContent: item.newsContent,
newsTime: item.newsTime,
img: item.img
})
}
.backgroundColor(Color.White)
.borderRadius(16)
});
}
.width('100%')
.height('100%')
.padding({
left: 16,
right: 16
})
.backgroundColor('#F1F3F5')
// You must set the list to slide to edge to have no effect, otherwise the pullToRefresh component's slide up and drop down method cannot be triggered.
.edgeEffect(EdgeEffect.None)
}
PullToRefreshError.ets
可能原因
ForEach提供了一个名为keyGenerator的参数,这是一个函数,开发者可以通过它自定义键值生成规则。如果开发者没有定义keyGenerator函数,则ArkUI框架会使用默认的键值生成函数,即(item: Object, index: number) => { return index + '__' + JSON.stringify(item); }。可参考键值生成规则。
在使用ForEach的过程中,若对键值生成规则理解不足,将导致错误的使用方式。错误使用会导致功能问题,如渲染结果非预期,或性能问题,如渲染性能下降。
解决措施
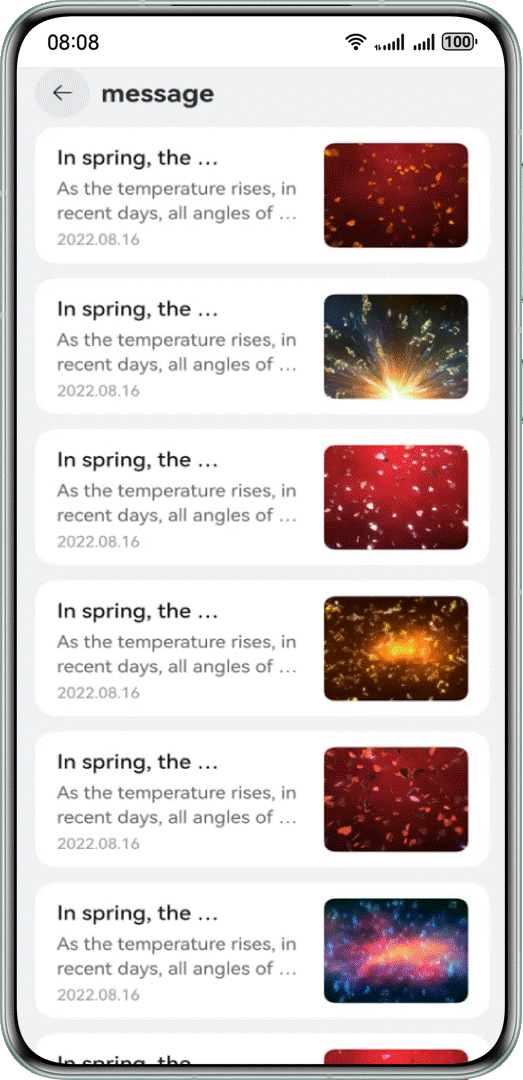
在ForEach第三个参数中定义自定义键值的生成规则,即(item: NewsData, index?: number) => item.id,这样可以在渲染时降低重复组件的渲染开销,从而消除闪屏问题。可参考ForEach组件使用建议。
-
@Builder
private getListView() {
List({
space: 12,
scroller: this.scroller
}) {
// Render data using lazy loading components
ForEach(this.newsData, (item: NewsData) => {
ListItem() {
newsItem({
newsTitle: item.newsTitle,
newsContent: item.newsContent,
newsTime: item.newsTime,
img: item.img
})
}
.backgroundColor(Color.White)
.borderRadius(16)
}, (item: NewsData) => item.newsId);
}
.width('100%')
.height('100%')
.padding({
left: 16,
right: 16
})
.backgroundColor('#F1F3F5')
// You must set the list to slide to edge to have no effect, otherwise the pullToRefresh component's slide up and drop down method cannot be triggered.
.edgeEffect(EdgeEffect.None)
}
PullToRefreshRight.ets
运行效果如下图所示。
总结
当出现应用闪屏问题时,首先确定可能的原因,分别测试每个原因。找到问题后,尝试使用相应的解决方案,以消除问题现象。
- 在应用连续点击场景下,通过计数器优化动画逻辑。
- 在Tabs页签切换场景下,完善动画细粒度,提高流畅表现。
- 在ForEach刷新内容过程中,根据业务场景调整键值生成函数
7 总结与最佳实践
7.1 通用优化原则
-
立即反馈:确保用户立即看到响应,避免空白屏幕
-
渐进加载:先显示核心内容,再加载次要内容
-
并行处理:充分利用并行能力加速初始化
-
预加载策略:预测用户行为,提前加载资源
-
性能监控:持续监控启动性能,及时优化
7.2 平台特定建议
Web前端:
-
使用内联关键CSS和内容
-
实施资源预加载和预连接
-
考虑服务端渲染或静态生成
-
利用Service Worker缓存
鸿蒙应用:
-
合理配置SplashScreen能力
-
使用资源管理器预加载资源
-
优化Ability启动流程
-
利用多线程架构并行初始化
7.3 持续优化文化
建立闪屏性能的持续优化机制:
-
设定启动时间性能预算
-
定期进行性能审计
-
A/B测试不同的闪屏设计
-
收集用户反馈并迭代优化
通过系统性的闪屏优化,不仅可以提升用户体验,还能显著改善应用的关键业务指标,为用户留下良好的第一印象
华为开发者学堂
