C++高频知识点(三十)
文章目录
- 146. C++11 中的 std::future 和 std::async 用法?
- 使用方法
- std::async 的执行策略
- 146.3 结合 std::promise与 std::future
- 注意事项
- std::unique_lock与std::lock_guard的区别是什么?
- 功能对比
- std::lock_guard
- std::unique_lock
- (1)延迟锁定
- (2)尝试锁定
- (3)显式解锁和重新锁定
- 148. static_cast和dynamic_cast区别?
- static_cast 示例
- dynamic_cast 示例
- 149. C++中如何实现一个简单的命令模式的示例?
- 代码示例
- 150. 对OpenGL 渲染管线了解吗?
- 渲染管线的主要流程
- 1. 输入阶段(准备数据)
- 2. 顶点着色器阶段
- 3. 图元装配与光栅化
- 4. 片段着色器阶段
- 5. 测试与混合
- 6. 输出图像
同步:完成这一步才能进行下一步。异步:不等待,完成后再回调处理。阻塞:调用者被迫等待,非阻塞:调用者不必等待。
146. C++11 中的 std::future 和 std::async 用法?
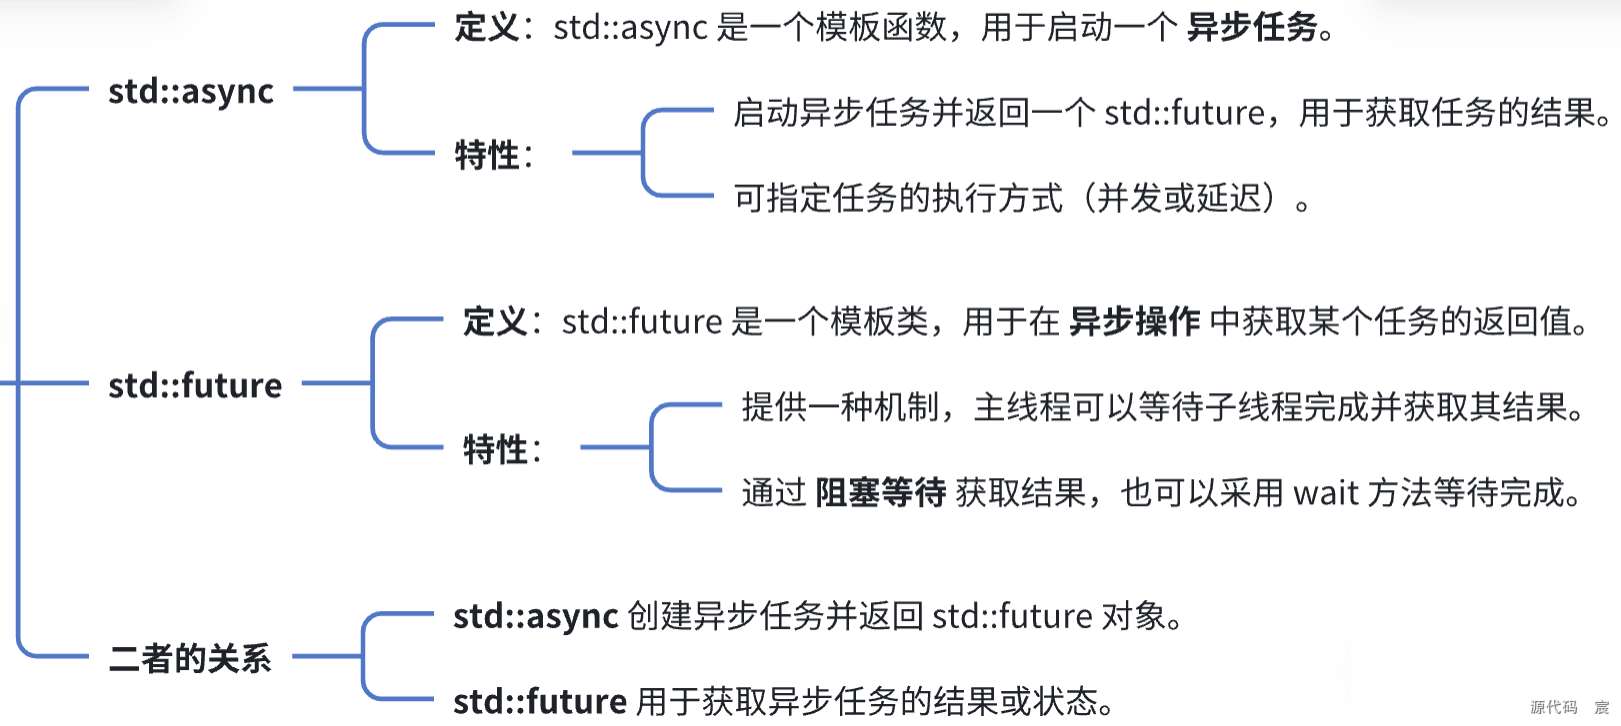
std::future 和 std::async 是 C++11 引入的线程支持库的一部分,主要用于 异步操作 和 线程结果的获取,大大简化了多线程编程的复杂性。
使用方法
#include <iostream>
#include <future>
#include <thread>// 一个耗时计算函数
int slowFunction(int x) {std::this_thread::sleep_for(std::chrono::seconds(3)); // 模拟耗时操作return x * x;
}int main() {// 使用 std::async 启动异步任务/*std::async:是 C++11 中引入的异步任务启动机制,用来启动一个异步任务,返回一个 std::future 对象。这个任务会在后台线程执行。std::launch::async:表示异步启动,即强制在新的线程中执行 slowFunction。这意味着 slowFunction 在主线程外的另一个线程中运行。slowFunction:需要被异步执行的函数。10:是传递给 slowFunction 的参数,slowFunction(10) 会被调用,返回 10 的平方。*/std::future<int> result = std::async(std::launch::async, slowFunction, 10);std::cout << "Doing other work while waiting for the result...\n";// 获取异步任务的结果(阻塞,直到任务完成)// std::future 提供了 get() 方法来获取异步任务的结果。如果任务还没有完成,调用 get() 会阻塞当前线程,直到任务完成并返回结果int value = result.get();std::cout << "Result is: " << value << std::endl;return 0;
}

std::async 的执行策略

#include <iostream>
#include <future>int compute(int x) {std::cout << "Computing...\n";return x * 2;
}int main() {// 异步策略std::future<int> asyncResult = std::async(std::launch::async, compute, 10);// 延迟策略/*std::launch::deferred:表示采用延迟执行策略。这个策略意味着 compute(20) 函数不会立即在后台线程执行,而是当调用 deferredResult.get() 时,任务才会在主线程中执行。换句话说,延迟策略不会在异步任务启动时就开始计算,而是等到请求结果时才执行计算。compute:指定要延迟执行的函数。20:传递给 compute 函数的参数,这里是 20*/std::future<int> deferredResult = std::async(std::launch::deferred, compute, 20);std::cout << "Other work is being done...\n";// 获取异步策略结果(任务已在后台运行)std::cout << "Async result: " << asyncResult.get() << std::endl;// 获取延迟策略结果(此时才运行任务)std::cout << "Deferred result: " << deferredResult.get() << std::endl;return 0;
}

146.3 结合 std::promise与 std::future
- std::promise 用于设置共享状态的值。
- std::future 用于获取共享状态的值。
#include <iostream>
#include <future>
#include <thread>void computeSquare(std::promise<int>&& prom, int x) {std::this_thread::sleep_for(std::chrono::seconds(2));prom.set_value(x * x); // 设置结果
}int main() {std::promise<int> prom;               // 创建 promise (它就像是倒斗中的斗 摸金校尉的工具)std::future<int> fut = prom.get_future(); // 获取 futurestd::thread t(computeSquare, std::move(prom), 10);std::cout << "Waiting for the result...\n";int result = fut.get(); // 获取异步结果(阻塞)std::cout << "Result is: " << result << std::endl;t.join();return 0;
}

注意事项

std::unique_lock与std::lock_guard的区别是什么?

功能对比

std::lock_guard

#include <iostream>
#include <mutex>
#include <thread>std::mutex mtx;void safeFunction() {std::lock_guard<std::mutex> guard(mtx); // 自动锁定std::cout << "Thread-safe operation\n";// 离开作用域时自动解锁
}int main() {std::thread t1(safeFunction);std::thread t2(safeFunction);t1.join();t2.join();return 0;
}
std::unique_lock
- 提供灵活的锁管理功能。
- 支持延迟锁定、尝试锁定和超时锁定。
- 可以显式解锁(unlock())或重新锁定(lock())。
(1)延迟锁定
#include <iostream>
#include <mutex>
#include <thread>std::mutex mtx;void safeFunction() {std::unique_lock<std::mutex> lock(mtx, std::defer_lock); // 延迟锁定//// 执行一些操作,不需要锁lock.lock(); // 显式锁定std::cout << "Thread-safe operation\n";// 离开作用域时自动解锁
}int main() {std::thread t1(safeFunction);std::thread t2(safeFunction);t1.join();t2.join();return 0;
}
(2)尝试锁定
#include <iostream>
#include <mutex>
#include <thread>std::mutex mtx;void safeFunction() {/*std::try_to_lock 表示我们不等待锁定,而是尝试锁定,如果当前锁已经被其他线程锁住了,它会立即返回并不会阻塞当前线程。如果锁定成功,lock 会管理对 mtx 的持有。如果锁定失败,lock 将不会持有 mtx,并且会进入 else 分支。if (lock.owns_lock()):检查 lock 是否成功持有锁。*/std::unique_lock<std::mutex> lock(mtx, std::try_to_lock); // 尝试锁定if (lock.owns_lock()) {std::cout << "Acquired the lock\n";} else {std::cout << "Failed to acquire the lock\n";}
}int main() {std::thread t1(safeFunction);std::thread t2(safeFunction);t1.join();t2.join();return 0;
}

(3)显式解锁和重新锁定
#include <iostream>
#include <mutex>
#include <thread>std::mutex mtx;void safeFunction() {std::unique_lock<std::mutex> lock(mtx); // 自动锁定std::cout << "Critical section\n";lock.unlock(); // 手动解锁// 非临界区操作lock.lock();   // 手动重新锁定std::cout << "Critical section again\n";
}int main() {std::thread t1(safeFunction);std::thread t2(safeFunction);t1.join();t2.join();return 0;
}
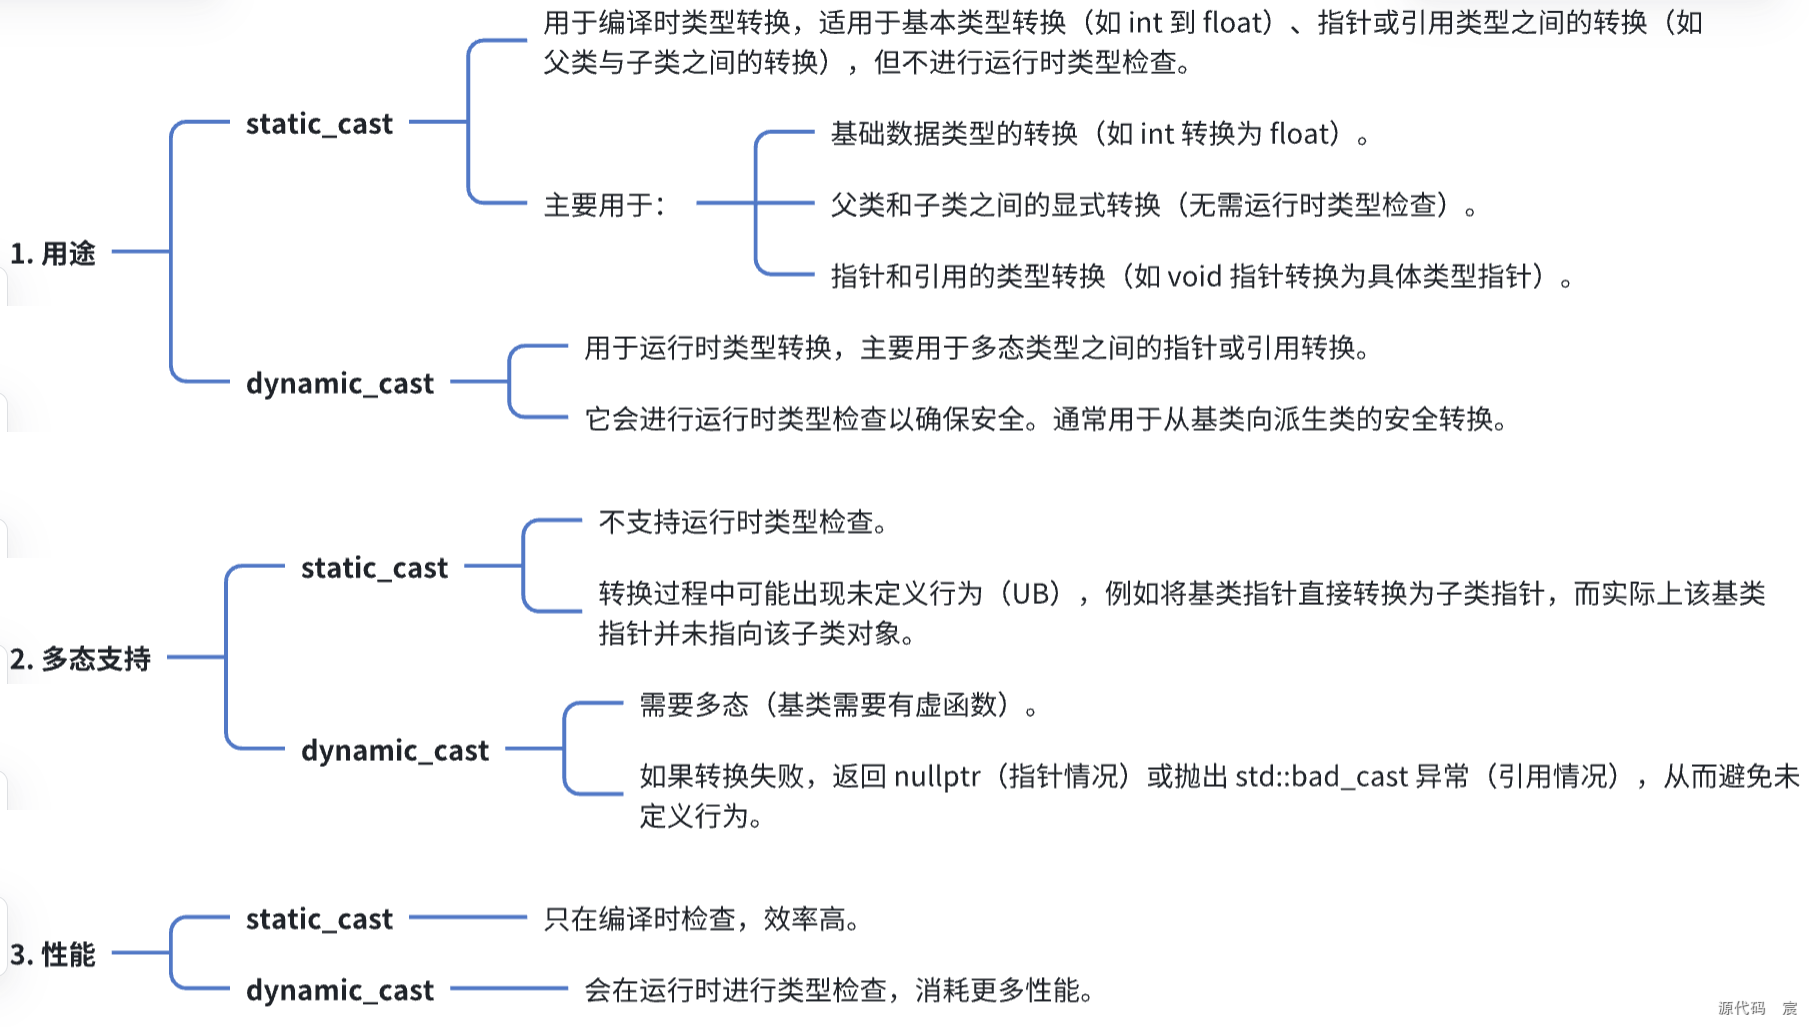
148. static_cast和dynamic_cast区别?

static_cast 示例
#include <iostream>
class Base {};
class Derived : public Base {};int main() {Base* base = new Derived();// 不安全的类型转换:无运行时检查Derived* derived = static_cast<Derived*>(base); if (derived) {std::cout << "static_cast 成功\n";}delete base;return 0;
}
dynamic_cast 示例
#include <iostream>
class Base {
public:virtual ~Base() {} // 必须是多态类
};
class Derived : public Base {};
class AnotherDerived : public Base {};int main() {Base* base = new AnotherDerived();// 安全的类型转换:有运行时检查Derived* derived = dynamic_cast<Derived*>(base); if (derived) {std::cout << "dynamic_cast 成功\n";} else {std::cout << "dynamic_cast 失败\n";}delete base;return 0;
}
149. C++中如何实现一个简单的命令模式的示例?

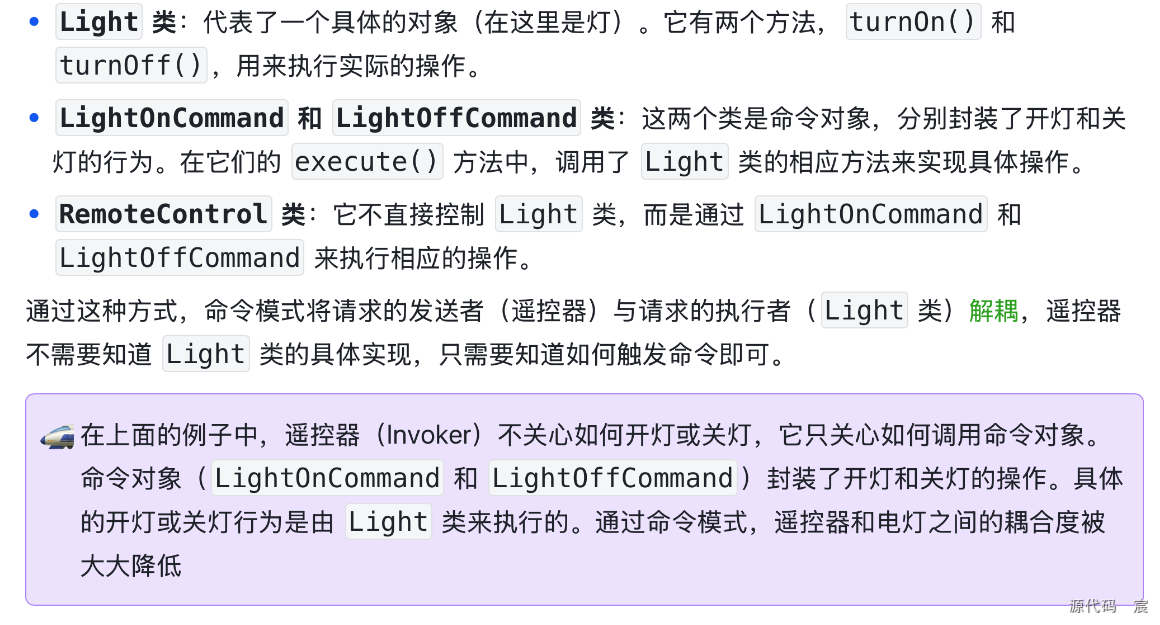
假设你有一个远程控制器,它不直接控制具体的设备(比如电灯),而是触发一个命令。不同的遥控器可能控制不同的设备,比如电视、空调或电灯。如果我们使用命令模式,那么每个设备的开关操作都会封装为一个命令对象,遥控器只需要知道如何“执行命令(只管发命令,你使劲儿按遥控器,具体能不能打开电视,那是电视的事儿)”,而不关心具体设备的实现。这就是命令模式的精髓所在。
代码示例
可以看我的文章,里面的代码结构更好深入浅出设计模式——行为型模式之命令模式 Command
#include <iostream>
using namespace std;// Command接口
class Command {
public:virtual ~Command() {}virtual void execute() = 0;  // 执行命令
};// 电灯类(接收者  这货才真正负责执行)
class Light {
public:void turnOn() {cout << "The light is on." << endl;}void turnOff() {cout << "The light is off." << endl;}
};// 开灯命令(对命令进行定义,命令定义中唤醒执行者)
class LightOnCommand : public Command {
private:Light* light;  // 这里持有一个Light对象的指针public:LightOnCommand(Light* l) : light(l) {}void execute() override {light->turnOn();  // 调用Light类的turnOn方法}
};// 关灯命令
class LightOffCommand : public Command {
private:Light* light;  // 这里持有一个Light对象的指针public:LightOffCommand(Light* l) : light(l) {}void execute() override {light->turnOff();  // 调用Light类的turnOff方法}
};// 遥控器(Invoker)对命令进行集成,遥控器上可以弄过个命令
class RemoteControl {
private:Command* command;public:RemoteControl() : command(nullptr) {}void setCommand(Command* cmd) {command = cmd;}void pressButton() {if (command) {command->execute();  // 执行当前命令}}
};int main() {// 创建接收者(电灯)Light* light = new Light();// 创建命令对象,并传入Light对象Command* lightOn = new LightOnCommand(light);Command* lightOff = new LightOffCommand(light);// 创建遥控器RemoteControl* remote = new RemoteControl();// 按下遥控器按钮,开灯remote->setCommand(lightOn);remote->pressButton();// 按下遥控器按钮,关灯remote->setCommand(lightOff);remote->pressButton();// 清理内存delete lightOn;delete lightOff;delete light;delete remote;return 0;
}
150. 对OpenGL 渲染管线了解吗?
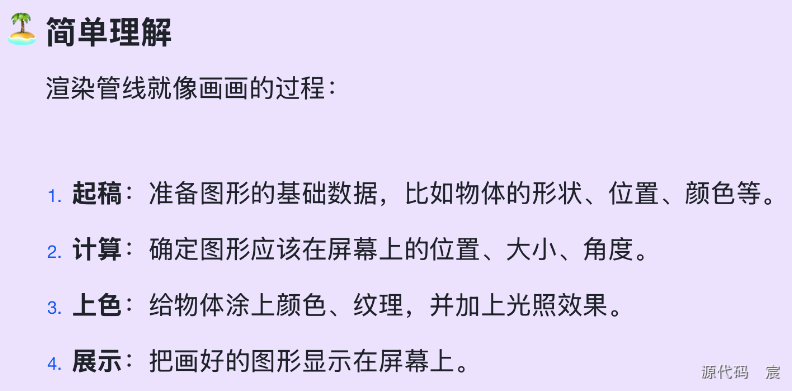
渲染管线是指将一个三维场景转换成二维图像的完整流程,它是一条流水线式的处理过程,每个阶段都负责完成特定的任务。通过渲染管线,我们把计算机里的模型、纹理和光照,变成最终显示在屏幕上的图像。
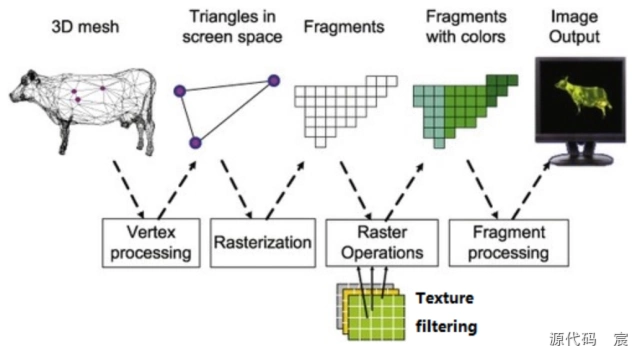


渲染管线的主要流程
以 OpenGL 为例,现代的渲染管线分为几个主要阶段:
1. 输入阶段(准备数据)
- 输入顶点数据:提供物体的基本信息,包括点的坐标、颜色、纹理等。
- 例子:> “我要画一个三角形,它有三个顶点,每个顶点的位置和颜色是这样的。”
2. 顶点着色器阶段

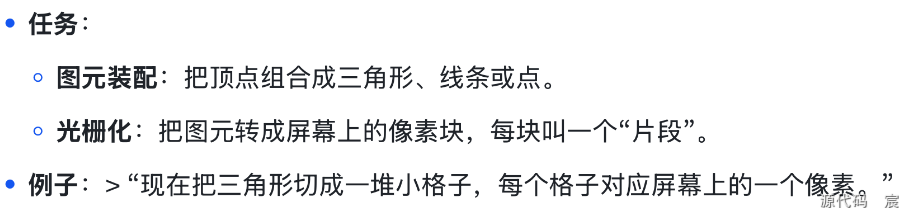
3. 图元装配与光栅化
4. 片段着色器阶段

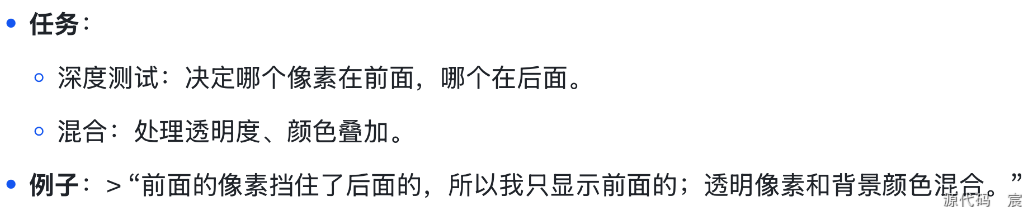
5. 测试与混合
6. 输出图像
- 最终把处理好的像素数据显示在屏幕上。
之后我会持续更新,如果喜欢我的文章,请记得一键三连哦,点赞关注收藏,你的每一个赞每一份关注每一次收藏都将是我前进路上的无限动力 !!!↖(▔▽▔)↗感谢支持!