Linux上安装PostgreSQL-源码编译安装备份恢复(超详细)
Linux上安装PostgreSQL-源码编译安装&备份恢复
目录
Linux上安装PostgreSQL-源码编译安装&备份恢复
一、服务器资源配置
二、官网PostgreSQL安装包下载
三、上传安装包
四、安装依赖包
1.创建文件夹,将Postgresql的压缩包移入
2.解压压缩包到目录中
3.进入解压后的文件夹
4.创建Postgresql的目录,编译Postgresql源码
5.源码编译安装
6.完成Postgresql的安装。进入/pgsql/postgresql目录看安装后的Postgresql的文件。
六、创建用户和用户组
七、创建数据主目录
八、配置环境变量
九、initdb初始化数据库
十、配置服务
十一、设置开机自启动
设置Postgresql服务开机自启动
1.创建systemd服务文件
2.设置正确的权限
3.重新加载systemd配置
4.自启用PostgreSQL服务(开机自启)
5.启动PostgreSQL服务
问题:服务启动不了
解决方法步骤:
1.创建数据目录并授权
2.初始化目录
3.修正systemd服务文件
4.重载并启动服务
十二、设置防火墙
十三、启动数据库服务
十四、测试本地连接
十五、数据的备份及恢复
一、服务器资源配置
服务器:almalinux、8CPU、8GB、150GB磁盘
最小配置
cpu:至少2核
内存:至少2GB
硬盘:至少10GB空间,推荐使用SSD以提高性能
网络:100Mbps
场景:这种配置适用于轻量级的测试,如功能验证、小型应用的开发等。
推荐配置
CPU:4核或以上
内存:8GB 或以上
硬盘:50GB 或更多的SSD空间
网络:1Gbps
场景:这种配置适用于更加接近生产环境的测试,包括性能测试、大规模数据处理等。
二、官网PostgreSQL安装包下载
下载地址:PostgreSQL: File Browser
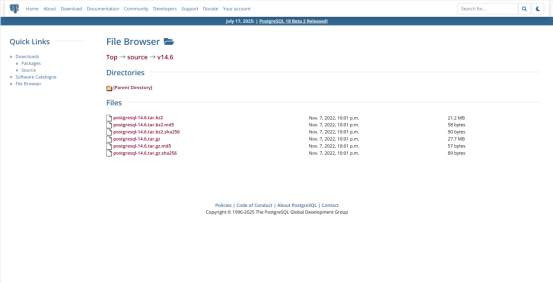
根据自己的系统找到对应的包进行下载(也可以直接wget直接拉)
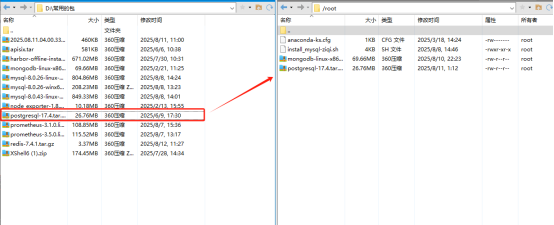
三、上传安装包
四、安装依赖包
#LInux执行如下语句4:
[rootalocalhost ~]# yum install -y perl-ExtUtils-Embed readline-devel2l1b-devel pam devel libxml2-devel libxslt-devel openldap-devel python-devel gcc-c++ openssl-devel cmake
| 序号 | 依赖包名称 | 说明 |
| 1 | perl-ExtUtils-Embed | 这个包用于嵌入Perl代码到C程序中。在PostgreSQL中,它可能被用于某些与Perl相关的扩展或自定义脚本功能。 |
| 2 | readline-devel | 这是readline库的开发版本,提供了命令行编辑和历史记录的功能。对于PostgreSQL,它使得使用交互式命令行工具(如psql)更加方便。 |
| 3 | zlib-devel | 这是zlib压缩库的开发版本,用于数据压缩和解压缩。在PostgreSQL中,它用于优化数据存储和传输。 |
| 4 | pam-deve | 这是Pluggable Authentication Modules(PAM)的开发包,用于集成多种认证技术。在PostgreSQL中,PAM可以用于用户认证。 |
| 5 | libxml2-devel | 这是libxml2库的开发版本,它提供了XML的支持。在PostgreSQL中,它用于处理XML数据格式的功能。 |
| 6 | libxslt-devel | 这是libxslt库的开发版本,用于XSLT转换。在PostgreSQL中,可能用于转换XML数据。 |
| 7 | openldap-devel | 这是OpenLDAP的开发包,用于LDAP协议的支持。在PostgreSQL中,它可以用于集成LDAP-based的用户认证。 |
| 8 | python-devel | 这是Python语言的开发包,可能用于支持Python编写的数据库脚本或扩展。 |
| 9 | gcc-c++ | 这是GNU C++编译器,用于编译C++代码。它可能用于编译PostgreSQL中的某些C++编写的部分或扩展。 |
| 10 | openssl-devel | 这是OpenSSL库的开发版本,提供加密和SSL/TLS支持。在PostgreSQL中,它用于确保数据传输的安全性。 |
| 11 | cmake | 这是一个跨平台的安装(构建)系统,用于控制软件编译和测试的过程。在某些PostgreSQL的扩展或自定义安装中可能会用到。 |
五、源码编译安装
1.创建文件夹,将Postgresql的压缩包移入
[root@localhost ~]# mkdir /soft
[root@localhost ~]# mv postgresql-17.4.tar.gz /soft/
[root@localhost ~]# cd /soft/
[root@localhost soft]# ls
postgresql-17.4.tar.gz
2.解压压缩包到目录中
[root@localhost soft]# tar -zxvf postgresql-14.6.tar.gz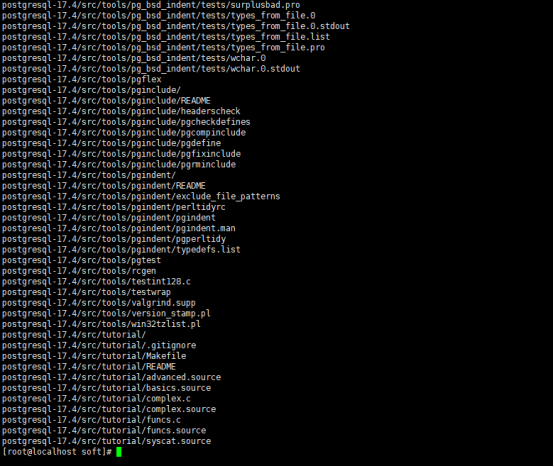
3.进入解压后的文件夹
[root@localhost soft]# cd postgresql-17.4
[root@localhost postgresql-17.4]# ls
COPYRIGHT       HISTORY   README.md   config     configure.ac  doc          meson_options.txt
GNUmakefile.in  Makefile  aclocal.m4  configure  contrib       meson.build  src
4.创建Postgresql的目录,编译Postgresql源码
[root@localhost postgresql-17.4]# mkdir -p /opt/pgsql/postgresql
[root@localhost postgresql-17.4]# ./configure --prefix=/opt/pgsql/postgresql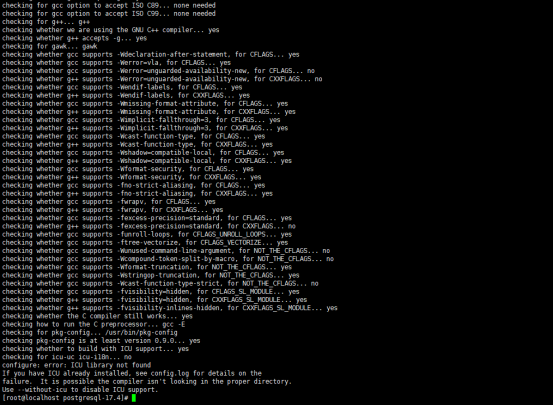
5.源码编译安装
[root@localhost postgresql-17.4]#yum install libicu-devel
[root@localhost postgresql-17.4]#yum install bison
[root@localhost postgresql-17.4]#yum install flex
[root@localhost postgresql-17.4]#yum install perl-core[root@localhost postgresql-17.4]# ./configure --prefix=/opt/pgsql/postgresql --without-icu
[root@localhost postgresql-17.4]# make
[root@localhost postgresql-17.4]# make install   # 将编译好的文件复制到配置指定的目录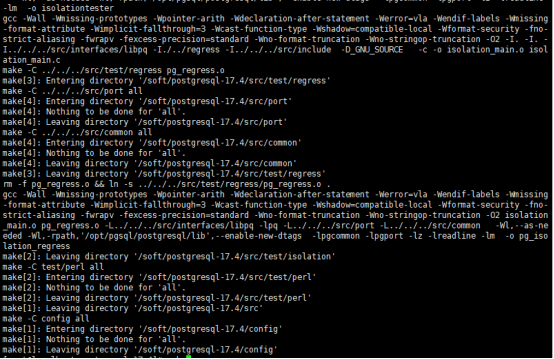
6.完成Postgresql的安装。进入/pgsql/postgresql目录看安装后的Postgresql的文件。
[root@localhost postgresql-17.4]# cd /opt/pgsql/postgresql/
[root@localhost postgresql]# pwd
/opt/pgsql/postgresql
[root@localhost postgresql]# ls
bin  include  lib  share
六、创建用户和用户组
创建用户组Postgres、用户Postgres
[root@localhost postgresql]# groupadd postgres
[root@localhost postgresql]# useradd -g postgres postgres
[root@localhost postgresql]#  id postgres
uid=1001(postgres) gid=1001(postgres) groups=1001(postgres)![]()
七、创建数据主目录
#创建Postgresql数据库的数据主目录并修改文件所有者
数据库主目录是随实际情况而不同,这里的主目录是在/pgsql/postgresql/data目录下
[root@localhost postgresql]#  cd /opt/pgsql/postgresql
[root@localhost postgresql]# mkdir data
[root@localhost postgresql]# chown postgres:postgres data
[root@localhost postgresql]# ls -la
total 16
drwxr-xr-x. 7 root     root       68 Aug 11 03:11 .
drwxr-xr-x. 3 root     root       24 Aug 11 01:51 ..
drwxr-xr-x. 2 root     root     4096 Aug 11 03:01 bin
drwxr-xr-x. 2 postgres postgres    6 Aug 11 03:11 data
drwxr-xr-x. 6 root     root     4096 Aug 11 03:01 include
drwxr-xr-x. 4 root     root     4096 Aug 11 03:01 lib
drwxr-xr-x. 6 root     root     4096 Aug 11 03:01 share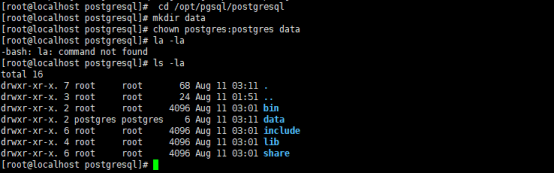
八、配置环境变量
进入home/postgres目录可以看到.bash_profile文件。
[root@localhost postgresql]# cd /home/postgres
[root@localhost postgres]# ls -la
total 12
drwx------. 2 postgres postgres  62 Aug 11 03:08 .
drwxr-xr-x. 3 root     root      22 Aug 11 03:08 ..
-rw-r--r--. 1 postgres postgres  18 Apr 30  2024 .bash_logout
-rw-r--r--. 1 postgres postgres 141 Apr 30  2024 .bash_profile
-rw-r--r--. 1 postgres postgres 492 Apr 30  2024 .bashrc
修改bash_profile文件。
[root@localhost postgres]# vi .bash_profile
[root@localhost postgres]# cat .bash_profile
# .bash_profile# Get the aliases and functions
if [ -f ~/.bashrc ]; then. ~/.bashrc
fi# User specific environment and startup programs
PATH=$PATH:$HOME/.local/bin:$HOME/bin
export PATHexport PGHOME=/opt/pgsql/postgresql
export PGDATA=$PGHOME/data
export PATH=$PATH:$HOME/bin:$PGHOME/bin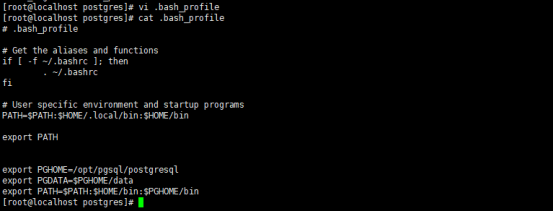
保存退出vi。执行以下命令,使环境变量生效
[root@localhost postgres]# source .bash_profile![]()
九、initdb初始化数据库
切换用户到postgres并使用initdb初始化数据库
[root@localhost postgres]# su - postgres
[postgres@localhost ~]$ initdb
The files belonging to this database system will be owned by user "postgres".
This user must also own the server process.The database cluster will be initialized with locale "C.UTF-8".
The default database encoding has accordingly been set to "UTF8".
The default text search configuration will be set to "english".Data page checksums are disabled.fixing permissions on existing directory /opt/pgsql/postgresql/data ... ok
creating subdirectories ... ok
selecting dynamic shared memory implementation ... posix
selecting default "max_connections" ... 100
selecting default "shared_buffers" ... 128MB
selecting default time zone ... Asia/Shanghai
creating configuration files ... ok
running bootstrap script ... ok
performing post-bootstrap initialization ... ok
syncing data to disk ... okinitdb: warning: enabling "trust" authentication for local connections
initdb: hint: You can change this by editing pg_hba.conf or using the option -A, or --auth-local and --auth-host, the next time you run initdb.Success. You can now start the database server using:pg_ctl -D /opt/pgsql/postgresql/data -l logfile start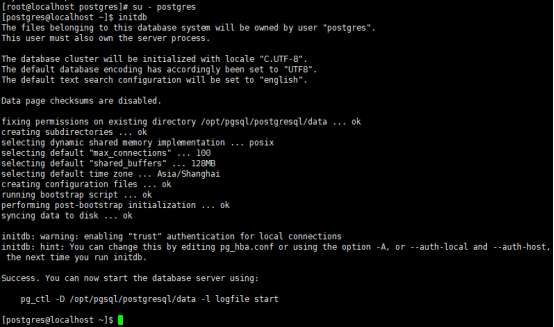
查看/pgsql/postgresql/data目录,看是否初始化成功
[postgres@localhost ~]$  ls -lh $PGDATA
total 56K
-rw-------. 1 postgres postgres    3 Aug 11 03:25 PG_VERSION
drwx------. 5 postgres postgres   33 Aug 11 03:25 base
drwx------. 2 postgres postgres 4.0K Aug 11 03:25 global
drwx------. 2 postgres postgres    6 Aug 11 03:25 pg_commit_ts
drwx------. 2 postgres postgres    6 Aug 11 03:25 pg_dynshmem
-rw-------. 1 postgres postgres 5.6K Aug 11 03:25 pg_hba.conf
-rw-------. 1 postgres postgres 2.6K Aug 11 03:25 pg_ident.conf
drwx------. 4 postgres postgres   68 Aug 11 03:25 pg_logical
drwx------. 4 postgres postgres   36 Aug 11 03:25 pg_multixact
drwx------. 2 postgres postgres    6 Aug 11 03:25 pg_notify
drwx------. 2 postgres postgres    6 Aug 11 03:25 pg_replslot
drwx------. 2 postgres postgres    6 Aug 11 03:25 pg_serial
drwx------. 2 postgres postgres    6 Aug 11 03:25 pg_snapshots
drwx------. 2 postgres postgres   25 Aug 11 03:25 pg_stat
drwx------. 2 postgres postgres    6 Aug 11 03:25 pg_stat_tmp
drwx------. 2 postgres postgres   18 Aug 11 03:25 pg_subtrans
drwx------. 2 postgres postgres    6 Aug 11 03:25 pg_tblspc
drwx------. 2 postgres postgres    6 Aug 11 03:25 pg_twophase
drwx------. 4 postgres postgres   77 Aug 11 03:25 pg_wal
drwx------. 2 postgres postgres   18 Aug 11 03:25 pg_xact
-rw-------. 1 postgres postgres   88 Aug 11 03:25 postgresql.auto.conf
-rw-------. 1 postgres postgres  30K Aug 11 03:25 postgresql.conf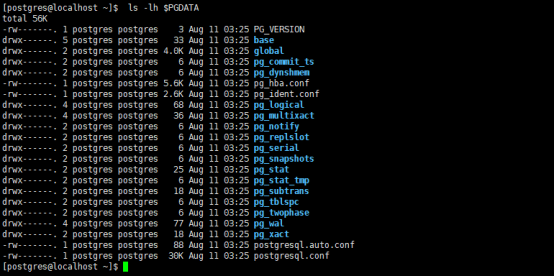
十、配置服务
修改/opt/pgsql/postgresql/data目录下postgresql.conf文件,该文件配置PostgreSQL数据库服务器的相应的参数。
[postgres@localhost ~]$ cd /opt/pgsql/postgresql/data
[postgres@localhost data]$ vi postgresql.conf#------------------------------------------------------------------------------
# CONNECTIONS AND AUTHENTICATION
#------------------------------------------------------------------------------# - Connection Settings -listen_addresses = '*'          # what IP address(es) to listen on;# comma-separated list of addresses;# defaults to 'localhost'; use '*' for all# (change requires restart)
port = 5432                             # (change requires restart)
max_connections = 100                   # (change requires restart)
注意:其中,参数“listen_addresses”表示监听的IP地址,默认是在localhost处监听,也就是127.0.0.1的ip地址上监听,只接受来自本机localhost的连接请求,这会让远程的主机无法登陆这台数据库,如果想从其他的机器上登陆这台数据库,需要把监听地址改为实际网络的地址,一种简单的方法是,将行开头的#去掉,把这个地址改为*,表示在本地的所有地址上监听
修改/opt/pgsql/postgresql/data目录下pg_hba.conf 文件,该文件 配置对数据库的访问权限。
[postgres@localhost data]$  vi pg_hba.conf
#添加下面这一行
# IPv4 local connections:
host    all             all             0.0.0.0/0               trust
host    all             all             127.0.0.1/32            trust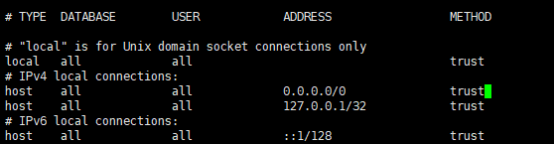
十一、设置开机自启动
PostgreSQL的开机自启动脚本位于PostgreSQL源码目录的contrib/start-scripts路径下。linux文件即为linux系统上的启动脚本。需切换为root用户。
[postgres@localhost data]$ su root
[root@localhost data]#
[root@localhost data]# cd /soft/postgresql-17.4/contrib/start-scripts
[root@localhost start-scripts]# ls
freebsd  linux  macos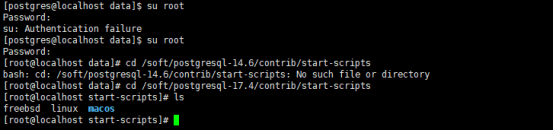
切换为root用户,修改Linux文件属性,添加X属性
[root@localhost start-scripts]# chmod a+x linux![]()
复制linux文件到/etc/init.d目录下,更名为postgresql
[root@localhost start-scripts]# cp linux /etc/init.d/postgresql![]()
修改/etc/init.d/postgresql文件的两个变量
[root@localhost start-scripts]# vi /etc/init.d/postgresql
[root@localhost start-scripts]# cat /etc/init.d/postgresql ## EDIT FROM HERE# Installation prefix
#prefix=/usr/local/pgsql
prefix=/opt/pgsql/postgresql# Data directory
#PGDATA="/usr/local/pgsql/data"
PGDATA="/opt/pgsql/postgresql/data"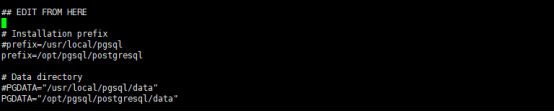
设置Postgresql服务开机自启动
1.创建systemd服务文件
[Unit]
Description=PostgreSQL Database Server
After=network.target[Service]
Type=forking
User=postgres
Group=postgres
Environment=PGDATA=/opt/pgsql/data
ExecStart=/opt/pgsql/postgresql/bin/pg_ctl start -D ${PGDATA}
ExecStop=/opt/pgsql/postgresql/bin/pg_ctl stop -D ${PGDATA}
Restart=on-failure
RestartSec=5
TimeoutSec=300# 调整内存限制(根据需要)
LimitNOFILE=65536
LimitAS=infinity
LimitFSIZE=infinity[Install]
WantedBy=multi-user.target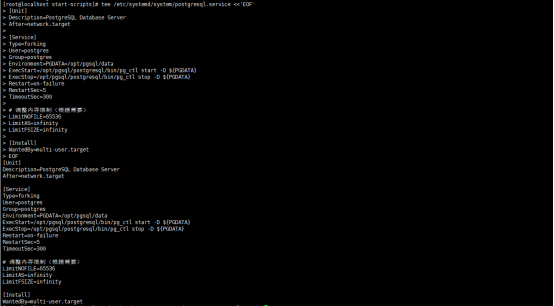
2.设置正确的权限
[root@localhost start-scripts]# sudo chmod 644 /etc/systemd/system/postgresql.service![]()
3.重新加载systemd配置
[root@localhost start-scripts]# systemctl daemon-reload![]()
4.自启用PostgreSQL服务(开机自启)
[root@localhost start-scripts]# systemctl enable postgresql
Created symlink /etc/systemd/system/multi-user.target.wants/postgresql.service → /etc/systemd/system/postgresql.service.![]()
5.启动PostgreSQL服务
[root@localhost start-scripts]# systemctl start postgresql![]()
问题:服务启动不了
![]()
路径问题
#查看日志
[root@localhost start-scripts]# journalctl -u postgresql -n 50 --no-pager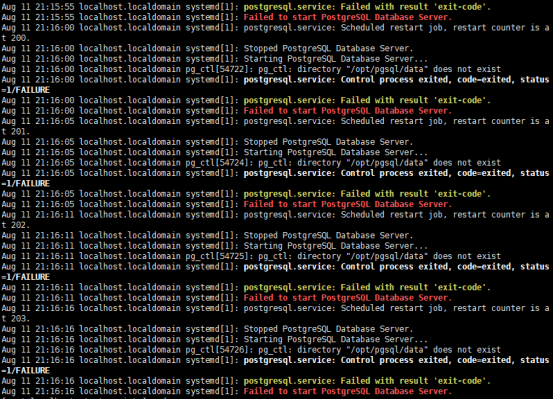
直接原因:systemd 服务中配置的 Environment=PGDATA=/opt/pgsql/data路径未创建或无效。
解决方法步骤:
1.创建数据目录并授权
[root@localhost ~]# mkdir -p /opt/pgsql/data
[root@localhost ~]# chown -R postgres:postgres /opt/pgsql
[root@localhost ~]# chmod 700 /opt/pgsql/data![]()
说明:目录权限必须为700(仅Postgre用户可访问),否则启动失败
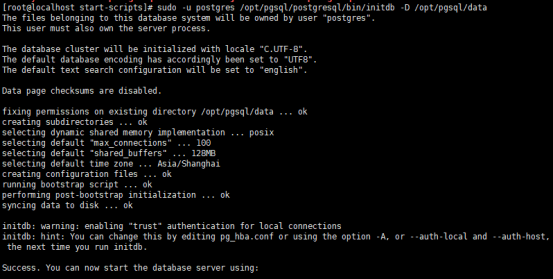
2.初始化目录
[root@localhost start-scripts]# sudo -u postgres /opt/pgsql/postgresql/bin/initdb -D /opt/pgsql/data关键参数:-D指定数据目录路径需与 PGDATA一致
成功标志:输出提示 Success. You can now start the database server。
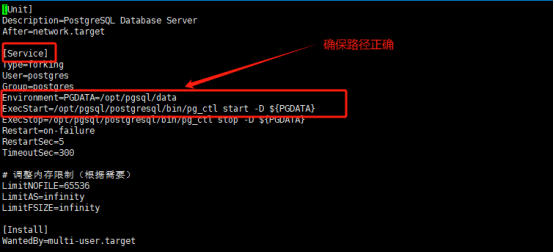
3.修正systemd服务文件
检查 /etc/systemd/system/postgresql.service中的路径配置:
4.重载并启动服务
[root@localhost start-scripts]# systemctl daemon-reload
[root@localhost start-scripts]# systemctl start postgresql
[root@localhost start-scripts]# systemctl status postgresql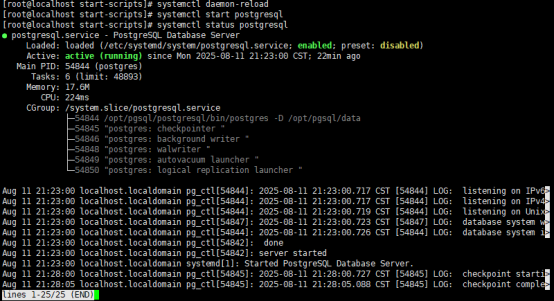
十二、设置防火墙
安装依赖包
[root@localhost start-scripts]# yum install -y firewalld设置防火墙
[root@localhost start-scripts]# systemctl start firewalld
[root@localhost start-scripts]# systemctl enable firewalld
[root@localhost start-scripts]# systemctl status firewalld
● firewalld.service - firewalld - dynamic firewall daemonLoaded: loaded (/usr/lib/systemd/system/firewalld.service; enabled; preset: enabled)Active: active (running) since Mon 2025-08-11 21:53:39 CST; 17s agoDocs: man:firewalld(1)Main PID: 55432 (firewalld)Tasks: 2 (limit: 48893)Memory: 22.2MCPU: 558msCGroup: /system.slice/firewalld.service└─55432 /usr/bin/python3 -s /usr/sbin/firewalld --nofork --nopidAug 11 21:53:39 localhost.localdomain systemd[1]: Starting firewalld - dynamic firewall daemon...
Aug 11 21:53:39 localhost.localdomain systemd[1]: Started firewalld - dynamic firewall daemon.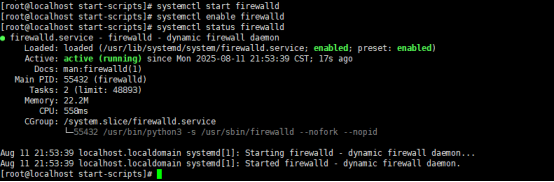
添加postgresql服务到防火墙,并加载
[root@localhost start-scripts]# firewall-cmd --permanent --zone=public --add-service=postgresql
success
[root@localhost start-scripts]#  firewall-cmd --reload
success![]()
十三、启动数据库服务
[root@localhost start-scripts]# systemctl start postgresql#查看PostgreSQL服务,确认是否启动成功
[root@localhost start-scripts]# ps -ef | grep postgres
root       51791    2103  0 03:25 pts/1    00:00:00 su - postgres
postgres   51792   51791  0 03:25 pts/1    00:00:00 -bash
postgres   54844       1  0 21:23 ?        00:00:00 /opt/pgsql/postgresql/bin/postgres -D /opt/pgsql/data
postgres   54845   54844  0 21:23 ?        00:00:00 postgres: checkpointer
postgres   54846   54844  0 21:23 ?        00:00:00 postgres: background writer
postgres   54848   54844  0 21:23 ?        00:00:00 postgres: walwriter
postgres   54849   54844  0 21:23 ?        00:00:00 postgres: autovacuum launcher
postgres   54850   54844  0 21:23 ?        00:00:00 postgres: logical replication launcher
root       55877   51886  0 23:46 pts/1    00:00:00 grep --color=auto postgres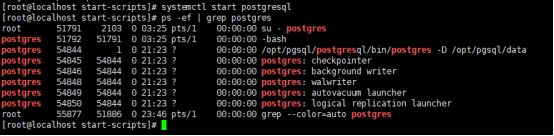
十四、测试本地连接
切换设置的Postgres用户
[root@localhost ~]# su - postgres
Last login: Mon Aug 11 23:54:57 CST 2025 on pts/1
[postgres@localhost ~]$ psql
psql (17.4)
Type "help" for help.postgres=# \lList of databasesName    |  Owner   | Encoding | Locale Provider | Collate |  Ctype  | Locale | ICU Rules |   Access privileges-----------+----------+----------+-----------------+---------+---------+--------+-----------+--------------------
---postgres  | postgres | UTF8     | libc            | C.UTF-8 | C.UTF-8 |        |           | template0 | postgres | UTF8     | libc            | C.UTF-8 | C.UTF-8 |        |           | =c/postgres        +|          |          |                 |         |         |        |           | postgres=CTc/postgr
estemplate1 | postgres | UTF8     | libc            | C.UTF-8 | C.UTF-8 |        |           | =c/postgres        +|          |          |                 |         |         |        |           | postgres=CTc/postgr
es
(3 rows)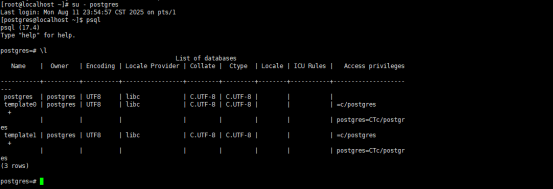
十五、数据的备份及恢复
确认服务都启动都没有问题
数据库的恢复
先下载后的数据,解压进入交互界面
# 1. 进入 psql 交互终端
psql -U postgres
进入之后
# 2. 在 psql 中执行创建命令
CREATE DATABASE 目标数据库名;(自己起一个名字要把包里的数据恢复在这里)
# 3. 退出\q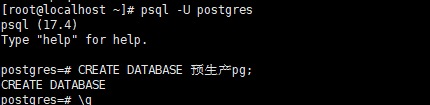
#也可以直接用这个方法创建,不用进入交互终端界面
# 以 postgres 用户身份登录并创建数据库
psql -U postgres -c "CREATE DATABASE 目标数据库名;"
#查看文件类型命令
file 文件名
恢复SQL文本备份(.sql)
psql -U postgres -d 目标数据库名 -f /root/预生产_10.0.20.164_pg/postgresql/postgres/postgres.sql
-U postgres:使用 postgres 用户(需有权限)。
-d 目标数据库名:要恢复到的数据库(需先创建)。
-f /dp/生产172.16.1.123pg.sql:指定备份文件路径
![]()
![]()
恢复二进制备份(.pgdump文件)
如果备份是 pg_dump 生成的二进制格式(.pgdump 或 .backup),使用 pg_restore:
pg_restore -U postgres -d 目标数据库名 /dp/生产172.16.1.123pg.dump
对你有帮助的话给个一键三连呐,各位大佬有问题请指出来呐