大数据服务完全分布式部署- 其他组件(阿里云版)
ZooKeeper
安装
官网
解压
cd /export/server/
tar -zxvf /export/server/apache-zookeeper-3.9.3-bin.tar.gz -C /export/server/
软链接
ln -s /export/server/apache-zookeeper-3.9.3-bin /export/server/zookeeper
配置
cd /export/server/zookeeper/
mkdir zkData
myid
cd zkData
vim myid
写个数字,node1就写1
zoo.cfg
cd /export/server/zookeeper/conf/
cp zoo_sample.cfg zoo.cfg
vim zoo.cfg
修改dataDir属性为
dataDir=/export/server/zookeeper/zkData
并在末尾添加
#########cluster#########
server.1=node1:2888:3888
server.2=node2:2888:3888
server.3=node3:2888:3888
然后分发一下
xsync /export/server/zookeeper /export/server/apache-zookeeper-3.9.3-bin
然后分别去node2、node3把myid中的数字改成2和3
vim /export/server/zookeeper/zkData/myid
启动
xcall /export/server/zookeeper/bin/zkServer.sh start
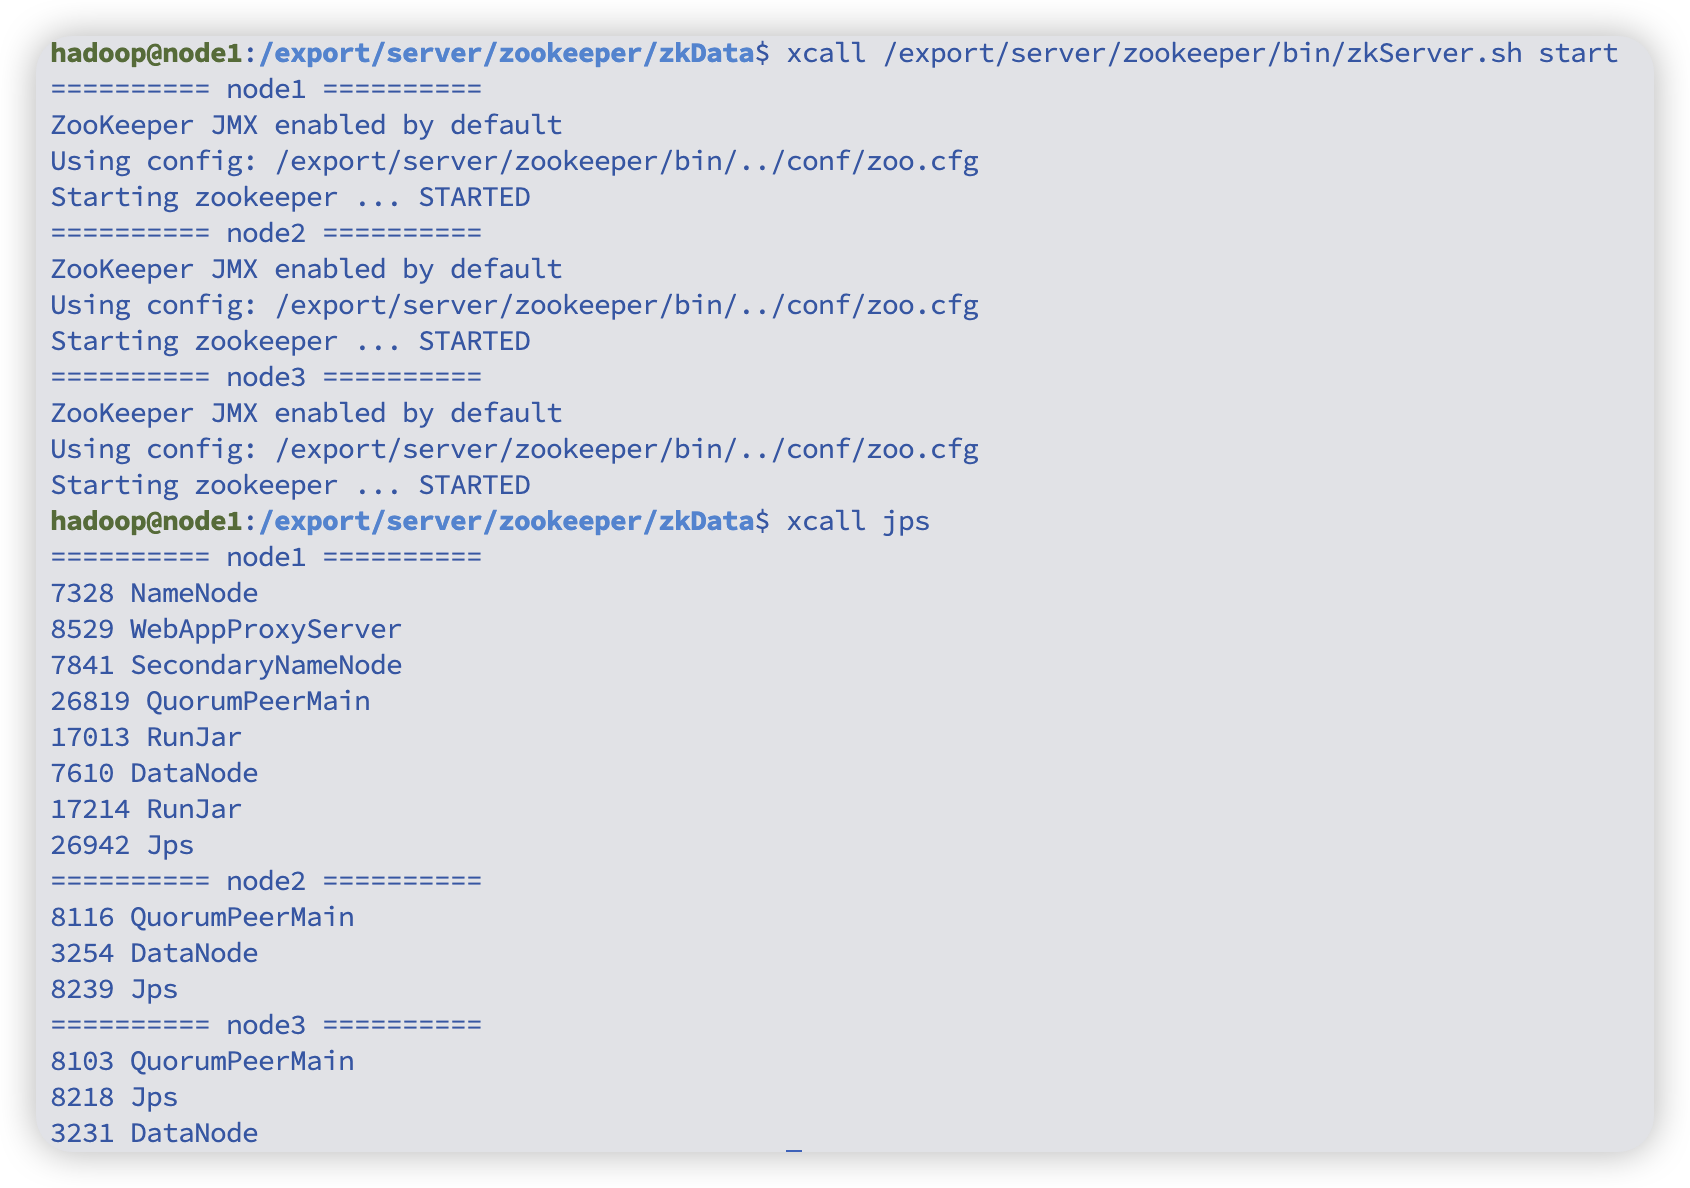
# 查看状态,应该有leader有follower
xcall /export/server/zookeeper/bin/zkServer.sh status
# 停止
xcall /export/server/zookeeper/bin/zkServer.sh stop
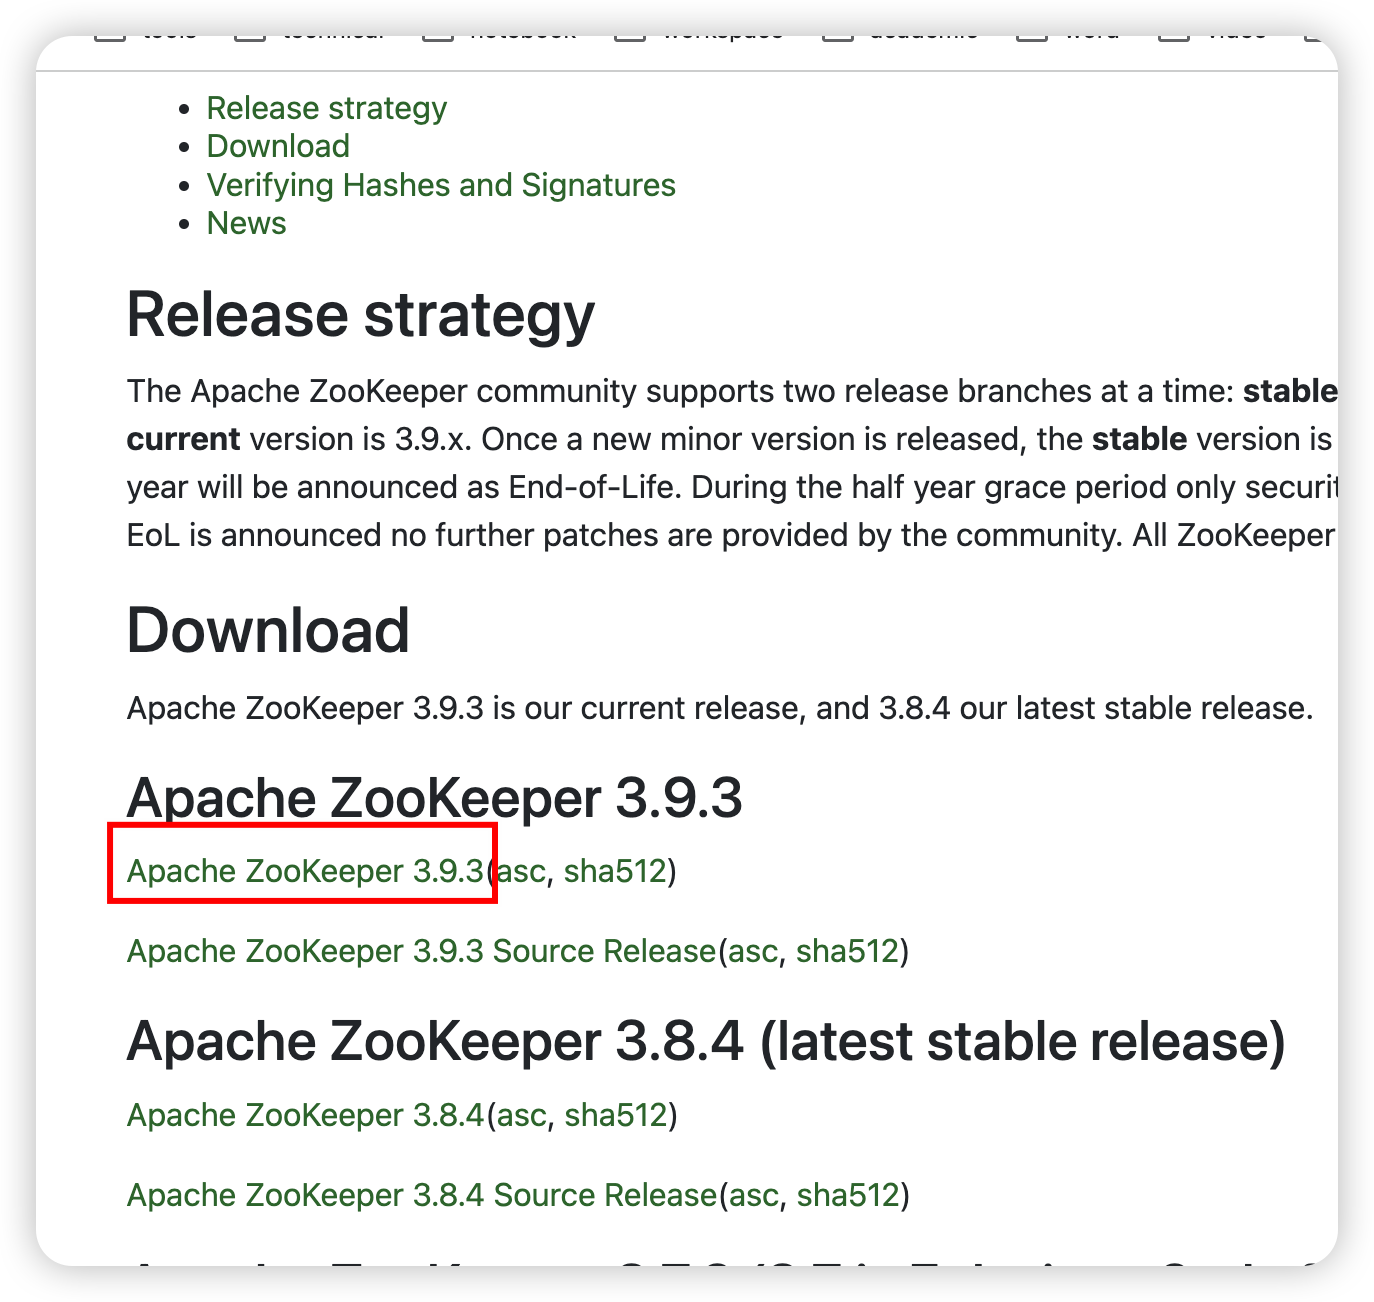
kafka
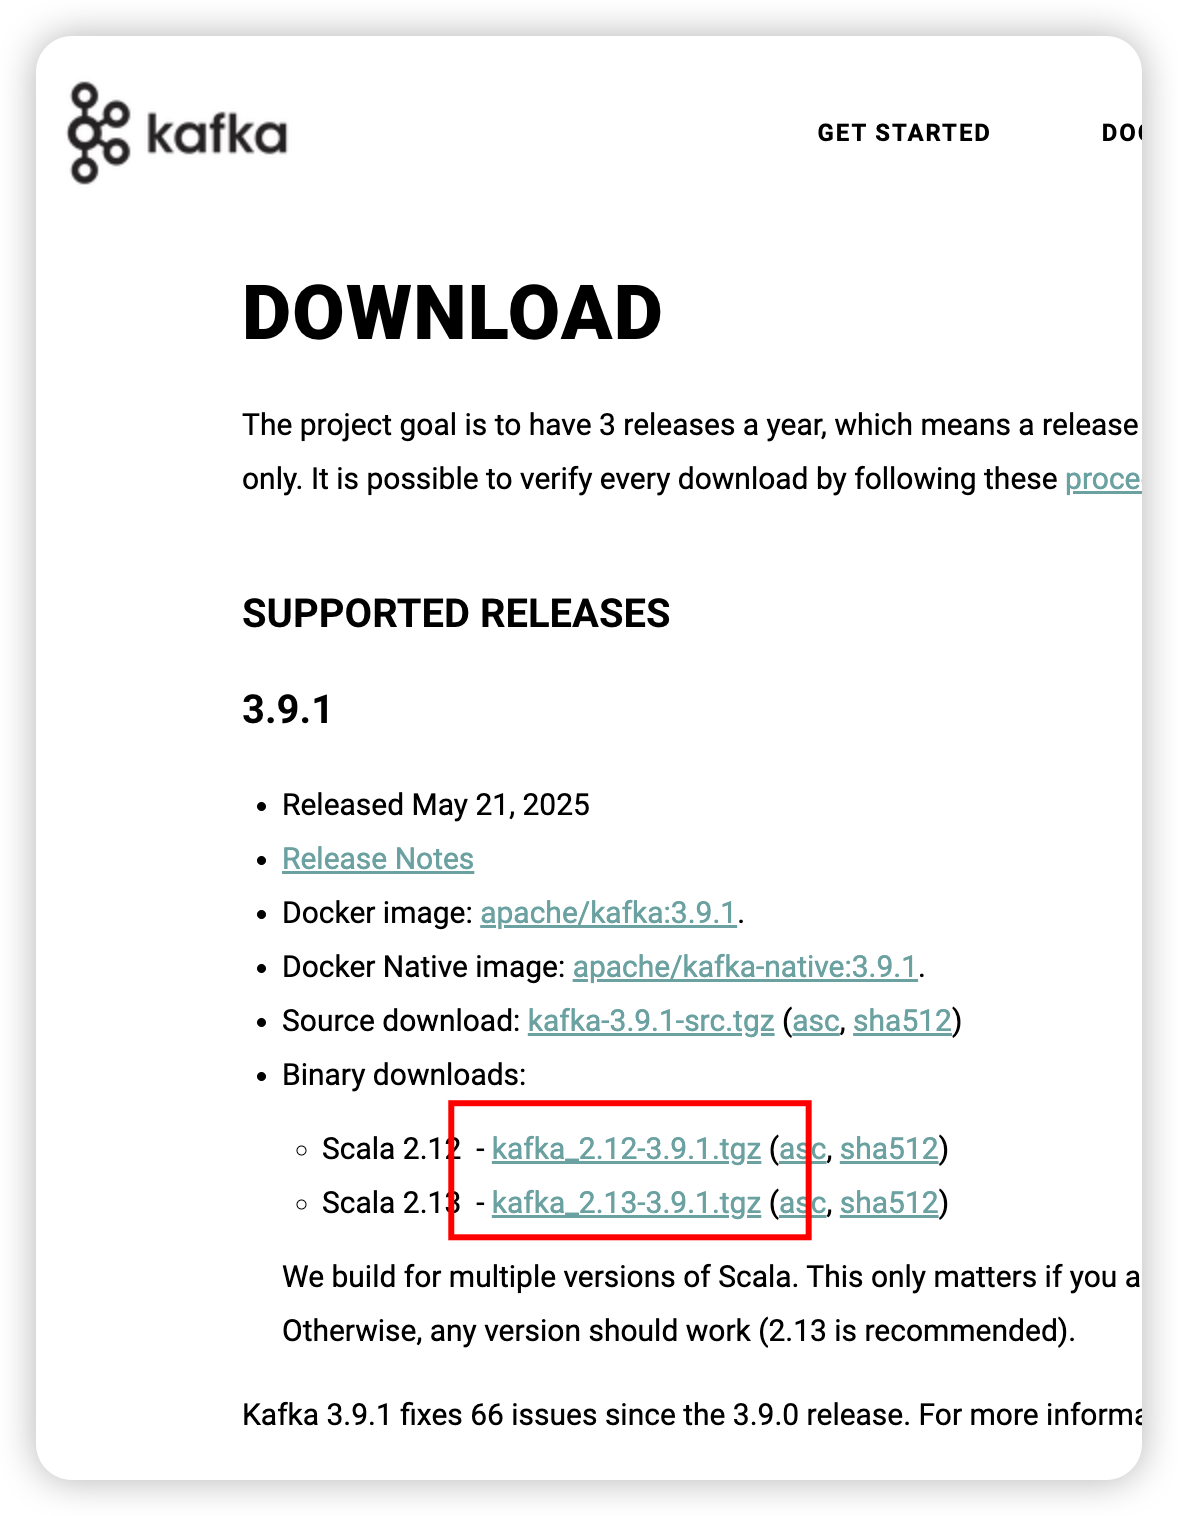
官网
安装
解压
cd /export/server
tar -zxvf /export/server/kafka_2.13-3.9.1.tgz -C /export/server/
软链接
ln -s /export/server/kafka_2.13-3.9.1 /export/server/kafka
配置
server.properties
cd /export/server/kafka/config/
vim server.properties
新增
advertised.listeners=PLAINTEXT://node1:9092
替换
log.dirs=/export/server/kafka/datas
替换
# Kafka 连接 Zookeeper 集群的地址列表(逗号分隔)
# 每个地址格式为:主机名:端口
# node1、node2、node3 分别代表三台 Zookeeper 节点主机
# /kafka 表示 Kafka 在 Zookeeper 中的 chroot 路径,用于隔离存储 Kafka 元数据,防止一个 Zookeeper 集群中多个应用(例如 Kafka、HBase、Hadoop 等)数据冲突。
zookeeper.connect=node1:2181,node2:2181,node3:2181/kafka
保存退出后,分发一下
xsync /export/server/kafka /export/server/kafka_2.13-3.9.1
然后其他节点需要修改一下broker.id和advertised.listeners
cd /export/server/kafka/config/
vim server.properties
node2 broker.id=1 advertised.listeners改成node2
node3 broker.id=2 advertised.listeners改成node3
环境变量
sudo vim /etc/profile
末尾新增
export KAFKA_HOME=/export/server/kafka
export PATH=$PATH:$KAFKA_HOME/bin
分发一下
sudo xsync /etc/profile
各个节点刷新一下
source /etc/profile
启动
xcall /export/server/kafka/bin/kafka-server-start.sh -daemon /export/server/kafka/config/server.properties
停止
xcall /export/server/kafka/bin/kafka-server-stop.sh
如果没有启动成功,那就等一会重启一下。
flume
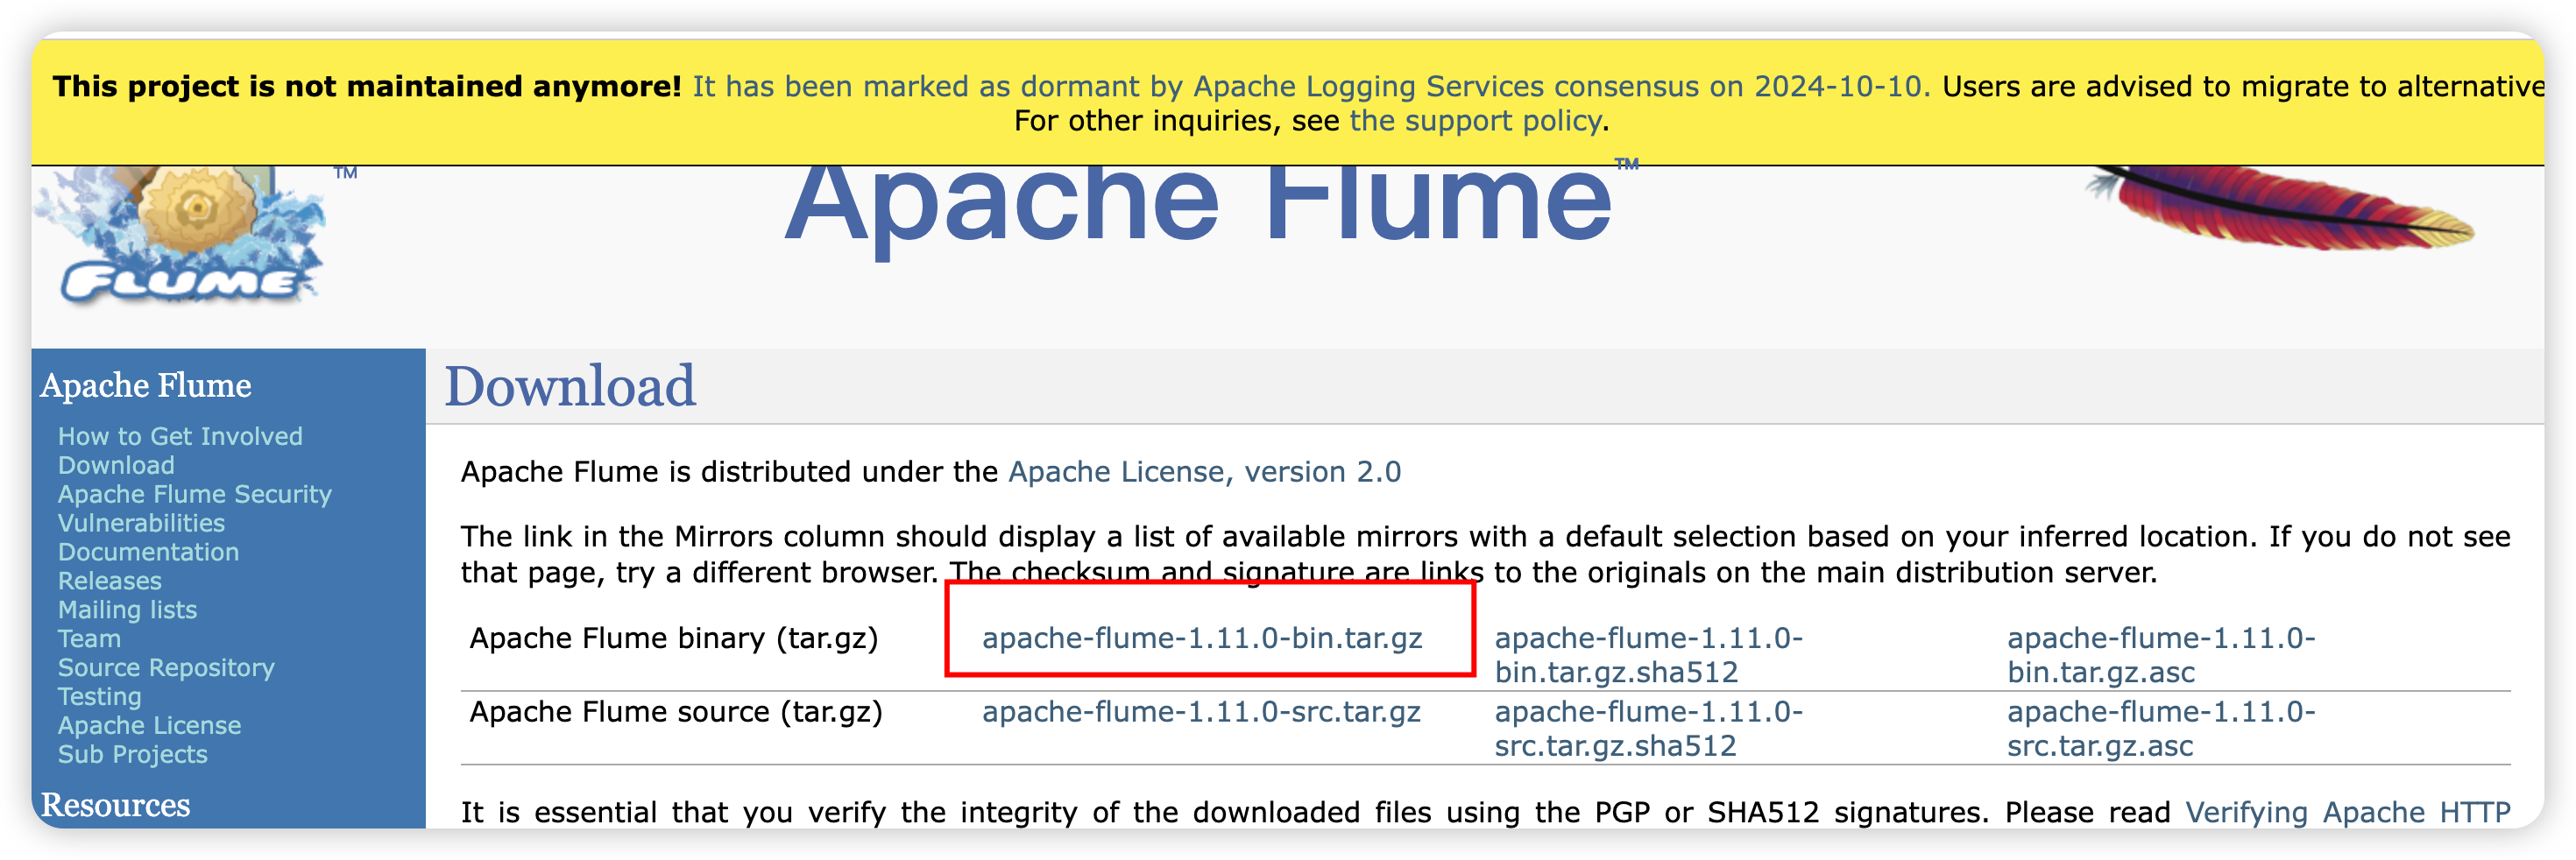
官网
安装
解压
cd /export/server
tar -zxvf /export/server/apache-flume-1.11.0-bin.tar.gz -C /export/server/
软链接
ln -s /export/server/apache-flume-1.11.0-bin /export/server/flume
配置
log4j2.xml
cd /export/server/flume/conf/
替换
<Properties><Property name="LOG_DIR">/export/server/flume/log</Property></Properties>
替换
<Root level="INFO"><AppenderRef ref="LogFile" /><AppenderRef ref="Console" /></Root>
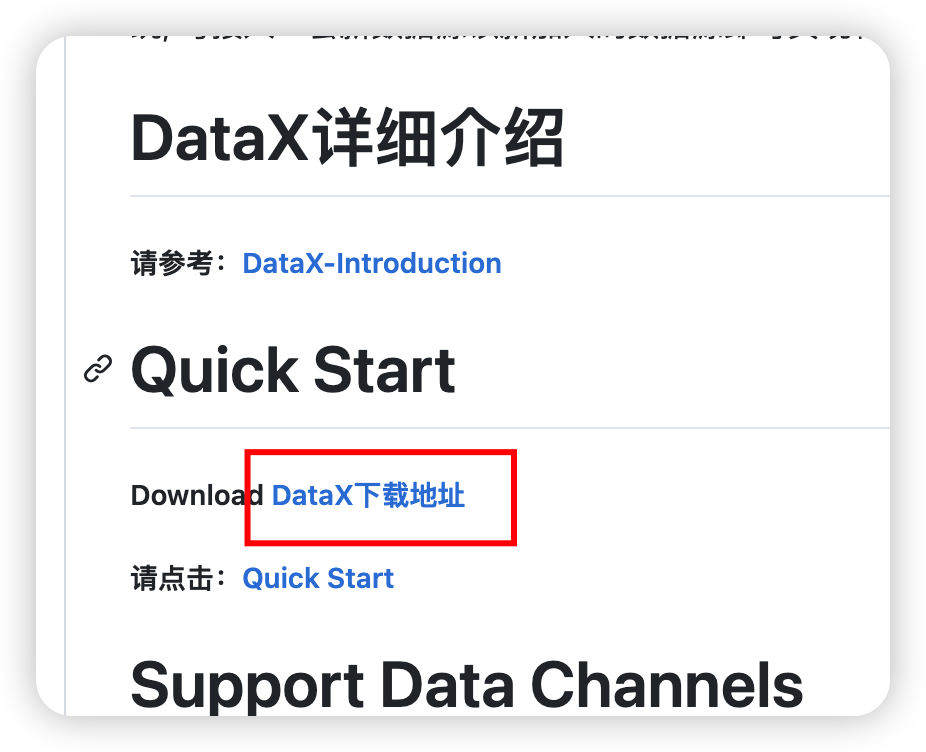
DataX
官网
cd /export/server/
tar -zxvf /export/server/datax.tar.gz -C /export/server/
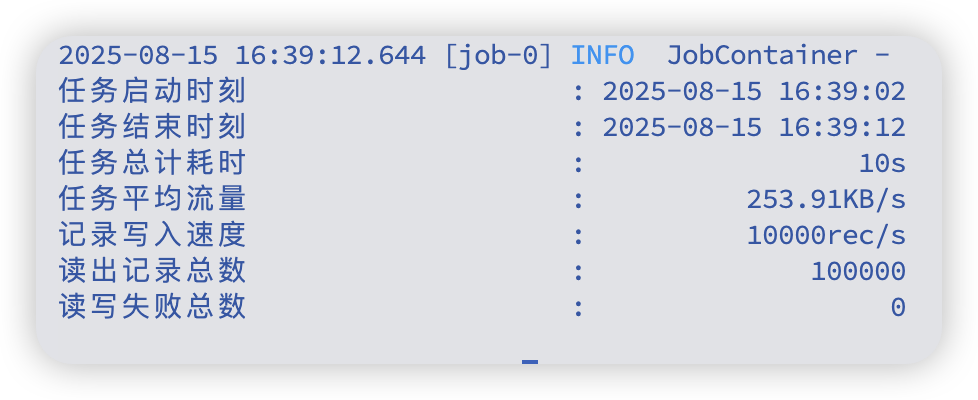
自检
python3 /export/server/datax/bin/datax.py /export/server/datax/job/job.json
DolphinScheduler
为dolphinscheduler准备专用账号
sudo mysql -u root -p
这里是本地连接不用密码的,直接回车即可
-- 创建 DolphinScheduler 元数据库
CREATE DATABASE IF NOT EXISTS dolphinschedulerDEFAULT CHARACTER SET utf8mb4COLLATE utf8mb4_general_ci;-- 创建 DolphinScheduler 用户(只允许远程连接)
CREATE USER 'dolphinscheduler'@'%' IDENTIFIED BY 'Dolphin!123';-- 授权 DolphinScheduler 用户管理 dolphinscheduler 库
GRANT ALL PRIVILEGES ON dolphinscheduler.* TO 'dolphinscheduler'@'%';-- 刷新权限
FLUSH PRIVILEGES;
EXIT;
下载
官网
文档
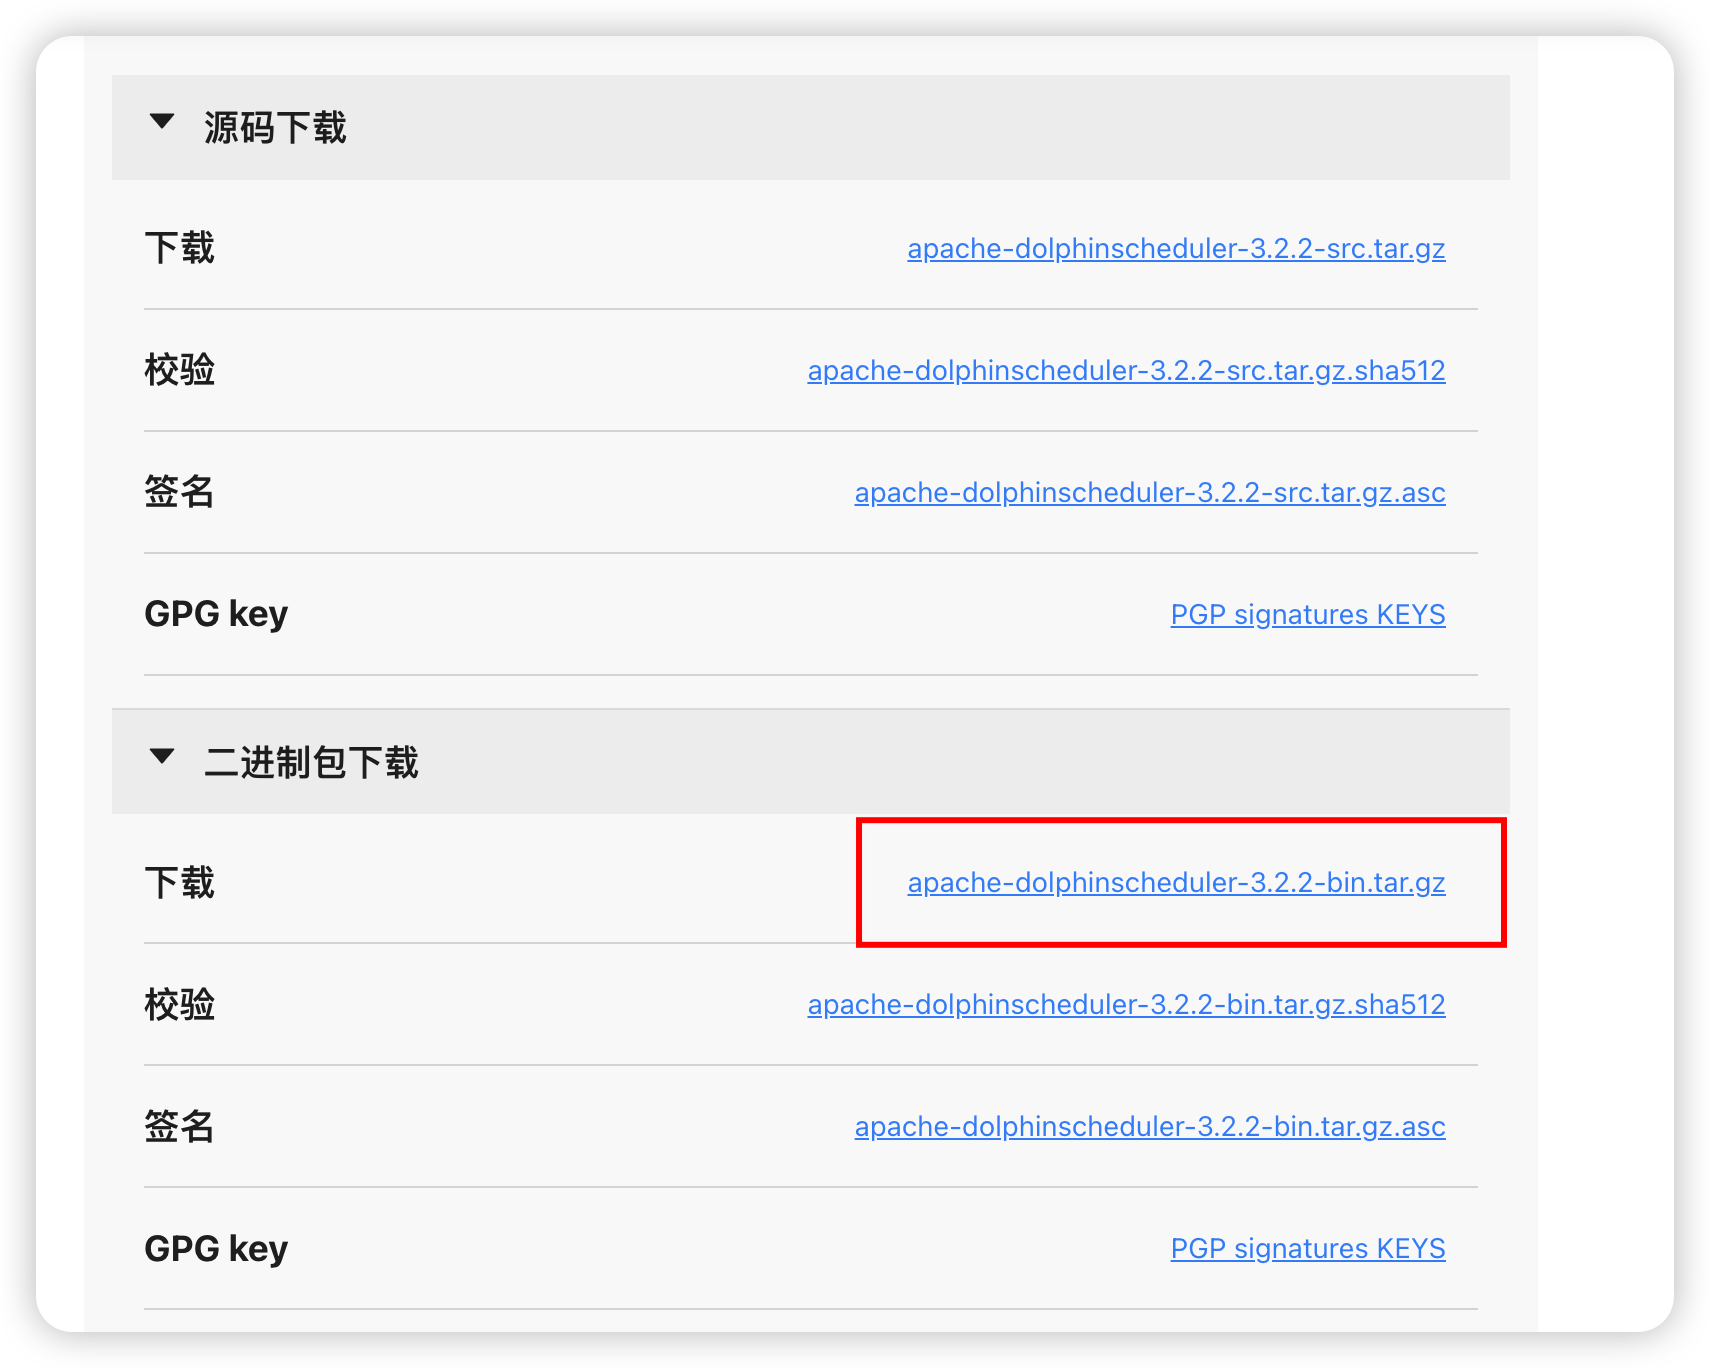
cd /export/server/
tar -zxvf /export/server/apache-dolphinscheduler-3.1.9-bin.tar.gz -C /export/server/
配置
cd /export/server/apache-dolphinscheduler-3.1.9-bin/bin/env
mv dolphinscheduler_env.sh dolphinscheduler_env.sh.back
mv install_env.sh install_env.sh.back
vim install_env.sh
#
# Licensed to the Apache Software Foundation (ASF) under one or more
# contributor license agreements.  See the NOTICE file distributed with
# this work for additional information regarding copyright ownership.
# The ASF licenses this file to You under the Apache License, Version 2.0
# (the "License"); you may not use this file except in compliance with
# the License.  You may obtain a copy of the License at
#
#     http://www.apache.org/licenses/LICENSE-2.0
#
# Unless required by applicable law or agreed to in writing, software
# distributed under the License is distributed on an "AS IS" BASIS,
# WITHOUT WARRANTIES OR CONDITIONS OF ANY KIND, either express or implied.
# See the License for the specific language governing permissions and
# limitations under the License.
## ---------------------------------------------------------
# INSTALL MACHINE
# ---------------------------------------------------------
# A comma separated list of machine hostname or IP would be installed DolphinScheduler,
# including master, worker, api, alert. If you want to deploy in pseudo-distributed
# mode, just write a pseudo-distributed hostname
# Example for hostnames: ips="ds1,ds2,ds3,ds4,ds5", Example for IPs: ips="192.168.8.1,192.168.8.2,192.168.8.3,192.168.8.4,192.168.8.5"
ips=${ips:-"node1,node2,node3"}
# 需要安装 DolphinScheduler 的所有机器列表;此处为三节点集群:node1、node2、node3# Port of SSH protocol, default value is 22. For now we only support same port in all `ips` machine
# modify it if you use different ssh port
sshPort=${sshPort:-"22"}
# SSH 端口,三台机器保持一致;如果自定义端口请修改# A comma separated list of machine hostname or IP would be installed Master server, it
# must be a subset of configuration `ips`.
# Example for hostnames: masters="ds1,ds2", Example for IPs: masters="192.168.8.1,192.168.8.2"
masters=${masters:-"node1,node2"}
# Master 角色所在节点;建议至少 2 个节点以保证高可用# A comma separated list of machine <hostname>:<workerGroup> or <IP>:<workerGroup>.All hostname or IP must be a
# subset of configuration `ips`, And workerGroup have default value as `default`, but we recommend you declare behind the hosts
# Example for hostnames: workers="ds1:default,ds2:default,ds3:default", Example for IPs: workers="192.168.8.1:default,192.168.8.2:default,192.168.8.3:default"
workers=${workers:-"node1:default,node2:default,node3:default"}
# Worker 角色与分组;这里三台都加入 default 分组,便于调度均衡# A comma separated list of machine hostname or IP would be installed Alert server, it
# must be a subset of configuration `ips`.
# Example for hostname: alertServer="ds3", Example for IP: alertServer="192.168.8.3"
alertServer=${alertServer:-"node3"}
# Alert 告警服务所在节点;放在 node3# A comma separated list of machine hostname or IP would be installed API server, it
# must be a subset of configuration `ips`.
# Example for hostname: apiServers="ds1", Example for IP: apiServers="192.168.8.1"
apiServers=${apiServers:-"node1"}
# API 服务所在节点;放在 node1(可按需扩容到多节点)# The directory to install DolphinScheduler for all machine we config above. It will automatically be created by `install.sh` script if not exists.
# Do not set this configuration same as the current path (pwd). Do not add quotes to it if you using related path.installPath=${installPath:-"/export/server/dolphinscheduler"}
# 安装目标目录;install.sh 会在各节点自动创建# The user to deploy DolphinScheduler for all machine we config above. For now user must create by yourself before running `install.sh`
# script. The user needs to have sudo privileges and permissions to operate hdfs. If hdfs is enabled than the root directory needs
# to be created by this user
deployUser=${deployUser:-"hadoop"}
# 部署用户(需具备 sudo 与 HDFS 操作权限);与你当前使用的 hadoop 用户一致# The root of zookeeper, for now DolphinScheduler default registry server is zookeeper.
zkRoot=${zkRoot:-"/dolphinscheduler"}
# Zookeeper 注册中心根路径;三节点 ZK 集群共享该路径
vim dolphinscheduler_env.sh
#
# Licensed to the Apache Software Foundation (ASF) under one or more
# contributor license agreements.  See the NOTICE file distributed with
# this work for additional information regarding copyright ownership.
# The ASF licenses this file to You under the Apache License, Version 2.0
# (the "License"); you may not use this file except in compliance with
# the License.  You may obtain a copy of the License at
#
#     http://www.apache.org/licenses/LICENSE-2.0
#
# Unless required by applicable law or agreed to in writing, software
# distributed under the License is distributed on an "AS IS" BASIS,
# WITHOUT WARRANTIES OR CONDITIONS OF ANY KIND, either express or implied.
# See the License for the specific language governing permissions and
# limitations under the License.
## JAVA_HOME, will use it to start DolphinScheduler server
export JAVA_HOME=${JAVA_HOME:-/export/server/jdk}
# (Java 安装路径;优先取系统已配置的 JAVA_HOME,否则使用 /export/server/jdk# Database related configuration, set database type, username and password
export DATABASE=${DATABASE:-mysql}
export SPRING_PROFILES_ACTIVE=${DATABASE}
export SPRING_DATASOURCE_URL=${SPRING_DATASOURCE_URL:-"jdbc:mysql://node1:3306/dolphinscheduler?useUnicode=true&characterEncoding=utf8&useSSL=false&serverTimezone=Asia/Shanghai&allowPublicKeyRetrieval=true&nullCatalogMeansCurrent=true"}
export SPRING_DATASOURCE_USERNAME=${SPRING_DATASOURCE_USERNAME:-dolphinscheduler}
export SPRING_DATASOURCE_PASSWORD=${SPRING_DATASOURCE_PASSWORD:-Dolphin!123}
# (切换为 MySQL;URL 使用主机名 node1,时区与字符集已设置;用户名/密码与之前创建一致# DolphinScheduler server related configuration
export SPRING_CACHE_TYPE=${SPRING_CACHE_TYPE:-none}
export SPRING_JACKSON_TIME_ZONE=${SPRING_JACKSON_TIME_ZONE:-Asia/Shanghai}
export MASTER_FETCH_COMMAND_NUM=${MASTER_FETCH_COMMAND_NUM:-10}
# (服务端配置:关闭缓存;Jackson 使用中国时区;Master 每次抓取命令数量为 10(可按需调整)# Registry center configuration, determines the type and link of the registry center
export REGISTRY_TYPE=${REGISTRY_TYPE:-zookeeper}
export REGISTRY_ZOOKEEPER_CONNECT_STRING=${REGISTRY_ZOOKEEPER_CONNECT_STRING:-node1:2181,node2:2181,node3:2181}
# (注册中心为 Zookeeper;三节点集群连接串# Tasks related configurations, need to change the configuration if you use the related tasks.
export HADOOP_HOME=${HADOOP_HOME:-/export/server/hadoop}
export HADOOP_CONF_DIR=${HADOOP_CONF_DIR:-/export/server/hadoop/etc/hadoop}
export SPARK_HOME1=${SPARK_HOME1:-/export/server/spark1}
export SPARK_HOME2=${SPARK_HOME2:-/export/server/spark2}
export PYTHON_HOME=${PYTHON_HOME:-/usr/bin}
export HIVE_HOME=${HIVE_HOME:-/export/server/hive}
export FLINK_HOME=${FLINK_HOME:-/export/server/flink}
export DATAX_HOME=${DATAX_HOME:-/export/server/datax}
export SEATUNNEL_HOME=${SEATUNNEL_HOME:-/export/server/seatunnel}
export CHUNJUN_HOME=${CHUNJUN_HOME:-/export/server/chunjun}
# (各类任务依赖路径;未安装的组件可保持默认或注释;PYTHON_HOME 设为系统 /usr/bin 便于直接调用 python3export PATH=$HADOOP_HOME/bin:$SPARK_HOME1/bin:$SPARK_HOME2/bin:$PYTHON_HOME/bin:$JAVA_HOME/bin:$HIVE_HOME/bin:$FLINK_HOME/bin:$DATAX_HOME/bin:$SEATUNNEL_HOME/bin:$CHUNJUN_HOME/bin:$PATH
# (将相关组件的 bin 目录加入 PATH,确保任务执行时可直接调用对应命令
安装
默认生成的目录权限是hadoop组hadoop用户,这是不合理的,改成默认主组(bigdata组)
cd /export/server/apache-dolphinscheduler-3.1.9-bin/bin# 1) 备份
mv install.sh install.sh.back# 2) 在 "if [ ! -d $installPath ];then" 之后插入属组选择逻辑(追加多行)
sed -E '/^\s*if \[ ! -d \$installPath \];then\s*$/a\\  # 【修改】计算属组优先级:DEPLOY_GROUP > bigdata(当 deployUser=hadoop 且存在) > deployUser 主组\\  if [ -n "${DEPLOY_GROUP}" ]; then\\    _target_group="${DEPLOY_GROUP}";\\  elif [ "${deployUser}" = "hadoop" ] && getent group bigdata >/dev/null 2>\&1; then\\    _target_group="bigdata";\\  else\\    _target_group="$(id -gn ${deployUser} 2>/dev/null || echo ${deployUser})";\\  fi
' install.sh.back > install.sh.tmp# 3) 精确替换 chown 行(不使用有歧义的字符类)
#    把:sudo chown -R $deployUser:$deployUser $installPath
#    换成:sudo chown -R $deployUser:${_target_group} $installPath
sed -E \'s#^([[:space:]]*)sudo[[:space:]]+chown[[:space:]]+-R[[:space:]]+\$deployUser:\$deployUser[[:space:]]+\$installPath#\1sudo chown -R \$deployUser:${_target_group} \$installPath#' \install.sh.tmp > install.shrm -f install.sh.tmp# 4) 校验插入与替换
echo "------ inserted lines around if-block ------"
nl -ba install.sh | sed -n '1,200p' | sed -n '/if \[ ! -d \$installPath \];then/,+8p'
echo "------ chown lines ------"
grep -n "chown -R" install.sh || true
解决垃圾回收采用cms但是高版本jdk以完全废弃的问题
cd /export/server/apache-dolphinscheduler-3.1.9-bin/bin# 备份
[ -f remove-zk-node.sh ] && mv remove-zk-node.sh remove-zk-node.sh.back# 基于备份生成新文件:CMS -> G1,并移除 CMS 相关参数
sed -E \-e 's/-XX:\+UseConcMarkSweepGC/-XX:+UseG1GC/g' \-e 's/[[:space:]]-XX:\+CMSParallelRemarkEnabled//g' \-e 's/[[:space:]]-XX:\+UseCMSInitiatingOccupancyOnly//g' \-e 's/[[:space:]]-XX:CMSInitiatingOccupancyFraction=[0-9]+//g' \remove-zk-node.sh.back > remove-zk-node.shchmod +x remove-zk-node.sh
grep -n 'DOLPHINSCHEDULER_OPTS' remove-zk-node.sh
bash /export/server/apache-dolphinscheduler-3.1.9-bin/bin/install.sh
如果报一些文件不存在导致的安装失败,请先检查目录权限。