【SpringBoot】07 容器功能 - SpringBoot底层注解的应用与实战 - @ConfigurationProperties配置绑定
一、@Component + @ConfigurationProperties配置绑定
首先新建一个Car类(组件)。
添加
package com.hello.bean;public class Car {private String brand; // 品牌private Integer price; // 价格public String getBrand() {return brand;}public void setBrand(String brand) {this.brand = brand;}public Integer getPrice() {return price;}public void setPrice(Integer price) {this.price = price;}@Overridepublic String toString() {return "Car{" +"brand='" + brand + '\'' +", price=" + price +'}';}}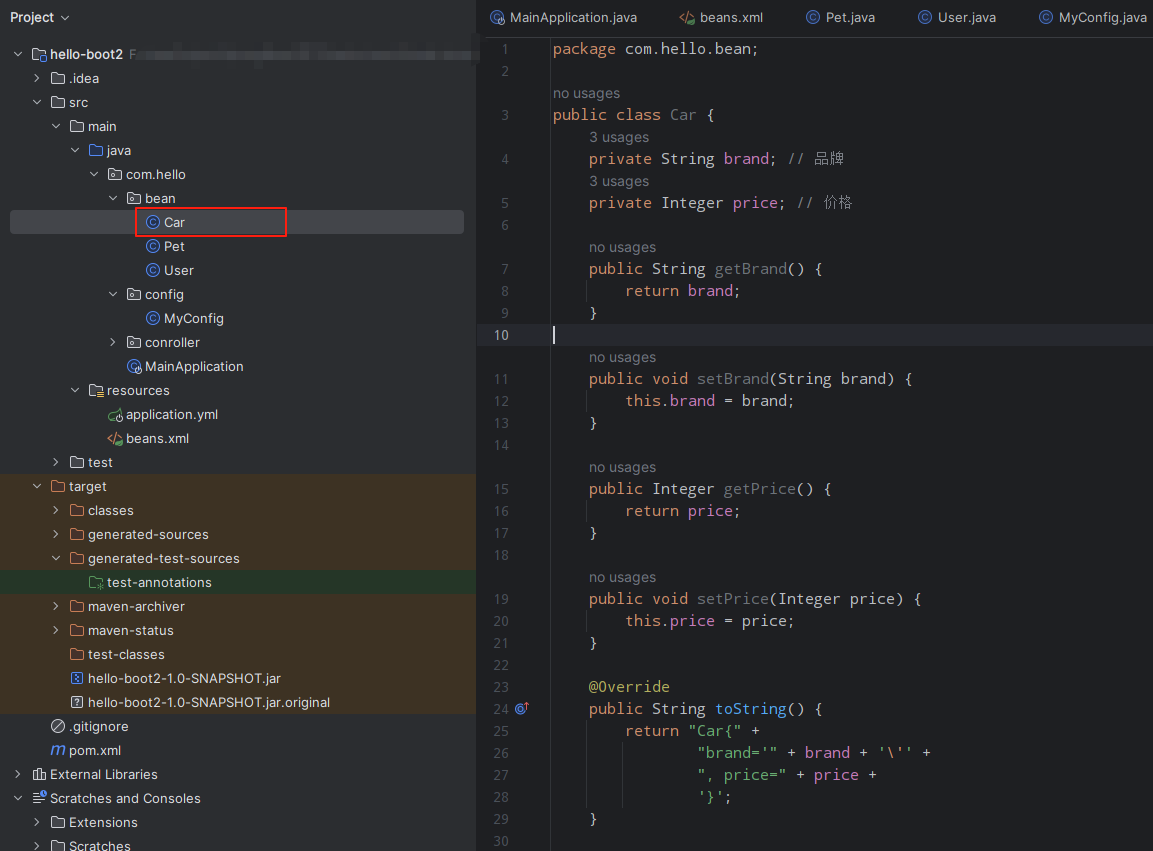
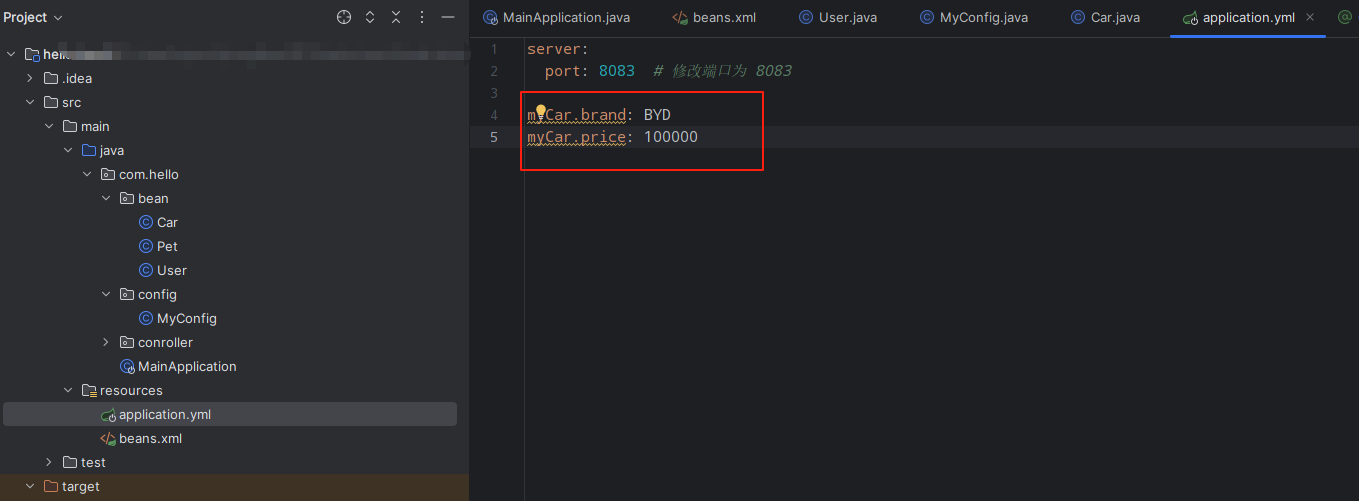
接着在配置文件中yml对汽车的品牌和价格进行配置。
mycar.brand: BYD
mycar.price: 100000
以前要将这个属性加到类中,要有很多代码要写,现在使用注解进行配置。
/*** 只有在容器中的组件,才能使用 @ConfigurationProperties 注解进行批量注入,所以要加@Component*/
@Component
@ConfigurationProperties(prefix = "mycar")
public class Car {
测试
在容器中进行调用测试。
@AutowiredCar car; // 组件扫描,自动装配(加入到容器后,直接使用)@RequestMapping("/car")public Car car(){return car;}
package com.hello.conroller;import org.springframework.beans.factory.annotation.Autowired;
import org.springframework.stereotype.Controller;
import org.springframework.web.bind.annotation.RequestMapping;
import org.springframework.web.bind.annotation.ResponseBody;
import org.springframework.web.bind.annotation.RestController;
import com.hello.bean.Car;//@ResponseBody // 类上加,表示该类下所有方法返回值作为响应体返回给浏览器
//@Controller // 类上加,表示该类下所有方法都是控制器方法@RestController // 是@ResponseBody与@Controller的合并体
public class HelloController {// @ResponseBody 单个方法的返回值作为响应体返回给浏览器@RequestMapping("hello")public String handle01(){int a = 23;int b = 100;int c = a + b;return "Hello, Spring Boot2 !" + "🎉 **返回信息成功!** (ノ◕ヮ◕)ノ*:" + c;}@AutowiredCar car; // 组件扫描,自动装配(加入到容器后,直接使用)@RequestMapping("/car")public Car car(){return car;}
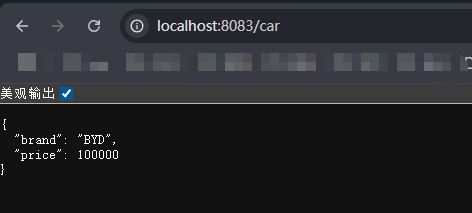
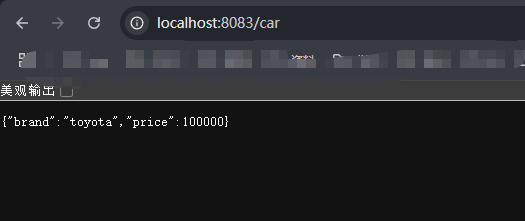
}运行项目,然后在浏览器输入/car进行验证。
可以看到通过@ConfigurationProperties(prefix = “mycar”)注解,已经将配置文件中的值给到了car对象进行了与对象属性的绑定。
二、@EnableAutoConfiguration + @ConfigurationProperties配置绑定
注意@EnableAutoConfiguration只能在配置类中添加。
@EnableConfigurationProperties(Car.class)// 1、开启配置自动绑定
// 2、将组件自动加入到容器中
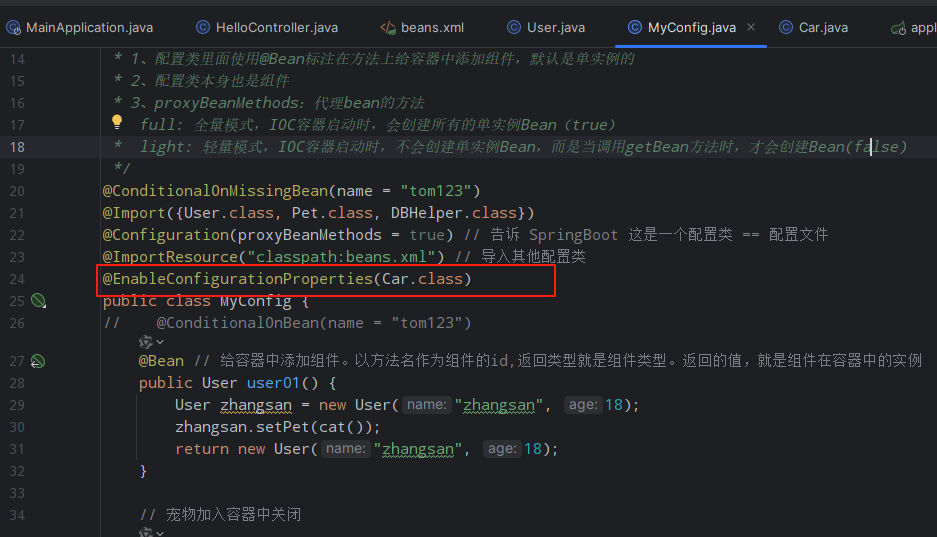
然后我们注解掉controller类中的@Component注解
然后我们重新运行项目,依然可以实现配置的值与属性的绑定。
三、完整代码
application.yml
server:port: 8083  # 修改端口为 8083mycar.brand: toyota
mycar.price: 100000
MainApplication
package com.hello;import ch.qos.logback.core.db.DBHelper;
import com.hello.bean.Pet;
import com.hello.bean.User;
import com.hello.config.MyConfig;
import org.springframework.boot.SpringApplication;
import org.springframework.boot.autoconfigure.SpringBootApplication;
import org.springframework.context.ConfigurableApplicationContext;import javax.security.auth.login.Configuration;/*** 主程序类* @SpringBootApplication 这是一个SpringBoot应用*/@SpringBootApplication
public class MainApplication {public static void main(String[] args) {// 1、返回我们IOC容器ConfigurableApplicationContext run = SpringApplication.run(MainApplication.class, args);// 2、查看容器里面的所有组件String[] names = run.getBeanDefinitionNames();for (String name : names){System.out.println(name);}//        // 3、从容器中获取组件
//        Pet tom1 = run.getBean("tom123", Pet.class);
//        Pet tom2 = run.getBean("tom123", Pet.class);
//
//        System.out.println("两个组件是否相同" + (tom1 == tom2));
//
//        MyConfig bean = run.getBean(MyConfig.class);
//        System.out.println(bean);
//
//
//        // 4、获取Import组件
//        String[] beanNamesForType = run.getBeanNamesForType(User.class);
//        System.out.println("=====");
//        for (String name : beanNamesForType){
//            System.out.println(name);
//        }
//
//        DBHelper bean1= run.getBean(DBHelper.class);
//        System.out.println(bean1);boolean tom222 = run.containsBean("tom222");System.out.println("tom123是否存在:" + tom222);// 判断用户组件是否加入到容器中boolean user01 = run.containsBean("user01");System.out.println("user01是否存在:" + user01);boolean haha = run.containsBean("haha");System.out.println("haha是否存在:" + haha);boolean hehe = run.containsBean("hehe");System.out.println("hehe是否存在:" + hehe);// 拼接最终启动成功信息String successMessage ="🎉 **启动成功!** (ノ◕ヮ◕)ノ*:・゚✧\n" +"✨ *服务已就绪,端口 8083* ✨\n" +"💻 访问地址:`http://localhost:8083`\n" +"💪 **Go! Go! Go!** (ง •_•)ง";System.out.println(successMessage);}
}
car
package com.hello.bean;import org.springframework.boot.context.properties.ConfigurationProperties;
import org.springframework.stereotype.Component;/*** 只有在容器中的组件,才能使用 @ConfigurationProperties 注解进行批量注入,所以要加@Component*/
//@Component
@ConfigurationProperties(prefix = "mycar")public class Car {private String brand; // 品牌private Integer price; // 价格public String getBrand() {return brand;}public void setBrand(String brand) {this.brand = brand;}public Integer getPrice() {return price;}public void setPrice(Integer price) {this.price = price;}@Overridepublic String toString() {return "Car{" +"brand='" + brand + '\'' +", price=" + price +'}';}}
HelloController
package com.hello.conroller;import org.springframework.beans.factory.annotation.Autowired;
import org.springframework.stereotype.Controller;
import org.springframework.web.bind.annotation.RequestMapping;
import org.springframework.web.bind.annotation.ResponseBody;
import org.springframework.web.bind.annotation.RestController;
import com.hello.bean.Car;//@ResponseBody // 类上加,表示该类下所有方法返回值作为响应体返回给浏览器
//@Controller // 类上加,表示该类下所有方法都是控制器方法@RestController // 是@ResponseBody与@Controller的合并体
public class HelloController {// @ResponseBody 单个方法的返回值作为响应体返回给浏览器@RequestMapping("hello")public String handle01(){int a = 23;int b = 100;int c = a + b;return "Hello, Spring Boot2 !" + "🎉 **返回信息成功!** (ノ◕ヮ◕)ノ*:" + c;}@AutowiredCar car; // 组件扫描,自动装配(加入到容器后,直接使用)@RequestMapping("/car")public Car car(){return car;}
}
总结
Spring Boot 配置属性绑定的两种核心方式总结
Spring Boot 提供了灵活的配置属性绑定机制,能够将外部配置(如 YAML/Properties 文件)中的值自动映射到 Java 对象的属性中,极大简化了配置管理。核心方式分为两种:@Component + @ConfigurationProperties 和 @EnableConfigurationProperties + @ConfigurationProperties,两者均通过类型安全的方式实现批量属性注入,避免了传统 @Value 注解的冗余代码。
1. @Component + @ConfigurationProperties 组合
此方式需将目标类(如 Car)标记为 Spring 组件(@Component),使其纳入容器管理,再通过 @ConfigurationProperties(prefix = "mycar") 指定配置前缀。Spring Boot 会自动扫描容器中的此类,并将配置文件中 mycar.brand、mycar.price 等属性绑定到对应字段。优点是简单直接,适合常规组件;缺点是需确保类被组件扫描到(如位于主类同级或子包下)。
2. @EnableConfigurationProperties + @ConfigurationProperties 组合
在配置类(如 @SpringBootApplication 主类)上使用 @EnableConfigurationProperties(Car.class),可显式启用指定类的配置绑定功能,并自动将其注册为 Bean。此时即使 Car 类未标注 @Component,也能完成属性注入。优点是解耦组件扫描与配置绑定,适合第三方库或需要集中管理的配置类;缺点是需额外配置注解。
验证与扩展
通过控制器(HelloController)的 /car 接口可验证绑定结果,浏览器返回的 JSON 数据会显示配置值已正确注入。两种方式本质相同,均依赖 Spring Boot 的自动配置机制,开发者可根据场景选择:简单项目推荐 @Component 方式,复杂或多模块项目推荐 @EnableConfigurationProperties 方式。此外,需确保字段名与配置键名匹配(或通过 @JsonProperty 等注解指定),并添加 spring-boot-configuration-processor 依赖以获得配置提示支持。