3.3keep-alive
.keep-alive
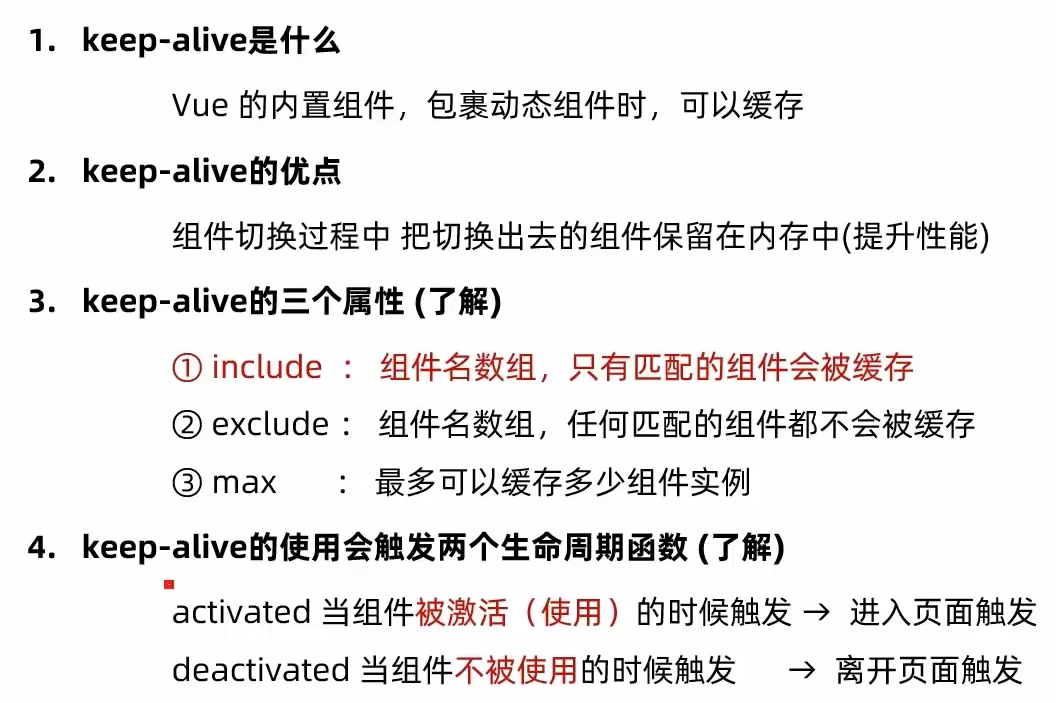
.keep-alive 是一个抽象组件,用于缓存动态组件实例,避免重复渲染以提高性能。它特别适用于那些需要频繁切换显示但内容不经常变动的场景,比如标签页或步骤向导等。
基本使用
要使用 .keep-alive,你需要将动态组件包裹在这个标签内:
<template><div><button @click="currentComponent = 'ComponentA'">Show A</button><button @click="currentComponent = 'ComponentB'">Show B</button><keep-alive><component :is="currentComponent"></component></keep-alive></div>
</template><script>
import ComponentA from './ComponentA.vue';
import ComponentB from './ComponentB.vue';export default {components: { ComponentA, ComponentB },data() {return {currentComponent: 'ComponentA'};}
};
</script>
属性介绍
include: 字符串或正则表达式。只有名称匹配的组件会被缓存。exclude: 字符串或正则表达式。任何名称匹配的组件都不会被缓存。max: 数字。最多可以缓存多少组件实例。
例如,只缓存名为 ComponentA 的组件:
<keep-alive include="ComponentA"><component :is="currentComponent"></component>
</keep-alive>
或者使用正则表达式:
<keep-alive :include="/A|B/"><component :is="currentComponent"></component>
</keep-alive>
生命周期钩子
当一个组件被激活或停用时,会触发以下生命周期钩子:
activated: 当组件被激活时调用。deactivated: 当组件停用时调用。
这些钩子允许你在组件进入或离开活跃状态时执行自定义逻辑。
.keep-alive 提供了一种有效的方式来优化应用的性能,特别是在处理复杂或大型组件时非常有用。不过,应该谨慎使用,因为过度依赖缓存可能会导致内存占用增加。
完整案例:
1. ComponentA.vue
<!-- ComponentA.vue -->
<template><div class="component-a"><h2>Component A</h2><p>这是一个可以被缓存的组件。</p><p>输入框内容会因 keep-alive 而保留:<input v-model="inputValue" placeholder="输入一些内容" /></p><p><small>创建时间: {{ createdAt }}</small></p></div>
</template><script>
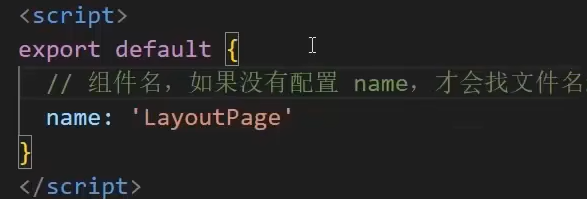
export default {name: 'ComponentA', // 必须定义 name 才能被 keep-alive 匹配data() {return {inputValue: '',createdAt: new Date().toLocaleTimeString()}},activated() {console.log('ComponentA 被激活')},deactivated() {console.log('ComponentA 被缓存')}
}
</script><style scoped>
.component-a {padding: 20px;border: 2px solid #409eff;margin-top: 10px;border-radius: 8px;
}
</style> 2. ComponentB.vue
<!-- ComponentB.vue -->
<template><div class="component-b"><h2>Component B</h2><p>这是另一个可以被缓存的组件。</p><p>列表选择会保留:<select v-model="selected"><option value="option1">选项 1</option><option value="option2">选项 2</option><option value="option3">选项 3</option></select> (当前选择: {{ selected }})</p><p><small>创建时间: {{ createdAt }}</small></p></div>
</template><script>
export default {name: 'ComponentB', // 同样需要 namedata() {return {selected: 'option1',createdAt: new Date().toLocaleTimeString()}},activated() {console.log('ComponentB 被激活')},deactivated() {console.log('ComponentB 被缓存')}
}
</script><style scoped>
.component-b {padding: 20px;border: 2px solid #67c23a;margin-top: 10px;border-radius: 8px;
}
</style>
3. App.vue(主组件,使用 keep-alive 切换)
<!-- App.vue -->
<template><div id="app"><h1>Vue 2 keep-alive 示例</h1><div><button @click="currentComponent = 'ComponentA'" :class="{ active: currentComponent === 'ComponentA' }">显示 Component A</button><button @click="currentComponent = 'ComponentB'" :class="{ active: currentComponent === 'ComponentB' }">显示 Component B</button></div><!-- 使用 keep-alive 缓存组件 --><keep-alive include="ComponentA,ComponentB"> <!-- 或者 :include="['ComponentA', 'ComponentB']" --><component :is="currentComponent" /></keep-alive></div>
</template><script>
import ComponentA from './ComponentA.vue'
import ComponentB from './ComponentB.vue'export default {name: 'App',components: {ComponentA,ComponentB},data() {return {currentComponent: 'ComponentA' // 初始显示 ComponentA}}
}
</script><style>
#app {font-family: Avenir, Helvetica, Arial, sans-serif;text-align: center;color: #2c3e50;margin-top: 30px;
}button {margin: 10px;padding: 10px 20px;font-size: 16px;cursor: pointer;
}button.active {background-color: #409eff;color: white;border: none;border-radius: 4px;
}
</style>
运行效果说明
- 点击按钮切换组件。
- 第一次进入
ComponentA,输入内容或选择值。 - 切换到
ComponentB,再切回ComponentA。 - 你会发现
ComponentA的输入框内容和创建时间都保留了(创建时间是初始化时的,不会变),说明它被缓存了。 - 控制台会输出
activated和deactivated的日志,验证生命周期钩子。
补充:如果只缓存 A
<keep-alive include="ComponentA"><component :is="currentComponent" />
</keep-alive>
此时 ComponentB 每次切换都会重新创建,状态不会保留。
这个示例完整展示了 keep-alive 如何通过组件名称(name)匹配并缓存动态组件。
缓存视图<router-view> 本质上就是一个动态组件。
要在路由视图中使用 <keep-alive>,你可以将 <router-view> 包装在 <keep-alive> 标签内:
<template><div id="app"><keep-alive><router-view></router-view></keep-alive></div>
</template>
这将缓存所有通过 <router-view> 渲染的组件实例。不过,在实际应用中,你可能只想缓存特定的路由组件或排除某些组件。这时,你可以利用 include 和 exclude 属性。
使用 include 和 exclude
include:只有名称匹配的组件会被缓存。exclude:任何名称匹配的组件都不会被缓存。
你可以通过组件的 name 属性来指定哪些组件应该被缓存。假设你的路由配置如下:
const routes = [{ path: '/a', component: A, name: 'A' },{ path: '/b', component: B, name: 'B' }
];
然后在你的模板中使用 include 或 exclude:
<template><div id="app"><keep-alive include="A"><router-view></router-view></keep-alive></div>
</template>
这样,只有名为 A 的路由组件会被缓存。
动态条件
如果你想根据某些条件动态地决定是否缓存一个组件,可以通过绑定属性的方式实现:
<template><div id="app"><keep-alive :include="cachedViews"><router-view></router-view></keep-alive></div>
</template><script>
export default {data() {return {cachedViews: ['A'] // 可以是一个数组,包含你想缓存的组件名};}
};
</script>这里,cachedViews 是一个数组,包含了所有应该被缓存的组件名称。你可以根据应用的状态动态修改这个数组的内容,从而控制哪些组件被缓存。
生命周期钩子
当一个组件被 <keep-alive> 缓存时,它会触发 activated 和 deactivated 生命周期钩子,而不是 mounted 和 destroyed。你可以在这些钩子中执行相应的逻辑,比如数据刷新或事件监听器的添加和移除。
通过合理使用 <keep-alive>,你可以有效地管理应用的状态,提升用户体验,特别是在处理复杂的多页面应用时。然而,也要注意避免过度使用缓存,以免导致内存占用过高。