Redis 基础(一)
文章目录
- 一、了解Redis
- 1.1 安装Redis
- 1.2 Redis 概念(键值对结构)
- 1.3 运用
- 1.4 使用
- 1.4.1 登录
- 1 命令行
- 2 图形化
- 1.4.2 Redis的数据结构
- 1.4.3 常见命令
- 1.4.4 数据类型
- 【1】String 类型
- 二、Redis的 Java客户端
- 2.1 `Jedis`客户端
- 2.1.1 连接指定Redis
- 2.1.2 `Junit`测试代码
- 2.1.3 `Jedis`连接池
- 2.2 `SpringDataRedis` 客户端
- 2.2.1 相关介绍
- 底层客户端
- 核心功能
- 2.2.2 配置
- 2.2.3 测试代码
- 2.2.4 序列化
- 2.2.5 序列化工具
- 方式一:
- 方式二:
- 2.2.6不带类信息的序列化
一、了解Redis
1.1 安装Redis
可以参考我的文章:
Docker Desktop 挂载本地Win系统配置指南:Redis/MySQL/RabbitMQ持久化与自启设置-CSDN博客
步骤一: 在Docker Desktop中拉去并配置好
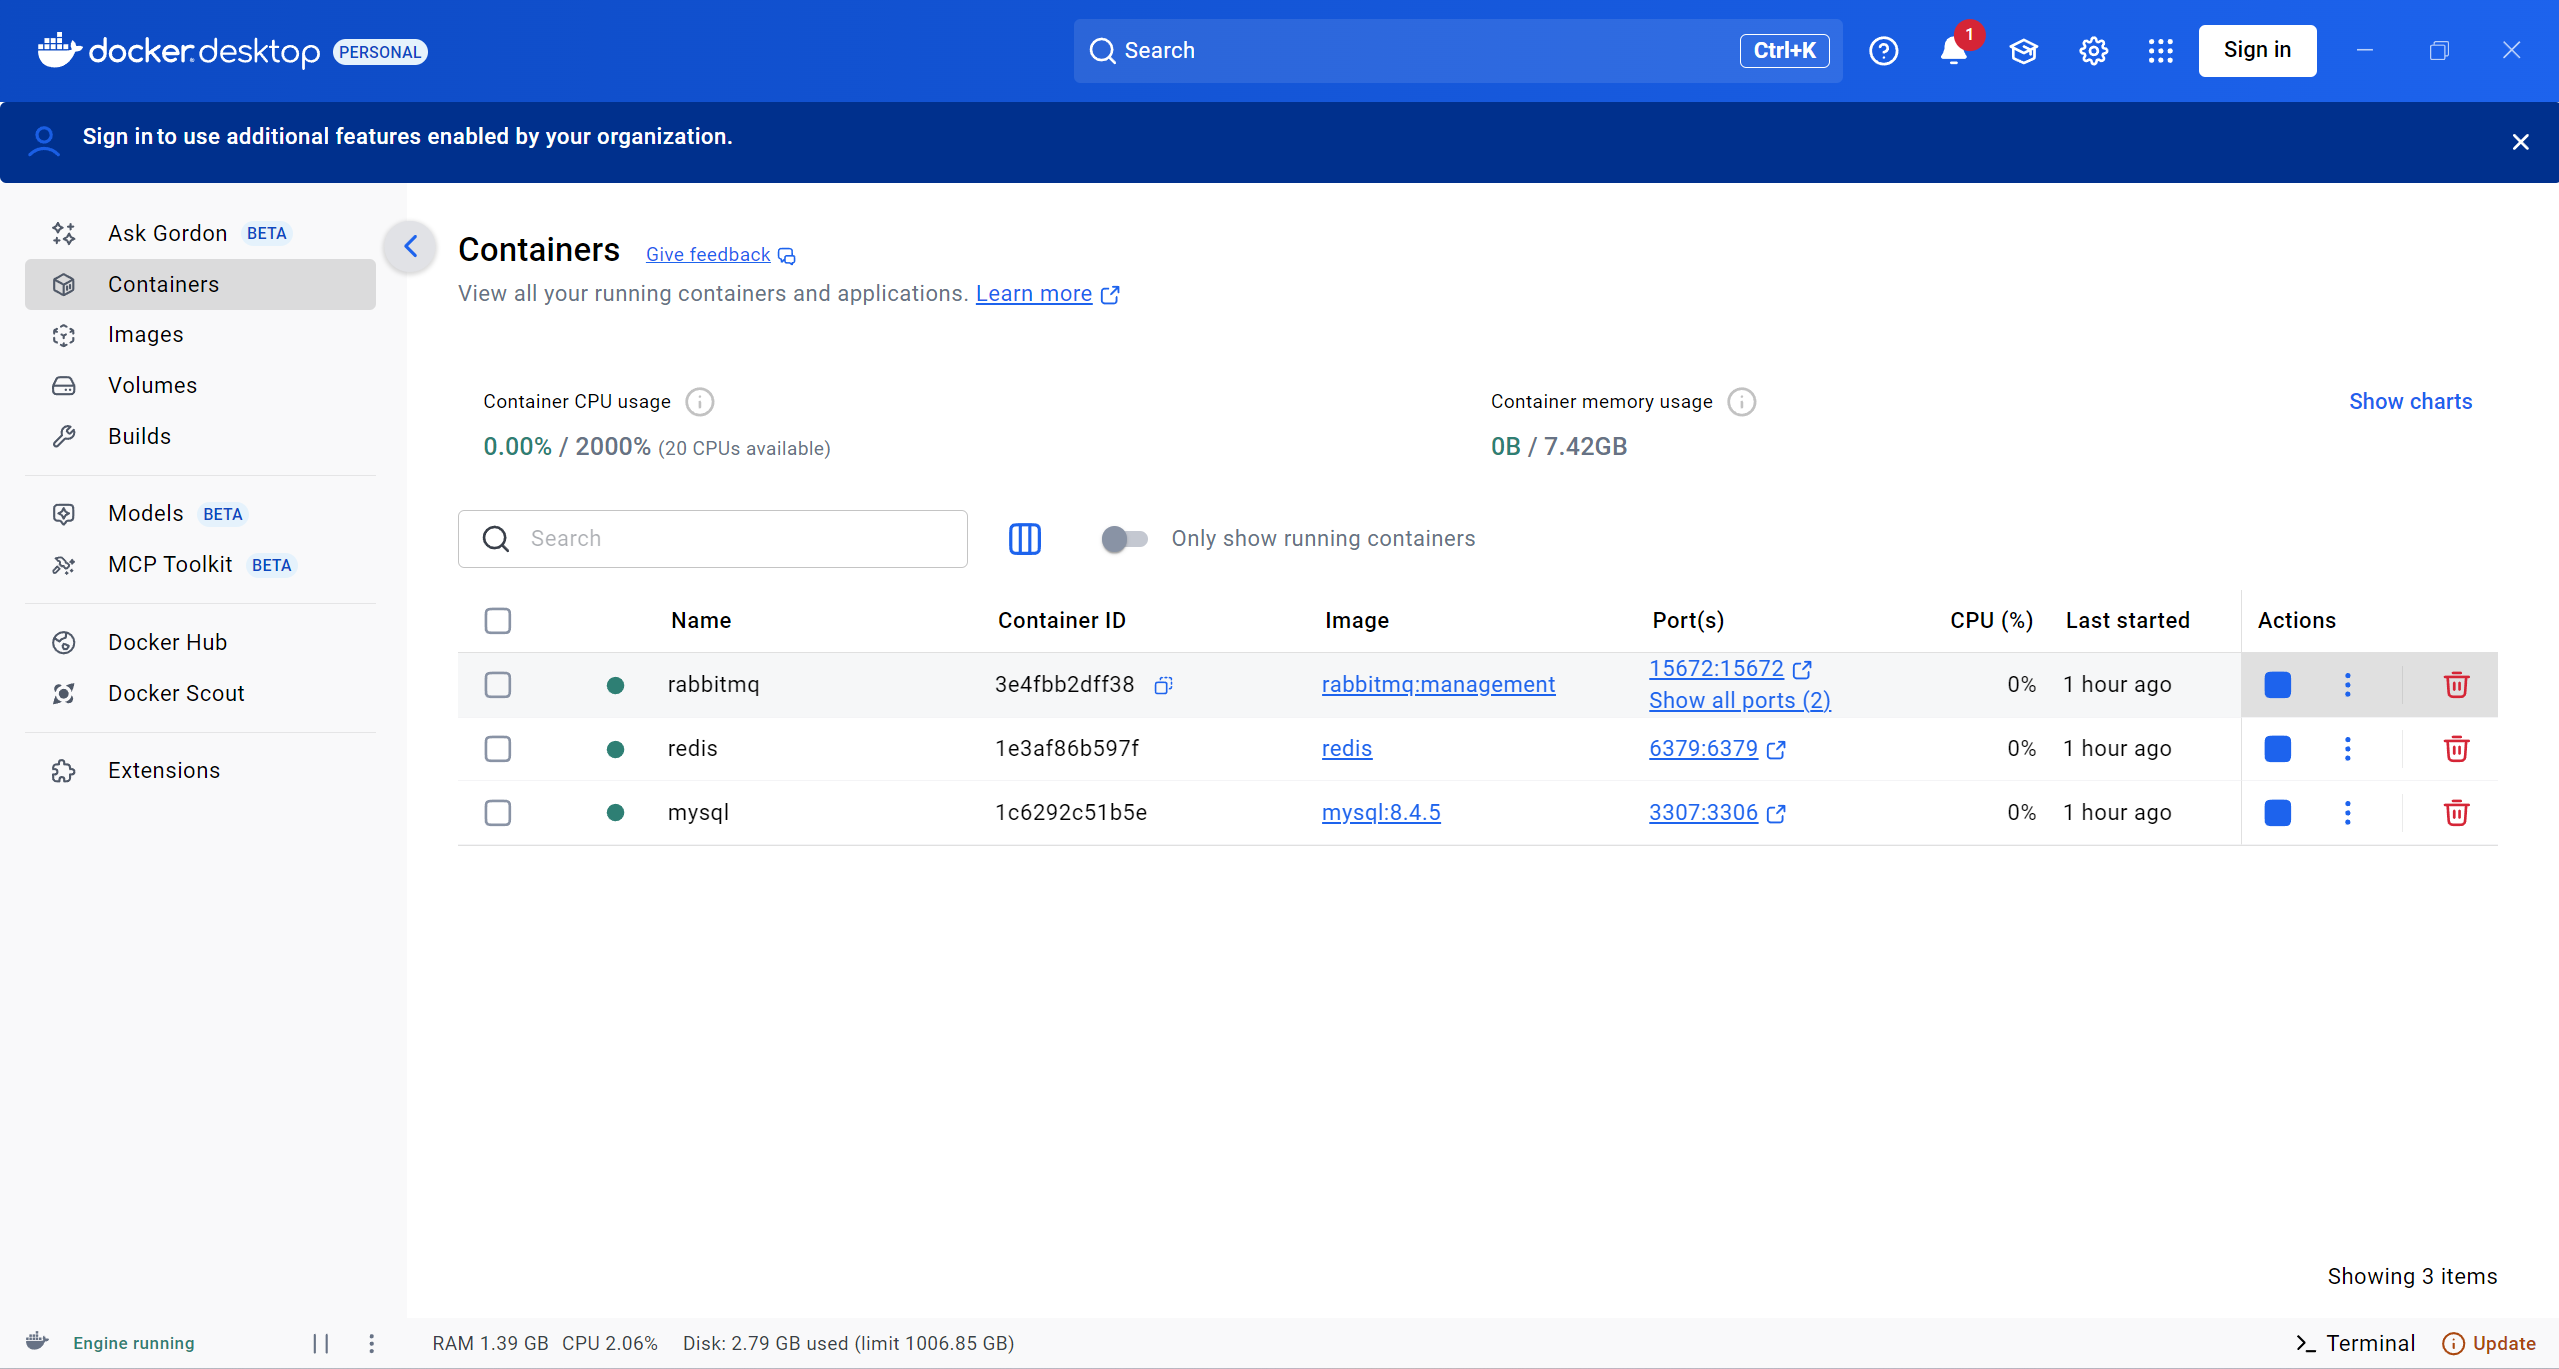
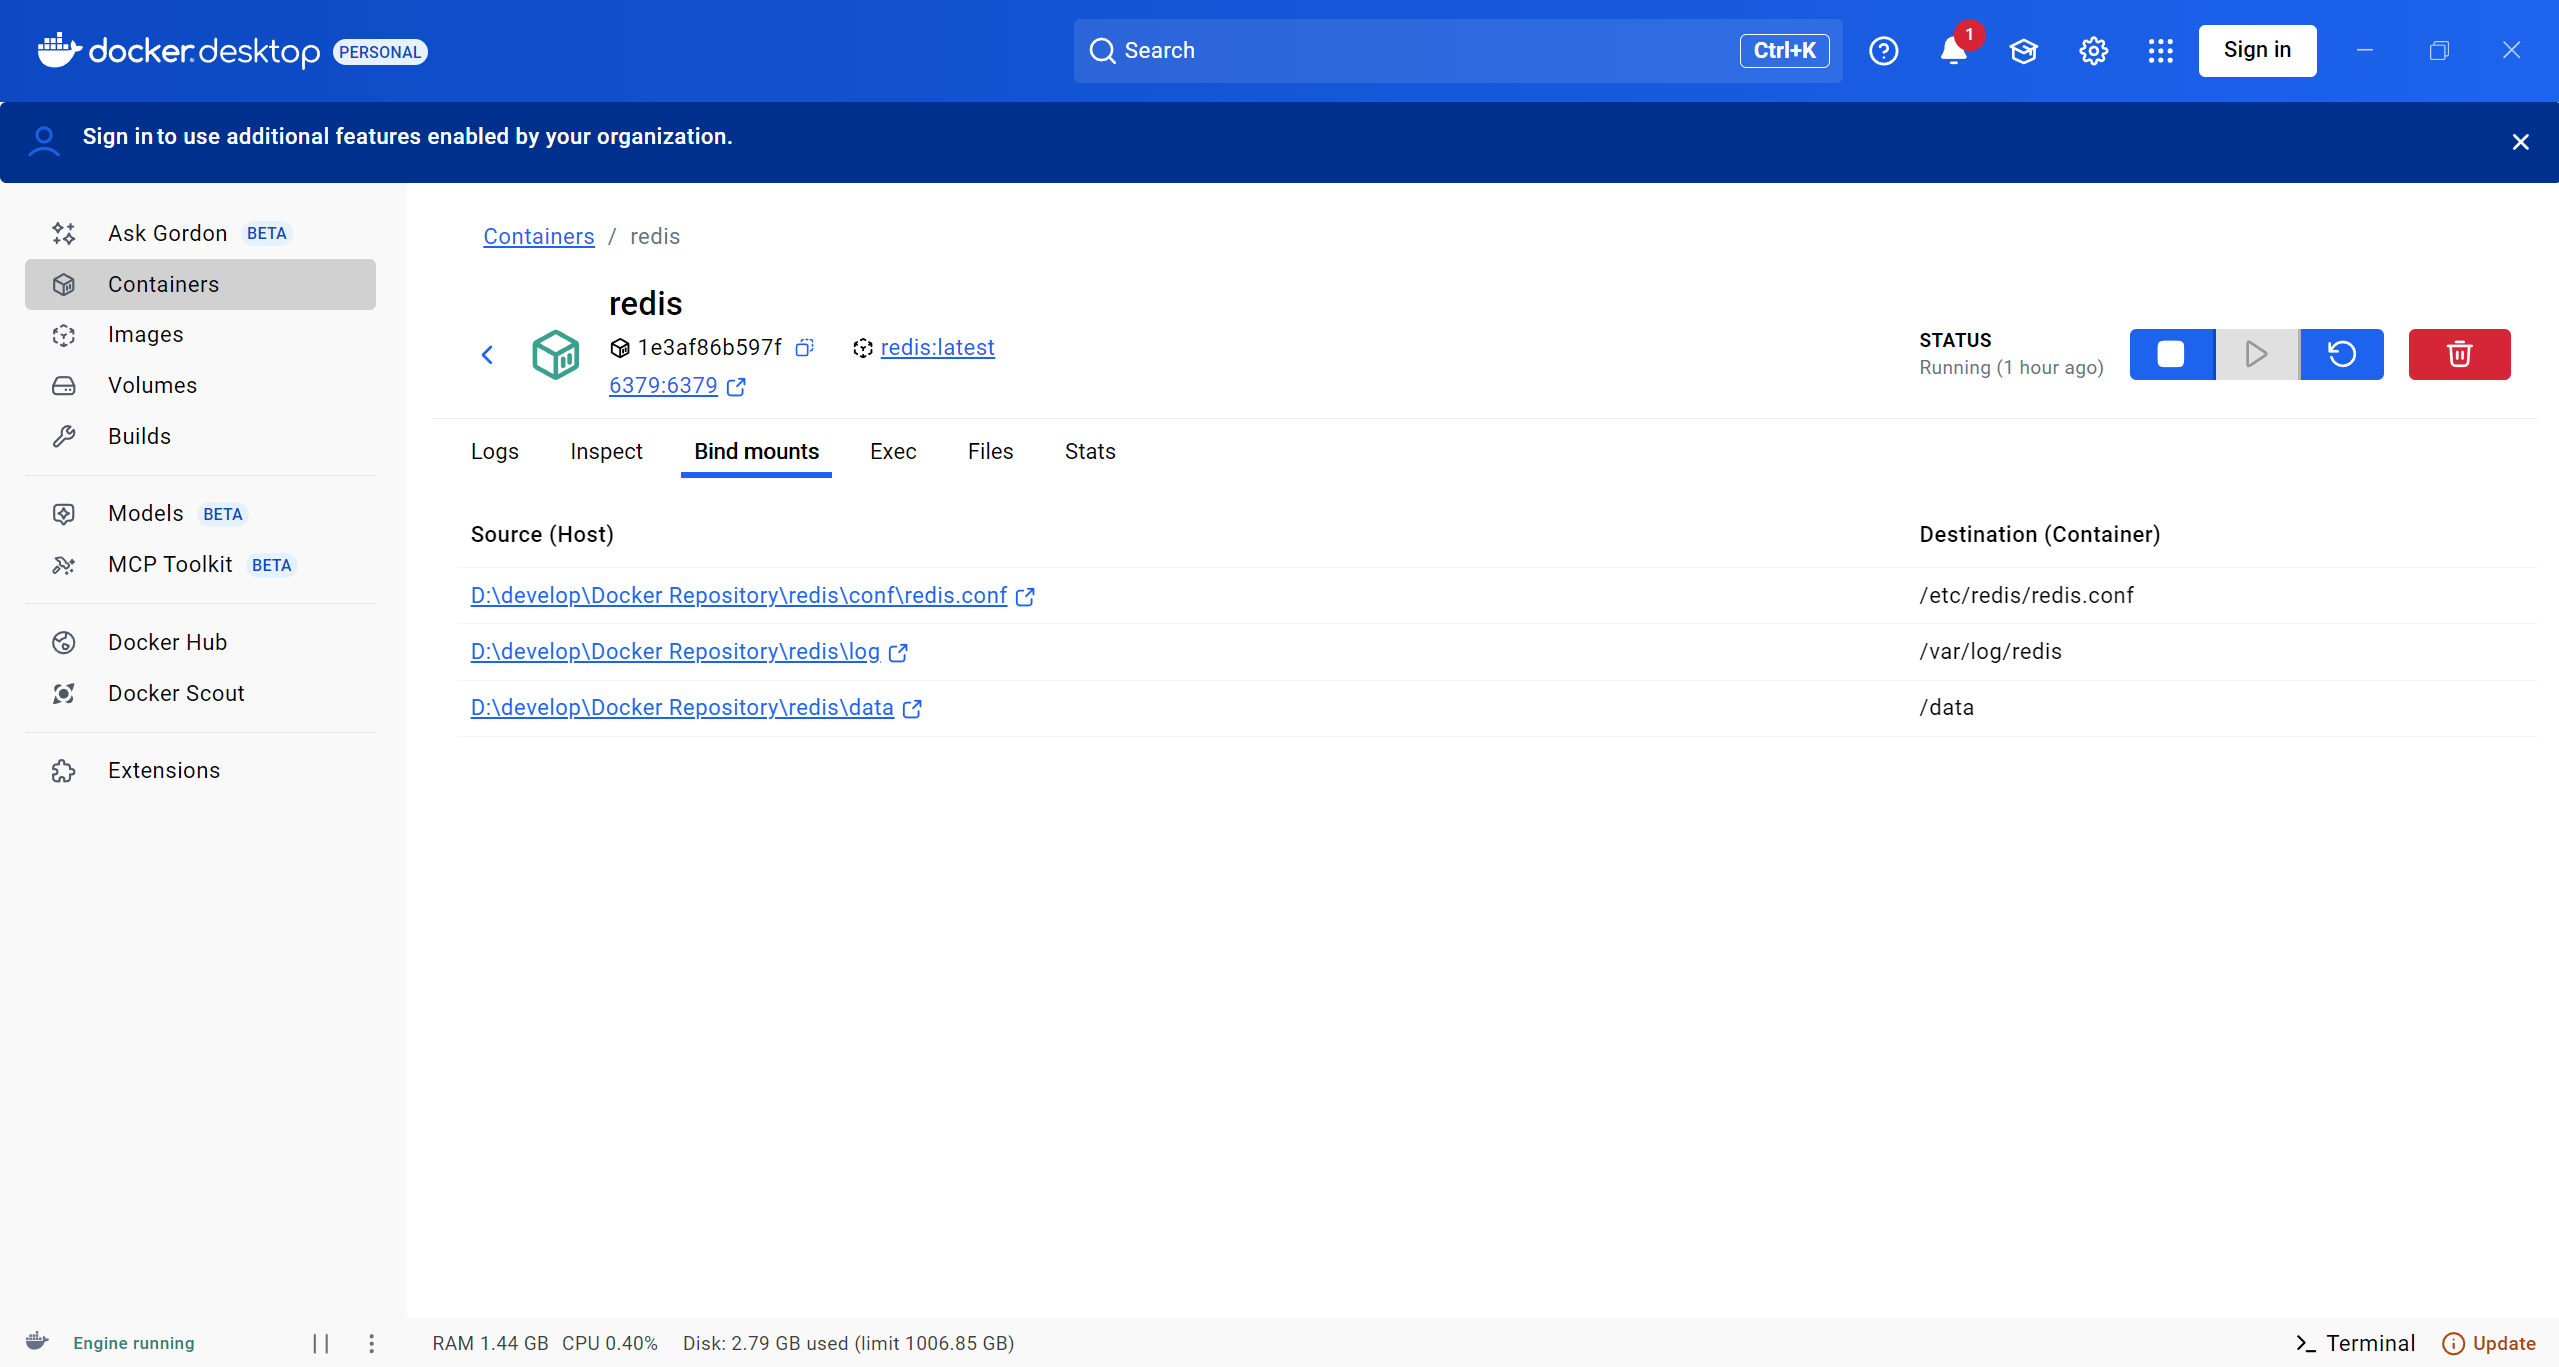
步骤二:最后看看,挂载在本机的哪里
1.2 Redis 概念(键值对结构)
Redis 是一个开源的、内存中的数据结构存储系统,通常用于缓存、消息队列、会话管理等场景。它支持多种数据结构,包括字符串(String)、哈希(Hash)、列表(List)、集合(Set)、有序集合(Sorted Set)等,因此非常适用于需要快速读写的应用。
| 特性 | SQL | NoSQL |
|---|---|---|
| 数据模型 | 关系型,表格、行、列 | 非关系型,文档、键值、图、Graph等 |
| 扩展性 | 垂直扩展,复杂的水平扩展 | 水平扩展,分布式架构 |
| 查询语言 | SQL | 非SQL,自定义的 |
| 一致性 | 强一致性,支持 ACID | 支持 BASE |
| 事务支持 | 完整的 ACID 支持 | 基本支持,通常不提供复杂事务 |
| 性能 | 高并发时可能遇到瓶颈 | 高并发和大规模数据时表现优异 |
| 应用场景 | 传统应用(金融、电商等) 安全性高的、一致性强 | 大数据、实时分析、社交媒体等 性能要求高的 |
1.3 运用
我们也可以在真正的Linux中用
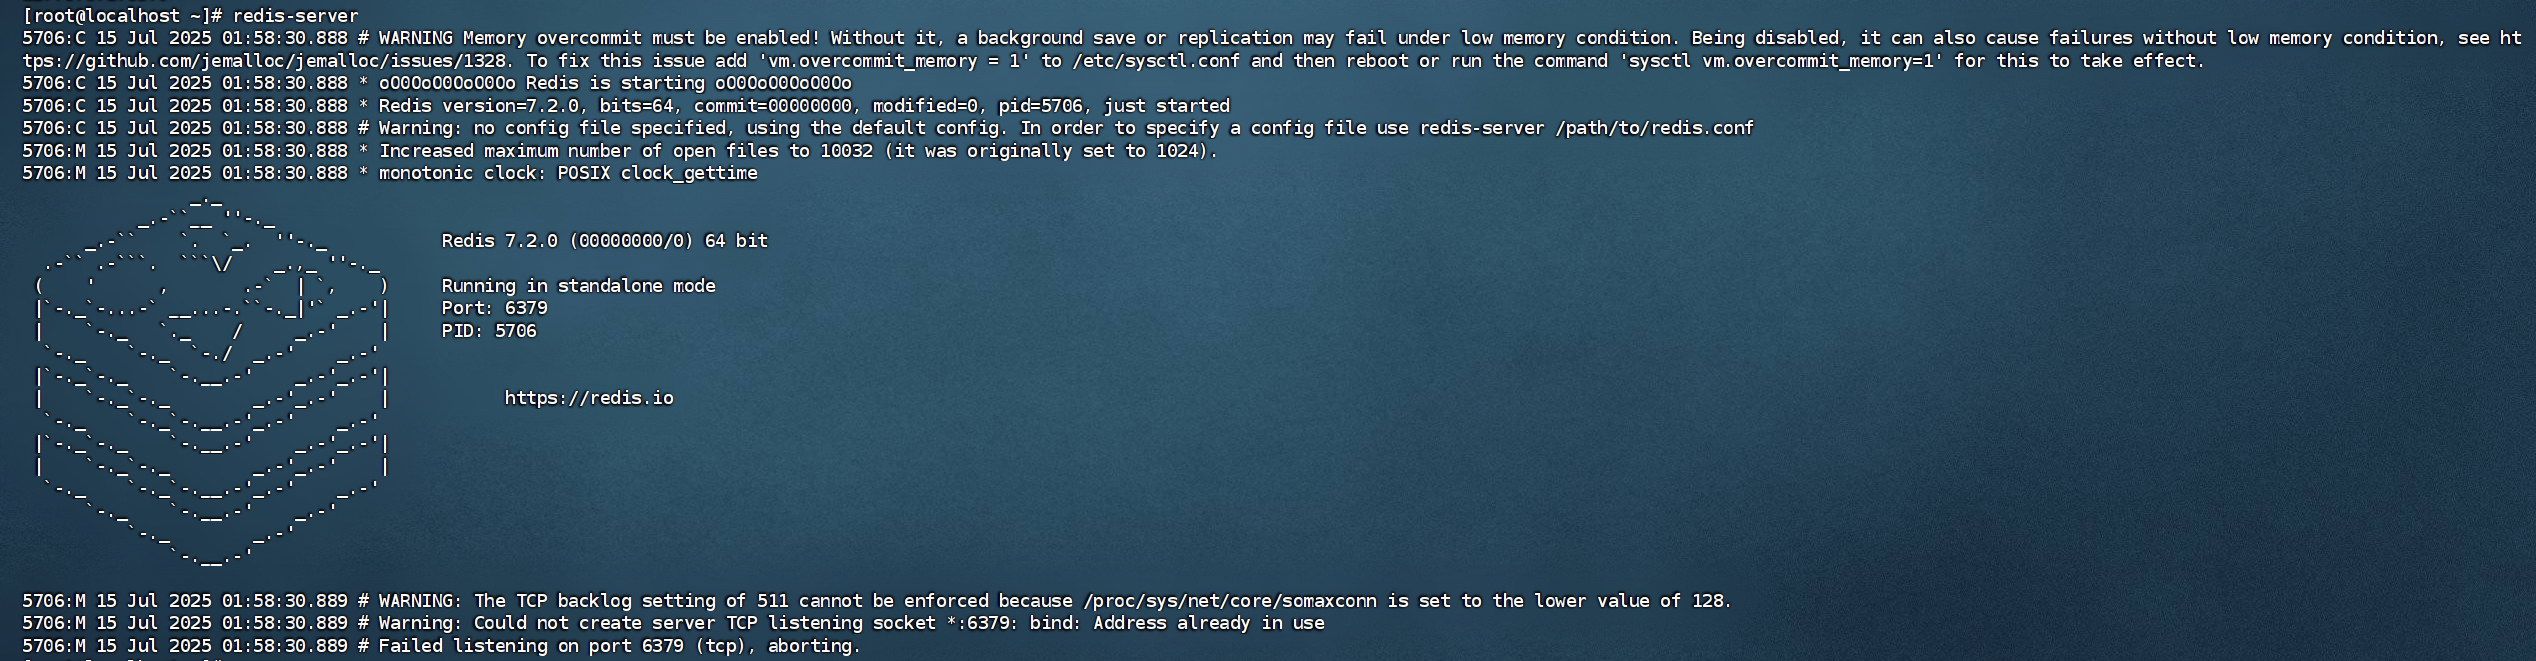
修改为后台启动redis.conf的daemonize yes,后在redis目录中,`redis-server redis.con

开机自启, systemctl daemon-reload,systemctl start redis
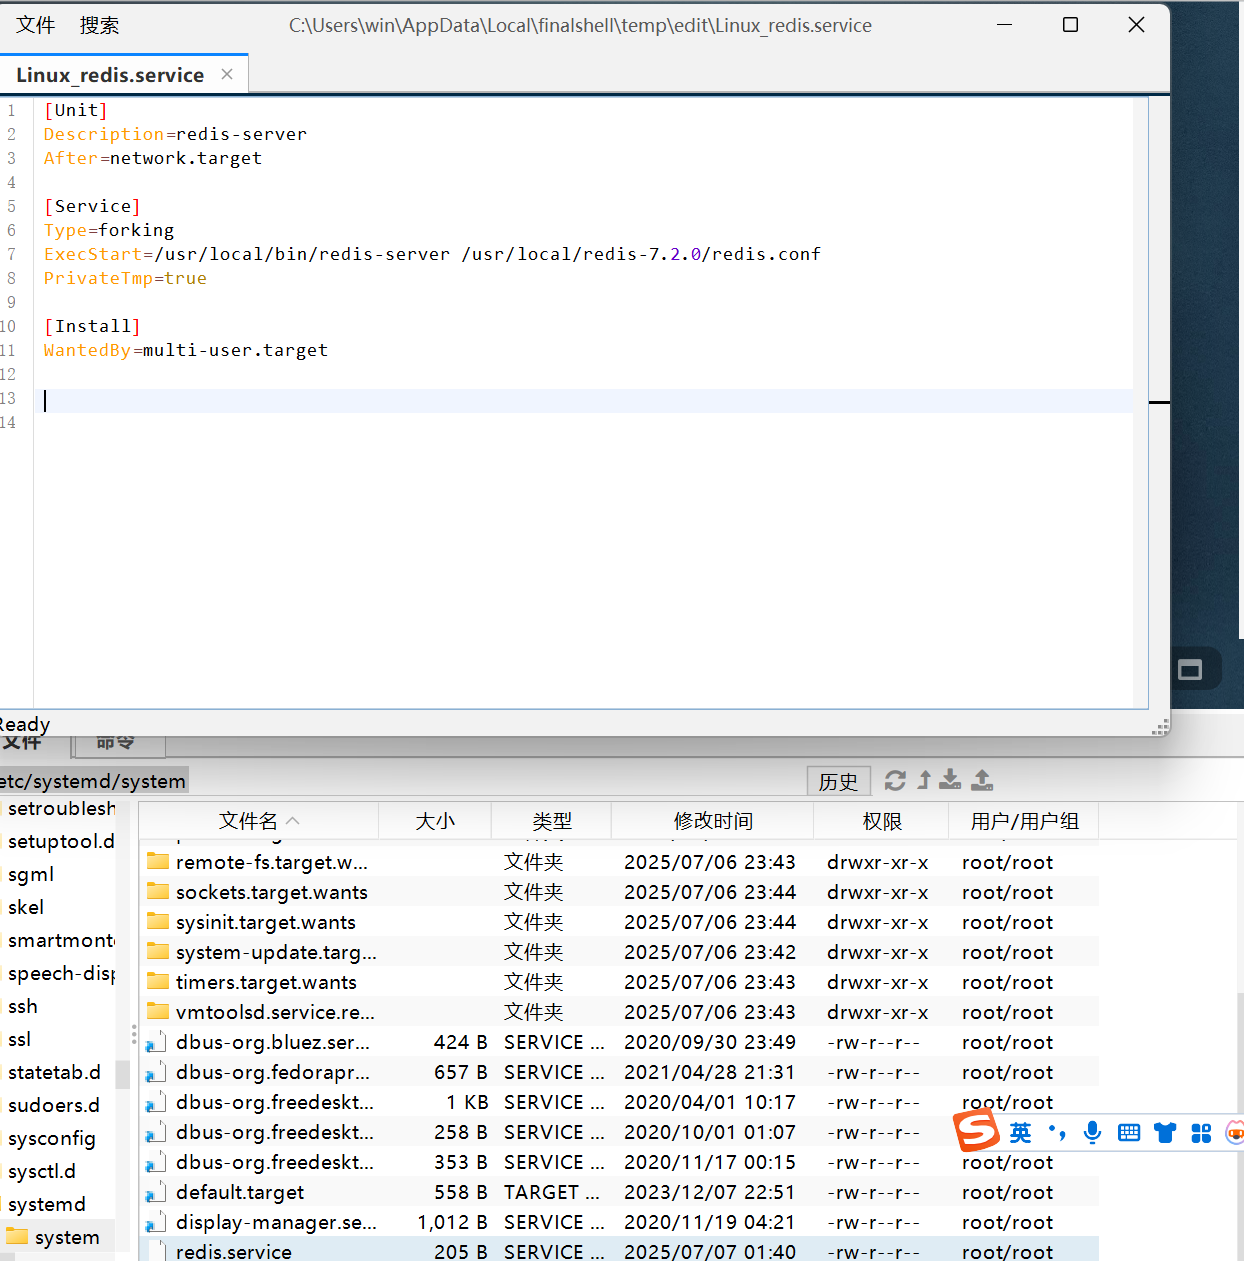
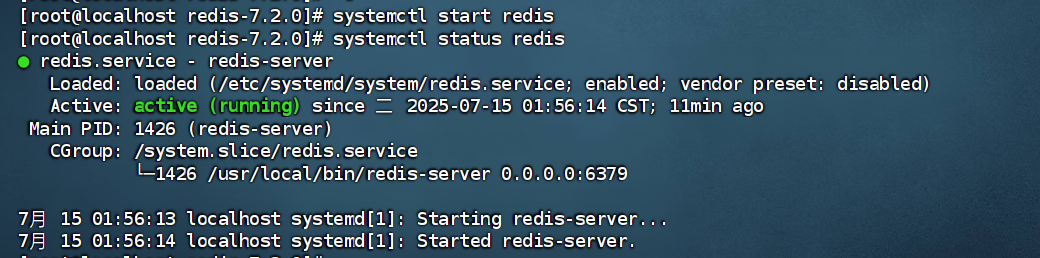
systemctl enable redis

1.4 使用
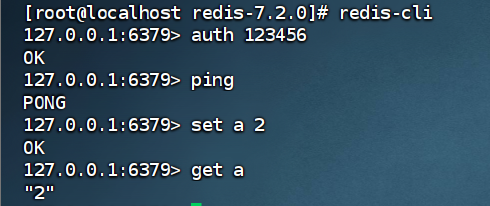
1.4.1 登录
1 命令行
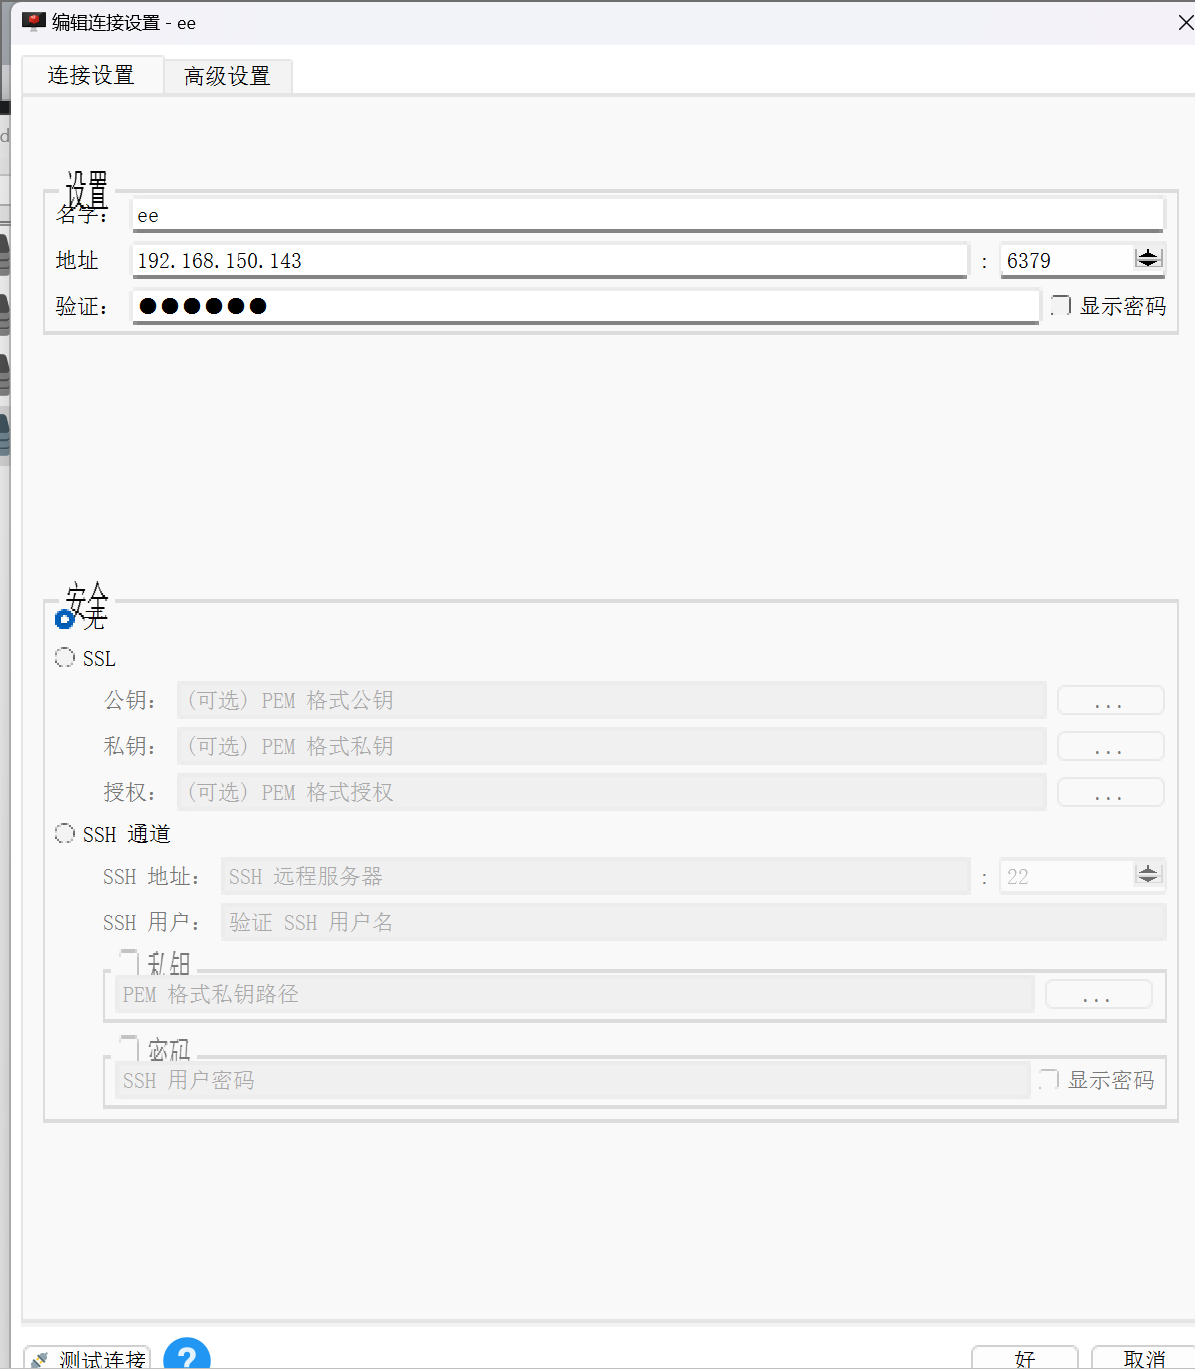
2 图形化
1.4.2 Redis的数据结构
基本类型:String、List、Set、Hash、Sorted Set。
特殊类型:Bitmaps、HyperLogLog、Geospatial、Stream。
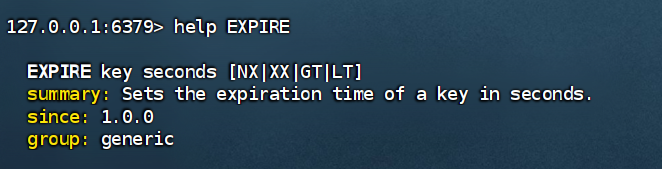
1.4.3 常见命令
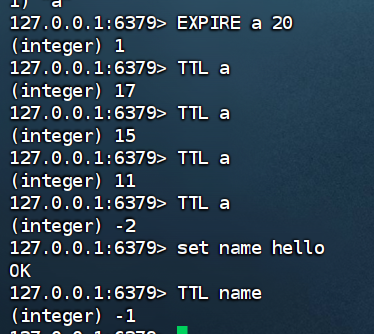
MSET;keys;del;EXISTS;ExpiRe(key的有效期);TTL(查看key的有效期)
keys *不建议生产环境如此使用
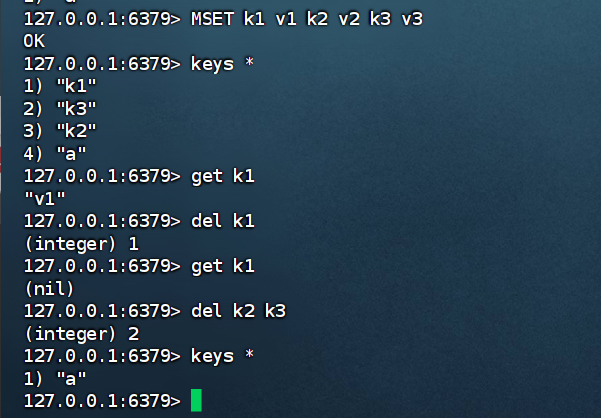
TTL = -2 即有时效性,-1为永久有效
1.4.4 数据类型
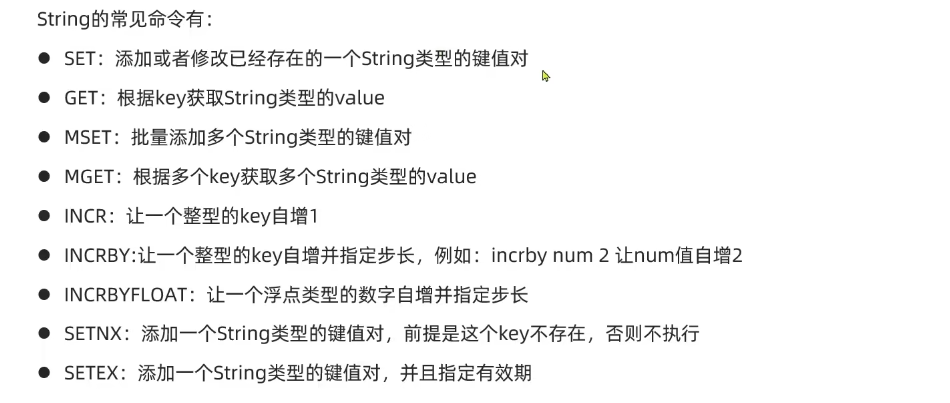
【1】String 类型
二、Redis的 Java客户端
Redis客户端下载

2.1 Jedis客户端
2.1.1 连接指定Redis
Step1:引入依赖
<dependency><groupId>redis.clients</groupId><artifactId>jedis</artifactId><version>4.3.1</version> <!-- 使用最新版本 -->
</dependency>
Step2: 建立连接
import redis.clients.jedis.Jedis;public class JedisExample {public static void main(String[] args) {// 创建连接,默认连接本地6379端口Jedis jedis = new Jedis("localhost", 6379);// 如果有密码// jedis.auth("password");// 测试连接System.out.println("连接成功: " + jedis.ping());// 关闭连接jedis.close();}
}
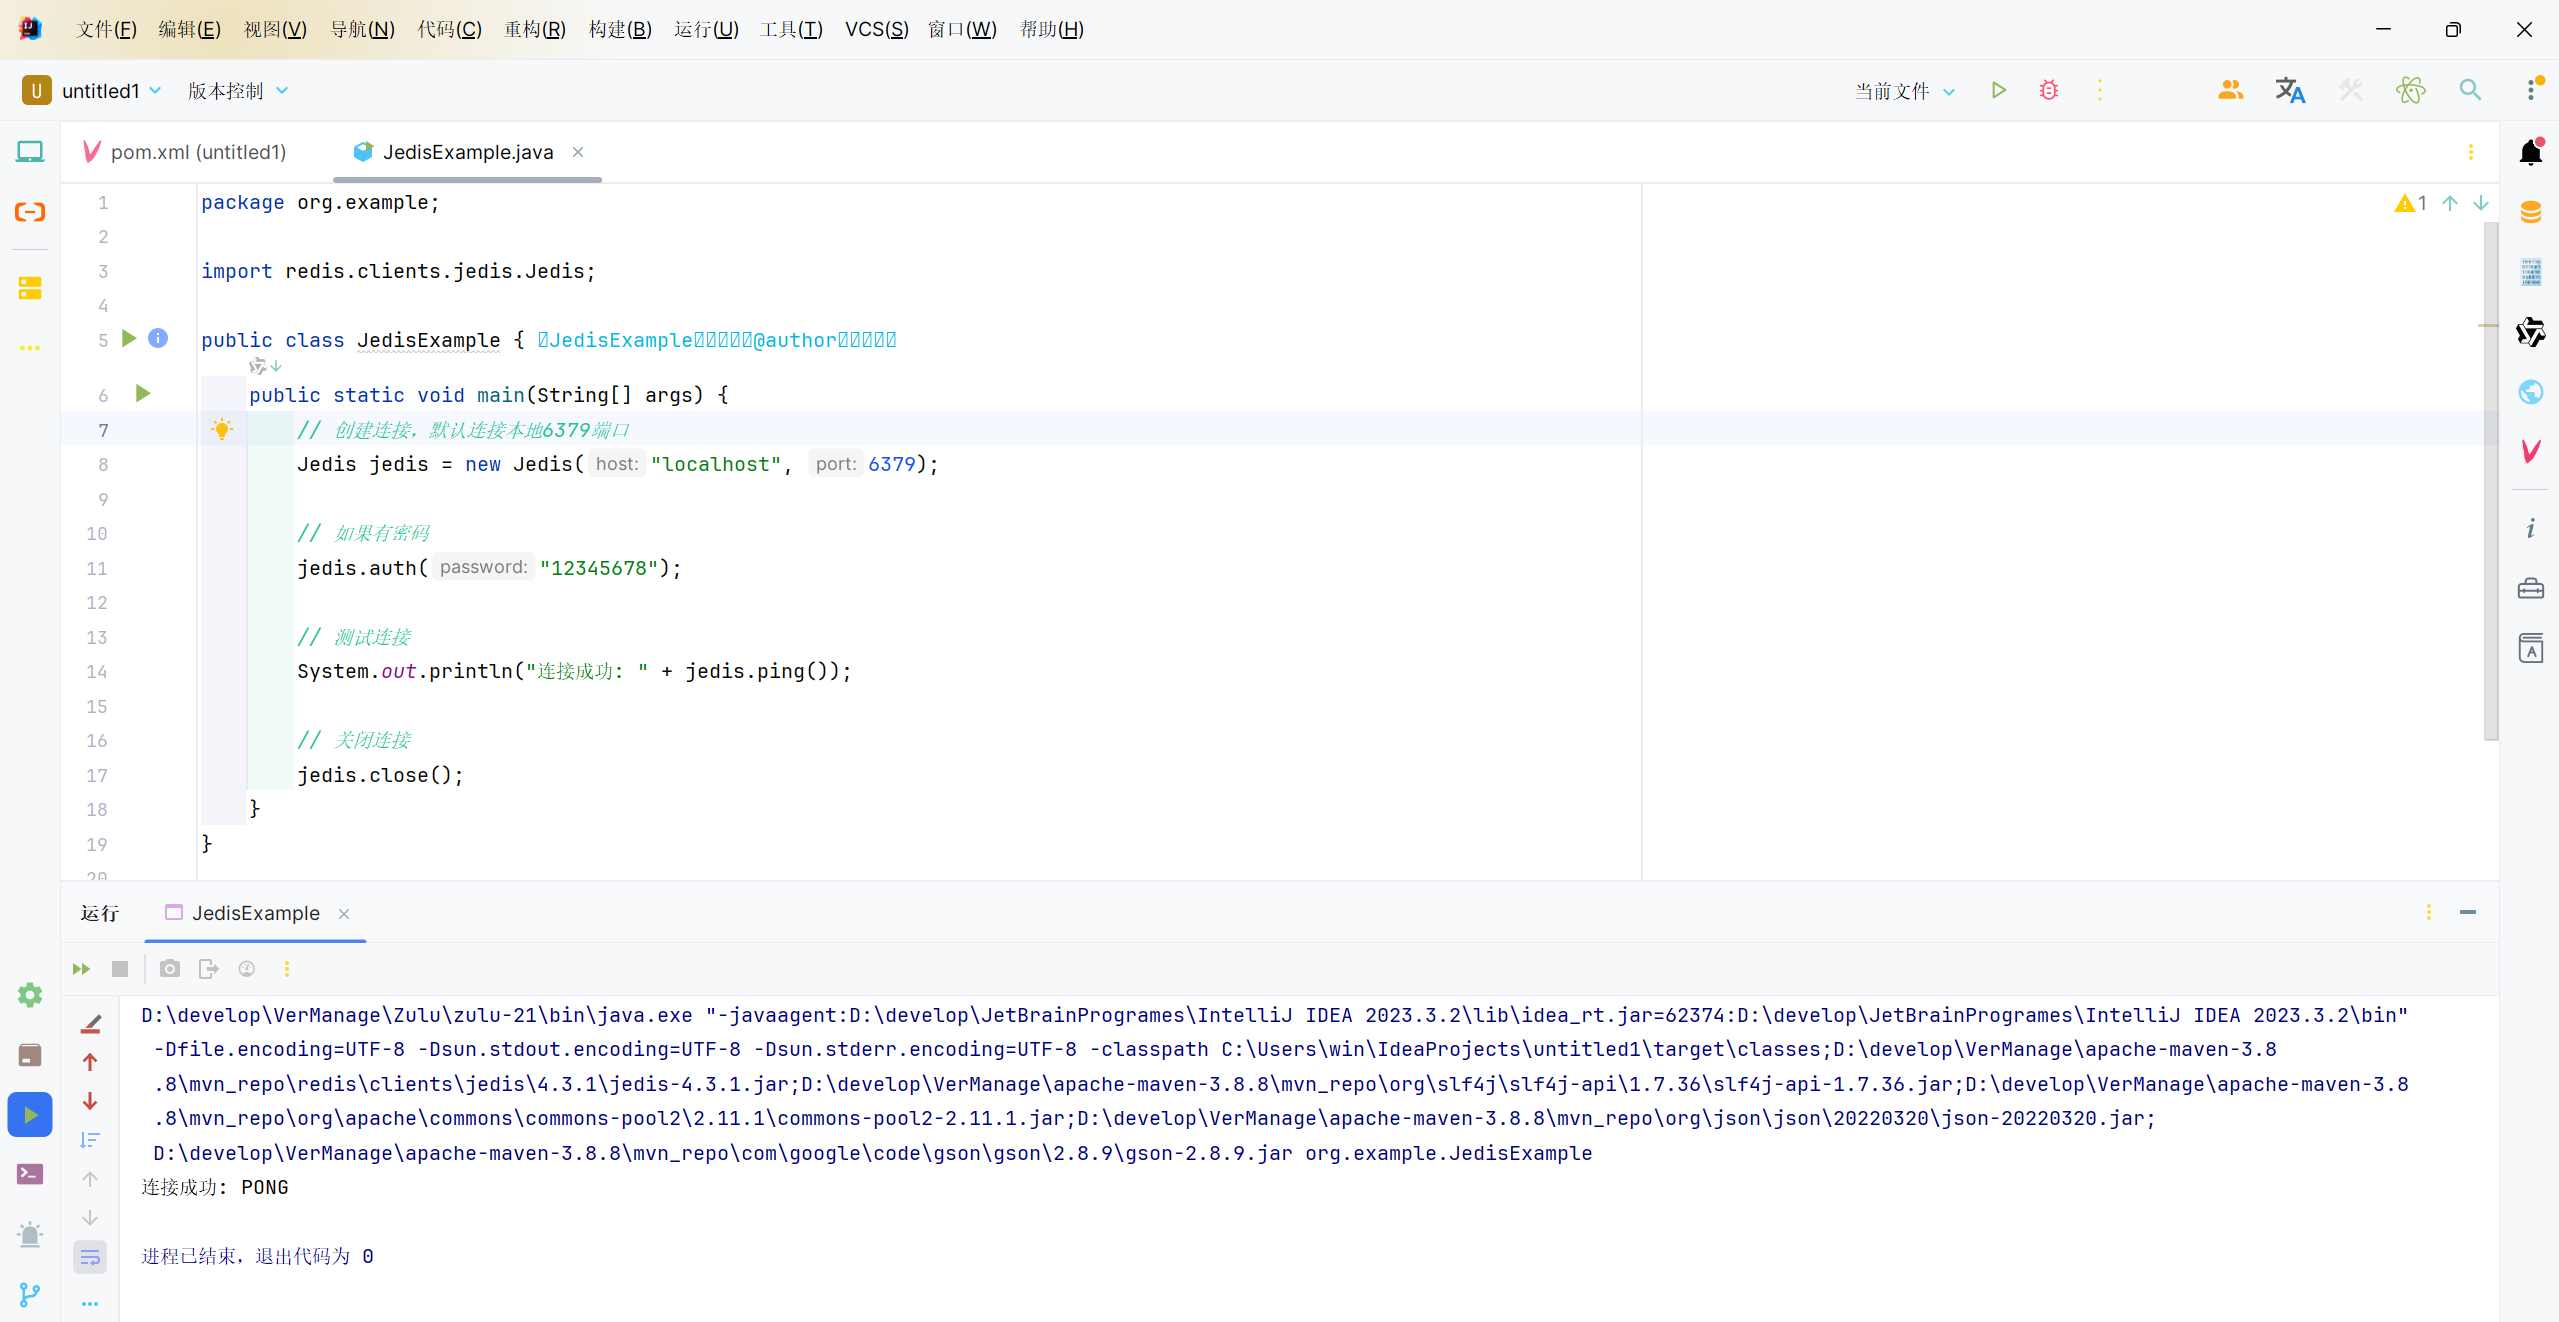
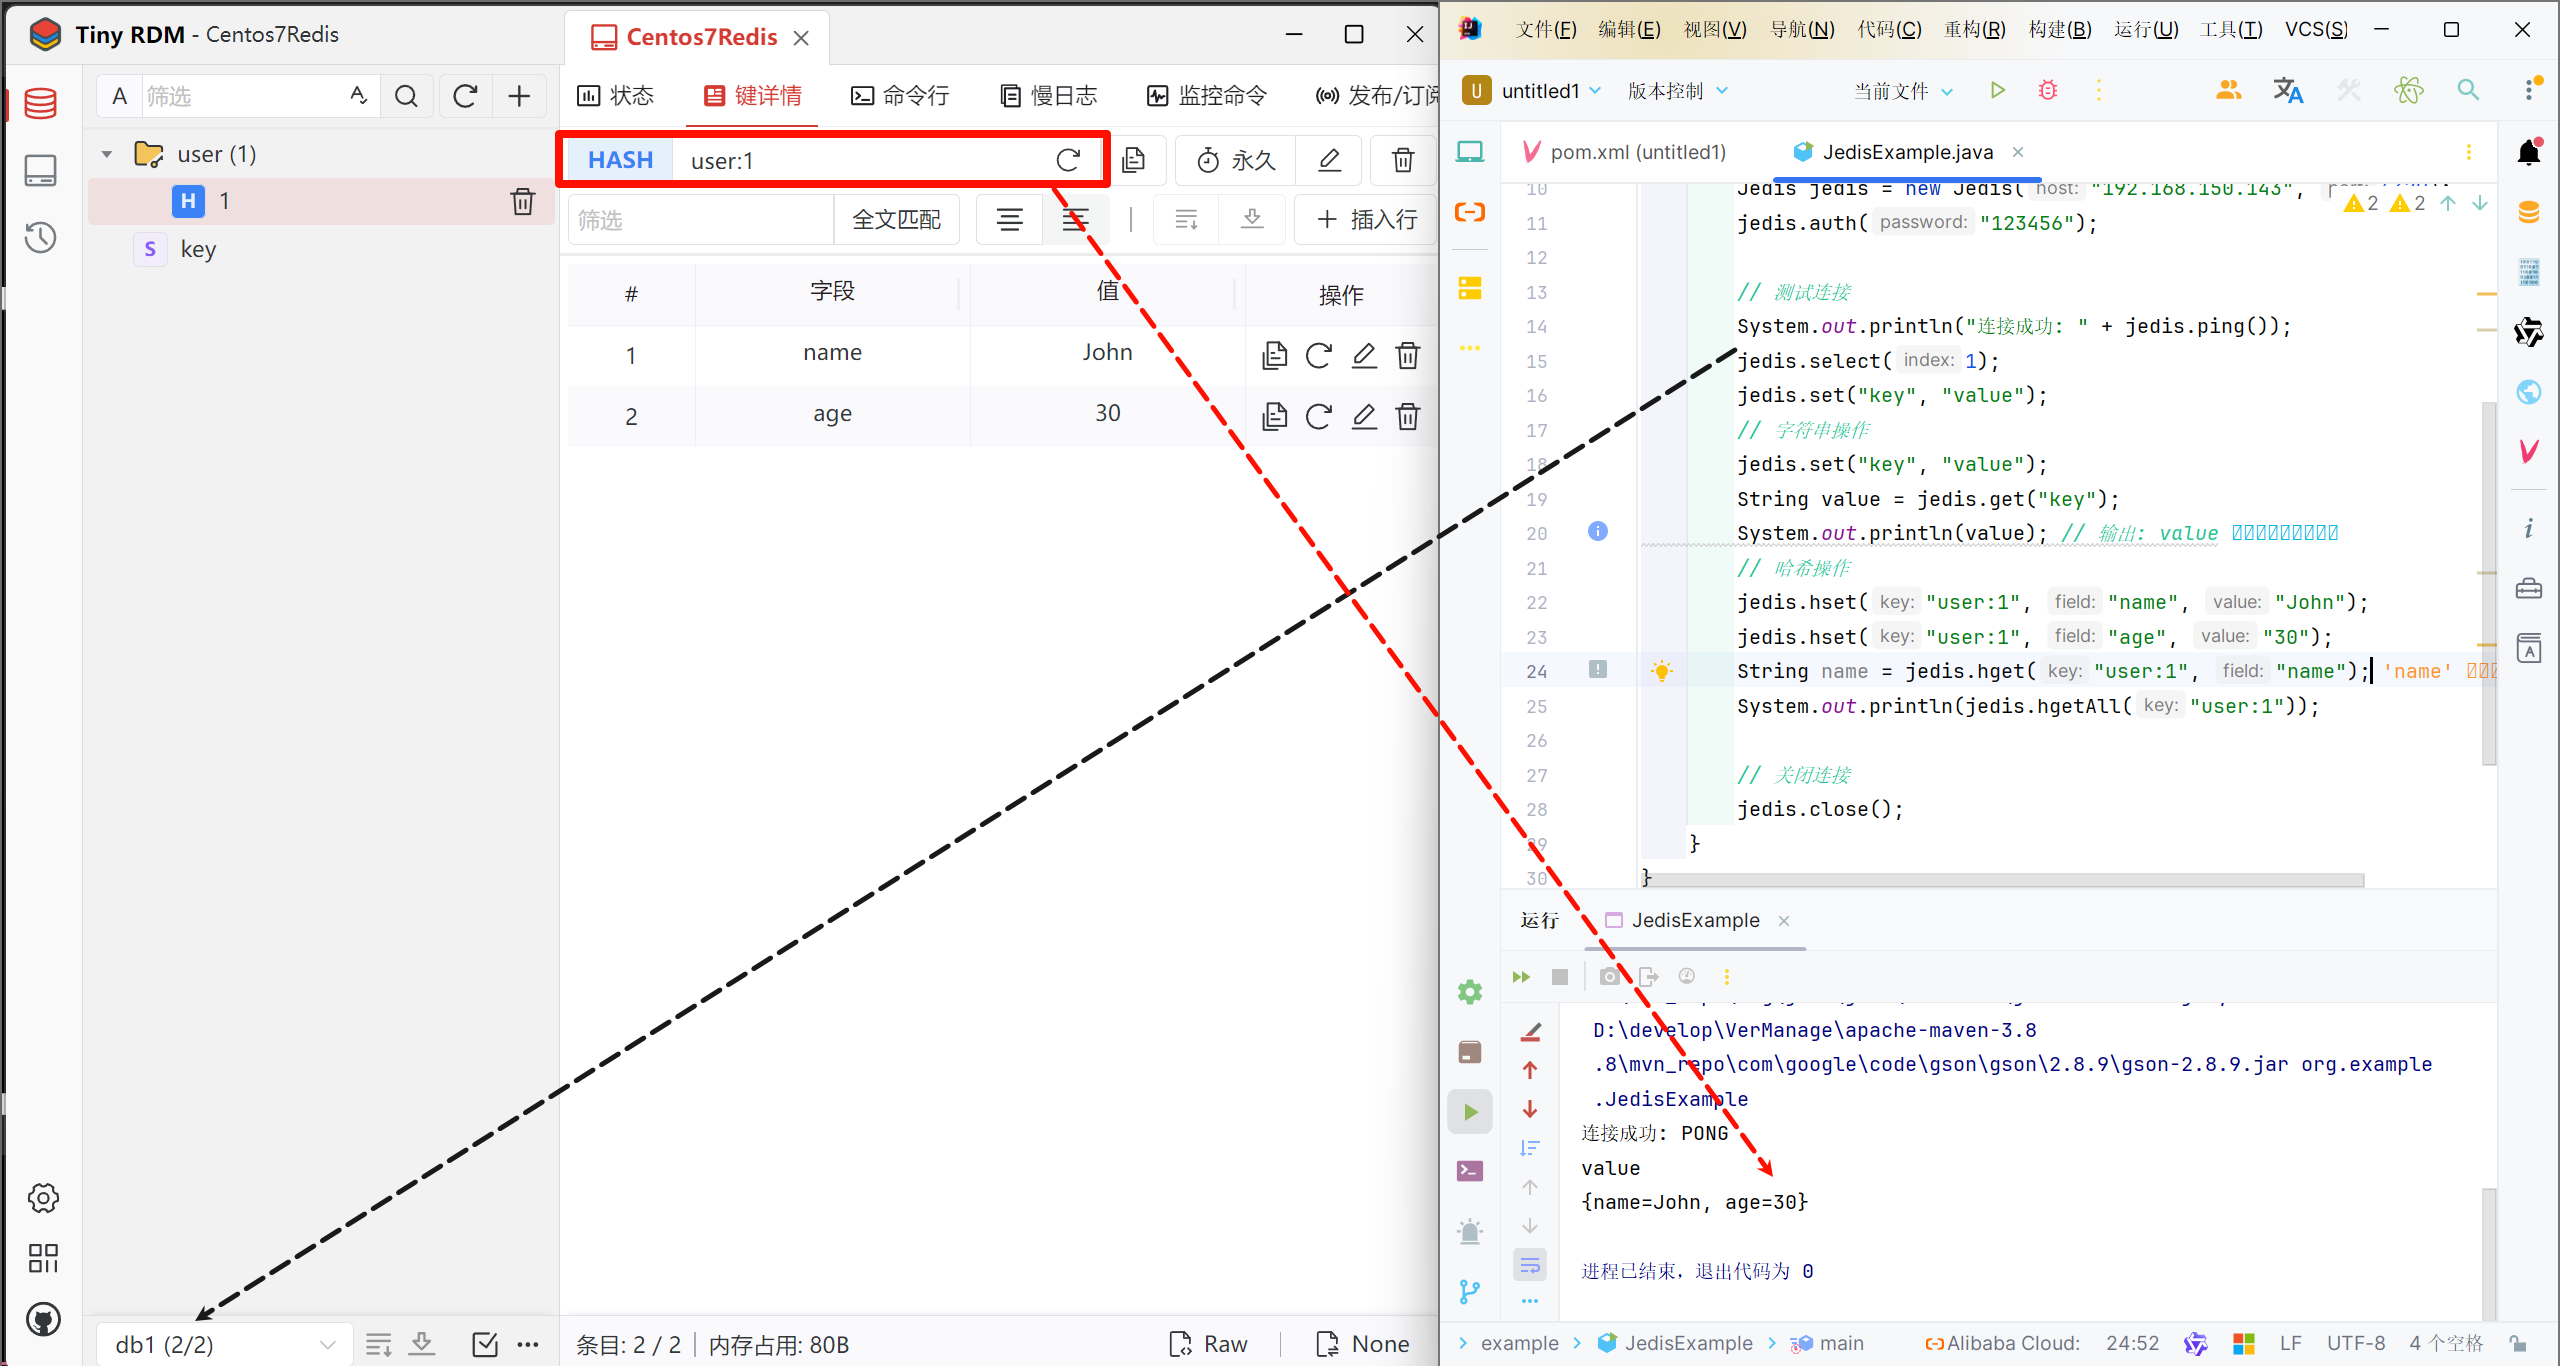
Step3:测试代码
package org.example;import redis.clients.jedis.Jedis;import java.util.List;public class JedisExample {public static void main(String[] args) {// 创建连接,默认连接本地6379端口Jedis jedis = new Jedis("192.168.150.143", 6379);// 如果有密码jedis.auth("123456");// 测试连接System.out.println("连接成功: " + jedis.ping());jedis.select(1);jedis.set("key", "value");
// 字符串操作jedis.set("key", "value");String value = jedis.get("key");System.out.println(value); // 输出: value// 哈希操作jedis.hset("user:1", "name", "John");jedis.hset("user:1", "age", "30");String name = jedis.hget("user:1", "name");System.out.println(name); // 输出: John// 关闭连接jedis.close();}
}
Step4:一定要释放资源
jedis.close();
2.1.2 Junit测试代码
在pom.xml中引入依赖Junit任意一个即可
<dependencies><!--junit--><dependency><groupId>junit</groupId><artifactId>junit</artifactId><version>4.13.2</version><scope>test</scope></dependency><dependency><groupId>org.junit.jupiter</groupId><artifactId>junit-jupiter</artifactId><version>RELEASE</version><scope>test</scope></dependency>
</dependencies>
后在Test包下,完整
import org.junit.jupiter.api.AfterEach;
import org.junit.jupiter.api.BeforeEach;
import org.junit.jupiter.api.Test;
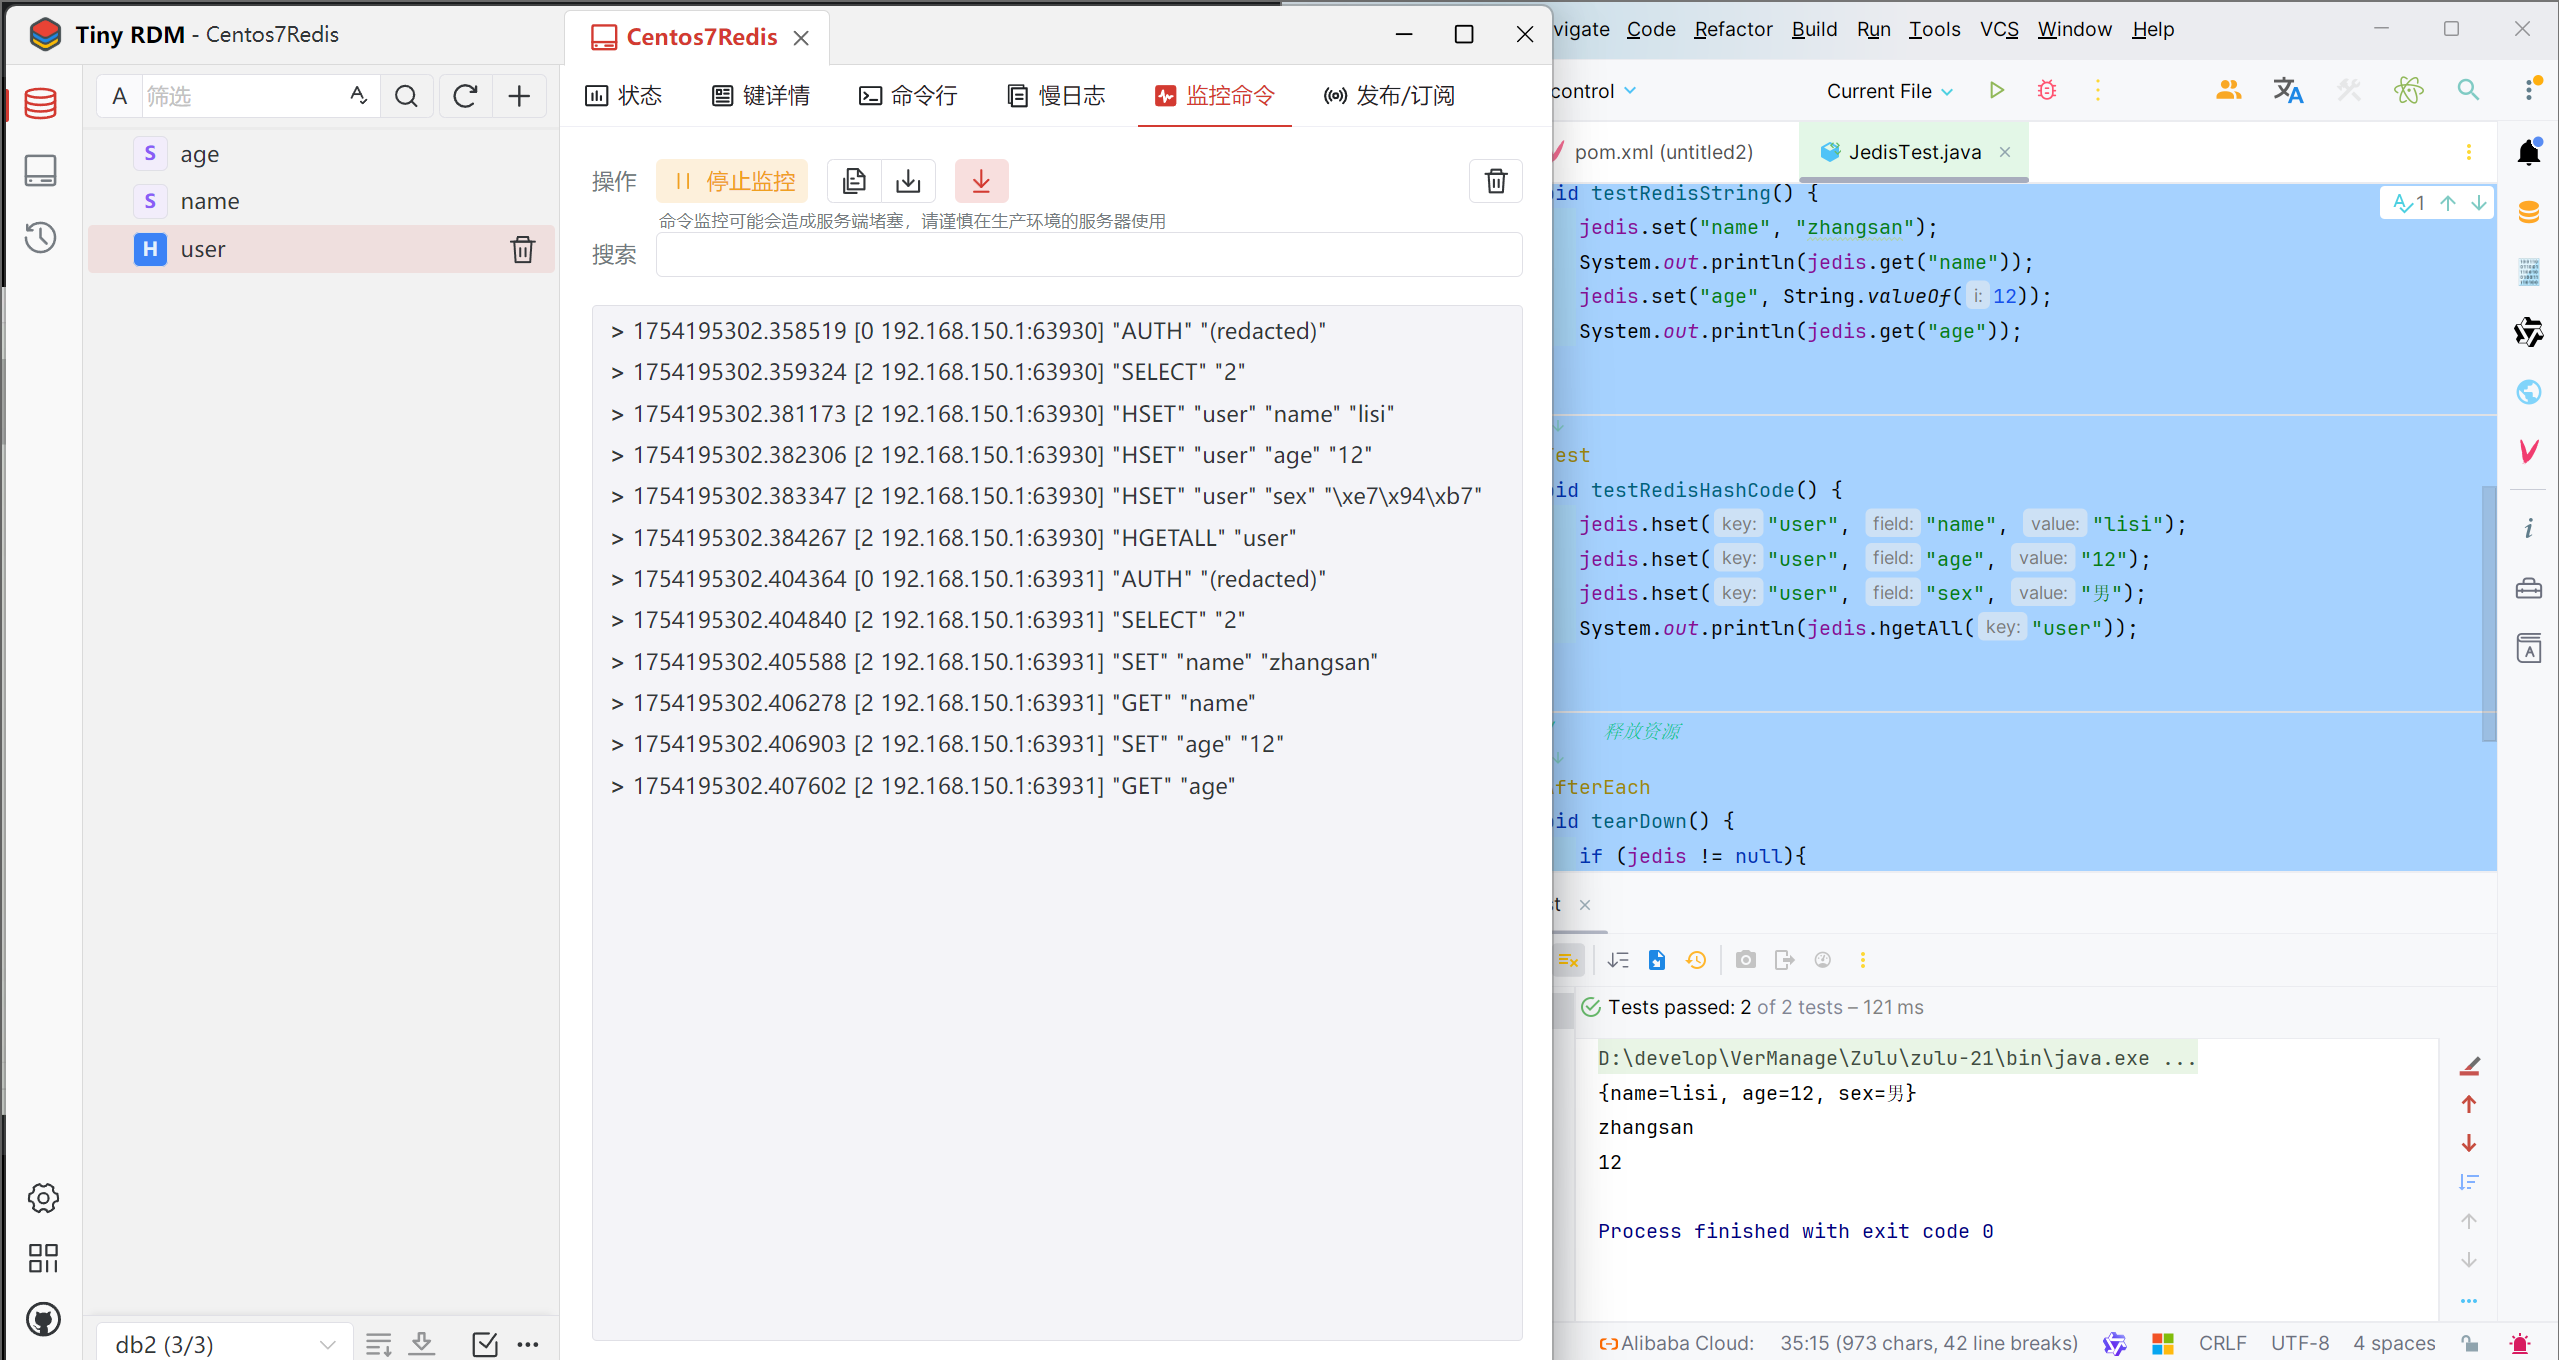
import redis.clients.jedis.Jedis;public class JedisTest {private Jedis jedis;// 初始化jedis连接@BeforeEachvoid setUp() {jedis = new Jedis("192.168.150.143", 6379);jedis.auth("123456");jedis.select(2);}
// 测试代码String@Testvoid testRedisString() {jedis.set("name", "zhangsan");System.out.println(jedis.get("name"));jedis.set("age", String.valueOf(12));System.out.println(jedis.get("age"));}
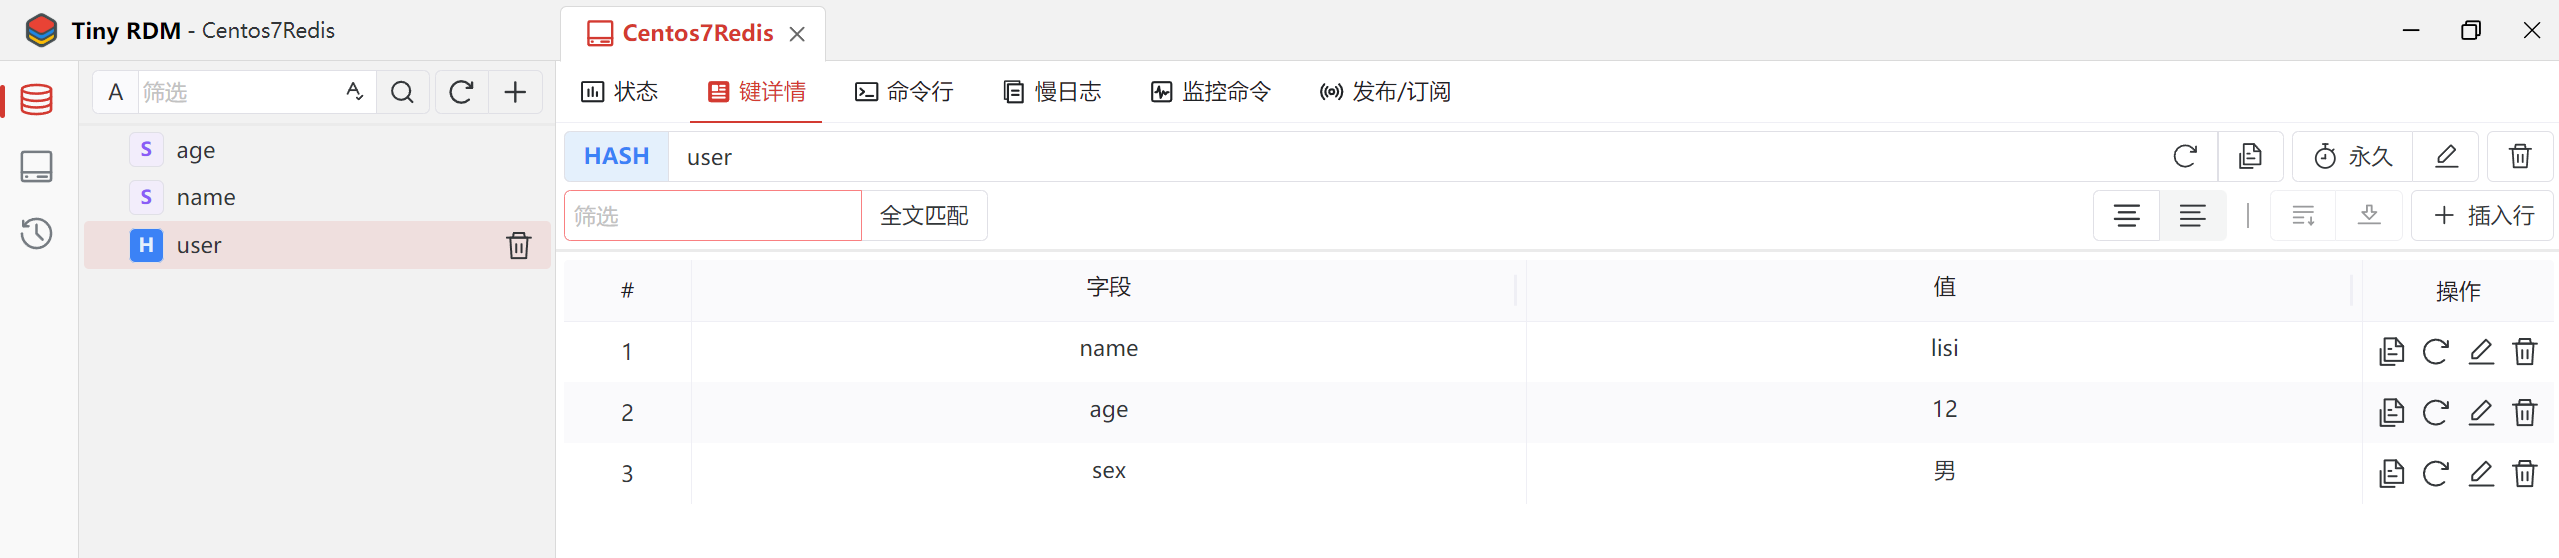
// 测试代码Hash@Testvoid testRedisHashCode() {jedis.hset("user", "name", "lisi");jedis.hset("user", "age", "12");jedis.hset("user", "sex", "男");System.out.println(jedis.hgetAll("user"));}// 释放资源@AfterEachvoid tearDown() {if (jedis != null){jedis.close();}}
}
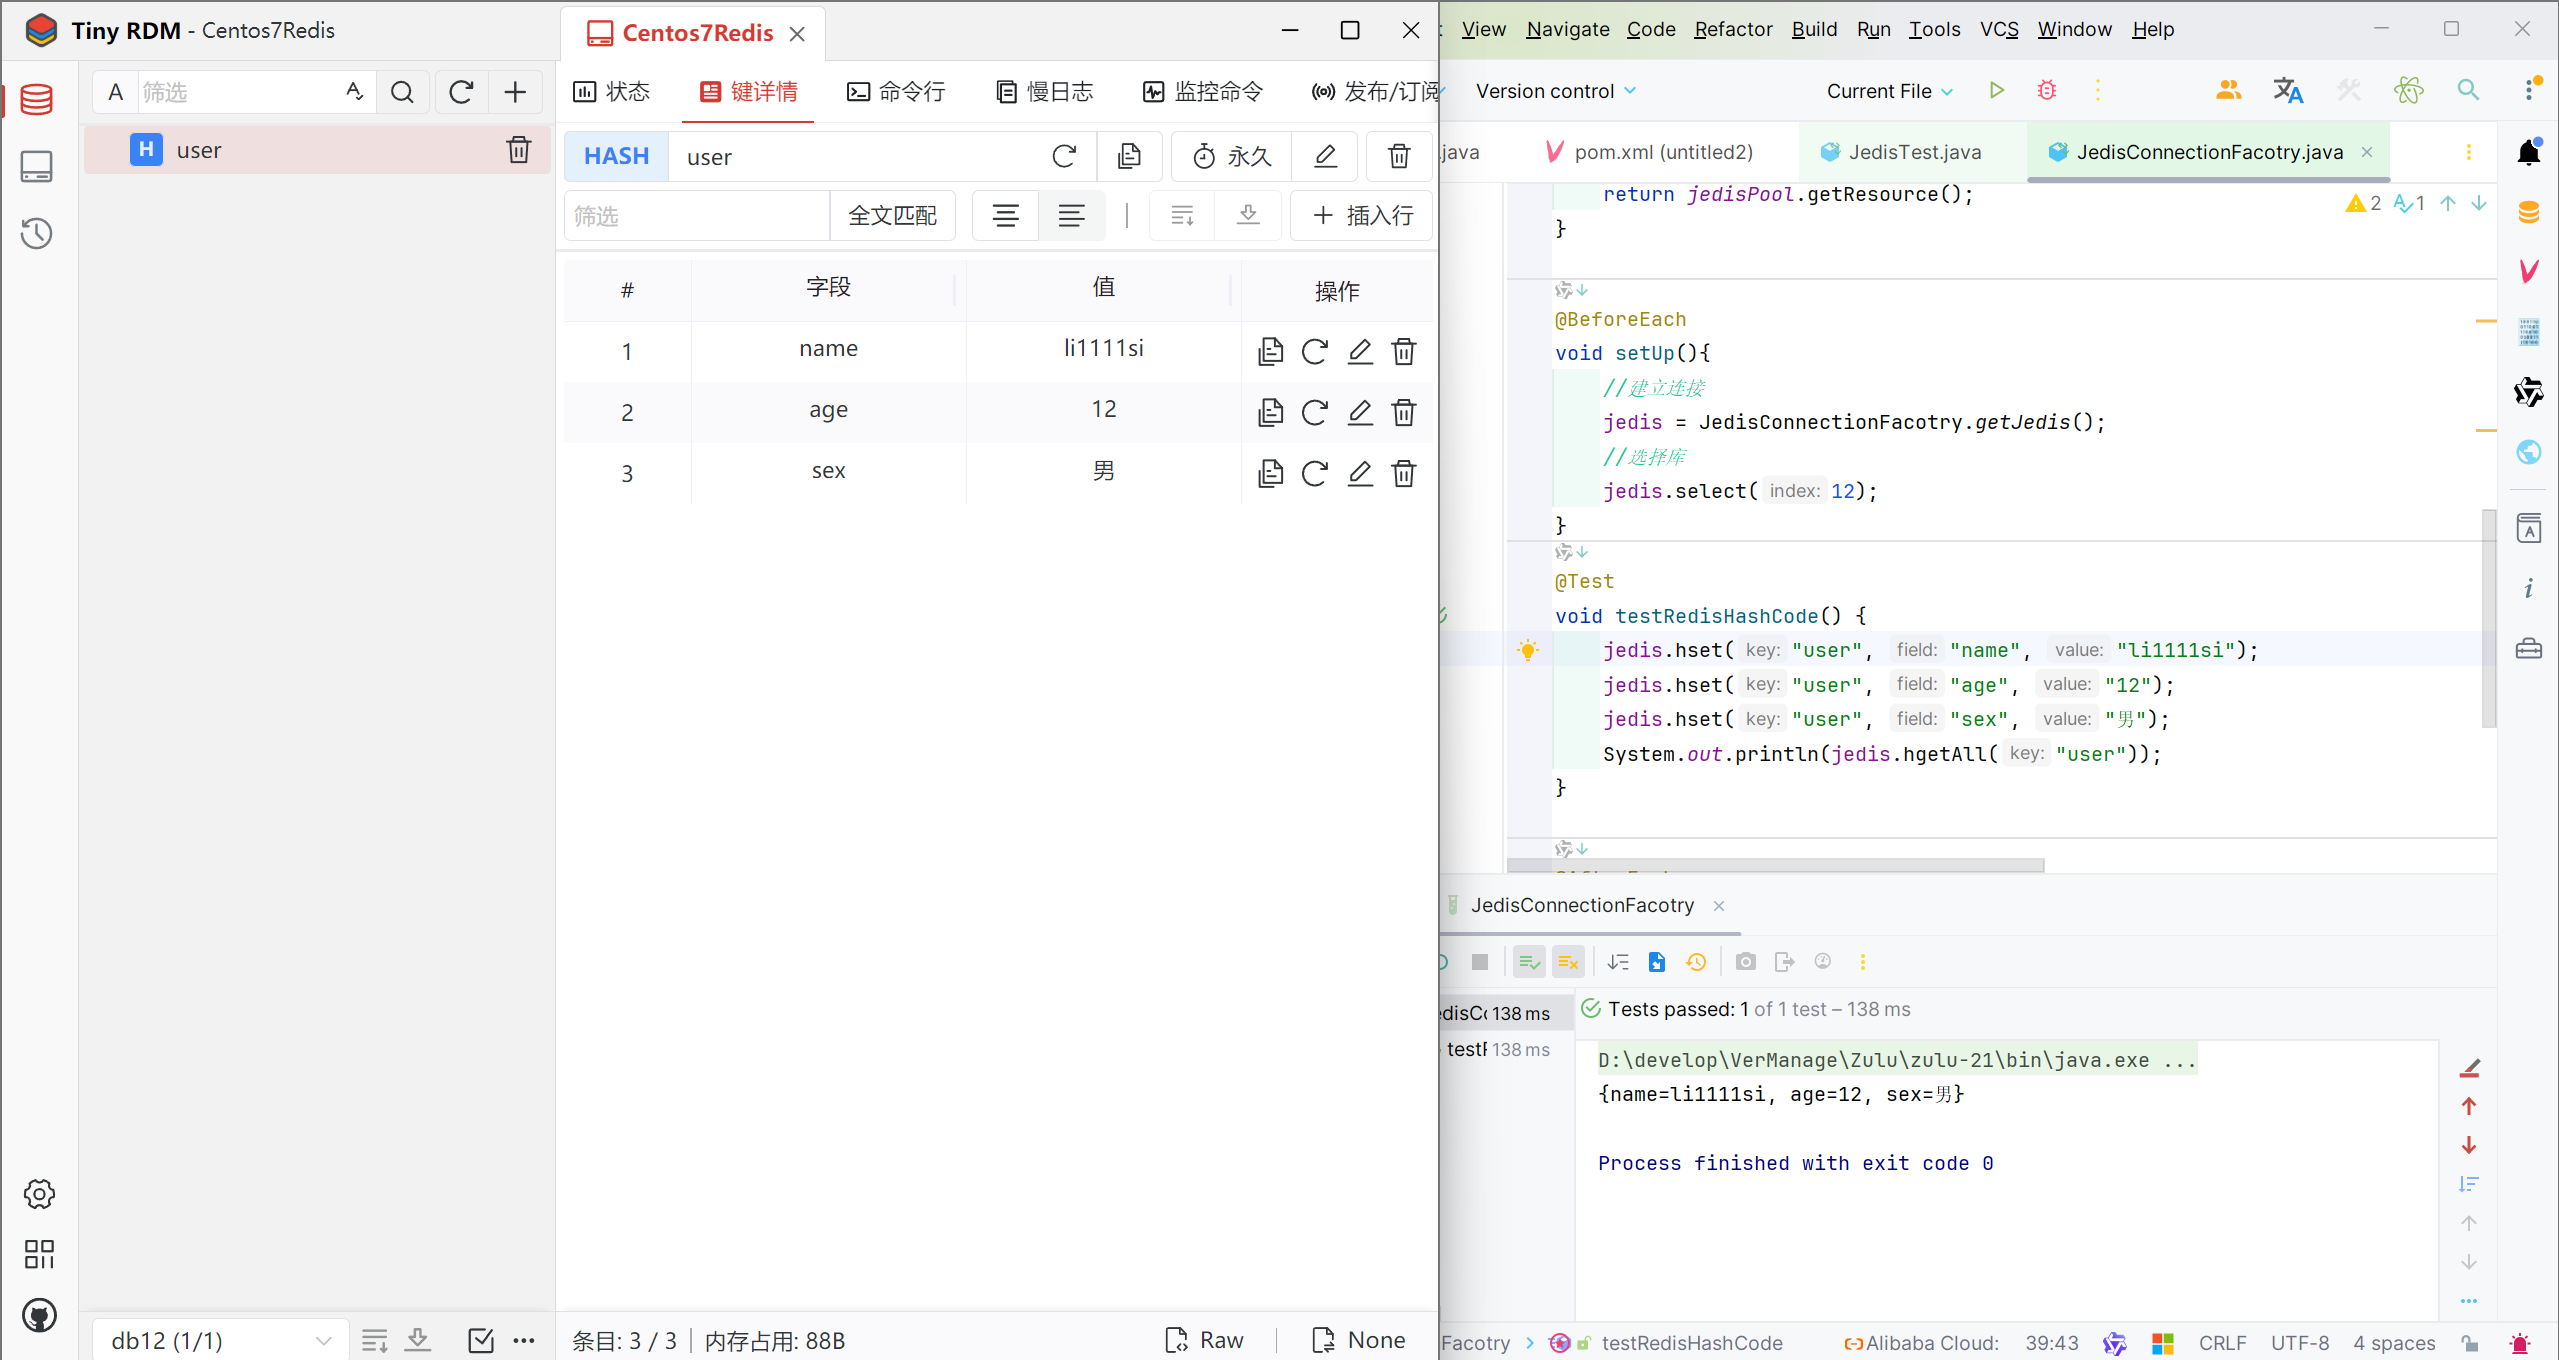
2.1.3 Jedis连接池
由于Jedis本身非线程安全,连接池还能为每个线程分配独立连接,避免并发问题,是高性能Redis访问的必备组件。
Step1:创建Jedis连接池
package org.example;import org.junit.jupiter.api.AfterEach;
import org.junit.jupiter.api.BeforeEach;
import org.junit.jupiter.api.Test;
import redis.clients.jedis.Jedis;
import redis.clients.jedis.JedisPool;
import redis.clients.jedis.JedisPoolConfig;public class JedisConnectionFacotry {private Jedis jedis;private static final JedisPool jedisPool;static {//配置连接池JedisPoolConfig poolConfig = new JedisPoolConfig();poolConfig.setMaxTotal(8);poolConfig.setMaxIdle(8);poolConfig.setMinIdle(0);poolConfig.setMaxWaitMillis(1000);//创建连接池对象jedisPool = new JedisPool(poolConfig,"192.168.150.143",6379,1000,"123456");}public static Jedis getJedis(){return jedisPool.getResource();}@BeforeEachvoid setUp(){//建立连接jedis = JedisConnectionFacotry.getJedis();//选择库jedis.select(12);}@Testvoid testRedisHashCode() {jedis.hset("user", "name", "li1111si");jedis.hset("user", "age", "12");jedis.hset("user", "sex", "男");System.out.println(jedis.hgetAll("user"));}@AfterEachvoid tearDown() {if (jedis != null) {jedis.close();}}
}
2.2 SpringDataRedis 客户端
Spring Data Redis 是 Spring 生态中用于简化 Redis 操作的客户端工具,它基于 Redis 的 Java 客户端(如 Jedis、Lettuce)进行了高层封装,提供了更简洁的 API 和与 Spring 框架的无缝集成。
2.2.1 相关介绍
底层客户端
Spring Data Redis 本身是封装层,实际依赖以下客户端之一:
- Lettuce:基于 Netty 的高性能、异步客户端,支持集群和哨兵模式。
- Jedis:老牌同步客户端,轻量但多线程环境下需连接池管理。
核心功能
- 模板化操作:提供
RedisTemplate和StringRedisTemplate类,封装了常见的 Redis 命令(如set/get、hset/hget、事务等)。 - 序列化支持:内置多种序列化方案(如 JSON、JDK、String),避免手动转换数据格式。
- Repository 支持:类似 JPA,可通过接口定义自动生成 Redis 数据访问代码(需注解
@RedisHash)。 - 发布/订阅:简化消息队列和事件驱动模型的实现。
- 事务管理:与 Spring 事务注解(
@Transactional)集成。
2.2.2 配置
<dependencies><!--redis依赖--><dependency><groupId>org.springframework.boot</groupId><artifactId>spring-boot-starter-data-redis</artifactId></dependency><!--common-pool--><dependency><groupId>org.apache.commons</groupId><artifactId>commons-pool2</artifactId></dependency><!--Jackson依赖--><dependency><groupId>com.fasterxml.jackson.core</groupId><artifactId>jackson-databind</artifactId></dependency><dependency><groupId>org.projectlombok</groupId><artifactId>lombok</artifactId><optional>true</optional></dependency><dependency><groupId>org.springframework.boot</groupId><artifactId>spring-boot-starter-test</artifactId><scope>test</scope></dependency>
</dependencies>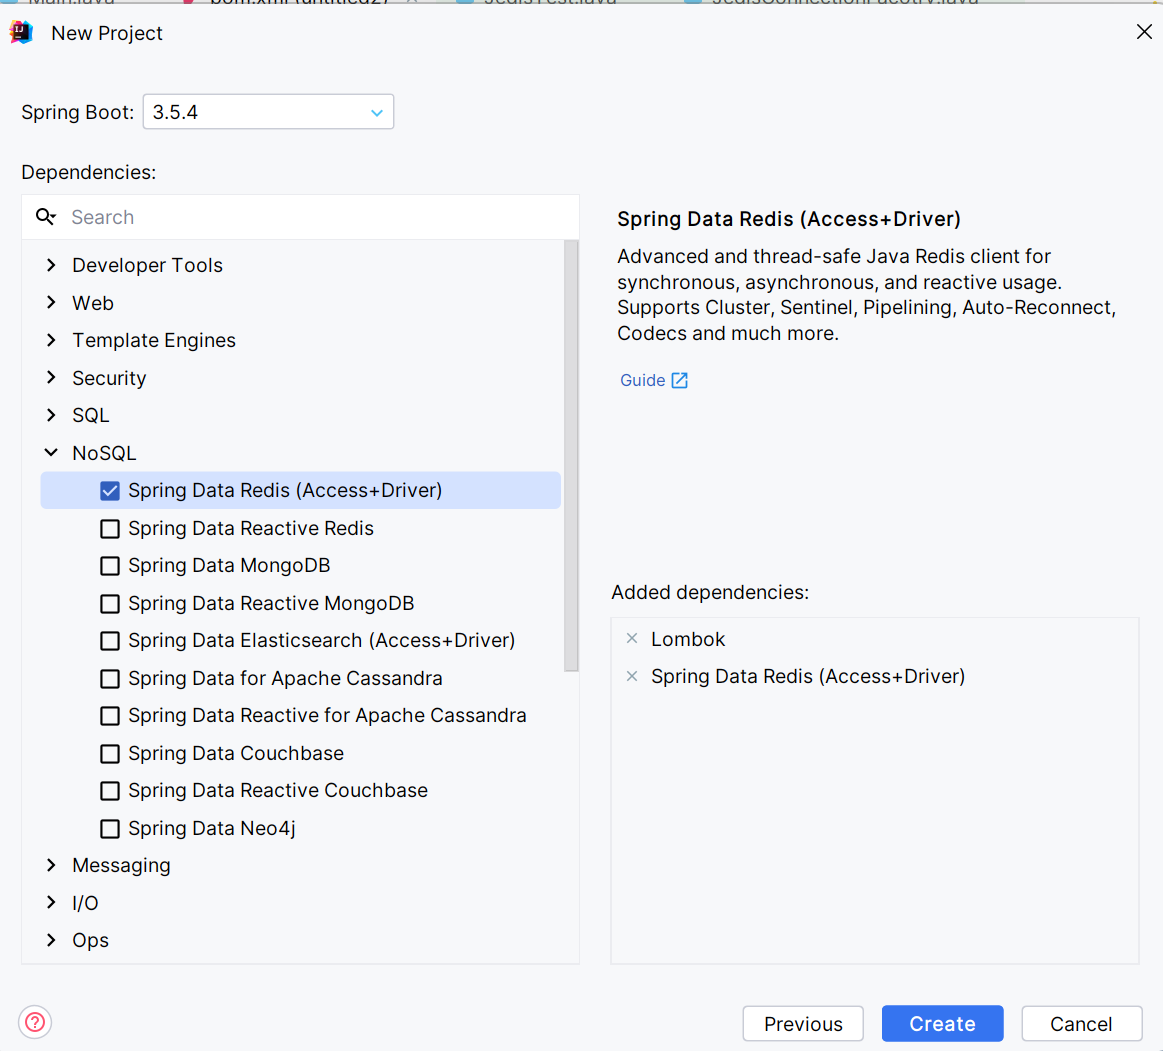
spring:data:redis:host: 192.168.150.143port: 6379password: 123456lettuce:pool:max-active: 8max-idle: 8min-idle: 0max-wait: 100ms
2.2.3 测试代码
package com.example.redisdemo;import org.junit.jupiter.api.Test;
import org.springframework.beans.factory.annotation.Autowired;
import org.springframework.boot.test.context.SpringBootTest;
import org.springframework.data.redis.core.RedisTemplate;@SpringBootTest
class RedisDemoApplicationTests {@Autowiredprivate RedisTemplate redisTemplate;@Testvoid testString() {// 写入一条String数据redisTemplate.opsForValue().set("name", "lucky");// 获取string数据Object name = redisTemplate.opsForValue().get("name");System.out.println("name = " + name);}
}
2.2.4 序列化
利用JDK的序列化工具
- 可读性差、内存占用较大
- 默认
JDK序列化

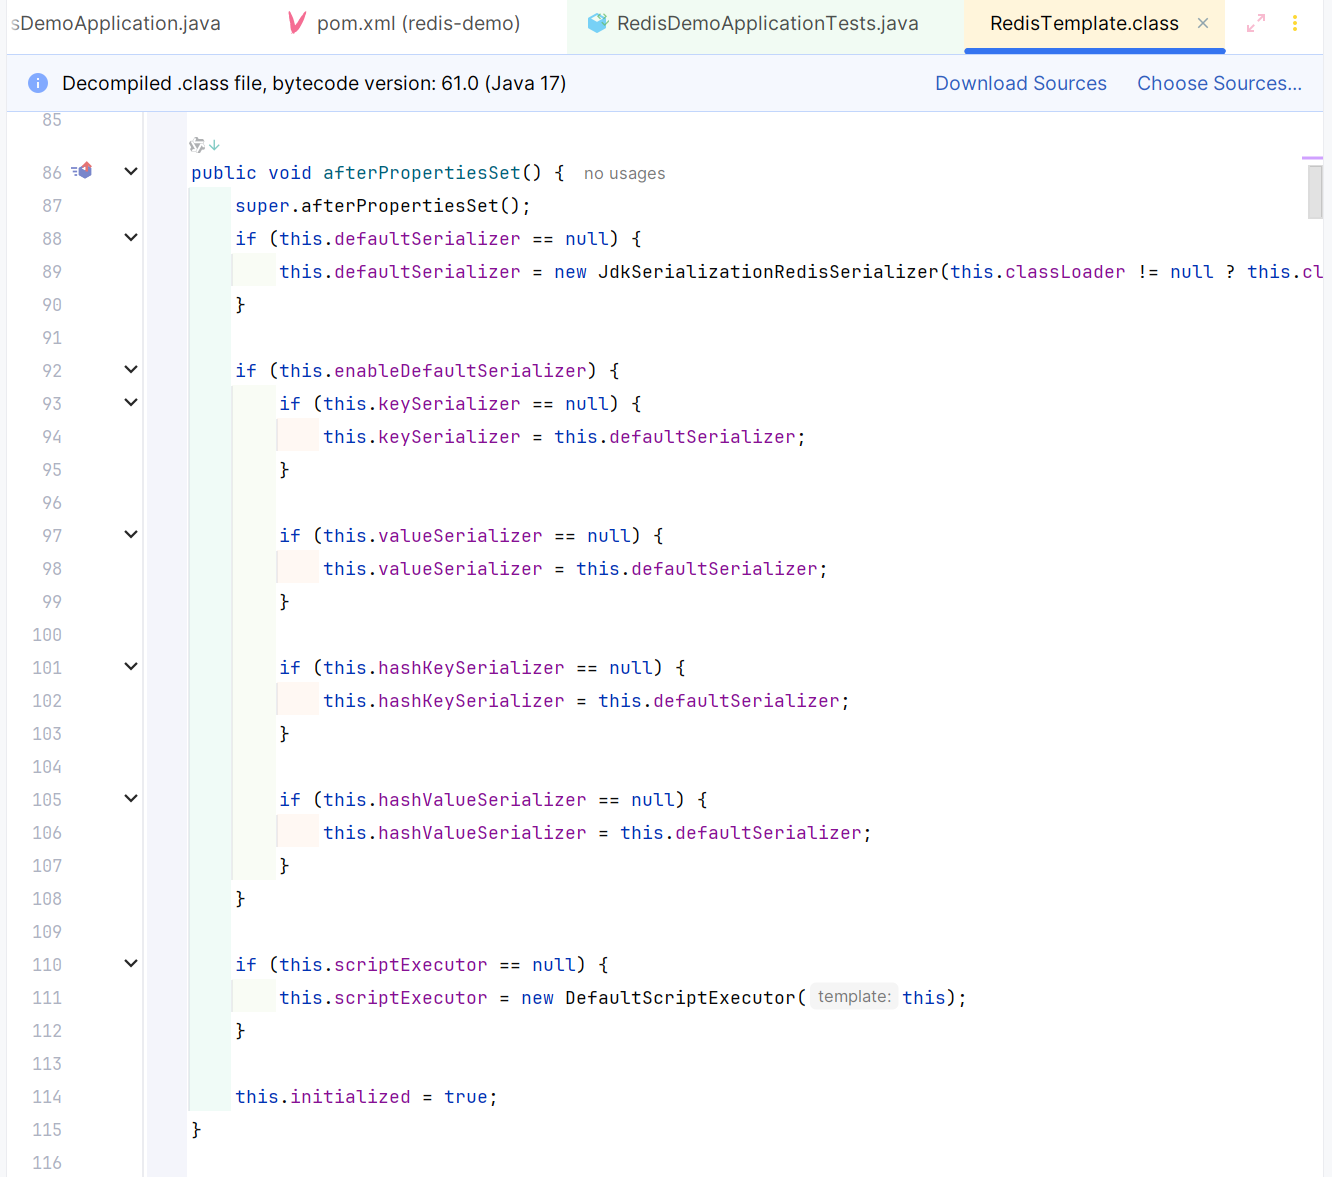
2.2.5 序列化工具
方式一:
package com.example.redisdemo;import com.fasterxml.jackson.annotation.JsonAutoDetect;
import com.fasterxml.jackson.annotation.PropertyAccessor;
import com.fasterxml.jackson.databind.ObjectMapper;
import org.springframework.context.annotation.Bean;
import org.springframework.context.annotation.Configuration;
import org.springframework.data.redis.connection.RedisConnectionFactory;
import org.springframework.data.redis.core.RedisTemplate;
import org.springframework.data.redis.serializer.Jackson2JsonRedisSerializer;
import org.springframework.data.redis.serializer.StringRedisSerializer;@Configuration
public class RedisConfig {@Beanpublic RedisTemplate<String, Object> redisTemplate(RedisConnectionFactory connectionFactory) {RedisTemplate<String, Object> template = new RedisTemplate<>();template.setConnectionFactory(connectionFactory);// 使用StringRedisSerializer来序列化和反序列化redis的key值template.setKeySerializer(new StringRedisSerializer());// 使用Jackson2JsonRedisSerializer来序列化和反序列化redis的value值ObjectMapper mapper = new ObjectMapper();mapper.setVisibility(PropertyAccessor.ALL, JsonAutoDetect.Visibility.ANY);mapper.activateDefaultTyping(mapper.getPolymorphicTypeValidator(),ObjectMapper.DefaultTyping.NON_FINAL);// 修复:直接在构造函数中传入配置好的ObjectMapperJackson2JsonRedisSerializer<Object> serializer = new Jackson2JsonRedisSerializer<>(mapper, Object.class);template.setValueSerializer(serializer);template.setHashKeySerializer(new StringRedisSerializer());template.setHashValueSerializer(serializer);template.afterPropertiesSet();return template;}
}
方式二:
package com.example.redisdemo;import org.springframework.context.annotation.Bean;
import org.springframework.context.annotation.Configuration;
import org.springframework.data.redis.connection.RedisConnectionFactory;
import org.springframework.data.redis.core.RedisTemplate;
import org.springframework.data.redis.serializer.GenericJackson2JsonRedisSerializer;
import org.springframework.data.redis.serializer.RedisSerializer;@Configuration
public class RedisConfig {@Beanpublic RedisTemplate<String, Object> redisTemplate(RedisConnectionFactory connectionFactory){// 创建RedisTemplate对象RedisTemplate<String, Object> template = new RedisTemplate<>();// 设置连接工厂template.setConnectionFactory(connectionFactory);// 创建JSON序列化工具GenericJackson2JsonRedisSerializer jsonRedisSerializer = new GenericJackson2JsonRedisSerializer();// 设置Key的序列化template.setKeySerializer(RedisSerializer.string());template.setHashKeySerializer(RedisSerializer.string());// 设置Value的序列化template.setValueSerializer(jsonRedisSerializer);template.setHashValueSerializer(jsonRedisSerializer);// 返回return template;}
}
package com.example.redisdemo;import com.example.redisdemo.User;
import org.junit.jupiter.api.Test;
import org.springframework.beans.factory.annotation.Autowired;
import org.springframework.boot.test.context.SpringBootTest;
import org.springframework.data.redis.core.RedisTemplate;@SpringBootTest
class RedisDemoApplicationTests {@Autowiredprivate RedisTemplate<String, Object> redisTemplate;@Testvoid testSaveUser() {// 写入数据redisTemplate.opsForValue().set("user:100", new User("lucky", 21));// 获取数据User o = (User) redisTemplate.opsForValue().get("user:100");System.out.println("o = " + o);}
}
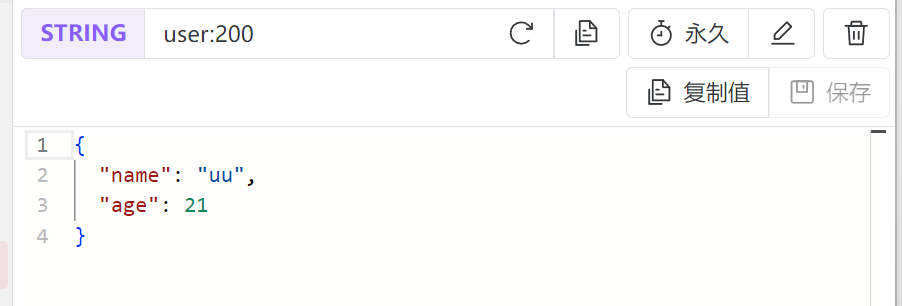
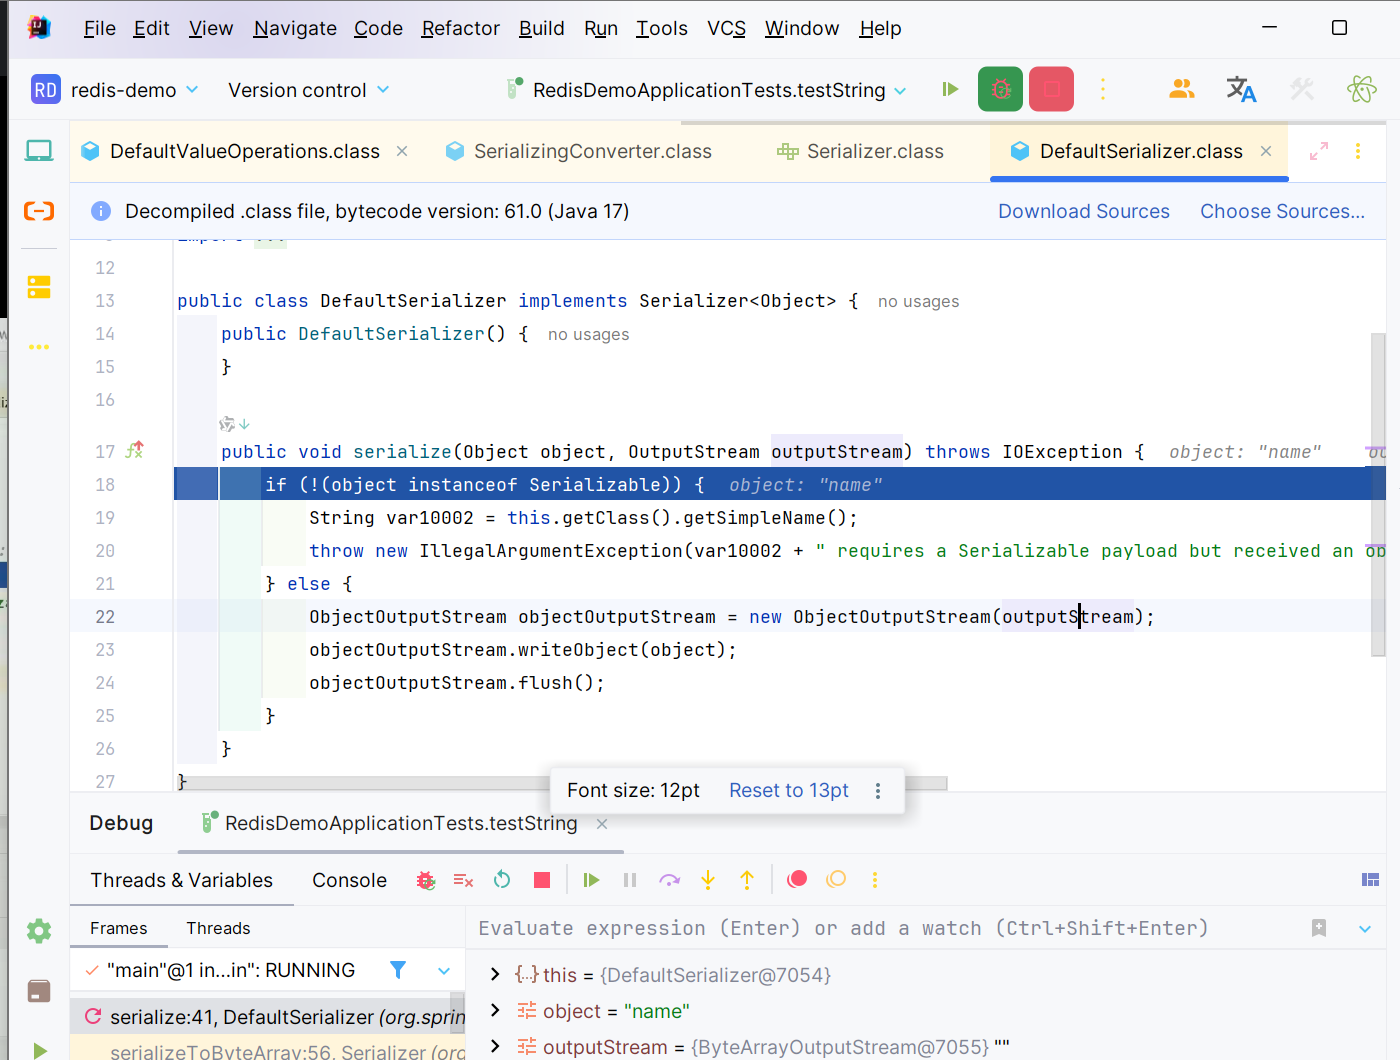
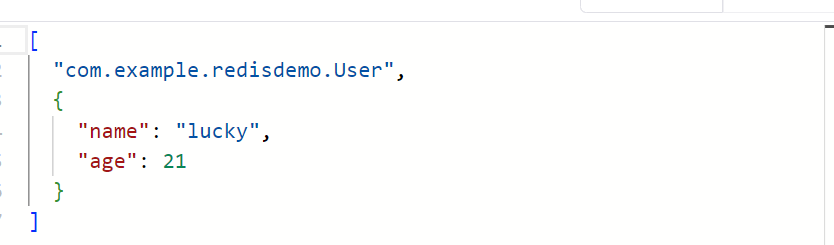
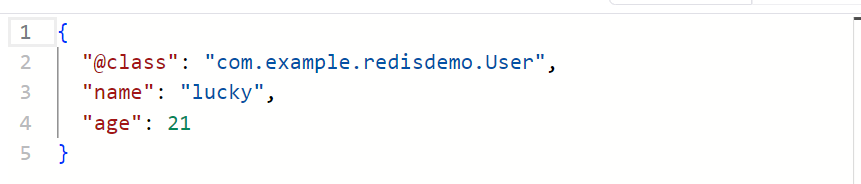
2.2.6不带类信息的序列化
RedisTemplate<String,Object> → JDK序列化 → 包含类信息
StringRedisTemplate + ObjectMapper → JSON序列化 → 只包含属性数据
-
RedisTemplate<String,Object>
该模板默认使用JDK序列化器(JdkSerializationRedisSerializer)
JDK序列化会将对象的完整类信息包含在序列化数据中
因此存储时包含了"@class"字段来标识对象类型 -
StringRedisTemplate
该模板专门用于处理字符串数据
使用手动JSON序列化方式(ObjectMapper)
JSON序列化只序列化对象的属性,不包含类的元数据信息
    @Autowiredprivate StringRedisTemplate stringRedisTemplate;// JSON序列化工具private static final ObjectMapper mapper = new ObjectMapper();
@Test
void testSaveUser1() throws JsonProcessingException {// 创建对象User user = new User("uu", 21);// 手动序列化String json = mapper.writeValueAsString(user);// 写入数据stringRedisTemplate.opsForValue().set("user:200", json);// 获取数据String jsonUser = stringRedisTemplate.opsForValue().get("user:200");// 手动反序列化User user1 = mapper.readValue(jsonUser, User.class);System.out.println("user1 = " + user1);
}