Arduino IDE离线安装ESP8266板管理工具
文章目录
- 概要
- 官网地址
- 开发板管理地址
- 安装ESP8266开发板支持
- 离线安装
- 额外记录NODE启动服务
概要
Arduino IDE离线安装ESP8266板管理工具,在线安装因为网络或者https的问题不能安装
官网地址
Adruino:https://www.arduino.cc/
ESP8266项目:<a href-‘https://github.com/esp8266/’ target=‘_blank’>https://github.com/esp8266/
开发板管理地址
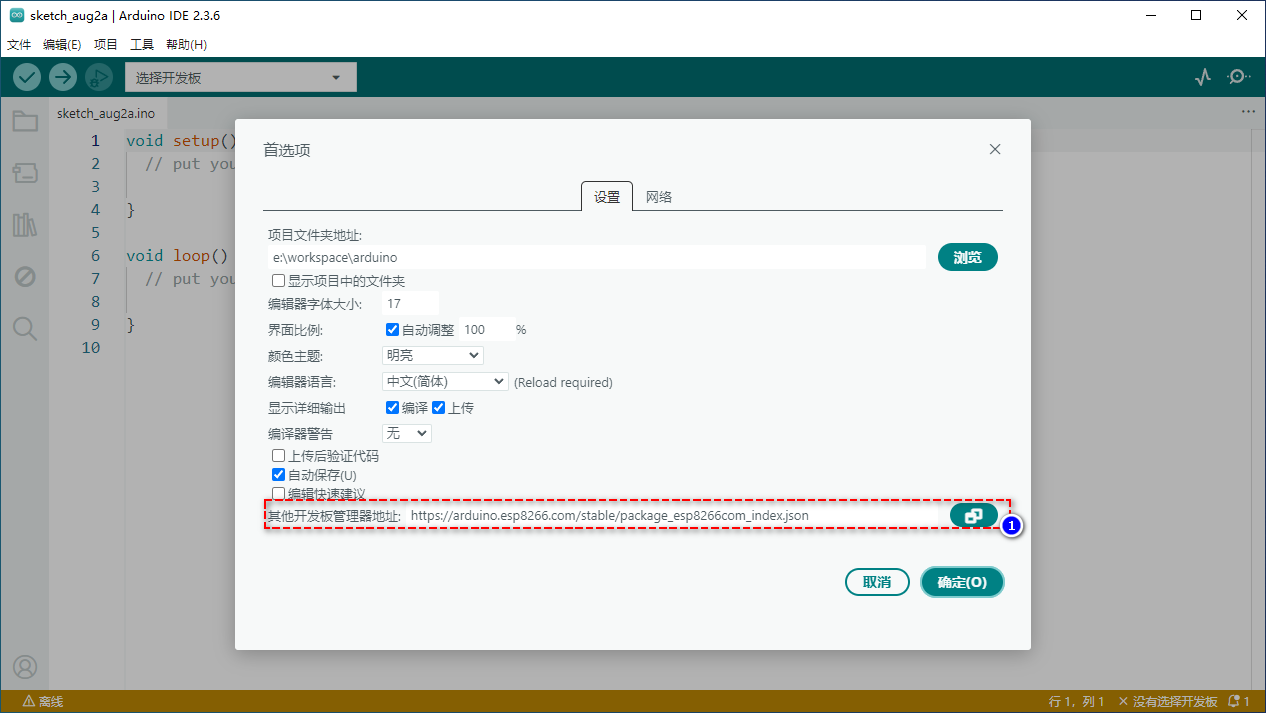
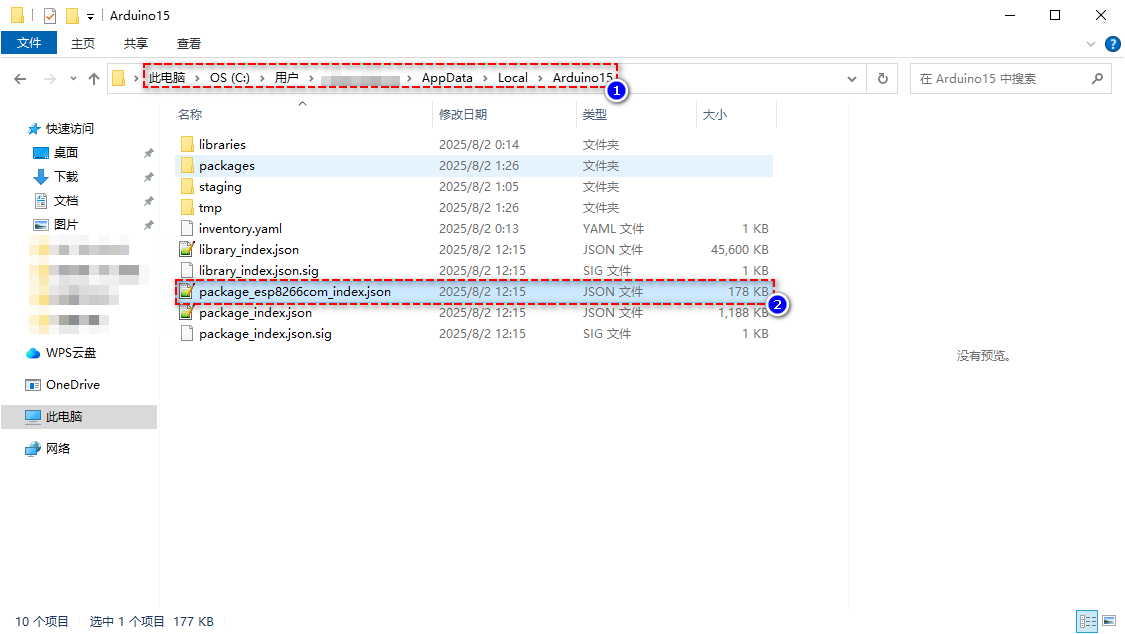
在配置了地址之后,会将该JSON文件下载到本地目录
安装ESP8266开发板支持
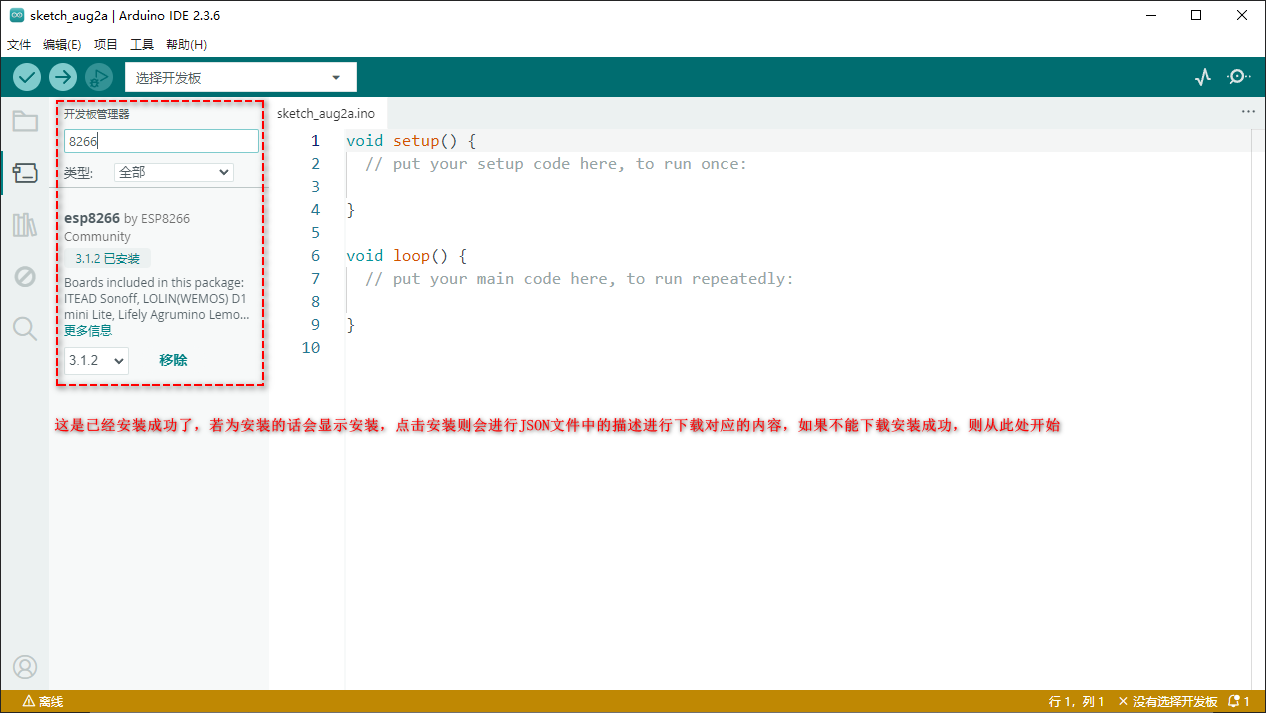
离线安装
按照上面的安装时候的报错,可以看到Arduino IDE去下载了什么文件,然后手动将文件下载保存到本地的任意目录,启动一个HTTP服务,下面是用NODE启动一个简单的HTTP服务
使用npm install http-server -g全局安装http-server
/e/workspace/http-server
$ http-server ./public -p 3000 --cors
Starting up http-server, serving ./publichttp-server version: 14.1.1http-server settings:
CORS: true
Cache: 3600 seconds
Connection Timeout: 120 seconds
Directory Listings: visible
AutoIndex: visible
Serve GZIP Files: false
Serve Brotli Files: false
Default File Extension: noneAvailable on:http://192.168.0.119:3000http://127.0.0.1:3000
Hit CTRL-C to stop the server
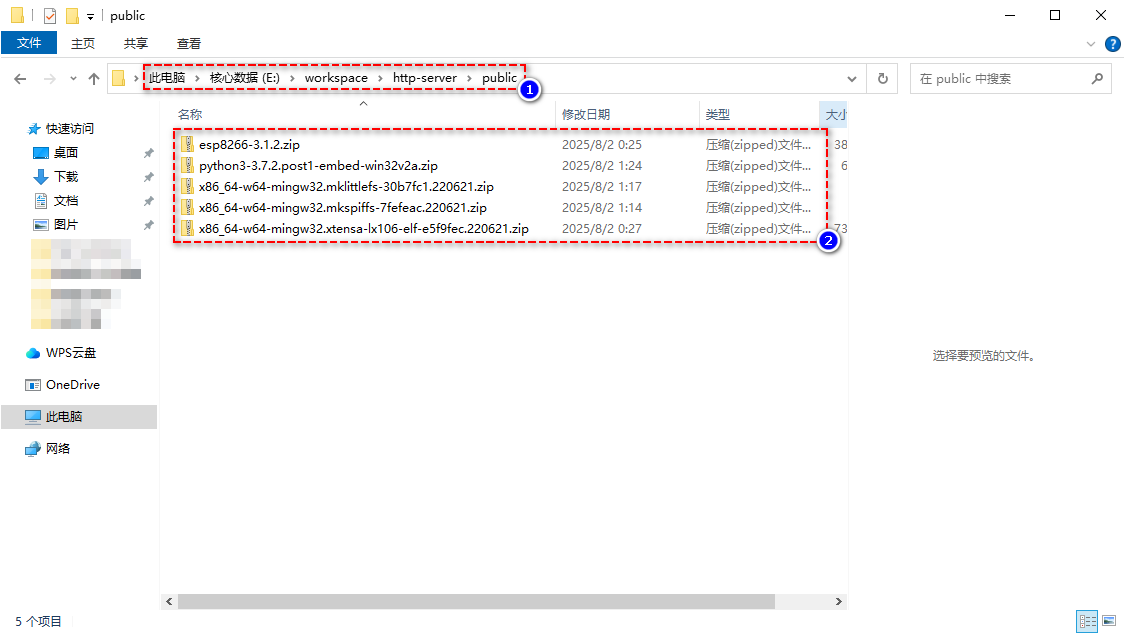
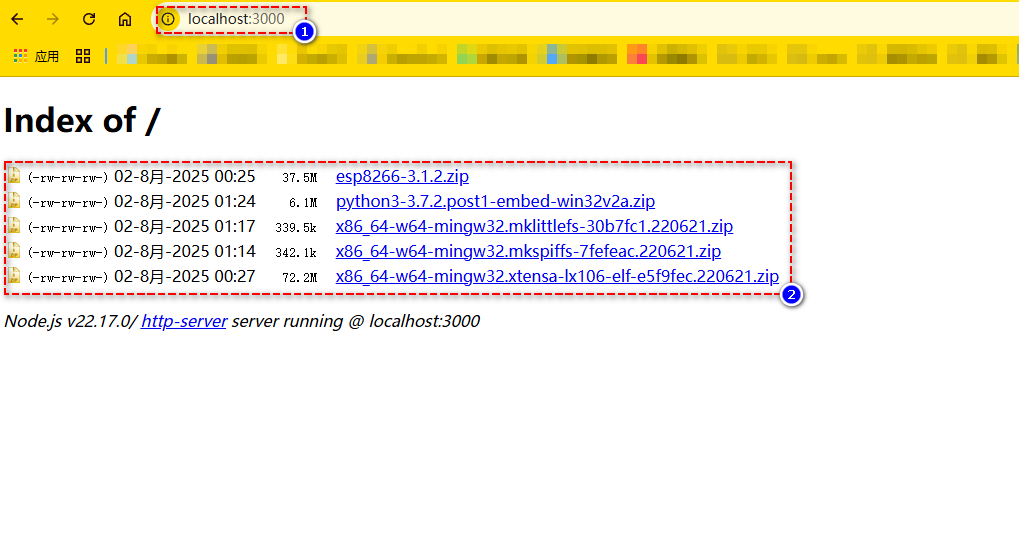
将下载的文件放到/e/workspace/http-server/public下
启动上面的服务,在浏览器中访问
将上面的地址文件下载地址替换掉package_esp8266com_index.json中下载的文件地址
https://github.com/esp8266/Arduino/releases/download/3.1.2/esp8266-3.1.2.zip
https://github.com/earlephilhower/esp-quick-toolchain/releases/download/2.5.0-4/python3-3.7.2.post1-embed-win32v2a.zip
https://github.com/earlephilhower/esp-quick-toolchain/releases/download/3.1.0-gcc10.3/x86_64-w64-mingw32.xtensa-lx106-elf-e5f9fec.220621.zip
https://github.com/earlephilhower/esp-quick-toolchain/releases/download/3.1.0-gcc10.3/x86_64-w64-mingw32.mkspiffs-7fefeac.220621.zip
https://github.com/earlephilhower/esp-quick-toolchain/releases/download/3.1.0-gcc10.3/x86_64-w64-mingw32.mklittlefs-30b7fc1.220621.zip
替换为
http://localhost:3000/esp8266-3.1.2.zip
http://localhost:3000/python3-3.7.2.post1-embed-win32v2a.zip
http://localhost:3000/x86_64-w64-mingw32.xtensa-lx106-elf-e5f9fec.220621.zip
http://localhost:3000/x86_64-w64-mingw32.mkspiffs-7fefeac.220621.zip
http://localhost:3000/x86_64-w64-mingw32.mklittlefs-30b7fc1.220621.zip
然后重启Arduino IDE,继续安装,就能安装成功
额外记录NODE启动服务
可以使用项目方式启动
$ npm init
$ cd http-server
$ mkdir public
$ npm install http-server --save-dev
$ npm install express --save-dev
$ npm install serve-index --save-dev
编辑package.json文件
{"name": "http-server","version": "1.0.0","main": "server.js","scripts": {"serve": "node server.js"},"author": "","license": "ISC","description": "","devDependencies": {"express": "^5.1.0","http-server": "^14.1.1","serve-index": "^1.9.1"}
}
创建server.js文件
const express = require('express');
const path = require('path');
const serveIndex = require('serve-index');const app = express();app.use((req, res, next) => {res.header('Access-Control-Allow-Origin', '*');next();
});app.use(express.static(path.join(__dirname, './public')));app.use('/', serveIndex(path.join(__dirname, './public'), {icons: true,stylesheet: false// stylesheet: './style.css',
}));app.listen(60802, () => {console.log('Server running on http://localhost:60802');
});
启动
$npm run serve> http-server@1.0.0 serve
> node server.jsServer running on http://localhost:60802
