使用OpenCV做个图片校正工具
昨天有位兄台给我发了个文件,是下面这个样子的:
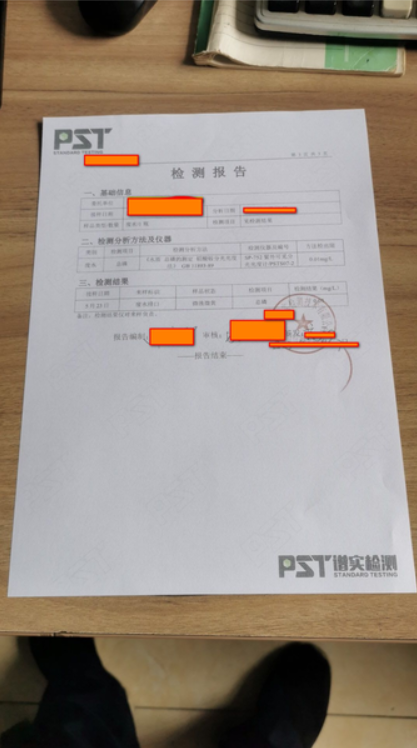
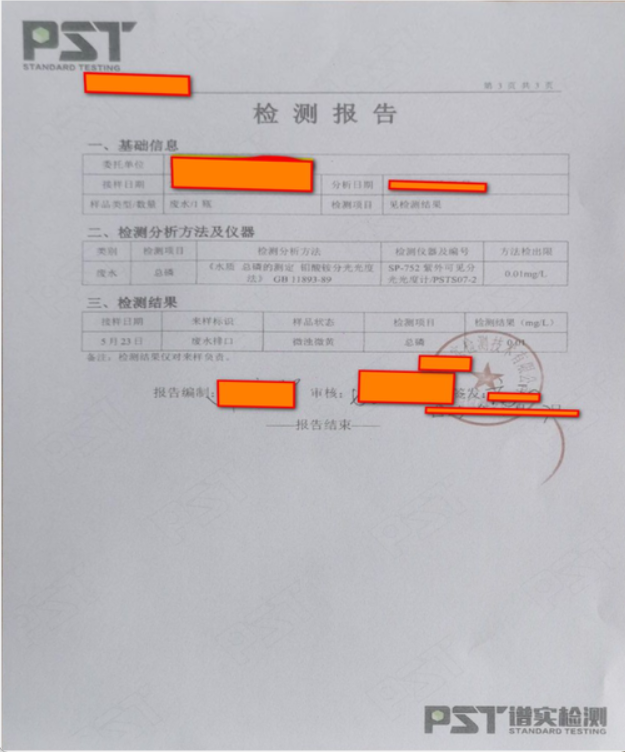
那一双小脚既没有裹成三寸金莲,又没有黑丝,这图片肯定不符合我的要求。我要的是这个样子的好不好:
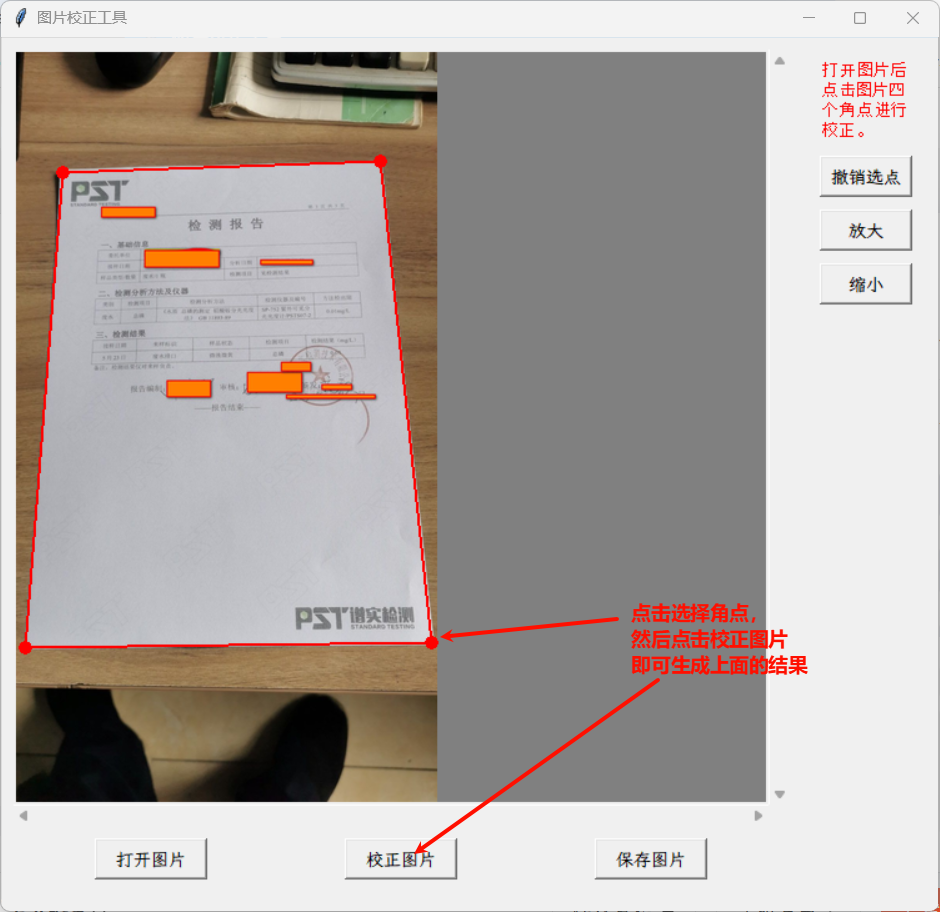
让他拿扫描仪重新给我规规矩矩扫一个发过来?他要能用扫描仪还用手机拍个这个东西给我?好在我有巨蟒与AI,对AI说:给我生成一个Python程序,可以打开一张图片并显示在图片容器中,在图片上点击四个角点,对四个角点先按x位置升序排序,取前两个点为右侧点,后两个点为左侧点,再将左右侧两组点分别按y位置升序排序,前面的为上部点,后面的为下部点,将这四个点按【左上,右上,右下,左下】的秩序构造一个列表。求出这四个点的minX,maxX,minY,maxY,按照[[min_x,min_y],[max_x,min_y],[max_x,max_y],[min_x,max_y]]构造一个列表,将图片中【左上,右上,右下,左下】四个点构成的四边形范围内的图像进行透视变换,变换为由[[min_x,min_y],[max_x,min_y],[max_x,max_y],[min_x,max_y]]这四个点构成的矩形图象。
几乎任意一个AI都能够给出一个基本能够实现功能的代码,然后可以继续对AI增加要求,例如组装出GUI界面、要求使用自己熟悉的工具库、对图片进行缩放显示之类,试着运行一下,自己或者让AI更正一下错误,还不到一小时就可以弄出下面的程序:
# pip install pillow opencv-python numpy
import tkinter as tk
from tkinter import filedialog, messagebox
from PIL import Image, ImageTk
import cv2
import numpy as npclass ImageCorrectorApp:def __init__(self, root):self.root = rootself.root.title("图片校正工具")self.img_canvas_size = 600  # 图片显示容器尺寸self.max_show_size = 600    # 校正后图片最大显示尺寸# 图片相关变量self.original_img = None      # 原始PIL图片self.display_img = None       # 当前显示的PIL图片self.tk_img = None            # Tkinter显示用图片self.scale = 1.0              # 当前缩放比例(放大/缩小按钮用)self.display_scale = 1.0      # 打开图片时的等比例缩放因子self.points = []              # 用户点击的点(用于校正)self.corrected_img = None     # 校正后的PIL图片# 主framemain_frame = tk.Frame(root)main_frame.pack(padx=10, pady=10)# 图片显示区及滚动条img_frame = tk.Frame(main_frame)img_frame.grid(row=0, column=0)self.canvas = tk.Canvas(img_frame, width=self.img_canvas_size, height=self.img_canvas_size, bg='gray')self.canvas.grid(row=0, column=0, sticky='nsew')# 水平和垂直滚动条self.hbar = tk.Scrollbar(img_frame, orient=tk.HORIZONTAL, command=self.canvas.xview)self.hbar.grid(row=1, column=0, sticky='ew')self.vbar = tk.Scrollbar(img_frame, orient=tk.VERTICAL, command=self.canvas.yview)self.vbar.grid(row=0, column=1, sticky='ns')self.canvas.config(xscrollcommand=self.hbar.set, yscrollcommand=self.vbar.set)self.canvas.bind("<Button-1>", self.on_canvas_click)  # 绑定鼠标点击事件# 右侧按钮区right_frame = tk.Frame(main_frame)right_frame.grid(row=0, column=1, sticky='nw', padx=10, rowspan=2)tk.Label(right_frame,text="打开图片后点击图片四个角点进行校正。",fg="red",font=("Arial", 10),justify='left',wraplength=80,  # 80像素宽度自动换行width=12  # 宽度为12个字符).pack(pady=5)tk.Button(right_frame, text="撤销选点", width=8, command=self.reset_point).pack(pady=5)tk.Button(right_frame, text="放大", width=8, command=self.zoom_in).pack(pady=5)tk.Button(right_frame, text="缩小", width=8, command=self.zoom_out).pack(pady=5)# 下方按钮区bottom_frame = tk.Frame(main_frame)bottom_frame.grid(row=1, column=0, sticky='sew', padx=10, pady=10)tk.Button(bottom_frame, text="打开图片", width=10, command=self.open_image).pack(side='left', expand=True, padx=5)tk.Button(bottom_frame, text="校正图片", width=10, command=self.correct_image).pack(side='left', expand=True, padx=5)tk.Button(bottom_frame, text="保存图片", width=10, command=self.save_image).pack(side='left', expand=True, padx=5)def open_image(self):# 打开图片文件,按容器等比例缩放显示file_path = filedialog.askopenfilename(filetypes=[("Image files", "*.jpg *.png *.jpeg")])if not file_path:returnself.original_img = Image.open(file_path).convert("RGB")w, h = self.original_img.sizescale = min(self.img_canvas_size / w, self.img_canvas_size / h, 1.0)self.display_scale = scaleif scale < 1.0:self.display_img = self.original_img.resize((int(w * scale), int(h * scale)), Image.LANCZOS)else:self.display_img = self.original_img.copy()self.scale = 1.0self.points.clear()self.corrected_img = Noneself.show_image()def reset_point(self):# 恢复图片到初始状态,清除点和校正结果if self.original_img is None:returnif len(self.points) > 0:if len(self.points) == 4 and self.corrected_img is not None:w, h = self.original_img.sizescale = min(self.img_canvas_size / w, self.img_canvas_size / h, 1.0)self.display_scale = scaleif scale < 1.0:self.display_img = self.original_img.resize((int(w * scale), int(h * scale)), Image.LANCZOS)else:self.display_img = self.original_img.copy()self.scale = 1.0self.corrected_img = None# 清除保存的用户选点中的最后一点self.points.pop()self.show_image()def show_image(self):# 在canvas上显示图片,并绘制用户点击的点和线if self.display_img is None:returnw, h = self.display_img.sizeself.tk_img = ImageTk.PhotoImage(self.display_img)self.canvas.config(scrollregion=(0, 0, w, h))self.canvas.delete("all")self.canvas.create_image(0, 0, anchor='nw', image=self.tk_img)# 绘制点和线for i, (x, y) in enumerate(self.points):self.canvas.create_oval(x-5, y-5, x+5, y+5, fill='red', outline='red')if i > 0:x0, y0 = self.points[i-1]self.canvas.create_line(x0, y0, x, y, fill='red', width=2)if len(self.points) == 4:x0, y0 = self.points[0]x3, y3 = self.points[3]self.canvas.create_line(x3, y3, x0, y0, fill='red', width=2)def zoom_in(self):# 放大图片,每次放大10%if self.display_img is None:returnself.scale *= 1.1w, h = self.original_img.sizescale = self.display_scale * self.scaleself.display_img = self.original_img.resize((int(w * scale), int(h * scale)), Image.LANCZOS)# 点坐标同步放大self.points = [(int(x*1.1), int(y*1.1)) for (x, y) in self.points]self.show_image()def zoom_out(self):# 缩小图片,每次缩小10%if self.display_img is None:returnself.scale /= 1.1w, h = self.original_img.sizescale = self.display_scale * self.scaleself.display_img = self.original_img.resize((int(w * scale), int(h * scale)), Image.LANCZOS)# 点坐标同步缩小self.points = [(int(x/1.1), int(y/1.1)) for (x, y) in self.points]self.show_image()def on_canvas_click(self, event):# 记录用户点击的点,最多4个if self.display_img is None or len(self.points) >= 4:return# 获取点击位置(考虑滚动条偏移)x = self.canvas.canvasx(event.x)y = self.canvas.canvasy(event.y)self.points.append((int(x), int(y)))self.show_image()def correct_image(self):# 校正图片,将四边形区域映射为矩形if self.original_img is None or len(self.points) != 4:messagebox.showwarning("提示", "请先选择图片并点击4个点")return# 将显示坐标还原为原图坐标pts = np.array(self.points, dtype=np.float32) / (self.display_scale * self.scale)# 1. 按x排序,分左右两组idx = np.argsort(pts[:, 0])left_pts = pts[idx[:2]]right_pts = pts[idx[2:]]# 2. 左右组分别按y排序left_pts = left_pts[np.argsort(left_pts[:, 1])]right_pts = right_pts[np.argsort(right_pts[:, 1])]# 3. 按左上、右上、右下、左下排列原始点位ordered_src = np.array([left_pts[0],   # 左上right_pts[0],  # 右上right_pts[1],  # 右下left_pts[1],   # 左下], dtype=np.float32)# 4. 目标点直接用x/y的min/max,按左上、右上、右下、左下排列min_x = np.min(pts[:, 0])max_x = np.max(pts[:, 0])min_y = np.min(pts[:, 1])max_y = np.max(pts[:, 1])ordered_dst = np.array([[min_x, min_y],  # 左上[max_x, min_y],  # 右上[max_x, max_y],  # 右下[min_x, max_y],  # 左下], dtype=np.float32)# 透视变换img_cv = cv2.cvtColor(np.array(self.original_img), cv2.COLOR_RGB2BGR)# 计算透视变换矩阵M = cv2.getPerspectiveTransform(ordered_src, ordered_dst)# 应用透视变换warped = cv2.warpPerspective(img_cv, M, (self.original_img.width, self.original_img.height))# 裁剪到目标矩形区域cropped = warped[int(min_y):int(max_y), int(min_x):int(max_x)]warped_pil = Image.fromarray(cv2.cvtColor(cropped, cv2.COLOR_BGR2RGB))self.corrected_img = warped_pil# 校正结果缩放显示show_w, show_h = warped_pil.sizescale = min(self.max_show_size / show_w, self.max_show_size / show_h, 1.0)if scale < 1.0:warped_pil = warped_pil.resize((int(show_w * scale), int(show_h * scale)), Image.LANCZOS)# 弹窗显示校正后图片win = tk.Toplevel(self.root)win.title("校正后图片")tk_img = ImageTk.PhotoImage(warped_pil)label = tk.Label(win, image=tk_img)label.image = tk_imglabel.pack()def save_image(self):# 保存校正后的图片if self.corrected_img is None:messagebox.showwarning("提示", "没有可保存的校正图片")returnfile_path = filedialog.asksaveasfilename(defaultextension=".png", filetypes=[("PNG文件", "*.png")])if file_path:self.corrected_img.save(file_path, "PNG")messagebox.showinfo("保存成功", f"图片已保存到\n{file_path}")if __name__ == "__main__":root = tk.Tk()# 设置窗体初始位置居中,距上100pxscreen_w = root.winfo_screenwidth()screen_h = root.winfo_screenheight()win_w = 750win_h = 700x = (screen_w - win_w) // 2y = 50root.geometry(f"{win_w}x{win_h}+{x}+{y}")app = ImageCorrectorApp(root)root.mainloop()
AI为代码生成了注释,其实最关键的就是提示词里提到的构造出原始四边形与目标图像矩形的角点一一映射的思路,至于透视变换的矩阵运算,可以直接调用OpenCV的API接口。程序运行界面如下:
AI时代就是好,真正做到了让人基本上只负责构思与理解AI代码的逻辑以及修改一些小错误,敲字和记忆知识都由AI负责,没有AI上面的程序恐怕要花掉我半天还不一定有这么完善。
附:使用命令行将pip安装源设置为阿里云镜像:
pip config set global.index-url https://mirrors.aliyun.com/pypi/simple
pip config set install.trusted-host mirrors.aliyun.com
