文本溢出时显示省略号,并在鼠标移入文本时显示 tooltip全内容
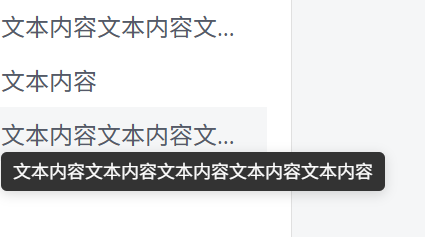
情景一:单行文本溢出,实现效果如下(设置了cursor:pointer;小手,一截图就消失了,正常是能看到的)。
<script setup>
const arr = [{ id: 'math-1', name: '文本内容文本内容文本内容' },{ id: 'math-2', name: '文本内容' },{ id: 'math-2', name: '文本内容文本内容文本内容文本内容文本内容' }]
// 鼠标移入教材时,判断是否超出宽度,超出显示 tooltip
function showTooltip(event, text) {const target = event.target;if (target.scrollWidth > 160) {tooltip.value.visible = true;tooltip.value.text = text;const rect = target.getBoundingClientRect();tooltip.value.style = {position: 'fixed',top: rect.bottom + 'px',left: rect.left + 'px',zIndex: '9999',maxWidth: '300px'}}
}
// 鼠标移出教材时隐藏 tooltip
function hideTooltip() {tooltip.value.visible = false;
}
</script><template>
<ul class="textbooks"><li v-for="item in arr" :key="arr.id"><span class="textbook-name" @mouseenter="showTooltip($event, item.name)"@mouseleave="hideTooltip">{{ item.name }}</span></li>
</ul><!-- tooltip -->
<div v-if="tooltip.visible" class="custom-tooltip" :style="tooltip.style"> {{tooltip.text }}
</div>
</template><style scoped lang="scss">
.textbooks {list-style: none;margin: 8px 0;padding: 0;li {font-size: 16px;position: relative;cursor: pointer;color: #555a68;display: flex;align-items: center;padding: 6px 2px;.textbook-name {// 单行文本超出省略display: inline-block;max-width: 160px;overflow: hidden;text-overflow: ellipsis;white-space: nowrap;vertical-align: middle;cursor: pointer; }}
}
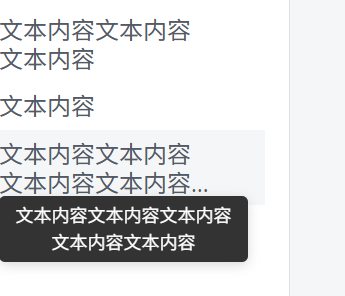
</style>情景:两行文本溢出,效果如图所下。
<script setup>
const arr =  [{ id: 'math-1', name: '文本内容文本内容文本内容' },{ id: 'math-2', name: '文本内容' },{ id: 'math-2', name: '文本内容文本内容文本内容文本内容文本内容' }]
// 鼠标移入教材时,判断是否超出宽度,超出显示 tooltip
function showTooltip(event, text) {const target = event.target;const isOverflow = target.scrollHeight > target.clientHeight + 1if (isOverflow) {tooltip.value.visible = true;tooltip.value.text = text;const rect = target.getBoundingClientRect();tooltip.value.style = {position: 'fixed',top: rect.bottom + 'px',left: rect.left + 'px',zIndex: '9999',maxWidth: '150px'}}
}
// 鼠标移出教材时隐藏 tooltip
function hideTooltip() {tooltip.value.visible = false;
}
</script><template>
<ul class="textbooks"><li v-for="item in arr" :key="arr.id"><span class="textbook-name" @mouseenter="showTooltip($event, item.name)"@mouseleave="hideTooltip">{{ item.name }}</span></li>
</ul><!-- tooltip -->
<div v-if="tooltip.visible" class="custom-tooltip" :style="tooltip.style"> {{tooltip.text }}
</div>
</template><style scoped lang="scss">
.textbooks {list-style: none;margin: 8px 0;padding: 0;li {font-size: 16px;position: relative;cursor: pointer;color: #555a68;display: flex;align-items: center;padding: 6px 2px;.textbook-name {//两行文本省略width: 140px;line-height: 1.2; //行与行之间的间隔display: -webkit-box; // 将元素设置为WebKit内核的弹性盒子模型-webkit-box-orient: vertical; // 设置弹性盒子的排列方向为垂直-webkit-line-clamp: 2; //限制显示的文本行数overflow: hidden; // 隐藏超出容器范围的内容line-clamp: 2; //兼容设置box-orient: vertical;text-align: left;        }}
}
</style>
🔧 scrollHeight vs clientHeight 是什么?
| 属性名 | 意义 | 举例 |
|---|---|---|
clientHeight | 元素实际可见区域的高度(不包含滚动区域) | 比如你的元素设置了固定高度 40px,那 clientHeight 就是 40 |
scrollHeight | 元素实际内容的高度(即使超出了可见区域也会计算进去) | 如果内容高度是 60px,那么 scrollHeight 就是 60 |
🧠 所以 scrollHeight > clientHeight 的意思是:元素的内容高度超出了它的可视区域(说明内容被截断了,出现了省略号或需要滚动)。