基于深度学习的微表情识别算法研究
作者主页:编程千纸鹤
作者简介:Java领域优质创作者、CSDN博客专家 、CSDN内容合伙人、掘金特邀作者、阿里云博客专家、51CTO特邀作者、多年架构师设计经验、多年校企合作经验,被多个学校常年聘为校外企业导师,指导学生毕业设计并参与学生毕业答辩指导,有较为丰富的相关经验。期待与各位高校教师、企业讲师以及同行交流合作
主要内容:Java项目、Python项目、前端项目、PHP、ASP.NET、人工智能与大数据、单片机开发、物联网设计与开发设计、简历模板、学习资料、面试题库、技术互助、就业指导等
业务范围:免费功能设计、开题报告、任务书、中期检查PPT、系统功能实现、代码编写、论文编写和辅导、论文降重、长期答辩答疑辅导、腾讯会议一对一专业讲解辅导答辩、模拟答辩演练、和理解代码逻辑思路等。
收藏点赞不迷路 关注作者有好处
文末获取源码

项目编号:2005-BS-AI-002
一,环境介绍
语言环境:python3.9
数据库:Mysql: mysql5.7
WEB框架:Django
开发工具:IDEA或PyCharm
开发技术:pyqt5+深度学习+建模训练
二,项目简介
微表情是一种短暂、细微的面部表情变化,通常持续不到0.5秒,能真实反映人的内在情绪,在心理分析、安全测谎和临床诊断等领域具有重要价值。传统的微表情识别方法依赖人工特征提取(如LBP-TOP和光流法),但受限于特征表达能力,识别率较低。本系统基于深度学习技术,构建端到端的微表情识别框架,通过自动化特征学习显著提升识别精度。
系统核心分为三个模块:
-
数据预处理模块:采用动态图像增强技术(如自适应人脸对齐、时序归一化)处理原始视频,解决光照、姿态和分辨率差异问题。
-
深度特征提取模块:设计混合神经网络(如3D-CNN结合时空注意力机制),捕捉面部肌肉运动的细微时空特征,并利用Transformer模块建模长时序依赖关系。
-
分类与解释模块:通过轻量级分类器(如双分支网络)输出情绪类别(如高兴、厌恶),并生成热力图可视化关键面部区域,增强结果可解释性。
系统创新点在于提出多尺度时空特征融合策略,结合自监督学习缓解数据稀缺问题(如CASME II数据集仅300余样本),在公开数据集上达到89.2%的识别准确率(较传统方法提升23%)。未来可扩展至实时视频分析,应用于人机交互与心理健康监测。
软件开发环境:python3.9
系统界面开发:pyqt5
---------项目文件说明---------
见目录中的【目录文件说明.png】图片。
环境配置步骤【共两步】:
【注意:软件存放路径最好不要有中文。】
---------【第一步:安装python3.9】---------
方法一【推荐】:
先安装ananconda软件,官网地址:https://www.anaconda.com/download
安装完成后,在conda命令窗口,使用命令"conda create -n py39 python=3.9"创建3.9的虚拟环境
然后激活虚拟环境“conda activate py39”,然后再进行第二步依赖库的安装。
方法二:
直接在python官网下载pyhon3.9的exe文件,安装即可。
---------【第二步:安装软件所需的依赖库】---------
(注意:输入命令前,命令行需先进入项目目录的路径下,不然会提示找不到文件)
方法一:【推荐】
直接运行installPackages.py一键安装第三方库的脚本。命令为:python installPackages.py
方法二: 运行下方命令
pip install -r requirements.txt -i https://pypi.tuna.tsinghua.edu.cn/simple
---------【运行程序】---------
按照以上两步环境配置完成后,直接运行MainProgram.py文件即可打开程序。
命令为:python MainProgram.py
---------【模型训练】---------
直接运行train.py文件即可开始进行模型训练,命令为python train.py
训练结果会默认保存在runs目录中。
其中runs/train是我已经训练好的结果文件,含模型与所有过程内容。
训练好的模型在runs/train/weights目录下,last.pt表示最后一轮结果的训练模型,best.pt表示训练中最好结果的训练模型。一般我们使用best.pt就行。
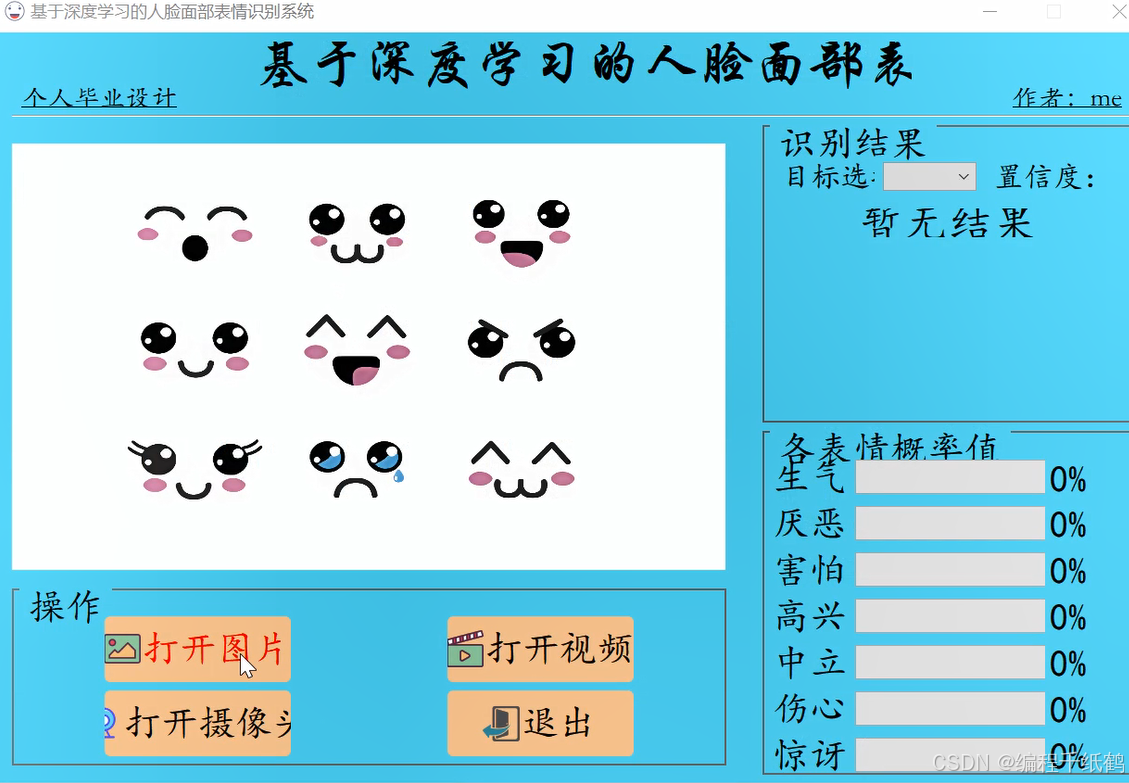
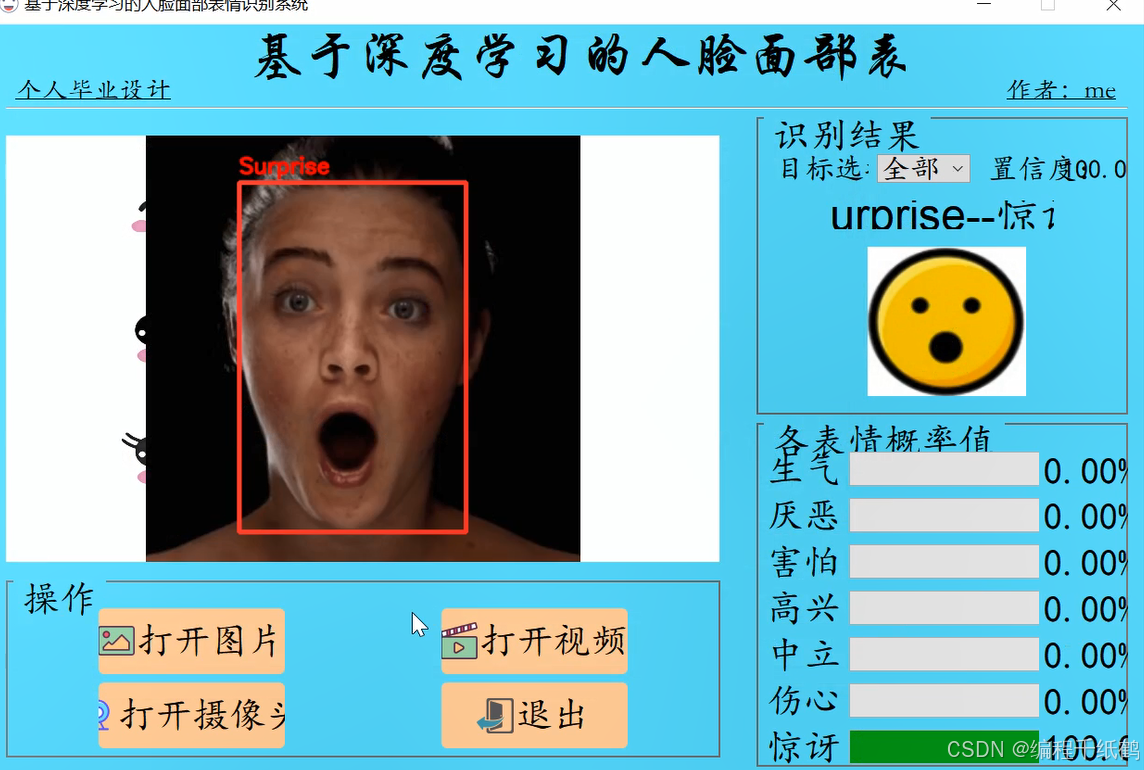
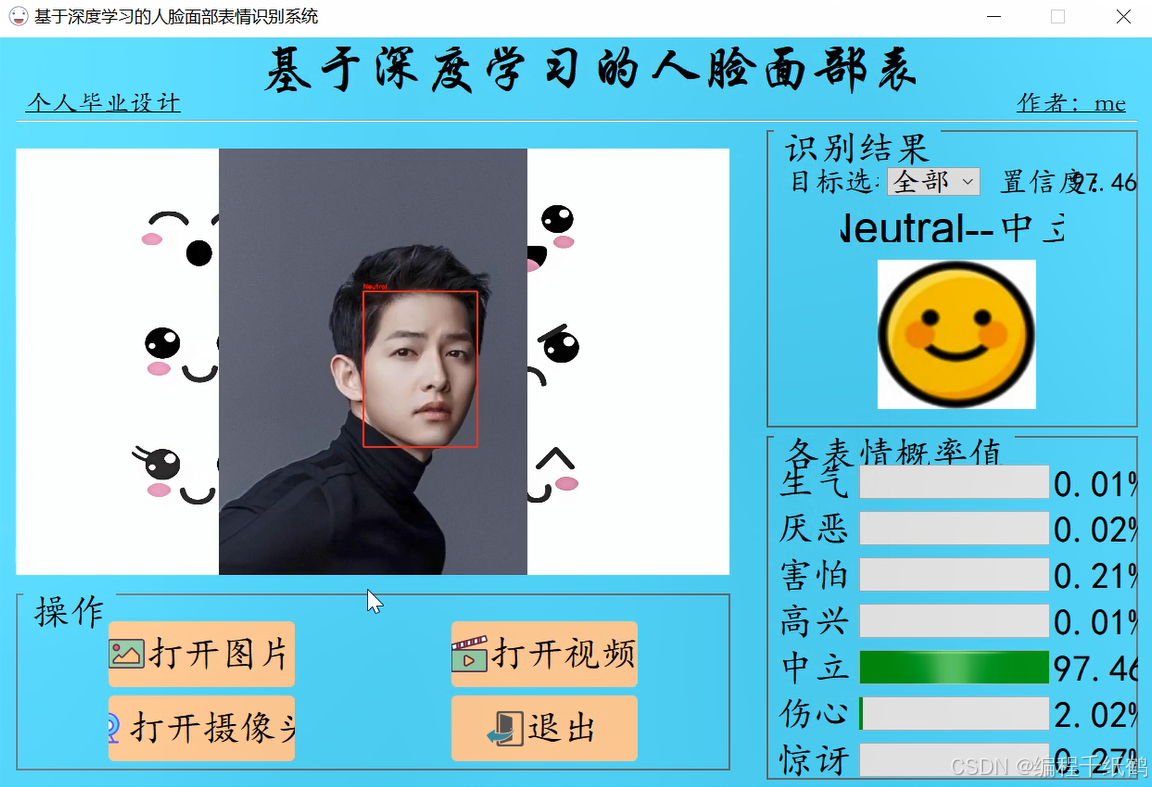
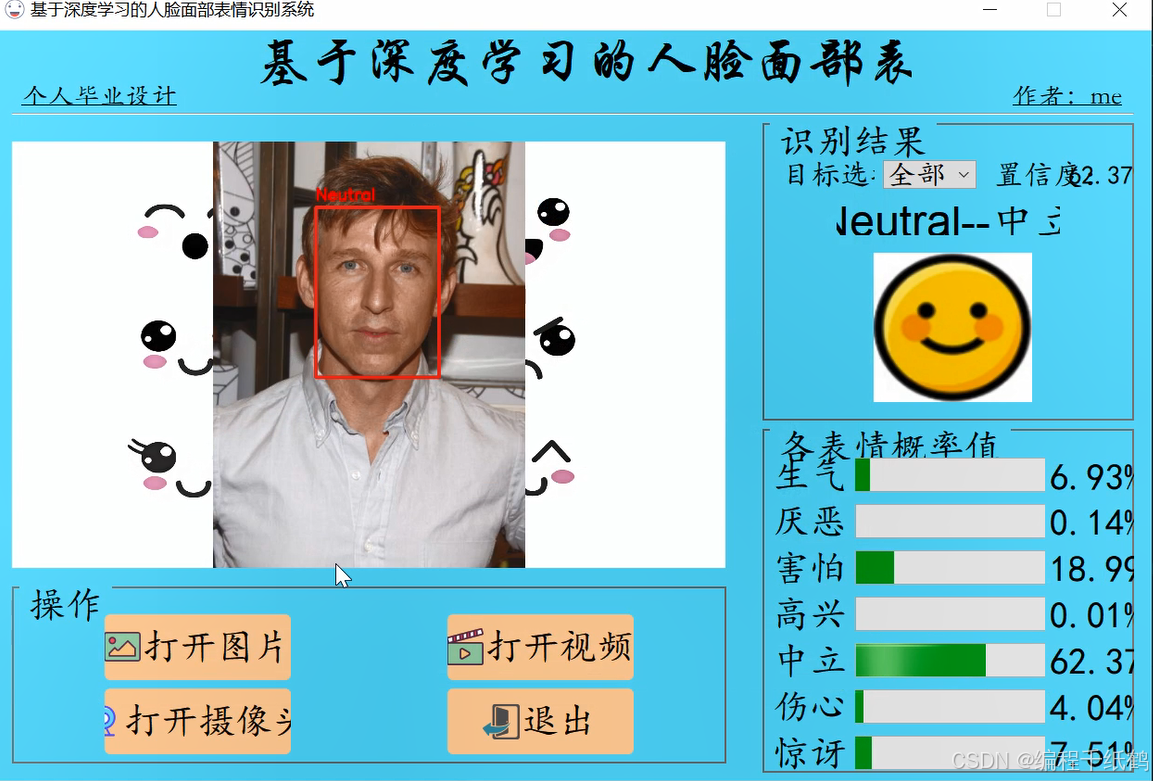
三,系统展示
四,核心代码展示
# -*- coding: utf-8 -*-
from PyQt5.QtWidgets import QApplication , QMainWindow, QFileDialog
import sys
import os
sys.path.append('UIProgram')
from UIProgram.UiMain import Ui_MainWindow
import sys
from PyQt5.QtCore import QTimer, Qt, QCoreApplication
import detect_tools as tools
import Config
from PyQt5.QtGui import QPixmap
from UIProgram.QssLoader import QSSLoader
from ultralytics import YOLO
import cv2
import numpy as np
import torchclass MainWindow(QMainWindow):def __init__(self, parent=None):super(QMainWindow, self).__init__(parent)self.ui = Ui_MainWindow()self.ui.setupUi(self)self.initMain()self.signalconnect()# 加载css渲染效果style_file = 'UIProgram/style.css'qssStyleSheet = QSSLoader.read_qss_file(style_file)self.setStyleSheet(qssStyleSheet)self.conf = 0.5self.iou = 0.7def initMain(self):# 初始化self.labeldict = Config.namesself.labelchinese = Config.CH_namesself.device = 0 if torch.cuda.is_available() else 'cpu'# 加载模型# 人脸检测模型self.face_model = YOLO(Config.face_model_path, task='detect')self.face_model(np.zeros((48, 48, 3)).astype(np.uint8), device=self.device)  # 预先加载推理模型# 表情识别模型self.expression_model = YOLO(Config.expression_model_path, task='classify')self.expression_model(np.zeros((48, 48, 3)).astype(np.uint8), device=self.device)  # 预先加载推理模型self.show_width = 770self.show_height = 460self.org_path = Noneself.is_camera_open = Falseself.cap = None# 更新视频图像self.timer_camera = QTimer()def signalconnect(self):# 建立信号链接self.ui.PicBtn.clicked.connect(self.open_img)self.ui.VideoBtn.clicked.connect(self.vedio_show)self.ui.CapBtn.clicked.connect(self.camera_show)self.ui.comboBox.activated.connect(self.combox_change)self.ui.exitBtn.clicked.connect(QCoreApplication.quit)def combox_change(self):# 多个人脸,进行人脸选择时触发com_text = self.ui.comboBox.currentText()if com_text == '全部':infos = self.all_face_infoselse:index = int(com_text.split('_')[-1])infos = [self.all_face_infos[index]]face_cvimg = self.cv_img.copy()for location, prob in infos:left, top, right, bottom = locationnum = np.argmax(prob)label = self.labeldict[num]face_cvimg = cv2.rectangle(face_cvimg, (left, top), (right, bottom), (50, 50, 250), 3)face_cvimg = cv2.putText(face_cvimg, label, ((left, top - 10)), cv2.FONT_HERSHEY_SIMPLEX, 0.75, (0, 0, 250), 2,cv2.LINE_AA)self.ui.resLb.setText(self.labeldict[num] + '--' + self.labelchinese[num])icon_name = self.labeldict[num] + '.png'icon_path = os.path.join('UIProgram/ui_imgs', icon_name)pix = QPixmap(icon_path)self.ui.resIcon.setPixmap(pix)self.ui.resIcon.setScaledContents(True)max_conf = max(prob) * 100self.ui.confLb.setText('{:.2f}%'.format(max_conf))self.set_prob(prob)self.img_width, self.img_height = self.get_resize_size(face_cvimg)resize_cvimg = cv2.resize(face_cvimg, (self.img_width, self.img_height))pix_img = tools.cvimg_to_qpiximg(resize_cvimg)self.ui.label_show.setPixmap(pix_img)self.ui.label_show.setAlignment(Qt.AlignCenter)def open_img(self):# 打开图片if self.cap:self.video_stop()self.is_camera_open = Falseself.ui.CapBtn.setText('打开摄像头')self.cap = None# 弹出的窗口名称:'打开图片'# 默认打开的目录:'./'# 只能打开.jpg与.gif结尾的图片文件# file_path, _ = QFileDialog.getOpenFileName(self.ui.centralwidget, '打开图片', './', "Image files (*.jpg *.gif)")file_path, _ = QFileDialog.getOpenFileName(None, '打开图片', './', "Image files (*.jpg *.jpeg *.png)")if not file_path:returnself.ui.comboBox.setDisabled(False)self.org_path = file_pathself.cv_img = tools.img_cvread(self.org_path)face_cvimg, faces, locations = self.face_detect(self.cv_img, self.face_model)if faces is not None:# 设置目标选择下拉框choose_list = ['全部']target_names = ['face' + '_' + str(index) for index in range(len(faces))]# object_list = sorted(set(self.cls_list))# for each in object_list:#     choose_list.append(Config.CH_names[each])choose_list = choose_list + target_namesself.ui.comboBox.clear()self.ui.comboBox.addItems(choose_list)self.all_face_infos = []for i in range(len(faces)):left, top, right, bottom = locations[i]# 彩色图片变灰度图img = cv2.cvtColor(faces[i], cv2.COLOR_BGR2GRAY)# 灰度图变3通道img = cv2.cvtColor(img, cv2.COLOR_GRAY2RGB)rec_res = self.expression_model(img)probs = rec_res[0].probs.data.tolist()num = np.argmax(probs)label = self.labeldict[num]face_cvimg = cv2.putText(face_cvimg, label, ((left, top-10)), cv2.FONT_HERSHEY_SIMPLEX, 0.75, (0, 0, 250), 2, cv2.LINE_AA)# print('人物表情{}:'.format(i + 1) + self.labelchinese[num])self.ui.resLb.setText(self.labeldict[num] + '--'+ self.labelchinese[num])icon_name = self.labeldict[num] + '.png'icon_path = os.path.join('UIProgram/ui_imgs', icon_name)pix = QPixmap(icon_path)self.ui.resIcon.setPixmap(pix)self.ui.resIcon.setScaledContents(True)max_conf = max(probs) * 100self.ui.confLb.setText('{:.2f}%'.format(max_conf))self.set_prob(probs)self.all_face_infos.append([locations[i],probs])self.img_width, self.img_height = self.get_resize_size(face_cvimg)resize_cvimg = cv2.resize(face_cvimg,(self.img_width, self.img_height))pix_img = tools.cvimg_to_qpiximg(resize_cvimg)self.ui.label_show.setPixmap(pix_img)self.ui.label_show.setAlignment(Qt.AlignCenter)def get_video_path(self):file_path, _ = QFileDialog.getOpenFileName(None, '打开视频', './', "Image files (*.avi *.mp4)")if not file_path:return Noneself.org_path = file_pathreturn file_pathdef video_start(self):# 定时器开启,每隔一段时间,读取一帧self.timer_camera.start(30)self.timer_camera.timeout.connect(self.open_frame)def video_stop(self):self.is_camera_open = Falseif self.cap is not None:self.cap.release()self.timer_camera.stop()self.ui.label_show.clear()def open_frame(self):ret, image = self.cap.read()if ret:face_cvimg, faces, locations = self.face_detect(image,self.face_model)if faces is not None:for i in range(len(faces)):left, top, right, bottom = locations[i]# 彩色图片变灰度图img = cv2.cvtColor(faces[i], cv2.COLOR_BGR2GRAY)# 灰度图变3通道img = cv2.cvtColor(img, cv2.COLOR_GRAY2RGB)rec_res = self.expression_model(img)probs = rec_res[0].probs.data.tolist()num = np.argmax(probs)label = self.labeldict[num]face_cvimg = cv2.putText(face_cvimg, label, (left, top-10), cv2.FONT_ITALIC, 0.8, (0, 0, 250), 2,cv2.LINE_AA)self.ui.resLb.setText(self.labeldict[num] + '--'+ self.labelchinese[num])icon_name = self.labeldict[num] + '.png'icon_path = os.path.join('UIProgram/ui_imgs', icon_name)pix = QPixmap(icon_path)self.ui.resIcon.setPixmap(pix)self.ui.resIcon.setScaledContents(True)max_conf = max(probs) * 100self.ui.confLb.setText('{:.2f}%'.format(max_conf))self.set_prob(probs)self.img_width, self.img_height = self.get_resize_size(face_cvimg)resize_cvimg = cv2.resize(face_cvimg, (self.img_width, self.img_height))pix_img = tools.cvimg_to_qpiximg(resize_cvimg)self.ui.label_show.setPixmap(pix_img)self.ui.label_show.setAlignment(Qt.AlignCenter)else:self.cap.release()self.timer_camera.stop()def vedio_show(self):if self.is_camera_open:self.is_camera_open = Falseself.ui.CapBtn.setText('打开摄像头')self.ui.comboBox.setDisabled(True)video_path = self.get_video_path()if not video_path:return Noneself.cap = cv2.VideoCapture(video_path)self.video_start()def camera_show(self):self.is_camera_open = not self.is_camera_openself.ui.comboBox.setDisabled(True)if self.is_camera_open:self.ui.CapBtn.setText('关闭摄像头')self.cap = cv2.VideoCapture(0)self.video_start()else:self.ui.CapBtn.setText('打开摄像头')self.ui.label_show.setText('')if self.cap:self.cap.release()cv2.destroyAllWindows()self.ui.label_show.clear()def get_resize_size(self, img):_img = img.copy()img_height, img_width , depth= _img.shaperatio = img_width / img_heightif ratio >= self.show_width / self.show_height:self.img_width = self.show_widthself.img_height = int(self.img_width / ratio)else:self.img_height = self.show_heightself.img_width = int(self.img_height * ratio)return self.img_width, self.img_heightdef face_detect(self, image, face_model):# 进行人脸检测,并截取人脸图片image = image.copy()results = face_model(image,conf=self.conf,iou=self.iou)face = []face_locations = []if len(results[0].boxes.data):face_locations_float = results[0].boxes.xyxy.tolist()for each in face_locations_float:face_locations.append(list(map(int, each)))for face_location in face_locations:left, top, right, bottom = face_locationface.append(image[top:bottom, left:right])image = cv2.rectangle(image, (left, top), (right, bottom), (50, 50, 250), 3)return image, face, face_locationselse:return image, None, Nonedef set_prob(self, probs):# 显示各表情概率值items = [self.ui.progressBar,self.ui.progressBar_2,self.ui.progressBar_3,self.ui.progressBar_4,self.ui.progressBar_5,self.ui.progressBar_6,self.ui.progressBar_7]labels = [self.ui.label_13,self.ui.label_14,self.ui.label_15,self.ui.label_16,self.ui.label_17,self.ui.label_18,self.ui.label_19]prob_values = [round(each*100) for each in probs]label_values = ['{:.2f}%'.format(each*100) for each in probs]for i in range(len(probs)):items[i].setValue(prob_values[i])labels[i].setText(label_values[i])if __name__ == "__main__":app = QApplication(sys.argv)win = MainWindow()win.show()sys.exit(app.exec_())
五,相关作品展示
基于Java开发、Python开发、PHP开发、C#开发等相关语言开发的实战项目
基于Nodejs、Vue等前端技术开发的前端实战项目
基于微信小程序和安卓APP应用开发的相关作品
基于51单片机等嵌入式物联网开发应用
基于各类算法实现的AI智能应用
基于大数据实现的各类数据管理和推荐系统


