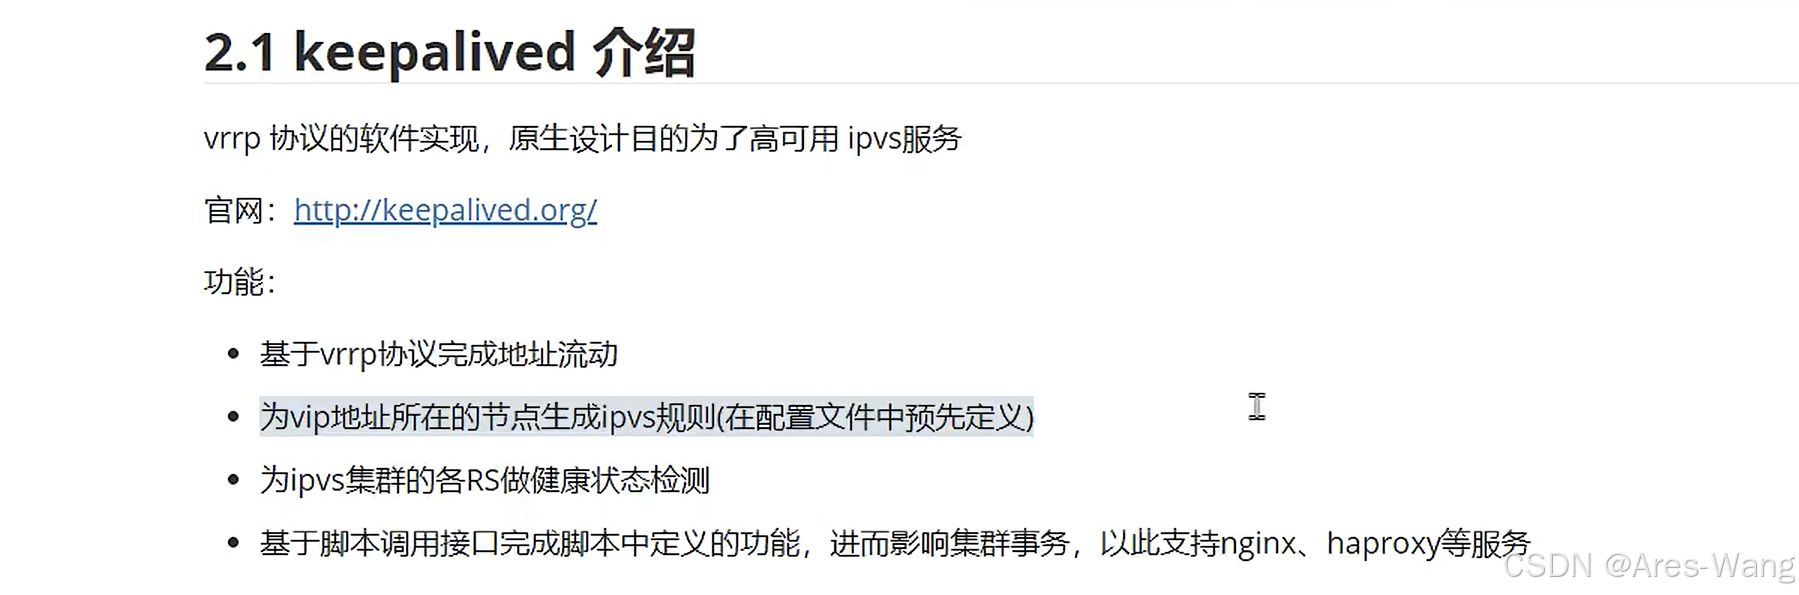
Keepalived 高可用
案例
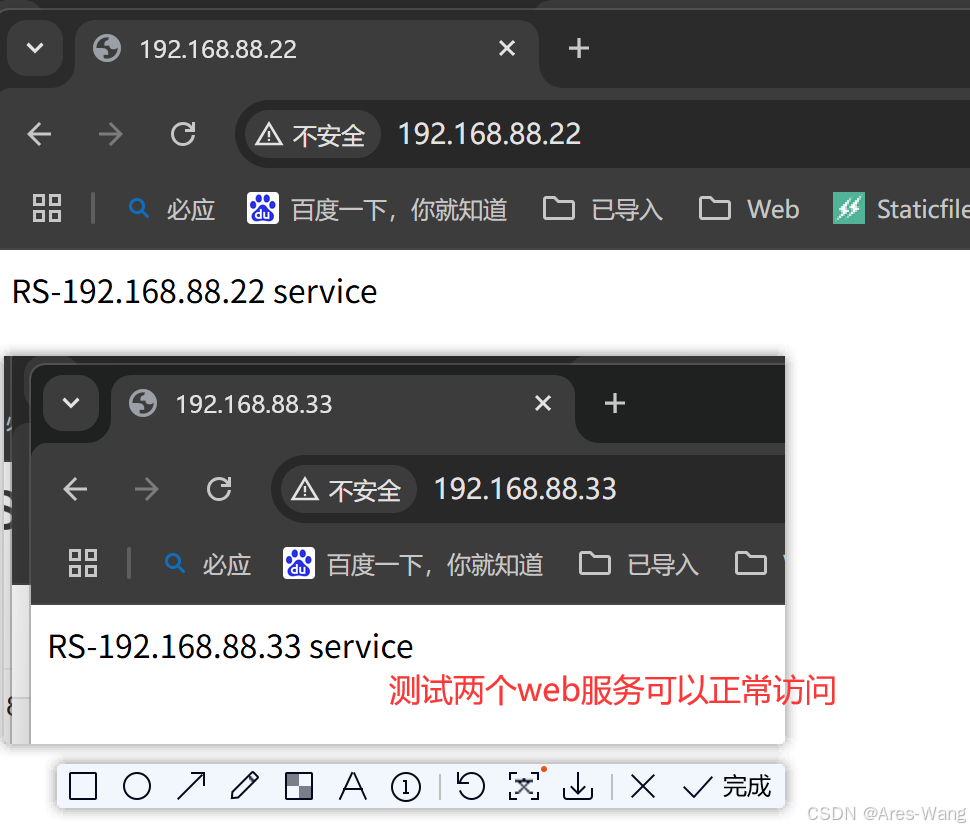
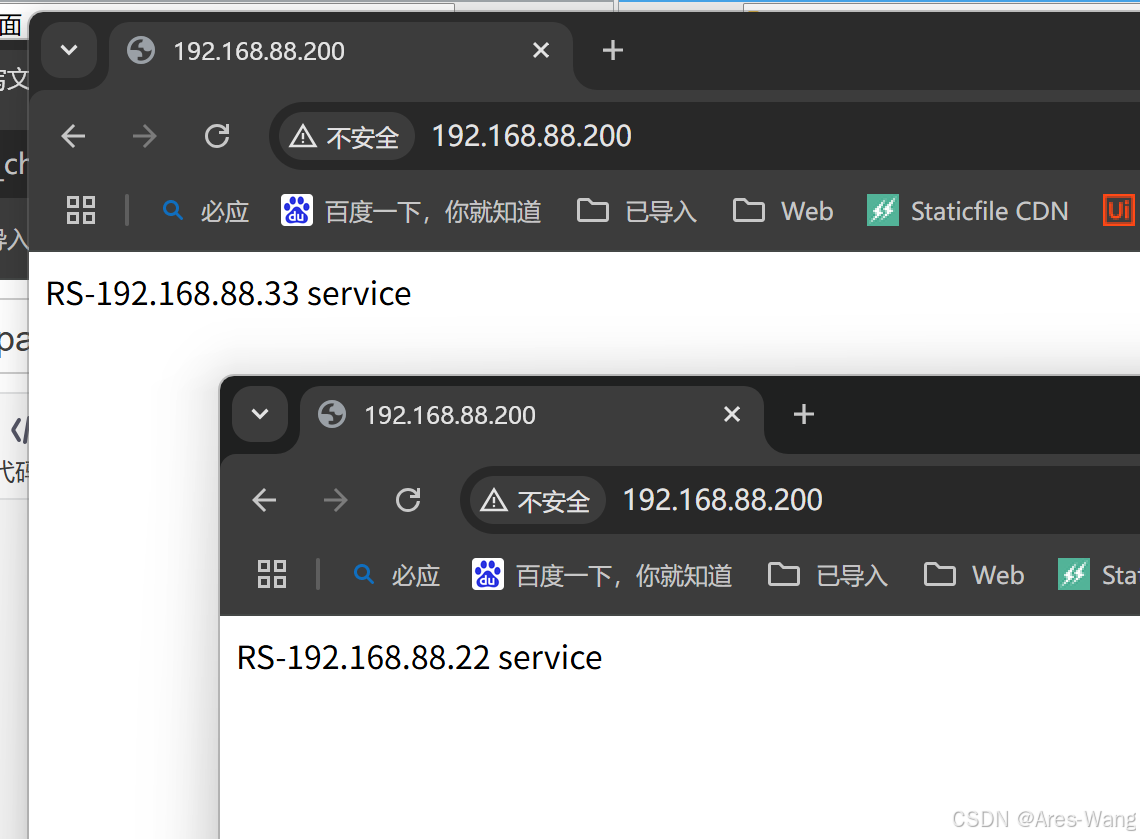
# 192.168.88.22 真实服务IP
# 192.168.88.33 真实服务IP
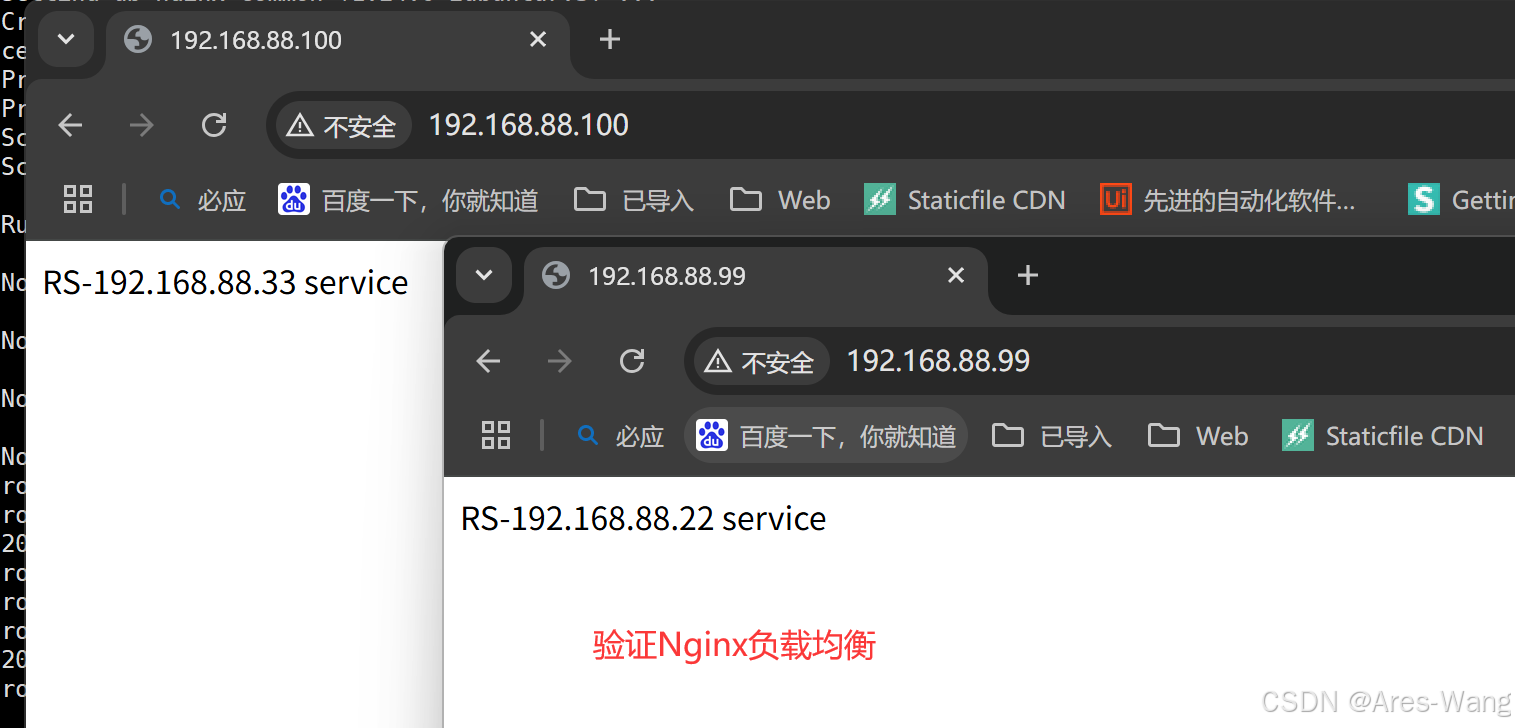
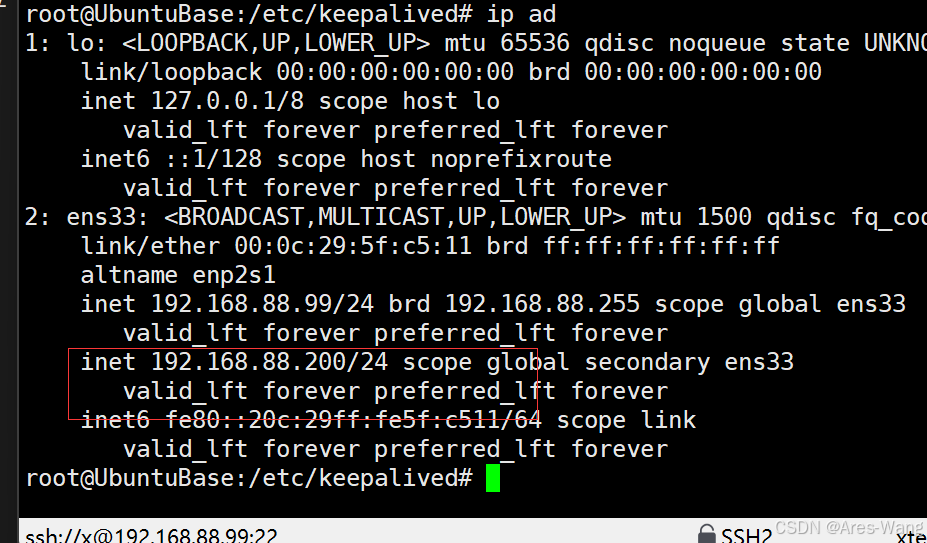
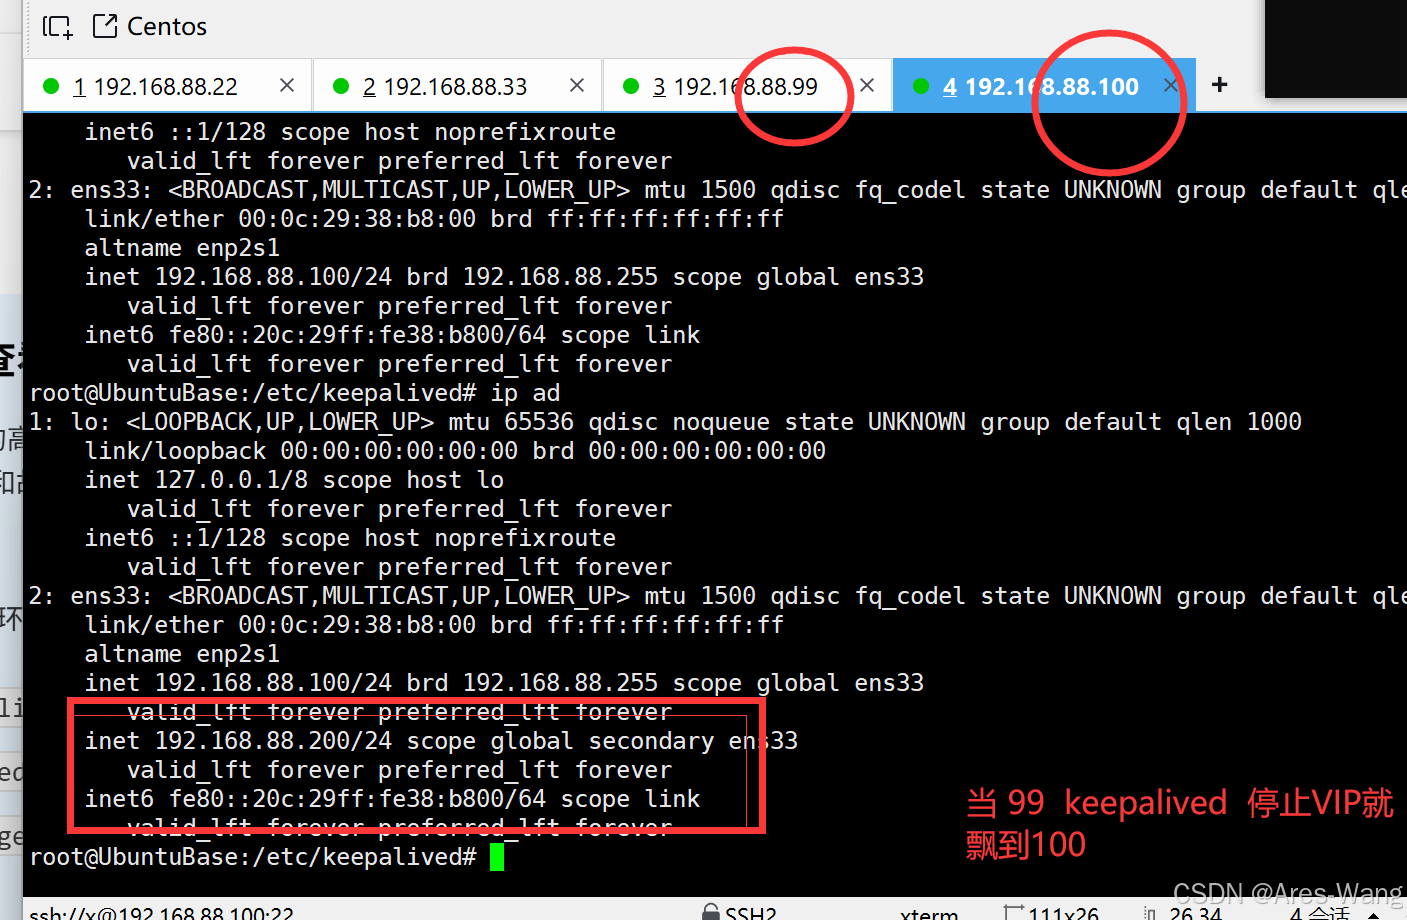
# 192.168.88.99 负载均衡服务IP
# 192.168.88.99 负载均衡服务IP
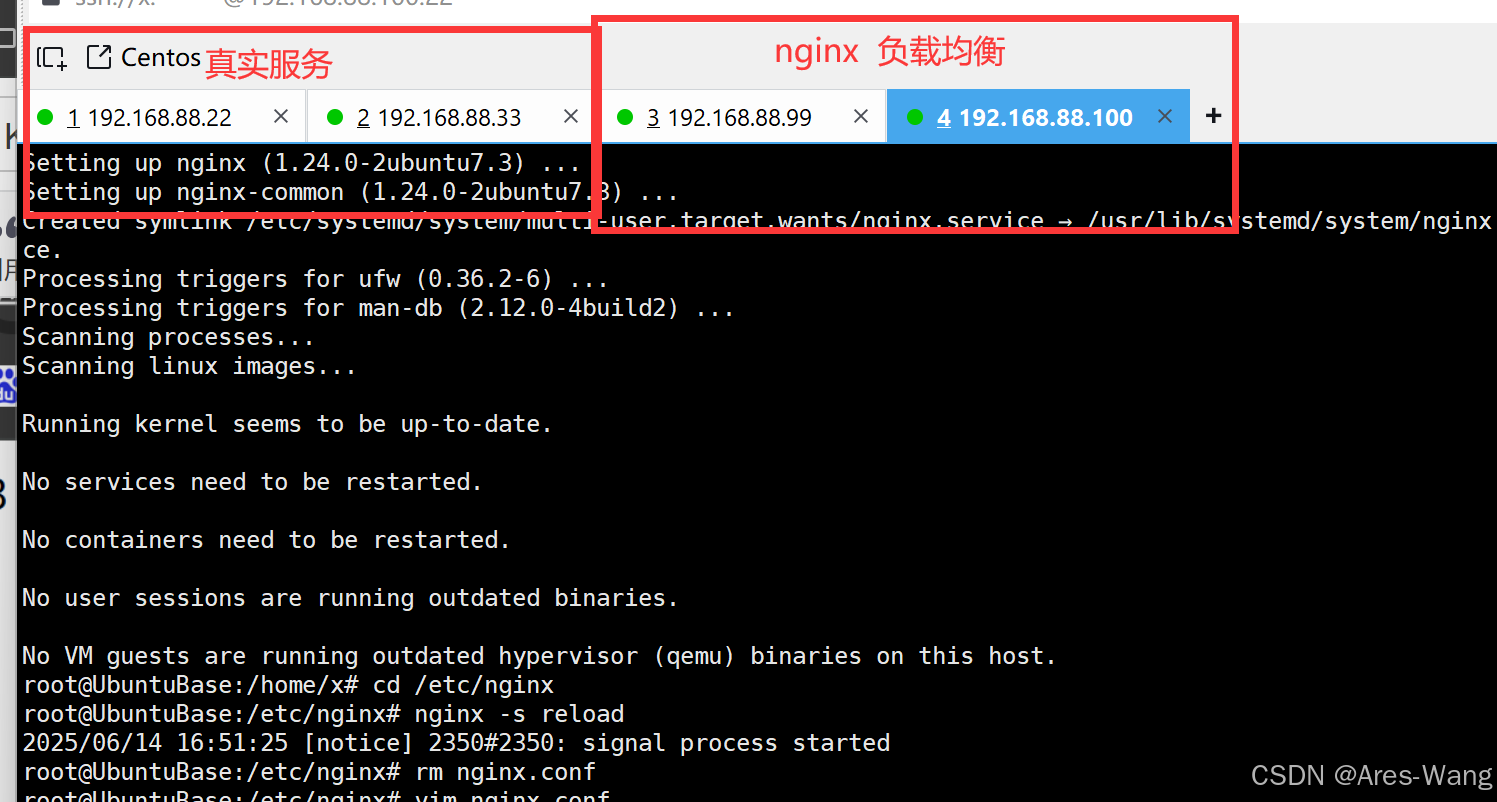
echo "RS-192.168.88.22 service" > /var/www/html/index.nginx-debian.html
echo "RS-192.168.88.33 service" > /var/www/html/index.nginx-debian.htm
apt update && apt install keepalived -y》》》》 22、33 真实服务器
1、通过安装Nginx(当作web服务的),当然也可以安装tomcat
2、修改nginx的 默认网页内容
## 修改之后
## nginx -t  测试一下语法
## nginx -s reload   加载配置
## vim /etc/nginx/nginx.conf
worker_processes  2;events {worker_connections  1024;
}http {upstream httpd {server 192.168.88.22;server 192.168.88.33;}include       mime.types;default_type  application/octet-stream;sendfile        on;server {listen       80;#  为了模拟域名访问,  需要在访问的客户端 host 加   IP  service.zen.com# server_name  service.zen.com;#charset koi8-r;#access_log  logs/host.access.log  main;location / {proxy_pass http://httpd;}}}
》》》》 99、100 负载均衡服务器
1、通过安装Nginx(当作负载均衡),当然也可以LVS、HAProxy
2、修改nginx的配置文件
3、安装keepalived
# apt update && apt install nginx -y
# apt update && apt install keepalived -y
#  systemctl enable keepalived
#  systemctl start keepalived
## vim /etc/keepalived/keepalived.conf!Configuration File for keepalivedglobal_defs{router_id 99
}vrrp_instance VI_1 {state masterinterface ens33virtual_router_id 88priority 100advert_int 2authentication {auth_type PASSauth_pass 1234}virtual_ipaddress{192.168.88.200/24}
}