Linux之MySQL安装篇
1.确保Yum环境是否能正常使用
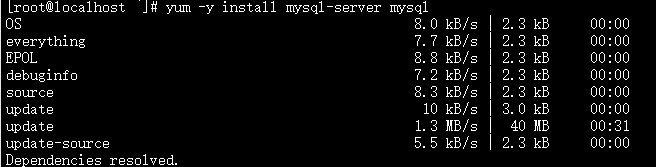
使用yum环境进行软件的安装
yum -y install mysql-server mysql
2.确保软件包已正常完成安装

3.设置防火墙和selinux配置
##   关闭防火墙
systemctl stop firewalld##   修该selinux配置
vim /etc/selinux/config
将seliux=enforcing修改为selinux=disable重启机器
reboot
4.创建安装目录
mkdir -p /usr/local/mysqlmkdir -p /usr/local/mysql/data5.查找目录路径
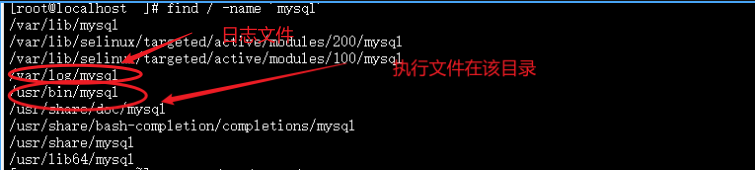
find / -name 'mysql'
6.设置开机自启动
##   打开mysql服务
systemctl start  mysqld.service
##   设置开机自启动mysql服务
systemctl enable mysqld.service
7.查找MySQ初始密码
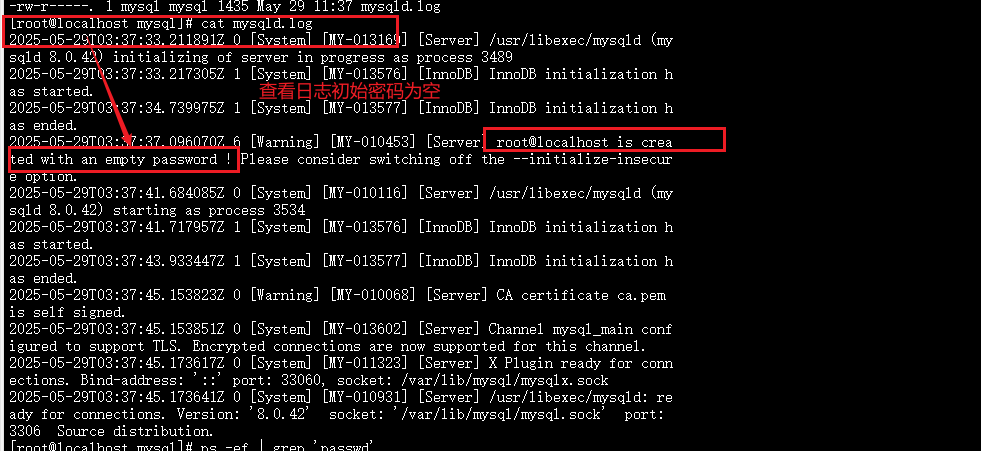
##    切换到日志文件路径
cat /var/log/mysql/mysqld.log2025-05-29T03:37:37.096070Z 6 [Warning] [MY-010453] [Server] root@localhost is created with an empty password ! Please consider switching off the --initialize-insecure option.
8.登上MySQL之后修改密码
## 登录mysql客户端
mysql -uroot -p## 使用修改密码sql语句
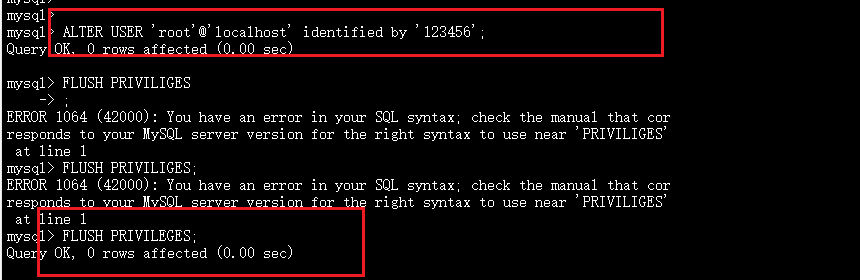
ALTER USER 'root'@'localhost' identified by '123456';## 刷新配置
FLUSH PRIVILEGES;
9.设置MySQL远程访问服务(创建单独用户)
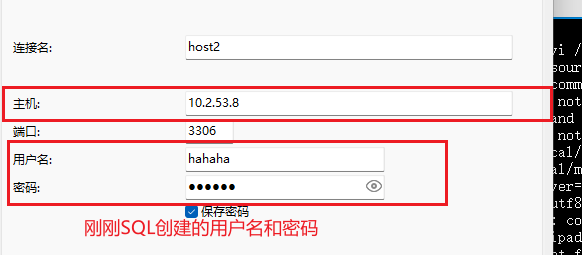
创建了一个hahaha用户,并给予了其相同的超级用户权利
##    创建hahaha用户,并设置密码为666666
create user 'hahaha'@'%' identified with mysql_native_password by '666666';##    给用户授予权限
grant all privileges on *.* to 'hahaha'@'%';##   刷新配置
flush privileges;
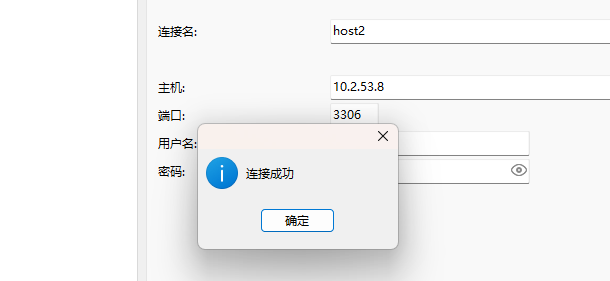
10.使用三方远程工具连接(Navicat工具)
创建一个新的MySQL连接
连接成功
注意:遇到以下情况问题解决方案
update mysql.user set host='%' where user="root";flush privileges;