【机器人】复现 Embodied-Reasoner 具身推理 | 具身任务 深度推理模型 多模态场景 长远决策 多轮互动
Embodied-Reasoner 是一个多模态具身模型,它将 o1 的深度推理能力扩展到具身交互任务。
可以在 AI2THOR 仿真中执行复杂的任务,例如搜索隐藏物体、操纵 和 运输物品
具有以下的功能:
- 🤔 深度推理能力,例如分析、空间推理、反思、规划
- 🔄 交错多模态处理能力,特别是处理长序列的交错图像文本上下文
- 🏠 环境互动能力,使其能够自主观察环境、探索房间并寻找隐藏物体
- 开源模型发布 7B/2B 尺寸
- 开源数据集🤗 Hugging Face:9.3k 条交错的观察-推理-行动轨迹,包括 64K 张图像和 8M 个思想标记
本文分享Embodied-Reasoner复现的模型推理、生成任务和数据的过程~
1、创建Conda环境
首先创建一个Conda环境,名字为embodied-reasoner,python版本为3.9
进入embodied-reasoner环境
conda create -n embodied-reasoner python=3.9
conda activate embodied-reasoner
然后下载代码,进入代码工程:https://github.com/zwq2018/embodied_reasoner
git clone https://github.com/zwq2018/embodied_reasoner.git
cd embodied_reasoner
2、安装ai2thor模拟器和相关依赖
编辑requirements.txt,修改为下面内容:
ai2thor==5.0.0
Flask==3.1.0
opencv-python==4.7.0.72
accelerate==1.3.0
FlagEmbedding==1.3.4
openai==1.60.0
opencv-python-headless==4.11.0.86
peft==0.14.0
qwen-vl-utils==0.0.8
safetensors==0.5.2
sentence-transformers==3.4.1
sentencepiece==0.2.0
tiktoken==0.7.0
tokenizers==0.21.0
然后进行安装~
pip install -r requirements.txt3、安装torch 和 torchvision
首先用nvcc -V查询CUDA的版本,比如系统使用的12.1版本的
(embodied-reasoner) lgp@lgp-MS-7E07:~/2025_project/embodied_reasoner$ nvcc -V
nvcc: NVIDIA (R) Cuda compiler driver
Copyright (c) 2005-2023 NVIDIA Corporation
Built on Mon_Apr__3_17:16:06_PDT_2023
Cuda compilation tools, release 12.1, V12.1.105
Build cuda_12.1.r12.1/compiler.32688072_0
然后安装与cuda版本对应的torch
pip install torch==2.4.0+cu121 torchvision torchaudio --extra-index-url https://download.pytorch.org/whl/cu121因为后续安装的flash_attn需要CUDA和torch进行编译的,这里的版本需要对应上
4、安装flash_attn
执行下面命令进行安装:
pip install flash_attn==2.7.4.post1安装成功会打印信息:
  Building wheel for flash_attn (setup.py) ... doneCreated wheel for flash_attn: filename=flash_attn-2.7.4.post1-cp39-cp39-linux_x86_64.whl size=187787224 sha256=8cbee35b7faaad89436c8855e5de8881f5b04962cf066e6bc12a81947dddbe4cStored in directory: /home/lgp/.cache/pip/wheels/a4/e3/79/560592cf99bd2bd893a372eee64a31c0bd903bc236a1a98e00
Successfully built flash_attn
Installing collected packages: flash_attn
Successfully installed flash_attn-2.7.4.post1
5、补丁安装
实际运行时,发现还缺少一些库(matplotlib,huggingface_hub等),需要进行安装
pip install matplotlib huggingface_hub openai还需要安装Vulkan,在可视化时需要用到
# 安装Vulkan工具包和运行时
sudo apt update
sudo apt install vulkan-tools vulkan-utils mesa-vulkan-drivers libvulkan-dev
# 验证Vulkan安装
vulkaninfo --summary6、下载“通义千问”模型权重
这里选择 2.5-VL-3B-Instruct版本的,如果用其他模型也可以的
使用huggingface_hub进行下载,执行命令:
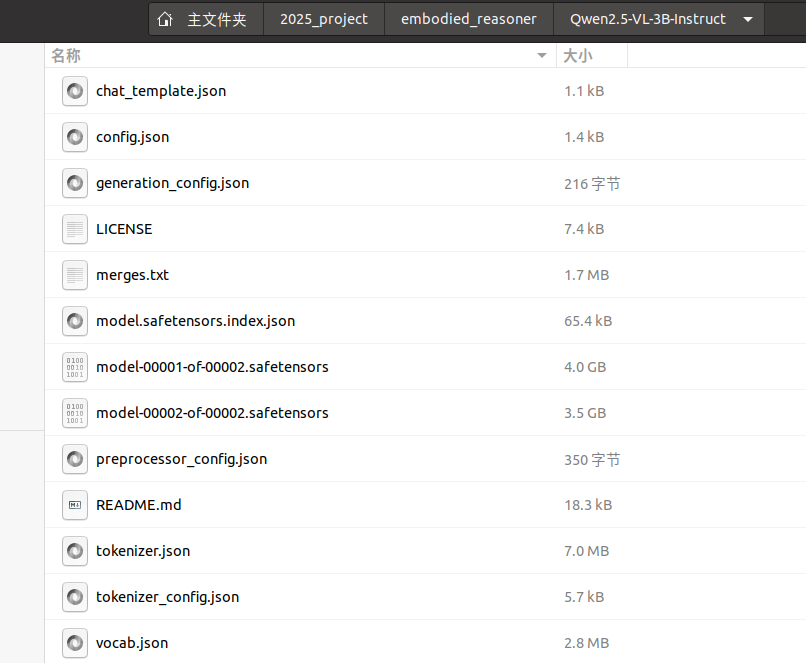
huggingface-cli download --resume-download Qwen/Qwen2.5-VL-3B-Instruct --local-dir ./Qwen2.5-VL-3B-Instruct官网地址:https://huggingface.co/Qwen/Qwen2.5-VL-3B-Instruct/tree/main
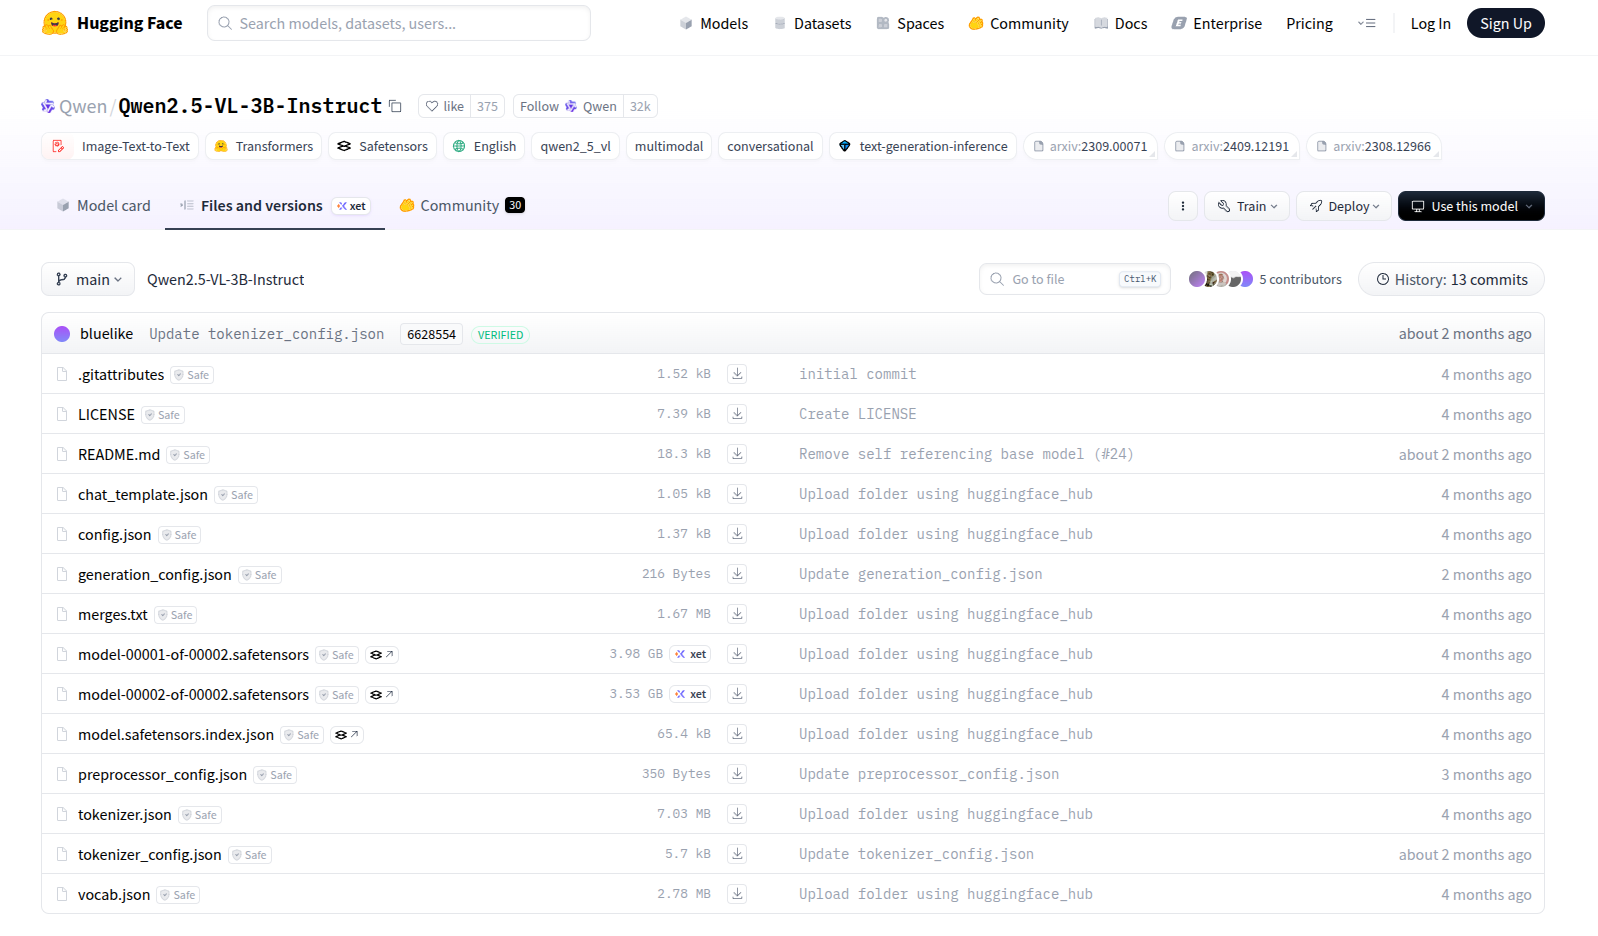
下载好后,目录结构如下图所示:
其他模型选择:https://www.modelscope.cn/models
7、修改配置文件
首先修改 evaluate/VLMCall.py,大约52行:
在api_key中,需要替换成自己的ModelScope SDK Token
while retry_count < retry_limit: try:t1=time.time()# import pdb;pdb.set_trace()print(f"********* start call {self.model} *********")api_key=random.choice(moda_keys)client = OpenAI(api_key="xxxxxxxxxxxxxxx", # 请替换成您的ModelScope SDK Tokenbase_url="https://api-inference.modelscope.cn/v1")if self.model=="Qwen/Qwen2-VL-7B-Instruct":max_tokens=2000outputs = client.chat.completions.create(model=self.model, stream=False,messages = messages,temperature=0.9,max_tokens=max_tokens)ModelScope SDK 地址:https://www.modelscope.cn/my/myaccesstoken
点击“新建 SDK/API 令牌”,然后复制api到代码中

8、合成任务和轨迹
先来到data_engine 文件夹来,它用来合成任务和轨迹。以下是 data_engine 中的关键文件:
data_engine/ # 数据引擎核心目录
├── taskgenerate/ # 任务生成数据集
│ ├── bathrooms/ # 浴室场景相关数据
│ ├── bedrooms/ # 卧室场景相关数据
│ ├── kitchens/ # 厨房场景相关数据
│ ├── living_rooms/ # 客厅场景相关数据
│ └── pick_up_and_put.json # 物品拾取与放置任务模板
│
├── TaskGenerate.py # 任务合成主脚本(生成复合任务流程)
├── o1StyleGenerate.py # 标准轨迹生成脚本(单任务轨迹)
├── o1StyleGenerate_ordered.py # 复杂任务轨迹生成脚本(多步骤有序任务)
├── vlmCall.py # 视觉语言模型调用接口(封装VLM交互逻辑)
└── vlmCallapi_keys.py # VLM API密钥配置文件(需在此设置访问凭证)
步骤1.生成任务
TaskGenerate.py可以合成任务模板以及对应的关键动作
生成的任务相关数据会存放在<tasktype>_metadatadata_engine下的文件夹中
运行以下代码来进行任务生成:
python TaskGenerate.py运行信息:
(embodied-reasoner) lgp@lgp-MS-7E07:~/2025_project/embodied_reasoner/data_engine$ python TaskGenerate.py
save json data to path: single_search_task_metadata/FloorPlan1.json
save json data to path: single_search_task_metadata/FloorPlan2.json
save json data to path: single_search_task_metadata/FloorPlan3.json
save json data to path: single_search_task_metadata/FloorPlan4.json
save json data to path: single_search_task_metadata/FloorPlan5.json
save json data to path: single_search_task_metadata/FloorPlan6.json
....
save json data to path: single_search_task_metadata/FloorPlan429.json
save json data to path: single_search_task_metadata/FloorPlan430.json
看一个json示例,了解包含那些内容
[[{"taskname": "Identify the Apple in the room.","tasktype": "single_search","metadatapath": "taskgenerate/kitchens/FloorPlan11/metadata.json","actions": [{"action": "navigate to","objectId": "CounterTop|+00.28|+00.95|+00.46","objectType": "CounterTop","baseaction": "","reward": 1,"relatedObject": ["CounterTop|+00.28|+00.95|+00.46","Apple|-00.05|+00.95|+00.30"]},{"action": "end","objectId": "","objectType": "","baseaction": "","reward": 1,"relatedObject": ["CounterTop|+00.28|+00.95|+00.46","Apple|-00.05|+00.95|+00.30"]}],"totalreward": 2}]
]
简单分析一下json的内容:
1. 任务元信息
| 字段 | 含义 |
|---|---|
taskname | 任务描述:"在房间中识别苹果"(自然语言定义任务目标) |
tasktype | 任务类型:single_search(单目标搜索任务,区别于多目标搜索) |
metadatapath | 元数据路径:指向包含场景布局、对象属性等信息的JSON文件(如厨房场景) |
2. 动作序列 (actions)
-
动作1:导航到目标位置
action:"navigate to"(导航动作类型)objectId:CounterTop|+00.28|+00.95|+00.46(目标对象ID,格式为类型|x|y|z)objectType:CounterTop(对象类型:厨房台面)relatedObject: 关联对象列表(包含当前台面和苹果的位置,可能用于视觉定位)reward:1(完成此动作的即时奖励)
-
动作2:结束任务
action:"end"(终止任务信号)reward:1(任务完成奖励)- 此动作可能触发后续评估逻辑(如验证是否识别到苹果)
3. 奖励机制 (totalreward)
- 总奖励值为
2,等于两个动作的奖励之和(1+1) - 可能用于强化学习中的策略优化(鼓励高效完成任务)
步骤2.生成O1样式轨迹
因为后需要用到gpt-4o的api,修改 data_engine/vlmCall.py代码
推荐使用国内的供应商,比较稳定:https://ai.nengyongai.cn/register?aff=RQt3
首先“添加令牌”,设置额度,点击查看就能看到Key啦

然后填写到 OPENAI_KEY 中:
import http.client
import json
import random
import base64
from datetime import datetime
from PIL import Image
import io
import time# 删除原VLMCallapi_keys.py的依赖,直接使用固定API密钥
OPENAI_KEY = "sk-tmlMwyAq8PQqExxxxxxxxxx"  # 替换为你的真实API密钥class VLMRequestError(Exception):pass  class VLMAPI:def __init__(self, model):self.model = modeldef encode_image(self, image_path):# 保持原图片处理逻辑不变with Image.open(image_path) as img:original_width, original_height = img.sizeif original_width == 1600 and original_height == 800:new_width = original_width // 2new_height = original_height // 2resized_img = img.resize((new_width, new_height), Image.Resampling.LANCZOS)buffered = io.BytesIO()resized_img.save(buffered, format="JPEG")base64_image = base64.b64encode(buffered.getvalue()).decode('utf-8')else:with open(image_path, "rb") as image_file:base64_image = base64.b64encode(image_file.read()).decode('utf-8')return base64_imagedef vlm_request(self, systext, usertext, image_path1=None, image_path2=None, image_path3=None, max_tokens=1500, retry_limit=3):# 构建请求体逻辑保持不变payload_data = [{"type": "text", "text": usertext}]# ...(原图片处理代码保持不变)messages = [{"role": "system", "content": systext},{"role": "user", "content": payload_data}]payload = json.dumps({"model": self.model,"stream": False,"messages": messages,"temperature": 0.9,"max_tokens": max_tokens})# 修改1:使用新的API端点conn = http.client.HTTPSConnection("ai.nengyongai.cn")retry_count = 0while retry_count < retry_limit:try:t1 = time.time()  # 提前定义时间戳# 修改2:使用固定API密钥headers = {'Accept': 'application/json','Authorization': f'Bearer {OPENAI_KEY}','User-Agent': 'Apifox/1.0.0 (https://apifox.com)','Content-Type': 'application/json'}print(f"********* start call {self.model} *********")conn.request("POST", "/v1/chat/completions", payload, headers)res = conn.getresponse()data = res.read().decode("utf-8")data_dict = json.loads(data)content = data_dict["choices"][0]["message"]["content"]print("****** content: \n", content)print(f"********* end call {self.model}: {time.time()-t1:.2f} *********")return contentexcept Exception as ex:print(f"Attempt call {self.model} {retry_count + 1} failed: {ex}")time.sleep(300)retry_count += 1return "Failed to generate completion after multiple attempts."if __name__ == "__main__":model = "gpt-4o-2024-11-20"llmapi = VLMAPI(model)# 示例调用response = llmapi.vlm_request(systext="你是一个AI助手,请用中文回答用户的问题。",usertext="今天天气怎么样?",image_path1="example.jpg")print(response)
再使用o1StyleGenerate.py或者o1StyleGenerate_ordered.py合成 10 种不同子任务类型的轨迹
备注:o1StyleGenerate_ordered.py 能合成更复杂的顺序对象传输任务
运行下面代码,生成简单任务轨迹数据:
python o1StyleGenerate.py生成复杂任务轨迹数据:(可选)
python o1StyleGenerate_ordered.py运行信息:
(embodied-reasoner) lgp@lgp-MS-7E07:~/2025_project/embodied_reasoner/data_engine$ python o1StyleGenerate.py
metadata_path: taskgenerate/kitchens/FloorPlan1/metadata.json
task_metadata_path: single_search_task_metadata/FloorPlan1.json*********************************************************************
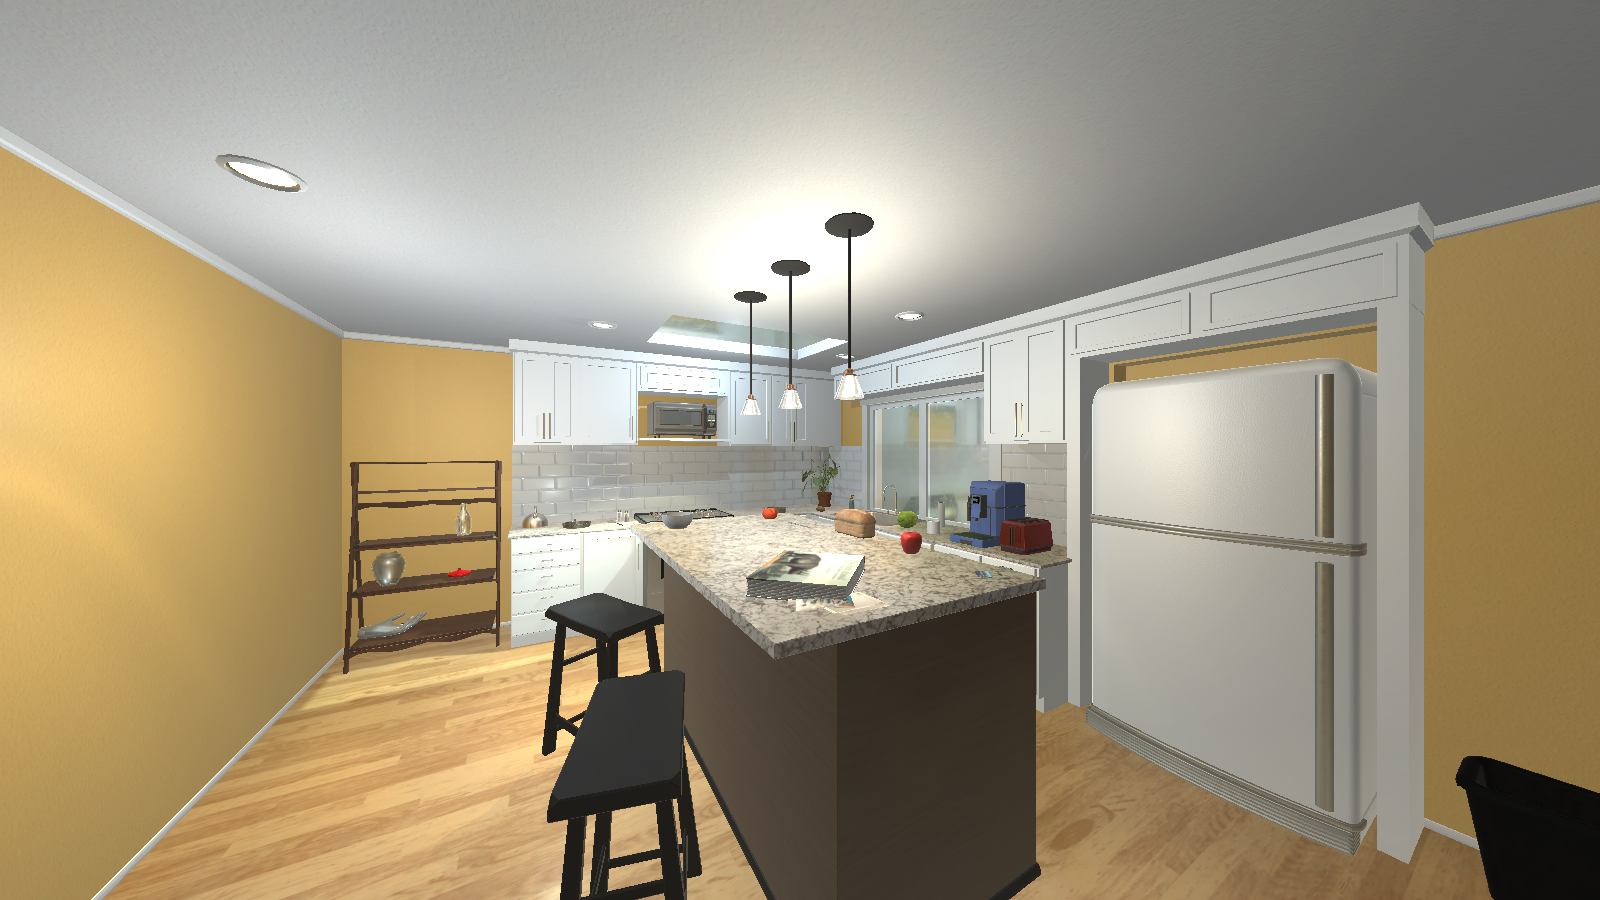
Scene:FloorPlan1 Task_Type: single_search Processing_Task: 0 Trajectory_idx: a
*********************************************************************task: {'taskname': 'Can you identify the Apple in the room, please?', 'tasktype': 'single_search', 'metadatapath': 'taskgenerate/kitchens/FloorPlan1/metadata.json', 'actions': [{'action': 'navigate to', 'objectId': 'CounterTop|-00.08|+01.15|00.00', 'objectType': 'CounterTop', 'baseaction': '', 'reward': 1, 'relatedObject': ['CounterTop|-00.08|+01.15|00.00', 'Apple|-00.47|+01.15|+00.48']}, {'action': 'end', 'objectId': '', 'objectType': '', 'baseaction': '', 'reward': 1, 'relatedObject': ['CounterTop|-00.08|+01.15|00.00', 'Apple|-00.47|+01.15|+00.48']}], 'totalreward': 2}
Initialization succeeded
Saved frame as data_single_search/FloorPlan1_single_search_0_a/0_init_observe.png.****** begin generate selfobservation ******
round: 0 ['Book', 'Drawer', 'GarbageCan', 'Window', 'Stool', 'CounterTop', 'Cabinet', 'ShelvingUnit', 'CoffeeMachine', 'Fridge', 'HousePlant']
********* start call gpt-4o-2024-11-20 *********
****** content: <Observation> I see a CounterTop with a CoffeeMachine placed on its surface. Adjacent to it, there is a ShelvingUnit containing books. To the side, a Fridge stands near a Cabinet. A Window is visible on the wall, and a HousePlant sits nearby, adding a touch of greenery. </Observation>
********* end call gpt-4o-2024-11-20: 2.70 *********
****** end generate selfobservation ************ begin generate r1 plan, plan object num: 2 ******
********* start call gpt-4o-2024-11-20 *********
****** content: ['Fridge']
********* end call gpt-4o-2024-11-20: 1.45 *********
****** r1_init_plan_object_list: ['Fridge', 'CounterTop'] correct type: CounterTop
********* start call gpt-4o-2024-11-20 *********
****** content: <Planning>Based on my observation, an apple is a food item likely stored in locations where food is typically kept or prepared. The Fridge is a common place for storing perishable items, including fruits. The CounterTop, being a food preparation area, may also hold an apple if it's readily available or recently used. Thus, I will prioritize searching the Fridge first and then move to the CounterTop as the next logical location based on its function and proximity to food-related activities.</Planning>
********* end call gpt-4o-2024-11-20: 1.58 *********
****** end generate r1 plan ******* Saved frame as data_single_search/FloorPlan1_single_search_0_a/1_Fridge|-02.10|+00.00|+01.07.png.
********* start generate thinking 2 ********
************ current plan object list: ['Fridge', 'CounterTop']
运行效果:
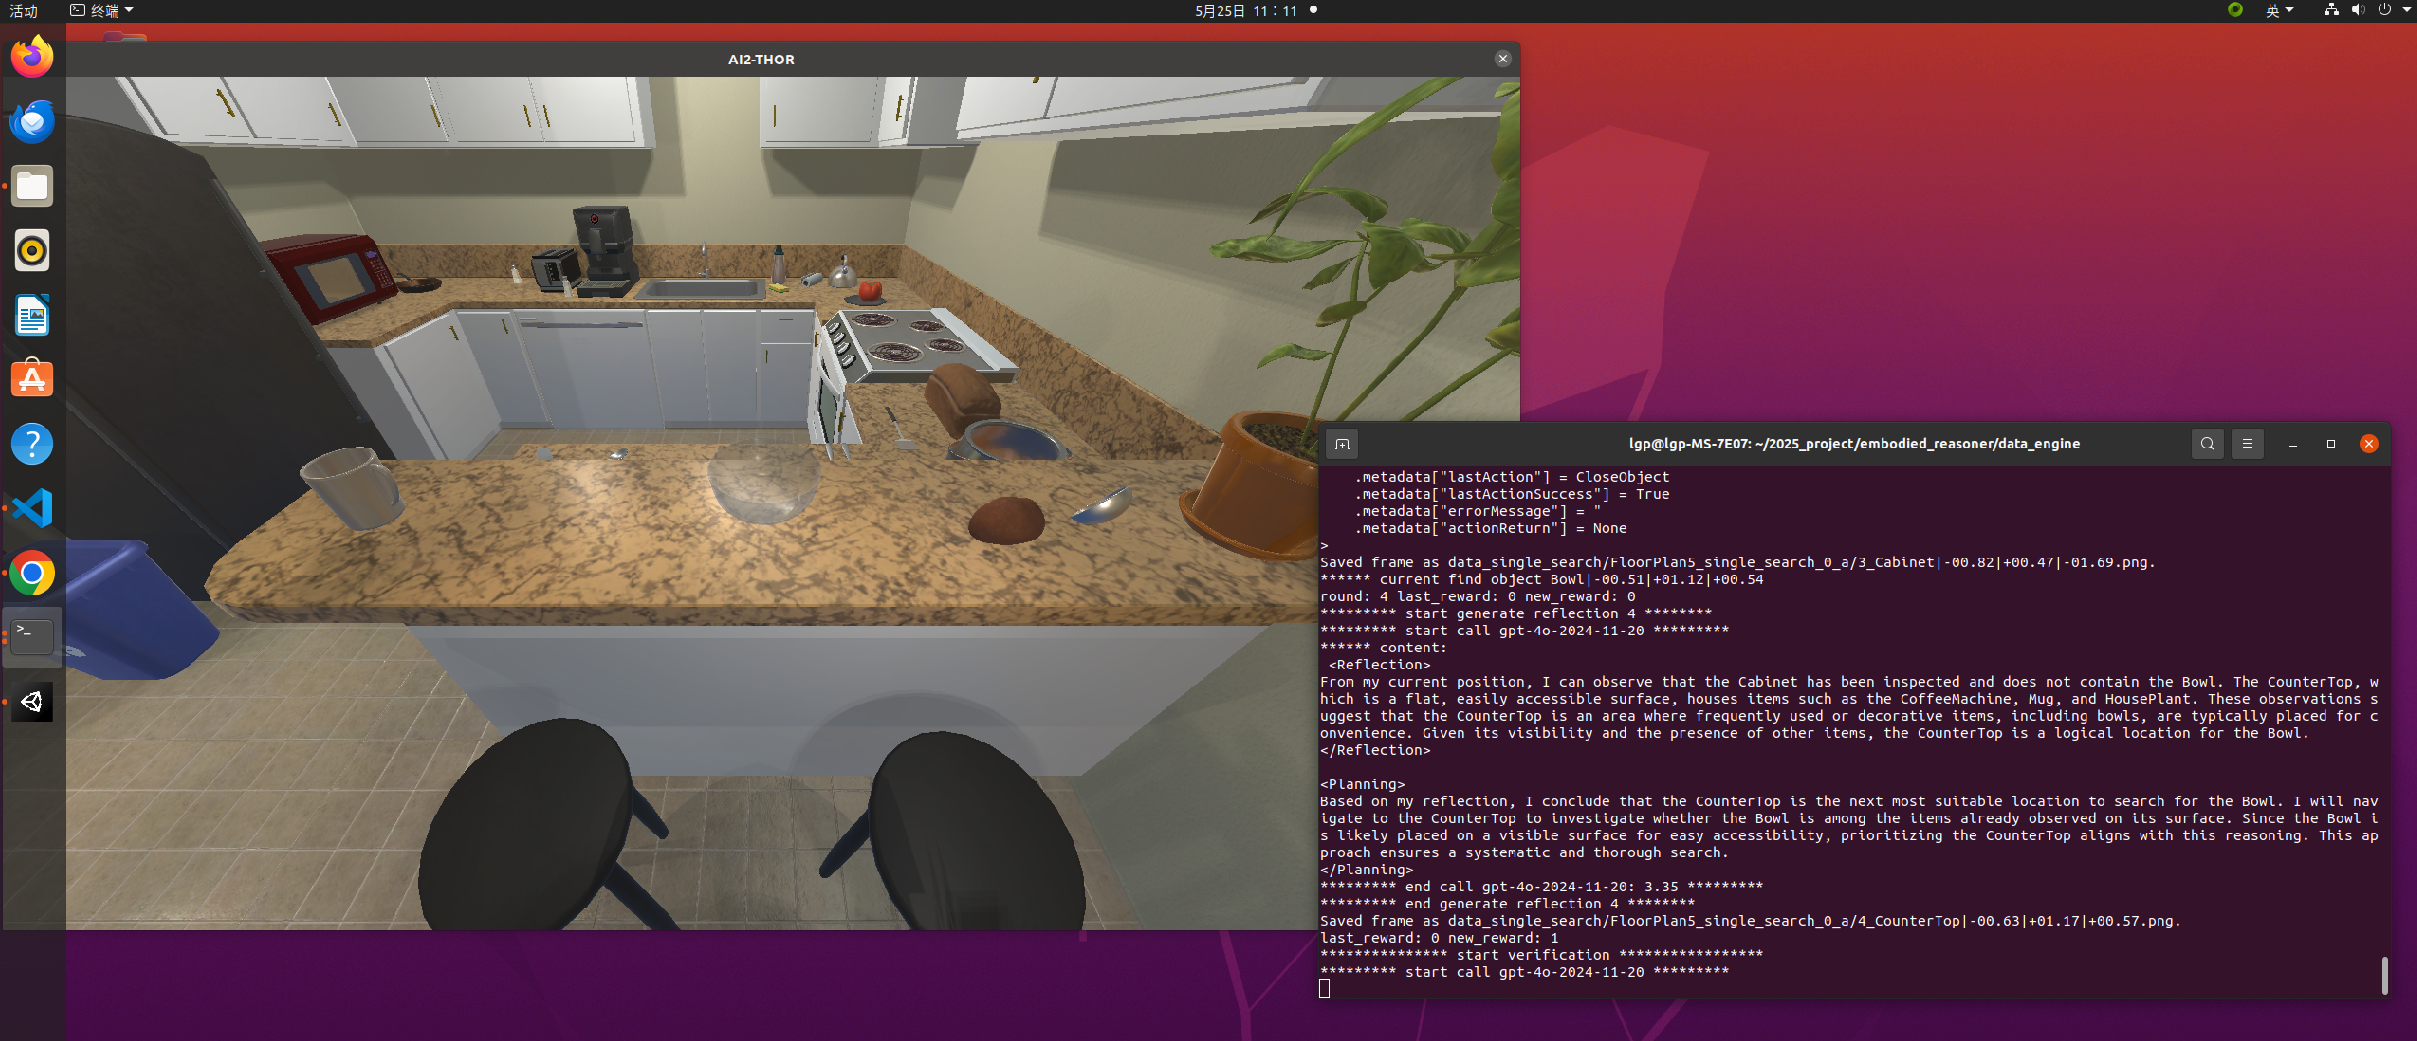
然后生成的轨迹的文件夹,会包括 JSON 文件和轨迹的相关图像
生存的文件目录示例:
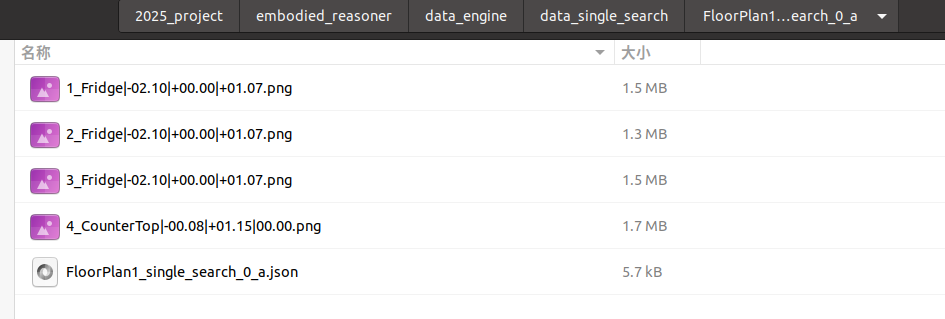
以下是 JSON 文件内容的示例:
{"scene": "FloorPlan1","tasktype": "...","taskname": "Locate the Apple in the room.","trajectory": ["<...>...</...>","<...>...</...>","..."],"images": [".../init_observe.png","..."],"flag": "","time": "...","task_metadata": {"..."}
}- 场景:执行任务的场景。
- tasktype:任务的类型。
- taskname:任务的名称。
- 轨迹:轨迹的推理和决策内容
- 图像:对应图像的路径(第一张图像代表初始状态;后续每张图像对应于执行轨迹中列出的每个动作后的状态)。
- time and flag:记录生成时间戳和轨迹生成过程中遇到的异常。
- task_metadata:步骤1中生成的任务信息。
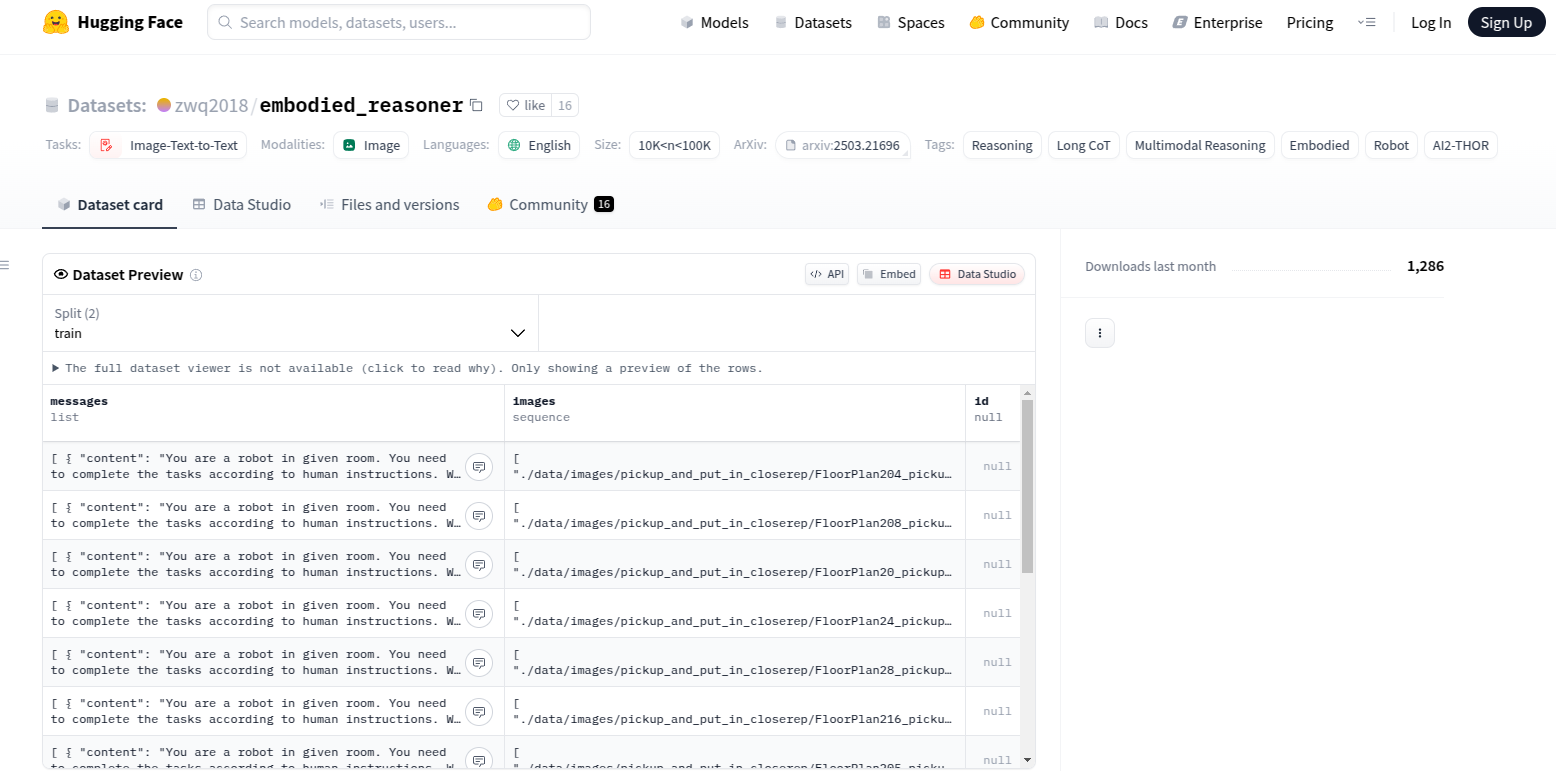
完整的轨迹数据,也可以去这里访问:https://huggingface.co/datasets/zwq2018/embodied_reasoner
主要特点:
- 📸丰富的视觉数据:包含 64,000 张第一人称视角交互图像
- 🤔深度推理能力:800 万个思维标记,涵盖分析、空间推理、反思和规划
- 🏠多样化环境:涵盖 107 种不同的室内场景(厨房、客厅等)
- 🎯丰富的交互对象:包含 2,100 个交互对象和 2,600 个容器对象
- 🔄完整的交互轨迹:每个样本包含完整的观察-思考-行动序列
10、模型推理与评估
需要修改 scripts/eval.sh 代码,参考一下:
# ========================
# 模型路径配置
# ========================
# 默认模型路径配置(对应local_deploy.py的默认加载模型)
DEFAULT_MODEL_PATH="Qwen2.5-VL-3B-Instruct"  # local_deploy.py使用的默认模型路径
DEFAULT_MODEL_NAME="Qwen2.5-VL-3B-Instruct"   # evaluate.py使用的默认模型名称# 参数优先级:命令行参数 > 默认值
# 使用方式:./script.sh [自定义模型路径] [自定义模型名称]
MODEL_PATH=${1:-$DEFAULT_MODEL_PATH}  # 优先使用第一个参数,未提供则用默认路径
MODEL_NAME=${2:-$DEFAULT_MODEL_NAME}  # 优先使用第二个参数,未提供则用默认名称# ========================
# 图像处理参数配置
# ========================
export IMAGE_RESOLUTION=351232       # 输入图像的最大分辨率
export MIN_PIXELS=3136               # 最小有效像素阈值
export MAX_PIXELS=351232             # 最大有效像素阈值
MODEL_TYPE="qwen2_5_vl"              # 模型类型标识(用于框架识别)# ========================
# 环境变量配置
# ========================
export PYTHONUNBUFFERED=1            # 禁用Python输出缓冲,实时显示日志# ========================
# 启动Embedding服务(后台运行)
# ========================
# 启动文本嵌入模型服务(用于对象匹配)
# --embedding 1 表示启用嵌入模式
# 使用端口20006,后台运行(&符号)
python ./inference/local_deploy.py \--embedding 1 \--port 20006 &# ========================
# 启动多模态推理服务(前台运行)
# ========================
# 使用GPU 1运行视觉语言模型服务
CUDA_VISIBLE_DEVICES=1 python inference/local_deploy.py \--frame "hf"                   # 使用HuggingFace框架模式--model_type $MODEL_TYPE       # 指定模型类型--model_name $MODEL_PATH       # 加载指定模型--port 10002 &                 # 使用端口10002,后台运行# ========================
# 等待服务就绪
# ========================
echo "Waiting for ports ..."
# 阻塞等待直到端口20006可用(Embedding服务)
while ! nc -z localhost 20006; do   sleep 1
done# 阻塞等待直到端口10002可用(多模态服务)
while ! nc -z localhost 10002; do   sleep 1
done# ========================
# 启动AI2Thor评估流程
# ========================
# 使用GPU 0运行评估脚本
CUDA_VISIBLE_DEVICES=0 python evaluate/evaluate.py \--model_name $MODEL_NAME     # 指定推理模型--input_path "data/test_809.json"  # 输入测试数据集--batch_size 200           # 批次大小--cur_count 1              # 当前任务编号--port 10002               # 连接多模态服务的端口--total_count 1            # 总任务数量# ========================
# 显示最终结果
# ========================
wait  # 等待所有后台进程结束
python evaluate/show_result.py \--model_name $MODEL_NAME  # 展示指定模型的评估结果
打印的日志信息:
(embodied-reasoner) (base) lgp@lgp-MS-7E07:~/2025_project/embodied_reasoner$ bash scripts/eval.sh
Waiting for ports ...
INFO 05-24 17:39:18 __init__.py:190] Automatically detected platform cuda.
INFO 05-24 17:39:18 __init__.py:190] Automatically detected platform cuda.
TP: 1
gmu None <class 'NoneType'>
TP: 1
gmu None <class 'NoneType'>
Loading checkpoint shards: 100%|█████████████████████████████████████████████████████████████████████████████████████████████████████████████████████████████████████████████████████████████| 2/2 [00:00<00:00, 12.06it/s]* Serving Flask app 'local_deploy'* Debug mode: off
WARNING: This is a development server. Do not use it in a production deployment. Use a production WSGI server instead.* Running on http://127.0.0.1:10002
Press CTRL+C to quit
127.0.0.1 - - [24/May/2025 17:39:28] "GET / HTTP/1.1" 404 -
127.0.0.1 - - [24/May/2025 17:39:28] "GET /favicon.ico HTTP/1.1" 404 -* Serving Flask app 'local_deploy'* Debug mode: off
WARNING: This is a development server. Do not use it in a production deployment. Use a production WSGI server instead.* Running on http://127.0.0.1:20006
Press CTRL+C to quit
No module named 'VLMCallapi_keys'
evaluate utils:4
evaluate utils:None
Namespace(input_path='data/test_809.json', model_name='Qwen2.5-VL-3B-Instruct', batch_size=200, port=10002, cur_count=1, total_count=1)
--total task count:809
--cache:0---remaining evaluation tasks:809
--Current process evaluation data:8090%| | 0/809 [00:00<?, ?it/s]******** Task Name: Do you find it overly troublesome to put the potato in the refrigerator and then take the apple out of the refrigerator, rinse it clean, and set it on a plate? *** Max Steps: 36 ********
******** Task Record: ./data/Qwen2.5-VL-3B-Instruct/809_long-range tasks with dependency relationships_FloorPlan2_4 ********
RoctAgent Initialization successful!!!
0 ****** begin exec action: init None ***
1 ****** end exec action: init None ***
url: http://127.0.0.1:10002/chat
predictor:utils:preprocess_image:image.width: 812
predictor:utils:preprocess_image:image.height: 448
predictor:utils:preprocess_image:image.width: 797
predictor:utils:preprocess_image:image.height: 440
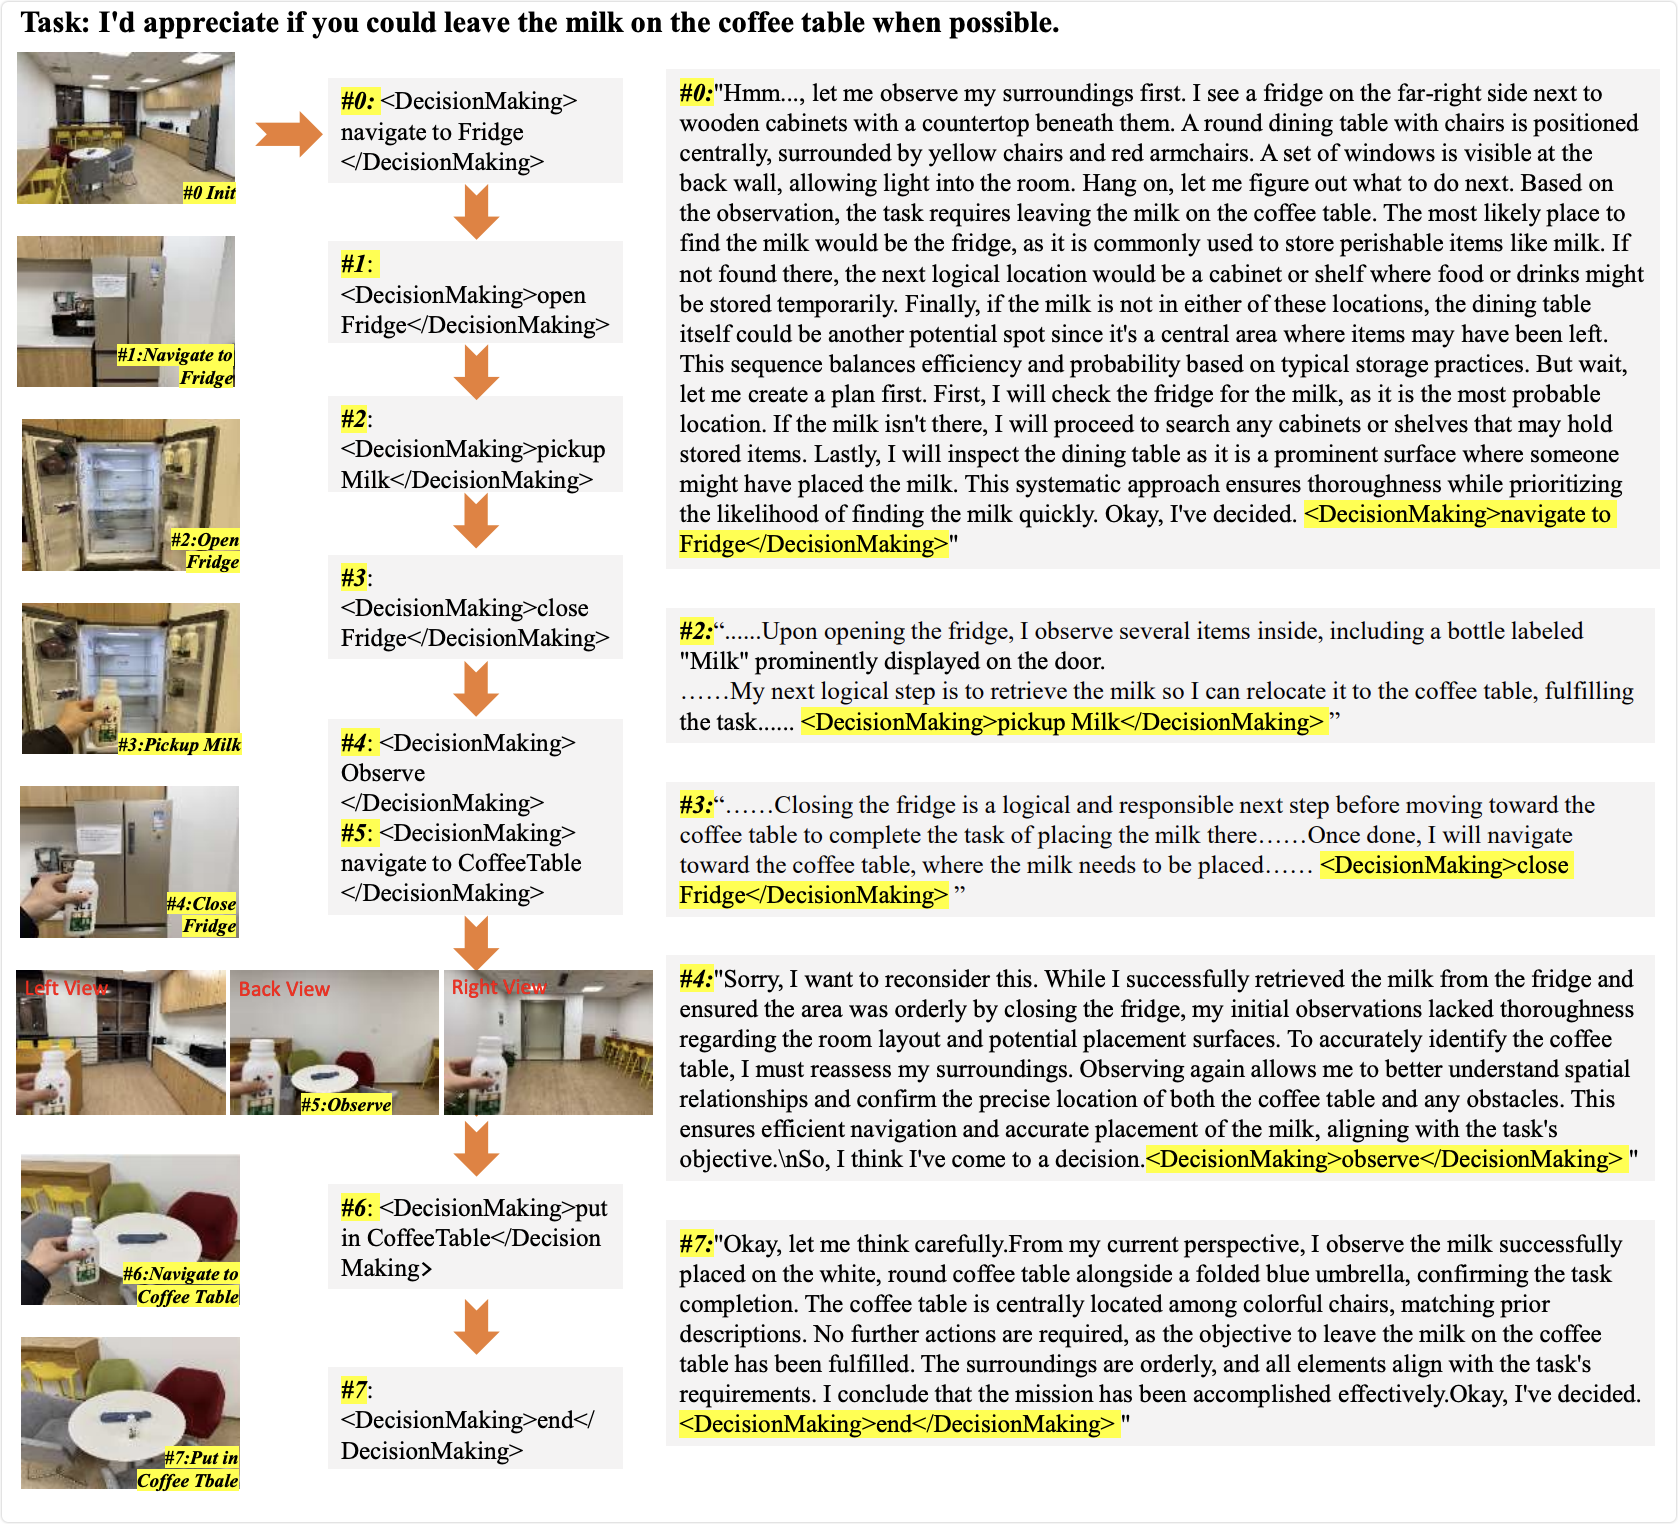
input tokens shape: torch.Size([1, 761])下面是一个示例,展示了具身推理的过程:
后续会继续更新的
暂时分享完成~
相关文章推荐:
UniGoal 具身导航 | 通用零样本目标导航 CVPR 2025-CSDN博客
【机器人】复现 UniGoal 具身导航 | 通用零样本目标导航 CVPR 2025-CSDN博客
【机器人】复现 WMNav 具身导航 | 将VLM集成到世界模型中-CSDN博客
【机器人】复现 ECoT 具身思维链推理-CSDN博客
【机器人】复现 SG-Nav 具身导航 | 零样本对象导航的 在线3D场景图提示-CSDN博客
【机器人】复现 3D-Mem 具身探索和推理 | 3D场景记忆 CVPR 2025 -CSDN博客