深度学习笔记24-LSTM火灾预测(Ptorch)
- 🍨 本文为🔗365天深度学习训练营中的学习记录博客
- 🍖 原作者:K同学啊
一、前期准备
1.数据处理
import torch.nn.functional as F
import numpy as np
import pandas as pd
import torch
from torch import nn
data = pd.read_csv("D:\TensorFlow1\woodpine2.csv")
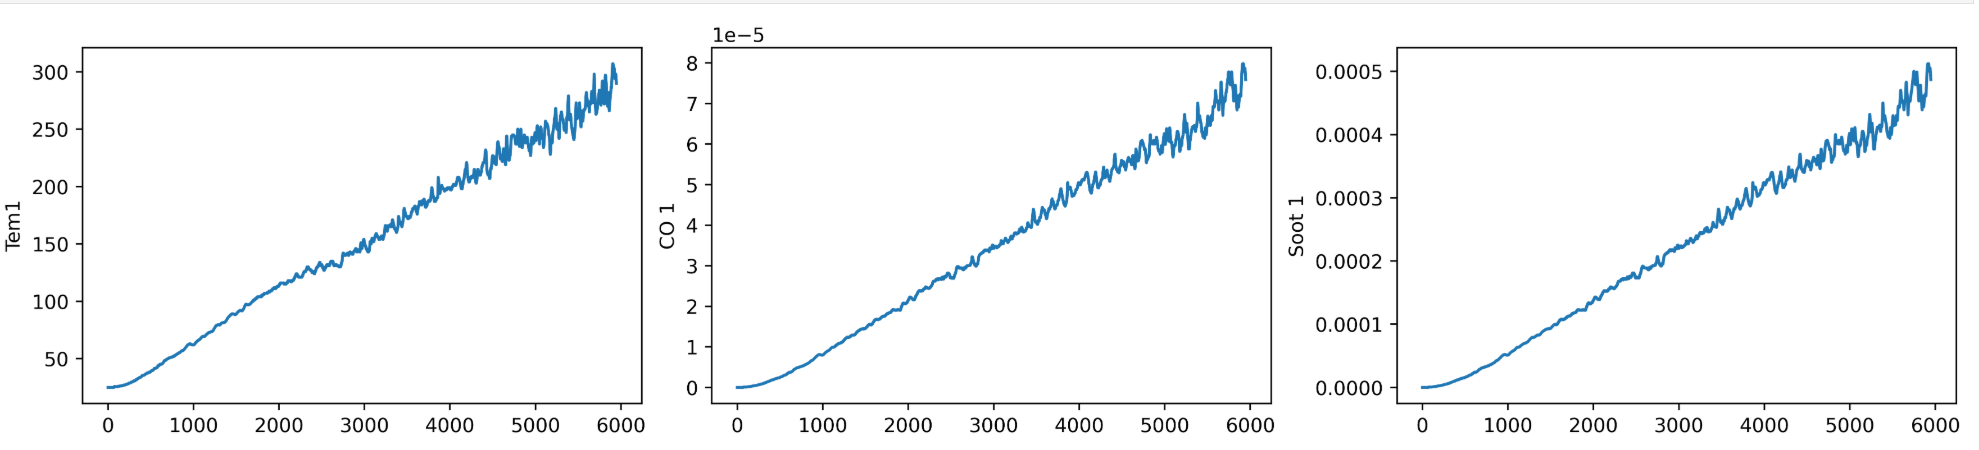
data 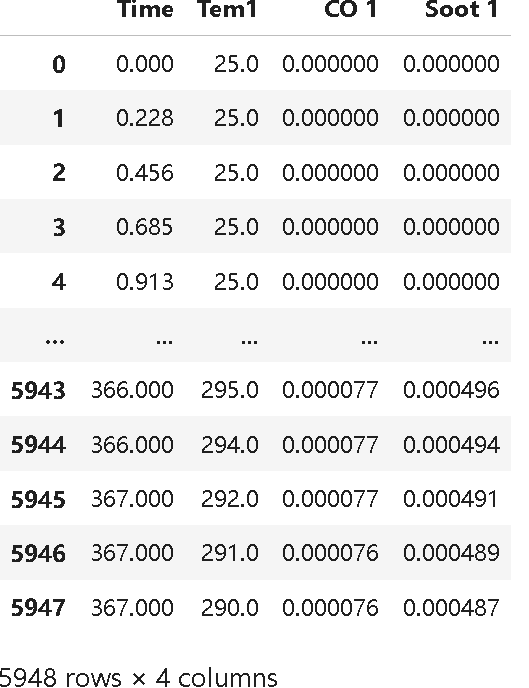 2.数据集可视化
二、构建数据集
1.数据集预处理
from sklearn.preprocessing import MinMaxScaler
dataFrame=data.iloc[:,1:].copy()
sc=MinMaxScaler(feature_range=(0,1))for i in ['CO 1','Soot 1','Tem1']:dataFrame[i]=sc.fit_transform(dataFrame[i].values.reshape(-1,1))
dataFrame.shape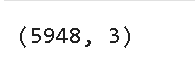
2.设置X,y
width_X =8
width_y=1
##取前8个时间段的Tem1、CO 1、Soot1为X,第9个时间段的Tem1为y。
X=[]
y=[]
in_start = θ
for _,_in data.iterrows():in_end= in_start + width_Xout_end = in_end+ width_yif out_end < len(dataFrame):X_ = np.array(dataFrame.iloc[in_start:in_end , ])y_ = np.array(dataFrame.iloc[in_end :out_end,0])X.append(X_)y.append(y_)in_start += 1
X = np.array(X)
y = np.array(y).reshape(-1,1,1)
X.shape, y.shape
检查数据集中是否有空值
print(np.any(np.isnan(X)))
print(np.any(np.isnan(y)))
3.数据集划分
X_train = torch.tensor(np.array(X[:5000]), dtype=torch.float32)

y_train = torch.tensor(np.array(y[:5000]), dtype=torch.float32)

X_test = torch.tensor(np.array(X[5000:]), dtype=torch.float32)

y_test = torch.tensor(np.array(y[5000:]), dtype=torch.float32)

X_train.shape, y_train.shape
from torch.utils.data import TensorDataset,DataLoader
train_dl = DataLoader(TensorDataset(X_train, y_train),batch_size=64,shuffle=False)
test_dl= DataLoader(TensorDataset(X_test,y_test),batch_size=64,shuffle=False)
三、模型训练
1.构建模型
class model_lstm(nn.Module):def __init__(self):super(model_lstm, self).__init__()self.lstm0 = nn.LSTM(input_size=3 ,hidden_size=320,num_layers=1, batch_first=True)self.lstm1 = nn.LSTM(input_size=320 ,hidden_size=320,num_layers=1, batch_first=True)self.fc0= nn.Linear(320,1)def forward(self,x):out,hidden1 = self.lstmθ(x)out,_ = self.lstm1(out,hidden1)out= self.fc0(out)return out[:,-1:,:]#取2个预测值,否则经过1stm会得到8*2个预测
model = model_lstm()
model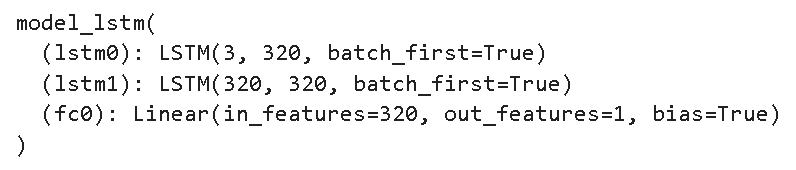
2.定义训练函数
#训练循环

import copy
def train(train_dl,model,loss_fn,opt,lr_scheduler=None):
size= len(train_dl.dataset)
num_batches = len(train_dl)
train_loss=0  #初始化训练损失和正确率
for x, y in train_dl:
#计算预测误差
pred = model(x)#网络输出
loss = loss_fn(pred,y)#计算网络输出和真实值之间的差距
#反向传播
opt.zero_grad()#grad属性归零
loss.backward()#反向传播
opt.step()#每一步自动更新
#记录loss
train_loss += loss.item()
if lr_scheduler is not None:
lr_scheduler.step()
print("learning rate = {:.5f}".format(opt.param_groups[0]['lr'],end="  ")train_loss /= num_batches
return train_loss
3.定义测试函数
def test (dataloader, model, loss_fn):size = len(dataloader.dataset) # 测试集的大小num_batches = len(dataloader) # 批次数目test_loss = 0# 当不进行训练时,停止梯度更新,节省计算内存消耗with torch.no_grad():for x, y in dataloader:# 计算lossy_pred = model(x)loss = loss_fn(y_pred, y)test_loss += loss.item()test_loss /= num_batchesreturn test_loss4.训练函数
#训练模型
model = model_lstm()
model = model.to(device)
loss_fn = nn.MSELoss() # 创建损失函数
learn_rate = 1e-1 # 学习率
opt = torch.optim.SGD(model.parameters(),lr=learn_rate,weight_decay=1e-4)
epochs = 50
train_loss = []
test_loss = []
lr_scheduler = torch.optim.lr_scheduler.CosineAnnealingLR(opt,epochs, last_epoch=-1) for epoch in range(epochs):model.train()epoch_train_loss = train(train_dl, model, loss_fn, opt, lr_scheduler)model.eval()epoch_test_loss = test(test_dl, model, loss_fn)train_loss.append(epoch_train_loss)test_loss.append(epoch_test_loss)template = ('Epoch:{:2d}, Train_loss:{:.5f}, Test_loss:{:.5f}')print(template.format(epoch+1, epoch_train_loss, epoch_test_loss))print("="*20, 'Done', "="*20)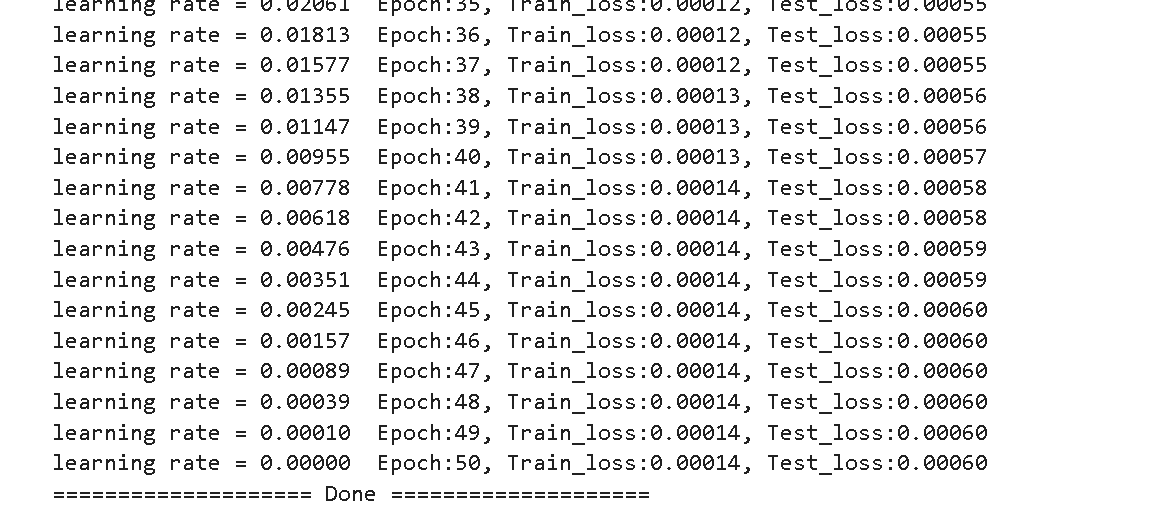 四、模型评估
1.loss图
import matplotlib.pyplot as plt
from datetime import datetime
current_time = datetime.now() # 获取当前时间plt.figure(figsize=(5, 3),dpi=120)plt.plot(train_loss , label='LSTM Training Loss')
plt.plot(test_loss, label='LSTM Validation Loss')plt.title('Training and Validation Loss')
plt.xlabel(current_time) # 打卡请带上时间戳,否则代码截图无效
plt.legend()
plt.show()# 将模型输出移至CPU后再转换为NumPy数组
predicted_y_lstm = sc.inverse_transform(model(X_test).cpu().detach().numpy().reshape(-1,1))
y_test_1 = sc.inverse_transform(y_test.reshape(-1,1))
y_test_one = [i[0] for i in y_test_1]
predicted_y_lstm_one = [i[0] for i in predicted_y_lstm]plt.figure(figsize=(5, 3),dpi=120)
# 画出真实数据和预测数据的对比曲线
plt.plot(y_test_one[:2000], color='red', label='real_temp')
plt.plot(predicted_y_lstm_one[:2000], color='blue', label='prediction')plt.title('Title')
plt.xlabel('X')
plt.ylabel('Y')
plt.legend()
plt.show()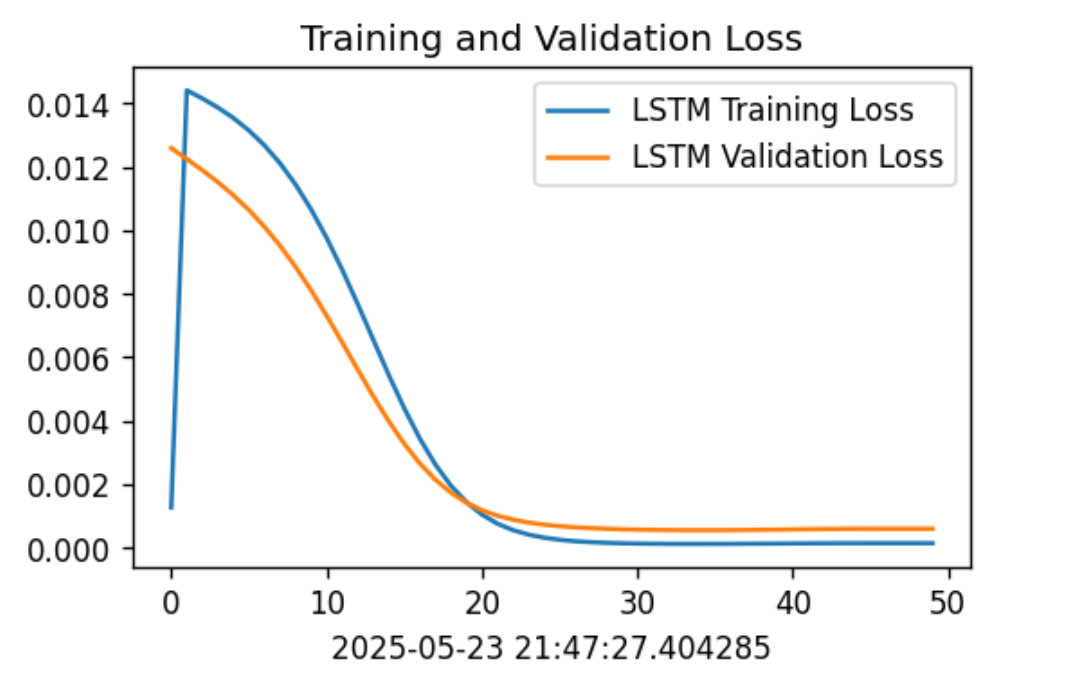 2.进行预测
# 将模型输出移至CPU后再转换为NumPy数组
predicted_y_lstm = sc.inverse_transform(model(X_test).cpu().detach().numpy().reshape(-1,1))
y_test_1 = sc.inverse_transform(y_test.reshape(-1,1))
y_test_one = [i[0] for i in y_test_1]
predicted_y_lstm_one = [i[0] for i in predicted_y_lstm]plt.figure(figsize=(5, 3),dpi=120)
# 画出真实数据和预测数据的对比曲线
plt.plot(y_test_one[:2000], color='red', label='real_temp')
plt.plot(predicted_y_lstm_one[:2000], color='blue', label='prediction')plt.title('Title')
plt.xlabel('X')
plt.ylabel('Y')
plt.legend()
plt.show()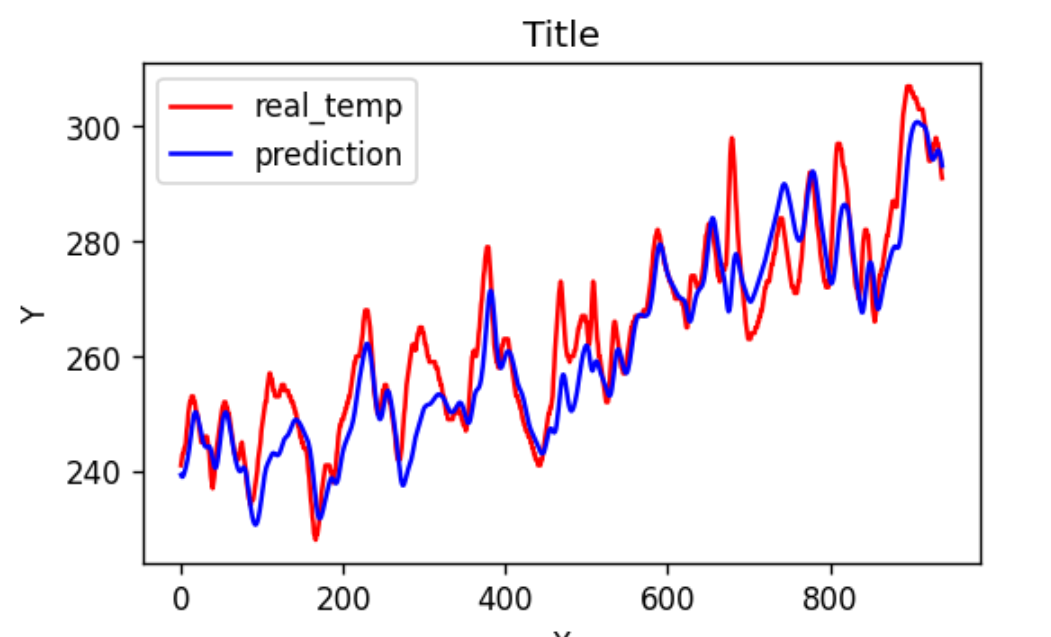
五、总结
lstm可以解决传统 RNN 在处理长序列数据时遇到的梯度消失或梯度爆炸问题,本周搭建了pytorch框架,与tensorflow不同的是:
-
TensorFlow 的 LSTM 实现较为模块化,通常通过
tf.keras.layers.LSTM来构建。它提供了丰富的参数选项,例如units(隐藏单元数)、return_sequences(是否返回整个序列)、return_state(是否返回状态)等。 -
PyTorch 的 LSTM 通过
torch.nn.LSTM来实现。它的 API 更加底层,直接操作张量和模块。用户需要手动定义模型的输入、输出以及隐藏状态的初始化。