Model 复现系列(一)OpenVLA
这个系列用来记录一些开源模型在本地部署或测试时遇到的一些坑以及解决方案。
系列第一篇文章给了 OpenVLA,该模型是具身智能与VLA领域的必读模型之一,虽然现在有很多模型号称超越了它,但作为行业的基石仍然有非常高的地位。
- 项目链接:https://github.com/openvla/openvla
1. 拉取仓库
$ git clone git@github.com:openvla/openvla.git
2. 创建conda虚拟环境
$ conda create -n openvla python=3.10 -y
$ conda activate openvla
$ conda install pytorch torchvision torchaudio pytorch-cuda=12.4 -c pytorch -c nvidia -y$ cd openvla
$ pip install -e .
如果你需要进行训练或者微调还需要安装 Flash Attention 2:
【Note】:Flash Attention 2 是需要硬件支持的,必须是Nvidia 30系列及其以上的显卡才可以;
$ pip install packaging ninja
$ ninja --version; echo $?  # Verify Ninja --> should return exit code "0"
$ pip install "flash-attn==2.5.5" --no-build-isolation
3. 轻量接口测试
在官方仓库中提供了一份轻量级接口测试的脚本,需要首先安装以下依赖,如果你的 torch 和torchvision 版本已经达到要求了就可以跳过这两个包:
timm==0.9.10
tokenizers==0.19.1
torch>=2.2.0
torchvision>=0.16.0
transformers==4.40.1
想要运行这个脚本需要提前准备一下 huggingface 上的 openvla/openvla-7b 模型,建议离线下载好后再进行后续步骤:
- huggingface 模型仓库:https://huggingface.co/openvla/openvla-7b;
- 离线下载模型教程:smolagents学习笔记系列(二)Agents - Guided tour 中
Local Transformers Model部分;
或者使用 git lfs 拉取仓库,但有时候容易中断导致拉取失败,安装 git lfs:
(openvla) $ curl -s https://packagecloud.io/install/repositories/github/git-lfs/script.deb.sh | sudo bash
(openvla) $ sudo apt-get install git-lfs
(openvla) $ git lfs install
成功安装后使用下面的命令直接拉取:
(openvla) $ git lfs clong git@hf.co:openvla/openvla-7b
假设下载好后的文件结构如下:
(openvla) $ tree -L 2
.
├── models
│   └── openvla-7b	# 存放模型的位置,大约 15 GB
├── openvla
│   ├── LICENSE
│   ├── Makefile
│   ├── README.md
│   ├── experiments
│   ├── openvla.egg-info
│   ├── prismatic
│   ├── pyproject.toml
│   ├── requirements-min.txt
│   ├── scripts
│   └── vla-scripts
原始 README 文件中有一些关于机器人动作、图像获取的代码没有填充进去,但可以用这个脚本测试一下上面的准备工作是否做到位,创建一个文件 light-demo.py 并编写以下内容:
from transformers import AutoModelForVision2Seq, AutoProcessor
from PIL import Image
import torch
import numpy as np# 加载离线模型和处理器
model_path = '../models/openvla-7b'		# 离线模型文件夹路径processor = AutoProcessor.from_pretrained(model_path, trust_remote_code=True)
vla = AutoModelForVision2Seq.from_pretrained(model_path,attn_implementation="flash_attention_2",torch_dtype=torch.bfloat16,low_cpu_mem_usage=True,trust_remote_code=True
).to("cuda:0")print('-' * 50)# 直接使用噪声图像作为模型的输入
noise = torch.randn((3, 224, 224), dtype=torch.float32)  # 假设输入尺寸为 224x224
noise_image = Image.fromarray((noise.numpy().transpose(1, 2, 0) * 255).astype(np.uint8))# 格式化提示语
prompt = "In: What action should the robot take to {<INSTRUCTION>}?\nOut:"# 预测动作
inputs = processor(prompt, noise_image).to("cuda:0", dtype=torch.bfloat16)
action = vla.predict_action(**inputs, unnorm_key="bridge_orig", do_sample=False)# 打印输出
print("Predicted Action:", action)
运行结果如下所示就说明前期的准备工作完成了:
(openvla) $ python light-demo.pyLoading checkpoint shards:   0%|          | 0/3 [00:00<?, ?it/s]
--------------------------------------------------
Predicted Action: [ 0.00180428 -0.00657556 -0.00621723  0.01135582 -0.00212033 -0.0065139 0.99607843]
4 Fine-Tuning via LoRA
官方仓库在 Fine-Tuning via LoRA 部分直接给了完整 124 GB 数据的微调方式,但通常情况下我们是需要筛选出适合自身任务的 Task 然后再去微调,这样就犯不着将上面完整的数据集下载下来,我这里给出一个方法用于下载该数据集中一部分内容然后进行微调。
4.1 下载数据集
官方仓库中给出的 BridgeData V2 链接 打开后只能下载完整的 zip数据包,但这个数据集本质上是UC Berkeley 的,因此可以通过他们原始链接下载散装数据集。
- 官方仓库给出的 124 GB 数据集: https://rail-berkeley.github.io/bridgedata/;
- 散装数据集:https://rail.eecs.berkeley.edu/datasets/bridge_release/data/tfds/bridge_dataset/1.0.0/;
打开散装链接后可以看到下面的界面:
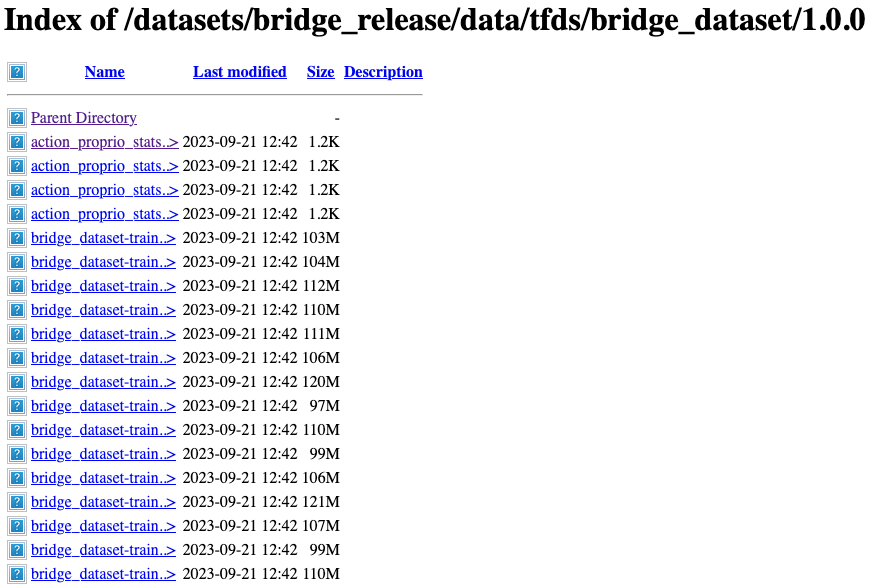
网页文件最下方可以以下内容:
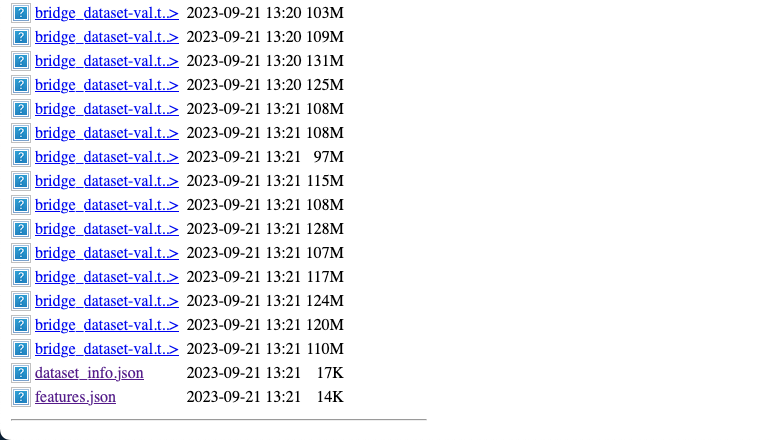
这里根据你的需求选择下载 dataset_info.json、一个训练集、一个验证集,我这里以下面两个数据包为例:
- bridge_dataset-train.tfrecord-00000-of-01024 训练集 130MB;
- bridge_dataset-val.tfrecord-00000-of-00128 验证集 133MB;
- dataset_info.json 数据集描述文件 17KB;
【Note】:如果你想要下载更多的包也可以,但需要在后面修改 dataset_info.json 文件时有些差异。
下载好数据后需要创建两个层级文件夹bridge_orig和1.0.0存放结构如下:
【Note】:你也可以按照自己的意愿来构建文件目录,但这样的话就需要你修改更多的源码,这里提供的是修改地方最少的方案。
(openvla) $ tree -L 2
|-- bridge_orig    # 创建的文件层级一
|   -- 1.0.0       # 创建的文件层级二
|       |-- action_proprio_stats_7d6a416829d818b733e7342f225f3c522a8265a5224e0175f2ab28e26a932ff1.json
|       |-- bridge_dataset-train.tfrecord-00000-of-00001   # 修改后的训练集名
|       |-- bridge_dataset-val.tfrecord-00000-of-00001     # 修改后的验证集名
|       |-- dataset_info.json
|       `-- features.json
...
4.2 修改数据描述文件 dataset_info.json
这一步比较麻烦,因为需要找到 splits 字段中 shardLengths 与你数据序号对应的索引并保留,我写了一个脚本用来自动生成这部分内容,脚本写的比较简陋凑合着用吧:
import re
import os, json, gc
import argparse
import os
import sysdef get_all_files(directory):"""递归获取目录下所有文件路径"""file_list = []for root, dirs, files in os.walk(directory):for file in files:full_path = os.path.join(root, file)file_list.append(full_path)return file_listdef json_comment_parser(file_path):"""读取含注释的 JSON 文件并转换为字典支持处理以下注释类型:- 单行注释 // comment- 块注释 /* comment */"""# 定义注释正则表达式comment_pattern = r'//.*?$|/\*.*?\*/|\'(?:\\.|[^\\\'])*\'|"(?:\\.|[^\\"])*"'with open(file_path, 'r', encoding='utf-8') as f:content = ''.join(f.readlines())# 分步处理注释def replace_comment(match):s = match.group(0)return '' if s.startswith(('//', '/*')) else s# 使用正则表达式过滤注释cleaned = re.sub(comment_pattern, replace_comment, content, flags=re.MULTILINE|re.DOTALL)# 删除多余逗号(JSON 严格模式校验)cleaned = re.sub(r',\s*(?=[}\]])', '', cleaned)return json.loads(cleaned)def extract_tfrecord_number(filename):"""从文件名中提取 tfrecord 编号:param filename: 符合 bridge_dataset-train.tfrecord-00000-of-01024 格式的字符串:return: 提取的整型数字 (如 00000 → 0)"""pattern = r"tfrecord-(\d+)-of"  # 捕获 tfrecord- 和 -of 之间的数字match = re.search(pattern, filename)if not match:raise ValueError(f"文件名格式不符合要求: {filename}")return int(match.group(1))  # 自动去除前导零def extract_aviable_indexs(original_list, indexs_list):"""从list中保留有效的index元素Args:origin_list (list): _description_indexs_list (list): _description_"""sorted_indices = sorted(indexs_list)original_list[:] = [original_list[i] for i in sorted_indices if 0 <= i < len(original_list)and i not in sorted_indices[:sorted_indices.index(i)]  # 去重]return original_listdef main():parser = argparse.ArgumentParser(description="处理命令行参数示例")parser.add_argument('--path', type=str, help='数据集文件夹路径')parser.add_argument('--info_file', type=str, help='dataset_info.json 文件路径')args = parser.parse_args()# 验证路径有效性if not os.path.exists(args.path):print(f"错误:路径 '{args.path}' 不存在", file=sys.stderr)sys.exit(1)if not os.path.isdir(args.path):print(f"错误:'{args.path}' 不是目录", file=sys.stderr)sys.exit(1)if not os.path.exists(args.info_file):print(f"错误:'{args.info_file}' 配置文件不存在", file=sys.stderr)sys.exit(1)# 获取并输出文件列表train_file_list = []    # 训练集文件列表train_file_indexs = []val_file_list = []      # 测试集文件列表val_file_indexs = []try:files = get_all_files(args.path)for idx, file in enumerate(files, 1):if 'train' in file:train_file_list.append(file)elif 'val' in file:val_file_list.append(file)else:continueexcept Exception as e:print(f"扫描过程中发生错误:{str(e)}", file=sys.stderr)gc.collect()sys.exit(1)# 打印训练集与验证集print(f"训练集文件共 [{len(train_file_list)}], 如下:")for i in range(len(train_file_list)):filename = train_file_list[i]train_file_indexs.append(extract_tfrecord_number(filename))print(f"\t[{i+1}/{len(train_file_list)}]: {filename} | index={extract_tfrecord_number(filename)}")print(f"验证集文件共 [{len(val_file_list)}], 如下:")for i in range(len(val_file_list)):filename = val_file_list[i]val_file_indexs.append(extract_tfrecord_number(filename))print(f"\t[{i+1}/{len(val_file_list)}]: {filename} | index={extract_tfrecord_number(filename)}")# 读取 dataset_info.json 配置文件try:dataset_info = json_comment_parser(args.info_file)print(f"配置文件 {args.info_file} 加载成功")except Exception as e:print(f"错误:'{args.info_file}' 配置文件不加载失败", file=sys.stderr)sys.exit(1)extract_aviable_indexs(dataset_info["splits"][0]["shardLengths"], train_file_indexs)extract_aviable_indexs(dataset_info["splits"][1]["shardLengths"], val_file_indexs)# 写文件try:save_file_name = "./dataset_info_new.json"with open(save_file_name, 'w', encoding='utf-8') as f:json.dump(dataset_info, f, ensure_ascii=False, indent=4)  # print(f"文件保存成功 {save_file_name}")except Exception as e:print(f"写本地文件失败 {e}")if __name__ == "__main__":main()
使用下面的命令运行脚本:
(openvla) $ python demo.py --path=./bridge_orig/1.0.0 --info=./bridge_orig/1.0.0/dataset_info.json训练集文件共 [1], 如下:[1/1]: ./bridge_orig/1.0.0/bridge_dataset-train.tfrecord-00000-of-01024 | index=0
验证集文件共 [1], 如下:[1/1]: ./bridge_orig/1.0.0/bridge_dataset-val.tfrecord-00000-of-00128 | index=0
配置文件 ./bridge_orig/1.0.0/dataset_info.json 加载成功
文件保存成功 ./dataset_info_new.json
在确认生成的文件 split 字段中数量对得上后将其替换掉 ./bridge_orig/1.0.0/dataset_info.json 文件并修改文件名为 dataset_info.json。
4.3 执行微调命令
在修改对微调命令前首先确认当前文件结构如下所示:
(openvla) $ tree -L 2
.
|-- datasets			# 保存数据的根文件夹
|   |-- bridge_orig
|-- models				# 保存模型的文件夹
|   |-- openvla-7b
|-- openvla
|   |-- LICENSE
|   |-- Makefile
|   |-- README.md
|   |-- experiments
|   |-- light-demo.ipynb
|   |-- openvla.egg-info
|   |-- prismatic
|   |-- pyproject.toml
|   |-- requirements-min.txt
|   |-- scripts
|   |-- vla-scripts
...
进行修改以适配
(openvla) $ cd openvla
(openvla) $ torchrun --standalone --nnodes 1 --nproc-per-node 2 vla-scripts/finetune.py \--vla_path "../models/openvla-7b" \--data_root_dir "../datasets" \--dataset_name "bridge_orig" \--run_root_dir "../models/fineture-checkpoint" \--adapter_tmp_dir "../models/tempory_save" \--lora_rank 32 \--batch_size 1 \--grad_accumulation_steps 1 \--learning_rate 5e-4 \--image_aug False \--shuffle_buffer_size 1 \--wandb_project "ft_vla" \--wandb_entity "ft_vla_en" \--save_steps 5
运行结果如下则表示正常:

5. Fully Fine-Tuning OpenVLA
如果你不想以LoRA的方式对模型进行微调,也可以以全量的方式微调。还是需要对官方的微调指令进行修改。为了全量方式微调,需要使用不同的checkpoint。
- openvla/openvla-7b-prismatic:https://huggingface.co/openvla/openvla-7b-prismatic
【Note】:模型太大了,等我把模型上传到服务器后再来补全。