代码随想录 算法训练 Day3:链表1
题目:
203.移除链表元素
建议: 本题最关键是要理解 虚拟头结点的使用技巧,这个对链表题目很重要。
力扣题目链接(opens new window)
题意:删除链表中等于给定值 val 的所有节点。
示例 1: 输入:head = [1,2,6,3,4,5,6], val = 6 输出:[1,2,3,4,5]
示例 2: 输入:head = [], val = 1 输出:[]
示例 3: 输入:head = [7,7,7,7], val = 7 输出:[]
题目链接/文章讲解/视频讲解::https://programmercarl.com/0203.移除链表元素.html
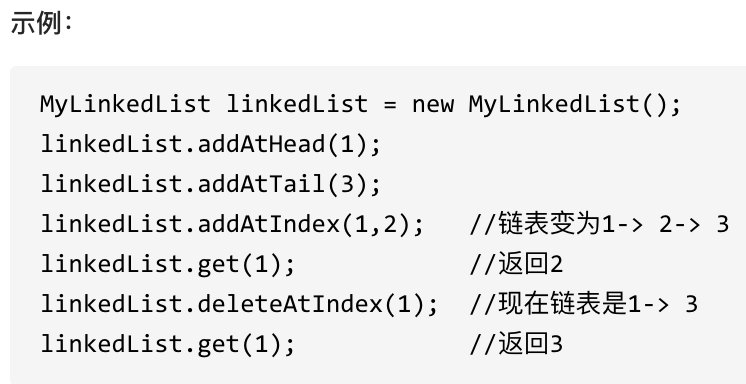
707.设计链表
建议: 这是一道考察 链表综合操作的题目,不算容易,可以练一练 使用虚拟头结点
力扣题目链接(opens new window)
题意:
在链表类中实现这些功能:
- get(index):获取链表中第 index 个节点的值。如果索引无效,则返回-1。
- addAtHead(val):在链表的第一个元素之前添加一个值为 val 的节点。插入后,新节点将成为链表的第一个节点。
- addAtTail(val):将值为 val 的节点追加到链表的最后一个元素。
- addAtIndex(index,val):在链表中的第 index 个节点之前添加值为 val 的节点。如果 index 等于链表的长度,则该节点将附加到链表的末尾。如果 index 大于链表长度,则不会插入节点。如果index小于0,则在头部插入节点。
- deleteAtIndex(index):如果索引 index 有效,则删除链表中的第 index 个节点。
题目链接/文章讲解/视频讲解:https://programmercarl.com/0707.设计链表.html
206.反转链表
建议先看我的视频讲解,视频讲解中对 反转链表需要注意的点讲的很清晰了,看完之后大家的疑惑基本都解决了。
力扣题目链接(opens new window)
题意:反转一个单链表。
示例: 输入: 1->2->3->4->5->NULL 输出: 5->4->3->2->1->NULL
题目链接/文章讲解/视频讲解:https://programmercarl.com/0206.翻转链表.html
答案:
/*** 链表节点类* 每个节点包含一个整数值和指向下一个节点的引用*/
class ListNode {int val;        // 节点存储的值ListNode next;  // 指向下一个节点的引用/*** 默认构造函数*/ListNode() {}/*** 带值的构造函数* @param val 节点存储的值*/ListNode(int val) {this.val = val;}/*** 带值和下一节点引用的构造函数* @param val 节点存储的值* @param next 指向下一个节点的引用*/ListNode(int val, ListNode next) {this.val = val;this.next = next;}/*** 重写toString方法,方便打印链表内容(主要用于调试单个节点)* @return 节点的字符串表示*/@Overridepublic String toString() {return "ListNode{" +"val=" + val +// 为了避免toString()递归过深导致StackOverflowError,不直接打印next的完整信息", next=" + (next != null ? next.val : "null") +'}';}
}/*** 单链表实现类* 提供了链表的基本操作,如添加、删除、查询等功能*/
public class List1 {private ListNode head; // 链表头节点/*** 构造函数 - 创建一个空链表*/public List1() {this.head = null;}/*** 打印链表内容* @param list 要打印的链表*/public void printList(List1 list) {// 如果链表为空,打印提示信息并返回if (list.head == null) {System.out.println("链表为空。");return;}// 从头节点开始遍历链表ListNode current = list.head;while (current != null) {// 打印当前节点的值,并添加箭头表示链接System.out.print(current.val + " -> ");// 移动到下一个节点current = current.next;}// 打印链表结束标志System.out.println("null");}/*** 移除链表中指定的元素(方法一:分步处理头节点和其他节点)* @param list 要操作的链表* @param val 要移除的元素值* @return 移除元素后的链表*/public List1 RemoveSelectedElements(List1 list, int val) {// 处理边界情况:链表为空或链表对象为nullif (list == null || list.head == null) {// System.out.println("链表为空或传入的List1对象为null,无法移除元素。"); // 可以选择性地打印消息return list; // 返回原始列表(可能是null或头部为null)}// 步骤1: 处理头节点(以及后续连续的头节点)就是要删除的元素的情况// 只要头节点不为空且其值等于目标值,就将头节点指向下一个节点while (list.head != null && list.head.val == val) {list.head = list.head.next;}// 如果链表在处理完头节点后变为空(例如,所有节点都被移除了),则直接返回if (list.head == null) {return list;}// 步骤2: 处理链表中间或尾部的元素// 此时,list.head 肯定不是 null,并且 list.head.val 不等于 valListNode current = list.head;// 遍历链表,检查 current 的 *下一个* 节点 (current.next) 是否需要删除while (current.next != null) {if (current.next.val == val) {// 如果 current.next 的值是目标值,则将 current.next 指向 current.next.next,// 从而"跳过"并删除 current.next 节点current.next = current.next.next;// 注意:这里 current 指针不移动。因为 current.next 已经更新为原 current.next.next,// 我们需要再次检查这个新的 current.next 是否也等于 val(处理连续多个相同值的情况)。} else {// 如果 current.next 的值不是目标值,则 current 指针正常后移到下一个节点current = current.next;}}return list; // 返回修改后的 list 对象(其 head 可能已更改)}/*** 使用虚拟头节点方式移除链表中指定的元素(方法二:统一处理所有节点)* @param list 要操作的链表* @param val 要移除的元素值* @return 移除元素后的链表*/public List1 RemoveSelectedElements2(List1 list, int val) {// 如果传入的链表对象为null,直接返回if (list == null) {return list;}// 创建一个虚拟头节点(dummy),其next指向原链表的头节点// 这样可以统一处理头节点和非头节点的删除逻辑,避免特殊判断ListNode dummy = new ListNode(-1);dummy.next = list.head;// prev指针用于追踪当前节点的前一个节点,初始为dummyListNode prev = dummy;// curr指针用于遍历链表,初始为原链表的头节点ListNode curr = list.head;// 遍历整个链表while (curr != null) {if (curr.val == val) {// 如果当前节点的值等于要删除的值// 让prev的next跳过当前节点,指向curr的下一个节点prev.next = curr.next;// 注意:此时prev不移动,因为curr被删除了,prev还要继续指向前一个有效节点} else {// 如果当前节点的值不等于要删除的值// prev正常后移到currprev = curr;}// curr每次都后移到下一个节点curr = curr.next;}// 最后,更新链表的头节点为dummy.next(防止原头节点被删除)list.head = dummy.next;return list;}/*** 获取链表指定索引位置的节点值* @param list 要操作的链表* @param index 要获取的索引位置(从0开始)* @return 索引位置的节点值,如果索引无效则返回-1*/public int GetIndexValue(List1 list, int index) {// 处理边界情况:链表为空或链表对象为nullif (list == null || list.head == null) {System.out.println("链表为空或传入的List1对象为null,无法获取索引值。");return -1;}// 从头节点开始遍历ListNode current = list.head;int currentIndex = 0;// 遍历链表直到找到目标索引或到达链表末尾while (current != null) {// 如果当前索引等于目标索引,返回当前节点的值if (currentIndex == index) {return current.val;}// 移动到下一个节点,索引加1current = current.next;currentIndex++;}// 如果遍历完链表仍未找到目标索引,返回-1表示索引无效return -1;}/*** 在链表头部添加新节点* @param list 要操作的链表* @param val 要添加的节点值* @return 添加节点后的链表*/public List1 addAtHead(List1 list, int val) {// 创建新节点ListNode newNode = new ListNode(val);// 将新节点的next指向原链表的头节点newNode.next = list.head;// 更新链表的头节点为新节点list.head = newNode;return list;}/*** 在链表指定索引位置添加新节点* @param list 要操作的链表* @param index 要添加的位置索引(从0开始)* @param val 要添加的节点值* @return 添加节点后的链表*/public List1 addAtIndex(List1 list, int index, int val){// 处理索引小于0的情况if (index < 0) {System.out.println("无效的索引。");return list;}// 如果索引为0,相当于在头部添加节点if (index == 0) {addAtHead(list, val);return list;}// 创建新节点ListNode newNode = new ListNode(val);// 从头节点开始遍历ListNode current = list.head;int currentIndex = 0;// 找到要插入位置的前一个节点while (current != null) {if (currentIndex == index - 1) {// 将新节点的next指向当前节点的nextnewNode.next = current.next;// 将当前节点的next指向新节点current.next = newNode;return list;}// 移动到下一个节点,索引加1current = current.next;currentIndex++;}// 如果索引超出链表长度,不执行插入操作return list;}/*** 删除链表指定索引位置的节点* @param list 要操作的链表* @param index 要删除的位置索引(从0开始)* @return 删除节点后的链表*/public List1 deleteAtIndex(List1 list, int index){// 处理边界情况:索引小于0或链表为空if (index < 0 || list.head == null) {System.out.println("无效的索引。");return list;}// 如果删除的是头节点if (index == 0) {list.head = list.head.next;return list;}// 从头节点开始遍历ListNode current = list.head;int currentIndex = 0;// 找到要删除节点的前一个节点while (current != null) {if (currentIndex == index - 1) {// 如果要删除的节点存在if (current.next != null) {// 将当前节点的next指向要删除节点的next,从而"跳过"要删除的节点current.next = current.next.next;} else {// 如果要删除的是最后一个节点,直接将当前节点的next设为nullcurrent.next = null;}return list;}// 移动到下一个节点,索引加1current = current.next;currentIndex++;}// 如果索引超出链表长度,不执行删除操作return list;}/*** 在链表尾部添加新节点* @param list 要操作的链表* @param val 要添加的节点值* @return 添加节点后的链表*/public List1 addAtTail(List1 list, int val){// 创建新节点ListNode newNode = new ListNode(val);// 如果链表为空,直接将新节点设为头节点if (list.head == null) {list.head = newNode;return list;}// 从头节点开始遍历,找到最后一个节点ListNode current = list.head;while (current.next != null) {current = current.next;}// 将最后一个节点的next指向新节点current.next = newNode;return list;}/*** 逆置链表 - 将链表反转(头变尾,尾变头)* 时间复杂度:O(n),其中n是链表的长度* 空间复杂度:O(1),只使用了常数个变量* * @param head 原链表的头节点* @return 反转后链表的头节点(原链表的尾节点)*/public ListNode reverseList(ListNode head) {// 定义三个指针:// prev - 指向当前处理节点的前一个节点,初始为null(因为头节点反转后没有下一个节点)ListNode prev = null;// curr - 指向当前正在处理的节点,初始为头节点ListNode curr = head;// next - 临时变量,用于在改变curr的next指针前保存下一个节点的引用ListNode next = null;// 遍历链表,直到当前节点为null(到达链表尾部后的null)while (curr != null) {// 步骤1: 保存当前节点的下一个节点,防止链接断开后丢失后续节点next = curr.next;// 步骤2: 反转当前节点的指针,使其指向前一个节点curr.next = prev;// 步骤3: 移动prev和curr指针,为处理下一个节点做准备// 3.1: prev移动到当前节点prev = curr;// 3.2: curr移动到下一个节点(之前在next中保存的)curr = next;            }// 返回新的头节点,即原链表的尾节点(现在由prev指向)return prev;    }/*** 主方法 - 测试链表的各种操作*/public static void main(String[] args) {System.out.println("创建一个 List1 实例 (空链表):");List1 myList1 = new List1();myList1.printList(myList1); // 应该打印 "链表为空。"System.out.println("\n手动构建一个链表并将其头节点赋值给 myList1.head:");// 1. 手动创建节点ListNode node1 = new ListNode(1);ListNode node2 = new ListNode(2);ListNode node3 = new ListNode(3);ListNode node4 = new ListNode(4);ListNode node5 = new ListNode(5);// 2. 连接节点形成链表node1.next = node2;node2.next = node3;node3.next = node4;node4.next = node5;// node5.next 默认为 null// 3. 将手动创建的链表头赋值给 myList1 的 head 成员变量myList1.head = node1;System.out.println("打印 myList1 中的链表内容:");myList1.printList(myList1); // 应该打印 1 -> 2 -> 3 -> 4 -> 5 -> null// ========== 新增接口测试 ==========System.out.println("\n测试 addAtHead:在头部插入0");myList1.addAtHead(myList1, 0);myList1.printList(myList1); // 0 -> 1 -> 2 -> 3 -> 4 -> 5 -> nullSystem.out.println("\n测试 addAtTail:在尾部插入6");myList1.addAtTail(myList1, 6);myList1.printList(myList1); // 0 -> 1 -> 2 -> 3 -> 4 -> 5 -> 6 -> nullSystem.out.println("\n测试 addAtIndex:在索引3插入99");myList1.addAtIndex(myList1, 3, 99);myList1.printList(myList1); // 0 -> 1 -> 2 -> 99 -> 3 -> 4 -> 5 -> 6 -> nullSystem.out.println("\n测试 deleteAtIndex:删除索引3(即99)");myList1.deleteAtIndex(myList1, 3);myList1.printList(myList1); // 0 -> 1 -> 2 -> 3 -> 4 -> 5 -> 6 -> nullSystem.out.println("\n测试 GetIndexValue:获取索引5的值(应为5)");int valAt5 = myList1.GetIndexValue(myList1, 5);System.out.println("索引5的值为:" + valAt5);System.out.println("\n测试 RemoveSelectedElements2:移除所有值为6的节点");myList1.RemoveSelectedElements2(myList1, 6);myList1.printList(myList1); // 0 -> 1 -> 2 -> 3 -> 4 -> 5 -> null// ========== 原有示例测试 ==========// 示例1:输入 head = [1,2,6,3,4,5,6], val = 6,输出 [1,2,3,4,5]System.out.println("\n示例1:输入 head = [1,2,6,3,4,5,6], val = 6");List1 ex1 = new List1();ex1.head = new ListNode(1, new ListNode(2, new ListNode(6, new ListNode(3, new ListNode(4, new ListNode(5, new ListNode(6)))))));System.out.print("原始链表:");ex1.printList(ex1);ex1.RemoveSelectedElements(ex1, 6);System.out.print("移除6后:");ex1.printList(ex1);// 示例2:输入 head = [], val = 1,输出 []System.out.println("\n示例2:输入 head = [], val = 1");List1 ex2 = new List1();System.out.print("原始链表:");ex2.printList(ex2);ex2.RemoveSelectedElements(ex2, 1);System.out.print("移除1后:");ex2.printList(ex2);// 示例3:输入 head = [7,7,7,7], val = 7,输出 []System.out.println("\n示例3:输入 head = [7,7,7,7], val = 7");List1 ex3 = new List1();ex3.head = new ListNode(7, new ListNode(7, new ListNode(7, new ListNode(7))));System.out.print("原始链表:");ex3.printList(ex3);ex3.RemoveSelectedElements(ex3, 7);System.out.print("移除7后:");ex3.printList(ex3);}
}// ========== 测试链表反转 ==========System.out.println("\n测试 reverseList:反转链表");// 创建一个新链表用于测试反转List1 reverseTestList = new List1();reverseTestList.head = new ListNode(1, new ListNode(2, new ListNode(3, new ListNode(4, new ListNode(5)))));System.out.print("原始链表:");reverseTestList.printList(reverseTestList); // 1 -> 2 -> 3 -> 4 -> 5 -> null// 反转链表reverseTestList.head = reverseTestList.reverseList(reverseTestList.head);System.out.print("反转后链表:");reverseTestList.printList(reverseTestList); // 5 -> 4 -> 3 -> 2 -> 1 -> null// 测试空链表反转System.out.println("\n测试空链表反转:");List1 emptyList = new List1();System.out.print("原始链表:");emptyList.printList(emptyList); // 链表为空。emptyList.head = emptyList.reverseList(emptyList.head);System.out.print("反转后链表:");emptyList.printList(emptyList); // 链表为空。// 测试单节点链表反转System.out.println("\n测试单节点链表反转:");List1 singleNodeList = new List1();singleNodeList.head = new ListNode(42);System.out.print("原始链表:");singleNodeList.printList(singleNodeList); // 42 -> nullsingleNodeList.head = singleNodeList.reverseList(singleNodeList.head);System.out.print("反转后链表:");singleNodeList.printList(singleNodeList); // 42 -> null
总结
周五了,心不在焉的看完了今天的题,效率很低,照这个架势,是要二刷了。