LWIP带freeRTOS系统移植笔记
以正点原子学习视频为基础的文章
LWIP带freeRTOS系统移植
准备资料/工程
1、lwIP例程1 lwIP裸机移植 工程 , 作为基础工程 改名为LWIP_freeRTOS_yizhi工程
2、lwIP例程6 lwIP_FreeRTOS移植 工程
3、freeRTO源码
打开https://www.freertos.org/网址下载FreeRTOS源码包
省出麻烦的细节移植,直接使用1、2 两个工程移植
在 lwIP例程6 lwIP_FreeRTOS移植 工程中
1、取出 Middlewares\FreeRTOS 把FreeRTOS系统源文件移植到
2、取出 Drivers\SYSTEM delay、sys、usart.c文件 移植到
3、取出 \User FreeRTOSConfig.h文件 移植到
LWIP_freeRTOS_yizhi工程中
在工程中新建分组
LWIP_freeRTOS_yizhi工程作为基础工程
分组1:Middlewares/FreeRTOS_CORE
Middlewares\FreeRTOS 当前文件夹下的全部c文件
分组2:Middlewares/FreeRTOS_PORT
1、Middlewares\FreeRTOS\portable\MemMang 的 heap_4.c文件
2、Middlewares\FreeRTOS\portable\RVDS\ARM_CM4F 的port.c文件
添加头文件路径
1、Middlewares\FreeRTOS\include
2、Middlewares\FreeRTOS\portable\RVDS\ARM_CM4F
移植支持lwip的freeRTOS系统文件
http://savannah.nongnu.org/projects/lwip/
网址下载lwIP源码包和contrib包
1、在 contrib-2.1.0\ports\freertos 取得sys_arch.c / .h
2、移植到 LWIP_freeRTOS_yizhi工程中 Middlewares/lwip/arch
并在工程中,添加到分组和添加包含路径
修改配置文件
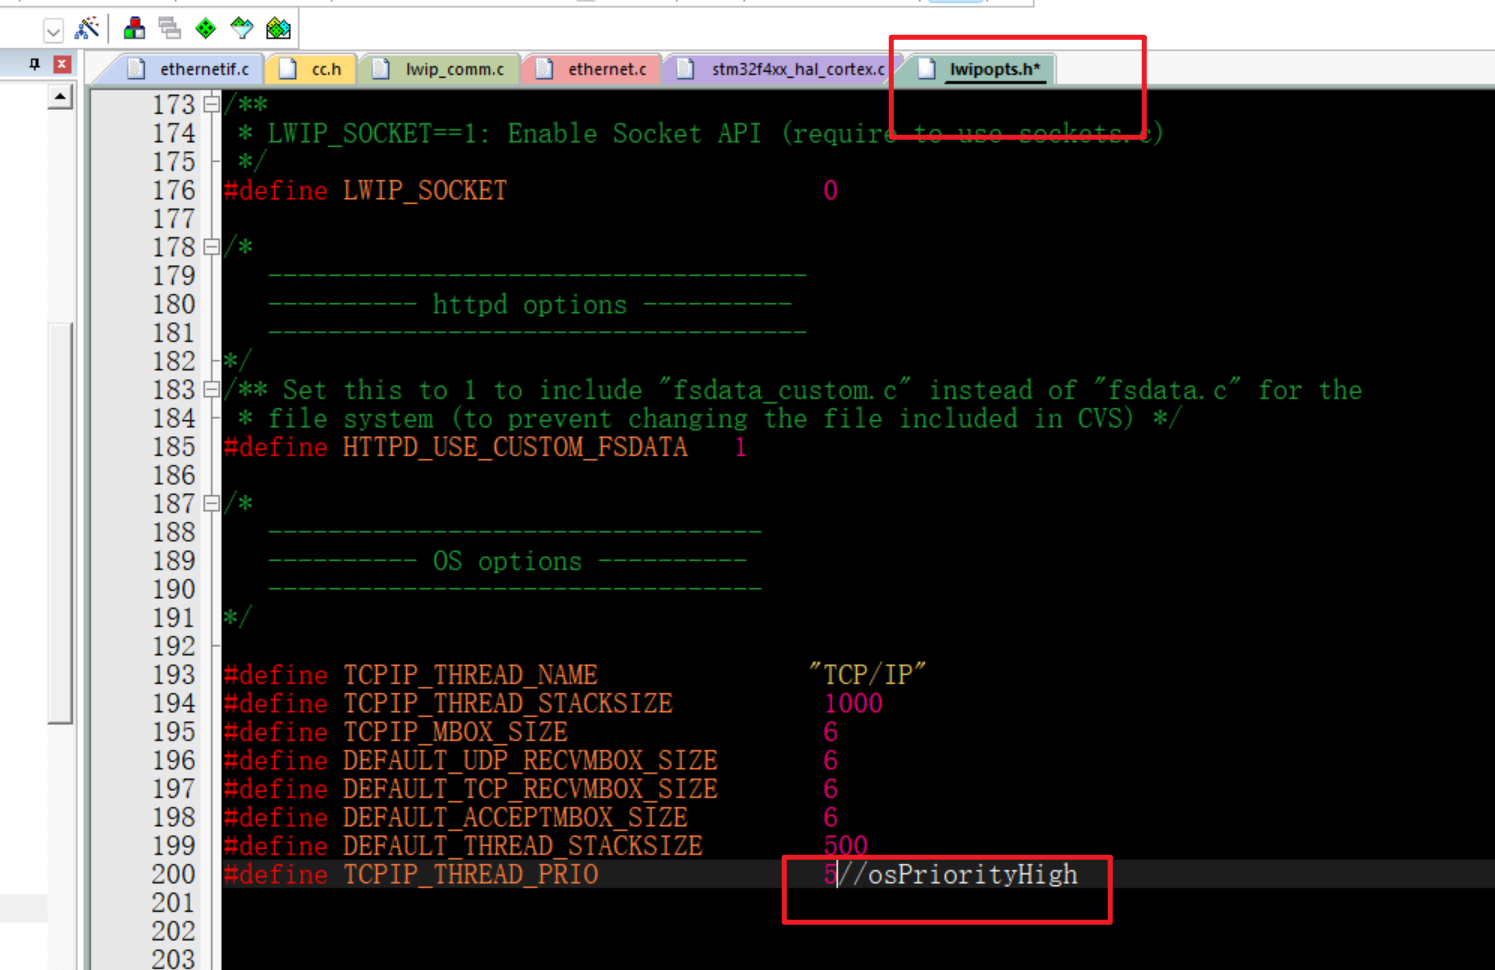
1,修改lwipopts.h
(目标:需要,符合带操作系统的配置文件)
因为基础工程是用的裸机移植作为基础,所以这个文件是用在裸机上的;所以需要更改找到stm提供的库文件相关文件
FW_F4_V1.26.0\Projects\STM32469I_EVAL\Applications\LwIP \LwIP_HTTP_Server_Netconn_RTOS\Inc\ 路径下的lwipopts.h替换本实验的Middlewares\lwip\arch lwipopts.h文件
ps:FW_F4_V1.26.0 stm官方资料包
修改TCPIP的优先级 此处没有实际的定义,所以改成5 如下
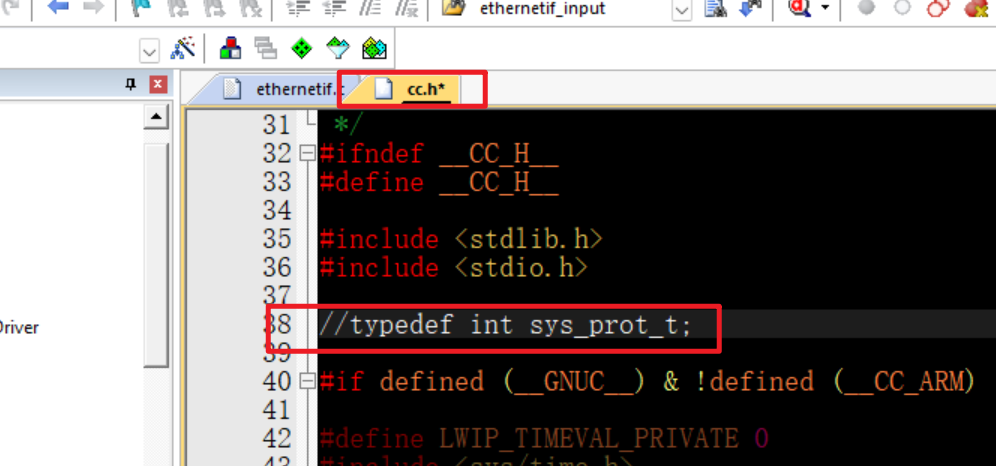
2、修改cc.h
(目标:注释掉重复的变量)
“typedef int sys_prot_t”代码注销
3,修改lwip_comm.c/.h
(目标:删除lwip_periodic_handle函数和修改lwip_comm_init 函数)
1、删除 lwIP 轮询函数 lwip_periodic_handle
2、修改 lwip_comm_init 函数
直接移植好的工程 后期源码分析;路径: Middlewares\lwip\arch
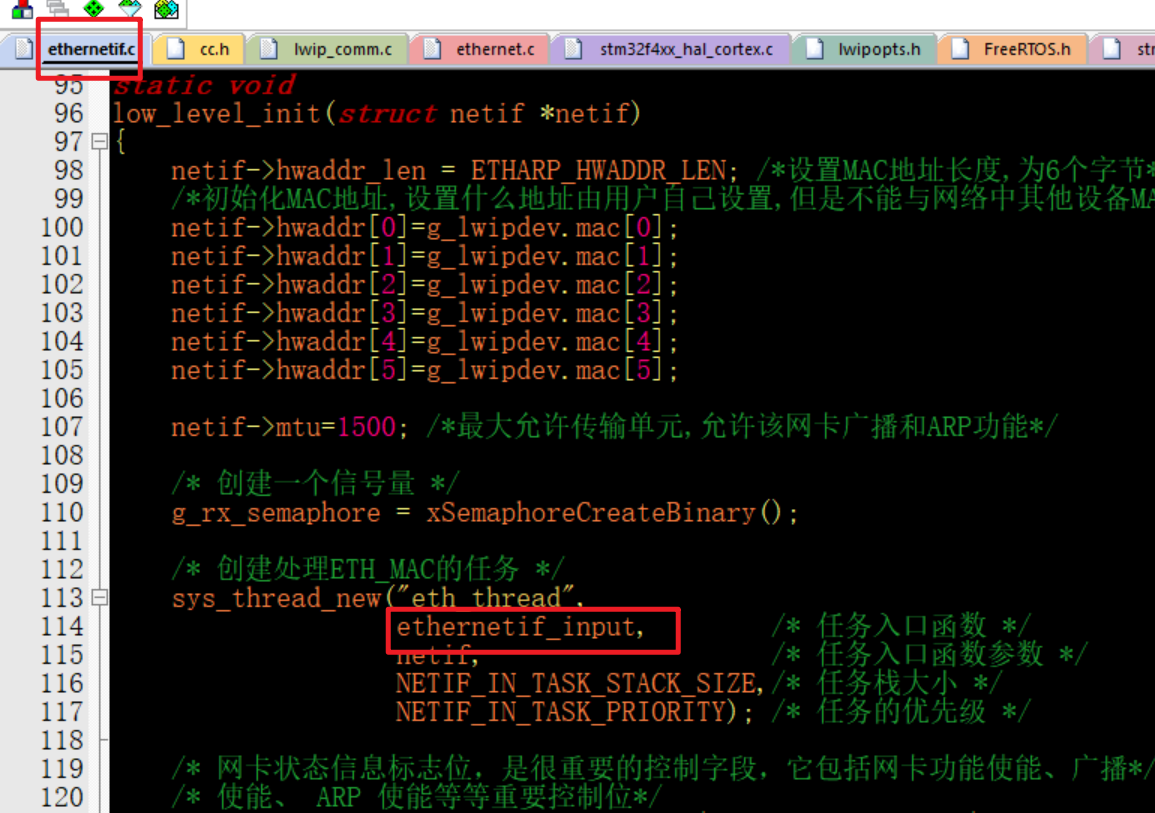
4,修改ethernetif.c/h
(目标:修改为带操作系统的网卡驱动)
修改low_level_init函数
修改 ethernetif_input函数
直接移植好的工程 后期源码分析;路径: Middlewares\lwip\arch
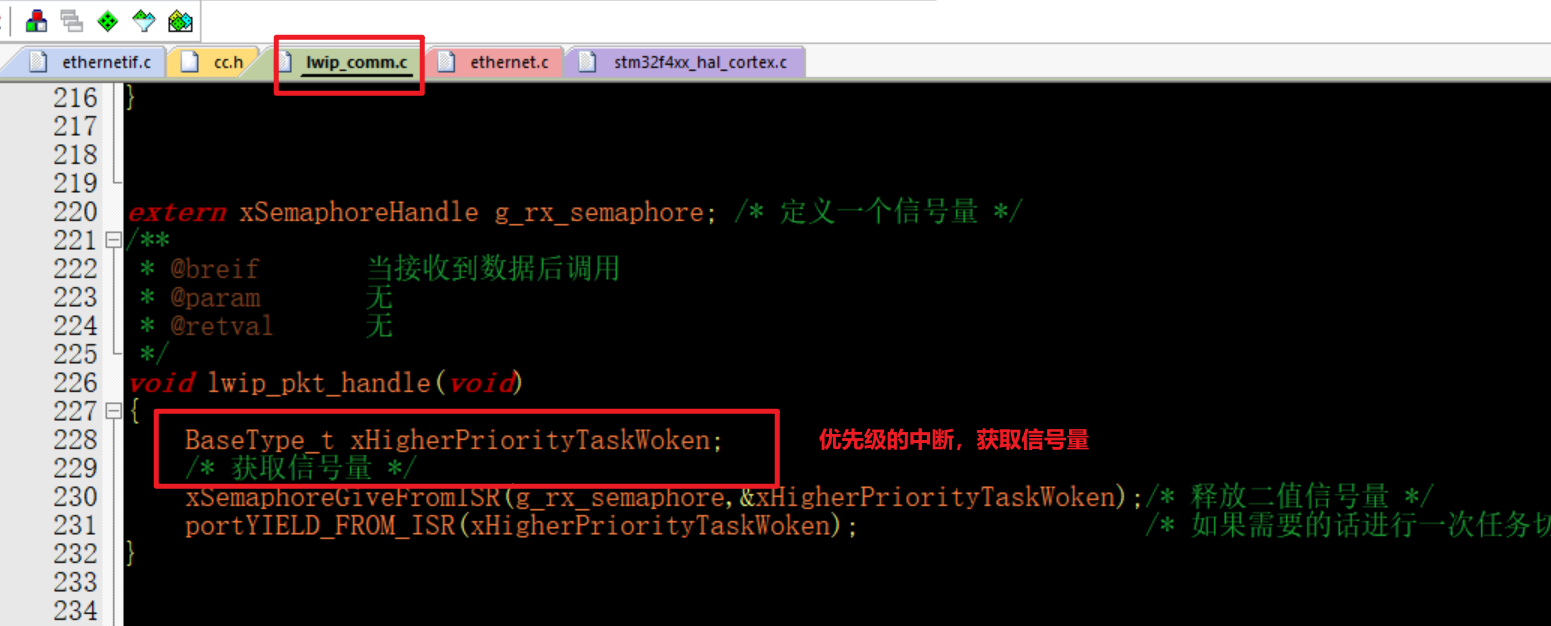
1、创建任务ethernetif_input任务;
该任务获取二值信号量,判断是否接收到数据
然后在中断函数中释放;
2、ethernetif_input 的相关中断 信号量释放
释放二值信号量,就是为了重复的操作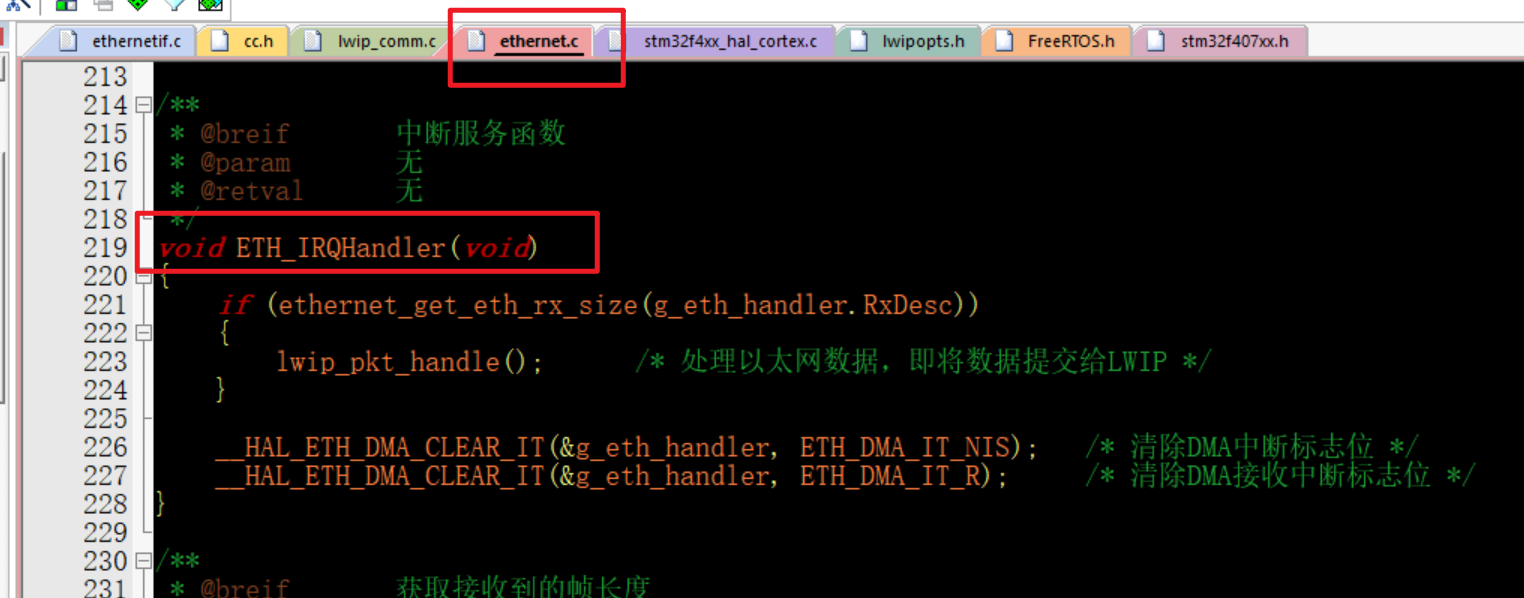
5,修改ethrnet.c
(目标:修改中断优先级;修改中断优先级,必须归FreeRTOS内核管理)
直接移植好的工程 后期源码分析;路径: Drivers\BSP\ETHERNET
优先级为6 子优先级0
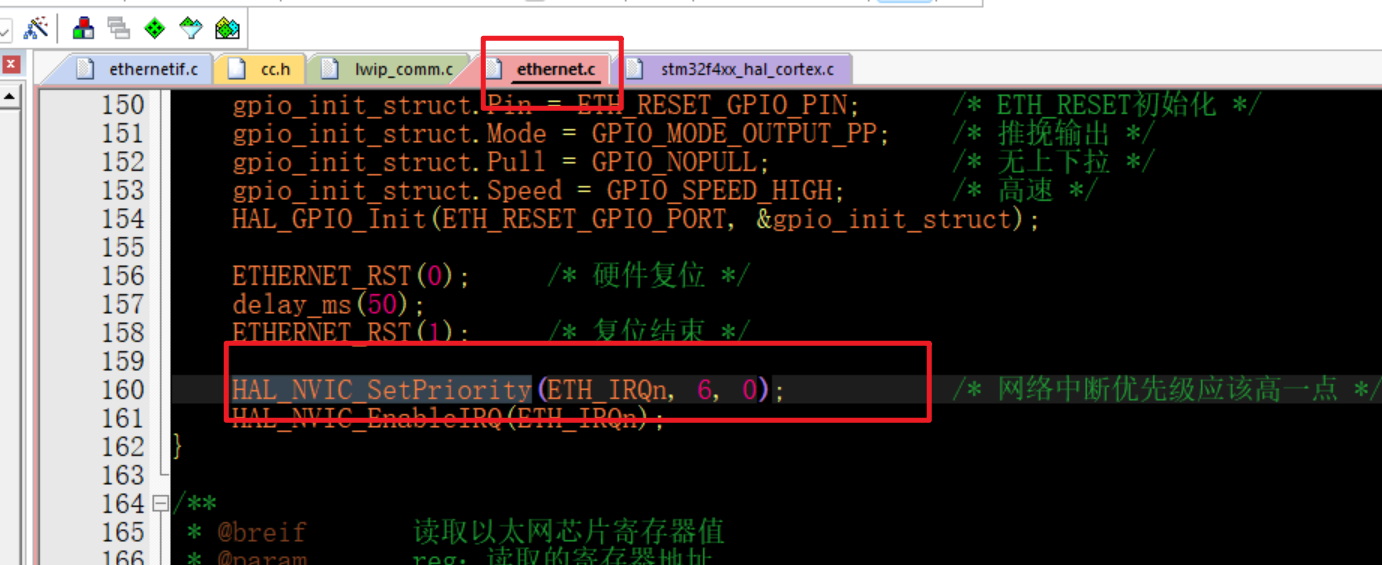
相关中断函数
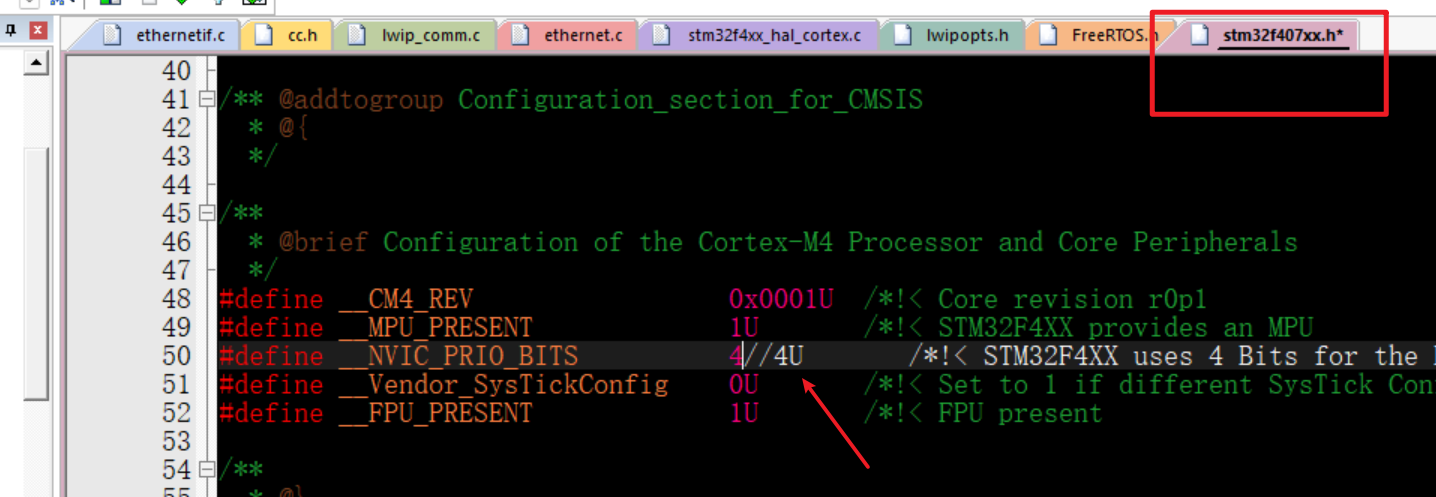
6、修改文件stm32f407xx.h
此处是跟freeRTOS系统有关;
把无符号删除,直接改为4
7、修改文件stm32f4xx_it.c
屏蔽如下函数,因为存在重复定义
1、SVC_Handler
2、PendSV_Handler
3、SysTick_Handler
8、修改文件malloc.h 修改SRAM内存大小

9、新建freertos_demo.c/.h文件:
在User分组下,新建freertos_demo.c/.h文件、
freertos_demo.c:创建任务
freertos_demo.h:声明入口函数
现在直接从好完成的工程中 移植 路径:\User 后续源码解析
10、main文件
现在直接从好完成的工程中 移植 路径:\User 后续源码解析
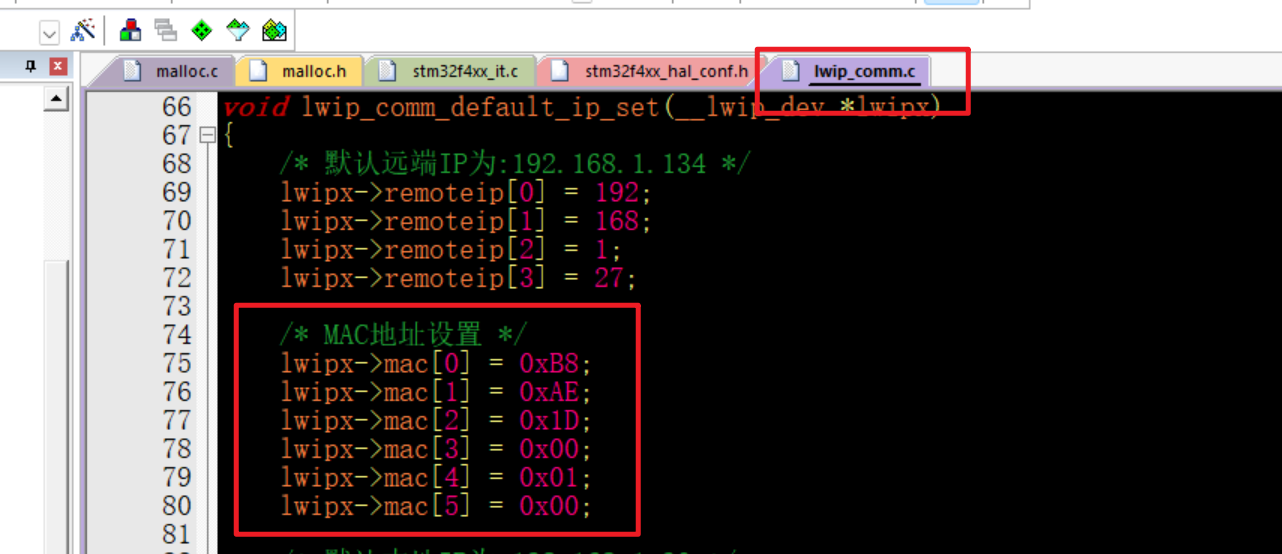
探索者/电机板三处不一样需要修改
1、PHY复位引脚不一样 探索者:PA 8 电机开发板 PA4
2、探索者pyh芯片:YT8512C 电机开发板芯片:PHY_TYPE
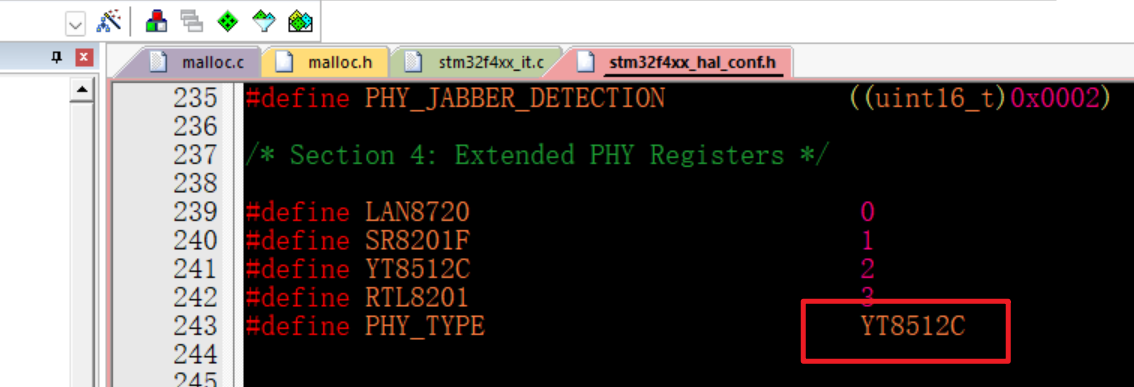
3、mac地址不一样
LWIP带FreeRTOS操作系统的启动流程
启动流程的原理,基本上和裸机移植的启动原理流程一样;除了裸机只能使用RAW限制外;
只不过添加了系统,触发不一样而已。比如二值信号量、创建任务等
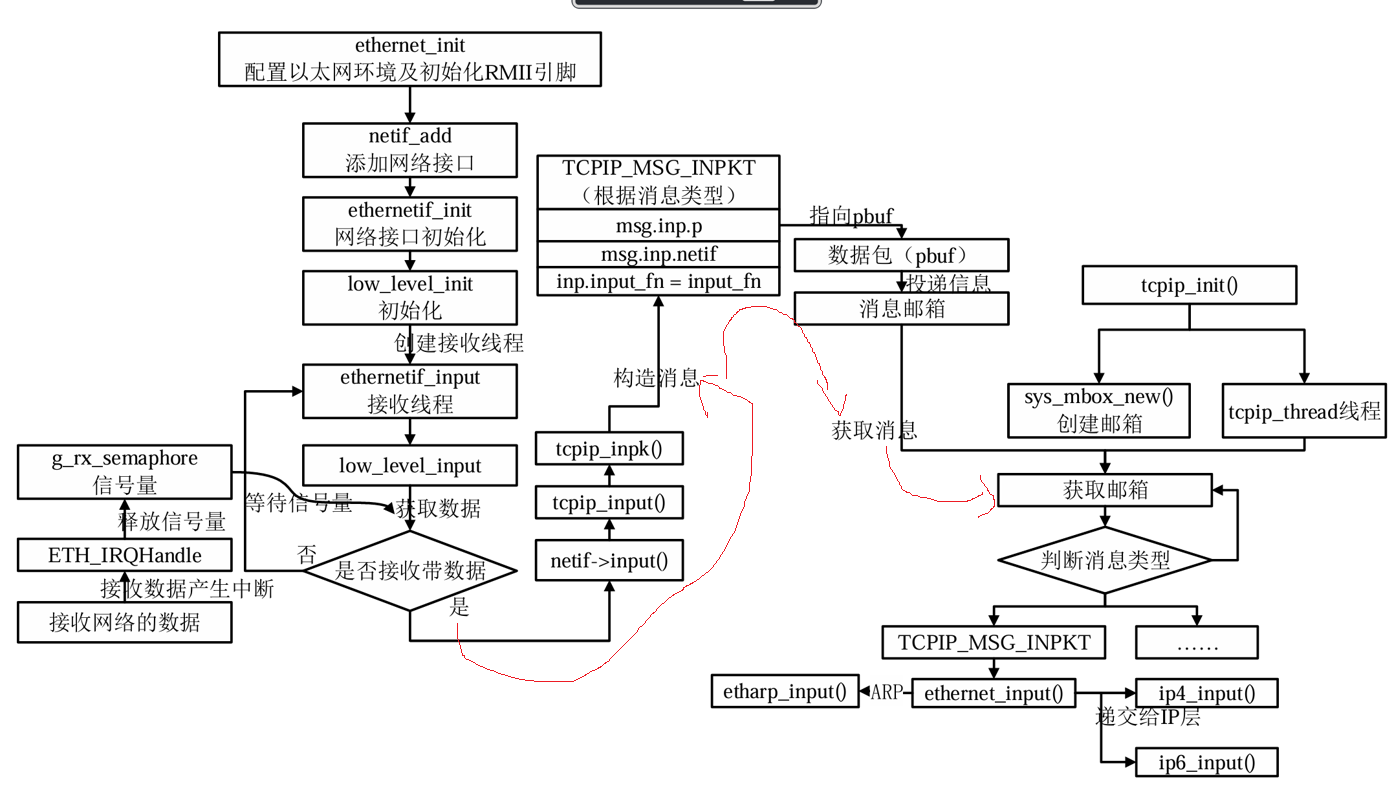
1、函数 void tcpip_init(tcpip_init_done_fn initfunc, void *arg)
..\..\Middlewares\LWIP\src\api\tcpip.c
/*** @ingroup lwip_os* Initialize this module:* - initialize all sub modules* - start the tcpip_thread** @param initfunc a function to call when tcpip_thread is running and finished initializing* @param arg argument to pass to initfunc*/
void
tcpip_init(tcpip_init_done_fn initfunc, void *arg)
{lwip_init();tcpip_init_done = initfunc;tcpip_init_done_arg = arg;if (sys_mbox_new(&tcpip_mbox, TCPIP_MBOX_SIZE) != ERR_OK) {  //创建一个邮箱LWIP_ASSERT("failed to create tcpip_thread mbox", 0);}
#if LWIP_TCPIP_CORE_LOCKINGif (sys_mutex_new(&lock_tcpip_core) != ERR_OK) {   //创建一个互斥锁LWIP_ASSERT("failed to create lock_tcpip_core", 0);}
#endif /* LWIP_TCPIP_CORE_LOCKING */sys_thread_new(TCPIP_THREAD_NAME, tcpip_thread, NULL, TCPIP_THREAD_STACKSIZE, TCPIP_THREAD_PRIO);//创建一个线程
}
2、函数tcpip_thread 任务
..\..\Middlewares\LWIP\src\api\tcpip.c
/*** The main lwIP thread. This thread has exclusive access to lwIP core functions* (unless access to them is not locked). Other threads communicate with this* thread using message boxes.** It also starts all the timers to make sure they are running in the right* thread context.** @param arg unused argument*/
static void
tcpip_thread(void *arg)
{struct tcpip_msg *msg;LWIP_UNUSED_ARG(arg);LWIP_MARK_TCPIP_THREAD();LOCK_TCPIP_CORE();if (tcpip_init_done != NULL) {tcpip_init_done(tcpip_init_done_arg);}while (1) {                          /* MAIN Loop */LWIP_TCPIP_THREAD_ALIVE();/* wait for a message, timeouts are processed while waiting */TCPIP_MBOX_FETCH(&tcpip_mbox, (void **)&msg);  //获取一个消息  阻塞if (msg == NULL) {LWIP_DEBUGF(TCPIP_DEBUG, ("tcpip_thread: invalid message: NULL\n"));LWIP_ASSERT("tcpip_thread: invalid message", 0);continue;}tcpip_thread_handle_msg(msg);//判断消息类型   递交网络层   IP层	还是arp层}
}
3、添加网卡
..\..\Middlewares\LWIP\src\api\tcpip.c
函数一样
4、tcpip_inpkt函数
/*** Pass a received packet to tcpip_thread for input processing** @param p the received packet* @param inp the network interface on which the packet was received* @param input_fn input function to call*/
err_t
tcpip_inpkt(struct pbuf *p, struct netif *inp, netif_input_fn input_fn)
{
#if LWIP_TCPIP_CORE_LOCKING_INPUTerr_t ret;LWIP_DEBUGF(TCPIP_DEBUG, ("tcpip_inpkt: PACKET %p/%p\n", (void *)p, (void *)inp));LOCK_TCPIP_CORE();ret = input_fn(p, inp);UNLOCK_TCPIP_CORE();return ret;
#else /* LWIP_TCPIP_CORE_LOCKING_INPUT */struct tcpip_msg *msg;LWIP_ASSERT("Invalid mbox", sys_mbox_valid_val(tcpip_mbox));msg = (struct tcpip_msg *)memp_malloc(MEMP_TCPIP_MSG_INPKT);if (msg == NULL) {return ERR_MEM;}msg->type = TCPIP_MSG_INPKT;msg->msg.inp.p = p;msg->msg.inp.netif = inp;msg->msg.inp.input_fn = input_fn;  //构建消息if (sys_mbox_trypost(&tcpip_mbox, msg) != ERR_OK) {//用邮箱发送消息memp_free(MEMP_TCPIP_MSG_INPKT, msg);return ERR_MEM;}return ERR_OK;
#endif /* LWIP_TCPIP_CORE_LOCKING_INPUT */
}