使用keepalived结合tomcat和nginx搭建三主热备架构

| 角色 | 主机名 | 软件 | IP地址 |
|---|---|---|---|
| 用户 | client | 172.25.250.90 | |
| keepalived | VIP | 172.25.250.100 | |
| keepalived | VIP | 172.25.250.101 | |
| keepalived | VIP | 172.25.250.102 | |
| master | serverA | keepalived, nginx | 172.25.250.30 |
| backup | serverB | keepalived, nginx | 172.25.250.31 |
| backup | serverC | keepalived, nginx | 172.25.250.32 |
| web | tomcat1 | tomcat | 172.25.250.41 |
| web | tomcat2 | tomcat | 172.25.250.42 |
| web | tomcat3 | tomcat | 172.25.250.43 |
| DNS轮询 | dns | nginx | 172.25.250.11 |
环境准备,修改主机名、IP 地址以及挂载仓库
关闭所有虚拟机的防火墙和 selinux(这里用 dns 示例)
[root@dns ~]# systemctl stop firewalld
[root@dns ~]# setenforce 0
[root@dns ~]# mount /dev/sr0 /mnt
mount: /mnt: WARNING: source write-protected, mounted read-only.
修改客户机
[root@localhost ~]# hostnamectl hostname client
[root@localhost ~]# nmcli c modify ens160 ipv4.method manual ipv4.addresses 172.25.250.90/24 ipv4.gateway 172.25.250.2 ipv4.dns 223.5.5.5
[root@localhost ~]# nmcli c up ens160
修改 master
[root@localhost ~]# hostnamectl hostname master
[root@localhost ~]# nmcli c modify ens160 ipv4.method manual ipv4.addresses 172.25.250.30/24 ipv4.gateway 172.25.250.2 ipv4.dns 223.5.5.5
[root@localhost ~]# nmcli c up ens160
修改 backup1
[root@localhost ~]# hostnamectl hostname backup1
[root@localhost ~]# nmcli c modify ens160 ipv4.method manual ipv4.addresses 172.25.250.31/24 ipv4.gateway 172.25.250.2 ipv4.dns 223.5.5.5
[root@localhost ~]# nmcli c up ens160
修改 backup2
[root@localhost ~]# hostnamectl hostname backup2
[root@localhost ~]# nmcli c modify ens160 ipv4.method manual ipv4.addresses 172.25.250.32/24 ipv4.gateway 172.25.250.2 ipv4.dns 223.5.5.5
[root@localhost ~]# nmcli c up ens160
修改 tomcat1
[root@localhost ~]# hostnamectl hostname tomcat1
[root@localhost ~]# nmcli c modify ens160 ipv4.method manual ipv4.addresses 172.25.250.41/24 ipv4.gateway 172.25.250.2 ipv4.dns 223.5.5.5
[root@localhost ~]# nmcli c up ens160
修改 tomcat2
[root@localhost ~]# hostnamectl hostname tomcat2
[root@localhost ~]# nmcli c modify ens160 ipv4.method manual ipv4.addresses 172.25.250.42/24 ipv4.gateway 172.25.250.2 ipv4.dns 223.5.5.5
[root@localhost ~]# nmcli c up ens160
修改 tomcat3
[root@localhost ~]# hostnamectl hostname tomcat3
[root@localhost ~]# nmcli c modify ens160 ipv4.method manual ipv4.addresses 172.25.250.43/24 ipv4.gateway 172.25.250.2 ipv4.dns 223.5.5.5
[root@localhost ~]# nmcli c up ens160
修改 dns
[root@localhost ~]# hostnamectl hostname dns
[root@localhost ~]# nmcli c modify ens160 ipv4.method manual ipv4.addresses 172.25.250.11/24 ipv4.gateway 172.25.250.2 ipv4.dns 223.5.5.5
[root@localhost ~]# nmcli c up ens160
搭建 Tomcat
tomcat1 配置 JDK
官网:https://www.oracle.com
#1. 下载JDK21
[root@tomcat1 ~]# wget https://download.oracle.com/java/21/latest/jdk-21_linux-x64_bin.tar.gz
--2025-03-20 19:29:50--  https://download.oracle.com/java/21/latest/jdk-21_linux-x64_bin.tar.gz
Resolving download.oracle.com (download.oracle.com)... 23.58.108.145
Connecting to download.oracle.com (download.oracle.com)|23.58.108.145|:443... connected.
HTTP request sent, awaiting response... 200 OK
Length: 197405999 (188M) [application/x-gzip]
Saving to: ‘jdk-21_linux-x64_bin.tar.gz’

jdk-21_linux-x64_bin.tar.gz 100%[===========================================>] 188.26M  1.60MB/s    in 78s

2025-03-20 19:31:10 (2.42 MB/s) - ‘jdk-21_linux-x64_bin.tar.gz’ saved [197405999/197405999]

# 查看下载文件
[root@tomcat1 ~]# ls
anaconda-ks.cfg  jdk-21_linux-x64_bin.tar.gz

# 2. 解压JDK21
[root@tomcat1 ~]# tar -zxf jdk-21_linux-x64_bin.tar.gz -C /usr/local
[root@tomcat1 ~]# ls /usr/local
bin  etc  games  include  jdk-21.0.6  lib  lib64  libexec  sbin  share  src
[root@tomcat1 ~]# ls /usr/local/jdk-21.0.6/
bin  conf  include  jmods  legal  lib  LICENSE  man  README  release

# 3. 配置JDK
[root@tomcat1 ~]# vim /etc/profile
....
export JAVA_HOME=/usr/local/jdk-21.0.6/
export PATH=$PATH:$JAVA_HOME/bin

# 4. 刷新文件让配置生效
[root@tomcat1 ~]# source /etc/profile

# 5. 验证JDK是否安装成功
[root@tomcat1 ~]# java -version
java version "21.0.6" 2025-01-21 LTS
Java(TM) SE Runtime Environment (build 21.0.6+8-LTS-188)
Java HotSpot(TM) 64-Bit Server VM (build 21.0.6+8-LTS-188, mixed mode, sharing)
tomcat1 配置 Tomcat
官网:Apache Tomcat® - Welcome!![]() https://tomcat.apache.org/
https://tomcat.apache.org/
# 1. 下载tomcat
[root@tomcat1 ~]# wget https://dlcdn.apache.org/tomcat/tomcat-11/v11.0.5/bin/apache-tomcat-11.0.5.tar.gz
--2025-03-20 19:47:28-- https://dlcdn.apache.org/tomcat/tomcat-11/v11.0.5/bin/apache-tomcat-11.0.5.tar.gz
Resolving dlcdn.apache.org (dlcdn.apache.org)... 151.101.2.132, 2a04:4e42::644
Connecting to dlcdn.apache.org (dlcdn.apache.org)|151.101.2.132|:443... connected.
HTTP request sent, awaiting response... 200 OK
Length: 13860898 (13M) [application/x-gzip]
Saving to: ‘apache-tomcat-11.0.5.tar.gz’
apache-tomcat-11.0.5.tar.gz 100%[===========================================>] 13.22M 67.3KB/s in 3m 27s
2025-03-20 19:50:57 (65.2 KB/s) - ‘apache-tomcat-11.0.5.tar.gz’ saved [13860898/13860898]
[root@tomcat1 ~]# ls
anaconda-ks.cfg apache-tomcat-11.0.5.tar.gz jdk-21_linux-x64_bin.tar.gz
# 2. 解压tomcat
[root@tomcat1 ~]# tar -zxf apache-tomcat-11.0.5.tar.gz -C /usr/local/
[root@tomcat1 ~]# cd /usr/local/
[root@tomcat1 local]# ls
apache-tomcat-11.0.5 bin etc games include jdk-21.0.6 lib lib64 libexec sbin share src
[root@tomcat1 local]# mv apache-tomcat-11.0.5/ tomcat-11.0.5/
[root@tomcat1 local]# cd tomcat-11.0.5/
[root@tomcat1 tomcat-11.0.5]# ls
bin conf lib logs README.md RUNNING.txt webapps
BUILDING.txt CONTRIBUTING.md LICENSE NOTICE RELEASE-NOTES temp work
# 3. 配置tomcat
[root@tomcat1 tomcat-11.0.5]# vim /etc/profile
......
export TOMCAT_HOME=/usr/local/tomcat-11.0.5
export PATH=$PATH:$TOMCAT_HOME/bin
# 4. 刷新配置
[root@tomcat1 bin]# source /etc/profile
# 5. 启动tomcat
[root@tomcat1 ~]# startup.sh
Using CATALINA_BASE: /usr/local/tomcat-11.0.5
Using CATALINA_HOME: /usr/local/tomcat-11.0.5
Using CATALINA_TMPDIR: /usr/local/tomcat-11.0.5/temp
Using JRE_HOME: /usr/local/jdk-21.0.6/
Using CLASSPATH: /usr/local/tomcat-11.0.5/bin/bootstrap.jar:/usr/local/tomcat-11.0.5/bin/tomcat-juli.jar
Using CATALINA_OPTS:
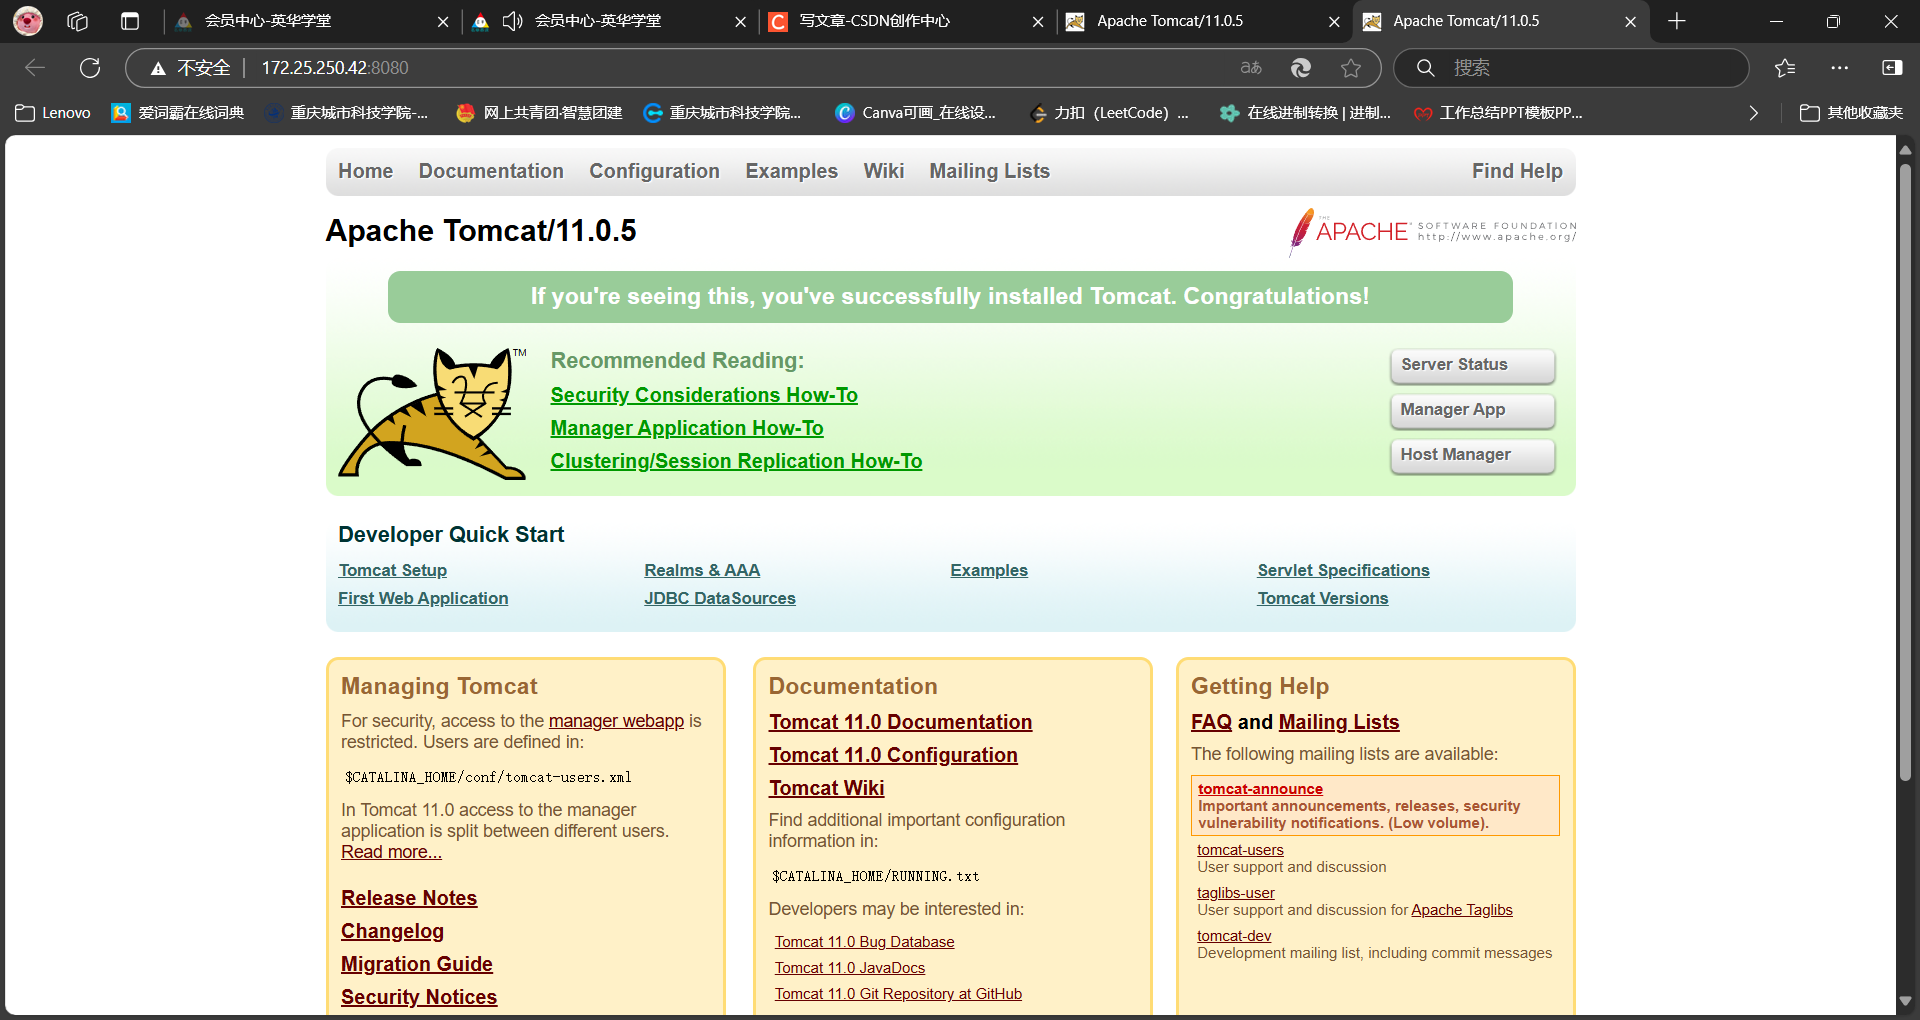
Tomcat started.配置好,打开浏览器,输入 http://172.25.250.41:8080,如果能够看到猫,表示 tomcat 安装成功。
 tomcat2 配置 JDK 和 Tomcat
# 1. 复制jdk安装目录
[root@tomcat1 ~]# scp -r /usr/local/jdk-21.0.6/ root@172.25.250.42:/usr/local/ > /dev/null
The authenticity of host '172.25.250.42 (172.25.250.42)' can't be established.
ED25519 key fingerprint is SHA256:zQRVAzxowh+vQParI9tLut0o4tqknS8RIH86Oa4QB/A.
This key is not known by any other names
Are you sure you want to continue connecting (yes/no/[fingerprint])? yes
Warning: Permanently added '172.25.250.42' (ED25519) to the list of known hosts.
root@172.25.250.42's password:

# 2. 复制tomcat安装目录
[root@tomcat1 ~]# scp -r /usr/local/tomcat-11.0.5/ root@172.25.250.42:/usr/local/ > /dev/null
root@172.25.250.42's password:

# 3. 复制/etc/profile文件
[root@tomcat1 ~]# scp /etc/profile root@172.25.250.42:/etc
root@172.25.250.42's password:
profile                                    100% 2053   452.9KB/s   00:00


# 4. 验证复制的目录
[root@tomcat2 ~]# ls /usr/local/
bin  games    jdk-21.0.6  lib64    sbin   src
etc  include  lib         libexec  share  tomcat-11.0.5

# 5. 刷新/etc/profile
[root@tomcat2 ~]# source /etc/profile

# 6. 查看JAVA是否安装完成
[root@tomcat2 ~]# java -version
java version "21.0.6" 2025-01-21 LTS
Java(TM) SE Runtime Environment (build 21.0.6+8-LTS-188)
Java HotSpot(TM) 64-Bit Server VM (build 21.0.6+8-LTS-188, mixed mode, sharing)

# 7. 启动tomcat
[root@tomcat2 ~]# startup.sh
Using CATALINA_BASE:   /usr/local/tomcat-11.0.5
Using CATALINA_HOME:   /usr/local/tomcat-11.0.5
Using CATALINA_TMPDIR: /usr/local/tomcat-11.0.5/temp
Using JRE_HOME:        /usr/local/jdk-21.0.6/
Using CLASSPATH:       /usr/local/tomcat-11.0.5/bin/bootstrap.jar:/usr/local/tomcat-11.0.5/bin/tomcat-juli.jar
Using CATALINA_OPTS:
Tomcat started.
配置好,打开浏览器,输入 http://172.25.250.42:8080,如果能够看到猫,表示 tomcat 安装成功。
tomcat3 配置 JDK 和 Tomcat
# 1. 复制jdk安装目录
[root@tomcat1 ~]# scp -r /usr/local/jdk-21.0.6/ root@172.25.250.43:/usr/local/ > /dev/null
The authenticity of host '172.25.250.43 (172.25.250.43)' can't be established.
ED25519 key fingerprint is SHA256:zQRVAzxowh+vQParI9tLut0o4tqknS8RIH86Oa4QB/A.
This key is not known by any other names
Are you sure you want to continue connecting (yes/no/[fingerprint])? yes
Warning: Permanently added '172.25.250.42' (ED25519) to the list of known hosts.
root@172.25.250.43's password:

# 2. 复制tomcat安装目录
[root@tomcat1 ~]# scp -r /usr/local/tomcat-11.0.5/ root@172.25.250.43:/usr/local/ > /dev/null
root@172.25.250.43's password:

# 3. 复制/etc/profile文件
[root@tomcat1 ~]# scp /etc/profile root@172.25.250.43:/etc
root@172.25.250.43's password:
profile                                    100% 2053   452.9KB/s   00:00


[root@tomcat3 ~]# ls /usr/local
bin  games    jdk-21.0.6  lib64    sbin   src
etc  include  lib         libexec  share  tomcat-11.0.5


[root@tomcat3 ~]# source /etc/profile

[root@tomcat3 ~]# java -version
java version "21.0.6" 2025-01-21 LTS
Java(TM) SE Runtime Environment (build 21.0.6+8-LTS-188)
Java HotSpot(TM) 64-Bit Server VM (build 21.0.6+8-LTS-188, mixed mode, sharing)


[root@tomcat3 ~]# startup.sh
Using CATALINA_BASE:   /usr/local/tomcat-11.0.5
Using CATALINA_HOME:   /usr/local/tomcat-11.0.5
Using CATALINA_TMPDIR: /usr/local/tomcat-11.0.5/temp
Using JRE_HOME:        /usr/local/jdk-21.0.6/
Using CLASSPATH:       /usr/local/tomcat-11.0.5/bin/bootstrap.jar:/usr/local/tomcat-11.0.5/bin/tomcat-juli.jar
Using CATALINA_OPTS:
Tomcat started.
配置好,打开浏览器,输入 http://172.25.250.43:8080,如果能够看到猫,表示 tomcat 安装成功。
 修改 tomcat 的主页
tomcat1
[root@tomcat1 ~]# cd /usr/local/tomcat-11.0.5/webapps/
[root@tomcat1 webapps]# ls
docs  examples  host-manager  manager  ROOT
[root@tomcat1 webapps]# rm -rf docs  examples  host-manager  manager
[root@tomcat1 webapps]# ls
ROOT
[root@tomcat1 webapps]# cd ROOT/
[root@tomcat1 ROOT]# ls
asf-logo-wide.svg  bg-nav.png    index.jsp          tomcat.svg
bg-button.png      bg-upper.png  RELEASE-NOTES.txt  WEB-INF
bg-middle.png      favicon.ico   tomcat.css
[root@tomcat1 ROOT]# rm -rf *
[root@tomcat1 ROOT]# vim index.jsp
[root@tomcat1 ROOT]# cat index.jsp
tomcat 172.25.250.41
修改后,在浏览器里面刷新页面,得到以下界面

tomcat2
[root@tomcat2 ~]# cd /usr/local/tomcat-11.0.5/webapps/
[root@tomcat2 webapps]# ls
docs  examples  host-manager  manager  ROOT
[root@tomcat2 webapps]# rm -rf docs examples host-manager manager
[root@tomcat2 webapps]# ls
ROOT
[root@tomcat2 webapps]# cd ROOT/
[root@tomcat2 ROOT]# ls
asf-logo-wide.svg  bg-nav.png    index.jsp          tomcat.svg
bg-button.png      bg-upper.png  RELEASE-NOTES.txt  WEB-INF
bg-middle.png      favicon.ico   tomcat.css
[root@tomcat2 ROOT]# rm -rf *
[root@tomcat2 ROOT]# vim index.jsp
[root@tomcat2 ROOT]# cat index.jsp
tomcat 172.25.250.42
修改后,在浏览器里面刷新页面,得到以下界面

tomcat3
[root@tomcat3 ~]# cd /usr/local/tomcat-11.0.5/webapps/
[root@tomcat3 webapps]# ls
docs  examples  host-manager  manager  ROOT
[root@tomcat3 webapps]# rm -rf docs examples host-manager manager
[root@tomcat3 webapps]# ls
ROOT
[root@tomcat3 webapps]# cd ROOT/
[root@tomcat3 ROOT]# ls
asf-logo-wide.svg  bg-nav.png    index.jsp          tomcat.svg
bg-button.png      bg-upper.png  RELEASE-NOTES.txt  WEB-INF
bg-middle.png      favicon.ico   tomcat.css
[root@tomcat3 ROOT]# rm -rf *
[root@tomcat3 ROOT]# vim index.jsp
[root@tomcat3 ROOT]# cat index.jsp
tomcat 172.25.250.43
修改后,在浏览器里面刷新页面,得到以下界面

搭建 nginx
master 配置 nginx
#下载nginx
[root@master ~]# dnf install -y nginx
Updating Subscription Management repositories.
Unable to read consumer identity

This system is not registered with an entitlement server. You can use "rhc" or "subscription-manager" to register.

Last metadata expiration check: 0:01:12 ago on Thu 27 Mar 2025 07:53:25 PM CST.
Dependencies resolved.
=============================================================================
 Package                  Architecture Version               Repo       Size
=============================================================================
Installing:
 nginx                    x86_64       2:1.20.1-20.el9       app        40 k
Installing dependencies:
 nginx-core               x86_64       2:1.20.1-20.el9       app       574 k
 nginx-filesystem         noarch       2:1.20.1-20.el9       app        11 k
 redhat-logos-httpd       noarch       90.4-2.el9            app        18 k

Transaction Summary
=============================================================================
Install  4 Packages

Total size: 643 k
Installed size: 1.8 M
Downloading Packages:
Running transaction check
Transaction check succeeded.
Running transaction test
Transaction test succeeded.
Running transaction
  Preparing        :                                                     1/1
  Running scriptlet: nginx-filesystem-2:1.20.1-20.el9.noarch             1/4
  Installing       : nginx-filesystem-2:1.20.1-20.el9.noarch             1/4
  Installing       : nginx-core-2:1.20.1-20.el9.x86_64                   2/4
  Installing       : redhat-logos-httpd-90.4-2.el9.noarch                3/4
  Installing       : nginx-2:1.20.1-20.el9.x86_64                        4/4
  Running scriptlet: nginx-2:1.20.1-20.el9.x86_64                        4/4
  Verifying        : nginx-2:1.20.1-20.el9.x86_64                        1/4
  Verifying        : nginx-core-2:1.20.1-20.el9.x86_64                   2/4
  Verifying        : nginx-filesystem-2:1.20.1-20.el9.noarch             3/4
  Verifying        : redhat-logos-httpd-90.4-2.el9.noarch                4/4
Installed products updated.

Installed:
  nginx-2:1.20.1-20.el9.x86_64
  nginx-core-2:1.20.1-20.el9.x86_64
  nginx-filesystem-2:1.20.1-20.el9.noarch
  redhat-logos-httpd-90.4-2.el9.noarch

Complete!

#配置nginx
[root@master ~]# vim /etc/nginx/conf.d/master.conf
[root@master ~]# cat /etc/nginx/conf.d/master.conf
upstream tomcat {
        server  172.25.250.41:8080;
        server  172.25.250.42:8080;
	server  172.25.250.43:8080;
}
server {
        listen  80;
        server_name     172.25.250.30;
        access_log      /var/log/nginx/master_access.log;
        error_log       /var/log/nginx/master_error.log;
        location / {
                proxy_pass      http://tomcat;
        }
}

#启动nginx
[root@master ~]# systemctl start nginx

#测试
[root@master ~]# curl http://172.25.250.30
tomcat 172.25.250.41
[root@master ~]# curl http://172.25.250.30
tomcat 172.25.250.42
[root@master ~]# curl http://172.25.250.30
tomcat 172.25.250.43
[root@master ~]# curl http://172.25.250.30
tomcat 172.25.250.41
[root@master ~]# curl http://172.25.250.30
tomcat 172.25.250.42
[root@master ~]# curl http://172.25.250.30
tomcat 172.25.250.43
[root@master ~]# curl http://172.25.250.30
tomcat 172.25.250.41
[root@master ~]# curl http://172.25.250.30
tomcat 172.25.250.42
backup1 配置 nginx
#下载nginx
[root@backup1 ~]# dnf install -y nginx
Updating Subscription Management repositories.
Unable to read consumer identity

This system is not registered with an entitlement server. You can use "rhc" or "subscription-manager" to register.

Last metadata expiration check: 0:19:33 ago on Thu 27 Mar 2025 07:39:23 PM CST.
Dependencies resolved.
=============================================================================
 Package                  Architecture Version               Repo       Size
=============================================================================
Installing:
 nginx                    x86_64       2:1.20.1-20.el9       app        40 k
Installing dependencies:
 nginx-core               x86_64       2:1.20.1-20.el9       app       574 k
 nginx-filesystem         noarch       2:1.20.1-20.el9       app        11 k
 redhat-logos-httpd       noarch       90.4-2.el9            app        18 k

Transaction Summary
=============================================================================
Install  4 Packages

Total size: 643 k
Installed size: 1.8 M
Downloading Packages:
Running transaction check
Transaction check succeeded.
Running transaction test
Transaction test succeeded.
Running transaction
  Preparing        :                                                     1/1
  Running scriptlet: nginx-filesystem-2:1.20.1-20.el9.noarch             1/4
  Installing       : nginx-filesystem-2:1.20.1-20.el9.noarch             1/4
  Installing       : nginx-core-2:1.20.1-20.el9.x86_64                   2/4
  Installing       : redhat-logos-httpd-90.4-2.el9.noarch                3/4
  Installing       : nginx-2:1.20.1-20.el9.x86_64                        4/4
  Running scriptlet: nginx-2:1.20.1-20.el9.x86_64                        4/4
  Verifying        : nginx-2:1.20.1-20.el9.x86_64                        1/4
  Verifying        : nginx-core-2:1.20.1-20.el9.x86_64                   2/4
  Verifying        : nginx-filesystem-2:1.20.1-20.el9.noarch             3/4
  Verifying        : redhat-logos-httpd-90.4-2.el9.noarch                4/4
Installed products updated.

Installed:
  nginx-2:1.20.1-20.el9.x86_64
  nginx-core-2:1.20.1-20.el9.x86_64
  nginx-filesystem-2:1.20.1-20.el9.noarch
  redhat-logos-httpd-90.4-2.el9.noarch

Complete!

#配置nginx
[root@backup1 ~]# vim /etc/nginx/conf.d/backup1.conf
[root@backup1 ~]# cat /etc/nginx/conf.d/backup1.conf
upstream backup1 {
        server  172.25.250.41:8080;
        server  172.25.250.42:8080;
	server  172.25.250.43:8080;
}
server {
        listen  80;
        server_name     172.25.250.31;
        access_log      /var/log/nginx/backup_access.log;
        error_log       /var/log/nginx/backup_error.log;

        location / {
                proxy_pass      http://backup1;
        }
}

#启动nginx
[root@backup1 ~]# systemctl start nginx

#测试
[root@backup1 ~]# curl 172.25.250.31
tomcat 172.25.250.41
[root@backup1 ~]# curl 172.25.250.31
tomcat 172.25.250.42
[root@backup1 ~]# curl 172.25.250.31
tomcat 172.25.250.43
[root@backup1 ~]# curl 172.25.250.31
tomcat 172.25.250.41
[root@backup1 ~]# curl 172.25.250.31
tomcat 172.25.250.42
[root@backup1 ~]# curl 172.25.250.31
tomcat 172.25.250.43
backup2 配置 nginx
#下载nginx
[root@backup2 ~]# dnf install -y nginx
Updating Subscription Management repositories.
Unable to read consumer identity

This system is not registered with an entitlement server. You can use "rhc" or "subscription-manager" to register.

Last metadata expiration check: 0:17:57 ago on Thu 27 Mar 2025 07:47:18 PM CST.
Dependencies resolved.
=============================================================================
 Package                  Architecture Version               Repo       Size
=============================================================================
Installing:
 nginx                    x86_64       2:1.20.1-20.el9       app        40 k
Installing dependencies:
 nginx-core               x86_64       2:1.20.1-20.el9       app       574 k
 nginx-filesystem         noarch       2:1.20.1-20.el9       app        11 k
 redhat-logos-httpd       noarch       90.4-2.el9            app        18 k

Transaction Summary
=============================================================================
Install  4 Packages

Total size: 643 k
Installed size: 1.8 M
Downloading Packages:
Running transaction check
Transaction check succeeded.
Running transaction test
Transaction test succeeded.
Running transaction
  Preparing        :                                                     1/1
  Running scriptlet: nginx-filesystem-2:1.20.1-20.el9.noarch             1/4
  Installing       : nginx-filesystem-2:1.20.1-20.el9.noarch             1/4
  Installing       : nginx-core-2:1.20.1-20.el9.x86_64                   2/4
  Installing       : redhat-logos-httpd-90.4-2.el9.noarch                3/4
  Installing       : nginx-2:1.20.1-20.el9.x86_64                        4/4
  Running scriptlet: nginx-2:1.20.1-20.el9.x86_64                        4/4
  Verifying        : nginx-2:1.20.1-20.el9.x86_64                        1/4
  Verifying        : nginx-core-2:1.20.1-20.el9.x86_64                   2/4
  Verifying        : nginx-filesystem-2:1.20.1-20.el9.noarch             3/4
  Verifying        : redhat-logos-httpd-90.4-2.el9.noarch                4/4
Installed products updated.

Installed:
  nginx-2:1.20.1-20.el9.x86_64
  nginx-core-2:1.20.1-20.el9.x86_64
  nginx-filesystem-2:1.20.1-20.el9.noarch
  redhat-logos-httpd-90.4-2.el9.noarch

Complete!

#配置nginx
[root@backup2 ~]# vim /etc/nginx/conf.d/backup2.conf
[root@backup2 ~]# cat /etc/nginx/conf.d/backup2.conf
upstream backup2 {
        server  172.25.250.41:8080;
        server  172.25.250.42:8080;
	server  172.25.250.43:8080;
}
server {
        listen  80;
        server_name     172.25.250.32;
        access_log      /var/log/nginx/backup_access.log;
        error_log       /var/log/nginx/backup_error.log;

        location / {
                proxy_pass      http://backup2;
        }
}

#启动nginx
[root@backup2 ~]# systemctl start nginx

#测试
[root@backup2 ~]# curl 172.25.250.32
tomcat 172.25.250.41
[root@backup2 ~]# curl 172.25.250.32
tomcat 172.25.250.42
[root@backup2 ~]# curl 172.25.250.32
tomcat 172.25.250.43
[root@backup2 ~]# curl 172.25.250.32
tomcat 172.25.250.41
[root@backup2 ~]# curl 172.25.250.32
tomcat 172.25.250.42
dns 配置 nginx
#下载nginx
[root@dns ~]# dnf install -y nginx
Updating Subscription Management repositories.
Unable to read consumer identity

This system is not registered with an entitlement server. You can use "rhc" or "subscription-manager" to register.

Last metadata expiration check: 0:55:27 ago on Thu 27 Mar 2025 07:39:25 PM CST.
Dependencies resolved.
=============================================================================
 Package                  Architecture Version               Repo       Size
=============================================================================
Installing:
 nginx                    x86_64       2:1.20.1-20.el9       app        40 k
Installing dependencies:
 nginx-core               x86_64       2:1.20.1-20.el9       app       574 k
 nginx-filesystem         noarch       2:1.20.1-20.el9       app        11 k
 redhat-logos-httpd       noarch       90.4-2.el9            app        18 k

Transaction Summary
=============================================================================
Install  4 Packages

Total size: 643 k
Installed size: 1.8 M
Downloading Packages:
Running transaction check
Transaction check succeeded.
Running transaction test
Transaction test succeeded.
Running transaction
  Preparing        :                                                     1/1
  Running scriptlet: nginx-filesystem-2:1.20.1-20.el9.noarch             1/4
  Installing       : nginx-filesystem-2:1.20.1-20.el9.noarch             1/4
  Installing       : nginx-core-2:1.20.1-20.el9.x86_64                   2/4
  Installing       : redhat-logos-httpd-90.4-2.el9.noarch                3/4
  Installing       : nginx-2:1.20.1-20.el9.x86_64                        4/4
  Running scriptlet: nginx-2:1.20.1-20.el9.x86_64                        4/4
  Verifying        : nginx-2:1.20.1-20.el9.x86_64                        1/4
  Verifying        : nginx-core-2:1.20.1-20.el9.x86_64                   2/4
  Verifying        : nginx-filesystem-2:1.20.1-20.el9.noarch             3/4
  Verifying        : redhat-logos-httpd-90.4-2.el9.noarch                4/4
Installed products updated.

Installed:
  nginx-2:1.20.1-20.el9.x86_64
  nginx-core-2:1.20.1-20.el9.x86_64
  nginx-filesystem-2:1.20.1-20.el9.noarch
  redhat-logos-httpd-90.4-2.el9.noarch

Complete!

#修改配置文件
[root@dns ~]# vim /etc/nginx/conf.d/dns.conf
[root@dns ~]# cat /etc/nginx/conf.d/dns.conf
upstream web {
        server 172.25.250.100;
        server 172.25.250.101;
	server 172.25.250.102;
}
server {
        listen  80;
        server_name     172.25.250.11;
        access_log      /var/log/nginx/dns_access.log;
        error_log       /var/log/nginx/dns_error.log;
        location / {
                proxy_pass      http://web;
        }
}

#启动nginx
[root@dns ~]# systemctl start nginx

#测试
[root@dns ~]# for ((i=1;i<=10;i++)); do curl 172.25.250.11;done;
tomcat 172.25.250.42
tomcat 172.25.250.41
tomcat 172.25.250.42
tomcat 172.25.250.43
tomcat 172.25.250.42
tomcat 172.25.250.43
tomcat 172.25.250.41
tomcat 172.25.250.43
tomcat 172.25.250.41
tomcat 172.25.250.42
[root@dns ~]#
搭建 keepalived

master 配置 keepalived
#下载keepalived
[root@master ~]# dnf install -y keepalived
……
Complete!

#配置keepalived
[root@master ~]# vim /etc/keepalived/keepalived.conf
[root@master ~]# cat /etc/keepalived/keepalived.conf
global_defs {
   router_id LVS_master
}

vrrp_instance VI_1 {
    state MASTER
    interface ens160
    virtual_router_id 51
    priority 100
    advert_int 1
    authentication {
        auth_type PASS
        auth_pass 1111
    }
    virtual_ipaddress {
        172.25.250.100
    }
}

vrrp_instance VI_2 {
    state BACKUP
    interface ens160
    virtual_router_id 52
    priority 80
    advert_int 1
    authentication {
        auth_type PASS
        auth_pass 1111
    }
    virtual_ipaddress {
        172.25.250.101
    }
}

vrrp_instance VI_3 {
    state BACKUP
    interface ens160
    virtual_router_id 53
    priority 60
    advert_int 1
    authentication {
        auth_type PASS
        auth_pass 1111
    }
    virtual_ipaddress {
        172.25.250.102
    }
}

#启动keepalived
[root@master ~]# systemctl start keepalived

#查看漂移IP
[root@master ~]# ip a
1: lo: <LOOPBACK,UP,LOWER_UP> mtu 65536 qdisc noqueue state UNKNOWN group default qlen 1000
    link/loopback 00:00:00:00:00:00 brd 00:00:00:00:00:00
    inet 127.0.0.1/8 scope host lo
       valid_lft forever preferred_lft forever
    inet6 ::1/128 scope host
       valid_lft forever preferred_lft forever
2: ens160: <BROADCAST,MULTICAST,UP,LOWER_UP> mtu 1500 qdisc mq state UP group default qlen 1000
    link/ether 00:0c:29:3c:4d:e9 brd ff:ff:ff:ff:ff:ff
    altname enp3s0
    inet 172.25.250.30/24 brd 172.25.250.255 scope global noprefixroute ens160
       valid_lft forever preferred_lft forever
    inet 172.25.250.100/32 scope global ens160
       valid_lft forever preferred_lft forever
    inet6 fe80::20c:29ff:fe3c:4de9/64 scope link noprefixroute
       valid_lft forever preferred_lft forever
backup1 配置 keepalived
#下载nginx
[root@backup1 ~]# dnf install -y keepalived

#从master上拷贝配置文件过去,方便后续的修改且不容易修改错
[root@master ~]# scp /etc/keepalived/keepalived.conf root@172.25.250.31:/etc/keepalived/keepalived.conf
The authenticity of host '172.25.250.31 (172.25.250.31)' can't be established.
ED25519 key fingerprint is SHA256:zQRVAzxowh+vQParI9tLut0o4tqknS8RIH86Oa4QB/A.
This key is not known by any other names
Are you sure you want to continue connecting (yes/no/[fingerprint])? yes
Warning: Permanently added '172.25.250.31' (ED25519) to the list of known hosts.
root@172.25.250.31's password:
keepalived.conf                            100%  780   242.7KB/s   00:00


[root@backup1 ~]# vim  /etc/keepalived/keepalived.conf
[root@backup1 ~]# cat /etc/keepalived/keepalived.conf
global_defs {
   router_id LVS_backup
}

vrrp_instance VI_1 {
    state BACKUP
    interface ens160
    virtual_router_id 51
    priority 60
    advert_int 1
    authentication {
        auth_type PASS
        auth_pass 1111
    }
    virtual_ipaddress {
        172.25.250.100
    }
}

vrrp_instance VI_2 {
    state MASTER
    interface ens160
    virtual_router_id 52
    priority 100
    advert_int 1
    authentication {
        auth_type PASS
        auth_pass 1111
    }
    virtual_ipaddress {
        172.25.250.101
    }
}

vrrp_instance VI_3 {
    state BACKUP
    interface ens160
    virtual_router_id 53
    priority 80
    advert_int 1
    authentication {
        auth_type PASS
        auth_pass 1111
    }
    virtual_ipaddress {
        172.25.250.102
    }
}

[root@backup1 ~]# ip ad
1: lo: <LOOPBACK,UP,LOWER_UP> mtu 65536 qdisc noqueue state UNKNOWN group default qlen 1000
    link/loopback 00:00:00:00:00:00 brd 00:00:00:00:00:00
    inet 127.0.0.1/8 scope host lo
       valid_lft forever preferred_lft forever
    inet6 ::1/128 scope host
       valid_lft forever preferred_lft forever
2: ens160: <BROADCAST,MULTICAST,UP,LOWER_UP> mtu 1500 qdisc mq state UP group default qlen 1000
    link/ether 00:0c:29:b5:c5:e2 brd ff:ff:ff:ff:ff:ff
    altname enp3s0
    inet 172.25.250.31/24 brd 172.25.250.255 scope global noprefixroute ens160
       valid_lft forever preferred_lft forever
    inet 172.25.250.101/32 scope global ens160
       valid_lft forever preferred_lft forever
    inet6 fe80::20c:29ff:feb5:c5e2/64 scope link noprefixroute
       valid_lft forever preferred_lft forever
backup2 配置 keepalived
#下载keepalived
[root@backup2 ~]# dnf install -y keepalived

#从master上拷贝配置文件过去,方便后续的修改且不容易修改错
[root@master ~]# scp /etc/keepalived/keepalived.conf root@172.25.250.32:/etc/keepalived/keepalived.conf
The authenticity of host '172.25.250.32 (172.25.250.32)' can't be established.
ED25519 key fingerprint is SHA256:zQRVAzxowh+vQParI9tLut0o4tqknS8RIH86Oa4QB/A.
This host key is known by the following other names/addresses:
    ~/.ssh/known_hosts:1: 172.25.250.31
Are you sure you want to continue connecting (yes/no/[fingerprint])? yes
Warning: Permanently added '172.25.250.32' (ED25519) to the list of known hosts.
root@172.25.250.32's password:
keepalived.conf                            100%  780   275.3KB/s   00:00


#修改配置文件
[root@backup2 ~]# vim /etc/keepalived/keepalived.conf
[root@backup2 ~]# cat /etc/keepalived/keepalived.conf
global_defs {
   router_id LVS_master
}

vrrp_instance VI_1 {
    state BACKUP
    interface ens160
    virtual_router_id 51
    priority 80
    advert_int 1
    authentication {
        auth_type PASS
        auth_pass 1111
    }
    virtual_ipaddress {
        172.25.250.100
    }
}

vrrp_instance VI_2 {
    state BACKUP
    interface ens160
    virtual_router_id 52
    priority 60
    advert_int 1
    authentication {
        auth_type PASS
        auth_pass 1111
    }
    virtual_ipaddress {
        172.25.250.101
    }
}

vrrp_instance VI_3 {
    state MASTER
    interface ens160
    virtual_router_id 53
    priority 100
    advert_int 1
    authentication {
        auth_type PASS
        auth_pass 1111
    }
    virtual_ipaddress {
        172.25.250.102
    }
}

#启动keepalived
[root@backup2 ~]# systemctl start keepalived

#查看漂移IP
[root@backup2 ~]# ip a
1: lo: <LOOPBACK,UP,LOWER_UP> mtu 65536 qdisc noqueue state UNKNOWN group default qlen 1000
    link/loopback 00:00:00:00:00:00 brd 00:00:00:00:00:00
    inet 127.0.0.1/8 scope host lo
       valid_lft forever preferred_lft forever
    inet6 ::1/128 scope host
       valid_lft forever preferred_lft forever
2: ens160: <BROADCAST,MULTICAST,UP,LOWER_UP> mtu 1500 qdisc mq state UP group default qlen 1000
    link/ether 00:0c:29:1d:25:2d brd ff:ff:ff:ff:ff:ff
    altname enp3s0
    inet 172.25.250.32/24 brd 172.25.250.255 scope global noprefixroute ens160
       valid_lft forever preferred_lft forever
    inet 172.25.250.102/32 scope global ens160
       valid_lft forever preferred_lft forever
    inet6 fe80::20c:29ff:fe1d:252d/64 scope link noprefixroute
       valid_lft forever preferred_lft forever
修改nginx
master
[root@master ~]# vim /etc/nginx/conf.d/master.conf
[root@master ~]# cat /etc/nginx/conf.d/master.conf
upstream tomcat {
        server  172.25.250.41:8080;
        server  172.25.250.42:8080;
	server  172.25.250.43:8080;
}
server {
        listen  80;
        server_name     172.25.250.100;
        access_log      /var/log/nginx/master_access.log;
        error_log       /var/log/nginx/master_error.log;
        location / {
                proxy_pass      http://tomcat;
        }
}

[root@master ~]# systemctl restart nginx
[root@master ~]# curl 172.25.250.100
tomcat 172.25.250.41
[root@master ~]# curl 172.25.250.100
tomcat 172.25.250.42
[root@master ~]# curl 172.25.250.100
tomcat 172.25.250.43
[root@master ~]# curl 172.25.250.100
tomcat 172.25.250.41
backup1
[root@backup1 ~]# vim /etc/nginx/conf.d/backup1.conf
[root@backup1 ~]# cat /etc/nginx/conf.d/backup1.conf
upstream backup1 {
        server  172.25.250.41:8080;
        server  172.25.250.42:8080;
	server  172.25.250.43:8080;
}
server {
        listen  80;
        server_name     172.25.250.101;
        access_log      /var/log/nginx/backup_access.log;
        error_log       /var/log/nginx/backup_error.log;

        location / {
                proxy_pass      http://backup1;
        }
}

[root@backup1 ~]# systemctl restart nginx
[root@backup1 ~]# curl 172.25.250.101
tomcat 172.25.250.41
[root@backup1 ~]# curl 172.25.250.101
tomcat 172.25.250.42
[root@backup1 ~]# curl 172.25.250.101
tomcat 172.25.250.43
backup2
[root@backup2 ~]# vim /etc/nginx/conf.d/backup2.conf
[root@backup2 ~]# cat /etc/nginx/conf.d/backup2.conf
upstream backup2 {
        server  172.25.250.41:8080;
        server  172.25.250.42:8080;
	server  172.25.250.43:8080;
}
server {
        listen  80;
        server_name     172.25.250.102;
        access_log      /var/log/nginx/backup_access.log;
        error_log       /var/log/nginx/backup_error.log;

        location / {
                proxy_pass      http://backup2;
        }
}
[root@backup2 ~]# systemctl restart nginx
[root@backup2 ~]# curl 172.25.250.102
tomcat 172.25.250.41
[root@backup2 ~]# curl 172.25.250.102
tomcat 172.25.250.42
[root@backup2 ~]# curl 172.25.250.102
tomcat 172.25.250.43
配置 nginx 高可用
编写检测脚本
[root@master ~]# vim /etc/keepalived/check_nginx.sh
[root@master ~]# cat /etc/keepalived/check_nginx.sh
#!/bin/bash
counter=$(ps -C nginx --no-header|wc -l)
if [ $counter -eq 0 ]; then
	systemctl start nginx
	if [ `ps -C nginx --no-header|wc -l` -eq 0 ]; then
		systemctl stop keepalived
	fi
fi
给脚本文件赋予可执行权限
[root@master ~]# chmod +x /etc/keepalived/check_nginx.sh
[root@master ~]# ll /etc/keepalived/check_nginx.sh
-rwxr-xr-x. 1 root root 191 Mar 27 20:47 /etc/keepalived/check_nginx.sh
将脚本文件复制到 backup1 和 backup2 主机中
#拷贝到backup1上
[root@master ~]# scp /etc/keepalived/check_nginx.sh root@172.25.250.32:/etc/keepalived/
root@172.25.250.32's password:
check_nginx.sh                             100%  191    63.8KB/s   00:00

#拷贝到backup2上
[root@master ~]# scp /etc/keepalived/check_nginx.sh root@172.25.250.31:/etc/keepalived/
root@172.25.250.31's password:
check_nginx.sh                             100%  191    83.1KB/s   00:00

#在backup1上验证是否拷贝成功
[root@backup1 ~]# ll /etc/keepalived/
total 8
-rwxr-xr-x. 1 root root 191 Mar 27 20:48 check_nginx.sh
-rw-r--r--. 1 root root 780 Mar 27 20:25 keepalived.conf

#在backup2上验证是否拷贝成功
[root@backup2 ~]# ll /etc/keepalived/
total 8
-rwxr-xr-x. 1 root root 191 Mar 27 20:48 check_nginx.sh
-rw-r--r--. 1 root root 780 Mar 27 20:27 keepalived.conf
修改 master 主机上的 keepavlied.conf 文件
在该文件上增加执行脚本的函数以及调用
[root@master ~]# vim /etc/keepalived/keepalived.conf
[root@master ~]# cat /etc/keepalived/keepalived.conf
global_defs {
   router_id LVS_master
}


vrrp_script chk_nginx {
    script "/etc/keepalived/check_nginx.sh"
    interval 2
}


vrrp_instance VI_1 {
    state MASTER
    interface ens160
    virtual_router_id 51
    priority 100
    advert_int 1
    authentication {
        auth_type PASS
        auth_pass 1111
    }
    virtual_ipaddress {
        172.25.250.100
    }
    track_script {
        chk_nginx
    }
}

vrrp_instance VI_2 {
    state BACKUP
    interface ens160
    virtual_router_id 52
    priority 80
    advert_int 1
    authentication {
        auth_type PASS
        auth_pass 1111
    }
    virtual_ipaddress {
        172.25.250.101
    }
    track_script {
        chk_nginx
    }
}

vrrp_instance VI_3 {
    state BACKUP
    interface ens160
    virtual_router_id 53
    priority 60
    advert_int 1
    authentication {
        auth_type PASS
        auth_pass 1111
    }
    virtual_ipaddress {
        172.25.250.102
    }
    track_script {
        chk_nginx
    }
}
修改 backup1 主机上的 keepavlied.conf 文件
[root@backup1 ~]# vim /etc/keepalived/keepalived.conf
[root@backup1 ~]# cat /etc/keepalived/keepalived.conf
global_defs {
   router_id LVS_backup
}

vrrp_script chk_nginx {
    script "/etc/keepalived/check_nginx.sh"
    interval 2
}

vrrp_instance VI_1 {
    state BACKUP
    interface ens160
    virtual_router_id 51
    priority 60
    advert_int 1
    authentication {
        auth_type PASS
        auth_pass 1111
    }
    virtual_ipaddress {
        172.25.250.100
    }
    track_script {
        chk_nginx
    }
}

vrrp_instance VI_2 {
    state MASTER
    interface ens160
    virtual_router_id 52
    priority 100
    advert_int 1
    authentication {
        auth_type PASS
        auth_pass 1111
    }
    virtual_ipaddress {
        172.25.250.101
    }
    track_script {
        chk_nginx
    }
}

vrrp_instance VI_3 {
    state BACKUP
    interface ens160
    virtual_router_id 53
    priority 80
    advert_int 1
    authentication {
        auth_type PASS
        auth_pass 1111
    }
    virtual_ipaddress {
        172.25.250.102
    }
    track_script {
        chk_nginx
    }
}
修改 backup2 主机上的 keepavlied.conf 文件
[root@backup2 ~]# vim /etc/keepalived/keepalived.conf
[root@backup2 ~]# cat /etc/keepalived/keepalived.conf
global_defs {
   router_id LVS_master
}

vrrp_script chk_nginx {
    script "/etc/keepalived/check_nginx.sh"
    interval 2
}

vrrp_instance VI_1 {
    state BACKUP
    interface ens160
    virtual_router_id 51
    priority 80
    advert_int 1
    authentication {
        auth_type PASS
        auth_pass 1111
    }
    virtual_ipaddress {
        172.25.250.100
    }
    track_script {
        chk_nginx
    }
}

vrrp_instance VI_2 {
    state BACKUP
    interface ens160
    virtual_router_id 52
    priority 60
    advert_int 1
    authentication {
        auth_type PASS
        auth_pass 1111
    }
    virtual_ipaddress {
        172.25.250.101
    }
    track_script {
        chk_nginx
    }
}

vrrp_instance VI_3 {
    state MASTER
    interface ens160
    virtual_router_id 53
    priority 100
    advert_int 1
    authentication {
        auth_type PASS
        auth_pass 1111
    }
    virtual_ipaddress {
        172.25.250.102
    }
    track_script {
        chk_nginx
    }
}
重启 keepalived 服务(配置的三台主机都要重启)
[root@master ~]# systemctl restart keepalived.service

[root@backup1 ~]# systemctl restart keepalived.service

[root@backup2 ~]# systemctl restart keepalived.service
测试高可用
关闭 master 主机上的 nginx 服务
[root@master ~]# systemctl stop nginx
[root@master ~]# curl 172.25.250.100
tomcat 172.25.250.41
[root@master ~]# curl 172.25.250.100
tomcat 172.25.250.42
[root@master ~]# curl 172.25.250.100
tomcat 172.25.250.43
[root@master ~]# ps -ef | grep nginx
root       14539       1  0 21:03 ?        00:00:00 nginx: master process /usr/sbin/nginx
nginx      14540   14539  0 21:03 ?        00:00:00 nginx: worker process
nginx      14541   14539  0 21:03 ?        00:00:00 nginx: worker process
nginx      14542   14539  0 21:03 ?        00:00:00 nginx: worker process
nginx      14543   14539  0 21:03 ?        00:00:00 nginx: worker process
root       14587   12840  0 21:03 pts/1    00:00:00 grep --color=auto nginx
关闭 master 主机上的 keepalived 和 nginx
[root@master ~]# systemctl stop keepalived.service
[root@master ~]# curl 172.25.250.100
tomcat 172.25.250.41
[root@master ~]# curl 172.25.250.100
tomcat 172.25.250.42
[root@master ~]# curl 172.25.250.100
tomcat 172.25.250.43


[root@master ~]# systemctl stop nginx
[root@master ~]# curl 172.25.250.100
tomcat 172.25.250.41
[root@master ~]# curl 172.25.250.100
tomcat 172.25.250.42
[root@master ~]# curl 172.25.250.100
tomcat 172.25.250.43
[root@master ~]# ps -ef | grep nginx
root       14623   12840  0 21:04 pts/1    00:00:00 grep --color=auto nginx


[root@master ~]#  systemctl start keepalived.service
[root@master ~]# ps -ef | grep nginx
root       14636       1  0 21:05 ?        00:00:00 nginx: master process /usr/sbin/nginx
nginx      14637   14636  0 21:05 ?        00:00:00 nginx: worker process
nginx      14638   14636  0 21:05 ?        00:00:00 nginx: worker process
nginx      14639   14636  0 21:05 ?        00:00:00 nginx: worker process
nginx      14640   14636  0 21:05 ?        00:00:00 nginx: worker process
root       14653   12840  0 21:05 pts/1    00:00:00 grep --color=auto nginx
关闭 backup1 主机上的 nginx 服务
[root@backup1 ~]# systemctl stop nginx
[root@backup1 ~]# curl 172.25.250.101
tomcat 172.25.250.41
[root@backup1 ~]# curl 172.25.250.101
tomcat 172.25.250.42
[root@backup1 ~]# curl 172.25.250.101
tomcat 172.25.250.43
[root@backup1 ~]# ps -ef | grep nginx
root       15182       1  0 21:08 ?        00:00:00 nginx: master process /usr/sbin/nginx
nginx      15183   15182  0 21:08 ?        00:00:00 nginx: worker process
nginx      15184   15182  0 21:08 ?        00:00:00 nginx: worker process
nginx      15185   15182  0 21:08 ?        00:00:00 nginx: worker process
nginx      15186   15182  0 21:08 ?        00:00:00 nginx: worker process
root       15226   12839  0 21:08 pts/1    00:00:00 grep --color=auto nginx
关闭 backup1 主机上的 keepalived 和 nginx
[root@backup1 ~]# systemctl stop keepalived.service
[root@backup1 ~]# curl 172.25.250.101
tomcat 172.25.250.41
[root@backup1 ~]# curl 172.25.250.101
tomcat 172.25.250.42
[root@backup1 ~]# curl 172.25.250.101
tomcat 172.25.250.43


[root@backup1 ~]# systemctl stop nginx
[root@backup1 ~]# curl 172.25.250.101
tomcat 172.25.250.41
[root@backup1 ~]# curl 172.25.250.101
tomcat 172.25.250.42
[root@backup1 ~]# curl 172.25.250.101
tomcat 172.25.250.43
[root@backup1 ~]# ps -ef | grep nginx
root       15289   12839  0 21:09 pts/1    00:00:00 grep --color=auto nginx


[root@backup1 ~]# systemctl start keepalived.service
[root@backup1 ~]# ps -ef | grep nginx
root       15317       1  0 21:09 ?        00:00:00 nginx: master process /usr/sbin/nginx
nginx      15318   15317  0 21:09 ?        00:00:00 nginx: worker process
nginx      15319   15317  0 21:09 ?        00:00:00 nginx: worker process
nginx      15320   15317  0 21:09 ?        00:00:00 nginx: worker process
nginx      15321   15317  0 21:09 ?        00:00:00 nginx: worker process
root       15330   12839  0 21:09 pts/1    00:00:00 grep --color=auto nginx
关闭 backup2 主机上的 nginx 服务
[root@backup2 ~]# systemctl stop nginx
[root@backup2 ~]# curl 172.25.250.102
tomcat 172.25.250.41
[root@backup2 ~]# curl 172.25.250.102
tomcat 172.25.250.42
[root@backup2 ~]# curl 172.25.250.102
tomcat 172.25.250.43
[root@backup2 ~]# ps -ef | grep nginx
root       15635       1  0 21:12 ?        00:00:00 nginx: master process /usr/sbin/nginx
nginx      15636   15635  0 21:12 ?        00:00:00 nginx: worker process
nginx      15637   15635  0 21:12 ?        00:00:00 nginx: worker process
nginx      15638   15635  0 21:12 ?        00:00:00 nginx: worker process
nginx      15639   15635  0 21:12 ?        00:00:00 nginx: worker process
root       15691   12839  0 21:12 pts/1    00:00:00 grep --color=auto nginx
关闭 backup2 主机上的 keepalived 和 nginx
[root@backup2 ~]# systemctl stop keepalived.service
[root@backup2 ~]# curl 172.25.250.102
tomcat 172.25.250.41
[root@backup2 ~]# curl 172.25.250.102
tomcat 172.25.250.42
[root@backup2 ~]# curl 172.25.250.102
tomcat 172.25.250.43


[root@backup2 ~]# systemctl stop nginx
[root@backup2 ~]# curl 172.25.250.102
tomcat 172.25.250.41
[root@backup2 ~]# curl 172.25.250.102
tomcat 172.25.250.42
[root@backup2 ~]# curl 172.25.250.102
tomcat 172.25.250.43
[root@backup2 ~]# ps -ef | grep nginx
root       15746   12839  0 21:13 pts/1    00:00:00 grep --color=auto nginx


[root@backup2 ~]# systemctl start keepalived.service
[root@backup2 ~]# ps -ef | grep nginx
root       15759       1  0 21:13 ?        00:00:00 nginx: master process /usr/sbin/nginx
nginx      15760   15759  0 21:13 ?        00:00:00 nginx: worker process
nginx      15761   15759  0 21:13 ?        00:00:00 nginx: worker process
nginx      15762   15759  0 21:13 ?        00:00:00 nginx: worker process
nginx      15763   15759  0 21:13 ?        00:00:00 nginx: worker process
root       15772   12839  0 21:13 pts/1    00:00:00 grep --color=auto nginx