Resume全栈项目(一)(.NET)
文章目录
- 项目地址
- 一、数据库创建/日志安装
- 1.1 创建实体层
- 1. Entities
- 2. Enums 存放枚举
- 1.2 创建数据库层
- 1. 安装Persistance层需要的库
- 2. 创建ResumeDbContext
- 3. 添加数据库配置/注册DBContext
- 4. 执行Add-Migration
- 5. 修改字段类型
- 6. Enum支持Json
- 1.3 安装Serilog
- 1. Api层安装所需要的包
- 2. 在appsetting里配置
- 3. 注册Serilog在Program里
- 4.EfCore开启日志
- 5. 在Hanlder里使用
- 二、数据库接口创建
- 2.1 Application创建需要的数据接口
- 1. 创建IAsyncRepository
- 2. 创建创建ICompanyRepository
- 2.2 Persistence层实现接口
- 1. 实现BaseRepository
- 2. 实现CompanyRepository
- 2.3 注册实现的接口
- 三、创建CreateCompany接口
- 3.1 安装MediaR和AutoMapper
- 1. 安装所需要的包和引用
- 2. 添加ApplicationRegistration
- 3. 在Program里注册
- 3.2 创建BaseResponse
- 3.3 创建CQRS
- 1. 创建CreateCompanyDto
- 2. 创建CraeteCompanyResponse
- 3. 创建CreateCompanyCommand
- 4. 创建CreateCompanyCommandHandler
- 5. 创建Validator用来验证数据
- 6. 创建MappingProfile
- 3.4 创建Controller
- 1. 创建Company的Controller
- 四、创建GetAllJob接口
- 4.1 创建GetAllJobVM用于展示数据
- 1. Job实体的导航属性Campany
- 2. 创建GetAllJobVm
- 3. 使用AutoMapper获取导航属性
- 4. 修改IRepository
- 五、Candidate上传下载
- 5.1 创建candidate和上传resume PDF
- 1. 创建CreateCandidateDto
- 2. 创建CreateCandidate的Controller
- 5.2 下载pdf
- 1. 下载Pdf的Controller
项目地址
- 教程作者:
- 教程地址:
https://www.CSDN.com/watch?v=AiwzQMupPsU
- 代码仓库地址作者:
https://github.com/mohammad-taheri1/Youtube-Resume-Management-dotnet-react-ts
- 代码仓库自己:
https://github.com/CXTV/Resume/tree/main/backend
一、数据库创建/日志安装

1.1 创建实体层
- 使用泛型作为ID,这样可以控制哪张表用自增,哪张表用Guid
1. Entities
BaseEntity.cs
namespace ResumeManagement.Domain.Entities
{
    public abstract class BaseEntity<T>
    {
        public T ID { get; set; }
        public DateTime CreatedAt { get; set; } = DateTime.Now;
        public DateTime UpdateAt { get; set; } = DateTime.Now;
        public bool isActive { get; set; } = true;
    }
}
Company.cs: 里面有Job的Collection
namespace ResumeManagement.Domain.Entities
{
    public class Company:BaseEntity<Guid>
    {
        public string Name { get; set; }
        public CompanySize Size { get; set; }
        //relations 一对多
        public ICollection<Job> Jobs { get; set; }
    }
}
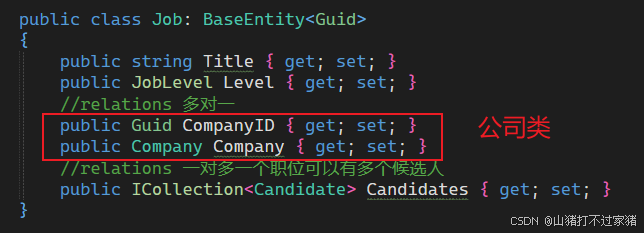
Job.cs:每个职位有对应的公司id和名称,一个职位有多个候选人
namespace ResumeManagement.Domain.Entities
{
    public class Job: BaseEntity<Guid>
    {
        public string Title { get; set; }
        public JobLevel Level { get; set; }
        //relations 多对一
        public Guid CompanyID { get; set; }
        public Company Company { get; set; }
        //relations 一对多一个职位可以有多个候选人
        public ICollection<Candidate> Candidates { get; set; }
    }
}
Candidate.cs: 每个候选人,有投递的工作ID和工作名称
namespace ResumeManagement.Domain.Entities
{
    public class Candidate: BaseEntity<Guid>
    {
        public string FirstName { get; set; }
        public string LastName { get; set; }
        public string Email { get; set; }
        public string Phone { get; set; }
        public string CoverLetter { get; set; }
        public string ResumeUrl { get; set; }
        //relations 多对一
        public Guid JobID { get; set; }
        public Job Job { get; set; }
    }
}
2. Enums 存放枚举
- 公司规模的枚举
namespace ResumeManagement.Domain.Enums
{
    public enum CompanySize
    {
        Small,
        Medium,
        Large
    }
}
2.工作等级的
namespace ResumeManagement.Domain.Enums
{
    public enum JobLevel
    {
        Intern,
        Junior,
        MidLevel,
        Senior,
        TeamLead,
        Cto,
        Architect,
    }
}
1.2 创建数据库层

1. 安装Persistance层需要的库

2. 创建ResumeDbContext
- 这里定义表的关系

3. 添加数据库配置/注册DBContext
- API层数据库连接
appsettings.json
{
  "Logging": {
    "LogLevel": {
      "Default": "Information",
      "Microsoft.AspNetCore": "Warning"
    }
  },
  "ConnectionStrings": {
    "ResumeDBConnectionStrings": "Server=.;Database=ResumeDB;Trusted_Connection=True;MultipleActiveResultSets=true;TrustServerCertificate=True;"
  },
  "AllowedHosts": "*"
}
- 在Persistance层创建
PersistanceRegistration.cs文件
using Microsoft.EntityFrameworkCore;
using Microsoft.Extensions.Configuration;
using Microsoft.Extensions.DependencyInjection;

namespace ResumenManagement.Persistance
{
    public static class PersistanceRegistration
    {
        public static void  AddPersistanceRegistration(this IServiceCollection services, IConfiguration configuration)
        {
            services.AddDbContext<ResumeDbContext>(options =>
        options.UseSqlServer(configuration.GetConnectionString("ResumeDBConnectionStrings")));
        }
    }
}
- 在Api层里注册

4. 执行Add-Migration
- 注意:如果从新添加了文件夹,一定要build项目之后,重启项目,才会执行migration成功

- 执行成功后,在数据里,就可以看到我们的表

5. 修改字段类型
- 在我们创建完成表之后,返现Size是int类型,Job里的Level也是int类型,这是因为枚举类型造成的原因,需要在DbContext里修改类型

6. Enum支持Json
- 在
Program.cs里添加
builder.Services.AddControllers().AddJsonOptions(options =>
{
    options.JsonSerializerOptions.Converters.Add(new JsonStringEnumConverter());
});
1.3 安装Serilog
1. Api层安装所需要的包

2. 在appsetting里配置
- 直接配置在setting之后,就不需要在中间件里配置
  "Serilog": {
    "MinimumLevel": {
      "Override": {
        "Microsoft": "Warning",
        "Microsoft.EntityFrameworkCore": "Information"
      }
    },
    "WriteTo": [
      {
        "Name": "Console",
        "Args": {
          "outputTemplate": "[{Timestamp:dd-MM HH:mm:ss} {Level:u3}] |{SourceContext}| {NewLine}{Message:lj}{NewLine}{Exception}"
        }
      },
      {
        "Name": "File",
        "Args": {
          "path": "Logs/Resturant-API-.log",
          "rollingInterval": "Day",
          "rollOnFileSizeLimit": true,
          "formatter": "Serilog.Formatting.Compact.CompactJsonFormatter, Serilog.Formatting.Compact"
        }
      }
    ]
  },
  "AllowedHosts": "*"
3. 注册Serilog在Program里
- 注册服务以及中间件

4.EfCore开启日志
- 在Persistence层里,efCore服务注册的地方
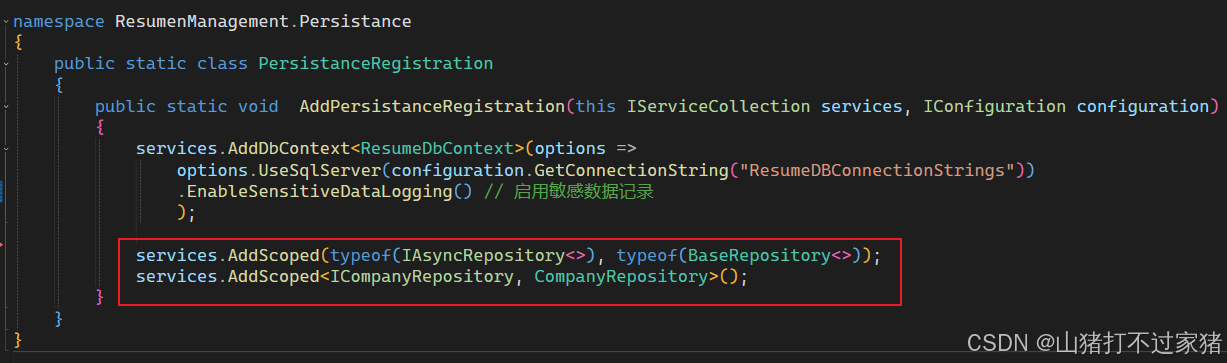
PersistanceRegistration.cs
using Microsoft.EntityFrameworkCore;
using Microsoft.Extensions.Configuration;
using Microsoft.Extensions.DependencyInjection;
using Microsoft.Extensions.Logging;
using ResumenManagement.Application.Contracts.Persistance;
using ResumenManagement.Persistance.Repositories;

namespace ResumenManagement.Persistance
{
    public static class PersistanceRegistration
    {
        public static void  AddPersistanceRegistration(this IServiceCollection services, IConfiguration configuration)
        {
            services.AddDbContext<ResumeDbContext>(options =>
                options.UseSqlServer(configuration.GetConnectionString("ResumeDBConnectionStrings"))
                .EnableSensitiveDataLogging() // 启用敏感数据记录
                );

            services.AddScoped(typeof(IAsyncRepository<>), typeof(BaseRepository<>));
            services.AddScoped<ICompanyRepository, CompanyRepository>();
        }
    }
}
5. 在Hanlder里使用
- 需要先在Application层安装一个包才可以使用

- 注册服务以及使用

二、数据库接口创建
2.1 Application创建需要的数据接口
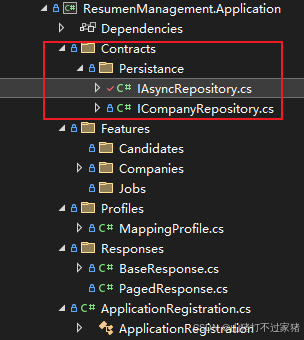
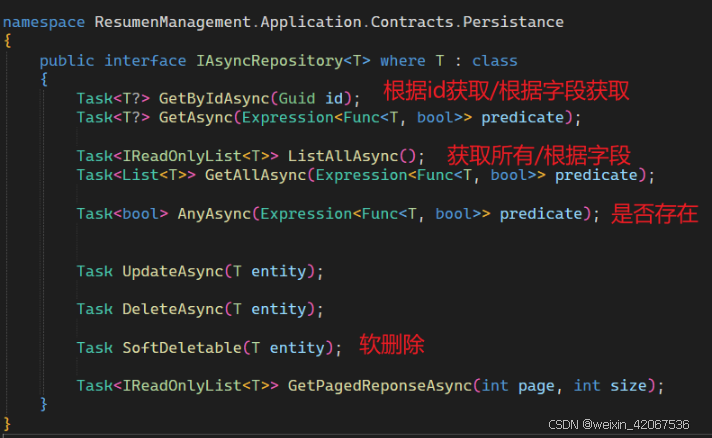
1. 创建IAsyncRepository
- 根接口
2. 创建创建ICompanyRepository
- 继承IAsyncRepository,实现Company自己的方法,这里暂时没有自己独特的查询
namespace ResumenManagement.Application.Contracts.Persistance
{
    public interface ICompanyRepository: IAsyncRepository<Company>
    {
    }
}
2.2 Persistence层实现接口
- 实现Application层的接口
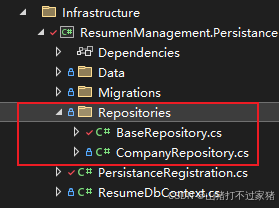
1. 实现BaseRepository
- 这里只实现一个方法
using Microsoft.EntityFrameworkCore;
using ResumenManagement.Application.Contracts.Persistance;
using System.Linq.Expressions;

namespace ResumenManagement.Persistance.Repositories
{
    public class BaseRepository<T> : IAsyncRepository<T> where T : class
    {
        protected readonly ResumeDbContext _dbContext;

        public BaseRepository(ResumeDbContext dbContext)
        {
            _dbContext = dbContext;
        }

        public async Task<T> AddAsync(T entity)
        {
            await _dbContext.Set<T>().AddAsync(entity);
            await _dbContext.SaveChangesAsync();
            return entity;
        }

        public async Task<bool> AnyAsync(Expression<Func<T, bool>> predicate)
        {
            return await _dbContext.Set<T>().AnyAsync(predicate);
        }
}
2. 实现CompanyRepository
using ResumeManagement.Domain.Entities;
using ResumenManagement.Application.Contracts.Persistance;

namespace ResumenManagement.Persistance.Repositories
{
    public class CompanyRepository:BaseRepository<Company>, ICompanyRepository
    {
        public CompanyRepository(ResumeDbContext dbContext) : base(dbContext)
        {
        }
    }
}
2.3 注册实现的接口
在Persistence层的PersistenceRegistration.cs 里注册实现的服务,提供给其他地方使用,很重要
三、创建CreateCompany接口
- 功能:创建一个Company
3.1 安装MediaR和AutoMapper
1. 安装所需要的包和引用
- 在Application层安装所需要的包

2. 添加ApplicationRegistration
- 在Application层添加
ApplicationRegistration.cs
using Microsoft.Extensions.DependencyInjection;

namespace ResumenManagement.Application
{
    public static class ApplicationRegistration
    {
        public static void AddApplicationRegistration(this IServiceCollection services)
        {
            //1.获取应用程序程序集
            var applicationAssembly = typeof(ApplicationRegistration).Assembly;

            //2.注册所有MediatR处理程序
            services.AddMediatR(cfg => cfg.RegisterServicesFromAssembly(applicationAssembly));
            //3.注册所有AutoMapper配置
            services.AddAutoMapper(applicationAssembly);
        }
    }
}
3. 在Program里注册
Program.cs里添加ApplicationRegistration

3.2 创建BaseResponse
- 定义整个项目的api返回的格式
Responses
using System.Text.Json.Serialization;

namespace ResumenManagement.Application.Responses
{
    public class BaseResponse
    {
        public BaseResponse()
        {
            Success = true;
        }
        public BaseResponse(string message)
        {
            Success = true;
            Message = message;
        }

        public BaseResponse(string message, bool success)
        {
            Success = success;
            Message = message;
        }

        public bool Success { get; set; }

        [JsonIgnore(Condition = JsonIgnoreCondition.WhenWritingNull)]
        public string? Message { get; set; }

        [JsonIgnore(Condition = JsonIgnoreCondition.WhenWritingNull)]
        public List<string>? ValidationErrors { get; set; }
    }
}
3.3 创建CQRS
- add/update/delete等操作是Command
- 查询为是Query
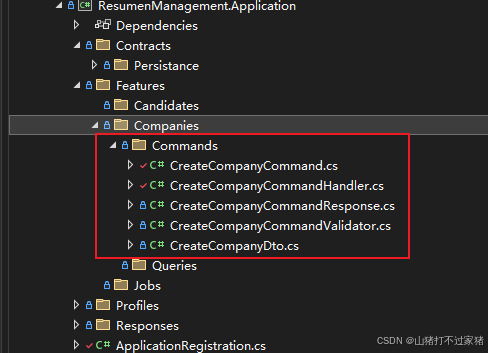
1. 创建CreateCompanyDto
- 定义CreateCompanyDto类,用于返回数据
using ResumeManagement.Domain.Enums;

namespace ResumenManagement.Application.Features.Companies.Commands
{
    public class CreateCompanyDto
    {
        public Guid ID { get; set; }
        public string Name { get; set; }
        public CompanySize Size { get; set; }
    }
}
2. 创建CraeteCompanyResponse
- 返回一个CreateCompanyDto 类
using ResumenManagement.Application.Responses;
using System.Text.Json.Serialization;

namespace ResumenManagement.Application.Features.Companies.Commands
{
    public class CreateCompanyCommandResponse : BaseResponse
    {

        public CreateCompanyCommandResponse() : base()
        {
        }

        [JsonIgnore(Condition = JsonIgnoreCondition.WhenWritingNull)]
        public CreateCompanyDto? Company { get; set; }
    }
}
3. 创建CreateCompanyCommand
- 定义传入的值,以及返回值

4. 创建CreateCompanyCommandHandler
- 获取数据库服务,AutoMapper服务,Serilog服务
- 根据业务增删改查
using AutoMapper;
using MediatR;
using Microsoft.Extensions.Logging;
using ResumeManagement.Domain.Entities;
using ResumenManagement.Application.Contracts.Persistance;

namespace ResumenManagement.Application.Features.Companies.Commands
{
    public class CreateCompanyCommandHandler : IRequestHandler<CreateCompanyCommand, CreateCompanyCommandResponse>
    {
        private readonly IAsyncRepository<Company> _companyRepository;
        private readonly IMapper _mapper;
        private readonly ILogger<CreateCompanyCommandHandler> _logger;

        public CreateCompanyCommandHandler(IAsyncRepository<Company> companyRepository, IMapper mapper, ILogger<CreateCompanyCommandHandler> logger)
        {
            _companyRepository = companyRepository;
            _mapper = mapper;
            _logger = logger;
        }

        public async Task<CreateCompanyCommandResponse> Handle(CreateCompanyCommand request, CancellationToken cancellationToken)
        {
            var createCompanyCommandResponse = new CreateCompanyCommandResponse();

            var validator = new CreateCompanyCommandValidator();
            var validationResult = await validator.ValidateAsync(request);
            bool existingCompany = await _companyRepository.AnyAsync(c => c.Name == request.Name);

            if (existingCompany)
            {
                _logger.LogInformation("Company Already Exists");
                createCompanyCommandResponse.Success = false;
                createCompanyCommandResponse.ValidationErrors ??= new List<string>();
                createCompanyCommandResponse.ValidationErrors.Add("Company Already Exists");
            }


            if (validationResult.Errors.Count > 0)
            {
                _logger.LogInformation("validation error  ");

                createCompanyCommandResponse.Success = false;
                createCompanyCommandResponse.ValidationErrors = new List<string>();

                foreach (var error in validationResult.Errors)
                {
                    createCompanyCommandResponse.ValidationErrors.Add(error.ErrorMessage);
                }
            }

            if (createCompanyCommandResponse.Success)
            {
                _logger.LogInformation("Create a new Company");
                createCompanyCommandResponse.Message = "Company Created Successfully";
                var company = _mapper.Map<Company>(request);
                company = await _companyRepository.AddAsync(company);
                createCompanyCommandResponse.Company = _mapper.Map<CreateCompanyDto>(company);
            }

            return createCompanyCommandResponse;
        }
    }
}
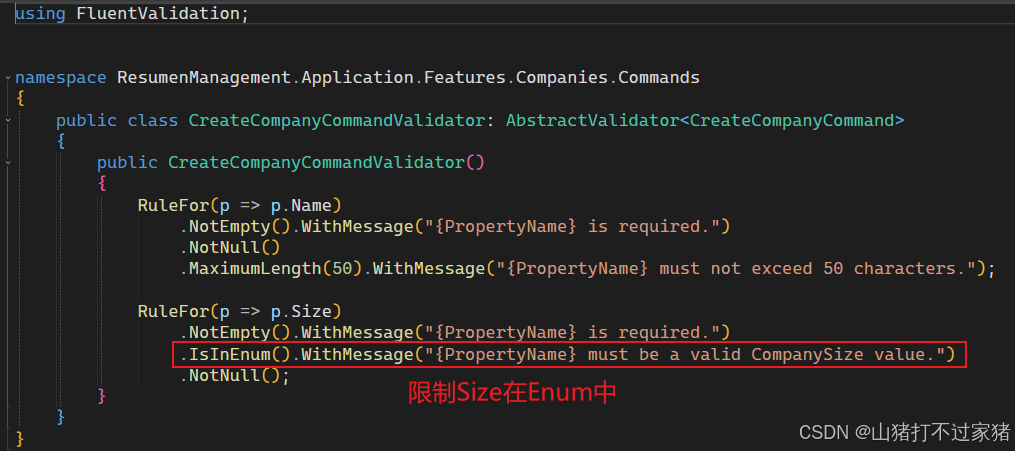
5. 创建Validator用来验证数据
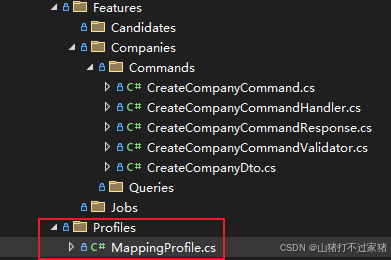
6. 创建MappingProfile
- 创建
MapppingProfile.cs用于映射
using AutoMapper;
using ResumeManagement.Domain.Entities;
using ResumenManagement.Application.Features.Companies.Commands;

namespace ResumenManagement.Application.Profiles
{
    public class MappingProfile: Profile
    {
        public MappingProfile()
        {
            CreateMap<Company, CreateCompanyDto>().ReverseMap();
            CreateMap<Company, CreateCompanyCommand>().ReverseMap();
        }
    }
}
3.4 创建Controller
1. 创建Company的Controller
using MediatR;
using Microsoft.AspNetCore.Mvc;
using ResumenManagement.Application.Features.Companies.Commands.CreateCompany;
using ResumenManagement.Application.Features.Companies.Queries.GetAllCompany;

namespace backend.Controllers
{

    [Route("api/[controller]")]
    [ApiController]
    public class CompanyController:ControllerBase
    {
        private readonly IMediator _mediator;
        public CompanyController(IMediator mediator)
        {
            _mediator = mediator;
        }

        [HttpPost(Name = "CreateCampany")]
        public async Task<ActionResult<CreateCompanyCommandResponse>> CreateCompany([FromBody] CreateCompanyCommand createCompanyCommand)
        {
            var response = await _mediator.Send(createCompanyCommand);

            return Ok(response);
            //return CreatedAtRoute("GetCompanyById", new { id = response.Company.CompanyID }, response);
        }


        [HttpGet(Name = "GetAllCompany")]
        public async Task<ActionResult<List<GetAllCompanyVm>>> GetAllCompany([FromQuery] GetAllCompanyQuery getAllCompanyQuery)
        {
            var response = await _mediator.Send(getAllCompanyQuery);

            return Ok(response);
        }
    }
}
四、创建GetAllJob接口
- 功能:获取所有的工作
4.1 创建GetAllJobVM用于展示数据
1. Job实体的导航属性Campany
- 这里的Campany是Job的导航属性
2. 创建GetAllJobVm
- 创建Vm用于接口显示
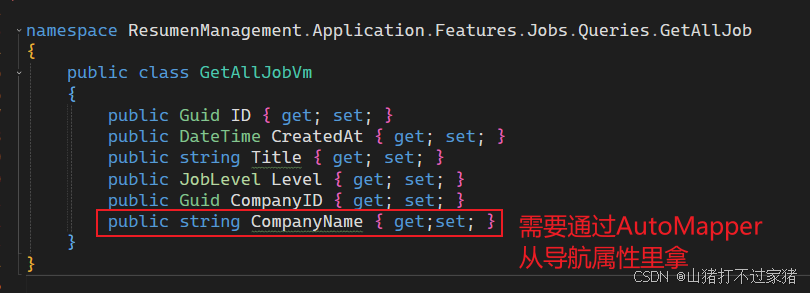
3. 使用AutoMapper获取导航属性
- 由于是读取数据,所以是从Job映射为VM
- dest既GetAllJobVm的CompanyName属性,是从Job既src里的Company.Name里获取

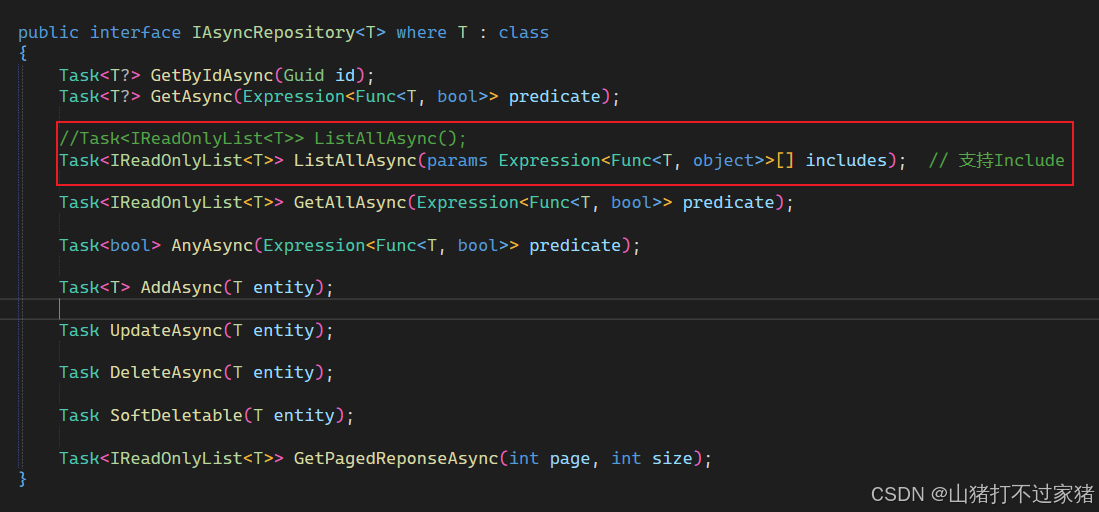
4. 修改IRepository
- 由于使用了导航属性,不可以直接使用
await _dbContext.Set<T>().ToListAsync();用来查询,需要使用include
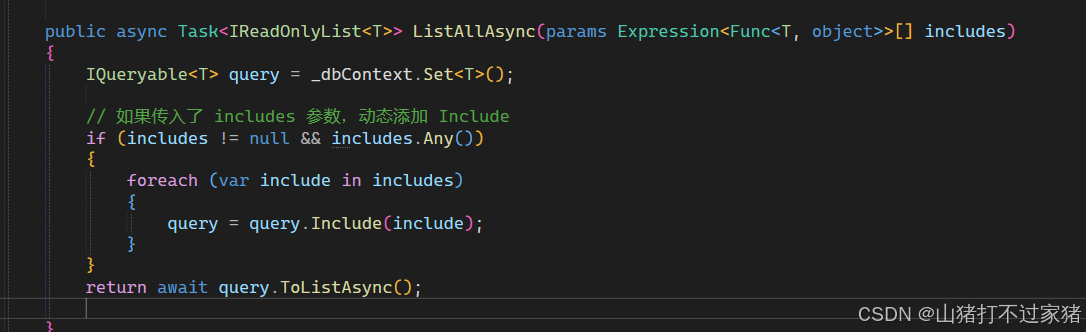
- 修改IRepository
2. 修改实现
五、Candidate上传下载
- 功能:创建Candidate,以及上传resume和下载
5.1 创建candidate和上传resume PDF
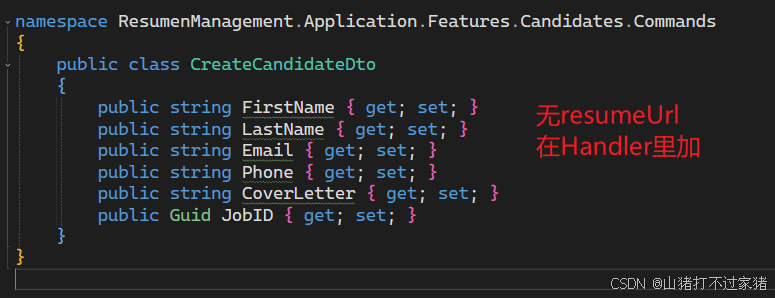
1. 创建CreateCandidateDto
- 根据Catedidate的Entity创建Dto,这个只用于前端提交表单
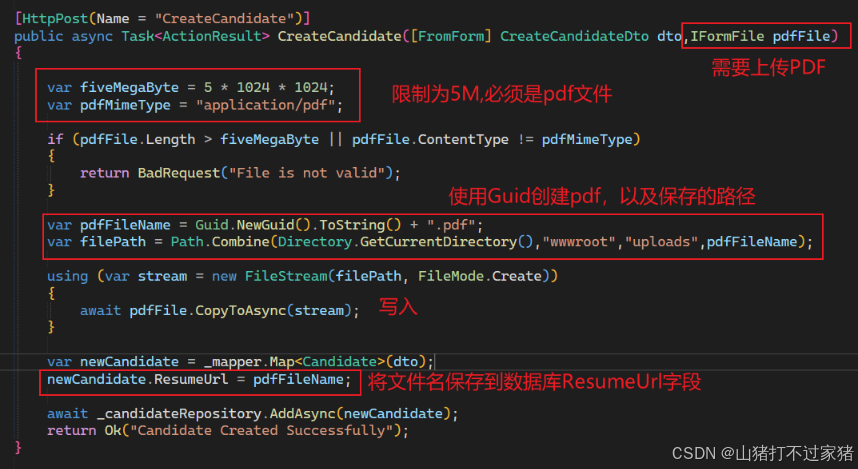
2. 创建CreateCandidate的Controller
- 传入Candidate的信息和resume pdf保存到数据库和本地
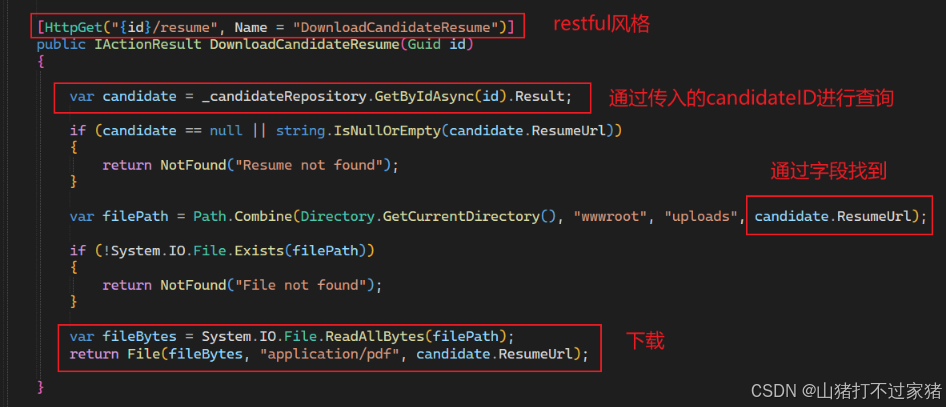
5.2 下载pdf
1. 下载Pdf的Controller