在虚拟机中部署kafka
首先,最开始我想通过docker来部署kafka,但遇到一个问题,就是这kafka的镜像下不下来。然后我在网上找答案,说需要改一下,修改/etc/docker/daemon.json内容,配置国内镜像,然后我发现不行,然后试着修改一下DNS改为223.5.5.5也不行,之后我就是直接到阿里云开源镜像网站下来一个kafka_2.12.3.7.2版本开始安装
镜像包地址
https://mirrors.aliyun.com/apache/kafka/3.7.2/?spm=a2c6h.25603864.0.0.4fe7126eV8pEfm
之后就是开始安装了
首先我用的是FinalShell
用其他的工具也行,接下来就是正式开始了,下把镜像包下载下来。
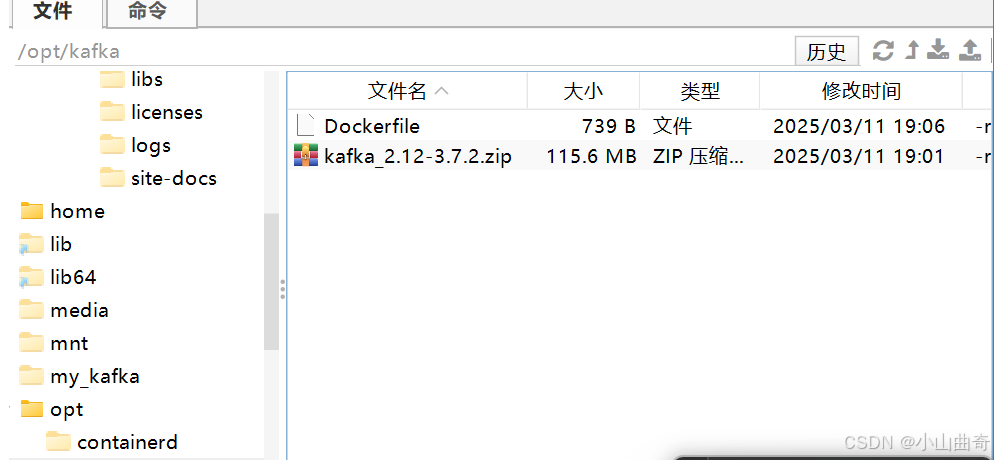
在opt目录下创建一个kafka的文件夹来放kafka的镜像包
mkdir /opt/kafka顺便在新建一个叫Dockerfile的文件,把下面的配置写进去
FROM ubuntu:latest

# 设置工作目录
WORKDIR /opt/kafka

# 将本地的 kafka_2.12-3.7.2.zip 复制到镜像中
COPY kafka_2.12-3.7.2.zip .

# 安装必要的工具,如 unzip
RUN apt-get update && apt-get install -y unzip

# 解压 Kafka 压缩包
RUN unzip kafka_2.12-3.7.2.zip

# 删除压缩包以减小镜像体积
RUN rm kafka_2.12-3.7.2.zip

# 可以根据需要设置环境变量
ENV KAFKA_HOME /opt/kafka/kafka_2.12-3.7.2
ENV PATH $PATH:$KAFKA_HOME/bin

# 暴露 Kafka 相关端口,例如 9092 是 Kafka 的默认端口
EXPOSE 9092

# 启动 Kafka 的命令,这里只是示例,实际使用时可能需要根据配置调整
CMD ["sh", "-c", "$KAFKA_HOME/bin/kafka-server-start.sh $KAFKA_HOME/config/server.properties"]
然后就是下面这样了
然后对kafka镜像包解压到/export/server
创建/export/server
mkdir -p /export/server安装 unzip 工具
unzip -vCentOS/RHEL
sudo yum install unzip解压 .zip 文件
使用 unzip 命令将 kafka_2.12 - 3.7.2.zip 解压到 /export/server 目录:
unzip /opt/kafka/kafka_2.12-3.7.2.zip -d /export/server验证解压结果
使用 ls 命令查看 /export/server 目录,确认镜像包是否成功解压:
ls /export/server若输出里包含解压后的 Kafka 目录(像 kafka_2.12 - 3.7.2),就说明解压成功。
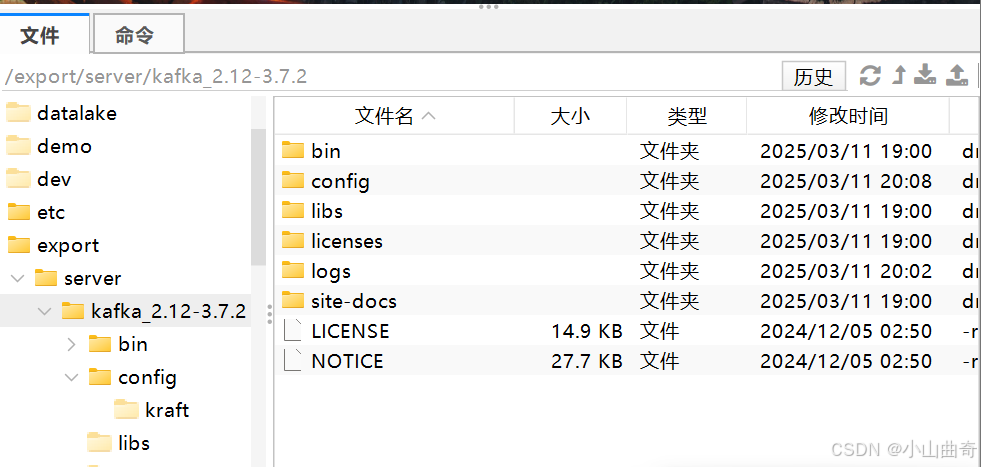
到/export/server/kafka_2.12-2.4.1/开始改配置
cd /export/server/kafka_2.12-2.4.1/创建日志方便记录
mkdir logs到config
[root@node1 kafka_2.12-2.4.1]# cd config/
[root@node1 config]# ll -ah
总用量 76K
drwxr-xr-x 2 root root 4.0K 3月   3 2020 .
drwxr-xr-x 7 root root  101 5月  30 18:03 ..
-rw-r--r-- 1 root root  906 3月   3 2020 connect-console-sink.properties
-rw-r--r-- 1 root root  909 3月   3 2020 connect-console-source.properties
-rw-r--r-- 1 root root 5.2K 3月   3 2020 connect-distributed.properties
-rw-r--r-- 1 root root  883 3月   3 2020 connect-file-sink.properties
-rw-r--r-- 1 root root  881 3月   3 2020 connect-file-source.properties
-rw-r--r-- 1 root root 2.2K 3月   3 2020 connect-log4j.properties
-rw-r--r-- 1 root root 1.6K 3月   3 2020 connect-mirror-maker.properties
-rw-r--r-- 1 root root 2.3K 3月   3 2020 connect-standalone.properties
-rw-r--r-- 1 root root 1.2K 3月   3 2020 consumer.properties
-rw-r--r-- 1 root root 4.6K 3月   3 2020 log4j.properties
-rw-r--r-- 1 root root 1.9K 3月   3 2020 producer.properties
-rw-r--r-- 1 root root 6.7K 3月   3 2020 server.properties
-rw-r--r-- 1 root root 1.1K 3月   3 2020 tools-log4j.properties
-rw-r--r-- 1 root root 1.2K 3月   3 2020 trogdor.conf
-rw-r--r-- 1 root root 1.2K 3月   3 2020 zookeeper.properties
consumer.properties就是消费者配置文件,producer.properties就是生产者配置文件,server.properties就是Kafka服务配置文件。先修改server.properties:
vim server.properties
进入后按i进入插入模式,按我下面的修改
单节点部署
假设当前节点主机名为 node1
# Licensed to the Apache Software Foundation (ASF) under one or more
# contributor license agreements.  See the NOTICE file distributed with
# this work for additional information regarding copyright ownership.
# The ASF licenses this file to You under the Apache License, Version 2.0
# (the "License"); you may not use this file except in compliance with
# the License.  You may obtain a copy of the License at
#
#    http://www.apache.org/licenses/LICENSE-2.0
#
# Unless required by applicable law or agreed to in writing, software
# distributed under the License is distributed on an "AS IS" BASIS,
# WITHOUT WARRANTIES OR CONDITIONS OF ANY KIND, either express or implied.
# See the License for the specific language governing permissions and
# limitations under the License.

#
# This configuration file is intended for use in ZK-based mode, where Apache ZooKeeper is required.
# See kafka.server.KafkaConfig for additional details and defaults
#

############################# Server Basics #############################

# The id of the broker. This must be set to a unique integer for each broker.
broker.id=1

############################# Socket Server Settings #############################

# The address the socket server listens on. If not configured, the host name will be equal to the value of
# java.net.InetAddress.getCanonicalHostName(), with PLAINTEXT listener name, and port 9092.
#   FORMAT:
#     listeners = listener_name://host_name:port
#   EXAMPLE:
#     listeners = PLAINTEXT://your.host.name:9092
listeners=PLAINTEXT://:9092

# Listener name, hostname and port the broker will advertise to clients.
# If not set, it uses the value for "listeners".
advertised.listeners=PLAINTEXT://node1:9092

# Maps listener names to security protocols, the default is for them to be the same. See the config documentation for more details
#listener.security.protocol.map=PLAINTEXT:PLAINTEXT,SSL:SSL,SASL_PLAINTEXT:SASL_PLAINTEXT,SASL_SSL:SASL_SSL

# The number of threads that the server uses for receiving requests from the network and sending responses to the network
num.network.threads=3

# The number of threads that the server uses for processing requests, which may include disk I/O
num.io.threads=8

# The send buffer (SO_SNDBUF) used by the socket server
socket.send.buffer.bytes=102400

# The receive buffer (SO_RCVBUF) used by the socket server
socket.receive.buffer.bytes=102400

# The maximum size of a request that the socket server will accept (protection against OOM)
socket.request.max.bytes=104857600


############################# Log Basics #############################

# A comma separated list of directories under which to store log files
log.dirs=/export/server/kafka_2.12-3.7.2/logs

# The default number of log partitions per topic. More partitions allow greater
# parallelism for consumption, but this will also result in more files across
# the brokers.
num.partitions=1

# The number of threads per data directory to be used for log recovery at startup and flushing at shutdown.
# This value is recommended to be increased for installations with data dirs located in RAID array.
num.recovery.threads.per.data.dir=1

############################# Internal Topic Settings  #############################
# The replication factor for the group metadata internal topics "__consumer_offsets" and "__transaction_state"
# For anything other than development testing, a value greater than 1 is recommended to ensure availability such as 3.
offsets.topic.replication.factor=1
transaction.state.log.replication.factor=1
transaction.state.log.min.isr=1

############################# Log Flush Policy #############################

# Messages are immediately written to the filesystem but by default we only fsync() to sync
# the OS cache lazily. The following configurations control the flush of data to disk.
# There are a few important trade-offs here:
#    1. Durability: Unflushed data may be lost if you are not using replication.
#    2. Latency: Very large flush intervals may lead to latency spikes when the flush does occur as there will be a lot of data to flush.
#    3. Throughput: The flush is generally the most expensive operation, and a small flush interval may lead to excessive seeks.
# The settings below allow one to configure the flush policy to flush data after a period of time or
# every N messages (or both). This can be done globally and overridden on a per-topic basis.

# The number of messages to accept before forcing a flush of data to disk
#log.flush.interval.messages=10000

# The maximum amount of time a message can sit in a log before we force a flush
#log.flush.interval.ms=1000

############################# Log Retention Policy #############################

# The following configurations control the disposal of log segments. The policy can
# be set to delete segments after a period of time, or after a given size has accumulated.
# A segment will be deleted whenever *either* of these criteria are met. Deletion always happens
# from the end of the log.

# The minimum age of a log file to be eligible for deletion due to age
log.retention.hours=168

# A size-based retention policy for logs. Segments are pruned from the log unless the remaining
# segments drop below log.retention.bytes. Functions independently of log.retention.hours.
#log.retention.bytes=1073741824

# The maximum size of a log segment file. When this size is reached a new log segment will be created.
#log.segment.bytes=1073741824

# The interval at which log segments are checked to see if they can be deleted according
# to the retention policies
log.retention.check.interval.ms=300000

############################# Zookeeper #############################

# Zookeeper connection string (see zookeeper docs for details).
# This is a comma separated host:port pairs, each corresponding to a zk
# server. e.g. "127.0.0.1:3000,127.0.0.1:3001,127.0.0.1:3002".
# You can also append an optional chroot string to the urls to specify the
# root directory for all kafka znodes.
#zookeeper.connect=localhost:2181

# Timeout in ms for connecting to zookeeper
#zookeeper.connection.timeout.ms=18000


############################# Group Coordinator Settings #############################

# The following configuration specifies the time, in milliseconds, that the GroupCoordinator will delay the initial consumer rebalance.
# The rebalance will be further delayed by the value of group.initial.rebalance.delay.ms as new members join the group, up to a maximum of max.poll.interval.ms.
# The default value for this is 3 seconds.
# We override this to 0 here as it makes for a better out-of-the-box experience for development and testing.
# However, in production environments the default value of 3 seconds is more suitable as this will help to avoid unnecessary, and potentially expensive, rebalances during application startup.
group.initial.rebalance.delay.ms=0
delete.topic.enable=true
保证一样然后退出按ESC并且按:wq和回车保存
因为我这个是 Kafka 3.x 及以上版本,Kafka 已经支持 KRaft 模式,这种模式下可以不依赖 ZooKeeper ,所以我把zookeeper里面的配置给注释了,用的是KRaft
在上面的底下再加上KRaft的配置
# 节点角色,controller 表示控制器,broker 表示代理
process.roles=controller,broker

# 控制器投票者信息,格式为 节点 ID@主机名:端口
controller.quorum.voters=1@localhost:9093

# 节点的唯一标识符
node.id=1

# 之前生成的集群 ID
cluster.id=abcdef1234567890abcdef1234567890

# 控制器监听地址
controller.listener.names=CONTROLLER

# 控制器监听器安全协议映射
listener.security.protocol.map=CONTROLLER:PLAINTEXT,PLAINTEXT:PLAINTEXT

# 控制器监听地址
listeners=PLAINTEXT://localhost:9092,CONTROLLER://localhost:9093

# 控制器广告地址
advertised.listeners=PLAINTEXT://localhost:9092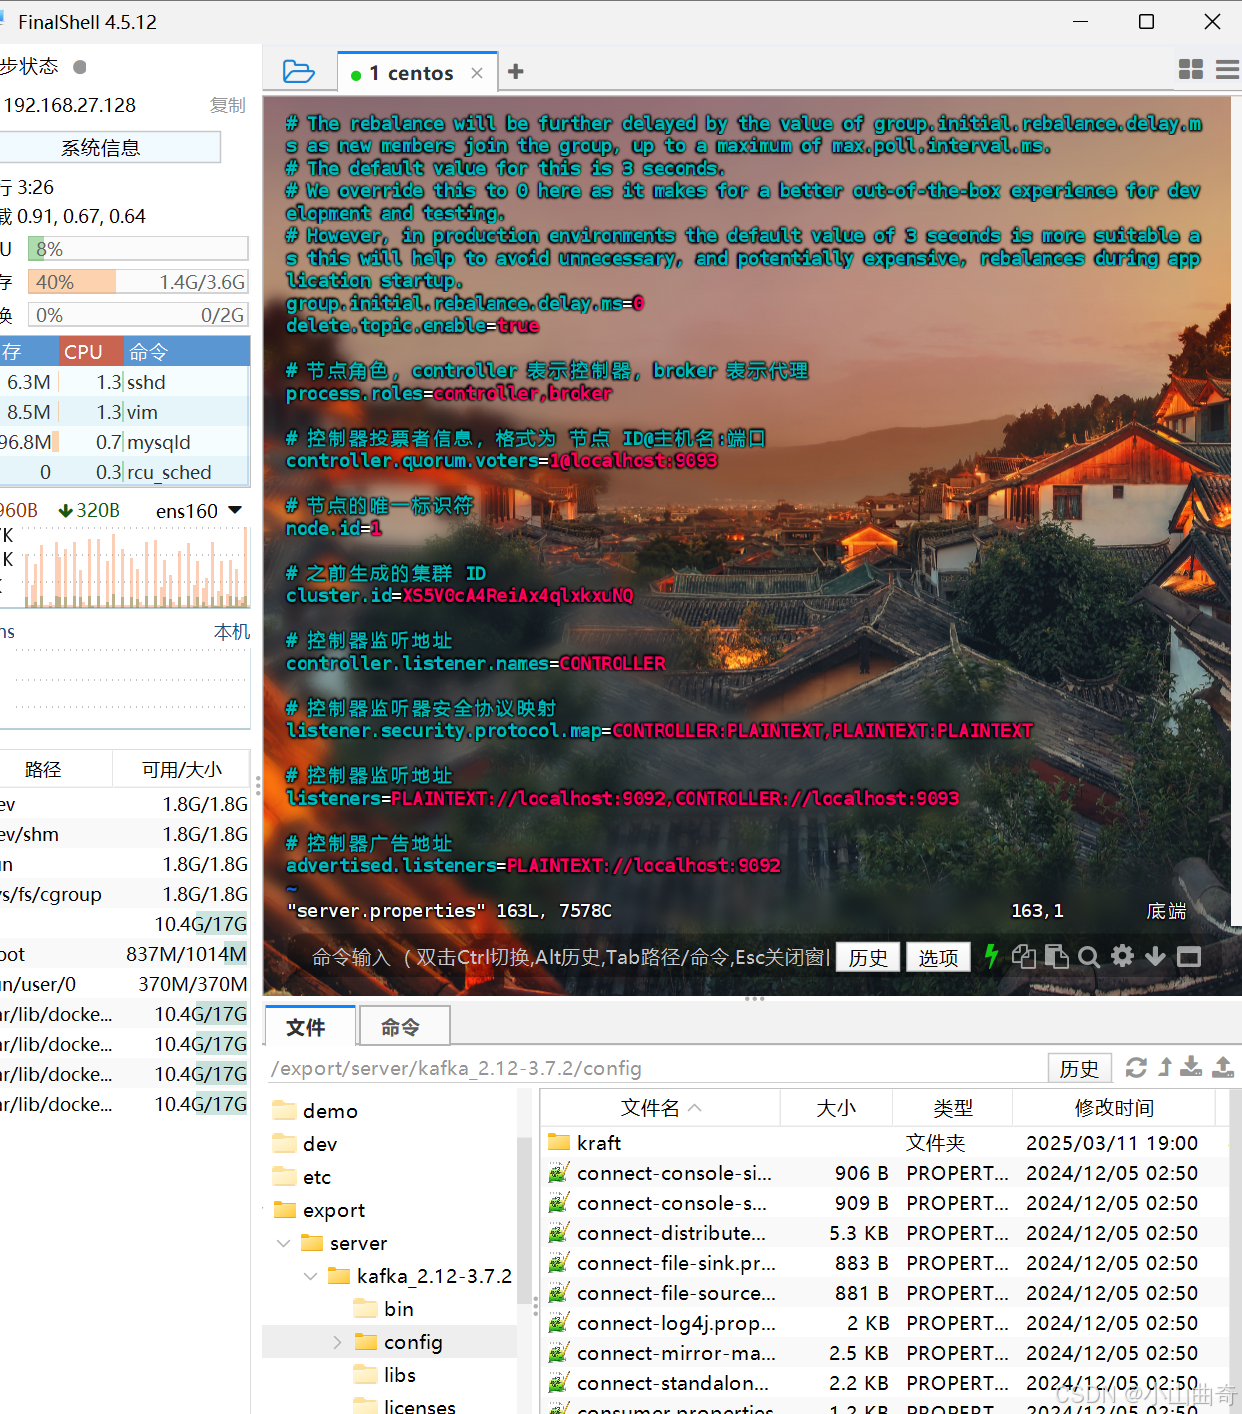
写好就像之前一样用ESC,然后:wq加回车保存退出
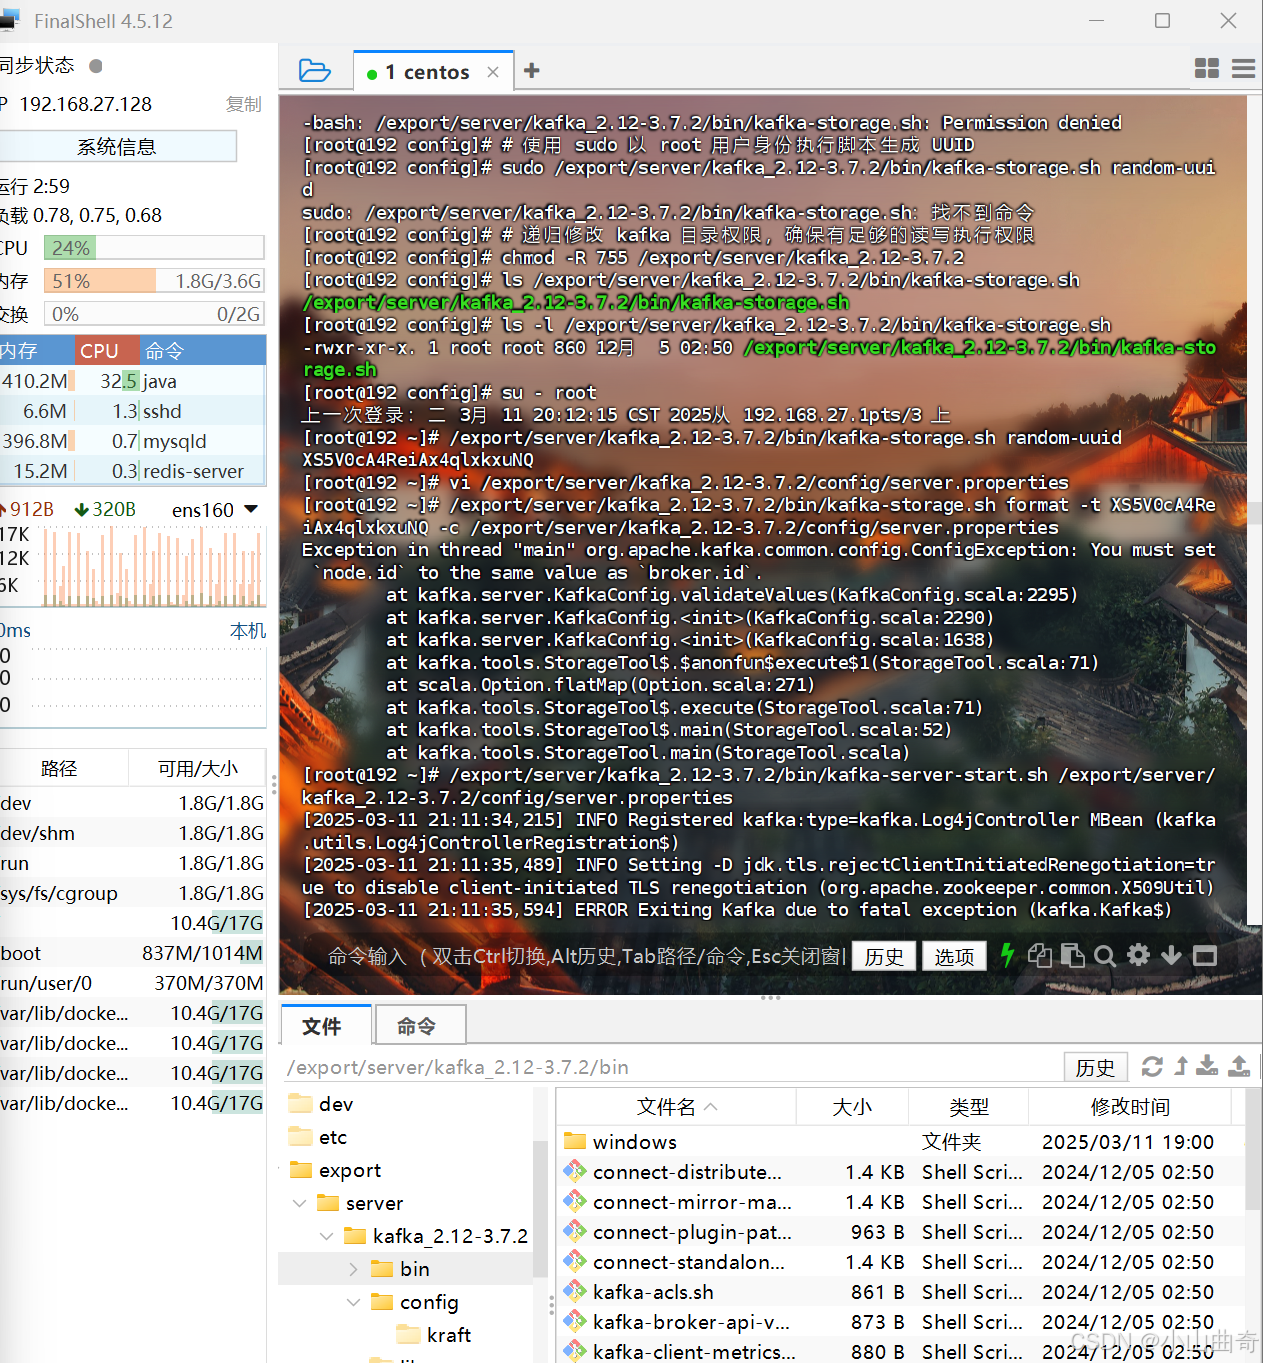
在启动 Kafka 之前,需要对存储目录进行格式化,以适应 KRaft 模式。使用以下命令进行格式化:
/export/server/kafka_2.12-3.7.2/bin/kafka-storage.sh format -t abcdef1234567890abcdef1234567890 -c /export/server/kafka_2.12-3.7.2/config/server.properties格式化完成后,就可以启动 Kafka 服务了:
/export/server/kafka_2.12-3.7.2/bin/kafka-server-start.sh /export/server/kafka_2.12-3.7.2/config/server.properties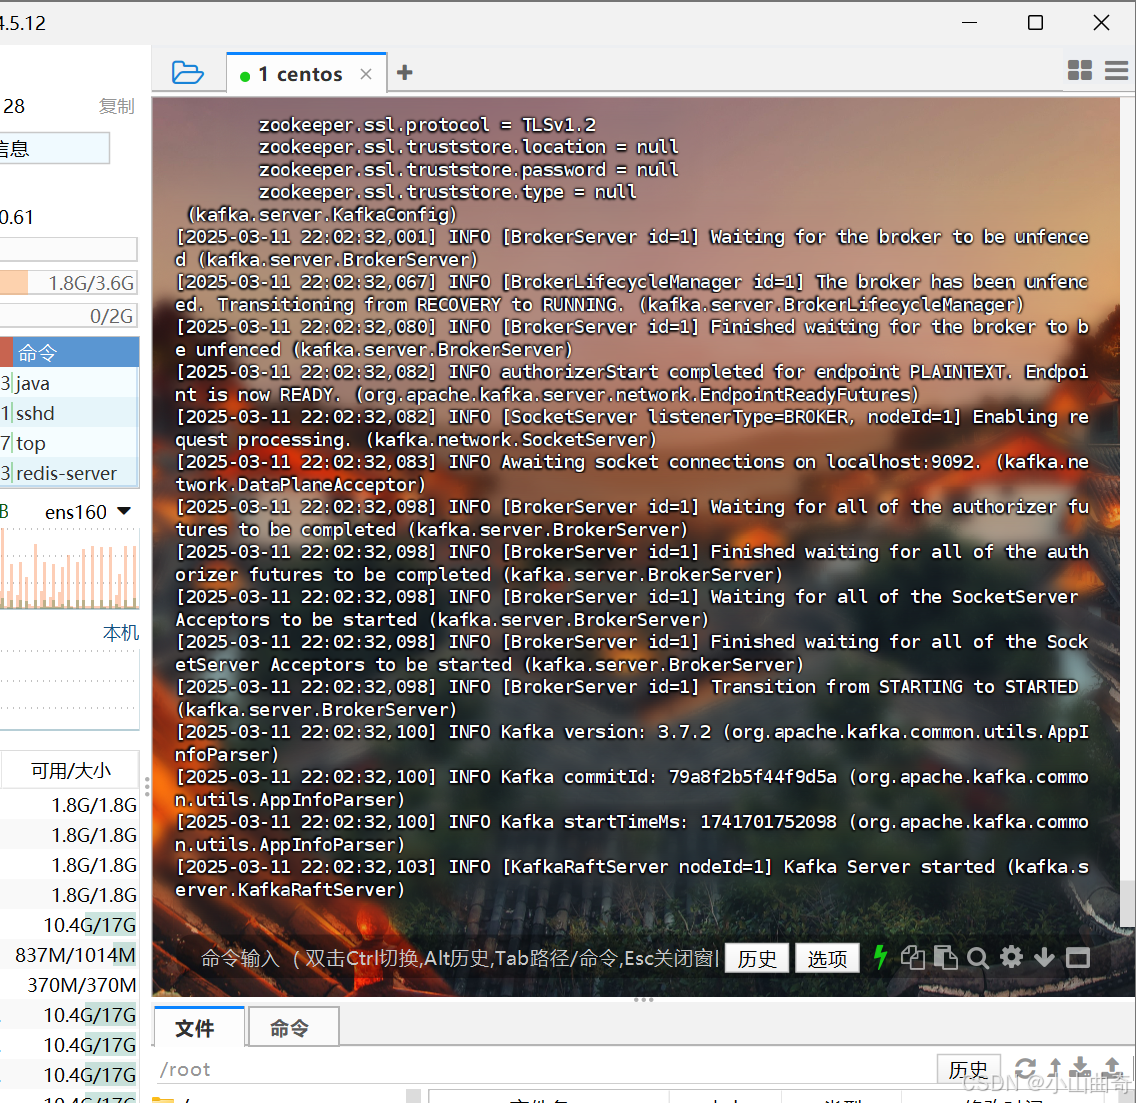
可以使用以下命令创建一个测试主题,以验证 Kafka 服务是否正常工作:
/export/server/kafka_2.12-3.7.2/bin/kafka-topics.sh --create --topic test_topic --bootstrap-server localhost:9092 --partitions 1 --replication-factor 1之后我为了方便设置一个开机自启动
创建系统服务单元文件
使用文本编辑器(如 vi 或 nano)创建一个新的系统服务单元文件 /etc/systemd/system/kafka.service:
sudo vi /etc/systemd/system/kafka.service编辑服务单元文件内容
在打开的文件中输入以下内容:
[Unit]
Description=Apache Kafka Server
Documentation=http://kafka.apache.org/documentation.html
Requires=network.target
After=network.target

[Service]
Type=simple
User=root
Group=root
ExecStart=/export/server/kafka_2.12-3.7.2/bin/kafka-server-start.sh /export/server/kafka_2.12-3.7.2/config/server.properties
ExecStop=/export/server/kafka_2.12-3.7.2/bin/kafka-server-stop.sh
Restart=on-failure

[Install]
WantedBy=multi-user.target
复制时可能前面会有缺失自己补上就行
保存并退出文件
在 vi 编辑器中,按下 Esc 键,然后输入 :wq 保存并退出。
重新加载系统服务管理器配置
执行以下命令使系统服务管理器重新加载配置:
sudo systemctl daemon-reload再次尝试启用服务
sudo systemctl enable kafka验证服务状态和开机自启设置
sudo systemctl status kafka
sudo systemctl is-enabled kafka
要是 is-enabled 命令输出 enabled,就说明开机自启设置成功。
可以进行一些后续的测试,比如创建 Kafka 主题、发送和接收消息,来验证 Kafka 服务是否能正常工作:
- 创建主题:
/export/server/kafka_2.12-3.7.2/bin/kafka-topics.sh --create --bootstrap-server localhost:9092 --replication-factor 1 --partitions 1 --topic test-topic- 启动生产者发送消息:
/export/server/kafka_2.12-3.7.2/bin/kafka-console-producer.sh --broker-list localhost:9092 --topic test-topic- 启动消费者接收消息:
/export/server/kafka_2.12-3.7.2/bin/kafka-console-consumer.sh --bootstrap-server localhost:9092 --topic test-topic --from-beginning
看到这就说明我们的kafka在虚拟机中安装成功了。
借鉴了
https://apache.csdn.net/66c959dea0bc797cf7b7304b.html