Docker-仓库-镜像制作
一、Harbor 仓库
https://goharbor.io/![]() https://goharbor.io/
https://goharbor.io/
1.Harbor仓库简介
- "Harbor" 是一个用于管理和部署容器化应用程序的开源仓库管理系统,主要用于存储、管理和分发 Docker 容器镜像。
- 它提供了一个企业级的 Docker 镜像仓库,支持多种安全特性、镜像管理和访问控制。
2.安装需求
服务器配置需求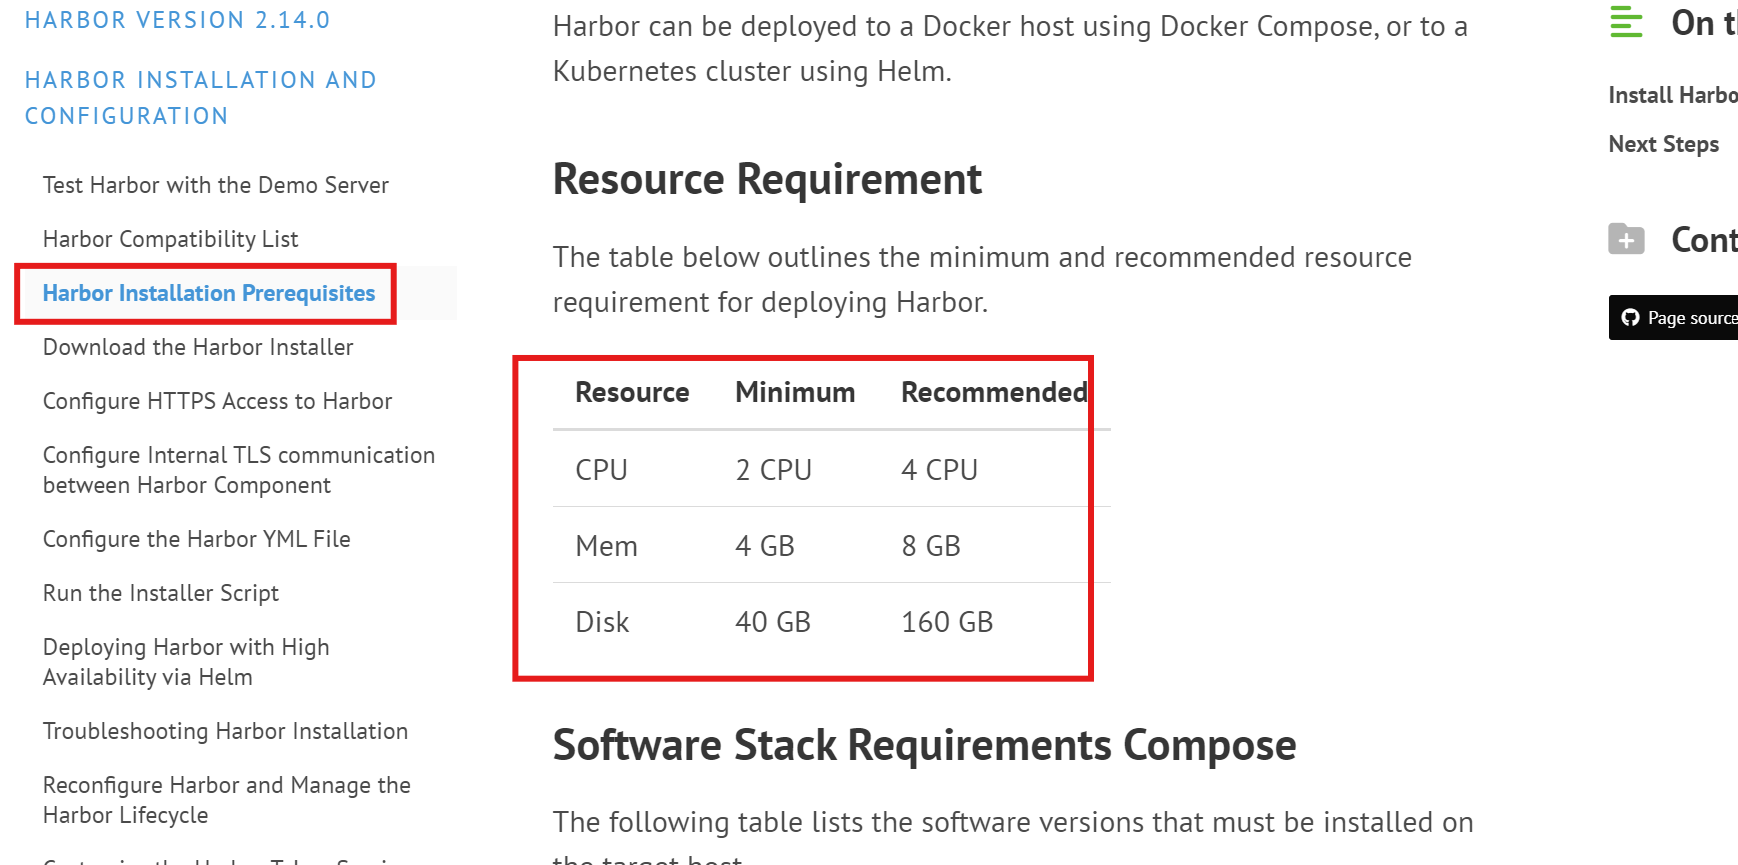
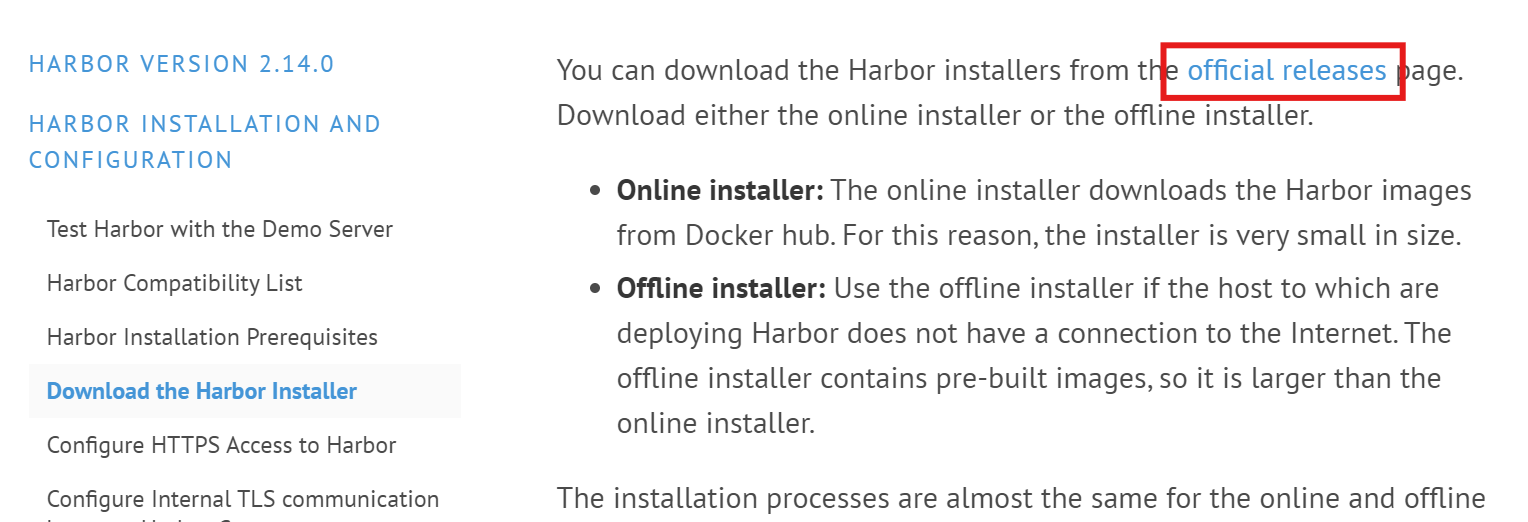
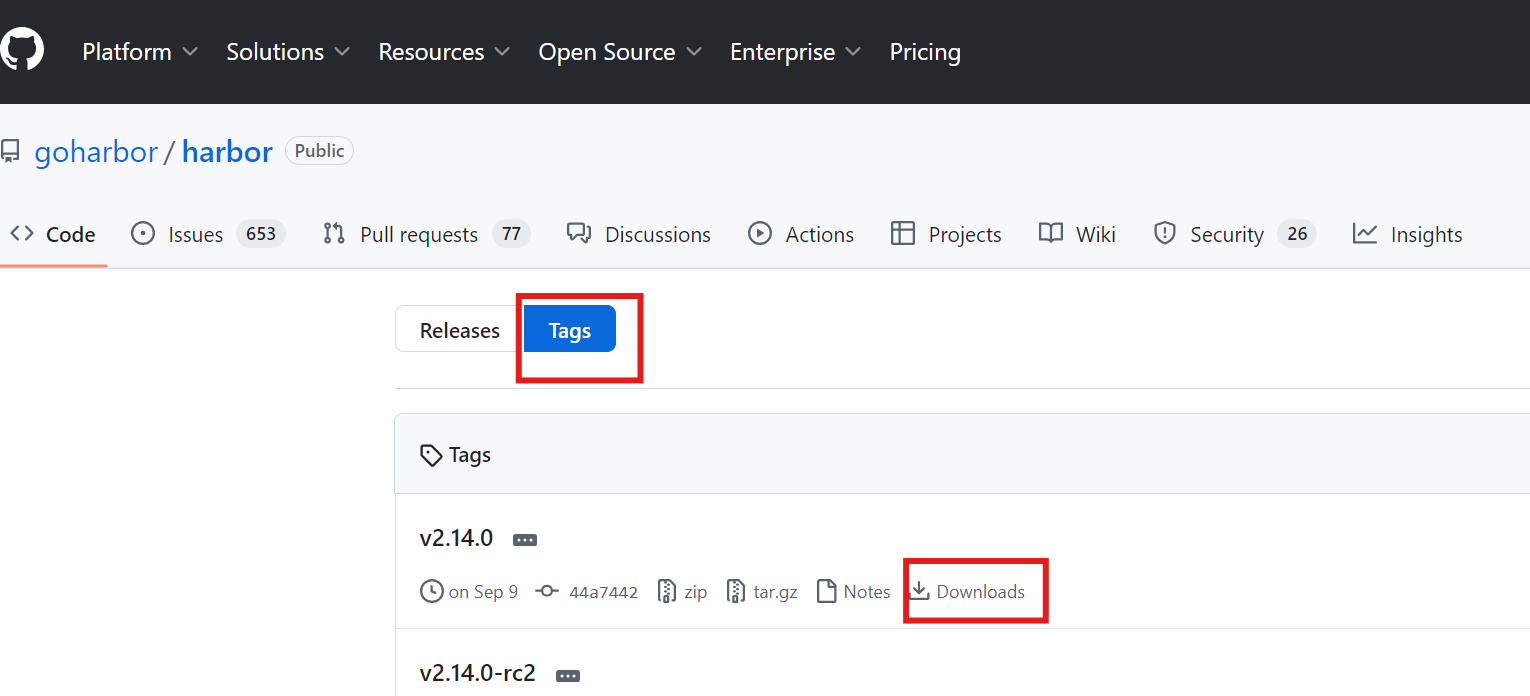
有两种安装方式,在线安装和离线安装
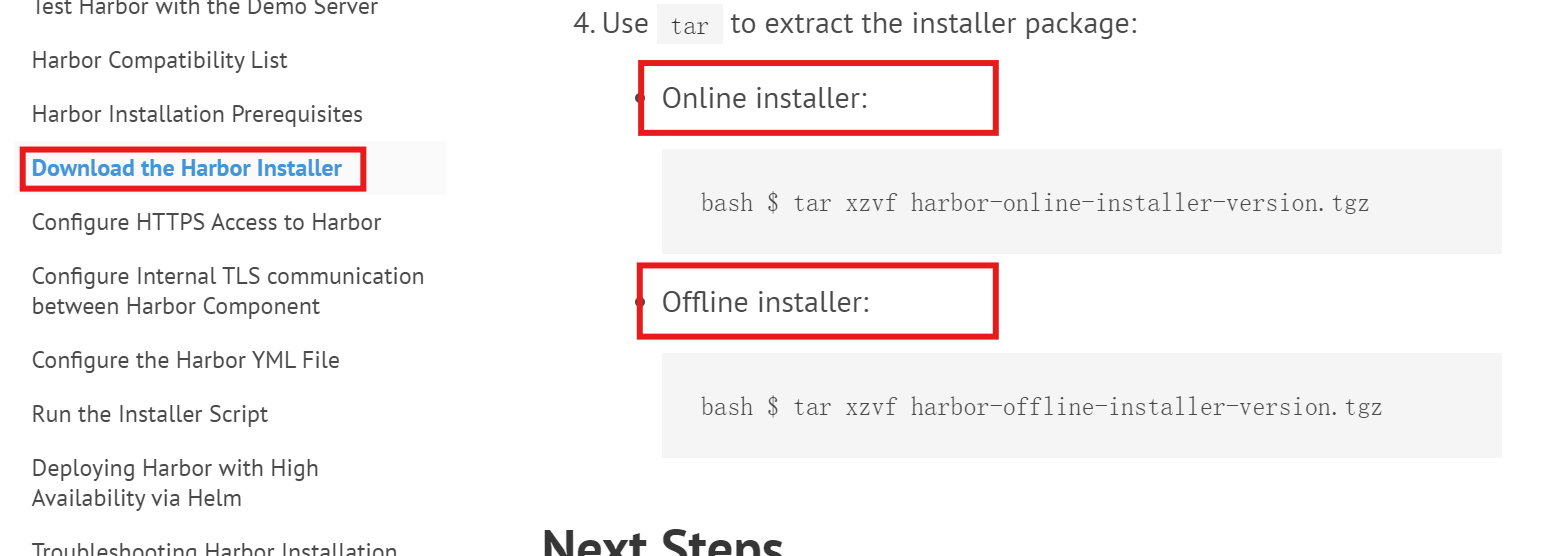
下载安装包,注意rc是预售版本,还不完善
3.安装Harbor仓库
(1)解压软件包
[root@localhost ~]# tar xvf harbor-offline-installer-v2.13.2.tgz -C /usr/local/
[root@localhost ~]# cd /usr/local/harbor/
[root@localhost harbor]# ll
总用量 659252
-rw-r--r-- 1 root root      3646  7月 31 10:48 common.sh
-rw-r--r-- 1 root root 675032342  7月 31 10:48 harbor.v2.13.2.tar.gz
-rw-r--r-- 1 root root     14688  7月 31 10:48 harbor.yml.tmpl
-rwxr-xr-x 1 root root      1975  7月 31 10:48 install.sh
-rw-r--r-- 1 root root     11347  7月 31 10:48 LICENSE
-rwxr-xr-x 1 root root      2211  7月 31 10:48 preparecommon.sh               # 共用脚本 harbor.v2.13.2.tar.gz   # Harbor 离线镜像      harbor.yml.tmpl         # template 模板 harbor.yml              # 配置文件  install.sh              # 脚本   安装 Harbor , 执行一次LICENSEprepare                 # 脚本  harbor.yml
(2)修改yml配置文件
[root@localhost harbor]# mkdir -p /data/registry
[root@localhost harbor]# mv harbor.yml.tmpl harbor.yml
[root@localhost harbor]# vi harbor.yml
# 可以改成域名或ip,但建议使用域名,这样内网外网用户都可以访问
hostname: reg.xxhf.com
# 先注释掉这里,不配置公钥
# https related config
# https:# https port for harbor, default is 443# port: 443# The path of cert and key files for nginx# certificate: /your/certificate/path# private_key: /your/private/key/path# enable strong ssl ciphers (default: false)# strong_ssl_ciphers: false
# 设置账户密码,这里的密码最好用复杂密码
harbor_admin_password: "*id,4g5EPuB@B@xwEhYsISEn4JIS"
# 设置数据库密码,最好和账户密码不一致
database:# The password for the user('postgres' by default) of Harbor DB. Change this before any production use.password: uNIloGyBmezYl0f@SKosjOlbyL4DWUDtEjzuSvYn# 修改镜像存储位置,生产环境要挂载一块较大的磁盘
data_volume: /data/registry
设置复杂密码(可以调整位数)
[root@localhost harbor]# pwmake 128
*id,4g5EPuB@B@xwEhYsISEn4JIS
[root@localhost harbor]# pwmake 192
uNIloGyBmezYl0f@SKosjOlbyL4DWUDtEjzuSvYn
(3)执行安装脚本
# 直到所有容器都启动成功,才可以访问harbor
[root@localhost harbor]# ./install.sh
注:记得将域名注册到真实机的hosts文件当中
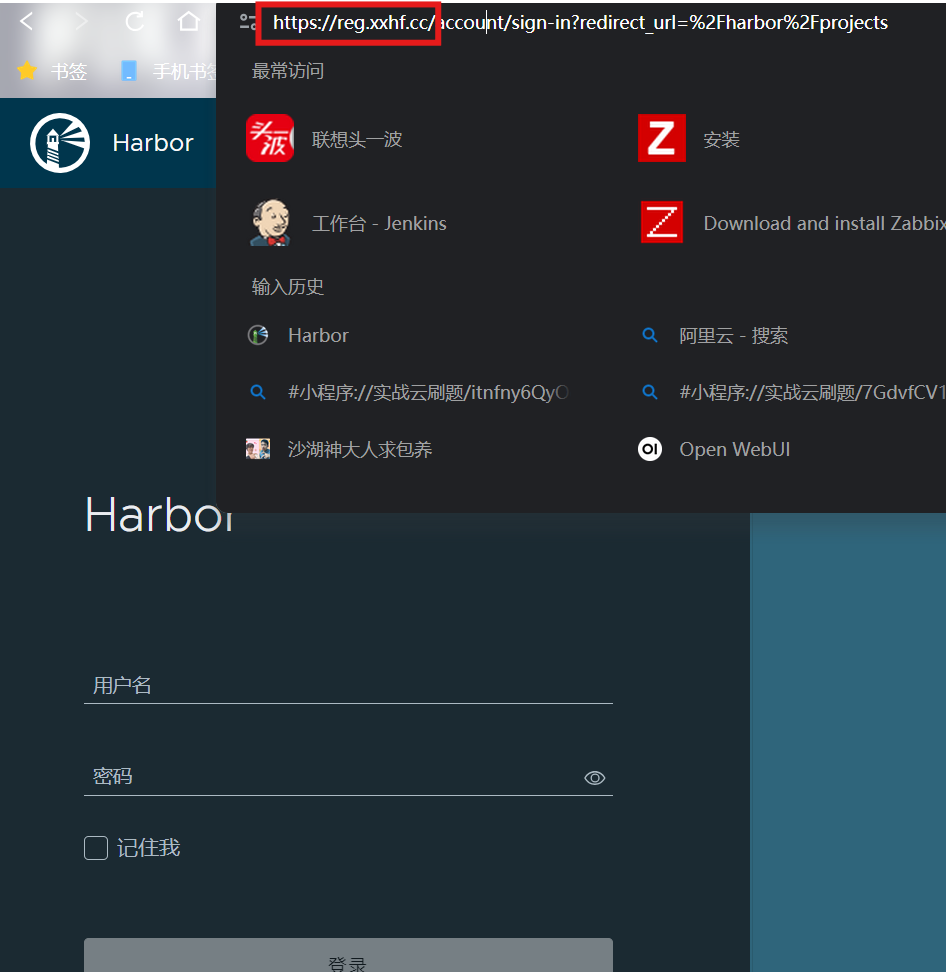
192.168.5.100 reg.xxhf.cc(4)通过域名访问web服务
注:访问时需要注意,目前的浏览器大多都默认使用https协议,而我们搭建的harbor仓库目前使用的是http协议,因此在使用域名访问时记得检查使用正确的协议http
(5)上传镜像
# 连接harbor仓库时,可以使用服务器,也可以使用客户端,客户端需要安装docker服务
[root@localhost ~]# echo "192.168.5.100 reg.xxhf.cc" >> /etc/hosts
[root@localhost ~]# vi /etc/docker/daemon.json
# 将域名注册到不安全的仓库当中
"insecure-registries": ["reg.xxhf.cc"][root@localhost harbor]# systemctl restart docker
# 重启docker之后,harbor仓库可能会掉线,需要重新启动# 登录
[root@localhost ~]# docker login reg.xxhf.cc
Username: admin
Password:
WARNING! Your password will be stored unencrypted in /root/.docker/config.json.
Configure a credential helper to remove this warning. See
https://docs.docker.com/engine/reference/commandline/login/#credential-storesLogin Succeeded
[root@localhost ~]# docker tag nginx:1.22.1 reg.xxhf.cc/xxhf/nginx:v1
# 上传镜像,域名+地址+容器名(需要提前设置)
[root@localhost ~]# docker push reg.xxhf.cc/xxhf/nginx:v1
The push refers to repository [reg.xxhf.cc/xxhf/nginx]
9543dec06aa8: Pushed
ccf4f419ba49: Pushed
21f8452ebfb1: Pushed
25bbf4633bb3: Pushed
a4f34e6fb432: Pushed
3af14c9a24c9: Pushed
v1: digest: sha256:9081064712674ffcff7b7bdf874c75bcb8e5fb933b65527026090dacda36ea8b size: 1570
4.配置harbor-https协议
注:若想要使harbor仓库支持https协议,那么它的域名(reg.xxhf.cc)就需要有对应的证书和私钥
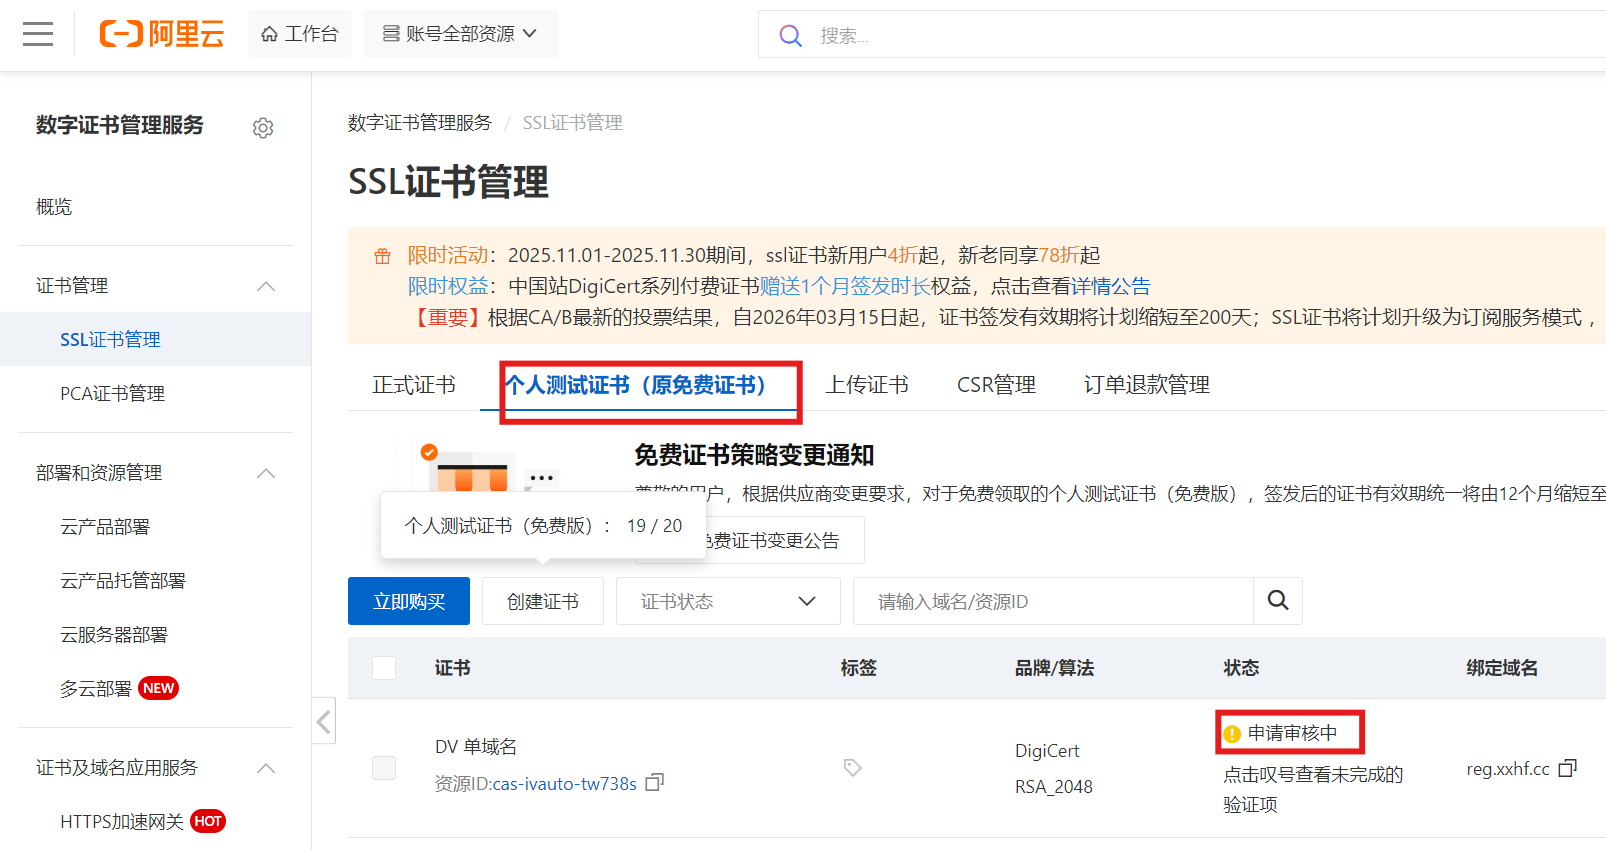
(1)证书申请
注:阿里云和腾讯云都可以申请免费的证书
(2)安装证书
# 下载证书到本机
[root@localhost ~]# ls
anaconda-ks.cfg  cat.sh  dockerfile-example.tgz  harbor-offline-installer-v2.13.2.tgz  reg.xxhf.cc_nginx.zip
[root@localhost ~]# unzip reg.xxhf.cc_nginx.zip
[root@localhost ~]# cd /usr/local/harbor/
[root@localhost harbor]# mkdir certs
[root@localhost harbor]# mv /root/reg.xxhf.cc_nginx/reg.xxhf.cc_bundle.crt certs/
[root@localhost harbor]# mv /root/reg.xxhf.cc_nginx/reg.xxhf.cc.key certs/
# 在配置文件中添加证书
[root@localhost harbor]# vi harbor.yml
# https related config
https:# https port for harbor, default is 443port: 443# The path of cert and key files for nginxcertificate: /usr/local/harbor/certs/reg.xxhf.cc_bundle.crtprivate_key: /usr/local/harbor/certs/reg.xxhf.cc.key# enable strong ssl ciphers (default: false)# strong_ssl_ciphers: false
# 使配置生效
[root@localhost harbor]# ./prepare
# 重启服务
[root@localhost harbor]# docker compose down
[root@localhost harbor]# docker compose up -d
注:如果过程报错,可以通过查看日志纠错
[root@localhost harbor]# docker compose logs -f
补充:如何查看文件内容是否一致?
# diff命令测试,如果一致则没有任何反应
[root@localhost reg.xxhf.cc_nginx]# diff reg.xxhf.cc_bundle.crt reg.xxhf.cc_bundle.pem# md5sum命令测试,如果哈希值一致,则内容一致
[root@localhost reg.xxhf.cc_nginx]# md5sum reg.xxhf.cc_bundle.crt
e7ad2c8d1157cd63b60d0e4f088708b3  reg.xxhf.cc_bundle.crt
[root@localhost reg.xxhf.cc_nginx]# md5sum reg.xxhf.cc_bundle.pem
e7ad2c8d1157cd63b60d0e4f088708b3  reg.xxhf.cc_bundle.pem
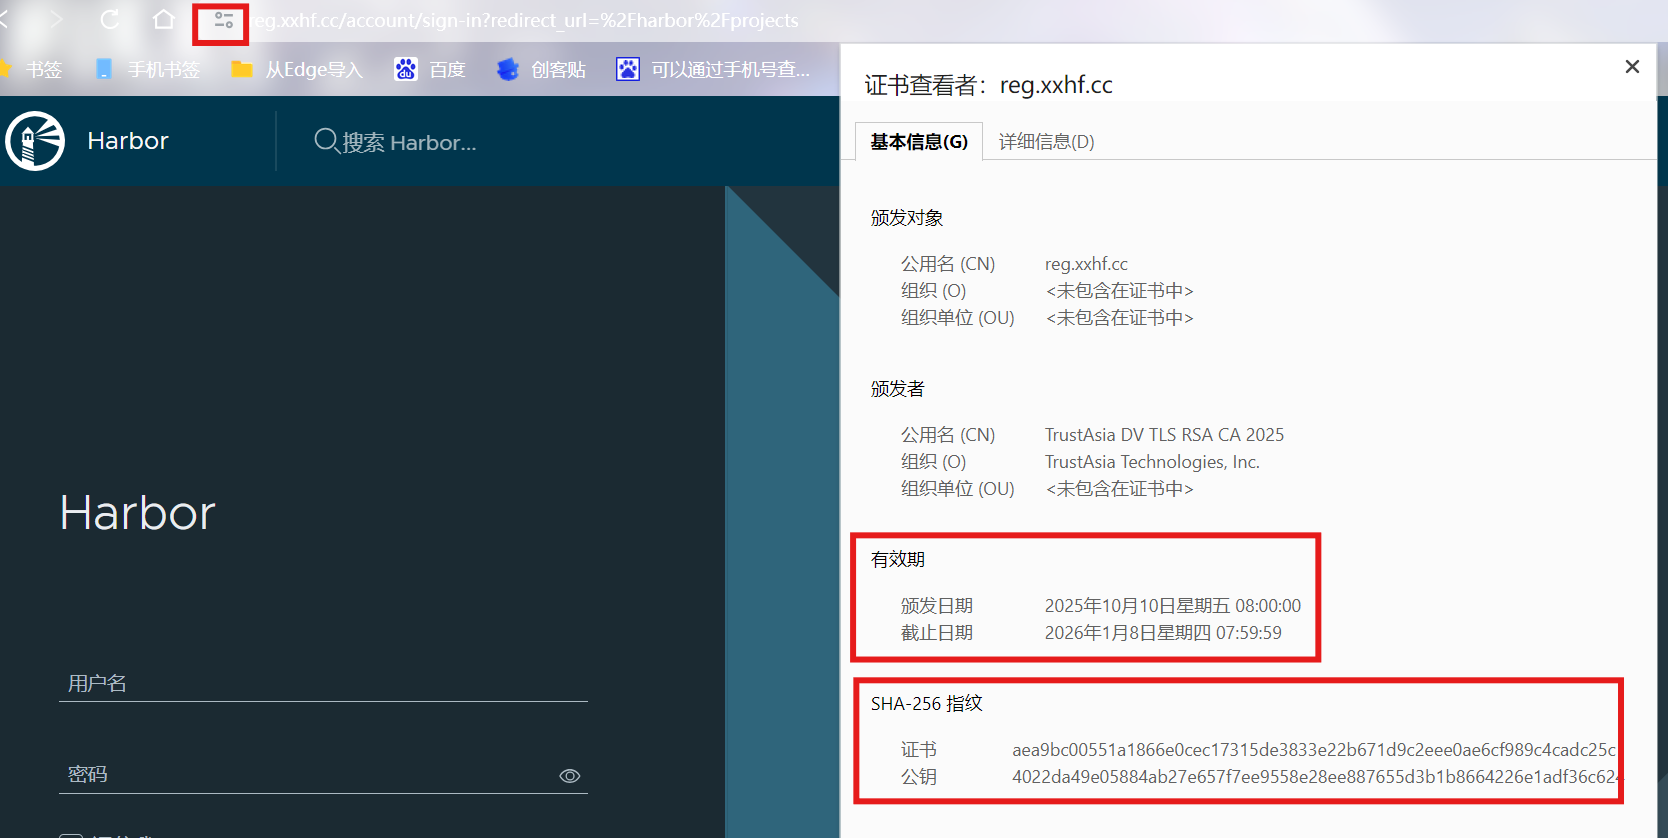
(3)再次访问web服务
注:可以发现此时的harbor仓库已经支持https协议了
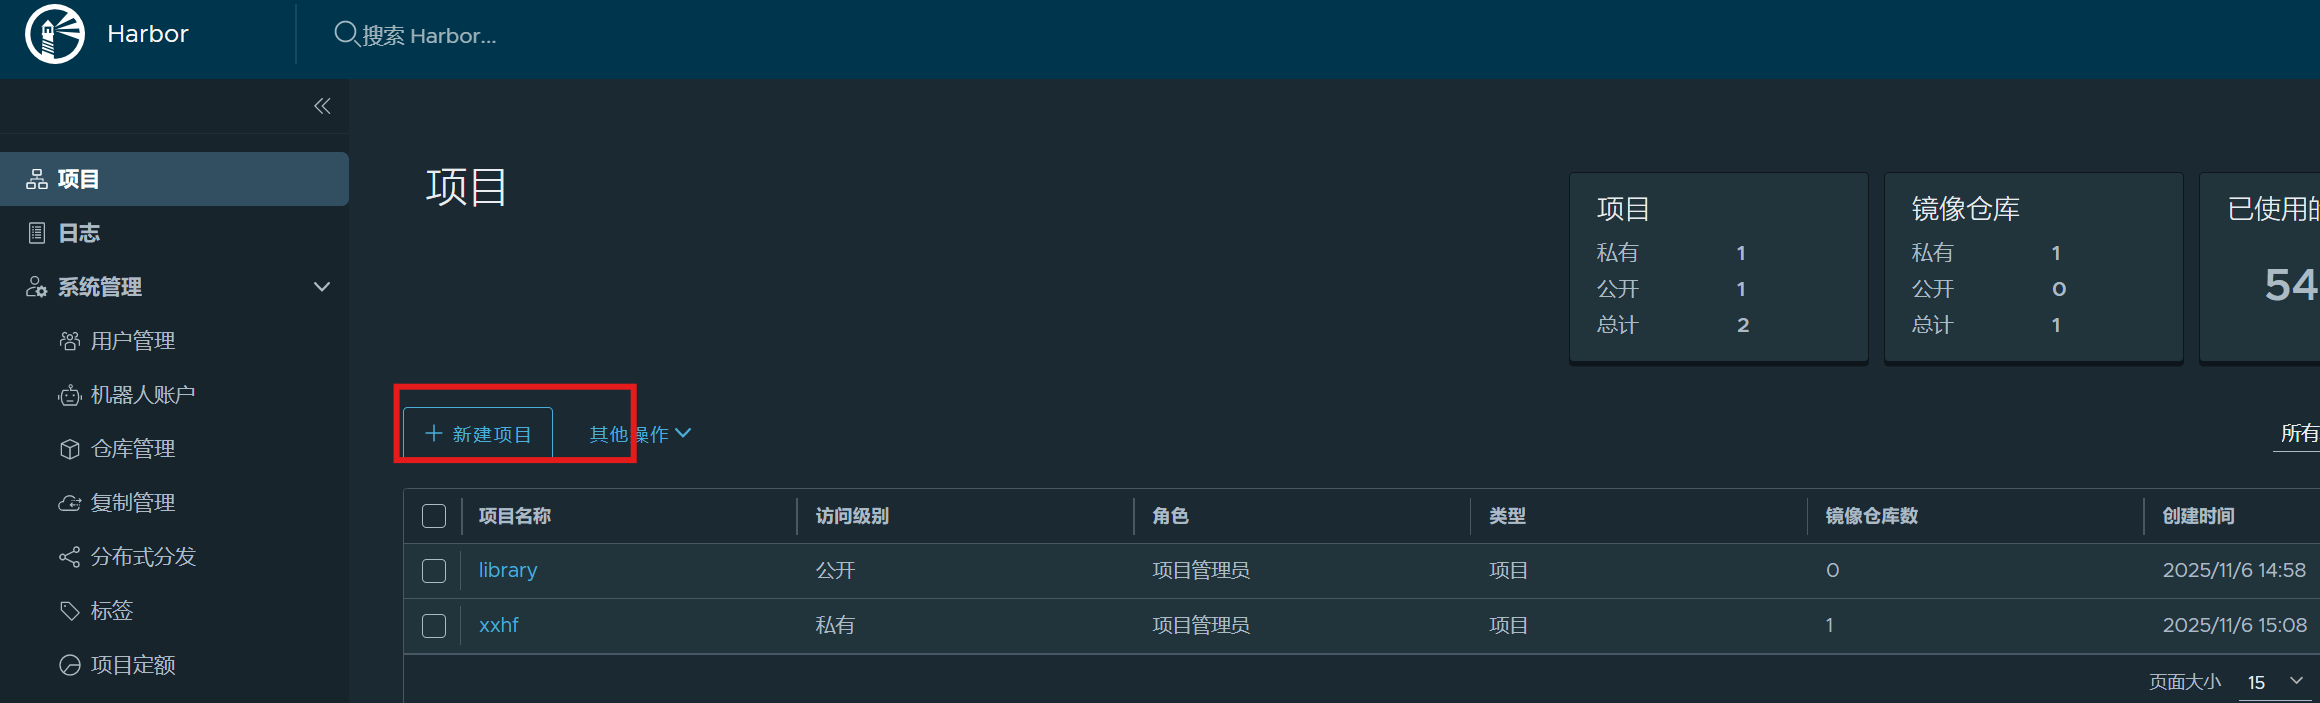
二、Harbor仓库常用功能
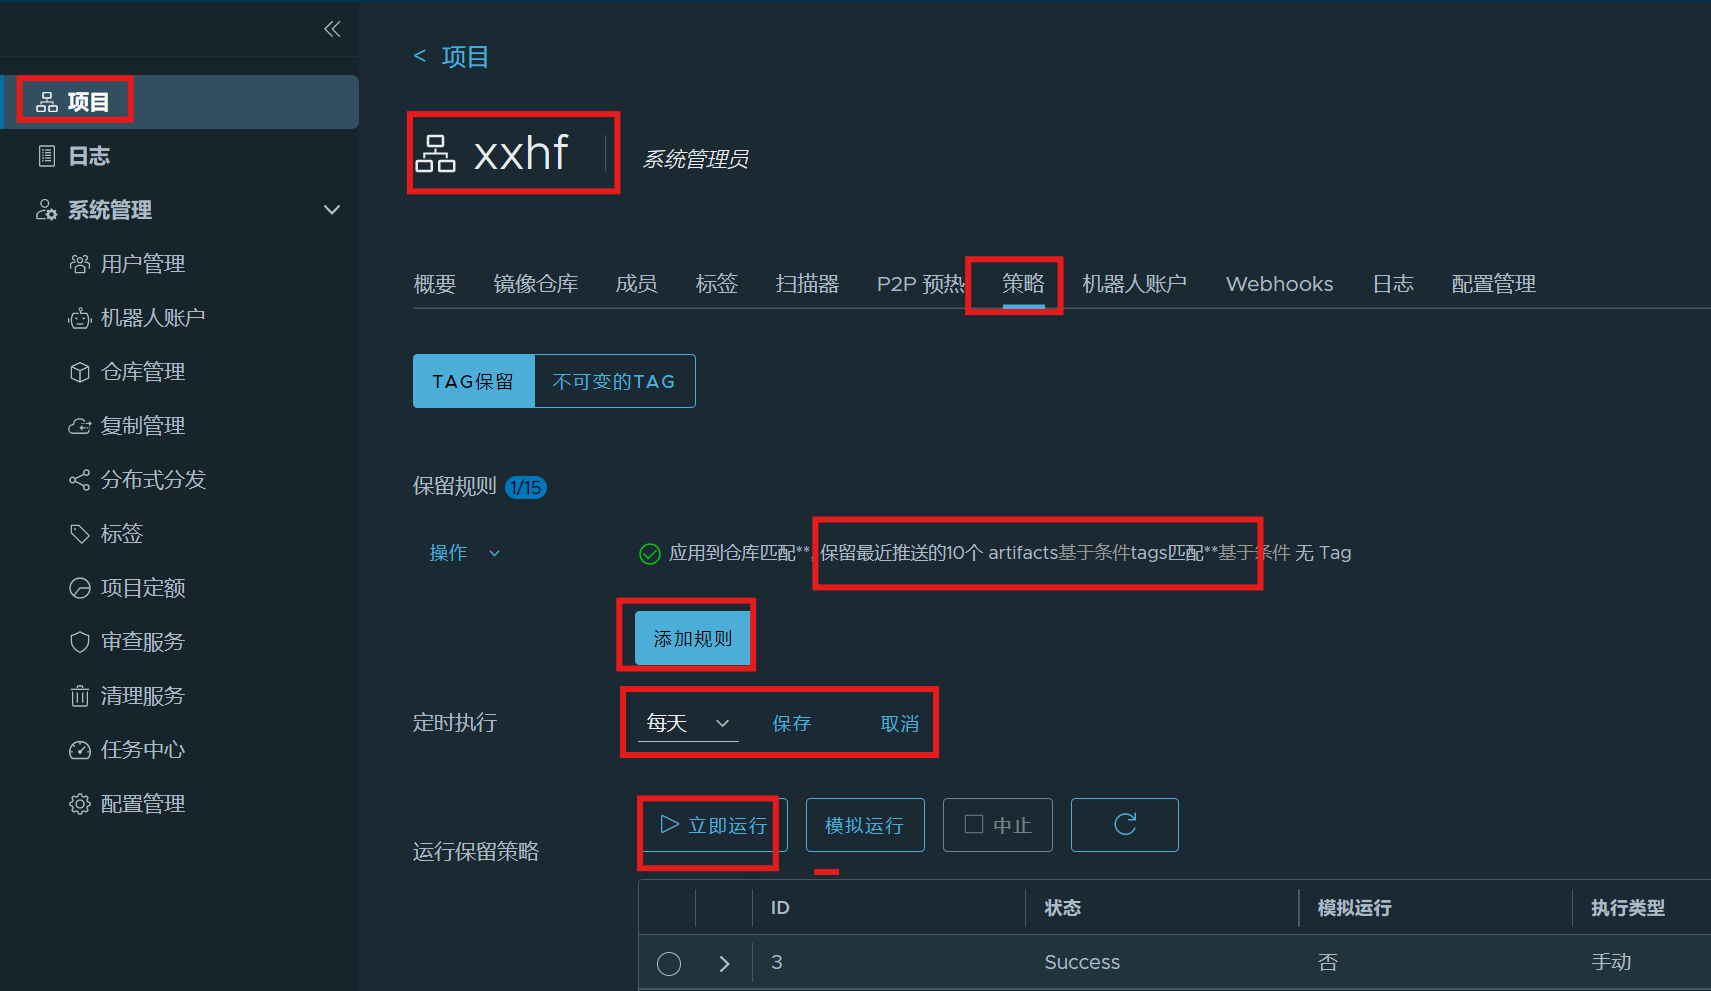
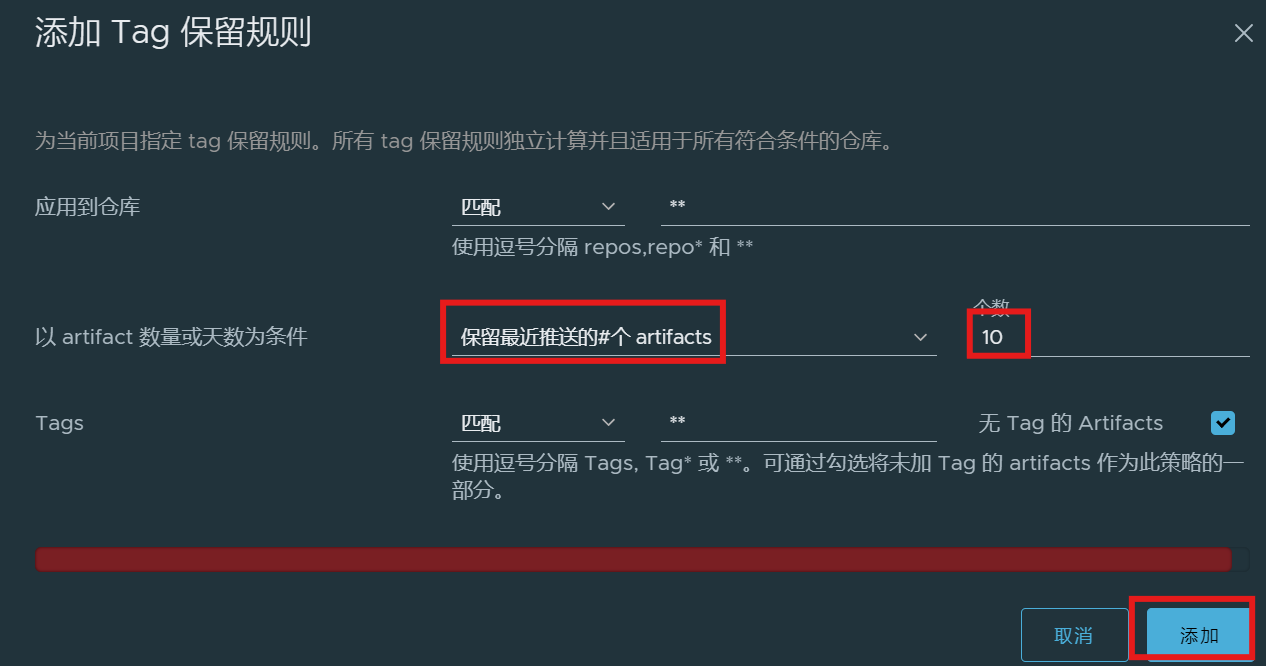
1.定时删除镜像
注:根据要求配置保留最近几个版本的镜像,配置定时执行周期即可
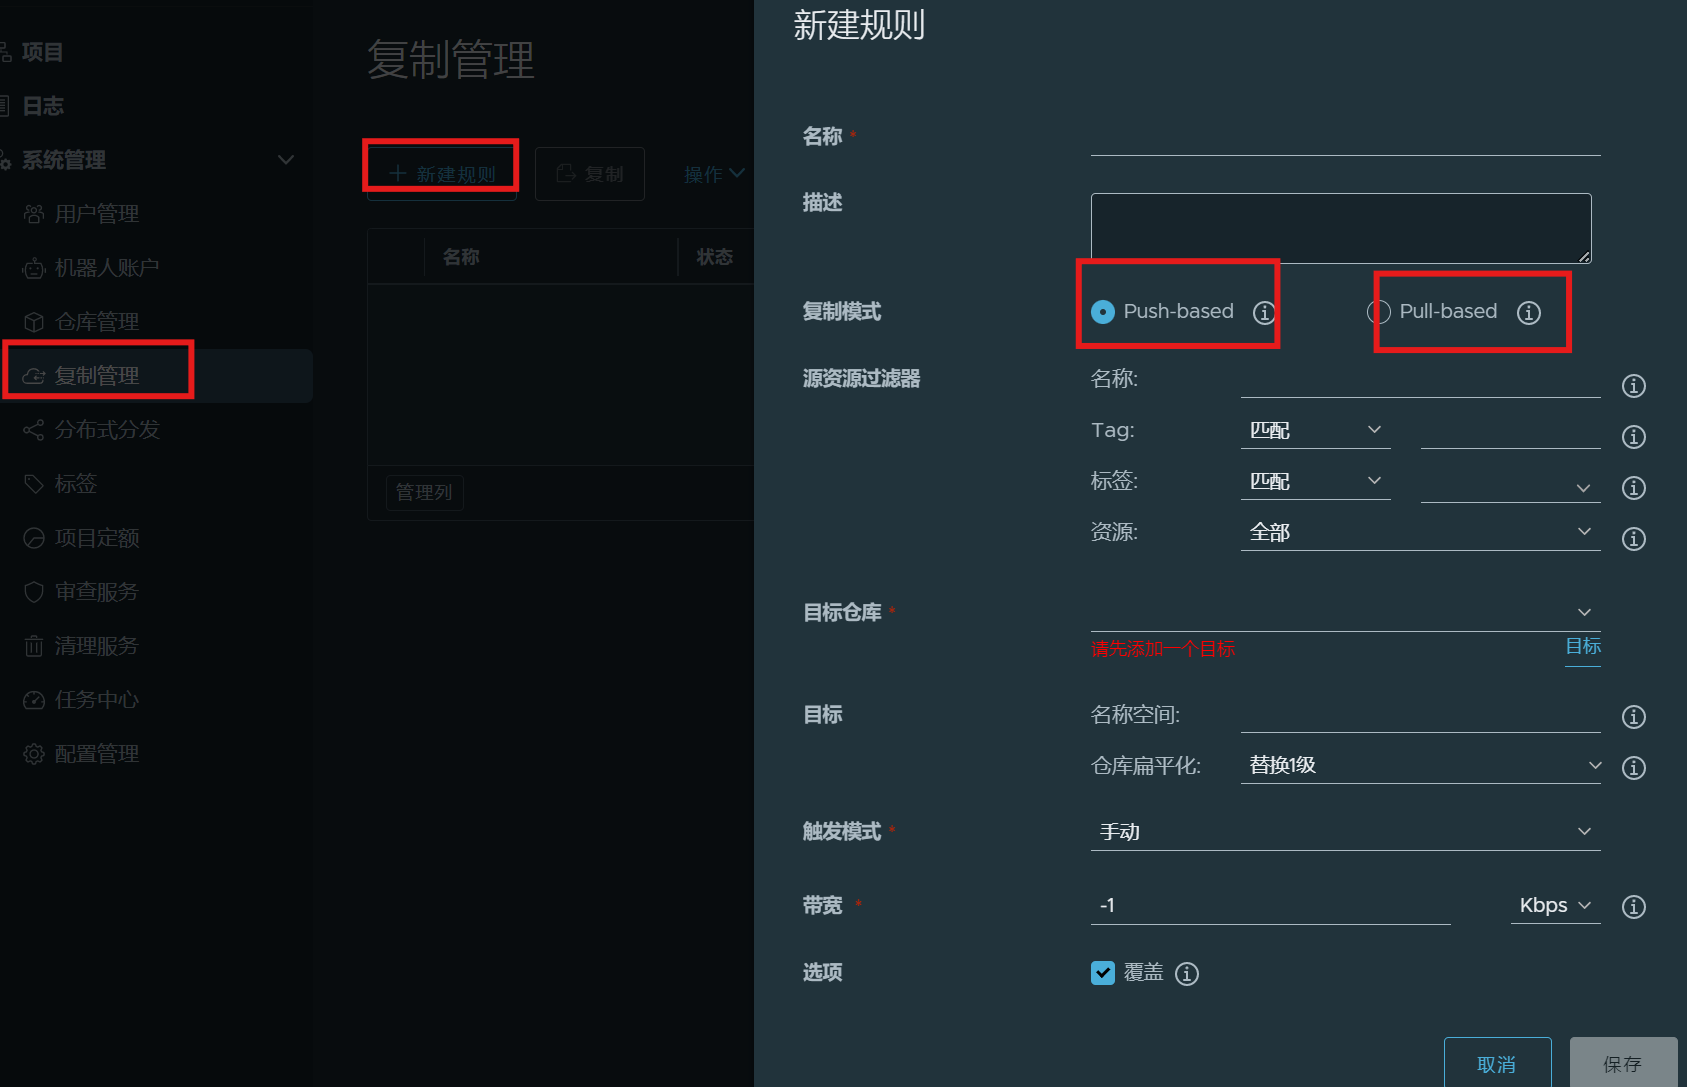
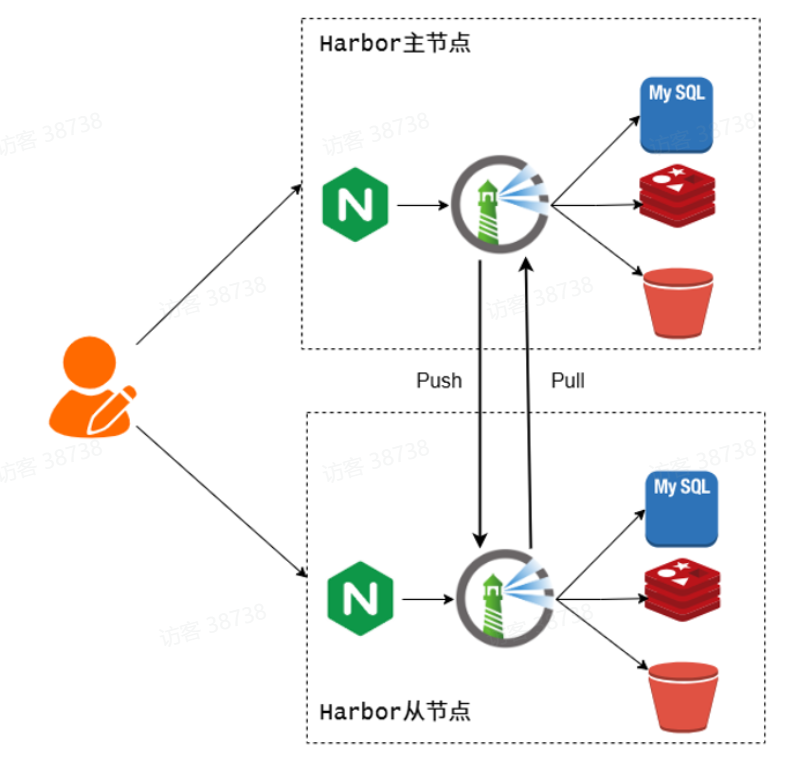
2.实现高可用
注:通过复制管理,创建复制,在复数的harbor仓库上推送镜像,实现高可用
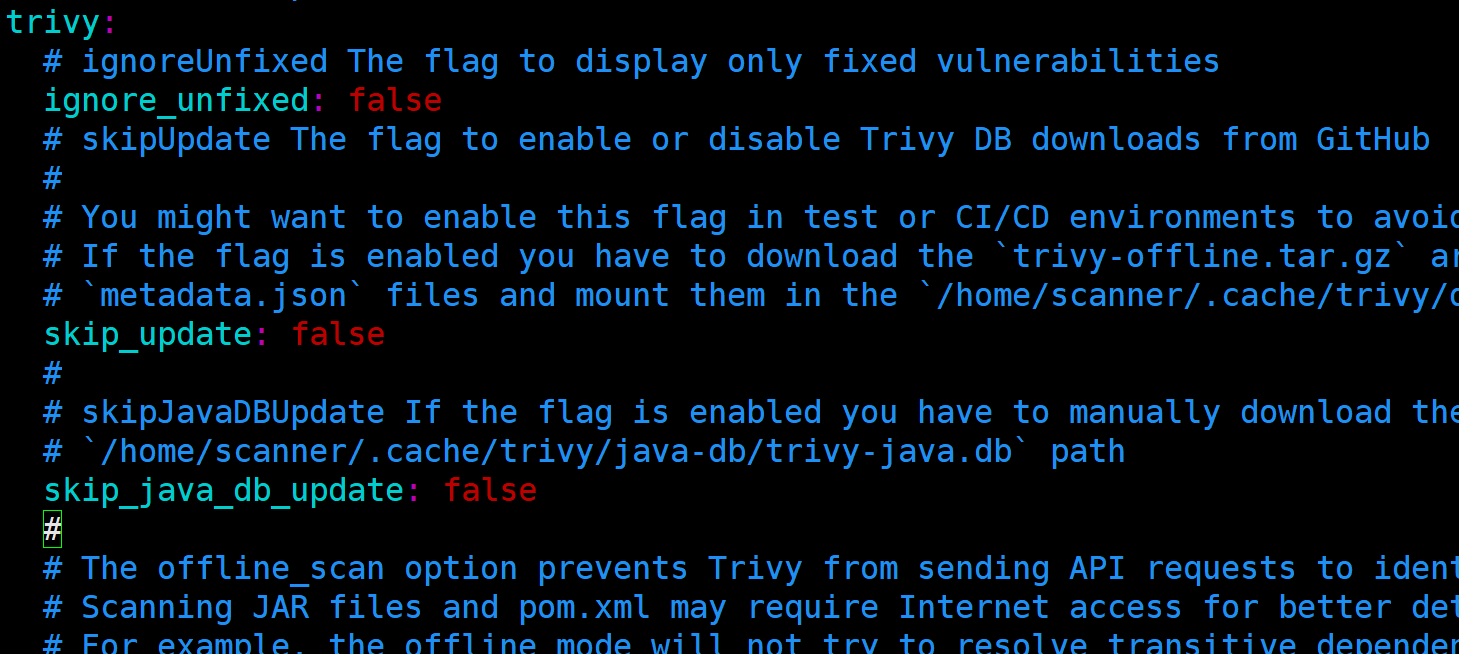
3.漏洞扫描
注:在镜像上传的时候,扫描镜像的漏洞(在安装时添加trivy,也可以在配置文件中修改)
三、镜像制作
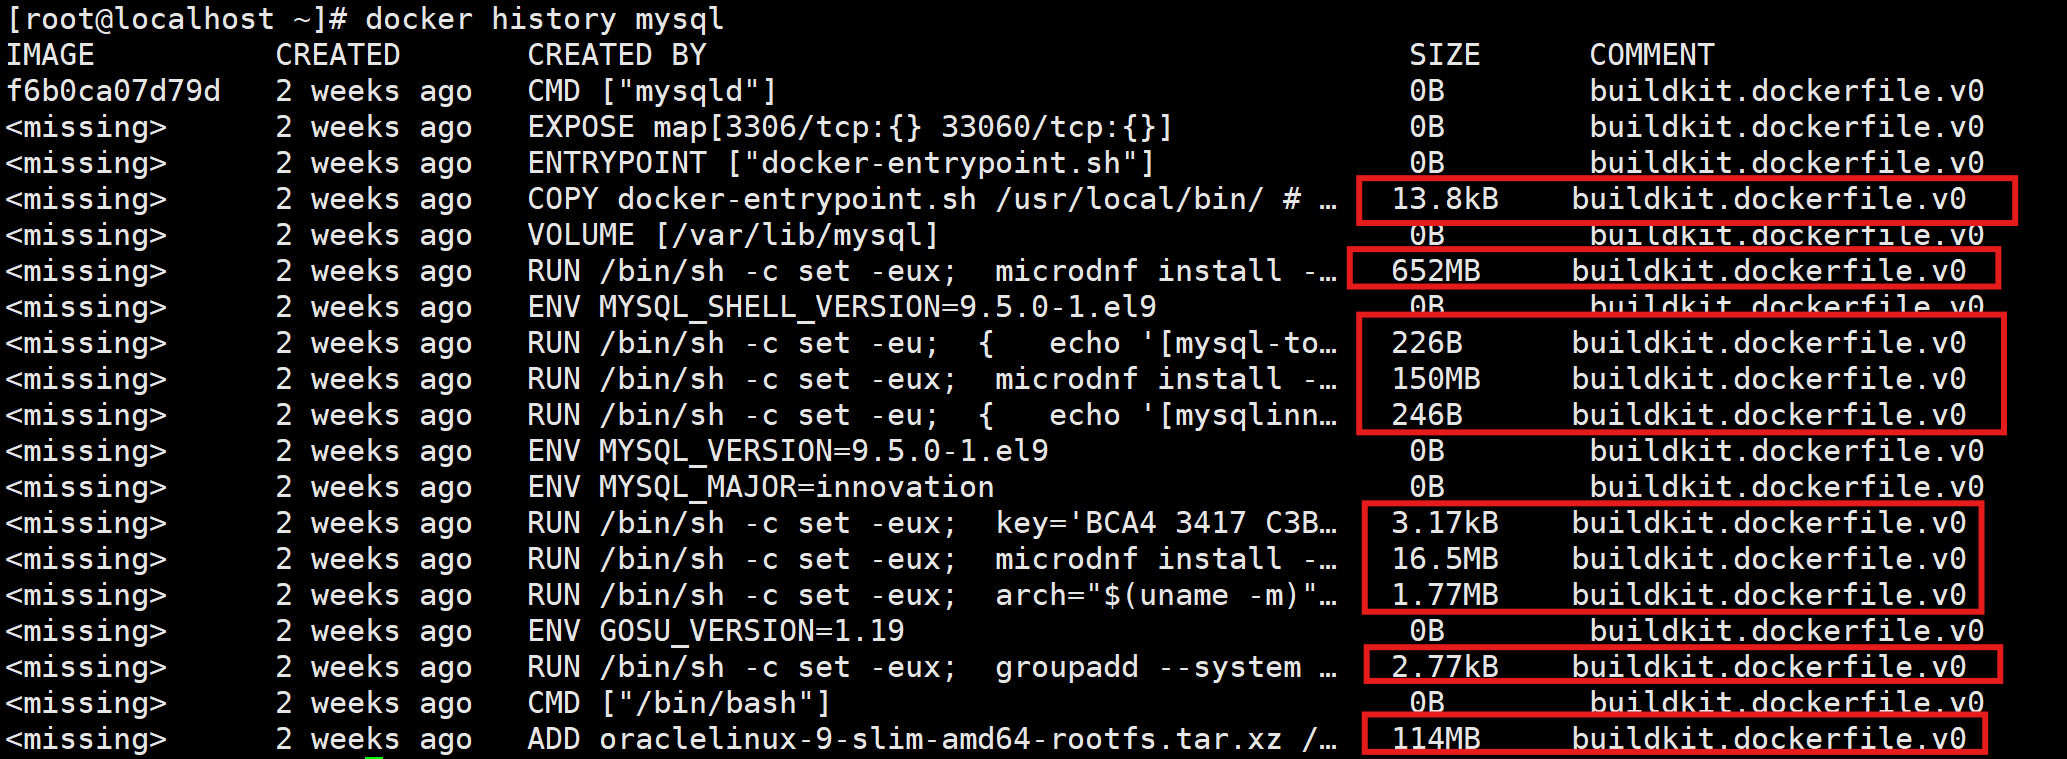
1.镜像的分层
- 容器创建时需要指定镜像,每一个镜像都有唯一的镜像ID
- Docker的镜像通过联合文件系统(UFS)将各层文件系统叠加在一起(这一点在下载镜像的过程中就可以体现出来)
2.镜像特性
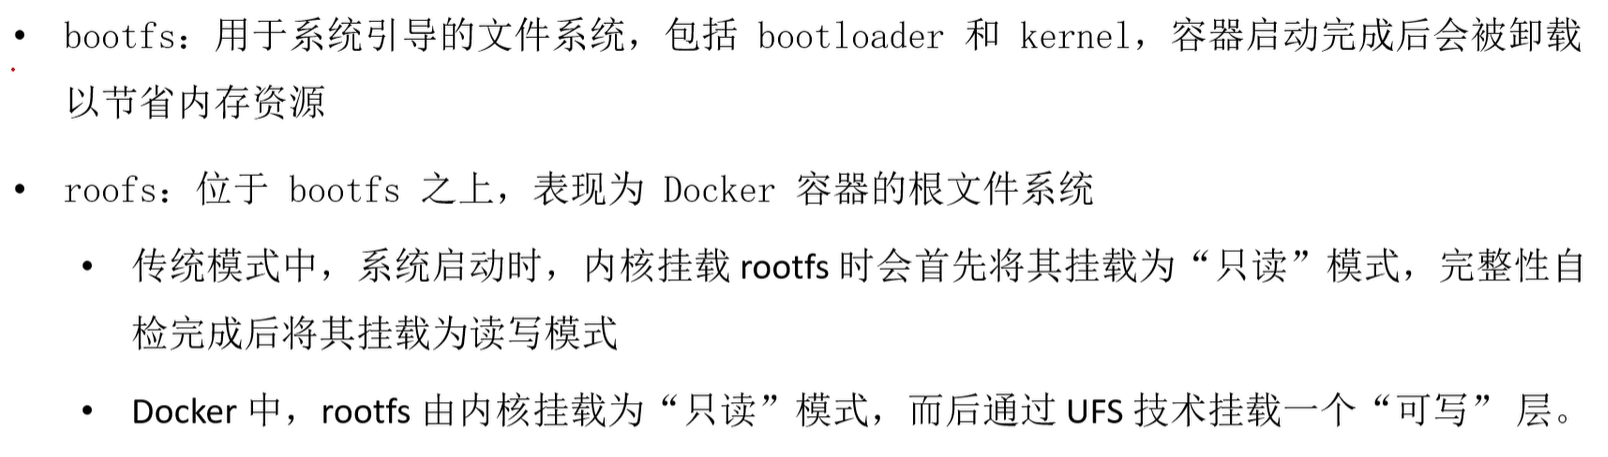
注:已有的分层只能读、不能修改;上层镜像优先级大于底层镜像;容器和宿主机共用bootfs
3.Docker commit制作镜像
# 添加命令工具
[root@localhost ~]# docker run -it rockylinux:9
[root@0f3aed80969d /]# dnf -y install wget iproute# 另开一个窗口,将添加命令后的容器制作镜像
[root@localhost ~]# docker commit 3782b435f6ac rocky9:v1
sha256:2647e88790d1b8921b015ba87108f8e57b4ebfd198fcfe03324324729c27071c
[root@localhost ~]# docker images rocky9:v1
REPOSITORY   TAG       IMAGE ID       CREATED          SIZE
rocky9       v1        2647e88790d1   22 seconds ago   213MB
# 查看原来的镜像,可以发现数据变多了
[root@localhost ~]# docker images rockylinux:9
REPOSITORY   TAG       IMAGE ID       CREATED         SIZE
rockylinux   9         9cc24f05f309   23 months ago   176MB

注:新添加的命令变成了分层,这就是镜像分层的概念;优点是创建简单,缺点是创建好的层无法修改,需要重新制作镜像
4.Dockerfile制作镜像
(1)Dockerfile简介
- Dockerfile 是一个文本格式的配置文件,我们可以使用Dockerfile来快速创建自定义的镜像
(2)创建Dockerfile
[root@localhost ~]# vim Dockerfile# Base imageFROM rockylinux:9LABEL authors="chijinjing@xinxianghf.com"RUN dnf -y install wget iproute && dnf clean all #这里做了缓存的清除CMD /usr/sbin/nginx(3)制作镜像
[root@localhost ~]# docker build -t rocky9:v2 .
[root@localhost ~]# docker images rocky9:v2
REPOSITORY   TAG       IMAGE ID       CREATED          SIZE
rocky9       v2        cf533c72574a   33 seconds ago   186MB
注:可以看到制作出来的镜像要比之前制作的要小上一些,是因为清除了缓存
(4)修改配置文件
[root@localhost ~]# vim Dockerfile
# Base imageFROM rockylinux:9LABEL authors="chijinjing@xinxianghf.com"RUN  dnf -y install wget iproute
RUN  dnf clean allCMD /usr/sbin/nginx[root@localhost ~]# docker build -t rocky9:v3 .
[root@localhost ~]# docker images rocky9:v3
REPOSITORY   TAG       IMAGE ID       CREATED          SIZE
rocky9       v3        c6d239ac0de5   17 seconds ago   213MB
注:可以看到在查看镜像时又恢复到了原来的体积
原因:镜像是分层的,已有的分层只能读,不能修改,而每运行一条 RUN 指令,镜像添加新的一层,并提交
(5)指令说明
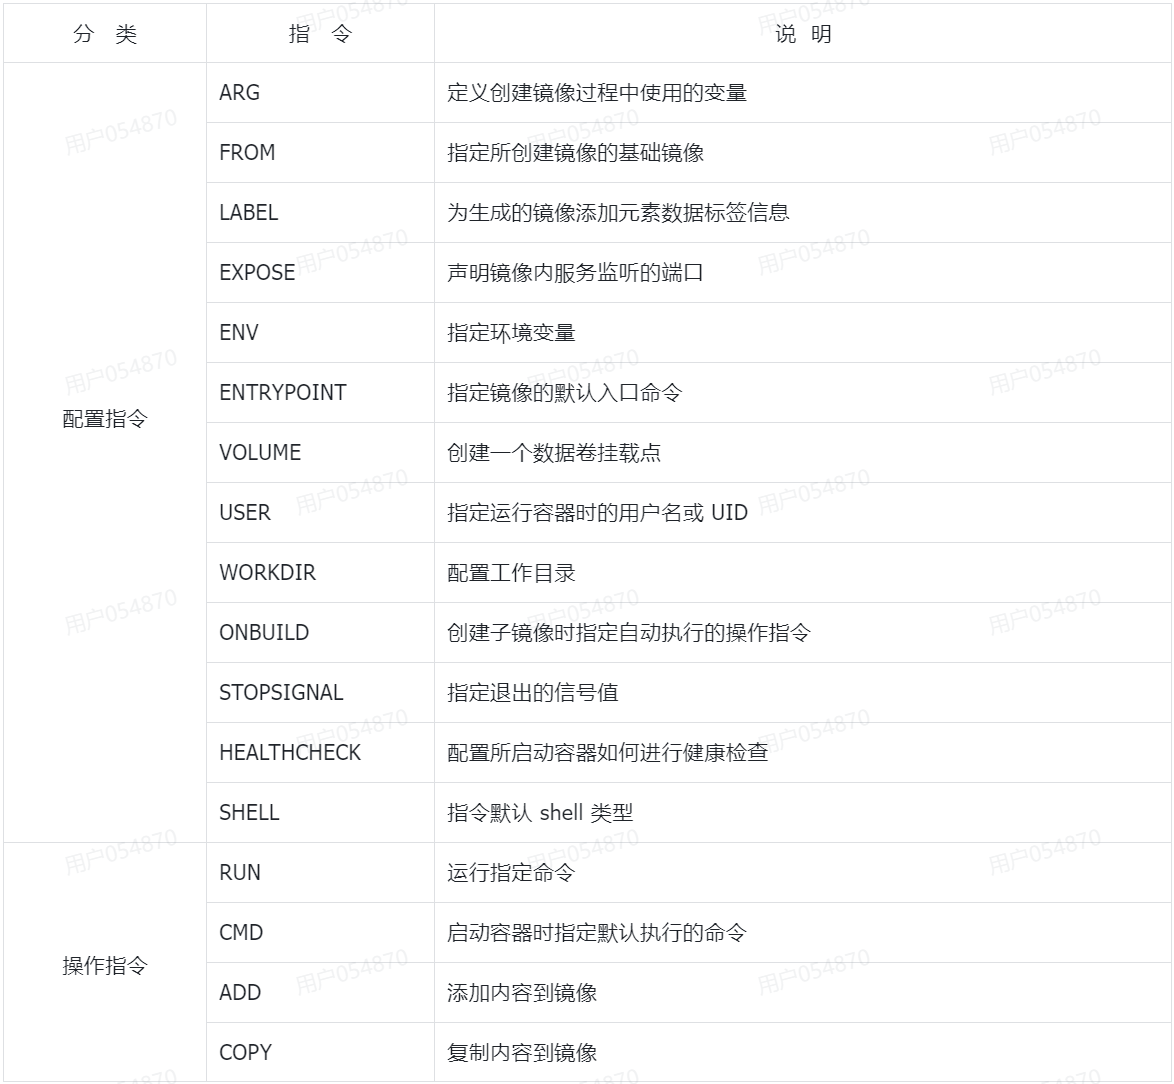
(6)ARG&&ENV
- ARG:定义创建镜像过程中使用的变量(只能在构建时使用,变成容器就没有了,支持在构建时传参数)
- ENV:声明镜像内服务监听的端口(生命周期较长 , 在构建时可以使用 ,变成容器还可以使用,不支持在构建时传参)
需求:安装 nginx-1:1.26.1 ,不允许 修改 Dockerfile 文件
当前配置文件
[root@localhost ~]# vi Dockerfile
# Base image
FROM rockylinux:9 # Maintainer
LABEL authors="chijinjing@xinxianghf.com"ARG VERSION=1.26.0
ENV NGINX_VERSION=1.26.1EXPOSE 80WORKDIR /data# Install nginx
RUN  dnf -y install nginx-1:$VERSION-1.el9.ngx.x86_64 && dnf clean all
#RUN  yum -y install nginx-1:$NGINX_VERSION-1.el9.ngx.x86_64 && yum clean all# Start nginx daemon
CMD ["/usr/sbin/nginx"]
执行命令
[root@localhost ~]# docker build -t nginx-arg:1.26.1 --build-arg VERSION=1.26.1 .5.指定环境变量
(1)运行mysql容器
[root@localhost ~]# docker run -d mysql
0f0684eb9a38219265e0a35e77b8ed31cb4012f62c64b91913ba1d70815e24f8
[root@localhost ~]# docker ps
CONTAINER ID   IMAGE          COMMAND                   CREATED             STATUS             PORTS      NAMES
2c3987c8d9a3   nginx          "/docker-entrypoint.…"   16 minutes ago      Up 16 minutes      80/tcp     gracious_shannon
3782b435f6ac   rockylinux:9   "/bin/bash"               About an hour ago   Up About an hour              sweet_blackwell
a647f85bc327   redis          "docker-entrypoint.s…"   2 hours ago         Up 2 hours         6379/tcp   gracious_blackburn
注:发现容器并没有启动,我们查看日志发现需要配置环境变量

(2)指定环境变量
注:我们可以在启动容器的时候指定环境变量的值,这次可以成功启动
[root@localhost ~]# docker run -e MYSQL_ROOT_PASSWORD=123456 -d mysql
2b001bfb03470ca8d34530489b43f119982405ad14dc619ef8a4077fa5083c98
[root@localhost ~]# docker ps
CONTAINER ID   IMAGE          COMMAND                   CREATED             STATUS             PORTS                 NAMES
2b001bfb0347   mysql          "docker-entrypoint.s…"   5 seconds ago       Up 5 seconds       3306/tcp, 33060/tcp   epic_allen
2c3987c8d9a3   nginx          "/docker-entrypoint.…"   21 minutes ago      Up 21 minutes      80/tcp                gracious_shannon
3782b435f6ac   rockylinux:9   "/bin/bash"               About an hour ago   Up About an hour                         sweet_blackwell
a647f85bc327   redis          "docker-entrypoint.s…"   2 hours ago         Up 2 hours         6379/tcp              gracious_blackburn