人脸识别:face_recognition参数详解
人脸识别:face_recognition参数详解
- 1. 人脸检测:`face_locations()`
- 2. 人脸编码:`face_encodings()`
- 3. 人脸比对:`compare_faces()`
- 4. 加载图像:`load_image_file()`
- 5. 人脸关键点:`face_landmarks()`
- 6. 批量处理(GPU 优化):`batch_face_locations()`
- 7. 计算人脸特征向量间欧氏距离:`face_distance()`
- 函数定义
- 参数详解
- 返回值
- 与 `compare_faces()` 的关系
- 阈值参考
- 安装 face_recognition 需要的基础组件
- 示例代码
- 训练
- 预测
- 参考
face_recognition 是一个基于 Python 的人脸识别库,封装了 dlib 的深度学习模型。
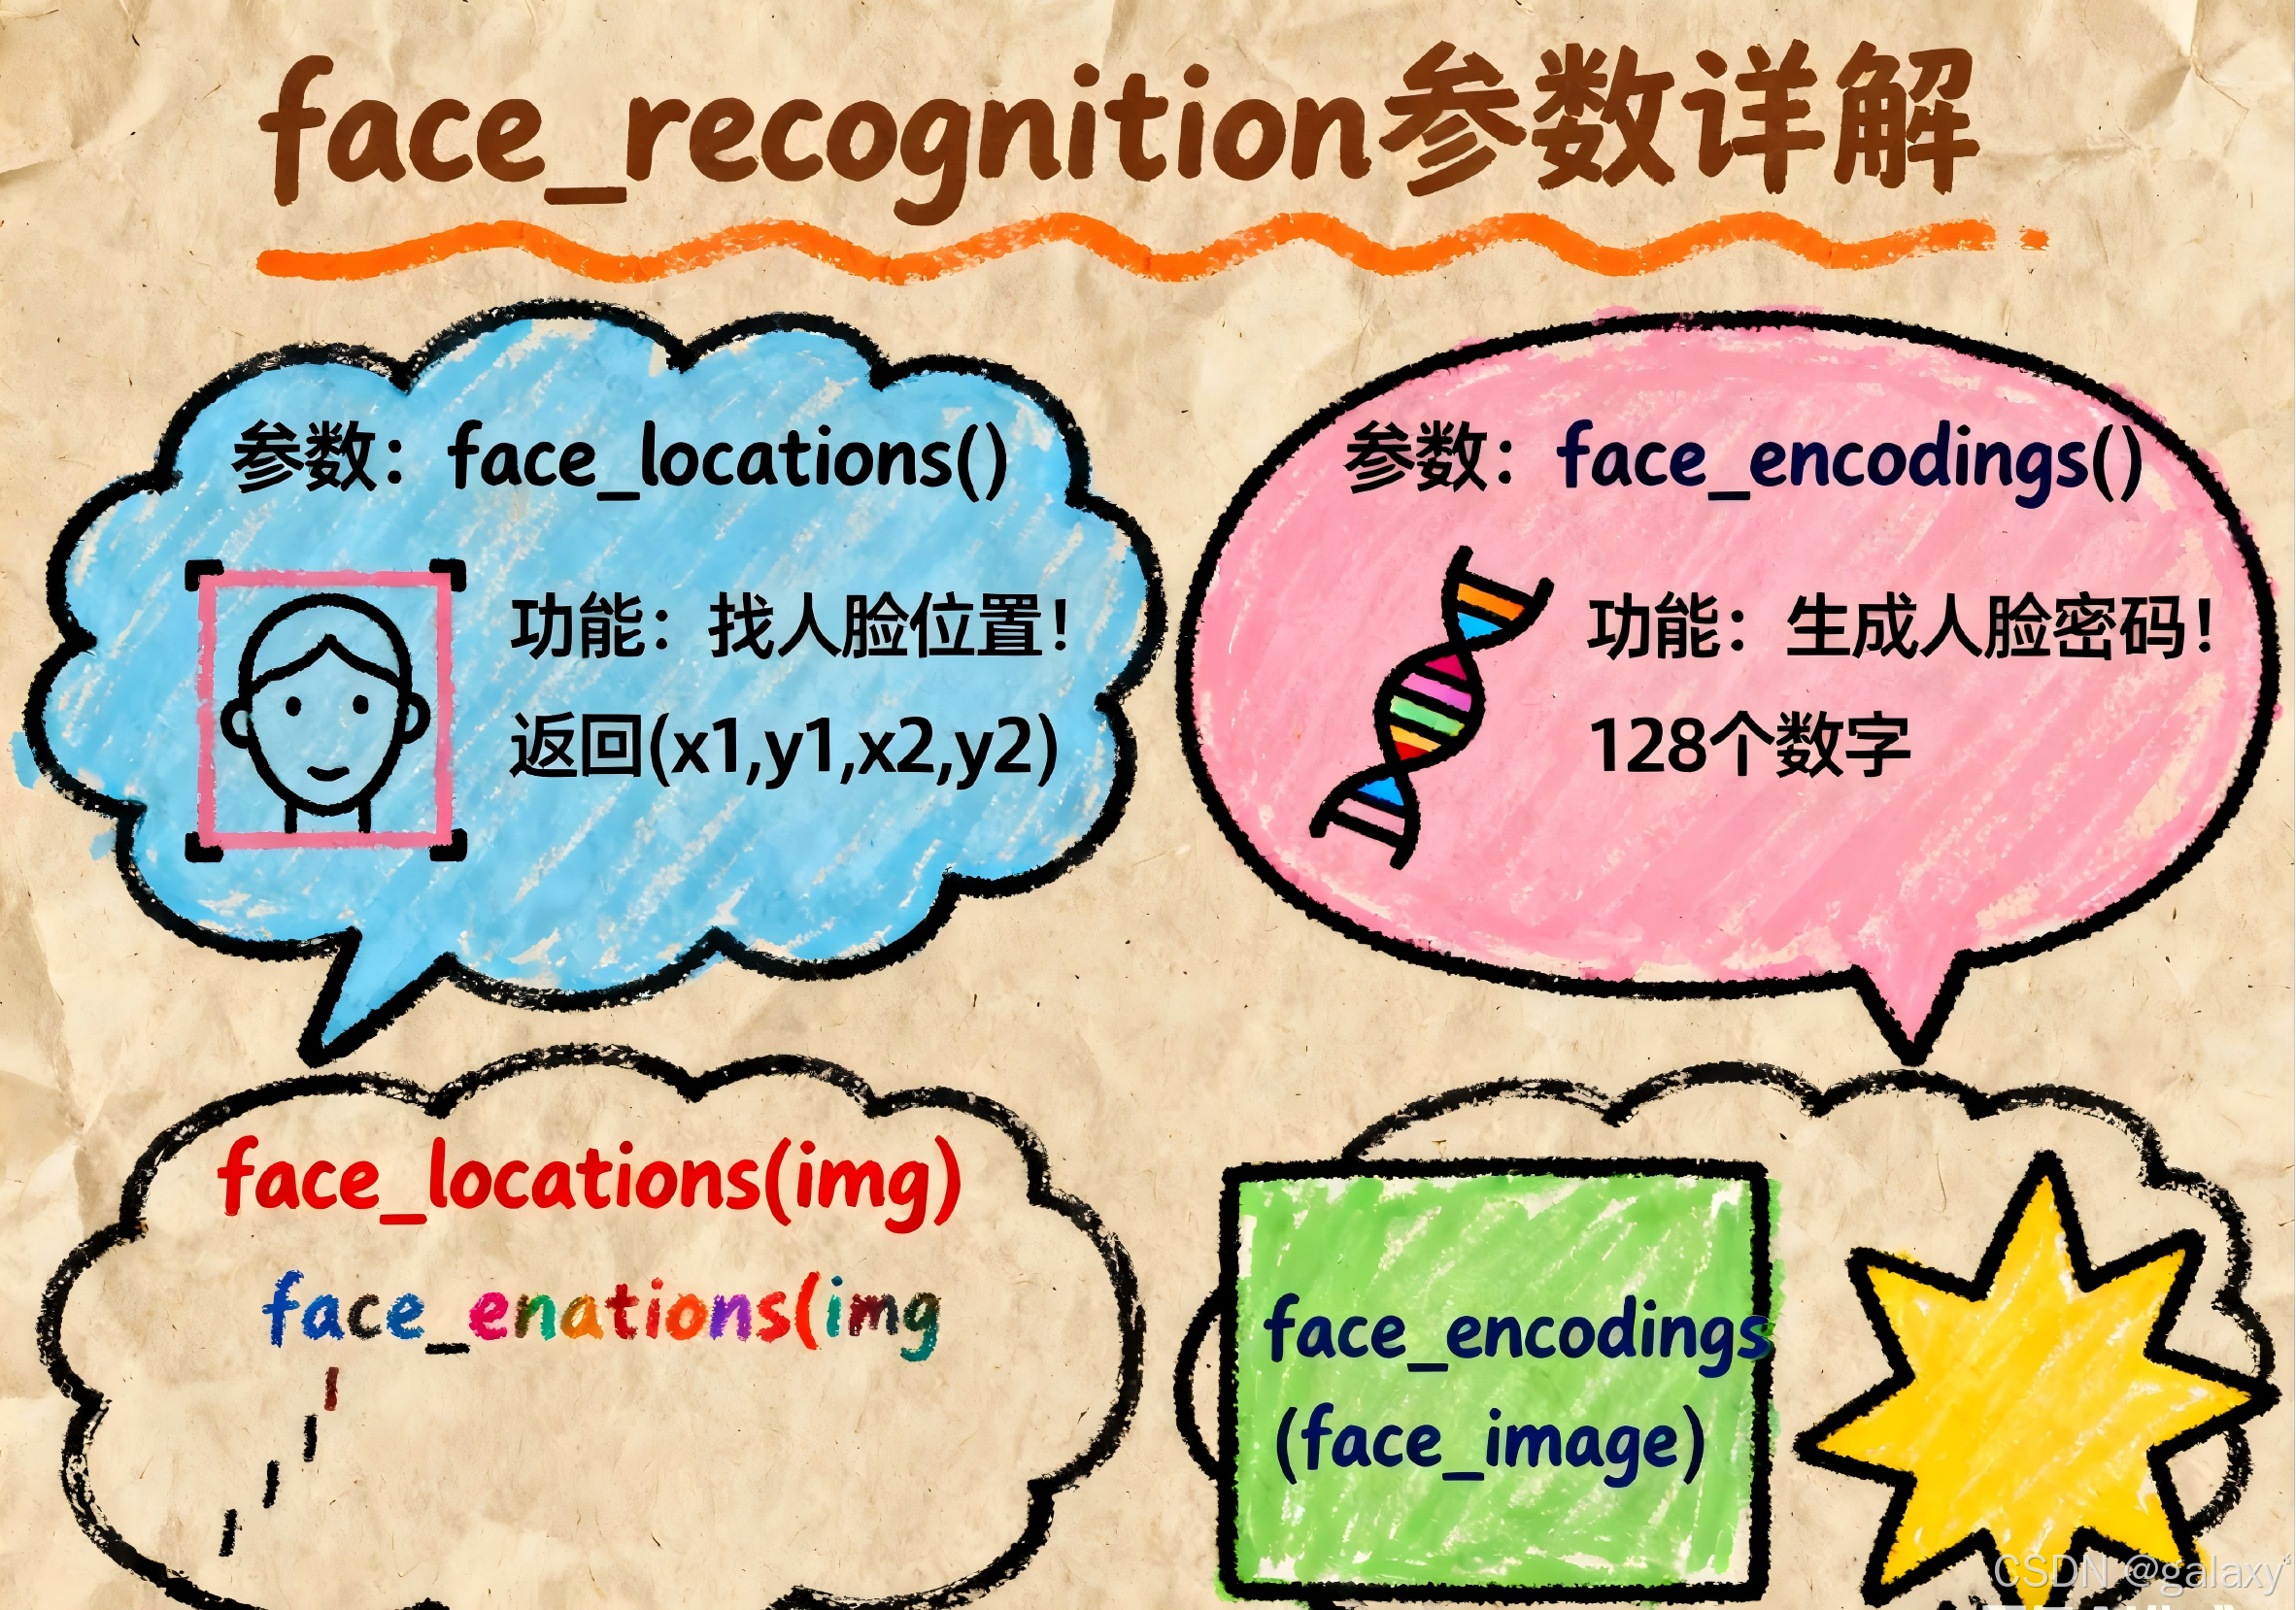
1. 人脸检测:face_locations()
在图像中定位人脸位置(边界框)。
face_locations(img, number_of_times_to_upsample=1, model="hog")
img:输入的图像(numpy 数组),通过load_image_file()加载。number_of_times_to_upsample(默认=1):
对图像进行上采样的次数(放大图像以检测更小人脸)。值越高检测越慢,但能检测更小的人脸。model(默认=“hog”):
检测模型选择:"hog":速度较快(CPU 友好),精度一般。"cnn":高精度(需 GPU 加速),速度慢。
2. 人脸编码:face_encodings()
获取人脸的 128 维特征向量(用于识别)。
face_encodings(face_image, known_face_locations=None, num_jitters=1, model="small")
face_image:输入图像(numpy 数组)。known_face_locations(可选):
若已通过face_locations()检测到位置,直接传入边界框列表(避免重复检测)。num_jitters(默认=1):
生成编码时随机扰动的次数(增加鲁棒性)。值越高越精确,但速度越慢。model(默认=“small”):
编码模型选择:"small":速度快,精度略低(默认)。"large":精度更高(适合侧脸、遮挡),速度慢。
3. 人脸比对:compare_faces()
比较两个人脸编码是否匹配。
compare_faces(known_face_encodings, face_encoding_to_check, tolerance=0.6)
known_face_encodings:已知人脸的编码列表(多个)。face_encoding_to_check:待比对的单个人脸编码。tolerance(默认=0.6):
判断是否为同一人的阈值(欧氏距离)。
值越小越严格(0.4-0.6 是常用范围)。
4. 加载图像:load_image_file()
加载图像文件为 numpy 数组。
load_image_file(file, mode="RGB")
file:图像文件路径。mode(默认=“RGB”):
颜色模式:"RGB"(三通道)或"L"(灰度图)。
5. 人脸关键点:face_landmarks()
检测人脸 68 个关键点(眼、鼻、嘴等)。
face_landmarks(face_image, face_locations=None, model="large")
face_image:输入图像。face_locations(可选):若已检测位置,直接传入。model(默认=“large”):"large":检测 68 个点(默认)。"small":检测 5 个点(更快,但信息少)。
6. 批量处理(GPU 优化):batch_face_locations()
批量处理多张图像(仅支持 CNN 模型)。
batch_face_locations(images, number_of_times_to_upsample=1, batch_size=128)
images:图像列表(numpy 数组)。batch_size(默认=128):GPU 一次处理的图像数量(需根据显存调整)。
7. 计算人脸特征向量间欧氏距离:face_distance()
face_distance 是 face_recognition 库中用于计算人脸特征向量间欧氏距离的关键函数,它提供了比 compare_faces() 更精细的相似度度量。
函数定义
face_recognition.face_distance(face_encodings, face_to_compare)
参数详解
-
face_encodings(必需)- 类型:列表(List of 128D arrays)
- 说明:包含一个或多个已知人脸的特征向量(128维编码)。每个编码通过
face_encodings()函数生成。 - 示例:
[encoding1, encoding2, ...]
-
face_to_compare(必需)- 类型:128D 数组
- 说明:待比较的目标人脸特征向量
- 示例:
target_encoding
返回值
- 类型:NumPy 数组(float 类型)
- 说明:返回目标人脸与每个已知人脸的欧氏距离(Euclidean distance)
- 距离值范围:[0, +∞)
- 值越小表示越相似(0 = 完全相同)
与 compare_faces() 的关系
compare_faces() 实际上是在内部调用 face_distance() 并应用阈值判断:
def compare_faces(encodings, target, tolerance=0.6):return list(face_distance(encodings, target) <= tolerance
阈值参考
| 距离范围 | 相似程度 | 典型应用场景 |
|---|---|---|
| 0.0 - 0.4 | 极高相似度 | 严格身份验证 |
| 0.4 - 0.6 | 可能匹配(默认阈值) | 常规人脸识别 |
| 0.6 - 0.8 | 低相似度 | 需二次确认 |
| > 0.8 | 极可能不同人 | 排除匹配 |
安装 face_recognition 需要的基础组件
- Python:3.6 或更高版本(推荐 3.8+)
- dlib:核心人脸识别库(C++编写)
- CMake:用于编译 dlib
- C++ 编译器:
- Linux:
g++或clang - Windows: Visual Studio 构建工具
- macOS: Xcode 命令行工具
- Linux:
示例代码
训练
import face_recognition
import os
import pickle
import numpy as np
from sklearn.metrics import accuracy_score, classification_report# 加载预训练模型
with open("face_recognition_model.pkl", 'rb') as f:model_data = pickle.load(f)
known_encodings = model_data['encodings']
known_names = model_data['names']# 验证集路径
val_path = "val_data"# 存储结果
true_labels = []
pred_labels = []
image_paths = []# 遍历验证集
for person_name in os.listdir(val_path):person_dir = os.path.join(val_path, person_name)for image_name in os.listdir(person_dir):image_path = os.path.join(person_dir, image_name)# 检查是否是符号链接(单人照片)if os.path.islink(image_path):actual_path = os.path.realpath(image_path)image = face_recognition.load_image_file(actual_path)is_single_sample = Trueelse:image = face_recognition.load_image_file(image_path)is_single_sample = False# 检测人脸face_locations = face_recognition.face_locations(image)if len(face_locations) == 0:print(f"警告: {image_path} 未检测到人脸")continue# 提取特征face_encodings = face_recognition.face_encodings(image, face_locations)if len(face_encodings) == 0:continue# 使用第一张人脸(假设每张图片只有一个人)face_encoding = face_encodings[0]# 匹配人脸 - 对单人样本使用更宽松的阈值if is_single_sample:tolerance = 0.65  # 更宽松的阈值else:tolerance = 0.6  # 正常阈值matches = face_recognition.compare_faces(known_encodings, face_encoding, tolerance)name = "Unknown"# 使用最接近的匹配face_distances = face_recognition.face_distance(known_encodings, face_encoding)best_match_index = np.argmin(face_distances)if matches[best_match_index]:name = known_names[best_match_index]# 记录结果true_labels.append(person_name)pred_labels.append(name)image_paths.append(image_path)# 计算整体准确率
accuracy = accuracy_score(true_labels, pred_labels)
print(f"整体准确率: {accuracy:.4f}")# 分类报告
print("\n分类报告:")
print(classification_report(true_labels, pred_labels))# 单独分析单人照片的表现
single_sample_results = []
for i, path in enumerate(image_paths):if os.path.islink(path):  # 符号链接表示单人照片single_sample_results.append({"image_path": path,"true_label": true_labels[i],"pred_label": pred_labels[i],"correct": true_labels[i] == pred_labels[i]})# 打印单人照片结果
if single_sample_results:print("\n单人照片识别结果:")correct_count = 0for result in single_sample_results:status = "✓" if result["correct"] else "✗"print(f"{status} {result['true_label']} -> {result['pred_label']} ({os.path.basename(result['image_path'])})")if result["correct"]:correct_count += 1single_accuracy = correct_count / len(single_sample_results)print(f"\n单人照片准确率: {single_accuracy:.4f} ({correct_count}/{len(single_sample_results)})")
else:print("\n验证集中没有单人照片")
预测
import face_recognition
import os
import pickle# 配置路径
train_path = "train_data"
model_save_path = "face_recognition_model.pkl"# 存储特征和标签
known_face_encodings = []
known_face_names = []single_sample_persons = []  # 记录只有单个样本的人for person_name in os.listdir(train_path):person_dir = os.path.join(train_path, person_name)person_images = os.listdir(person_dir)# 记录单人样本if len(person_images) == 1:single_sample_persons.append(person_name)for image_name in person_images:image_path = os.path.join(person_dir, image_name)image = face_recognition.load_image_file(image_path)# 检测人脸face_locations = face_recognition.face_locations(image)if len(face_locations) == 0:print(f"警告: {image_path} 未检测到人脸")continue# 提取特征face_encodings = face_recognition.face_encodings(image, face_locations)if len(face_encodings) > 0:known_face_encodings.append(face_encodings[0])known_face_names.append(person_name)# 保存模型
with open(model_save_path, 'wb') as f:pickle.dump({'encodings': known_face_encodings,'names': known_face_names}, f)print(f"模型训练完成! 共学习 {len(known_face_names)} 张人脸")
print(f"其中 {len(single_sample_persons)} 人只有单个样本: {', '.join(single_sample_persons)}")
参考
- https://github.com/ageitgey/face_recognition/blob/master/README_Simplified_Chinese.md