【JAVA全栈项目】弧图图-智能图床 SpringBoot+Vue3 :[框架开荒:一文全步骤打通前后端项目全流程]
文章目录
- 前言:
- 一、后端框架
- 1. 依赖版本说明
- 2. pom.xml
- 3. knife4j配置
- 4. 自定义异常处理
- 5. 自定义后端统一请求响应体
- 6. Mysql连接配置
- 7. mybatis-plus配置
- 8. 全局跨域配置
- 9. 接口测试
- 二、前端框架
- 1. 依赖版本说明
- 2. 快速构建Vue3+TypeScript前端框架
- 3. 引入组件库 (Ant Design Vue)
- 4. 开发规范
- 5. 修改标签页显示信息
- 6. 全局通用布局开发
- 7. 建立页面上中下布局结构
- 8. 建立上中下三层布局的公共内容
- 9. 集成Axios
- 10. 使用OpenAPI实现批量生成前端请求接口文件
- 11. 引入全局状态管理Pinia
- 12. 页面国际化设置
前言:
弧图图GitHub项目地址:https://github.com/whltaoin/hututu
本项目是基于Vue3 + SpringBoot + COS + WebScoket的企业级智能图床平台。
核心功能:
所有用户均可在平台上传和检索图片,可通过网络爬虫一键帮助用户生成需要类型的图片集。
实现图片存储空间
实现多人实时协同设计图片
平台可分为普通用户和企业用户,从而应用不同的权限场景。
一、后端框架
1. 依赖版本说明
SpringBoot版本:2.7.6
JDK:11
MybatisPlus:3.5.14
knife4j:4.4.0
hutool:5.8.38
2. pom.xml
<dependencies><dependency><groupId>org.springframework.boot</groupId><artifactId>spring-boot-starter-web</artifactId></dependency><!--切面aop--><dependency><groupId>org.springframework.boot</groupId><artifactId>spring-boot-starter-aop</artifactId></dependency><dependency><groupId>com.mysql</groupId><artifactId>mysql-connector-j</artifactId><scope>runtime</scope></dependency><!-- mybatis-plus说明文档:https://baomidou.com/getting-started/--><dependency><groupId>com.baomidou</groupId><artifactId>mybatis-plus-boot-starter</artifactId><version>3.5.14</version></dependency><dependency><groupId>org.projectlombok</groupId><artifactId>lombok</artifactId><optional>true</optional></dependency><dependency><groupId>org.springframework.boot</groupId><artifactId>spring-boot-starter-test</artifactId><scope>test</scope></dependency><!-- 接口文档: https://doc.xiaominfo.com/docs/quick-start#spring-boot-2--><dependency><groupId>com.github.xiaoymin</groupId><artifactId>knife4j-openapi2-spring-boot-starter</artifactId><version>4.4.0</version></dependency><!-- 常用工具类:https://doc.hutool.cn/pages/index/#%F0%9F%93%9A%E7%AE%80%E4%BB%8B--><dependency><groupId>cn.hutool</groupId><artifactId>hutool-all</artifactId><version>5.8.38</version></dependency>3. knife4j配置
openApi2.0配置文档:https://doc.xiaominfo.com/docs/quick-start#openapi2
访问Knife4j的文档地址:http://ip:port/doc.html即可查看文档
- application.yml
knife4j:enable: true # true为开启,false为关闭openapi:title: 弧图图-智能图床email: whltaoin@163.comurl: htt://www.varin.cnversion: V1.0.0group:default:group-name: ""api-rule: packageapi-rule-resources:- cn.varin.hututu.controller
4. 自定义异常处理
- 定义自定义响应码枚举:ResponseCode
package cn.varin.hututu.exception;import lombok.Getter;/*** 请求响应码*/@Getter
public enum ResponseCode {SUCCESS(200, "ok"),PARAMS_ERROR(40000, "请求参数错误"),NOT_LOGIN_ERROR(40100, "未登录"),NO_AUTH_ERROR(40101, "无权限"),NOT_FOUND_ERROR(40400, "请求数据不存在"),FORBIDDEN_ERROR(40300, "禁止访问"),SYSTEM_ERROR(50000, "系统内部异常"),OPERATION_ERROR(50001, "操作失败");private final int code;private final String message;ResponseCode(int code, String message) {this.code = code;this.message = message;}}- 自定义异常类:CustomizeExcaption
package cn.varin.hututu.exception;import lombok.Getter;/*** 自定义异常类*/
@Getterpublic class CustomizeException extends RuntimeException {private final Integer code;public CustomizeException(Integer code,String message ) {super(message);this.code = code;}public CustomizeException(ResponseCode responseCode ) {super(responseCode.getMessage());this.code = responseCode.getCode();}public CustomizeException(ResponseCode responseCode ,String message) {super(message);this.code = responseCode.getCode();}}- 自定义全局处理器 :GlobalExcaptionHandle
package cn.varin.hututu.exception;import cn.varin.hututu.common.BaseResponse;
import cn.varin.hututu.common.ResponseUtil;
import lombok.extern.slf4j.Slf4j;
import org.springframework.web.bind.annotation.ExceptionHandler;
import org.springframework.web.bind.annotation.RestControllerAdvice;/*** 全局异常处理器*/
@RestControllerAdvice
@Slf4j
public class GlobaExceptionHandle {/*** 自定义异常* @param customizeException 自定义异常* @return 响应体*/@ExceptionHandler(value = CustomizeException.class)public BaseResponse<?> customizeExceptionHandle (CustomizeException customizeException) {log.error("CustomizeException>>>>>",customizeException);return ResponseUtil.error(customizeException.getCode(), customizeException.getMessage());}@ExceptionHandler(value = RuntimeException.class)public BaseResponse<?> runtimeExceptionHandle (RuntimeException runtimeException) {log.error("RuntimeException>>>>>",runtimeException);return ResponseUtil.error(ResponseCode.SYSTEM_ERROR.getCode(), ResponseCode.SYSTEM_ERROR.getMessage());}}- 自定义异常捕获工具类:ThrowUtil
package cn.varin.hututu.exception;/*** 异常工具类*/
public class ThrowUtil {/*** 条件成立,抛运行时异常* @param flag 条件* @param runtimeException 异常*/public static void throwIf(Boolean flag, RuntimeException runtimeException) {if (flag) {throw runtimeException;}}/*** 条件成立,抛异常* @param flag 条件* @param responseCode 响应码*/public static void throwIf(Boolean flag,ResponseCode responseCode) {if (flag) {throwIf(flag,new CustomizeException(responseCode));}}/*** 条件成立,抛异常* @param flag 条件* @param code 响应码* @param message 响应信息*/public static void throwIf(Boolean flag,Integer code,String message) {if (flag) {throwIf(flag,new CustomizeException(code,message));}}}
5. 自定义后端统一请求响应体
- 定义请求响应类:BaseResponse
package cn.varin.hututu.common;import cn.varin.hututu.exception.ResponseCode;
import io.swagger.models.auth.In;
import lombok.Data;
import org.apache.catalina.valves.rewrite.RewriteCond;
import org.springframework.web.bind.annotation.ResponseStatus;import java.io.Serializable;/*** 请求响应体*/
@Data
public class BaseResponse<T> implements Serializable {private Integer code;private String message;private T data;public BaseResponse(Integer code, String message, T data) {this.code = code;this.message = message;this.data = data;}public BaseResponse(Integer code, String message) {this(code, message, null);}public BaseResponse(ResponseCode responseCode) {this(responseCode.getCode(), responseCode.getMessage(), null);}}- 定义请求响应工具类:ResponseUtil
package cn.varin.hututu.common;import cn.varin.hututu.exception.ResponseCode;public class ResponseUtil {/**** @param data 数据* @return 响应* @param <T> 数据类型*/public static<T> BaseResponse<T> success(T data) {return  new BaseResponse<>(200, "请求成功", data);}/**** @param responseCode 响应吗枚举* @return 响应*/public static BaseResponse<?> error(ResponseCode responseCode) {return new BaseResponse<>(responseCode);}/**** @param code 响应码* @param message 响应消息* @return 响应体*/public static BaseResponse<?> error(Integer code, String message) {return new BaseResponse<>(code, message, null);}/**** @param responseCode 响应枚举* @param message 响应消息* @return 响应体*/public static BaseResponse<?> error(ResponseCode responseCode, String message) {return new BaseResponse<>(responseCode.getCode(), message, null);}
}- 定义公共分页请求类:PageRequest
package cn.varin.hututu.common;import lombok.Data;@Data
public class PageRequest {// 页号private int current = 1;// 页数private int pageSize = 10;// 排序字段private String sortField;// 降序/升序 默认:降序private String sortOrder ="desc";
}- 定义公共删除请求类:DeleteRequest
package cn.varin.hututu.common;import lombok.Data;import java.io.Serializable;/*** 删除请求类*/
@Data
public class DeleteRequest  implements Serializable {private static final long serialVersionUID = 1L;private Integer id;
}
6. Mysql连接配置
spring:datasource:driver-class-name: com.mysql.cj.jdbc.Driverurl: jdbc:mysql://ip:3306/hututuusername: 你的账号password: 你的密码
7. mybatis-plus配置
mybaits-plus配置文档:https://baomidou.com/getting-started/
注意:如果是mybatis升级到mybaitsPlus,需要删除掉原本mybatis 依赖,因为mybaits-plus中包含mybatis。
mybatis-plus:configuration:# MyBatis 配置map-underscore-to-camel-case: false # 下划线转驼峰# 如果项目无日志框架,可以考虑指定为 org.apache.ibatis.logging.stdout.StdOutImpl (请勿在实际生产中使用).log-impl: org.apache.ibatis.logging.stdout.StdOutImplglobal-config:db-config:logic-delete-field: isDelete # 逻辑删除logic-delete-value: true # 为1删除logic-not-delete-value: false # 为0不删除
8. 全局跨域配置
package cn.varin.hututu.config;import org.springframework.context.annotation.Configuration;
import org.springframework.web.servlet.config.annotation.CorsRegistry;
import org.springframework.web.servlet.config.annotation.InterceptorRegistry;
import org.springframework.web.servlet.config.annotation.WebMvcConfigurer;import java.io.Serializable;/*** 浏览器跨域配置*/
@Configuration
public class CorsConfig implements WebMvcConfigurer {@Overridepublic void addCorsMappings(CorsRegistry registry) {registry.addMapping("/**").allowCredentials(true) // 可以发送cookie.allowedOriginPatterns("*").allowedMethods("GET", "POST", "PUT", "DELETE").allowedHeaders("*").exposedHeaders("*");}
}
9. 接口测试
- 创建一个健康检查接口 HealthController
package cn.varin.hututu.controller;import cn.varin.hututu.common.BaseResponse;
import cn.varin.hututu.common.ResponseUtil;
import org.springframework.http.ResponseEntity;
import org.springframework.web.bind.annotation.CrossOrigin;
import org.springframework.web.bind.annotation.GetMapping;
import org.springframework.web.bind.annotation.RequestMapping;
import org.springframework.web.bind.annotation.RestController;@RestController
@RequestMapping("/")
public class HealthController {/*** 项目健康检查* @return*/@GetMapping("/health")public BaseResponse health() {return ResponseUtil.success("success");}
}
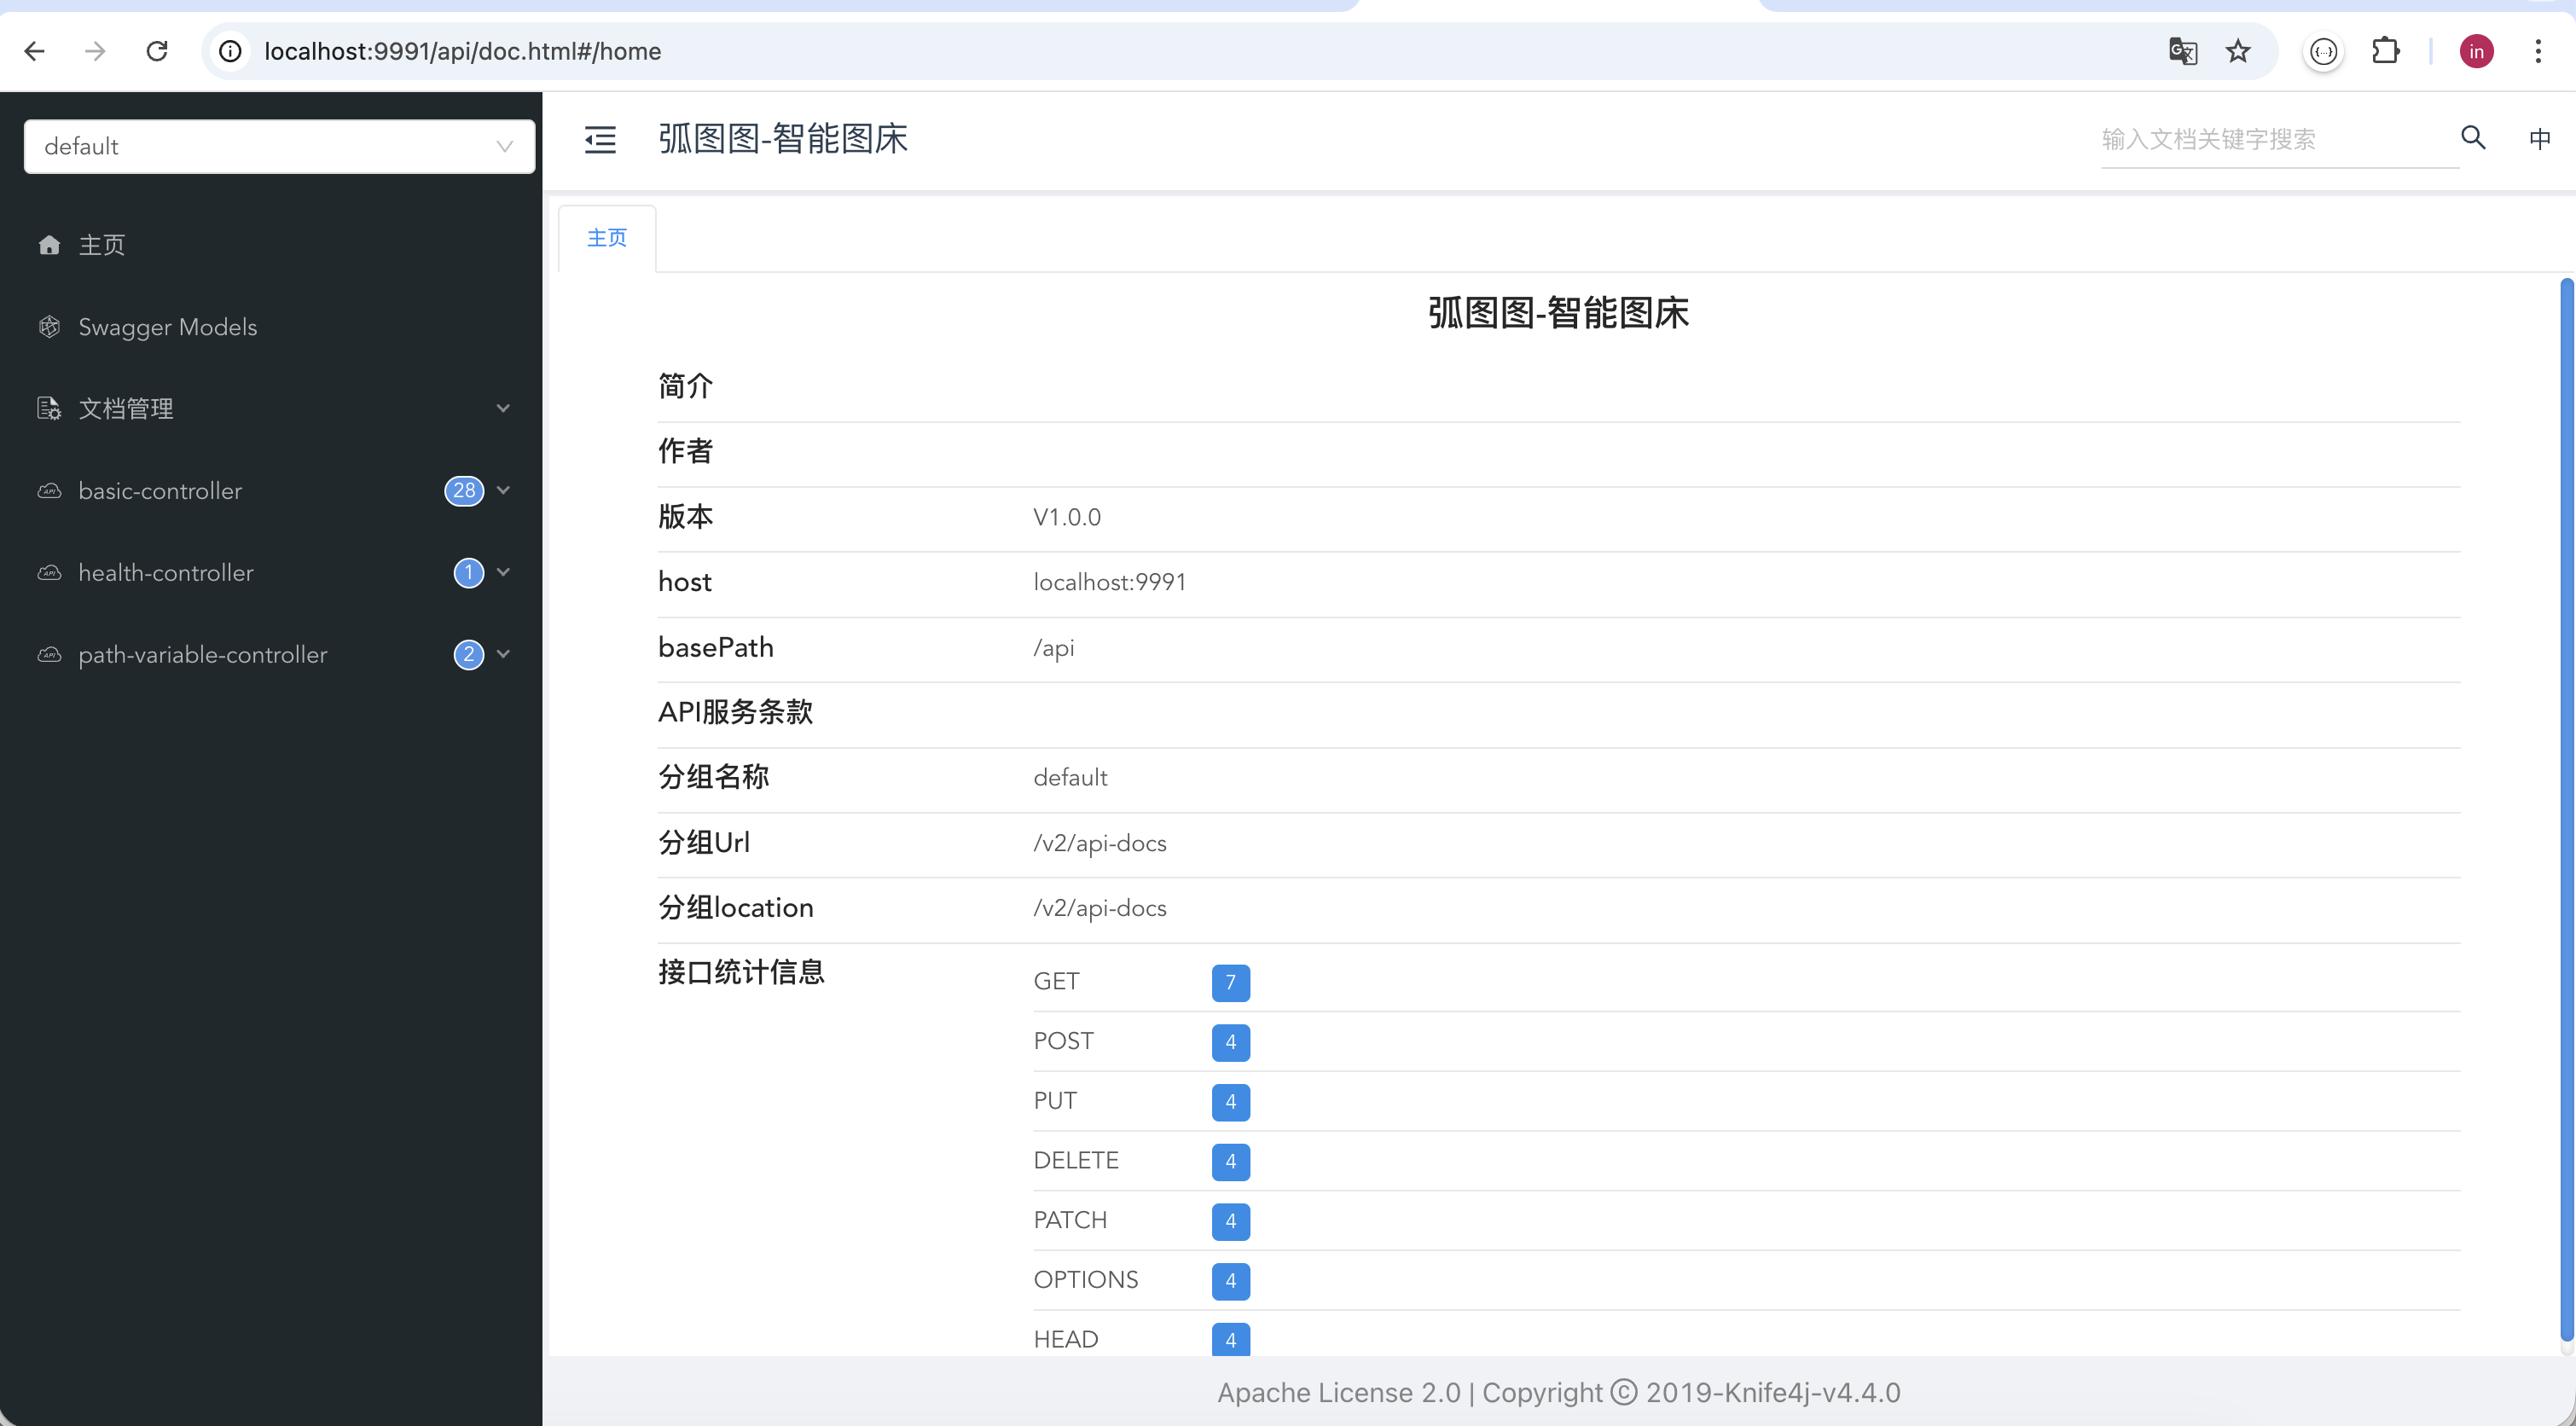
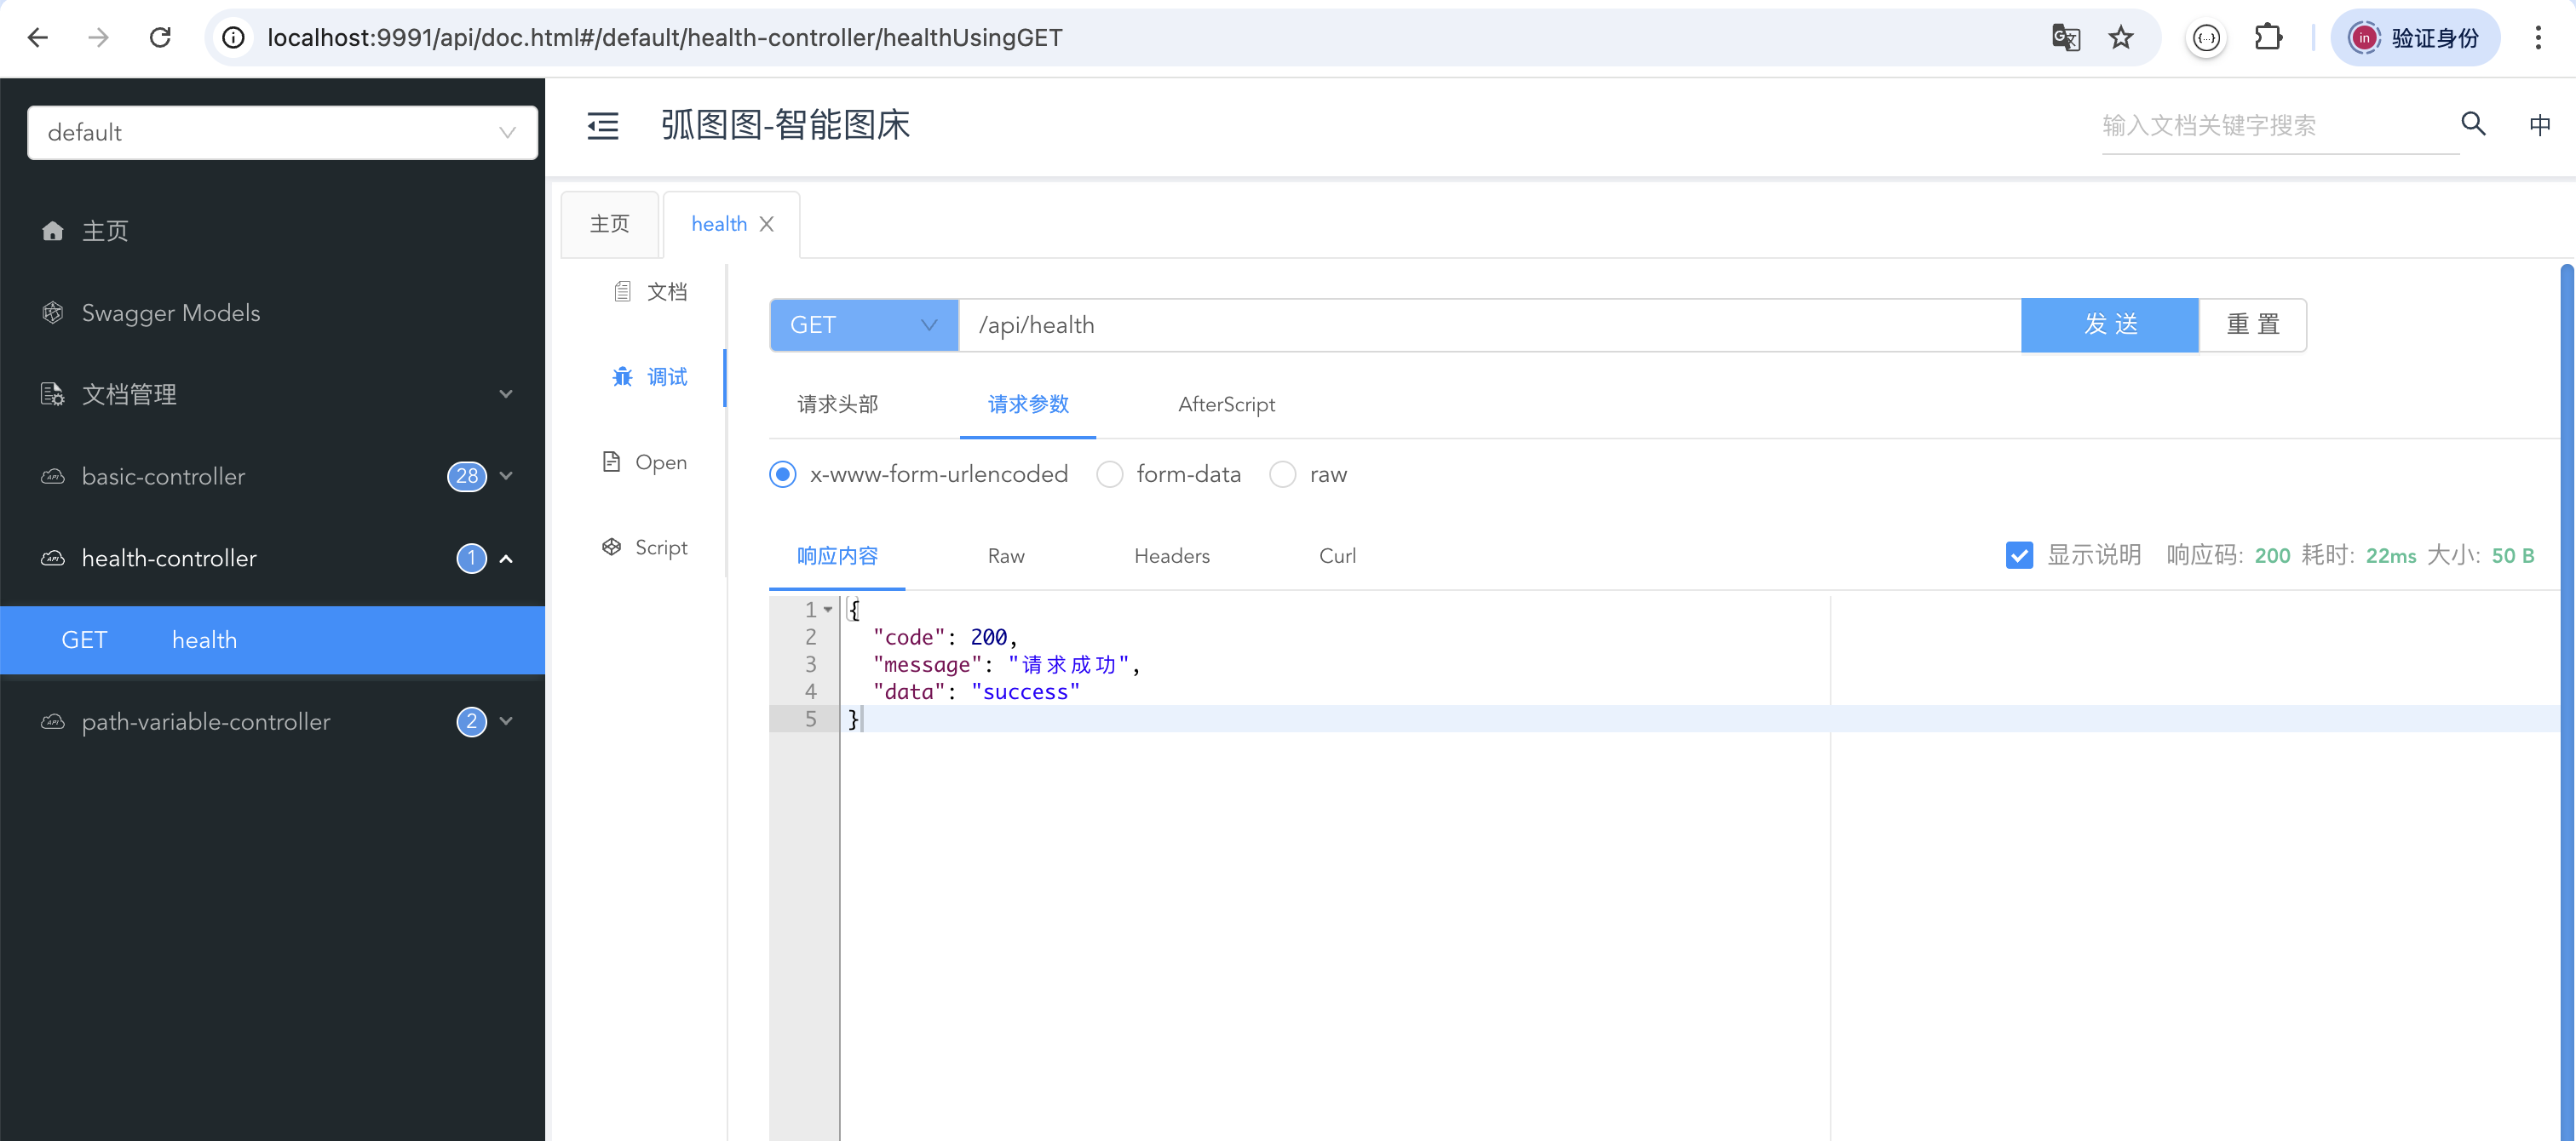
- 访问接口文档页面进行测试
http://localhost:9991/api/doc.htlm
- 接口测试结果:
:::success
后端通用模版搭建完成
:::
二、前端框架
1. 依赖版本说明
NPM:v11.6.0
Node:v24.10.0
Vue:v3.12.1
TypeScript:v5.6.3
Ant:v4.2.6
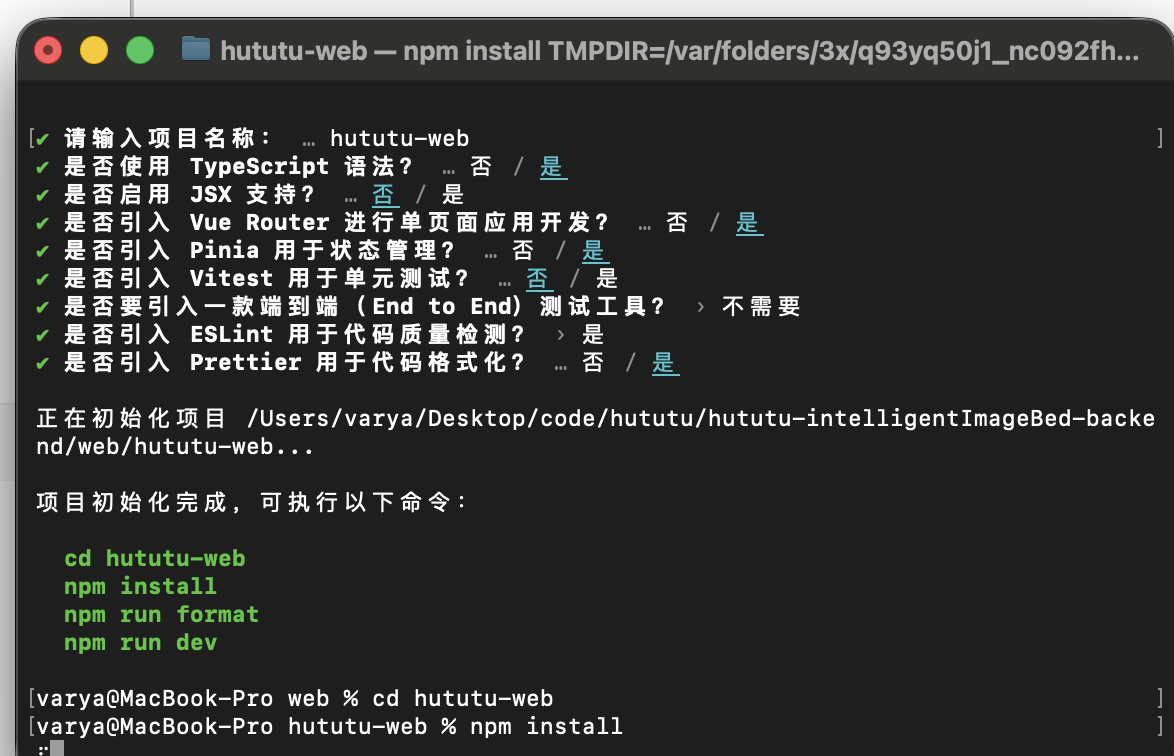
2. 快速构建Vue3+TypeScript前端框架
Vue.js文档说明: https://cn.vuejs.org/guide/quick-start
npm create vue@latest # 创建
npm install # 下载依赖
npm run dev # 启动项目
3. 引入组件库 (Ant Design Vue)
官方文档:https://antdv.com/docs/vue/getting-started-cn
本文选择全局安装并注册,只需要局部注册的请自行查询官网文档
- 下载依赖
npm i --save ant-design-vue@4.x #本文使用版本:4.2.6
- 全局注册
- 将将以下代码添加到main.ts文件中
import { createApp } from 'vue';
import Antd from 'ant-design-vue';
import App from './App';
import 'ant-design-vue/dist/reset.css';const app = createApp(App);app.use(Antd).mount('#app');
- 组件测试预览
- 到任意页面添加任意Ant组件测试
组件地址:https://antdv.com/components/overview-cn/
图中可以看到日期组件正常使用
<a-date-picker />
<a-time-picker />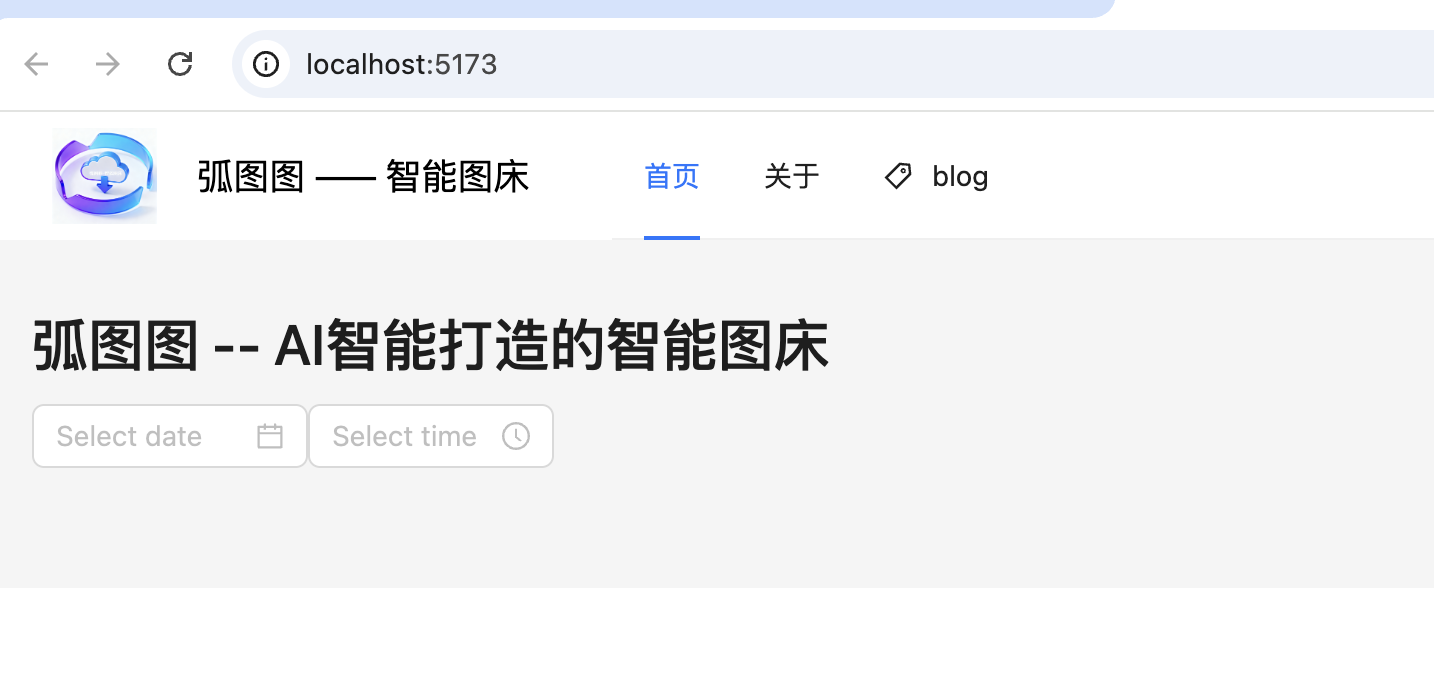
4. 开发规范
选择遵守VUE3的组合式API开发方式,喜欢选项式API的可以去参考官网文档
<!--默认前端模版--><template><div id="common-page"></div>
</template><script setup lang="ts"></script><style scoped>
#common-page {}
</style>
5. 修改标签页显示信息
修改:
标签页显示表示
标签页显示ico图标
修改文件地址:根目录下的index.html
<!DOCTYPE html>
<html lang=""><head><meta charset="UTF-8"><link rel="icon" href="/public/favicon.ico" /><meta name="viewport" content="width=device-width, initial-scale=1.0"><title>弧图图 —— 智能图床</title></head><body><div id="app"></div><script type="module" src="/src/main.ts"></script></body>
</html>
6. 全局通用布局开发
- 开发思路:
- 新建一个BasicLayout页面,作为根布局,引入到App.vue文件中。
- 实现功能:
- 只需要修改App.vue中的布局模版,就可以动态的切换不同的布局文件
- 文件位置:
- src/layouts/BasicLayout.vue
- src/App.vue
<template><basic-layout></basic-layout></template>
<script lang="ts" setup>import BasicLayout from '@/layouts/BasicLayout.vue'</script>
<!--默认前端模版--><template><div id="basic-page"></div>
</template><script setup lang="ts"></script><style scoped>
#basic-page {width: 100%;
}</style>7. 建立页面上中下布局结构
使用ant 布局组件:https://antdv.com/components/layout-cn
选择需要的布局代码,复制到BasicLayout文件中
本项目选择的页面接收示例:

BasicLayout.vue
<!--默认前端模版--><template><div id="basic-page"><a-layout style="min-width: 100vh"><a-layout-header class="headerStyle"></a-layout-header><a-layout-content class="contentStyle"></a-layout-content><a-layout-footer class="footerStyle"></a-layout-footer></a-layout></div>
</template><script setup lang="ts"></script><style scoped>#basic-page {width: 100%;}#basic-page .headerStyle  {padding-inline: 0px;margin-bottom: 16px;color:unset;background-color: white;}#basic-page .contentStyle{margin-bottom: 40px;padding:20px;}#basic-page .footerStyle{padding:16px;background-color: #efefef;position: fixed;bottom: 0;left:0;right:0;text-align: center;}
</style>
8. 建立上中下三层布局的公共内容
上:网站图标、标题,以及路由链接、以及登录按钮等
中:动态切换页面内容
下:展示网站的基本信息,例如:开发者,网站备案情况
- basicLayout.vue
<!--默认前端模版--><template><div id="basic-page"><a-layout style="min-width: 100vh"><a-layout-header class="headerStyle"><global-header></global-header></a-layout-header><a-layout-content class="contentStyle"><router-view></router-view></a-layout-content><a-layout-footer class="footerStyle"><div style="margin-bottom: 16px;text-align: right"><a-radio-group v-model:value="locale"><a-radio-button key="en" :value="enUS.locale">English</a-radio-button><a-radio-button key="cn" :value="zhCN.locale">中文</a-radio-button></a-radio-group></div><a href="http:www.varin.cn" target="_blank">varin.cn By Varin</a></a-layout-footer></a-layout></div>
</template><script setup lang="ts">import GlobalHeader from '@/components/GlobalHeader.vue'</script><style scoped>#basic-page {width: 100%;}#basic-page .headerStyle  {padding-inline: 0px;margin-bottom: 16px;color:unset;background-color: white;}#basic-page .contentStyle{margin-bottom: 40px;padding:20px;}#basic-page .footerStyle{padding:16px;background-color: #efefef;position: fixed;bottom: 0;left:0;right:0;text-align: center;}
</style>
- 设置路由配置:
import { createRouter, createWebHistory } from 'vue-router'const router = createRouter({history: createWebHistory(import.meta.env.BASE_URL),routes: [{path: '/',name: '首页',// route level code-splitting// this generates a separate chunk (About.[hash].js) for this route// which is lazy-loaded when the route is visited.component: () => import('../views/IndexView.vue'),},{path: '/about',name: '关于',// route level code-splitting// this generates a separate chunk (About.[hash].js) for this route// which is lazy-loaded when the route is visited.component: () => import('../views/AboutView.vue'),}],
})export default router- 抽离导航栏内容到全局导航栏组件中:
GlobalHeader.vue
<template><div id="global-header"><a-row><a-col flex="280px"><router-link to="/"><div class="title-bar"><img src="../assets/logo.png" alt="logo" class="logo" /><div class="title">弧图图 —— 智能图床</div></div></router-link></a-col><a-col flex="auto"><a-menu v-model:selectedKeys="current" mode="horizontal" :items="items"@click="doMenuClick"/></a-col><a-col flex="200px"><div class="user-login-status"><div v-if="loginUserStore.loginUser.id">{{loginUserStore.loginUser.userName?? "无名"}}</div><div v-else><a-button type="primary"  href="/user/login">登录</a-button></div></div></a-col></a-row></div>
</template>
<script lang="ts" setup>import { h, ref } from 'vue'import { MenuProps } from 'ant-design-vue'import {  TagOutlined  } from '@ant-design/icons-vue';const loginUserStore = useLoginUserStore()loginUserStore.getLoginUser()const current = ref<string[]>(['mail'])const items = ref<MenuProps['items']>([{key: '/',title: '首页',label: '首页',},{key: '/about',title: '关于',label: '关于',},{key: 'others',title: 'BLOG',icon: ()=>h(TagOutlined),label: h('a', { href: 'https://varin.blog.csdn.net', target: '_blank' }, 'blog'),},])import {useRouter} from 'vue-router';import { useLoginUserStore } from '@/store/userStore'const router = useRouter();// 路由跳转事件const doMenuClick = ({key}:{key:string}) => {router.push({path:key})}// 解决刷新后菜单高亮失效router.afterEach((to) => {current.value = [to.path]})</script>
<style scoped>#global-header {margin:0 30px;}.title-bar {display: flex;align-items: center;.logo{height: 48px;}.title{color: #000;font-size: 18px;margin-left: 20px;}}</style>
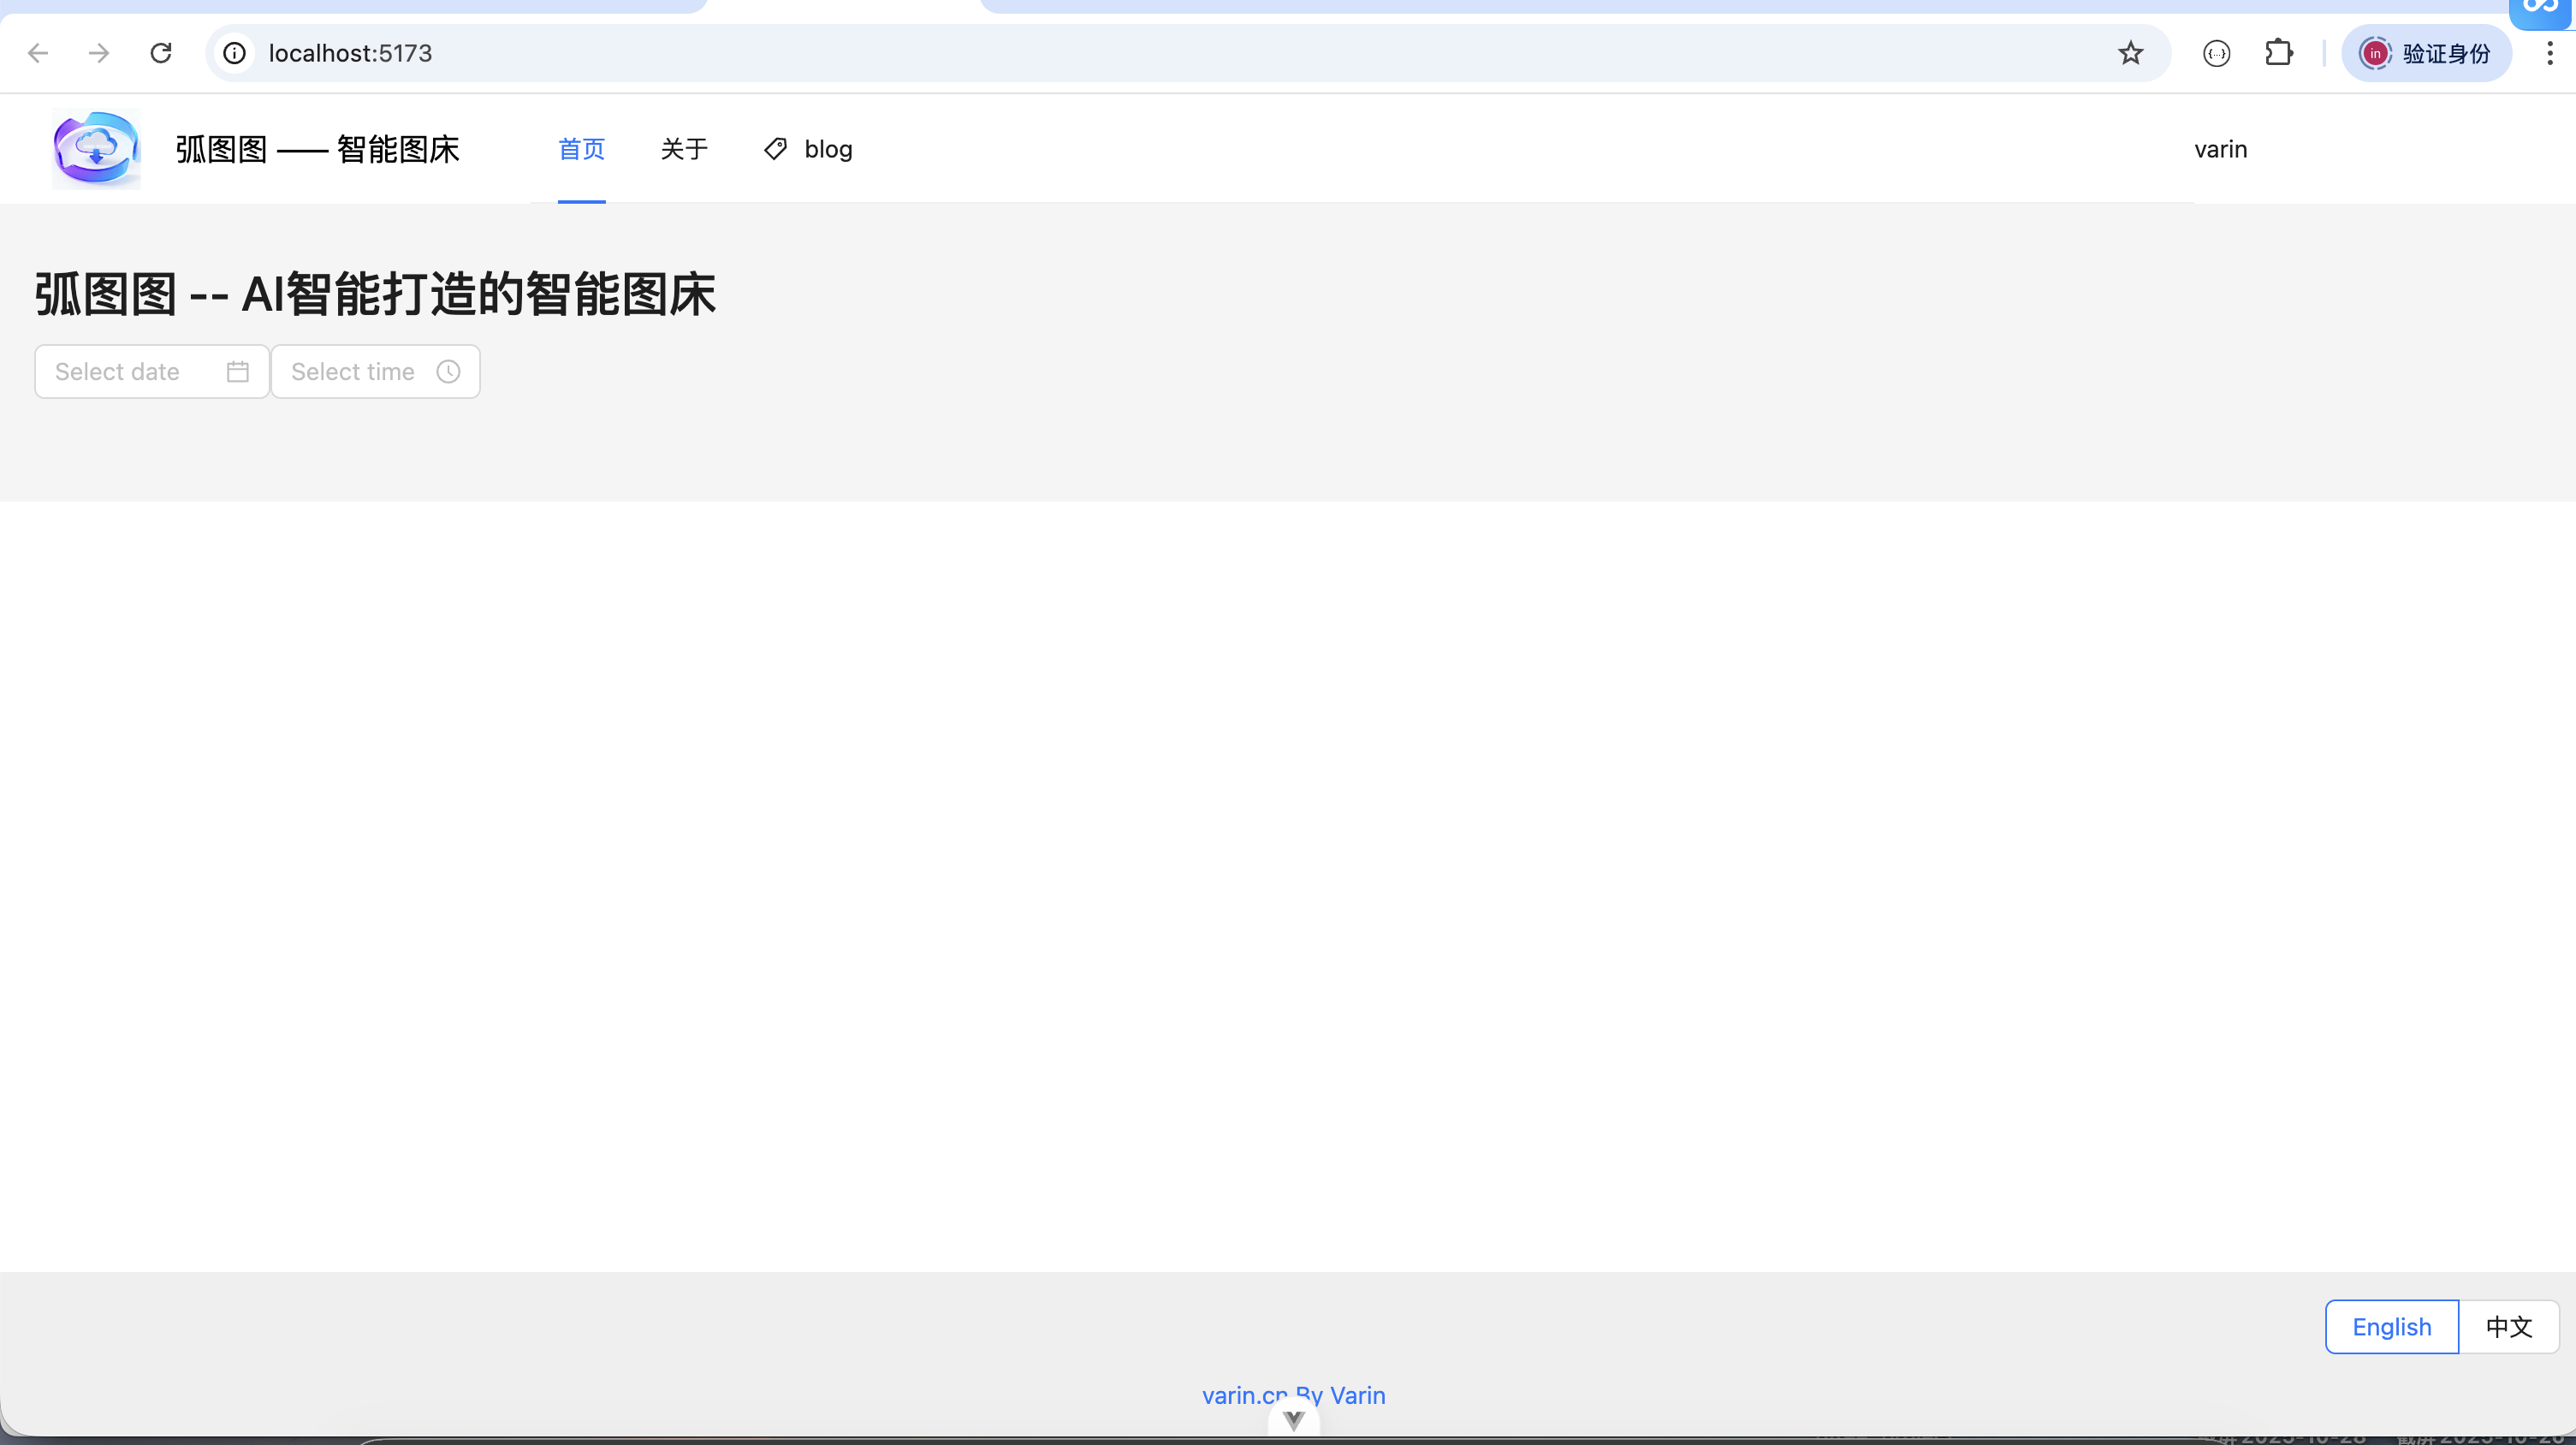
- 最终效果
9. 集成Axios
官网文档地址:https://axios-http.com/docs/intro
- 安装依赖
npm install axios- 建立全局自定义请求
参考文档:
基本信息配置:https://axios-http.com/docs/api_intro
拦截器配置:https://axios-http.com/docs/interceptors
import axios from 'axios'
import { message } from 'ant-design-vue'// Set config defaults when creating the instanceconst MyAxios = axios.create({baseURL: 'http://localhost:9991/',timeout: 60000,withCredentials: true, //发送请去时,可以携带cookie
});// Add a request interceptor 请求拦截
axios.interceptors.request.use(function (config) {// Do something before request is sentreturn config;}, function (error) {// Do something with request errorreturn Promise.reject(error);});// Add a response interceptor 响应拦截
axios.interceptors.response.use(function onFulfilled(response) {// Any status code that lie within the range of 2xx cause this function to trigger// Do something with response dataconst {data} = response;// 未登录if (data.code === 40100) {// 后续修改,逻辑:判断是不是登录请求,并且是不是页面,if (! response.request.responseUrl.includes('/user/get/login') &&!window.location.pathname.includes('/user/login')) {message.warning("请登录");window.location.href = '/login';}}return response;
}, function onRejected(error) {// Any status codes that falls outside the range of 2xx cause this function to trigger// Do something with response errorreturn Promise.reject(error);
});export default  MyAxios;
10. 使用OpenAPI实现批量生成前端请求接口文件
OpenAPI TypeScript 生成器介绍文档:https://www.npmjs.com/package/@umijs/openapi
- 安装
npm i --save-dev @umijs/openapi- 根目录建立openapi.config.ts配置文件
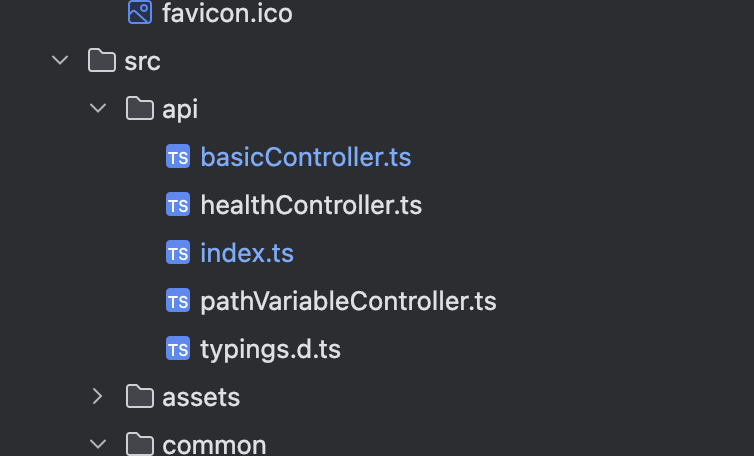
import {generateService} from '@umijs/openapi'generateService({requestLibPath:"import request from '@/request'",  # 使用默认请求文件schemaPath:"http://localhost:9991/api/v2/api-docs", # 后端接口地址serversPath:"./src" # 生成文件的目录
})
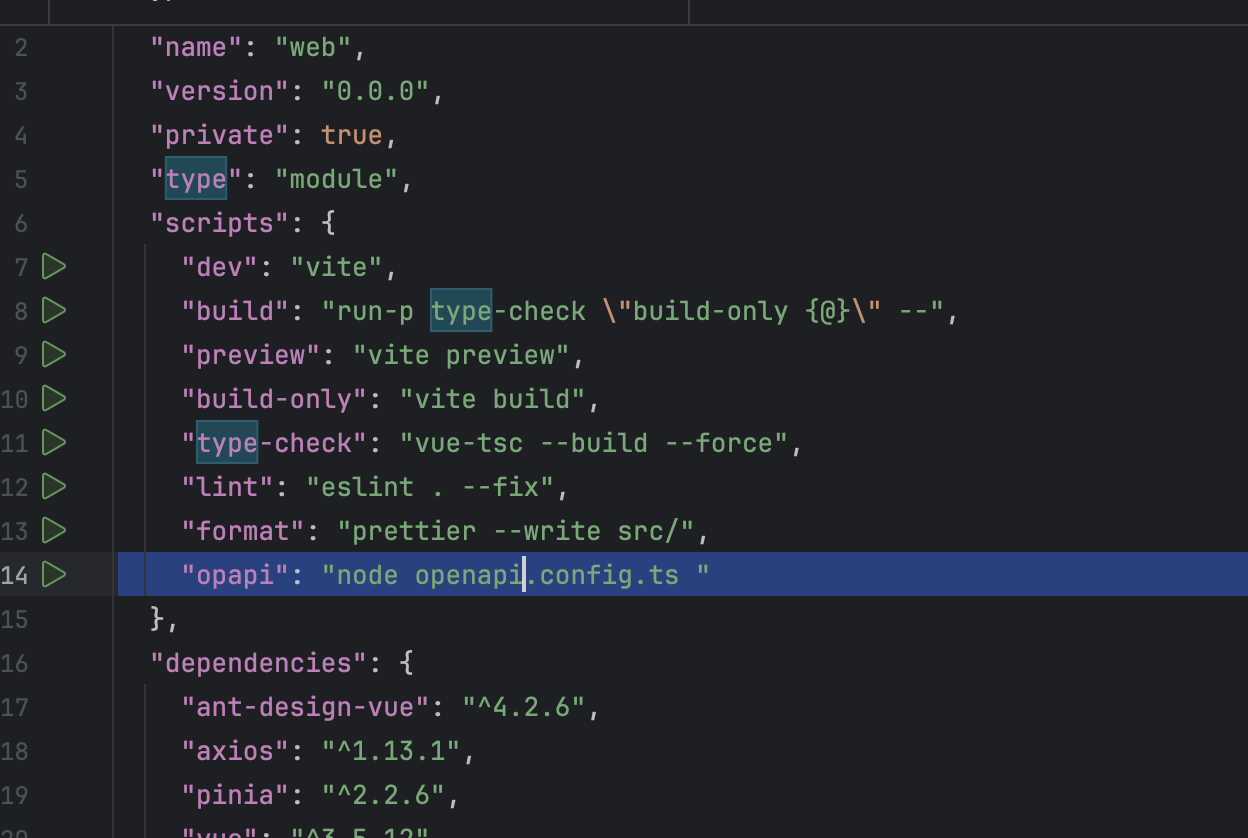
- 在 package.json 中添加生成脚本
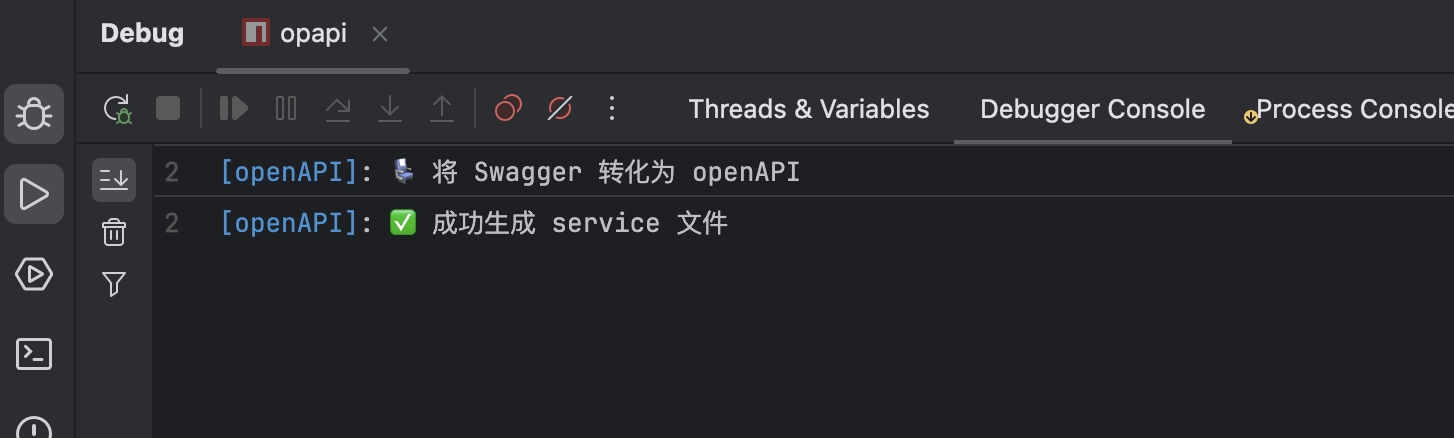
"opapi": "node openapi.config.ts "
- 运行指令
- 注意:运行该指令需要将后端项目启动
- 测试请求
- 在IndexPage.vue文件中编写任意请求接口代码
<template><div id="index-view"><h1>{{msg}}</h1>
<!--    测试组件中英文切换--><a-date-picker /><a-time-picker /></div>
</template>
<script setup lang="ts">
import { healthUsingGet } from "@/api/healthController";
healthUsingGet().then((res)=>{console.log(res);
})const msg = "弧图图 -- AI智能打造的智能图床"
</script>
<style>#index-view {}
</style>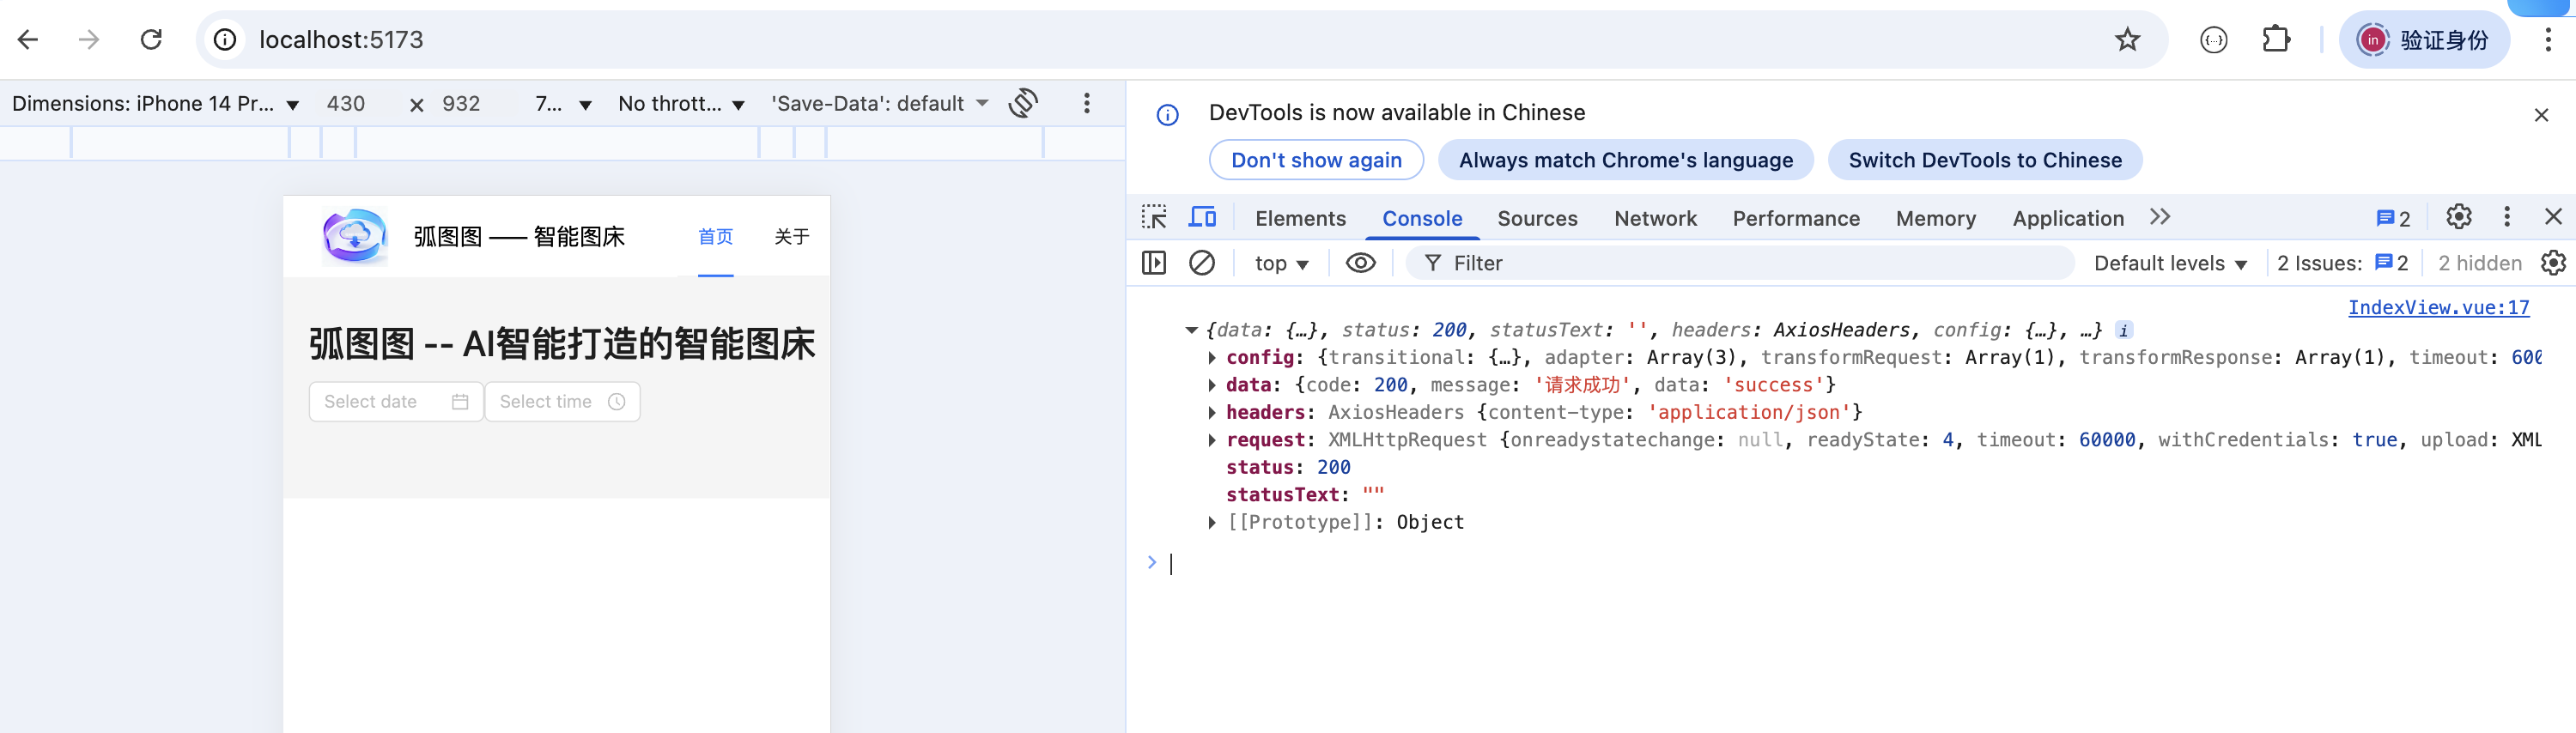
11. 引入全局状态管理Pinia
官网文档:https://pinia.vuejs.org/zh/getting-started.html
- 安装依赖
npm install pinia
- 创建user模块,定义用户信息全局存储、修改、获取功能
import {defineStore} from 'pinia'
import {ref} from 'vue'export const useLoginUserStore = defineStore("loginUser",()=>{// 创建登录用户信息const  loginUser = ref<any>({userName :"未登录"})// 获取登录用户async  function getLoginUser(){// 后端接口没有开发,暂时用定时器模拟setTimeout(()=>{loginUser.value = {id:526,userName:"varin"}},10000)}// 设置登录用户function setLoginUser(newLoginUser: any){loginUser.value = newLoginUser}return { loginUser ,setLoginUser  ,getLoginUser}
});- 使用示例
const loginUserStore = useLoginUserStore() # 获取到储存器
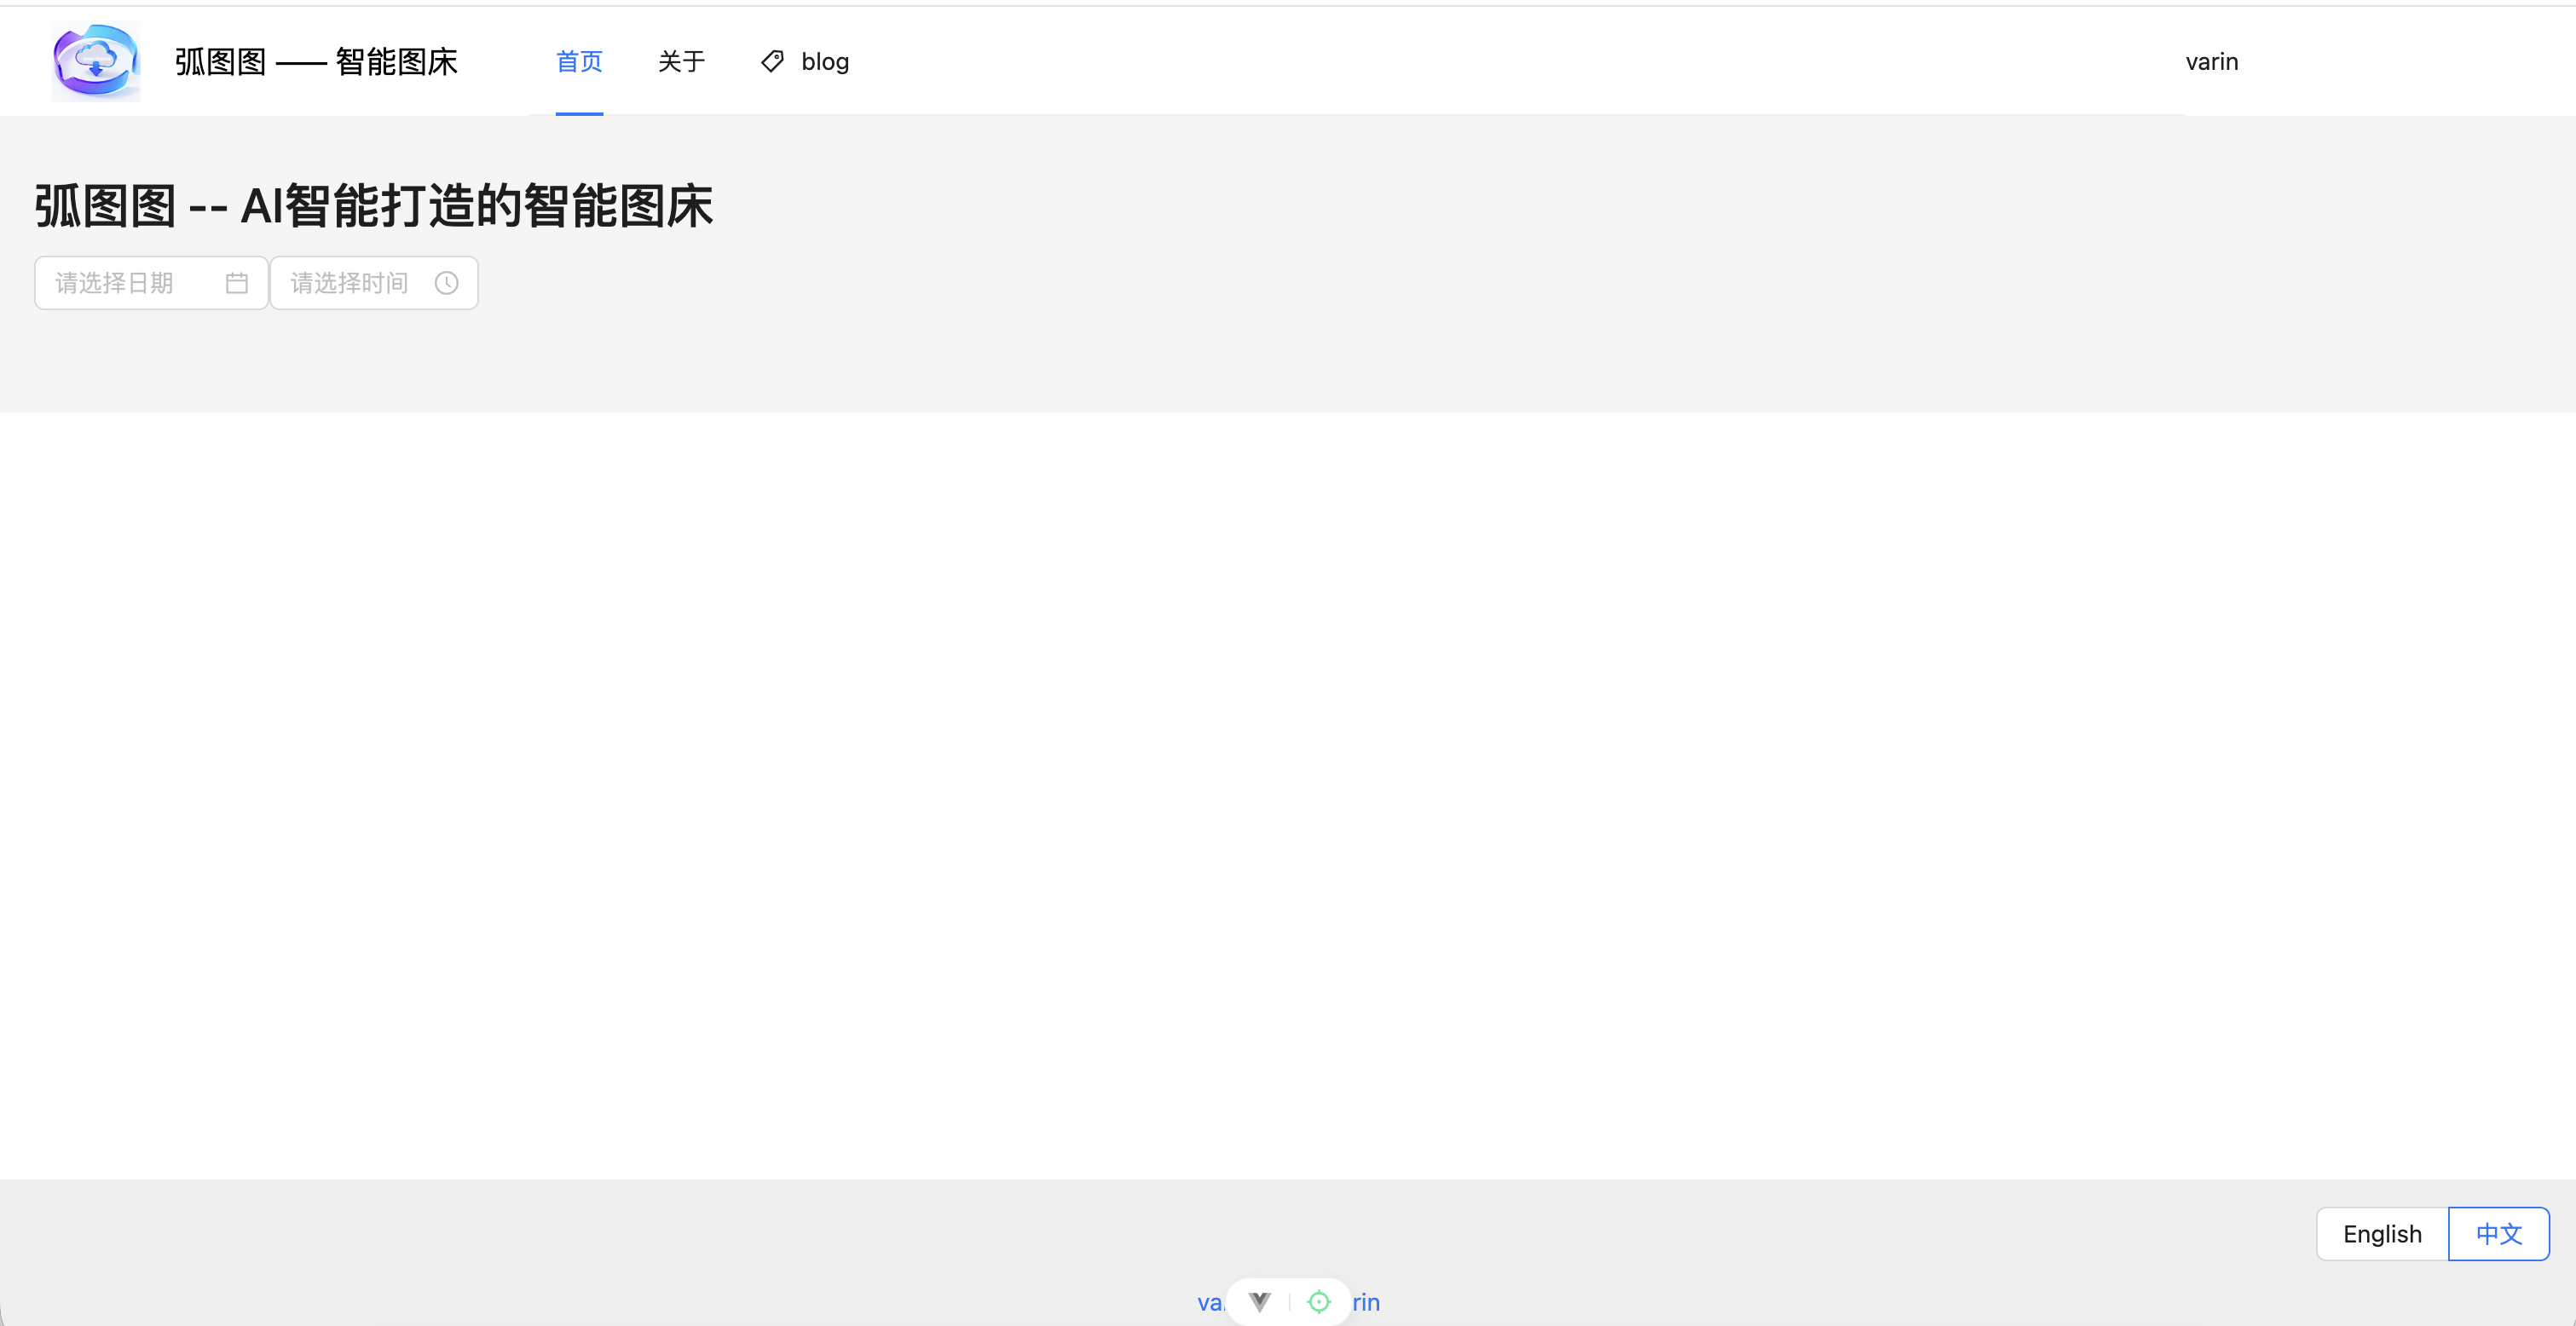
loginUserStore.getLoginUser() 获取到登录用户对象12. 页面国际化设置
ant组件提供的组件可以切换不同的语言,本项目实现了中英文切换
- 国际化说明文档:https://antdv.com/docs/vue/i18n-cn
- 使用组件:a-config-provider https://antdv.com/components/config-provider-cn
- 修改页面:BasicLayout.vue
<!--默认前端模版--><template><div id="basic-page"><a-config-provider :locale="locale === 'en' ? enUS : zhCN"><a-layout style="min-width: 100vh"><a-layout-header class="headerStyle"><global-header></global-header></a-layout-header><a-layout-content class="contentStyle"><router-view></router-view></a-layout-content><a-layout-footer class="footerStyle"><div style="margin-bottom: 16px;text-align: right"><a-radio-group v-model:value="locale"><a-radio-button key="en" :value="enUS.locale">English</a-radio-button><a-radio-button key="cn" :value="zhCN.locale">中文</a-radio-button></a-radio-group></div><a href="http:www.varin.cn" target="_blank">varin.cn By Varin</a></a-layout-footer></a-layout></a-config-provider></div>
</template><script setup lang="ts">import GlobalHeader from '@/components/GlobalHeader.vue'import { ref, watch } from 'vue';import enUS from 'ant-design-vue/es/locale/en_US';import zhCN from 'ant-design-vue/es/locale/zh_CN';import dayjs from 'dayjs';import 'dayjs/locale/zh-cn';dayjs.locale('en');const locale = ref(enUS.locale);watch(locale, val => {dayjs.locale(val);});</script><style scoped>#basic-page {width: 100%;}#basic-page .headerStyle  {padding-inline: 0px;margin-bottom: 16px;color:unset;background-color: white;}#basic-page .contentStyle{margin-bottom: 40px;padding:20px;}#basic-page .footerStyle{padding:16px;background-color: #efefef;position: fixed;bottom: 0;left:0;right:0;text-align: center;}
</style>
- 预览效果-英文
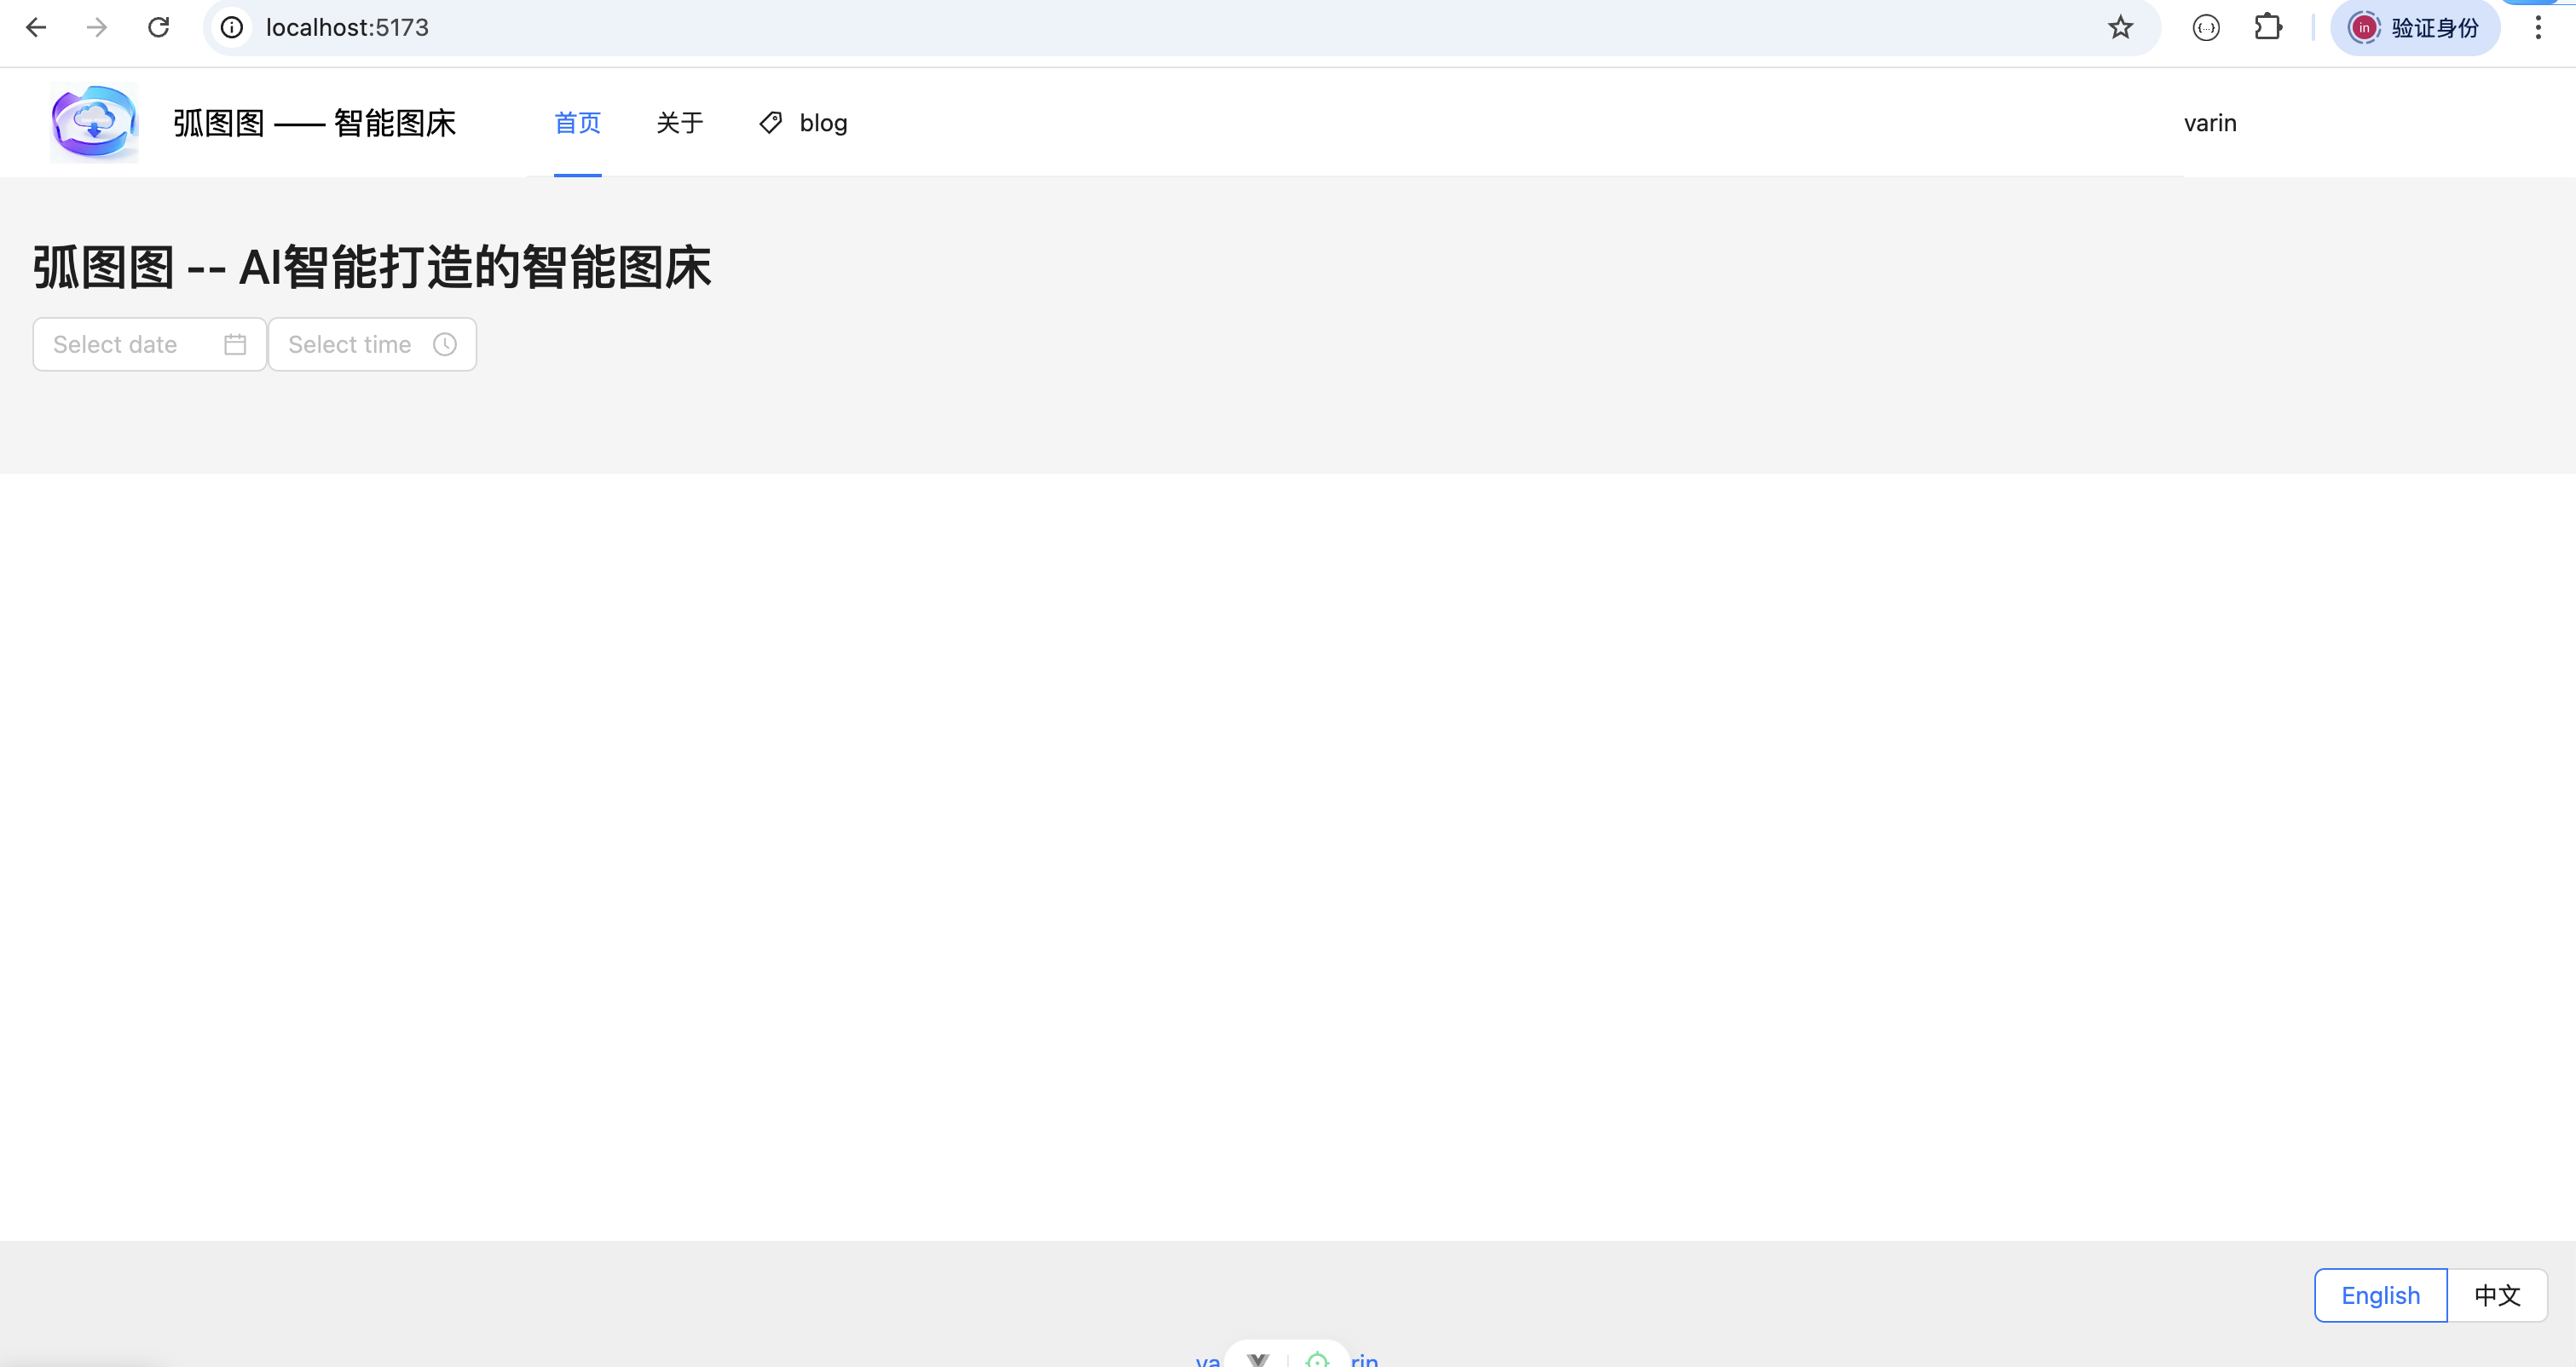
- 预览效果-中文