spiderdemo第四题
正文
分析
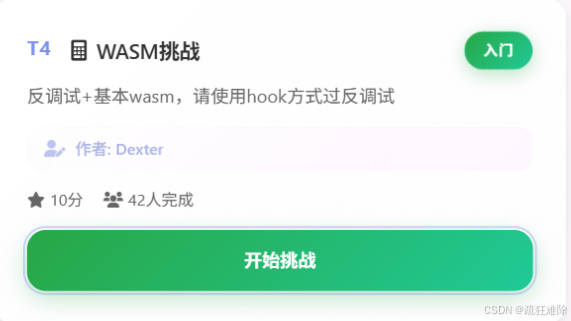
spiderdemo第四题是一道wasm的题
看到wasm,笔者知道这个流程
- 对某个wasm文件发送请求
- 初始化wasm
- 调用wasm里面的函数
必然如此。
题目还需要使用hook反调试,直言的说,笔者不会使用hook方式,爬虫技术不行,0.0
但是并不代表过不了。
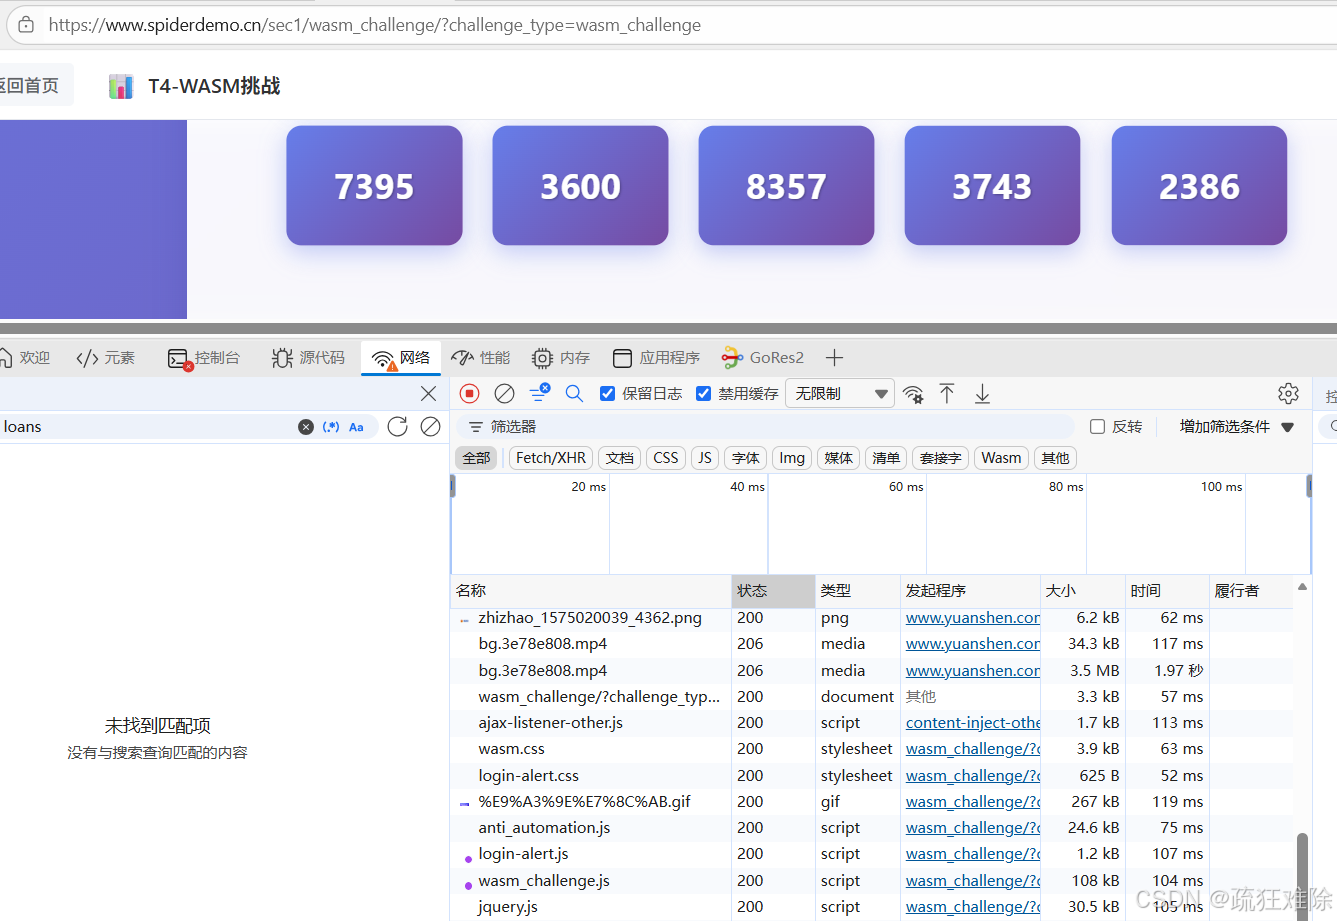
首先进入页面,打开开发者工具
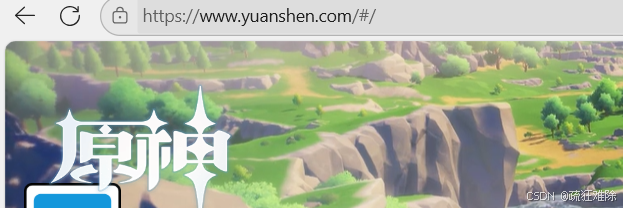
T4-WASM挑战![]() https://www.spiderdemo.cn/sec1/wasm_challenge/?challenge_type=wasm_challenge就会跳转到原神页面
https://www.spiderdemo.cn/sec1/wasm_challenge/?challenge_type=wasm_challenge就会跳转到原神页面
那么使用ctrl+u,查看网页源代码
view-source:https://www.spiderdemo.cn/sec1/wasm_challenge/?challenge_type=wasm_challenge
发现是看得到源代码,那很好
在源代码里面可以看到关键信息
<script>/*** 获取指定页面数据(集成 WASM 加密验证)* @param {number} page - 页码* @param {string} type - 挑战类型 (card.json中的id)* @returns {Object} 页面数据*/async function apiGetPageData(page, type = challengeType) {let url = `/sec1/api/wasm_challenge/page/${page}/?challenge_type=${encodeURIComponent(type)}`;let headers = { 'Content-Type': 'application/json' };// 如果 WASM 已准备好,添加加密验证if (window.wasmReady && window.encrypt_simple) {try {const timestamp = Math.floor(window.get_timestamp() / 1000).toString();const verifyString = `${type}_page_${page}`;const wasmAuth = window.encrypt_simple(verifyString, timestamp);// 添加 WASM 验证参数到 URLurl += `&wasm_auth=${encodeURIComponent(wasmAuth)}`;headers['X-WASM-Timestamp'] = timestamp;headers['X-WASM-Page'] = page.toString();} catch (error) {console.warn('⚠️ WASM 加密失败,继续无验证请求:', error);}}try {const data = await $.ajax({url: url,method: 'GET',headers: headers,dataType: 'json'});return data;} catch (xhr) {const data = xhr.responseJSON || {};const errorMessage = data.error || `HTTP ${xhr.status}: ${xhr.statusText}`;throw new Error(errorMessage);}}</script>分析一下,假设对第二页发送请求
首先可以确定暂时的url如下
https:://spiderdemo.cn//sec1/api/wasm_challenge/page/2/?challenge_type=${encodeURIComponent(type)}
其次,可以发现wasm里面的函数是encrypt_simple,
需要传入两个参数,一个是verifyString,是${type}_page_${page}这个字符串,另一个是
秒级别的时间戳,说白了10位的时间戳。
加密后的结果,变成wasm_auth对应的值,放到url里面
需要请求头的参数进行加密
headers['X-WASM-Timestamp'] = timestamp;
headers['X-WASM-Page'] = page.toString();
这两个很好处理。
那么现在只需要获取到encrypt_simple这个算法里面的东西,就可以了。
后面笔者又经过几个小时的分析,后面笔者又去搞的反调试,虽然成功了,但感觉没必要。
再次分析
在源代码里面搜索wasm

笔者看到了这个东西,那问题不就解决了,后面不就从从容容、游刃有余了
不需要过反调试。
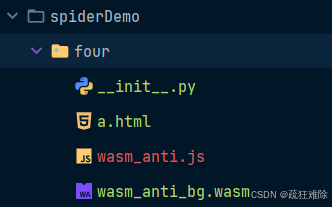
直接下载这个js文件
spiderdemo.cn//static/pkg/wasm_anti.js![]() https://www.spiderdemo.cn//static/pkg/wasm_anti.js新建一个a.html,和js文件在同一目录下,如下
https://www.spiderdemo.cn//static/pkg/wasm_anti.js新建一个a.html,和js文件在同一目录下,如下
<!DOCTYPE html>
<html lang="en">
<head><meta charset="UTF-8"><title>Title</title>
</head><script type="module">import init, { encrypt_simple, aes_encrypt, get_timestamp } from './wasm_anti.js';init().then(() => {window.encrypt_simple = encrypt_simple;window.aes_encrypt = aes_encrypt;window.get_timestamp = get_timestamp;window.wasmReady = true;console.log('🔐 WASM 加密模块已就绪');}).catch(err => {console.error('❌ WASM 加载失败:', err);window.wasmReady = false;});</script>
<body></body>
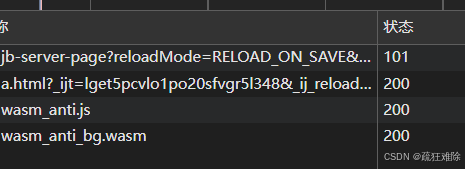
</html>在webstorm或者pycharm运行,
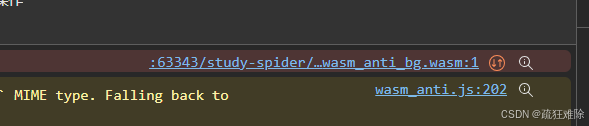
发现这个报错
说明,wasm文件的名字叫wasm_anti_bg.wasm。
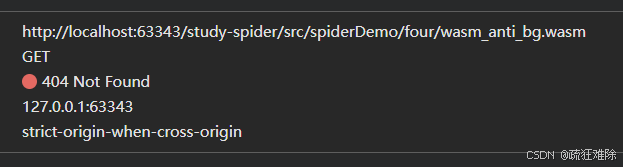
然后,对访问对应的文件
https://www.spiderdemo.cn//static/pkg/wasm_anti_bg.wasm![]() https://www.spiderdemo.cn//static/pkg/wasm_anti_bg.wasm就可以获取wasm文件,放到和wasm_anti.js同一目录下
https://www.spiderdemo.cn//static/pkg/wasm_anti_bg.wasm就可以获取wasm文件,放到和wasm_anti.js同一目录下
然后,运行a.html
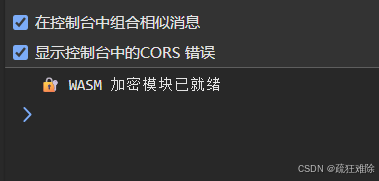
完美。
哈哈哈哈哈哈,不需要反调试。
编写爬虫
写爬虫最麻烦的是逆向,已经完成了逆向,后面不必多言
笔者还是使用和第二题一样的操作
关于spiderdemo第二题的奇思妙想-CSDN博客![]() https://blog.csdn.net/qq_63401240/article/details/153792789?spm=1001.2014.3001.5501修改a.html文件的内容
https://blog.csdn.net/qq_63401240/article/details/153792789?spm=1001.2014.3001.5501修改a.html文件的内容
<!DOCTYPE html>
<html lang="en">
<head><meta charset="UTF-8"><title>Title</title>
</head><script type="module">import init, { encrypt_simple, aes_encrypt, get_timestamp } from './wasm_anti.js';init().then(() => {window.encrypt_simple = encrypt_simple;window.aes_encrypt = aes_encrypt;window.get_timestamp = get_timestamp;window.wasmReady = true;console.log('🔐 WASM 加密模块已就绪');}).catch(err => {console.error('❌ WASM 加载失败:', err);window.wasmReady = false;});</script><script>function get_ok(){return window.wasmReady}function get_auth(page,timestamp){let type="wasm_challenge"let verifyString=`${type}_page_${page}`return window.encrypt_simple(verifyString, timestamp);}</script>
<body>
</body>
</html>
爬虫如下
from httpx import Client
import time
from DrissionPage import ChromiumPagehtml = ChromiumPage()
html.get("http://localhost:63343/..../a.html")while True:ready = html.run_js('return get_ok();')print(ready)if ready is True:breakcookies = {'sessionid':'你的session_id'
}
total=0
for page_number in range(1,101):timestamp = str(int(time.time()))url=f'https://www.spiderdemo.cn/sec1/api/wasm_challenge/page/{page_number}/'wasm_auth = html.run_js(f'return get_auth({page_number},"{timestamp}");')headers = {'Content-Type': 'application/json','X-Wasm-Page': str(page_number),'X-Wasm-Timestamp': str(timestamp),'user-agent': 'Mozilla/5.0 (Windows NT 10.0; Win64; x64) AppleWebKit/537.36 (KHTML, like Gecko) Chrome/141.0.0.0 Safari/537.36'}params={'challenge_type':'wasm_challenge','wasm_auth':wasm_auth}response = Client().get(url=url,params=params,cookies=cookies, headers=headers)total+=sum(response.json()['page_data'])
print(total)
结果如下
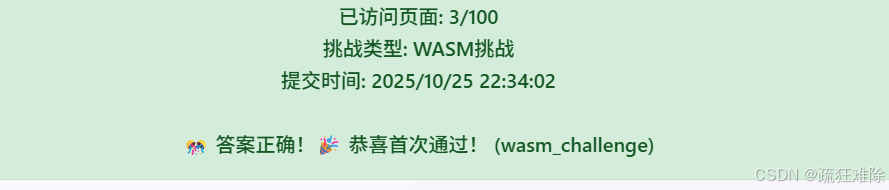
成功,哈哈哈哈哈哈
没有逆向js,没有逆向wasm,没有用hook。
反调试分析
还是从源代码里面入手,可以发现引入的外部js文件
可以查看四个js文件,那么显然最关键的文件就是wasm_challenge.js了。
因此,直接下载这个js文件
spiderdemo.cn/static/js/wasm_challenge.js![]() https://www.spiderdemo.cn/static/js/wasm_challenge.js分析一下这个文件,笔者使用webstorm
https://www.spiderdemo.cn/static/js/wasm_challenge.js分析一下这个文件,笔者使用webstorm
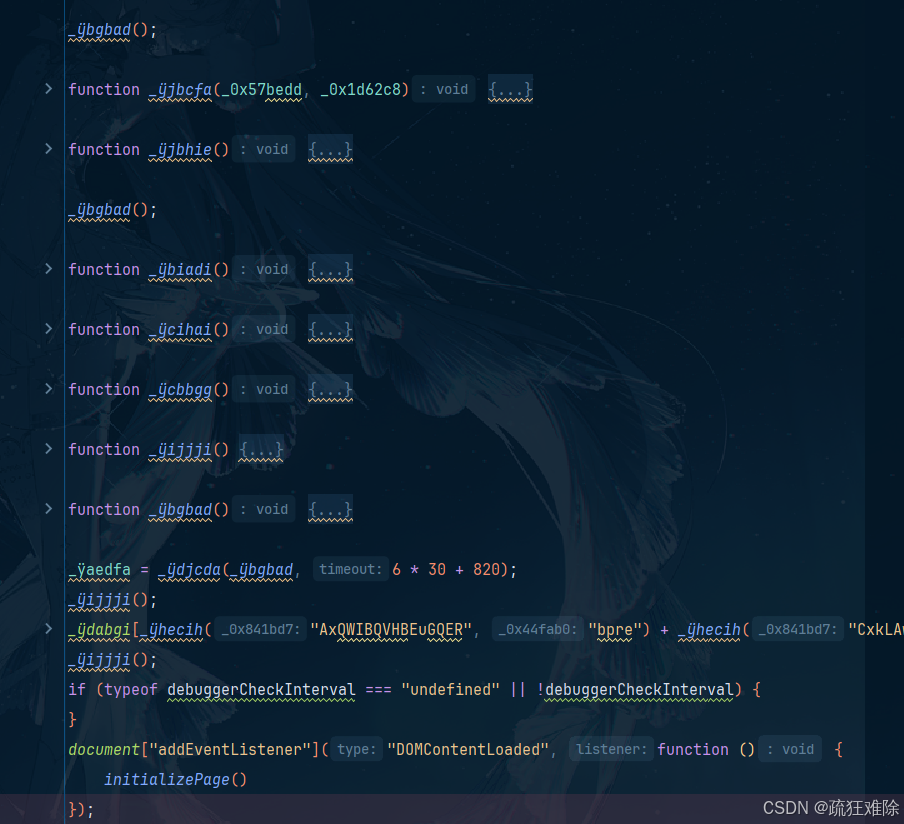
首先经过格式化这个js文件,可以在文件的末尾,发现一些东西

这里面好像有debug的事情 笔者看到setInterveral,还有什么debuggerCheckInterval
解决反调试和混淆
解决方法
直言的说,这里笔者搞了几个小时。。。。。。。。。
笔者使用本地替换的方式解决这个跳转问题,但是,笔者删除一些代码
if (typeof debuggerCheckInterval === "undefined" || !debuggerCheckInterval) {
}
document["addEventListener"]("DOMContentLoaded", function () {initializePage()
});
把那些全部删除了,还是不行,会跳转,后来笔者还去解混淆了,笔者还想看看这里是否对wasm文件发送了请求,最后没在这个wasm_challenge.js里面。
笔者就一直对跳转感到疑问,为什么??为什么?明明已经删除了
直言的说,笔者看到这篇文章
Python爬虫入门:spiderdemo题解及详细思路(入门篇) - 吾爱破解 - 52pojie.cn![]() https://www.52pojie.cn/thread-2066443-1-1.html笔者明白了。
https://www.52pojie.cn/thread-2066443-1-1.html笔者明白了。
首先,在webstrom里面,首先ctrl+shift+“+”快捷键是展开全部函数,ctrl+shift+“-”是折叠全部函数
然后笔者使用全部折叠
笔者发现这个_ÿijjji和_ÿbgbad这两个函数是执行了的,因此,把这两个去掉
实际上笔者是看了前面文章大佬才知道这是反调试的函数,总之,直接把执行函数去掉
如下
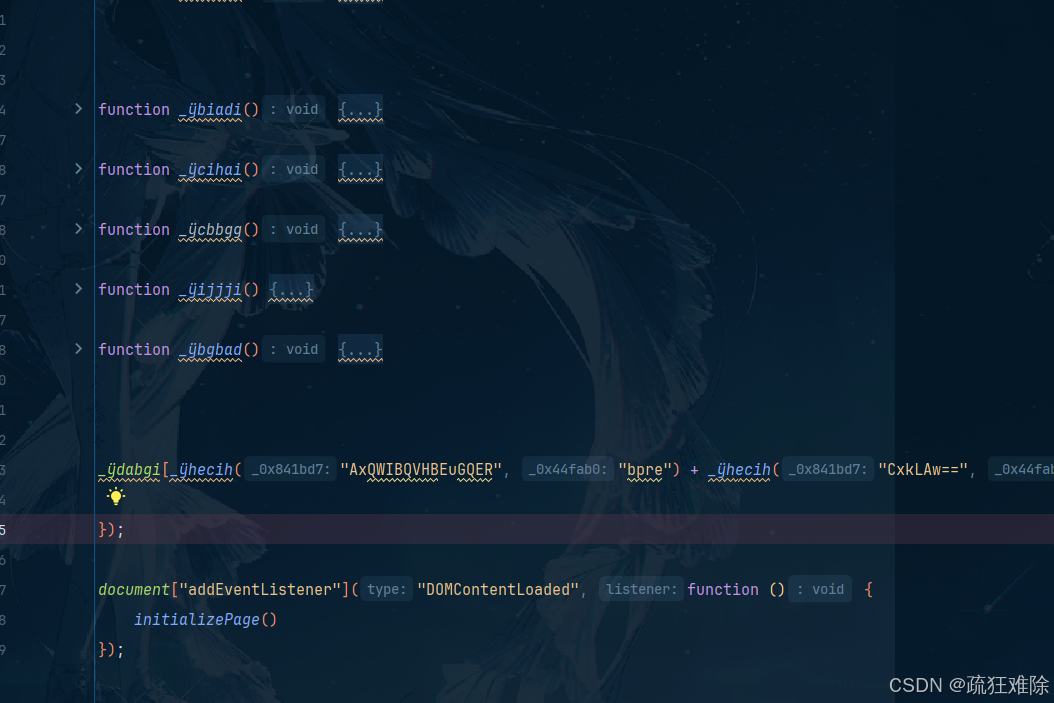
成功
解混淆_ÿhecih函数
那个wasm_challenge.js里面又许多函数,其中有个关键的函数_ÿhecih,笔者对其解混淆过
应该怎么说?是直接给出答案,还是一步一步来,笔者还是选择一步一步来,慢慢来,不慌
首先,把需要解混淆的代码放到一个新的文件——g.js
function _ÿhecih(_0x841bd7, _0x44fab0) {let _0x1f1cc1 = 3 + 1;for (let _0x536a0d = 0 - 0; _0x536a0d < 0 - -5; _0x536a0d++) {switch (_0x1f1cc1) {case 0 + 2: {return _0x3bc79e}case 1 * 1 + 2: {for (var _0x39d32e = 0 * 0 + 0; _0x39d32e < _0x841bd7["le" + "ngth"]; _0x39d32e++) {_0x3bc79e += _ÿdijia["fromCharCod" + "e"](_0x841bd7["cha" + "rCodeAt"](_0x39d32e) ^ _0x44fab0["char" + "CodeAt"](_0x39d32e % _0x44fab0["le" + "ngth"]))}_0x1f1cc1 += -(1 - 0);break}case 1 - 0: {var _0x3bc79e = "";_0x1f1cc1 += 0 + 2;break}case 0 * 0 + 4: {try {_0x841bd7 = _ÿgdjhd(_ÿdddej(_ÿjhbia(_0x841bd7)))} catch (_0x7648cb) {_0x841bd7 = _ÿjhbia(_0x841bd7)}_0x1f1cc1 += -(0 * 1 + 3);break}}}
}
慢慢来
webstrom在windows上的搜索是ctrl+f,webstrom在windows上的替换是ctrl+r
- 在新的文件中,搜索 _0x1f1cc1,发现有5个,全局替换为total,或者其他名字。
- 计算total在不同case情况下的结果
- _ÿgdjhd在wasm_challenge.js中搜索,发现是decodeURIComponent,全部替换
- _ÿdddej在wasm_challenge.js中搜索,发现是escape,全部替换
- _ÿjhbia在wasm_challenge.js中搜索,发现是atob,全部替换
- 最外层for循环中的_0x536a0d搜索并全部替换成变量i,计算值
- case 4的for循环中的_0x39d32e搜索并全部替换成变量j,计算值
- 合并字符串
现在解混淆之后的结果
function _ÿhecih(_0x841bd7, _0x44fab0) {let total = 4;for (let i = 0; i < 5; i++) {switch (total) {case 2: {return _0x3bc79e}case 3: {for (var j =  0; j < _0x841bd7["length"]; j++) {_0x3bc79e += String["fromCharCode"](_0x841bd7["charCodeAt"](j) ^ _0x44fab0["charCodeAt"](j % _0x44fab0["length"]))}total += -1;break}case 1: {var _0x3bc79e = "";total += 2;break}case 4: {try {_0x841bd7 = decodeURIComponent(escape(atob(_0x841bd7)))} catch (_0x7648cb) {_0x841bd7 = atob(_0x841bd7)}total += -3;break}}}
}
测试一下
let a=_ÿhecih("EBcVAQ==", "ccgh")
console.log(a)
能够解出来,是否正确就不敢确定,没报错,继续
- 修改函数_ÿhecih名为unmaskString
- 第一个参数为cipher,全局替换
- 第二个参数为key,全局替换
- total += -3;就是1,把case 1里面的内容放到case 4中,并修改_0x3bc79e名字为return_value
- total += 2就是3,把case 3里面的内容放到case 4中
- 其他同理,最后整理代码,去掉total,i,之类的中间变量
最后结果如下
function unmaskString(cipher, key) {try {cipher = decodeURIComponent(escape(atob(cipher)))} catch (_0x7648cb) {cipher = atob(cipher)}var return_value = "";for (var j =  0; j < cipher.length; j++) {return_value += String.fromCharCode(cipher.charCodeAt(j) ^ key.charCodeAt(j % key.length))}return return_value
}
行,再次测试
没问题。
其他函数类似的,解混淆。
测试一下
对_ÿaieic函数解一下混淆
如下
function _ÿaieic(_0x2e81e6) {var _0x31ab5c = {"header_check": _ÿhecih("6K6f5rCh5aWV", "hcab") + _ÿhecih("5qKm5rS45o295om6", "fslb"),"number_challenge": _ÿhecih("5Yud5oGl5pSI5ayl", "udxr") + _ÿhecih("5rC25ZOr5o2h5omw", "tgph"),"js_challenge": _ÿhecih("Pg==", "thhv") + _ÿhecih("Jea2nOa2vuimm+afpuaNuuaJoA==", "vkxx"),"wasm_challenge": _ÿhecih("IDEl", "wpvi") + _ÿhecih("OOaNvuaJqQ==", "uoqn")};return _0x31ab5c[_0x2e81e6] || _0x2e81e6
}把_ÿhecih变成unmaskString,并执行

结果如下
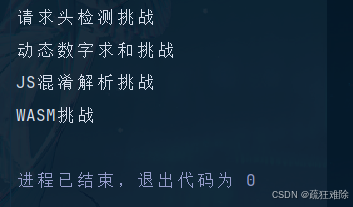
修改一下变量名和函数名,结果如下
function get_title(index) {let  map = {"header_check": "请求头检测挑战","number_challenge":  "动态数字求和挑战","js_challenge": "JS混淆解析挑战","wasm_challenge": "WASM挑战"};return map[index] || index
}这个_ÿaieic函数就是笔者自定义的get_title函数。
哈哈哈哈哈哈
就这样吧!!!!!!