【Java链表】从概念结构到单向链表创建,增删查改全流程实战

🎁个人主页:User_芊芊君子
🎉欢迎大家点赞👍评论📝收藏⭐文章
🔍系列专栏:Java.数据结构


【前言】
你是否在数据结构的学习中对“链表”感到困惑?它的概念为何如此重要?带头不带头、循环不循环、双向单向这些结构分类又有何区别?在实际开发中,单向链表的创建、打印、增删查改等操作该如何实现? 本文将带你走进链表的世界。
文章目录:
- 一、链表的概念
- 二、链表的结构
- 1.带头不带头
- 2.循环不循环
- 3.双向单向
- 三、单向链表实现
- 1.创建链表
- 2.打印链表
- 2.求链表长度
- 3.查找key方法
- 4.头插法
- 5.尾插法
- 6.指定位置插入
- 7.删除值为key的节点
- 8.删除所有值为key的节点
- 9.清空链表
一、链表的概念
- 相比于ArrayList,链表更适合插入和删除数据;
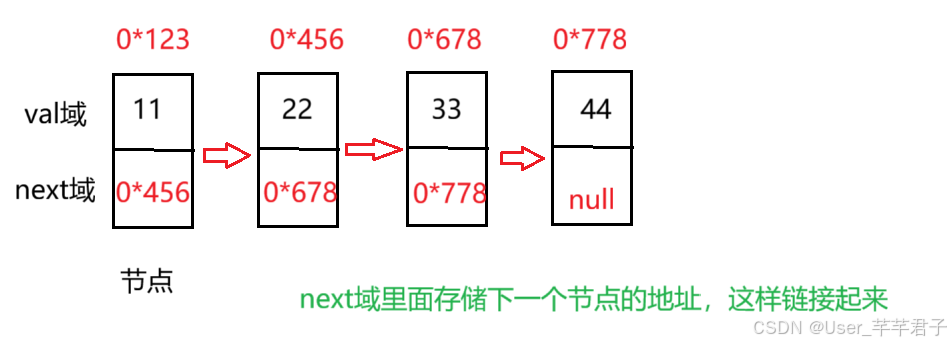
- 链表是一种物理存储结构上非连续存储结构,数据元素的逻辑顺序是通过链表中的引用链接次序实现的,说人话就是它的内存地址不一定连续,逻辑上是连续的,就相当于火车,一节一节的被链接起来
二、链表的结构
链表分为带头不带头,单向双向,循环不循环,一共八种,但我们用的就是两种:
- 单向,不带头,非循环
- 双向,不带头,非循环
1.带头不带头
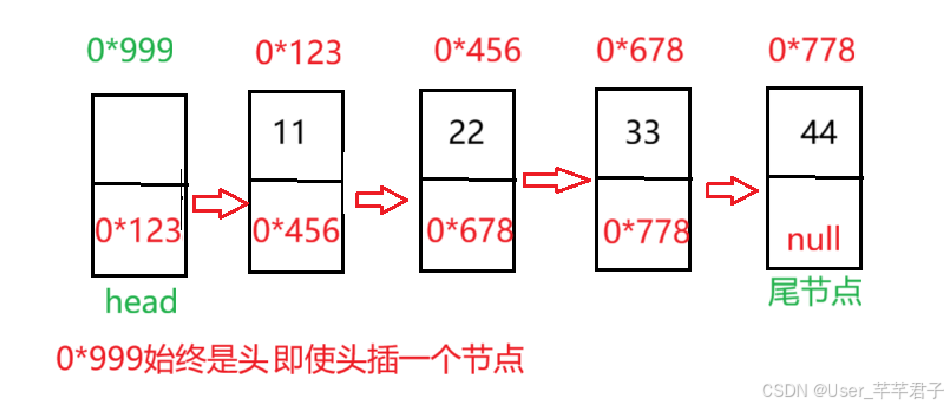
带头:即使在前面头插一个节点,它的头依然是0*999,它不存储数据,用来指向第一个存储数据有效的节点
不带头:头插节点就变成了它头
2.循环不循环
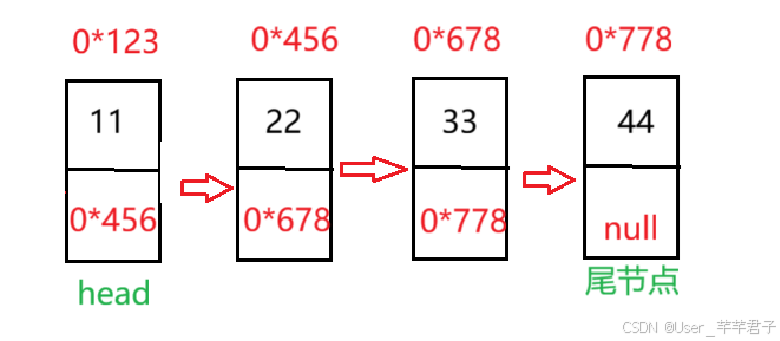
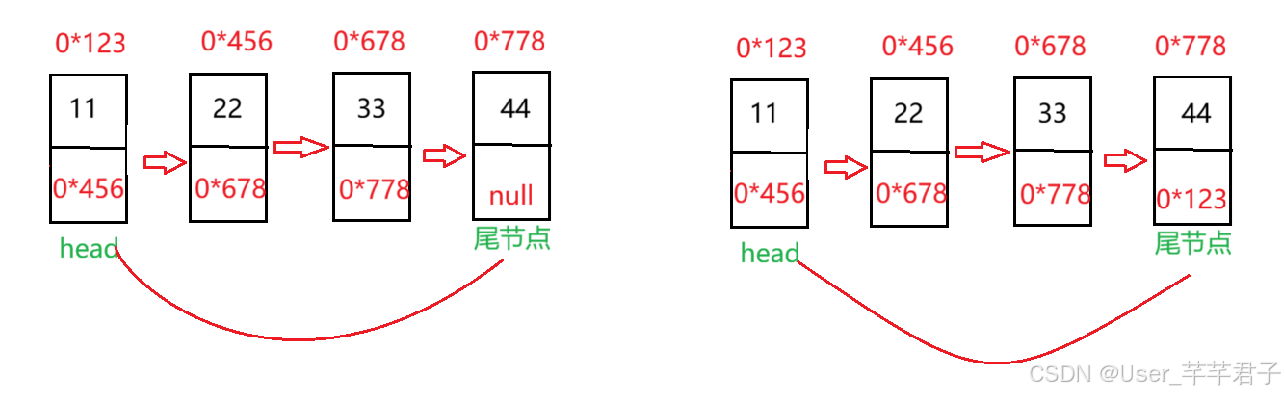
非循环:最后一个节点next域为null;
循环:最后一个节点next域为第一个节点的地址,形成闭环
3.双向单向
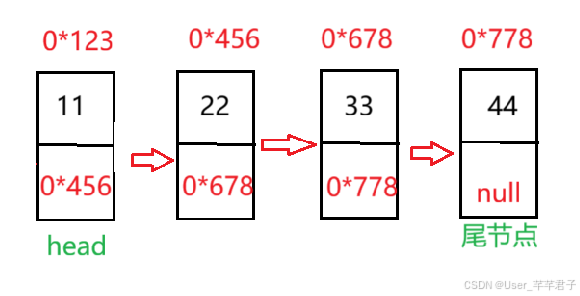
单向:每个节点只包含走向下一个节点的地址,只能从前往后遍历
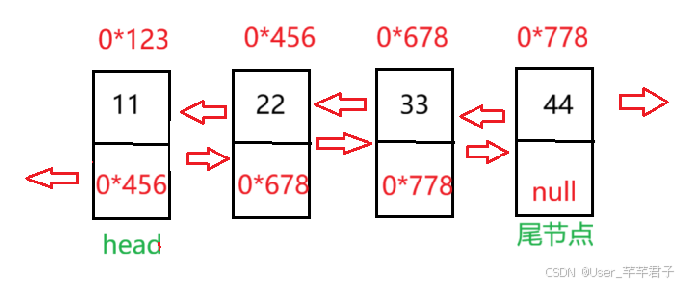
双向:每个节点包含两个地址,它可以从任意节点从前或者往后走
三、单向链表实现
链表由节点组成,每个节点包含数据域和next域,可以将其定义为内部类,然后在类外定义head变量,因为head属于链表的属性
//定义静态内部类来表示节点对象static class ListNote{//数据public int val;//节点的引用public ListNote next;public ListNote(int val){this.val = val;}}//存储链表的头节点的引用public ListNote head;
1.创建链表
创建5个节点,通过node1.next = node2这种方式将一个个节点连接起来,然后head = node1,head引用指向node1引用指向的内容,执行完后系统会回收局部变量node…剩下一个head,对象不会被回收
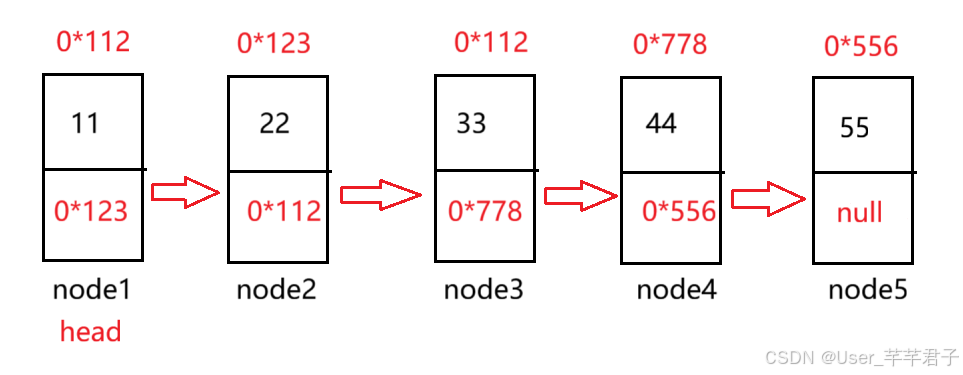
public void createList(){ListNote note1 = new ListNote(11);ListNote note2 = new ListNote(22);ListNote note3 = new ListNote(33);ListNote note4 = new ListNote(44);ListNote note5 = new ListNote(55);note1.next = note2;note2.next = note3;note3.next = note4;note4.next = note5;head = node1;}
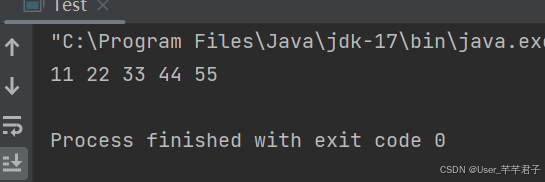
2.打印链表
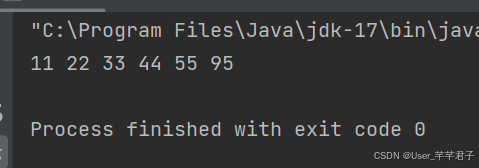
当head不等于空,进入循环,打印然后head.next向后遍历,直到head等于空,遍历完成
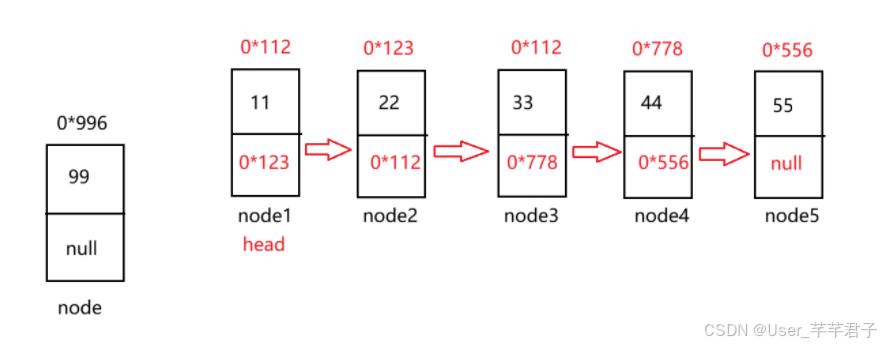
【注意】结束条件是head != null,如果是head.next != null,就打印不到最后一个节点的值,如下图,head.next==null,不进入循环打印不到55
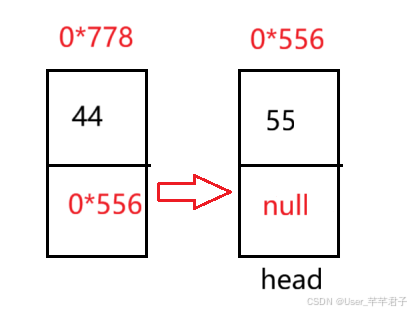
public void display() {ListNote cur = this.head;//避免head为空,找不到链表while (head != null){System.out.println(head.val+" ");head =head.next;}System.out.println();}
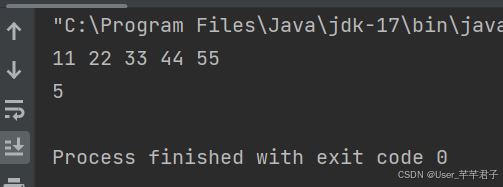
2.求链表长度
public int size() {int count = 0;ListNote cur = this.head;while (cur != null){count++;cur = cur.next;}return count;}
3.查找key方法
public boolean contains(int key) {ListNote cur = this.head;while (cur != null){if (cur.val == key){return true;}cur =cur.next;}return false;}
4.头插法
首先创建一个新的节点,99,next为null。要插入进去,先让新节点与后面的节建立联系,note.next = head,然后让head指向新的节点,让head = note,顺序不能打乱,所有的插入都要先绑住后边
public void addFirst(int data) {ListNote note = new ListNote(data);note.next = head;head = note;}
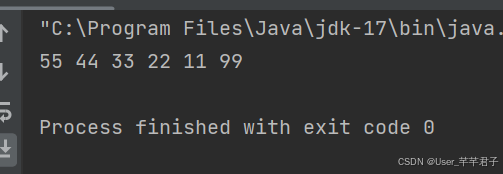
【注意】可以通过头插法直接创建列表(打印出来顺序是倒着的)
mySingleList.addFirst(99);mySingleList.addFirst(11);mySingleList.addFirst(22);mySingleList.addFirst(33);mySingleList.addFirst(44);mySingleList.addFirst(55);mySingleList.display();
5.尾插法
在链表的最后添加一个新的节点,只需要找到最后一个节点,让最后一个节点的next等于新的节点的地址,cur.next = note,但需要考虑一个问题,如果链表本来就是空的,head为空,需要判断一下,让head直接指向node,return.

public void addLast(int data) {ListNote note = new ListNote(data);//如果链表是空的,插入的节点就是第一个节点if (head == null){head = note;return;}//找到链表的尾巴ListNote cur = head;while (cur.next != null){cur = cur.next;}//cur指向的节点就是尾巴节点cur.next = note;}
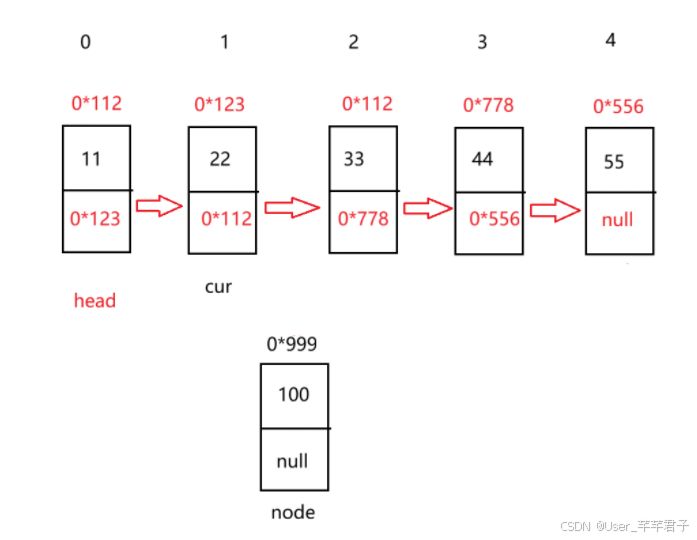
6.指定位置插入
index位置分为三种:头,尾,中间
index为0,使用头插法
index等于链表长度,使用尾插法
中间位置:找到插入位置的前一个节点,先然后让新节点的next等于前一个节点的next(也就是要插入位置那个节点的地址),然后让新节点的next等于node
如果位置不合法,写一个异常
public void addIndex(int index, int data) {checkPos(index);if(index == 0){addFirst(data);return;}if (index == size()){addLast(data);return;}ListNote cur = findIndex(index);ListNote note = new ListNote(data);note.next = cur.next;cur.next = note;}private ListNote findIndex(int index){ListNote cur = head;int count = 0;while (count != index-1){cur = cur.next;count ++;}return cur;}private void checkPos(int index){if(index < 0 || index > size()){throw new CheckPosException("index位置不合法"+index);}}
7.删除值为key的节点
判断有没有key的节点,没有直接return,如果有就找到这个节点的前一个节点,让前一个节点链接它后面的节点,cur.next = del.next,此时,它就会被回收
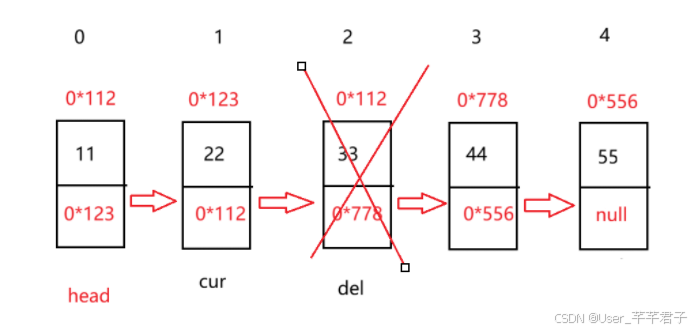
public void remove(int key) {if(head ==null){System.out.println("链表为空,无法删除");return;}//删除头节点,判断,让head跳到下一个节点if(head.val == key){head = head.next;return;}//删除其他节点ListNote cur = search(key);if(cur == null){System.out.println("没有"+key);return;}ListNote del = cur.next;cur.next = del.next;}//找key的前一个节点,返回curprivate ListNote search(int key){ListNote cur = head;while (cur != null){if(cur.next.val == key){return cur;}cur = cur.next;}return null;}
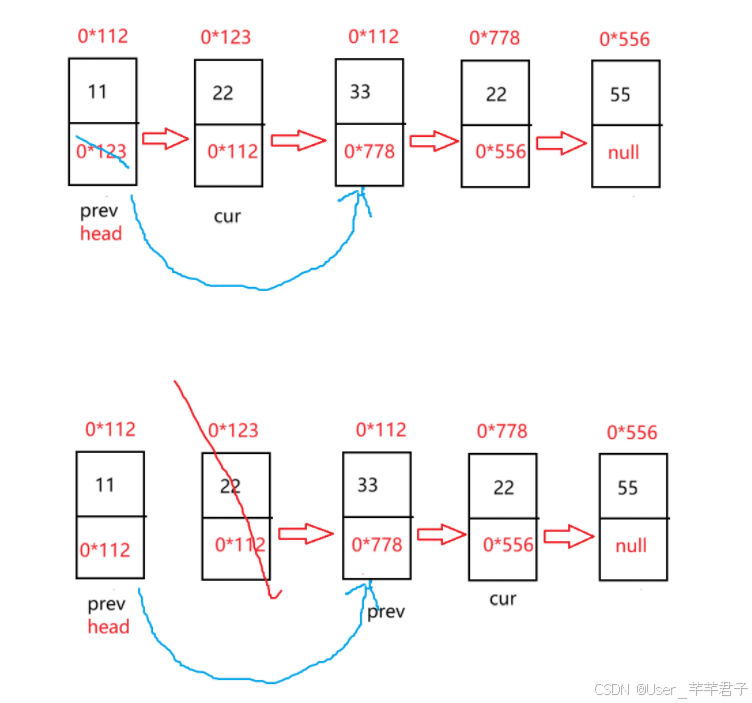
8.删除所有值为key的节点
- 先创建cur表示要删除的节点,prev表示前一个节点。当cur等于key时,让prev的next去指向cur的next,cur继续往后走;不等于key还是继续往后走,cur=cur.next,prev=cur直到找完所有key。
- 不过头节点需要注意,不能用先用if判断,判断完第一个,下一个可能还是key,要将后面key找完,再判断头节点是不是key,是就让head指向head.next(下一个节点)或者一开始使用while循环判断head是不是key
public void removeAllKey(int key) {if(head == null){return;}ListNote prev = head;ListNote cur = head.next;while (cur!=null){if(cur.val == key){prev.next = cur.next;cur = cur.next;}else {prev = cur;cur = cur.next;}}if(head.val == key){head = head.next;}}
9.清空链表
- 直接让head == null,后面节点无法被引用,都被回收了
- 或者制空每个节点的val和next,先创建一个curN放在第二个节点,保存信息,(否则cur.next被制空后后面节点找不到了)

public void clear() {this.head = null;}
public void clear() {ListNote cur = head;while (cur!=null){ListNote curN = cur.next;cur.next = null;cur = curN;}head = null;}
【总结】
通过本文的学习,我们系统地梳理了链表的概念,明确了它是一种适合频繁插入、删除操作的数据结构;深入分析了链表的三类核心结构(带头/不带头、循环/不循环、双向/单向),理解了不同结构的适用场景;并针对单向链表,从创建到清空,完整掌握了九大操作的实现逻辑与方法