调用apisix admin 接口创建资源
一、Route(路由)
下面是我k8s集群apisix service相关的信息,这里就直接调用apisix-admin 的service cluster ip 10.244.211.134
root@10-55-2-40:~/apisix-test# kubectl  get svc -n apisix
NAME                        TYPE        CLUSTER-IP       EXTERNAL-IP   PORT(S)                      AGE
apisix-admin                ClusterIP   10.244.211.134   <none>        9180/TCP                     26d
apisix-dashboard            NodePort    10.244.159.148   <none>        80:30507/TCP                 26d
apisix-etcd                 ClusterIP   10.244.187.100   <none>        2379/TCP,2380/TCP            26d
apisix-etcd-headless        ClusterIP   None             <none>        2379/TCP,2380/TCP            26d
apisix-gateway              NodePort    10.244.247.121   <none>        80:32080/TCP,443:32443/TCP   26d
apisix-ingress-controller   ClusterIP   10.244.187.252   <none>        8080/TCP
创建路由
将客户端的请求转发至 httpbin.org(这个网站能测试 HTTP 请求和响应的各种信息)。
通过下面的命令,你将创建一个路由,把请求
http://10.55.2.40:32080/ip 转发至 httpbin.org/ip:curl -i "http://10.244.211.134:9180/apisix/admin/routes" -H "X-API-KEY: edd1c9f034335f136f87ad84b625c8f1" -X PUT -d '
{"id": "getting-started-ip","uri": "/ip","upstream": {"type": "roundrobin","nodes": {"httpbin.org:80": 1}}
}'HTTP/1.1 201 Created
Date: Tue, 14 Oct 2025 06:35:16 GMT
Content-Type: application/json
Transfer-Encoding: chunked
Connection: keep-alive
Server: APISIX/3.14.0
Access-Control-Allow-Origin: *
Access-Control-Allow-Credentials: true
Access-Control-Expose-Headers: *
Access-Control-Max-Age: 3600
X-API-VERSION: v3{"key":"/apisix/routes/getting-started-ip","value":{"uri":"/ip","update_time":1760423716,"id":"getting-started-ip","create_time":1760423716,"upstream":{"type":"roundrobin","nodes":{"httpbin.org:80":1}}}}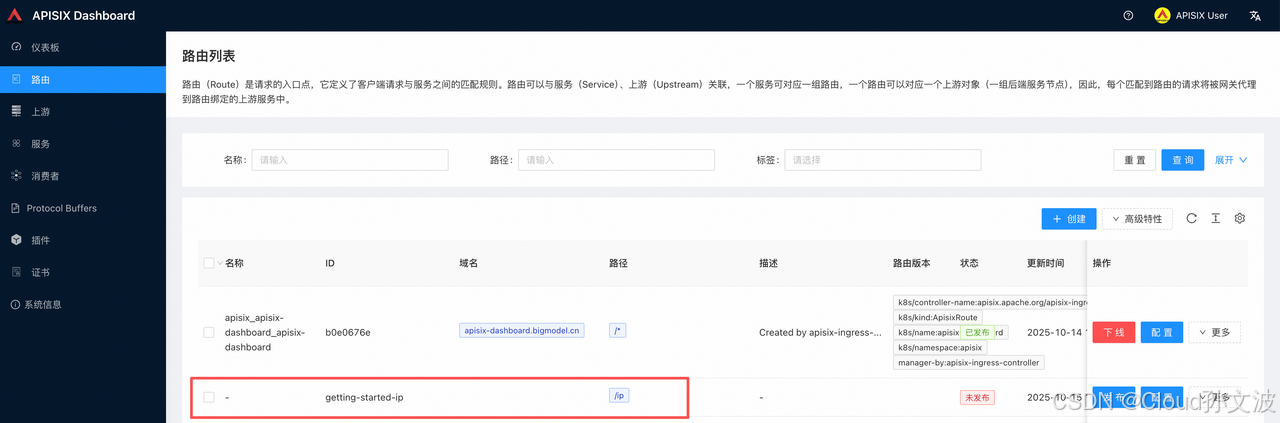
测试请求
我这里用的是nodePort
➜  ~ curl 10.55.2.40:32080/ip{"origin": "10.55.2.40, 106.75.44.57" # 106.75.44.57 就是我的出口IP
}
更新路由
curl -i "http://10.244.211.134:9180/apisix/admin/routes" -H "X-API-KEY: edd1c9f034335f136f87ad84b625c8f1"  -X PUT -d '
{"id": "getting-started-ip","uri": "/ip","upstream": {"type": "roundrobin","nodes": {"httpbin.org:81": 1      # 这里我故意将80端口改成了 81 }}
}'
HTTP/1.1 200 OK
Date: Tue, 14 Oct 2025 07:25:55 GMT
Content-Type: application/json
Transfer-Encoding: chunked
Connection: keep-alive
Server: APISIX/3.14.0
Access-Control-Allow-Origin: *
Access-Control-Allow-Credentials: true
Access-Control-Expose-Headers: *
Access-Control-Max-Age: 3600
X-API-VERSION: v3{"key":"/apisix/routes/getting-started-ip","value":{"uri":"/ip","update_time":1760426755,"id":"getting-started-ip","create_time":1760426707,"upstream":{"type":"roundrobin","nodes":{"httpbin.org:81":1}}}}
测试请求
 curl 10.55.2.40:32080/ip
<html>
<head><title>504 Gateway Time-out</title></head>
<body>
<center><h1>504 Gateway Time-out</h1></center>
<hr><center>openresty</center>
<p><em>Powered by <a href="https://apisix.apache.org/">APISIX</a>.</em></p></body>
</html>
删除路由
curl -i -X DELETE "http://10.244.211.134:9180/apisix/admin/routes/getting-started-ip" \-H "X-API-KEY: edd1c9f034335f136f87ad84b625c8f1"测试请求
➜  ~ curl 10.55.2.40:32080/ip
{"error_msg":"404 Route Not Found"}
二、Load-balancing(负载均衡)
创建负载均衡
创建一个具有两个上游服务的路由,访问
/headers 将被转发到 httpbin.org 和 mock.api7.ai 这两个上游服务,并且会返回请求头。curl -i "http://10.244.211.134:9180/apisix/admin/routes" -H "X-API-KEY: edd1c9f034335f136f87ad84b625c8f1" -X PUT -d '
{"id": "getting-started-headers","uri": "/headers","upstream" : {"type": "roundrobin","nodes": {"httpbin.org:443": 1,"mock.api7.ai:443": 1},"pass_host": "node","scheme": "https"}
}'
HTTP/1.1 201 Created
Date: Tue, 14 Oct 2025 09:04:45 GMT
Content-Type: application/json
Transfer-Encoding: chunked
Connection: keep-alive
Server: APISIX/3.14.0
Access-Control-Allow-Origin: *
Access-Control-Allow-Credentials: true
Access-Control-Expose-Headers: *
Access-Control-Max-Age: 3600
X-API-VERSION: v3{"key":"/apisix/routes/getting-started-headers","value":{"uri":"/headers","update_time":1760432685,"id":"getting-started-headers","create_time":1760432685,"upstream":{"scheme":"https","pass_host":"node","type":"roundrobin","nodes":{"mock.api7.ai:443":1,"httpbin.org:443":1}}}}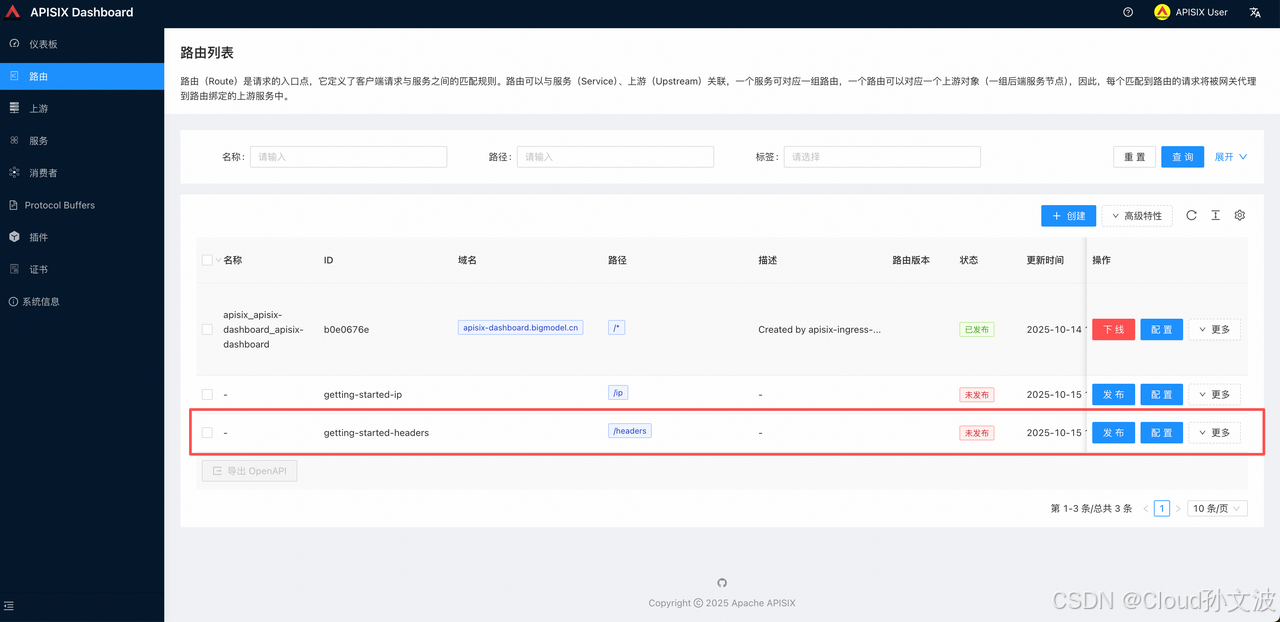
info
- 将
pass_host字段设置为node,将传递请求头给上游。 - 将
scheme字段设置为https,向上游发送请求时将启用 TLS。
1. 测试访问
➜  ~ curl 10.55.2.40:32080/headers
{"headers": {"accept": "*/*","accept-encoding": "gzip, br","cf-connecting-ip": "106.75.44.57","cf-ipcountry": "CN","cf-ray": "98e5eff3bf2b7bd9","cf-visitor": "{\"scheme\":\"https\"}","connection": "Keep-Alive","content-type": "application/json","host": "mock.api7.ai","user-agent": "curl/8.4.0","x-application-owner": "API7.ai","x-forwarded-for": "10.55.2.40","x-forwarded-host": "10.55.2.40","x-forwarded-port": "9080","x-forwarded-proto": "https","x-real-ip": "106.75.44.57","X-Application-Owner": "API7.ai","Content-Type": "application/json"}
}%
➜  ~ curl 10.55.2.40:32080/headers
{"headers": {"Accept": "*/*", "Host": "httpbin.org", "User-Agent": "curl/8.4.0", "X-Amzn-Trace-Id": "Root=1-68ee1342-065b82d27e4c878a66f82cc4", "X-Forwarded-Host": "10.55.2.40"}
}
2. 我们生成 100 个请求来测试负载均衡的效果:
hc=$(seq 100 | xargs -I {} curl "http://10.55.2.40:32080/headers" -sL | grep "httpbin" | wc -l); echo httpbin.org: $hc, mock.api7.ai: $((100 - $hc))3. 结果显示,请求几乎平均分配给这两个上游服务:
httpbin.org: 45, mock.api7.ai: 55更新负载均衡
将后端替换为自己部署的nginx v1 v2服务,并配置2:1的权重 实现灰度效果
# 注意这里用到了rewirte插件,不然会404
kubectl  get svc
NAME         TYPE        CLUSTER-IP       EXTERNAL-IP   PORT(S)   AGE
kubernetes   ClusterIP   10.244.0.1       <none>        443/TCP   230dnginx-v1     ClusterIP   10.244.215.252   <none>        80/TCP    5d18h
nginx-v2     ClusterIP   10.244.146.169   <none>        80/TCP    5d18h
curl -i "http://10.244.211.134:9180/apisix/admin/routes" \-H "X-API-KEY: edd1c9f034335f136f87ad84b625c8f1" \-X PUT -d '{"id": "getting-started-headers","uri": "/headers","plugins": {"proxy-rewrite": {"regex_uri": ["/headers", "/"] }},"upstream": {"type": "roundrobin","nodes": {"nginx-v1.default.svc.cluster.local:80": 9,"nginx-v2.default.svc.cluster.local:80": 1},"pass_host": "node","scheme": "http"}}'HTTP/1.1 200 OK
Date: Wed, 15 Oct 2025 02:52:47 GMT
Content-Type: application/json
Transfer-Encoding: chunked
Connection: keep-alive
Server: APISIX/3.14.0
Access-Control-Allow-Origin: *
Access-Control-Allow-Credentials: true
Access-Control-Expose-Headers: *
Access-Control-Max-Age: 3600
X-API-VERSION: v3{"value":{"id":"getting-started-headers","create_time":1760435704,"plugins":{"proxy-rewrite":{"regex_uri":["/headers","/"]}},"uri":"/headers","upstream":{"type":"roundrobin","scheme":"http","pass_host":"node","nodes":{"nginx-v1.default.svc.cluster.local:80":10,"nginx-v2.default.svc.cluster.local:80":10}},"update_time":1760496767},"key":"/apisix/routes/getting-started-headers"}1. 再次测试访问:
➜ ~ hc=$(seq 100 | xargs -I {} curl "http://10.55.2.40:32080/headers" -sL | grep "v1" | wc -l); echo nginx-v1: $hc,nginx-v2: $((100 - $hc))2. 结果显示,根据我们自己分配的权重比例将请求分配给这两个上游服务:
nginx-v1: 65,nginx-v2: 35删除负载均衡
curl -i -X DELETE "http://10.244.211.134:9180/apisix/admin/routes/getting-started-headers" \-H "X-API-KEY: edd1c9f034335f136f87ad84b625c8f1"验证测试
➜  ~ curl http://10.55.2.40:32080/headers
{"error_msg":"404 Route Not Found"}
三、Auth(密钥验证)
API 网关主要作用是连接 API 消费者和提供者。出于安全考虑,在访问内部资源之前,应先对消费者进行身份验证和授权。

APISIX 拥有灵活的插件扩展系统,目前有很多可用于用户身份验证和授权的插件。例如:
- Key Authentication
- Basic Authentication
- JSON Web Token (JWT) Authentication
- Keycloak
- Casdoor
- Wolf RBAC
- OpenID Connect
- Central Authentication Service (CAS)
- HMAC
- Casbin
- LDAP
- Open Policy Agent (OPA)
- Forward Authentication
- Multiple Authentications
本教程中,你将创建一个带有 密钥验证 插件的 消费者,并学习如何启用和停用身份验证插件。
Consumer 是什么
Consumer(也称之为消费者)是指使用 API 的应用或开发人员。
在 APISIX 中,消费者需要一个全局唯一的 名称,并从上面的列表中选择一个身份验证 插件。
Key Authentication
Key Authentication(也称之为密钥验证)是一个相对比较简单但是应用广泛的身份验证方法,它的设计思路如下:
- 管理员为路由添加一个身份验证密钥(API 密钥)。
- API 消费者在发送请求时,在查询字符串或者请求头中添加密钥。
创建消费者
创建一个名为
tom 的消费者,并启用 key-auth 插件,密钥设置为 secret-key。所有携带密钥 secret-key 的请求都会被识别为消费者 tom。注意
生产环境请使用复杂的密钥。因为开启了 apisix-ingress-controller ,并且通过 CRD(ApisixConsumer)方式在管理 APISIX;在这种情况下,Ingress Controller 会周期性同步 APISIX 实际状态和 Kubernetes CRD 状态。🔁 同步逻辑如下:
更深入的原理说明
apisix-ingress-controller 管理的对象包括:
| 类型 | 是否自动同步(清理孤儿资源) | 说明 |
|---|---|---|
| Route | ❌ 不会清理手动创建的 | 因为 CRD 与 Admin API 路由会共存 |
| Upstream | ❌ 不会删除手动创建的 | 同上 |
| Service | ❌ 不会删除手动创建的 | 同上 |
| Consumer | ✅ 会清理没有 CRD 对应的 | 出于安全原因(认证配置必须一致) |
为什么只删 Consumer?
🧱 原因 1:Consumer 与认证插件强绑定
Consumer 是用于身份认证(如 key-auth、jwt-auth)的用户配置对象。
Ingress Controller 认为:
如果 CRD 中没有定义某个 consumer,而 Admin API 中有同名 consumer,这可能意味着“脏数据”或“非法残留用户”,所以它会删除。
这在多租户场景下非常重要,防止有人绕过 K8s 配置直接往 APISIX 添加认证凭据。
所以在开启了 apisix-ingress-controller的情况下,生产环境中更推荐使用crd来创建。下面我将列出使用crd和api的方式,如果 只想使用api 需要将apisix-ingress-controller 同步机制关闭掉。实际情况自行选择。
- 使用crd 创建consumers
apiVersion: apisix.apache.org/v2
kind: ApisixConsumer
metadata:name: tom
spec:ingressClassName: apisixauthParameter:keyAuth:value:key: secret-key
kubectl apply -f key-auth.yaml
apisixconsumer.apisix.apache.org/tom created
- 使用API创建consumers
curl -i "http://10.244.211.134:9180/apisix/admin/consumers" -H "X-API-KEY: edd1c9f034335f136f87ad84b625c8f1"  -X PUT -d '
{"username": "tom","plugins": {"key-auth": {"key": "secret-key"}}
}'
HTTP/1.1 201 Created
Date: Wed, 15 Oct 2025 03:26:12 GMT
Content-Type: application/json
Transfer-Encoding: chunked
Connection: keep-alive
Server: APISIX/3.14.0
Access-Control-Allow-Origin: *
Access-Control-Allow-Credentials: true
Access-Control-Expose-Headers: *
Access-Control-Max-Age: 3600
X-API-VERSION: v3{"key":"/apisix/consumers/tom","value":{"create_time":1760498772,"plugins":{"key-auth":{"key":"0x1PpfmlMIj3CIq4xdd42A=="}},"username":"tom","update_time":1760498772}}
启用Authentication
在教程配置路由中,我们已经创建了路由
getting-started-ip,我们通过 PATCH 方法为该路由增加 key-auth 插件: curl -i "http://10.244.211.134:9180/apisix/admin/routes/getting-started-ip" -H "X-API-KEY: edd1c9f034335f136f87ad84b625c8f1" -X PATCH -d '
{"plugins": {"key-auth": {}}
}'HTTP/1.1 200 OK
Date: Wed, 15 Oct 2025 03:29:08 GMT
Content-Type: application/json
Transfer-Encoding: chunked
Connection: keep-alive
Server: APISIX/3.14.0
Access-Control-Allow-Origin: *
Access-Control-Allow-Credentials: true
Access-Control-Expose-Headers: *
Access-Control-Max-Age: 3600
X-API-VERSION: v3{"value":{"id":"getting-started-ip","plugins":{"key-auth":{}},"uri":"/ip","create_time":1760426707,"upstream":{"type":"roundrobin","nodes":{"httpbin.org:80":1}},"update_time":1760498948},"key":"/apisix/routes/getting-started-ip"}
请求验证
我们可以在以下场景中进行验证:
1. 发送不带任何密钥的请求
发送一个不带请求头
apikey 的请求。curl -i 10.55.2.40:32080/ip
HTTP/1.1 401 Unauthorized
Date: Wed, 15 Oct 2025 03:31:29 GMT
Content-Type: text/plain; charset=utf-8
Transfer-Encoding: chunked
Connection: keep-alive
Server: APISIX/3.14.0{"message":"Missing API key in request"}如果你已经启用了密钥身份验证,你将会得到返回
HTTP/1.1 401 Unauthorized,即未授权。2. 发送携带错误密钥的请求
curl -i  10.55.2.40:32080/ip -H 'apikey: wrong-key'
HTTP/1.1 401 Unauthorized
Date: Wed, 15 Oct 2025 03:32:00 GMT
Content-Type: text/plain; charset=utf-8
Transfer-Encoding: chunked
Connection: keep-alive
Server: APISIX/3.14.0如果密钥错误,你也将得到返回 HTTP/1.1 401 Unauthorized,即未授权。
{"message":"Invalid API key in request"}
3. 发送携带正确密钥的请求
curl -i  10.55.2.40:32080/ip -H 'apikey: secret-key'
HTTP/1.1 200 OK
Content-Type: application/json
Content-Length: 43
Connection: keep-alive
Date: Wed, 15 Oct 2025 04:02:38 GMT
Access-Control-Allow-Origin: *
Access-Control-Allow-Credentials: true
Server: APISIX/3.14.0{"origin": "10.55.2.40, 106.75.44.57"
}
禁用 Authentication
将参数设置 _meta.disable 为 true,即可禁用密钥验证插件。
curl "http:///10.244.211.134:9180/apisix/admin/routes/getting-started-ip" -H "X-API-KEY: edd1c9f034335f136f87ad84b625c8f1" -X PATCH -d '
{"plugins": {"key-auth": {"_meta": {"disable": true}}}
}'
{"value":{"plugins":{"key-auth":{"_meta":{"disable":true}}},"uri":"/ip","id":"getting-started-ip","upstream":{"type":"roundrobin","nodes":{"httpbin.org:80":1}},"create_time":1760426707,"update_time":1760501216},"key":"/apisix/routes/getting-started-ip"}
你可以发送一个不带任何密钥的请求来验证:
curl -i  10.55.2.40:32080/ip
HTTP/1.1 200 OK
Content-Type: application/json
Content-Length: 43
Connection: keep-alive
Date: Wed, 15 Oct 2025 04:07:32 GMT
Access-Control-Allow-Origin: *
Access-Control-Allow-Credentials: true
Server: APISIX/3.14.0{"origin": "10.55.2.40, 106.75.44.57"
}
因为你已经禁用了密钥验证插件,所以你将会得到返回
HTTP/1.1 200 OK。basic-auth Authentication
basic-auth 插件为 消费者 添加了 基本访问身份验证,以便消费者在访问上游资源之前进行身份验证。当消费者成功通过身份验证后,APISIX 会在将请求代理到上游服务之前向请求添加其他标头,例如
X-Consumer-Username、X-Credential-Indentifier 和其他消费者自定义标头(如果已配置)。上游服务将能够区分消费者并根据需要实现其他逻辑。如果这些值中的任何一个不可用,则不会添加相应的标头。Consumer/Credentials 端:
| 名称 | 类型 | 必选项 | 描述 |
| username | string | 是 | Consumer 的用户名并且该用户名是唯一,如果多个 Consumer 使用了相同的 username,将会出现请求匹配异常。 |
| password | string | 是 | 用户的密码。该字段支持使用 APISIX Secret 资源,将值保存在 Secret Manager 中。 |
注意:schema 中还定义了
encrypt_fields = {"password"},这意味着该字段将会被加密存储在 etcd 中。具体参考 加密存储字段。
Route 端:
| 名称 | 类型 | 必选项 | 默认值 | 描述 |
| hide_credentials | boolean | 否 | FALSE | 该参数设置为 true 时,则不会将 Authorization 请求头传递给 Upstream。 |
| anonymous_consumer | boolean | 否 | FALSE | 匿名消费者名称。如果已配置,则允许匿名用户绕过身份验证。 |
创建消费者 johndoe:
下面我将列出两种创建的方式分别是crd、和api。同样我们使用crd的方式创建consumers,原因上面有说到 是因为部署了apisix-ingress-controller sync,这时候使用api创建的consumers就会被自动删除掉
- 使用crd 创建 推荐
apiVersion: apisix.apache.org/v2
kind: ApisixConsumer
metadata:name: default_johndoe
spec:ingressClassName: apisixauthParameter:basicAuth:value:username: "default_johndoe"password: "john-key"
kubectl apply -f basic-auth.yaml
apisixconsumer.apisix.apache.org/johndoe created- 使用api创建
admin_key="edd1c9f034335f136f87ad84b625c8f1"
curl -i "http://10.244.211.134:9180/apisix/admin/consumers"  -X PUT \-H "X-API-KEY: ${admin_key}" \-d '{"username": "johndoe"}'
为消费者创建
basic-auth 凭证:
curl -i "http://10.244.211.134:9180/apisix/admin/consumers/johndoe/credentials" -X PUT \-H "X-API-KEY: ${admin_key}" \-d '{"id": "cred-john-basic-auth","plugins": {"basic-auth": {"username": "johndoe","password": "john-key"}}}'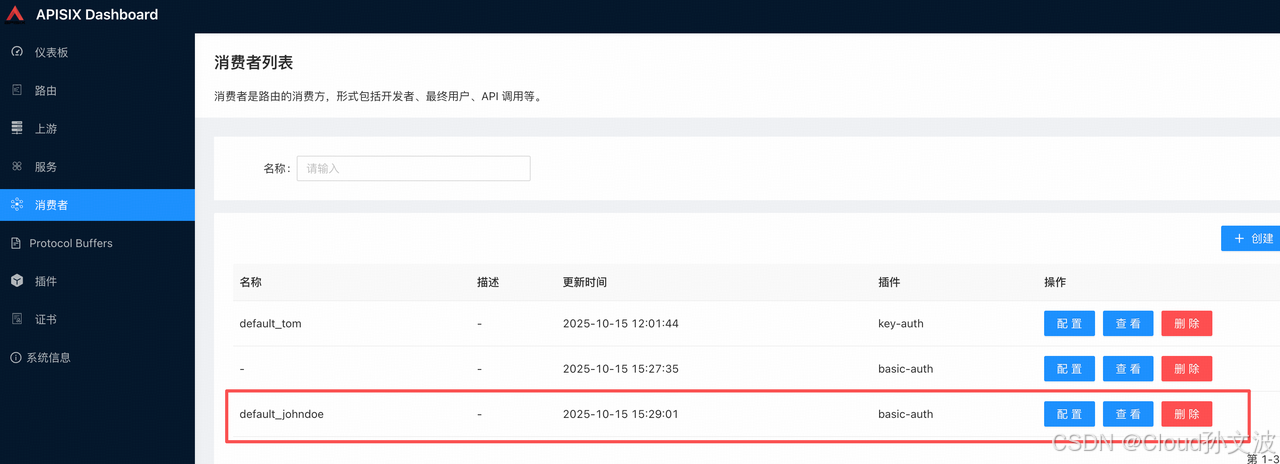
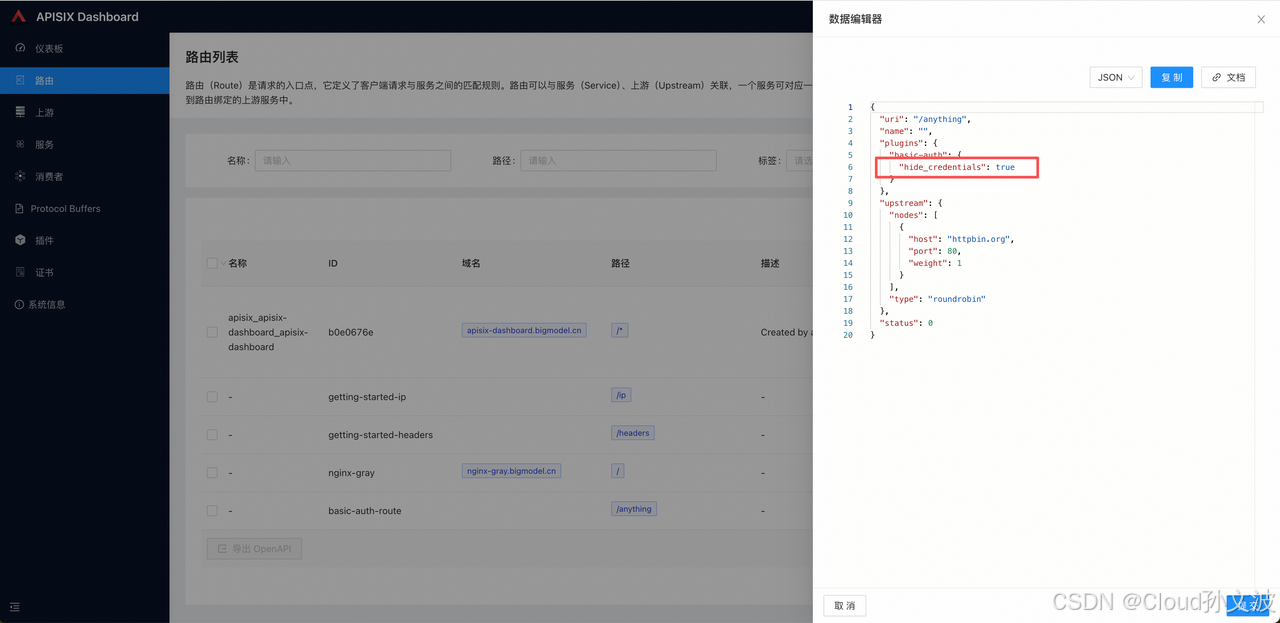
创建一个带有 basic-auth 的路由:
curl -i "http://10.244.211.134:9180/apisix/admin/routes" \-H "X-API-KEY: ${admin_key}" \-X PUT -d '{"id": "nginx-gray","uri": "/","plugins": {"basic-auth": {}},"hosts": ["nginx-gray.xxx.cn"] ,"upstream": {"type": "roundrobin","nodes": {"httpbin.org:80": 1},"pass_host": "node","scheme": "http"}}'
anything router
curl "http://10.244.211.134:9180/apisix/admin/routes" -X PUT \
-H "X-API-KEY: ${admin_key}" \
-d '{"id": "basic-auth-route","uri": "/anything","plugins": {"basic-auth": {"hide_credentials": false}},"upstream": {"type": "roundrobin","nodes": {"httpbin.org:80": 1}}
}'
1. 使用有效密钥进行验证
使用有效密钥发送请求至:
➜  ~ curl -i  http://nginx-gray.xxx.cn:32080 -u default_johndoe:john-key
HTTP/1.1 200 OK
Content-Type: text/html; charset=utf-8
Content-Length: 25
Connection: keep-alive
Date: Wed, 15 Oct 2025 07:31:46 GMT
Last-Modified: Wed, 01 Nov 2023 03:54:34 GMT
ETag: "6541cbfa-19"
Accept-Ranges: bytes
Server: APISIX/3.14.0nginx,this is v1 version
➜  ~ curl -i  http://nginx-gray.xxx.cn:32080 -u default_johndoe:john-key
HTTP/1.1 200 OK
Content-Type: text/html; charset=utf-8
Content-Length: 25
Connection: keep-alive
Date: Wed, 15 Oct 2025 07:31:50 GMT
Last-Modified: Wed, 01 Nov 2023 03:49:31 GMT
ETag: "6541cacb-19"
Accept-Ranges: bytes
Server: APISIX/3.14.0nginx,this is v2 version
请求 anything router
curl -i  10.55.2.40:32080/anything -u  default_johndoe:john-keyHTTP/1.1 200 OK
Content-Type: application/json
Content-Length: 500
Connection: keep-alive
Date: Wed, 15 Oct 2025 08:14:16 GMT
Access-Control-Allow-Origin: *
Access-Control-Allow-Credentials: true
Server: APISIX/3.14.0{"args": {}, "data": "", "files": {}, "form": {}, "headers": {"Accept": "*/*", "Authorization": "Basic ZGVmYXVsdF9qb2huZG9lOmpvaG4ta2V5", "Host": "10.55.2.40", "User-Agent": "curl/8.4.0", "X-Amzn-Trace-Id": "Root=1-68ef57d6-65d0c4466930ab8a4d41b743", "X-Consumer-Username": "default_johndoe", "X-Forwarded-Host": "10.55.2.40"}, "json": null, "method": "GET", "origin": "10.55.2.40, 106.75.44.57", "url": "http://10.55.2.40/anything"
}
2. 使用无效密钥进行验证
➜  ~ curl -i  http://nginx-gray.xxx.cn:32080 -u default_johndoe:john-key1
HTTP/1.1 401 Unauthorized
Date: Wed, 15 Oct 2025 07:32:27 GMT
Content-Type: text/plain; charset=utf-8
Transfer-Encoding: chunked
Connection: keep-alive
Server: APISIX/3.14.0{"message":"Invalid user authorization"}
3. 无密钥进行验证
➜  ~ curl -i  http://nginx-gray.xxx.cn:32080 -u default_johndoe:john-key1
HTTP/1.1 401 Unauthorized
Date: Wed, 15 Oct 2025 07:32:27 GMT
Content-Type: text/plain; charset=utf-8
Transfer-Encoding: chunked
Connection: keep-alive
Server: APISIX/3.14.0{"message":"Invalid user authorization"}
4. 隐藏凭据
将插件的
hide_credentials 更新为 true
curl "http://10.244.211.134:9180/apisix/admin/routes" -X PUT \
-H "X-API-KEY: ${admin_key}" \
-d '{"id": "basic-auth-route","uri": "/anything","plugins": {"basic-auth": {"hide_credentials": true}},"upstream": {"type": "roundrobin","nodes": {"httpbin.org:80": 1}}
}'
再次请求,可以看到已经没有Authorization字段了
curl -i  10.55.2.40:32080/anything -u  default_johndoe:john-key
HTTP/1.1 200 OK
Content-Type: application/json
Content-Length: 437
Connection: keep-alive
Date: Wed, 15 Oct 2025 08:18:21 GMT
Access-Control-Allow-Origin: *
Access-Control-Allow-Credentials: true
Server: APISIX/3.14.0{"args": {}, "data": "", "files": {}, "form": {}, "headers": {"Accept": "*/*", "Host": "10.55.2.40", "User-Agent": "curl/8.4.0", "X-Amzn-Trace-Id": "Root=1-68ef58cc-0467f3dd6d48dec604e78c36", "X-Consumer-Username": "default_johndoe", "X-Forwarded-Host": "10.55.2.40"}, "json": null, "method": "GET", "origin": "10.55.4.170, 106.75.44.57", "url": "http://10.55.2.40/anything"
}
已知问题,使用crd创建ApisixConsumer auth 不支持自定义header ,使用admin api是没问题的
consumer-restriction
consumer-restriction 插件允许用户根据 Route、Service、Consumer 或 Consumer Group 来设置相应的访问限制。
https://apisix.apache.org/zh/docs/apisix/plugins/consumer-restriction/
1. Conumer jack1 的认证配置:
curl http://10.244.211.134:9180/apisix/admin/consumers -H 'X-API-KEY: edd1c9f034335f136f87ad84b625c8f1' -X PUT -i -d '
{"username": "jack1","plugins": {"basic-auth": {"username":"jack2019","password": "123456"}}
}'
2. Conumer jack2 的认证配置:
curl http://10.244.211.134:9180/apisix/admin/consumers -H 'X-API-KEY: edd1c9f034335f136f87ad84b625c8f1' -X PUT -i -d '
{"username": "jack2","plugins": {"basic-auth": {"username":"jack2020","password": "123456"}}
}'
3. 配置白名单
现在我们只想给一个 Route 路由对象启用 jack1 这个 Consumer 的认证配置,则除了启用
basic-auth 插件之外,还需要在 consumer-restriction 插件中配置一个 whitelist 白名单(当然配置黑名单也是可以的),如下所示:
curl http://10.244.211.134:9180/apisix/admin/routes/1 -H 'X-API-KEY: edd1c9f034335f136f87ad84b625c8f1' -X PUT -d '
{"uri": "/index.html","upstream": {"type": "roundrobin","nodes": {"nginx-v1.default.svc.cluster.local:80": 1,"nginx-v2.default.svc.cluster.local:80": 1}},"plugins": {"basic-auth": {},"consumer-restriction": {"whitelist": ["jack1"]}}
}'
4. 请求验证
然后我们使用 jack1 去访问我们的路由进行验证:
curl -u jack2019:123456 http://10.55.2.40:32080/index.html -i
HTTP/1.1 200 OK
Content-Type: text/html; charset=utf-8
Content-Length: 25
Connection: keep-alive
Date: Wed, 15 Oct 2025 09:28:53 GMT
Last-Modified: Wed, 01 Nov 2023 03:54:34 GMT
ETag: "6541cbfa-19"
Accept-Ranges: bytes
Server: APISIX/3.14.0nginx,this is v1 version
正常使用 jack2 访问就会认证失败了:
curl -u jack2020:123456  http://10.55.2.40:32080/index.html -i
HTTP/1.1 403 Forbidden
Date: Wed, 15 Oct 2025 09:29:25 GMT
Content-Type: text/html; charset=utf-8
Transfer-Encoding: chunked
Connection: keep-alive
Server: APISIX/3.14.0{"message":"The consumer_name is forbidden."}
所以当你只想让一个 Route 对象关联指定的 Consumer 的时候,记得使用
consumer-restriction 插件。
5. 删除插件
当你需要删除该插件时,可以通过以下命令删除相应的 JSON 配置,APISIX 将会自动重新加载相关配置,无需重启服务:
curl http://10.244.211.134:9180/apisix/admin/routes/1 -H "X-API-KEY: $admin_key" -X PUT -d '
{"uri": "/index.html","upstream": {"type": "roundrobin","nodes": {"nginx-v1.default.svc.cluster.local:80": 9,"nginx-v2.default.svc.cluster.local:80": 1}},"plugins": {"basic-auth": {}}
}'
四、Rate Limiting(限速)
APISIX 是一个统一的控制中心,它管理 API 和微服务的进出流量。除了客户端发来的合理的请求,还可能存在网络爬虫产生的不必要的流量,此外,网络攻击(比如 DDos)也可能产生非法请求。
APISIX 提供限速功能,通过限制在规定时间内发送到上游服务的请求数量来保护 APIs 和微服务。请求的计数在内存中完成,具有低延迟和高性能的特点。

1. 启用limit 插件
前面我们已经创建了路由
getting-started-ip,我们通过 PATCH 方法为该路由增加 limit-count 插件:
curl -i "http://10.244.211.134:9180/apisix/admin/routes/getting-started-ip" -H 'X-API-KEY: edd1c9f034335f136f87ad84b625c8f1' -X PATCH -d '
{"plugins": {"limit-count": {"count": 2,"time_window": 10,"rejected_code": 503}}
}'
如果增加插件成功,你将得到返回
HTTP/1.1 201 Created。上述配置将传入流量的速率限制为每 10 秒最多 2 个请求。
1.1 请求验证
我们同时生成 100 个请求来测试限速插件的效果。
count=$(seq 100 | xargs -I {} curl -H 'apikey: secret-key' "http://10.55.2.40:32080/ip" -I -sL | grep "503" | wc -l); echo \"200\": $((100 - $count)), \"503\": $count请求结果同预期一致:在这 100 个请求中,有 2 个请求发送成功(状态码为
200),其他请求均被拒绝(状态码为 503)。
"200": 2, "503": 98"200": 2, "503": 98
2. 禁用限速插件
将参数设置
_meta.disable 为 true,即可禁用限速插件。
curl -i "http://10.244.211.134:9180/apisix/admin/routes/getting-started-ip" -H 'X-API-KEY: edd1c9f034335f136f87ad84b625c8f1' -X PATCH -d '
{"plugins": {"limit-count": {"_meta": {"disable": true}}}
}'
2. 请求验证
我们同时生成 100 个请求来测试限速插件的效果。
count=$(seq 100 | xargs -I {} curl -H 'apikey: secret-key' "http://10.55.2.40:32080/ip" -I -sL | grep "503" | wc -l); echo \"200\": $((100 - $count)), \"503\": $count请求结果同预期一致:在这 100 个请求中,有 2 个请求发送成功(状态码为
200),其他请求均被拒绝(状态码为 503)。
"200": 100, "503": 0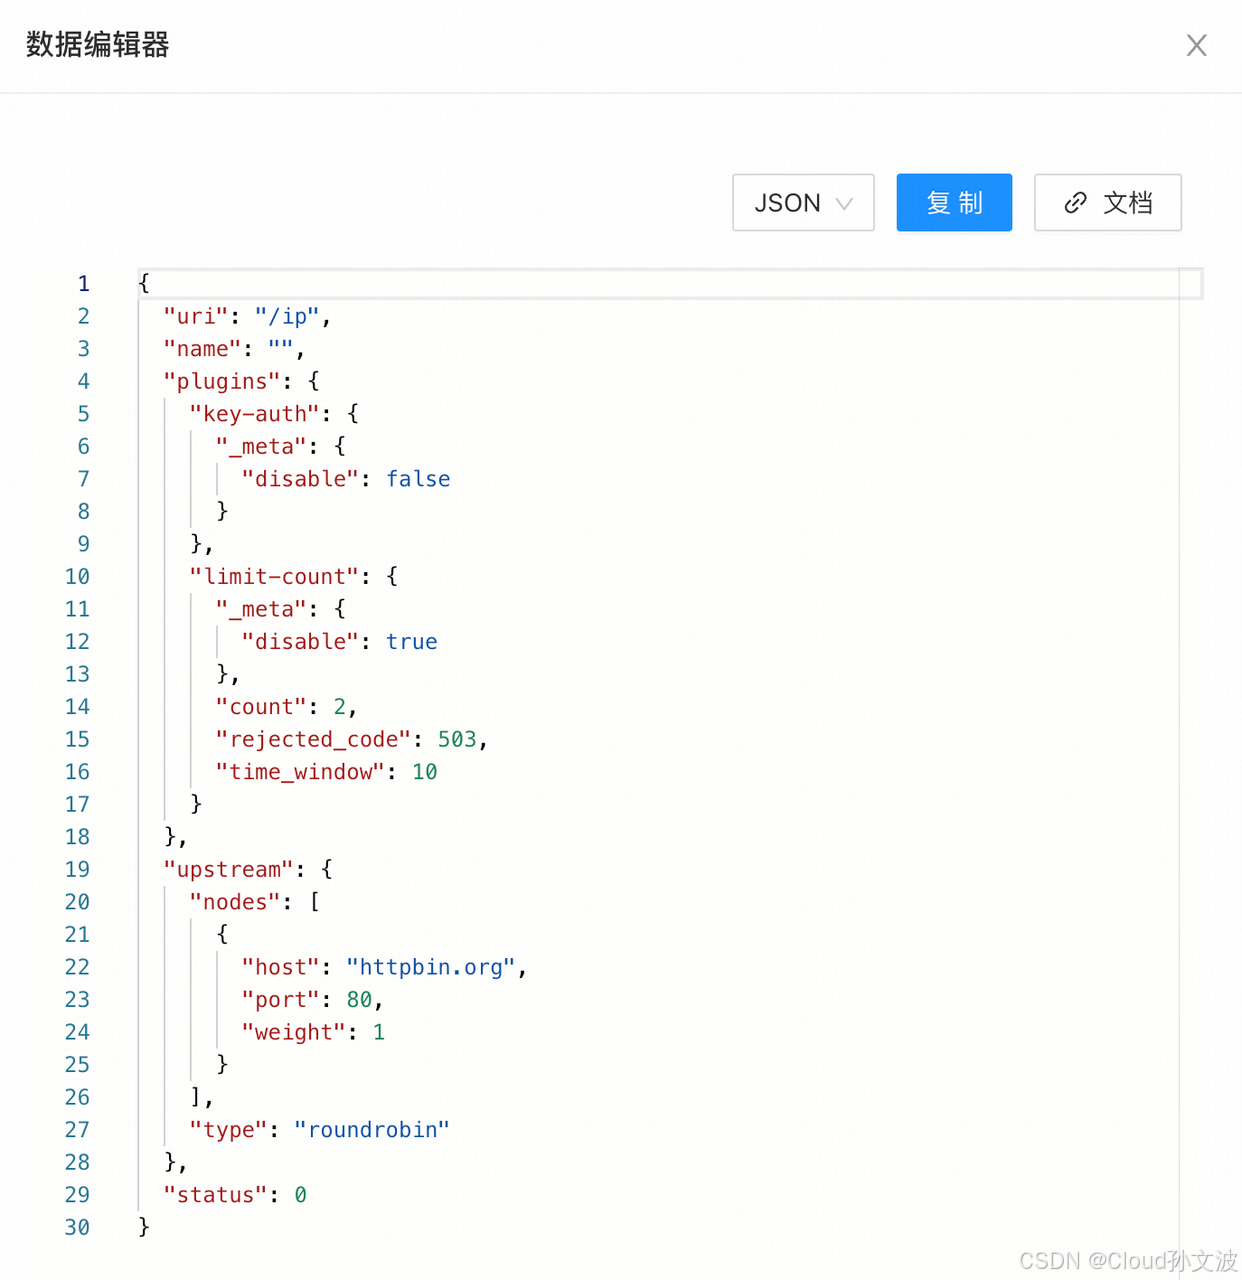
五、更多
你可以使用 APISIX 的变量来配置限速插件的规则,比如
$host 和 $uri。此外,APISIX 也支持使用 Redis 集群进行限速配置,即通过 Redis 来进行计数。
参考文献
https://apisix.apache.org/zh/docs/apisix/getting-started/configure-routes/
https://docs.api7.ai/apisix/reference/apisix-ingress-controller/examples/#configure-consumer-and-credentials