COLMAP原理讲解与使用教程
COLMAP论文简单介绍
COLMAP论文名: Structure-from-Motion Revisited
COLMAP是一个经典的增量式SfM(incremental structure from motion)方法
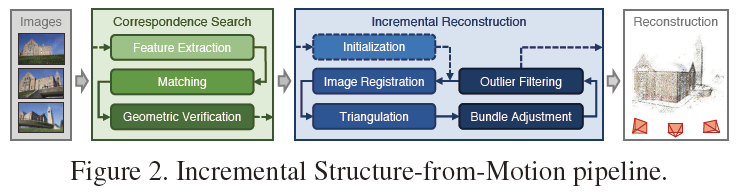
Incremental的SfM的pipeline的思想就是从一系列多视角图像中找到对应的feature的关系,然后选取两张质量好的视角图片进行初始化,通过增量的方式一步步还原出3D场景和每个图片对应的摄像机位姿。
COLMAP对incremental structure from motion的各个模块做了改进,具体的细节不是本文的重点,总而言之,COLMAP是一个典型的incremental SfM方法。
下面是Image-based 3D reconstruction和Structure-from-Motion以及Multi-View Stereo之间的关系(来自COLMAP文档)
Image-based 3D reconstruction from images traditionally first recovers a sparse representation of the scene and the camera poses of the input images using Structure-from-Motion.
This output then serves as the input to Multi-View Stereo to recover a dense representation of the scene.
Multi-View Stereo
MVS 的作用是根据SfM得到的初步的信息来还原每张图片像素级别的depth和normal的信息,然后还原出dense的3D场景,同时还可以根据normal的信息还原出3D surface
Multi-View Stereo (MVS) takes the output of SfM to compute depth and/or normal information for every pixel in an image. Fusion of the depth and normal maps of multiple images in 3D then produces a dense point cloud of the scene. Using the depth and normal information of the fused point cloud, algorithms such as the (screened) Poisson surface reconstruction [kazhdan2013] can then recover the 3D surface geometry of the scene. More information on Multi-View Stereo in general and the algorithms in COLMAP can be found in [schoenberger16mvs].
COLMAP安装
COLMAP官方仓库地址:
https://github.com/colmap/colmap![]() https://github.com/colmap/colmap
https://github.com/colmap/colmap
COLMAP官方文档地址:
https://colmap.github.io/![]() https://colmap.github.io/
https://colmap.github.io/
环境安装:
conda create -n colmap python=3.10 -y
conda activate colmap
COLMAP安装:
https://anaconda.org/conda-forge/colmap![]() https://anaconda.org/conda-forge/colmap
https://anaconda.org/conda-forge/colmap
直接使用conda安装
conda install conda-forge::colmap
conda install conda-forge/label/colmap_dev::colmap
稀疏重建代码:
由于没有图形界面,直接选择使用命令行操作
首先cd 到项目文件夹,创建一个images的文件夹存放图片:
# 特征提取
colmap feature_extractor --database_path ./database.db --image_path ./images# 特征匹配
colmap exhaustive_matcher --database_path ./database.db# 稀疏重建
mkdir sparse
colmap mapper --database_path ./database.db --image_path ./images --output_path ./sparse
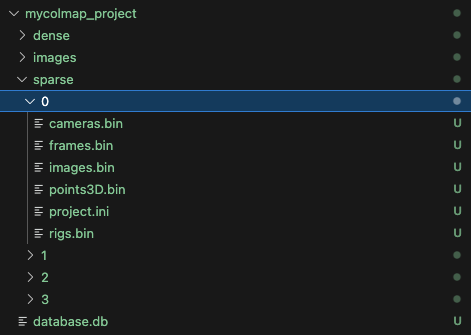
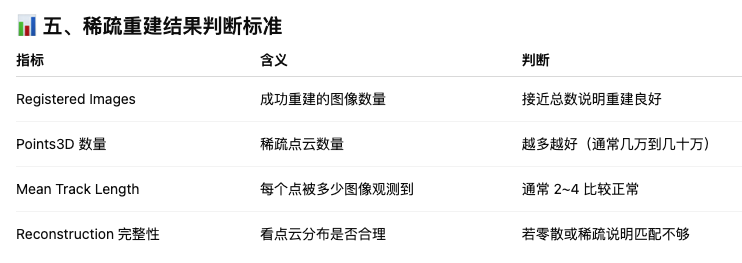
最终得到以下重建结果
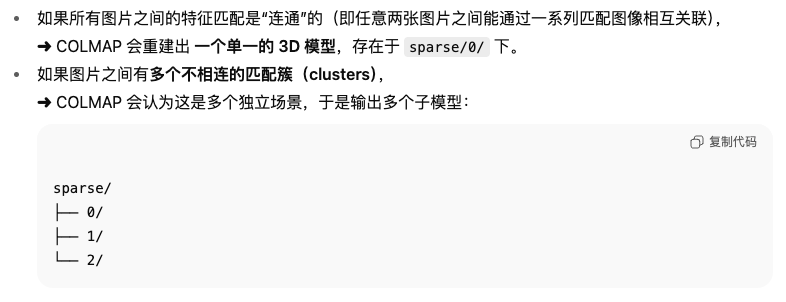
可能在这里看到多个模型结果,说明场景的图片不是连通的:
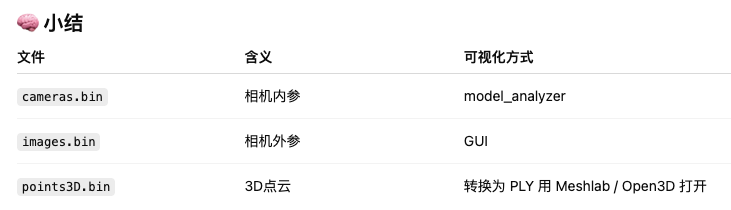
得到的文件解释:
查看重建效果:
colmap model_analyzer --path ./sparse/0
最终还要转换成ply文件才方便打开
colmap model_converter \--input_path ./sparse/0 \--output_path ./sparse/0/model.ply \--output_type PLY可用的可视化打开方式:
在meshlab中:
meshlab sparse/0/points3D.ply
在python中:
import open3d as o3d
pcd = o3d.io.read_point_cloud("sparse/0/points3D.ply")
o3d.visualization.draw_geometries([pcd])
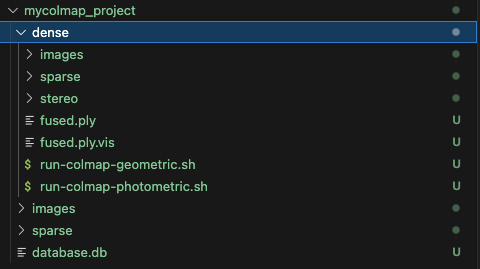
稠密重建代码:

# Step 1: 去畸变
colmap image_undistorter \--image_path ./images \--input_path ./sparse/0 \--output_path ./dense# Step 2: 深度图计算
colmap patch_match_stereo \--workspace_path ./dense \--workspace_format COLMAP \--PatchMatchStereo.geom_consistency true# Step 3: 深度融合
colmap stereo_fusion \--workspace_path ./dense \--workspace_format COLMAP \--input_type geometric \--output_path ./dense/fused.ply
得到dense的重建结果:
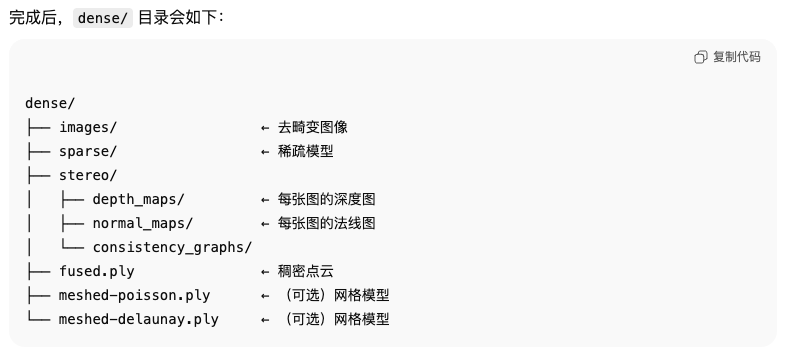
同时还能生成带mesh的可视化结果:
# 这个速度非常慢,不建议
colmap poisson_mesher \--input_path ./dense/fused.ply \--output_path ./dense/meshed-poisson.ply# 或更轻量的:colmap delaunay_mesher \--input_path ./dense \--output_path ./dense/meshed-delaunay.ply
最终可视化效果:
稀疏点云重建效果:
其实重建的只有稀疏的特征点的信息
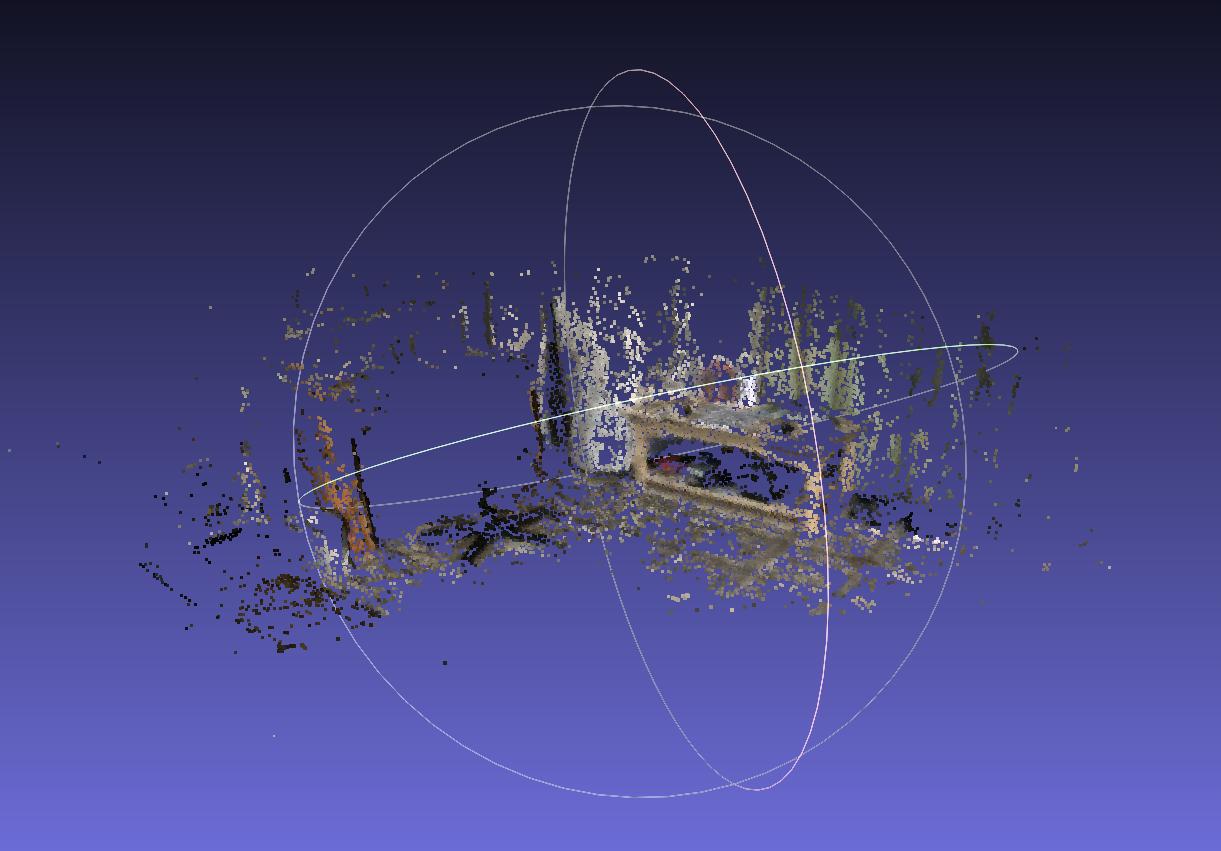
稠密点云重建效果:
fused.ply文件可以在mac上可以用meshlab打开,可以看到效果其实一般般:
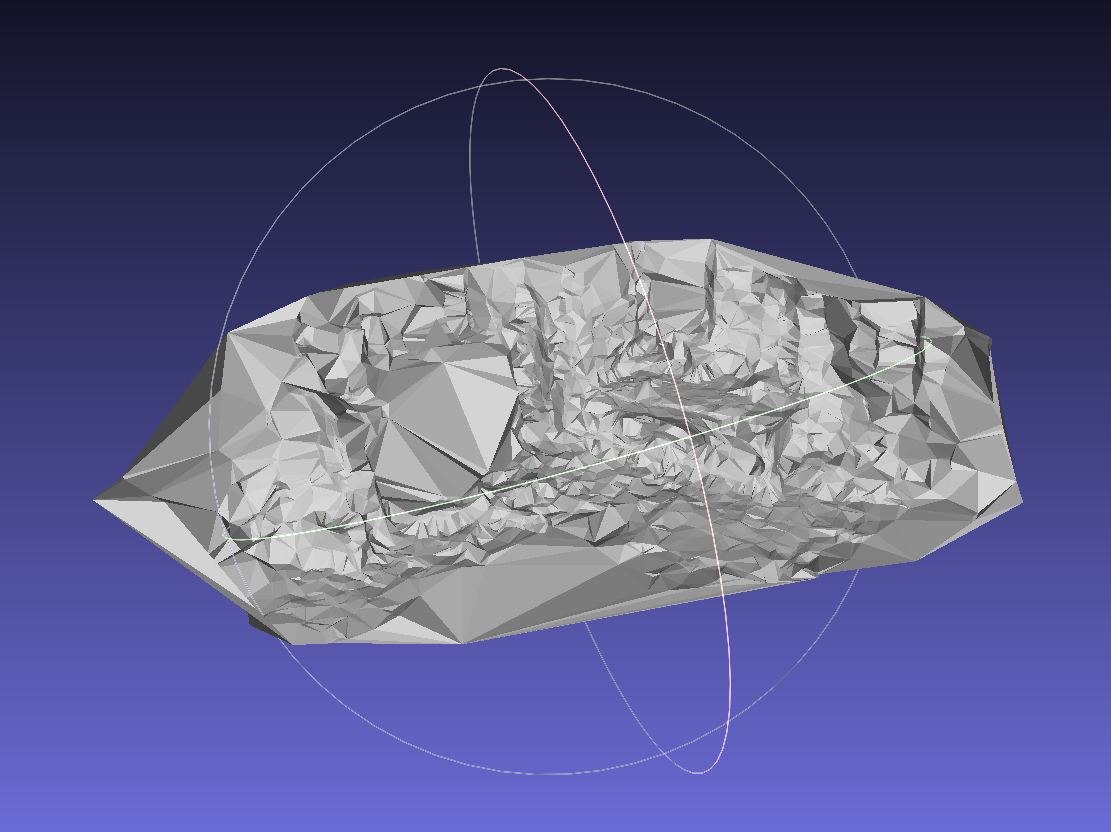
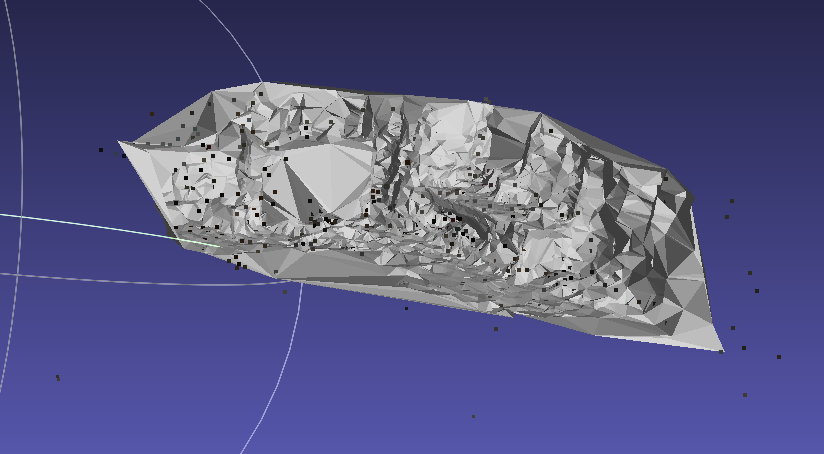
Mesh重建效果:
得到的粗糙的mesh的可视化结果