Unity笔记(十二)——角色控制器、导航寻路系统
写在前面:
写本系列(自用)的目的是回顾已经学过的知识、记录新学习的知识或是记录心得理解,方便自己以后快速复习,减少遗忘。这里只有代码相关部分,没有面板部分。
八、角色控制器
1、作用
角色控制器是让角色可以受制于碰撞,但是不会被刚体所牵制。如果我们对角色使用刚体判断碰撞,可能会出现一些奇怪的表现。比如:在斜坡上往下滑动;不加约束的情况下自己会被撞飞。使用角色碰撞器能让角色表现地更稳定。
添加了角色碰撞器之后就不用再添加刚体了。
2、使用
(1)脚本添加
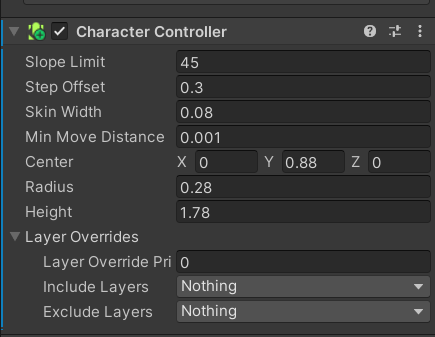
为要使用角色控制器的对象在Inspector页面添加角色控制器脚本:
(2)代码相关
主要使用的API有SimpleMove()和Move(),二者都是控制角色移动的API,区别在于前者是受重力影响的移动,后者不受重力影响。括号内需要传入在每个方向上移动的速度。如下例所示:
public CharacterController cc;
cc.SimpleMove(Vector3.forward * 10 * Time.deltaTime);
cc.Move(Vector3.forward * 10 * Time.deltaTime);
以下这段代码能够通过角色控制器控制对象移动。需要说明的是,这样写可能会出现一些奇怪的效果,例如无论按w还是s角色始终向前移动,解决方式是,不偷懒,将前进和后退的逻辑分开写。
private CharacterController cc;
private Animator animator;void Start()
{cc = this.GetComponent<CharacterController>();animator = this.GetComponent<Animator>();
}void Update()
{animator.SetInteger("Speed", (int)Input.GetAxisRaw("Vertical"));cc.SimpleMove(this.transform.forward * Time.deltaTime * 80f * Input.GetAxisRaw("Vertical"));
}
此外,还有一些好用的API,例如cc.isGrounded,可以判断对象是否接触地面。
可以通过OnControllerColliderHit函数来判断碰撞,获取到碰撞对象的信息。这里需要注意的是,我们之前检测碰撞时使用的函数是OnCollisionEnter,由于已经有了上面那个函数,在自己身上是不会触发这个函数的,只有当别人碰到自己才能触发。触发器检测函数OnTriggerEnter可以正常检测。
private CharacterController cc;
private Animator animator;void Start()
{if(cc.isGrounded){print("接触地面了");}
}private void OnControllerColliderHit(ControllerColliderHit hit)
{print(hit.collider.gameObject.name);
}private void OnCollisionEnter(Collision collision)
{print("碰撞触发");
}private void OnTriggerEnter(Collider other)
{print("触发器触发");
}
九、导航寻路系统
1、导航网格寻路组件
(1)场景
先搭建一个简单的地图,这个地图由三块plane组成。
点击Window-AI-Navigation打开面板:
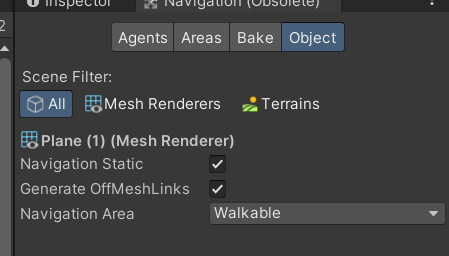
在Object页签处为场景中所有静态物体勾选Navigation Static。如果希望两块间隔着一段距离的物体直接能相互跳动,就为对应物体勾选Generate OffMeshLinks。
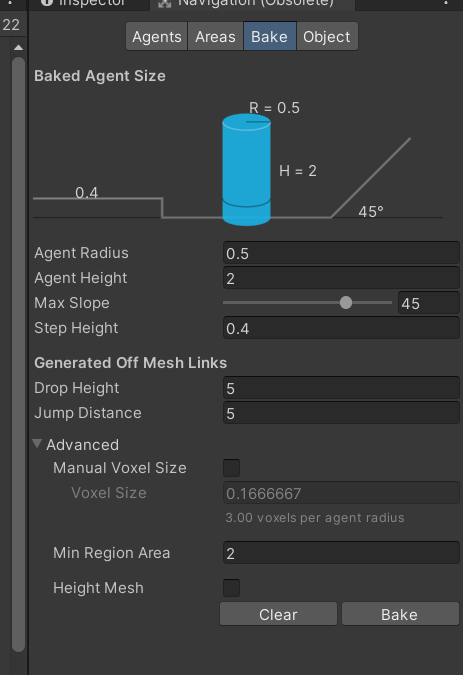
在Bake页签可以烘焙需要自动寻路的场景。
其中,DropHeight是导航时可下落的最大高度,如果希望导航时遇到阶梯可以跳跃,就填写相应高度。
Jump Distance是可以跳跃的最远距离,当地图上有间断处如悬崖,坑洞等。如果希望导航时可以自动跳过坑洞,可以设置最远跳跃距离。
Agent Radius是边缘半径,即障碍物/地图边缘等位置和可寻路范围直接的距离。
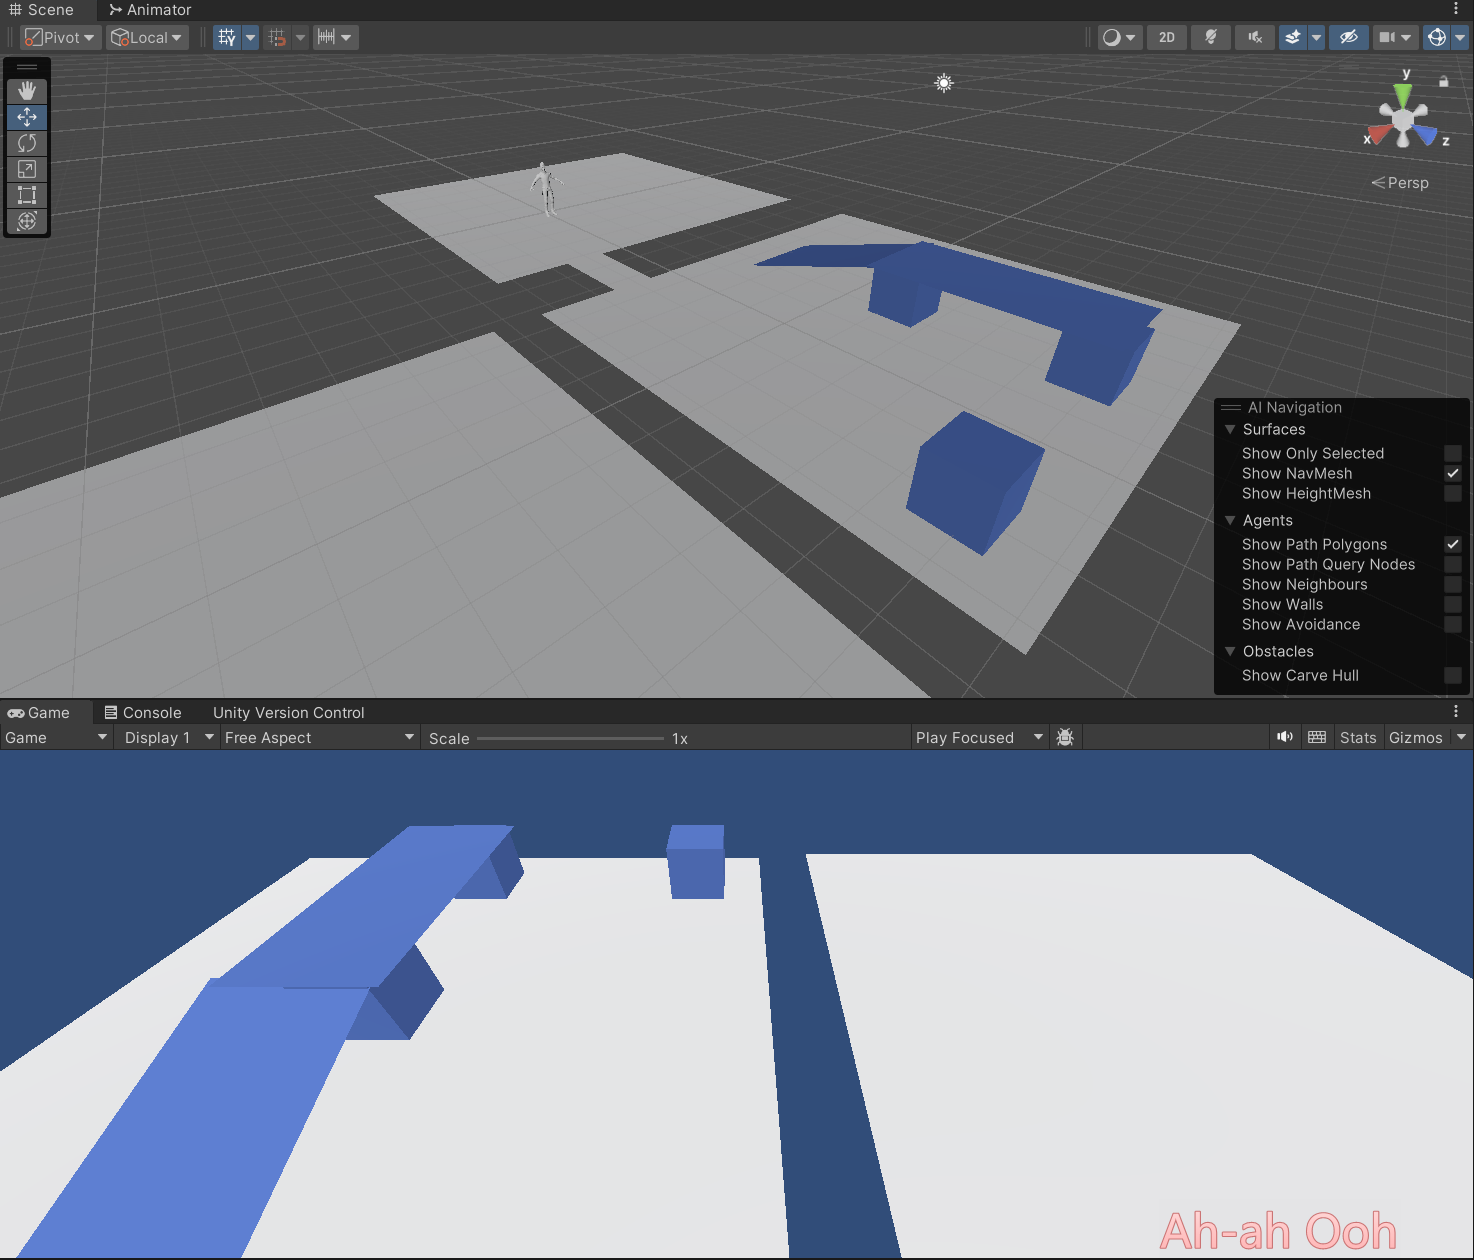
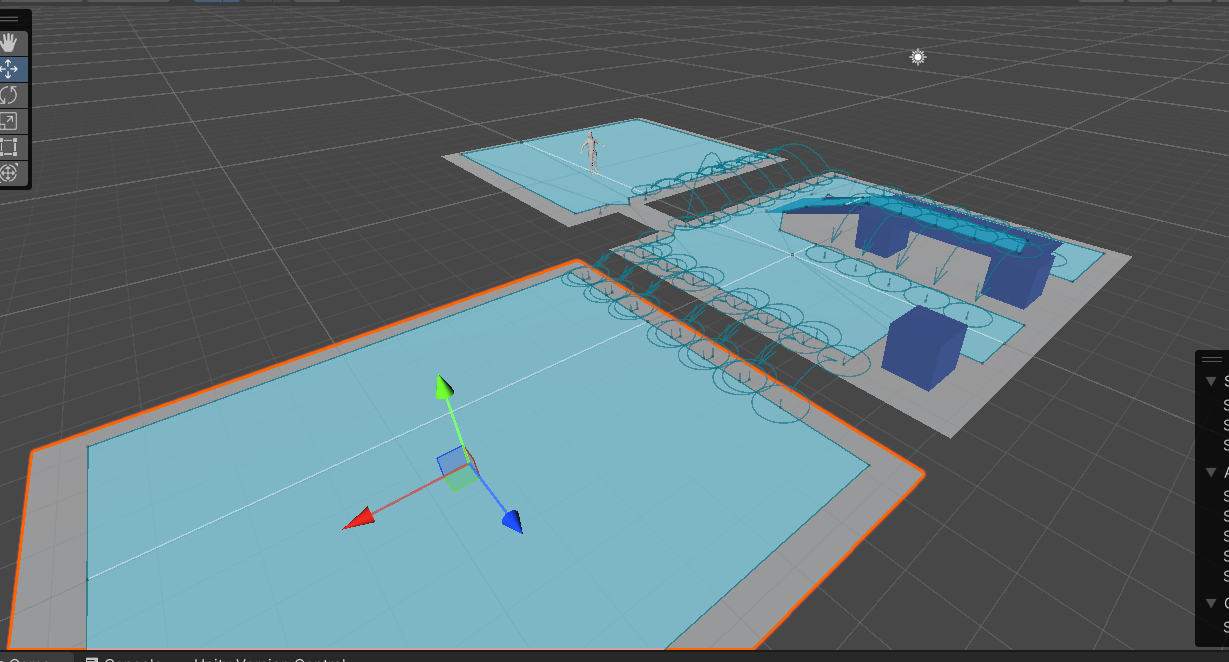
点击Bake之后,场景如图所示:
(2)角色
如果希望角色能进行自动寻路,需要为角色添加Nav Mesh Agent脚本:
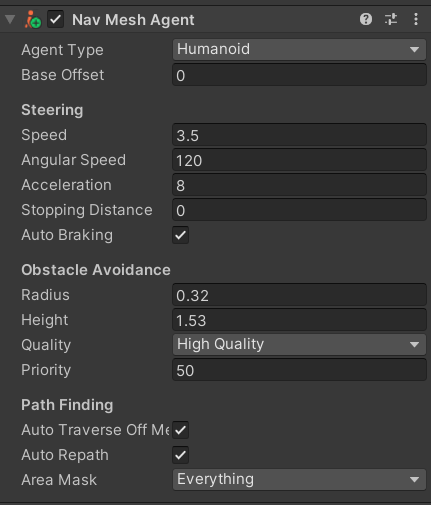
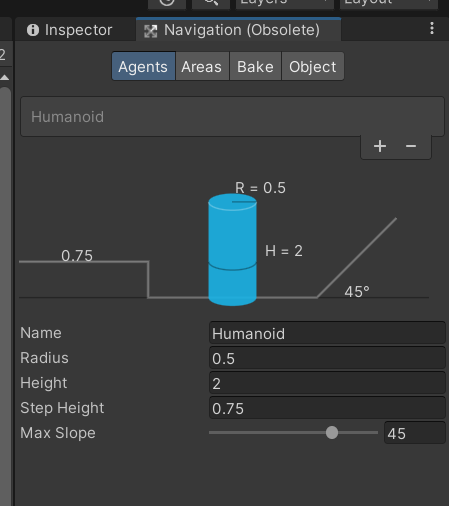
在这里可以设置Agent半径、位置,导航时角色速度与转身速度等。
2、代码相关
(1)常用API
SetDestination(),括号内传入需要移动到的位置,角色就会自动寻路到该位置。
agent.isStopped可以设置是否开启自动寻路。
private NavMeshAgent agent;void Start()
{agent = this.GetComponent<NavMeshAgent>();
}void Update()
{if(Input.GetMouseButtonDown(0)){RaycastHit hit;if(Physics.Raycast(Camera.main.ScreenPointToRay(Input.mousePosition), out hit)){print(hit.collider.name);agent.isStopped = false;agent.SetDestination(hit.point);}}if(Input.GetKeyDown(KeyCode.Space)){agent.isStopped = true;}
}
(2)不常用API
agent.speed:获取移动速度
agent.acceleration:获取移动加速度
agent.angularSpeed:获取转动速度
agent.hasPath:判断是否有路径
agent.destination:获取目标点
agent.isStopped:是否在寻路
agent.path:获取路径
agent.pathPending:是否在计算路径
agent.pathStatus:获取路径状态
agent.updatePosition:是否更新位置
agent.updateRotation:是否更新角度
agent.velocity:获取速度
手动寻路:
计算生成路径,第一个是目标位置,第二个是生成的路径
NavMeshPath path = new NavMeshPath();
if(agent.CalculatePath(Vector3.zero, path))
{
}
设置新路径:
if(agent.SetPath(path))
{
}
清除路径
agent.ResetPath();
调整到指定点位置
agent.Warp(Vector3.zero);
private NavMeshAgent agent;void Start()
{agent = this.GetComponent<NavMeshAgent>();print(agent.speed);print(agent.acceleration);print(agent.angularSpeed);if(agent.hasPath){}print(agent.destination);print(agent.isStopped);print(agent.path);//路径是否在计算之中if(agent.pathPending){}//路径状态print(agent.pathStatus);//是否更新位置agent.updatePosition = true;agent.updateRotation = true;print(agent.velocity);//手动寻路//计算生成路径,第一个是目标位置,第二个是生成的路径NavMeshPath path = new NavMeshPath();if(agent.CalculatePath(Vector3.zero, path)){}//设置新路径if(agent.SetPath(path)){}//清除路径agent.ResetPath();//调整到指定点位置agent.Warp(Vector3.zero);}