[嵌入式embed]Keil5-STM32F103C8T6(江协科技)+移植RT-Thread v3.15模版
Keil5-STM32F103C8T6_江协科技+移植RT-Thread v3.15模版
- 0.为什么不用<<Keil 模拟器 STM32F103 上手指南>>?
- 1.江协资料(接线图+视频+相关资料下载)
- 视频-(3-2 LED流水灯和4-1 OLED显示屏)
- 示例程序-(3-2 LED流水灯和4-1 OLED显示屏)
- 接线图-(3-2 LED流水灯和4-1 OLED显示屏)
- 资料下载
- 2.Keil5 安装 RT-Thread v3.15
- 方法一:在 IDE 内安装
- 方法二:手动安装
- 3.江协科技:4-1 OLED显示屏 移植RT-Thread Nano
- 3.1复制4-1 OLED显示屏项目
- 3.2打开项目并添加RT-Thread到项目
- 3.3修改RT-Thread的文件
- 3.4修改部分stm32的代码
- 4.查看效果
- led闪烁+oled显示
- 串口serial输出
- 5.百度云
0.为什么不用<<Keil 模拟器 STM32F103 上手指南>>?
Keil 模拟器 STM32F103 上手指南
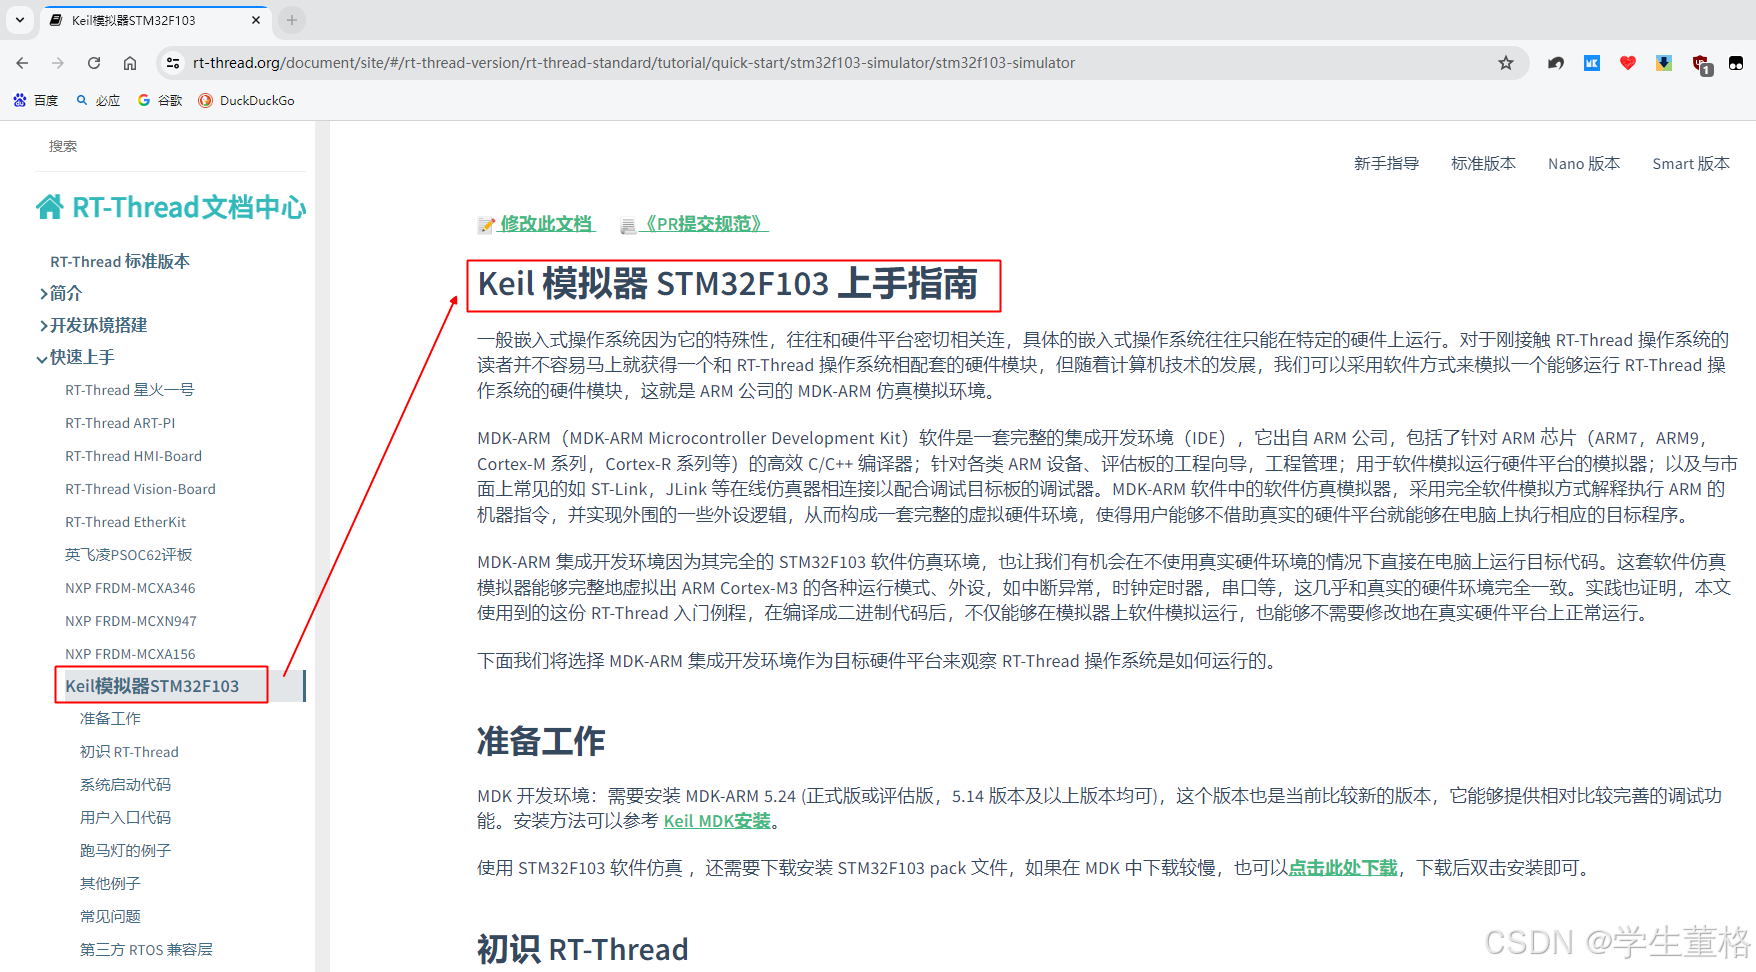
官方例子RT-Thread Simulator 例程
是基于STM32F103ZF的,与STM32F103C8T6差异巨大,移植时间成本过高
可用来参考移植结构

1.江协资料(接线图+视频+相关资料下载)
视频-(3-2 LED流水灯和4-1 OLED显示屏)
[3-2] LED闪烁&LED流水灯&蜂鸣器
[4-1] OLED调试工具
示例程序-(3-2 LED流水灯和4-1 OLED显示屏)
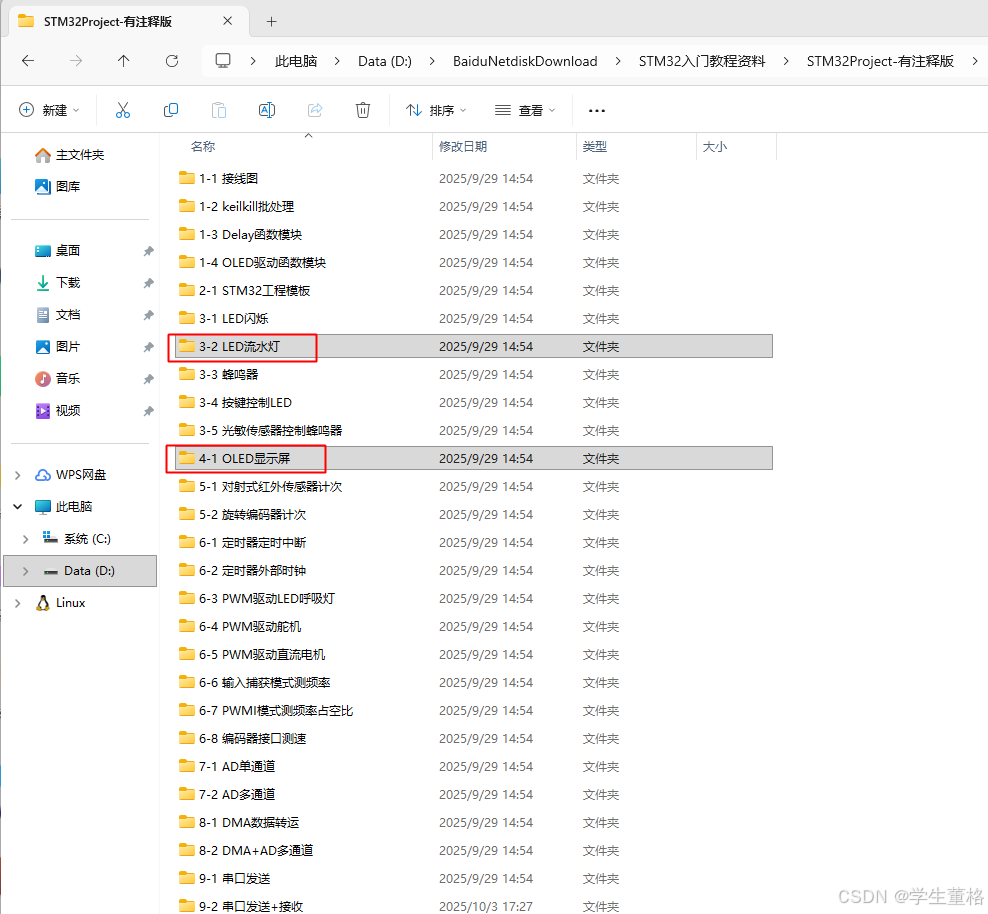
接线图-(3-2 LED流水灯和4-1 OLED显示屏)


因为需要Serial串口+OLED显示,所以最终接线如图

资料下载
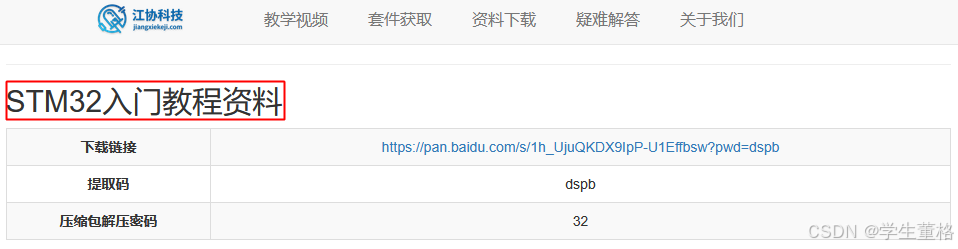
江协STM32资料下载
2.Keil5 安装 RT-Thread v3.15
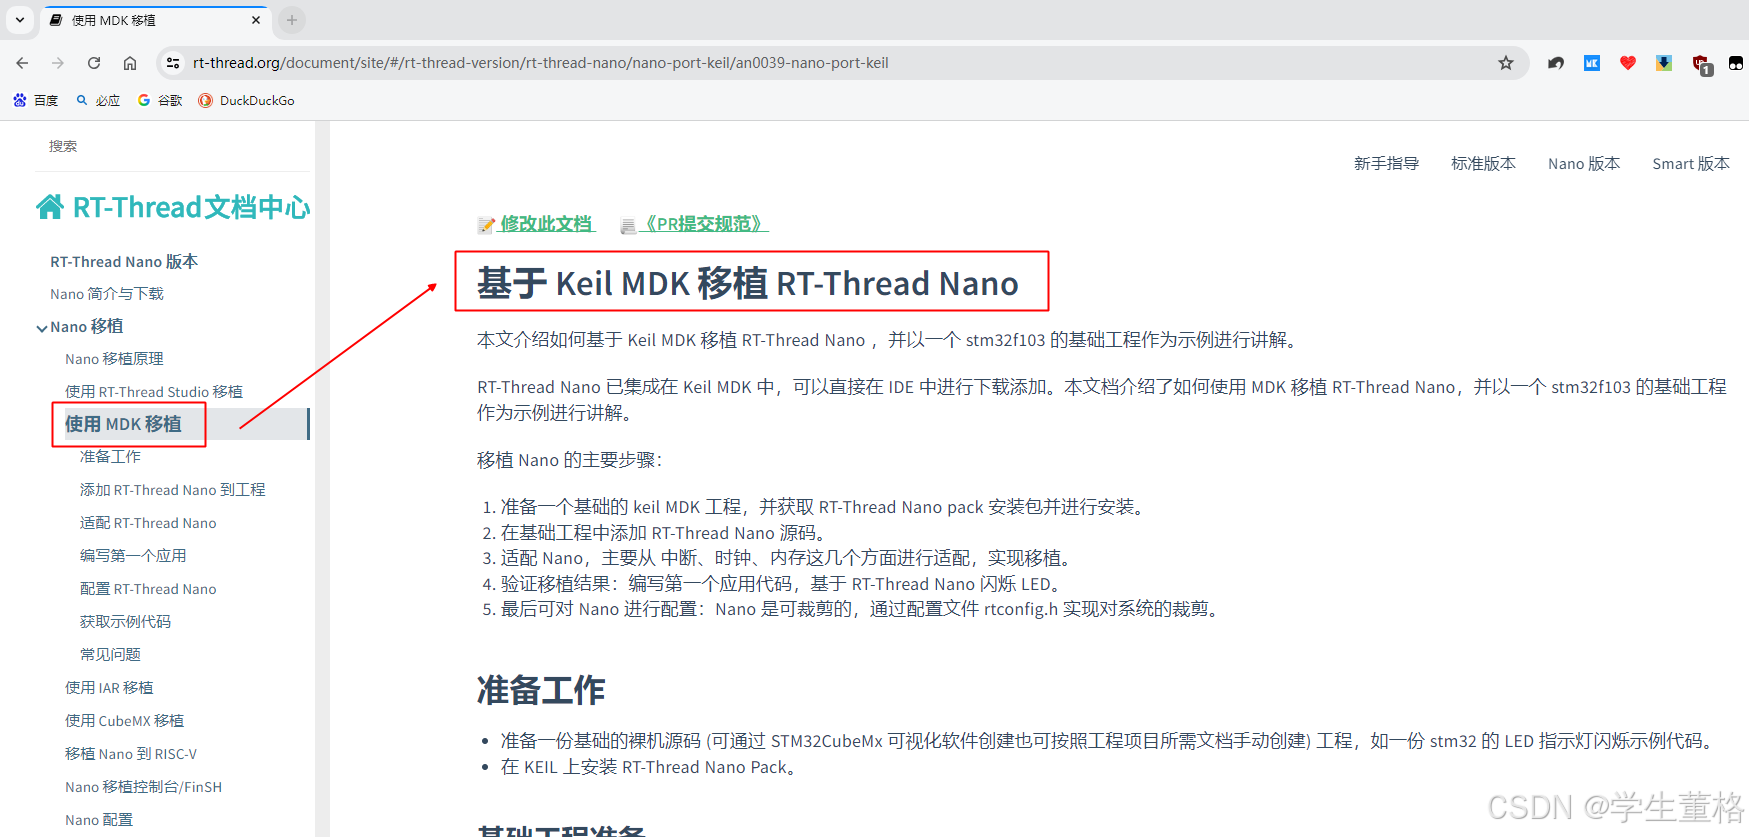
基于 Keil MDK 移植 RT-Thread Nano
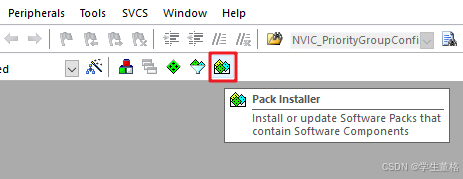
方法一:在 IDE 内安装
打开 MDK 软件,点击工具栏的 Pack Installer 图标:
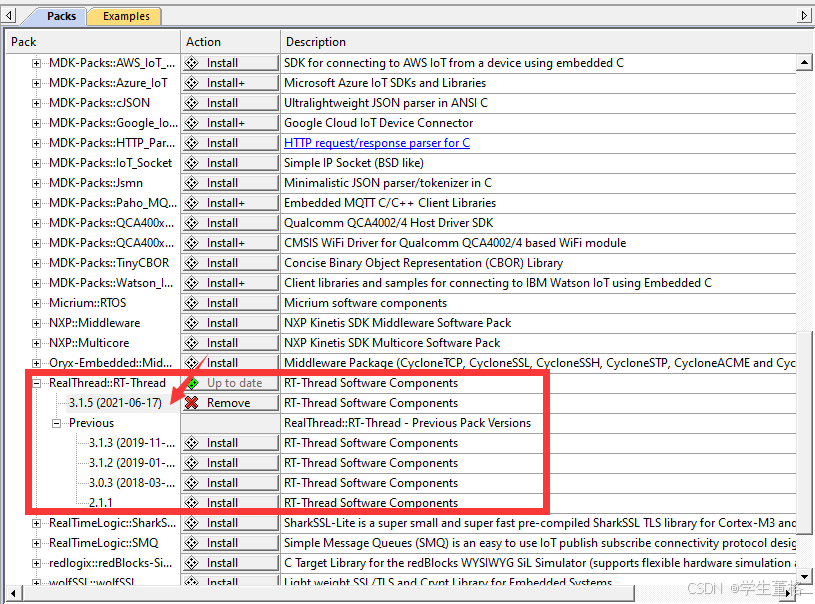
点击右侧的 Pack,展开 Generic,可以找到 RealThread::RT-Thread,点击 Action 栏对应的 Install ,就可以在线安装 Nano Pack 了。另外,如果需要安装其他版本,则需要展开 RealThread::RT-Thread,进行选择,箭头所指代表已经安装的版本。
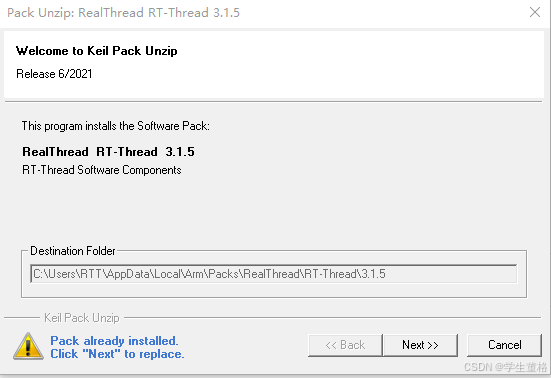
方法二:手动安装
我们也可以从官网下载安装文件,
RT-Thread Nano 离线安装包下载
双击文件进行安装:
3.江协科技:4-1 OLED显示屏 移植RT-Thread Nano
3.1复制4-1 OLED显示屏项目
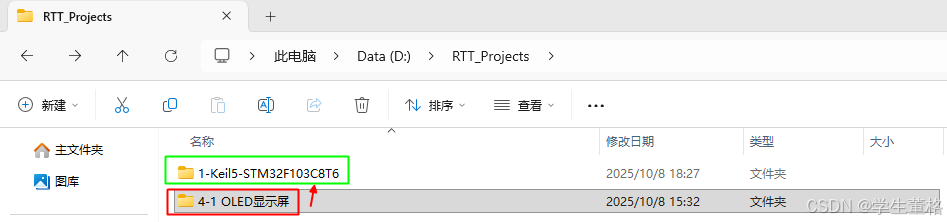
重命名为1-Keil5-STM32F103C8T6
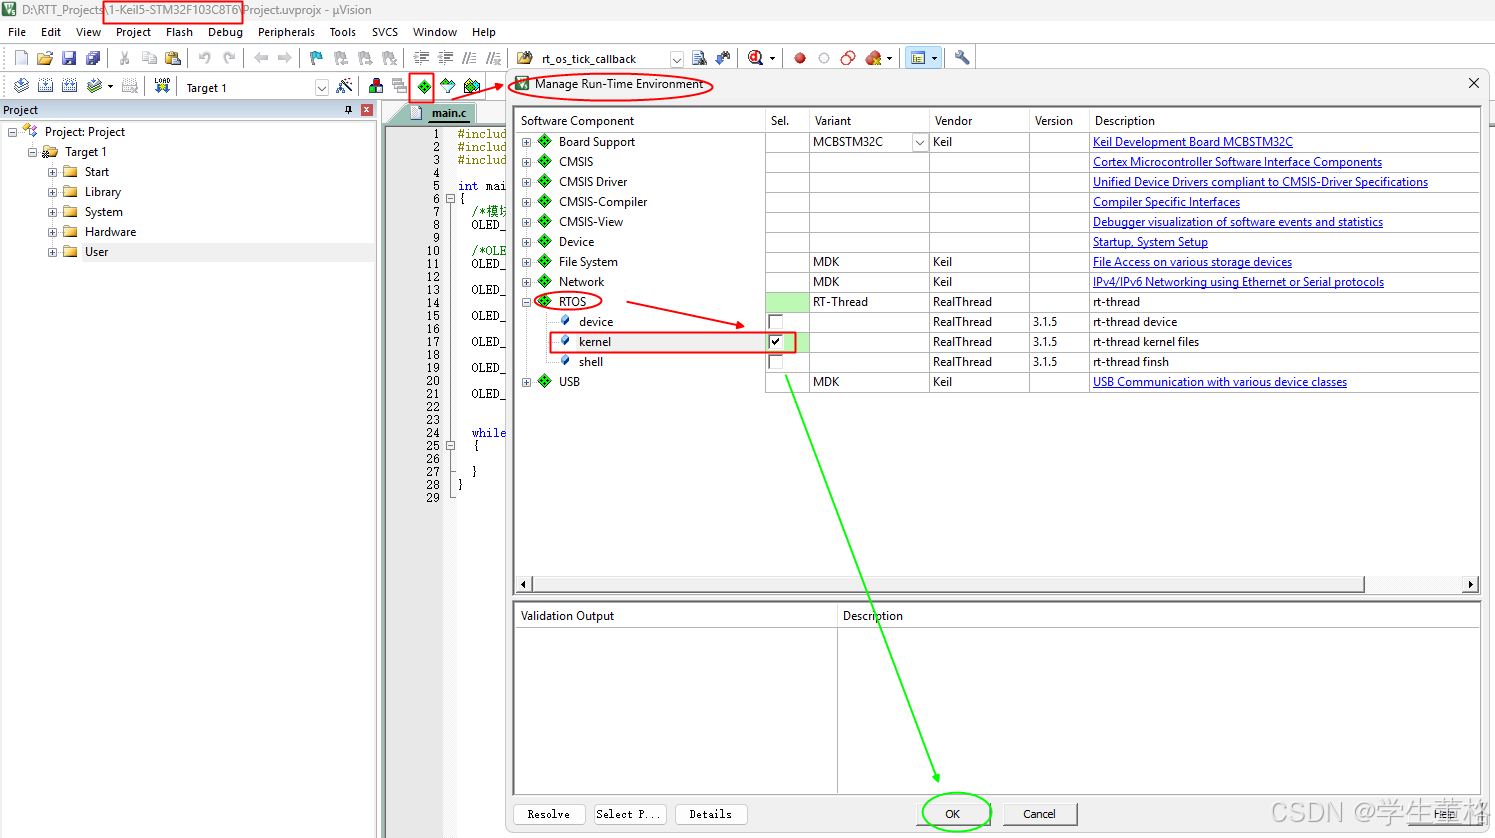
3.2打开项目并添加RT-Thread到项目
在 Manage Rum-Time Environment 里 “Software Component” 栏找到 RTOS,Variant 栏选择 RT-Thread,然后勾选 kernel,点击 “OK” 就添加 RT-Thread 内核到工程了。
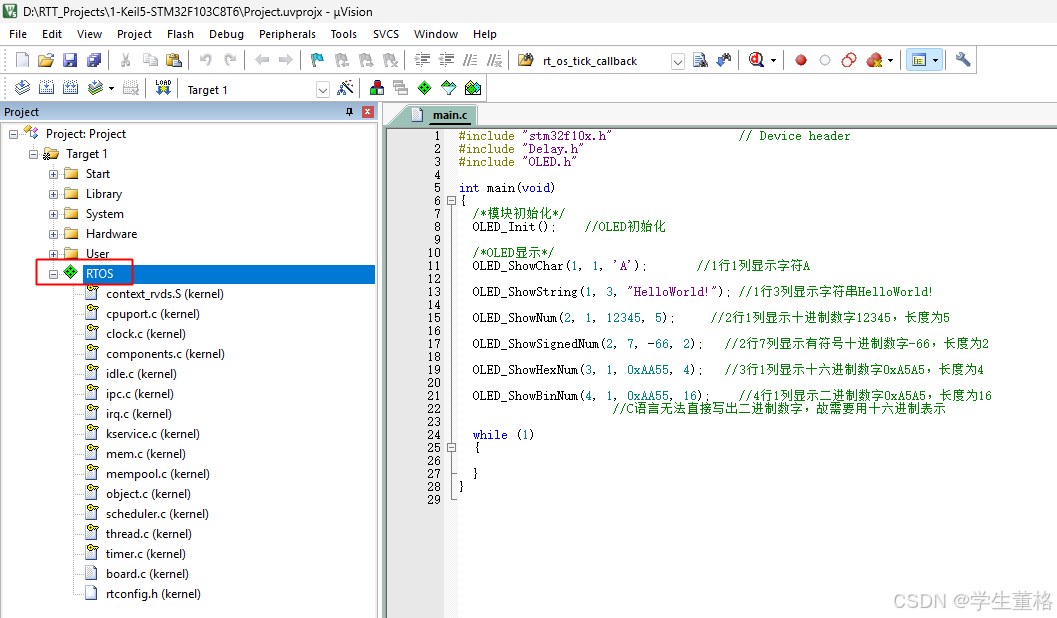
3.3修改RT-Thread的文件
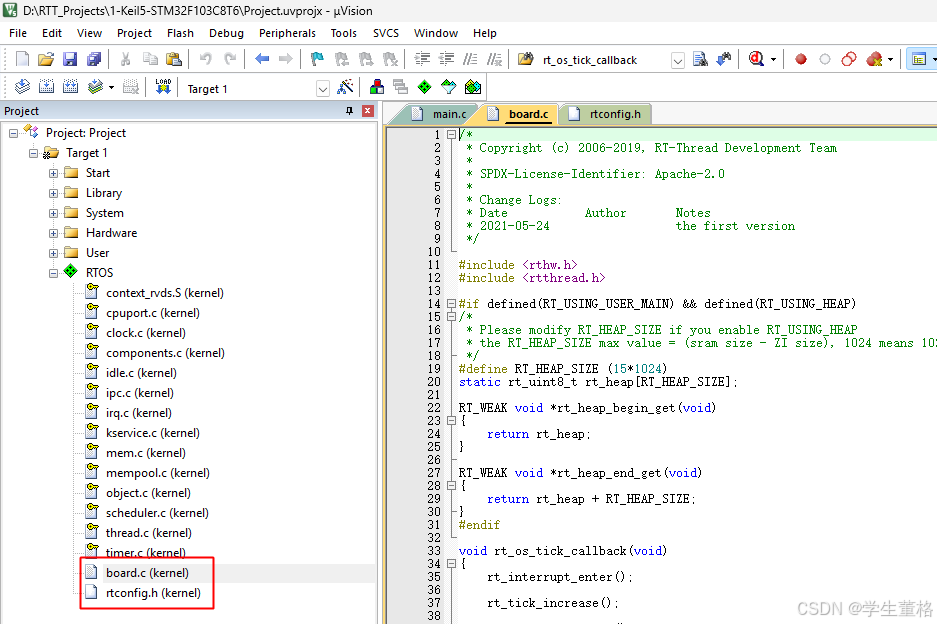
board.c

/** Copyright (c) 2006-2019, RT-Thread Development Team** SPDX-License-Identifier: Apache-2.0** Change Logs:* Date           Author       Notes* 2021-05-24                  the first version*/#include <rthw.h>
#include <rtthread.h>
#include "stm32f10x.h"#if defined(RT_USING_USER_MAIN) && defined(RT_USING_HEAP)
/** Please modify RT_HEAP_SIZE if you enable RT_USING_HEAP* the RT_HEAP_SIZE max value = (sram size - ZI size), 1024 means 1024 bytes*/
#define RT_HEAP_SIZE (15*1024)
static rt_uint8_t rt_heap[RT_HEAP_SIZE];RT_WEAK void *rt_heap_begin_get(void)
{return rt_heap;
}RT_WEAK void *rt_heap_end_get(void)
{return rt_heap + RT_HEAP_SIZE;
}
#endifvoid rt_os_tick_callback(void)
{rt_interrupt_enter();rt_tick_increase();rt_interrupt_leave();
}/*** This function will initial your board.*/
void rt_hw_board_init(void)
{
//#error "TODO 1: OS Tick Configuration."/* * TODO 1: OS Tick Configuration* Enable the hardware timer and call the rt_os_tick_callback function* periodically with the frequency RT_TICK_PER_SECOND.*/// 配置SysTick定时器,产生1ms中断SysTick_Config(SystemCoreClock / RT_TICK_PER_SECOND);/* Call components board initial (use INIT_BOARD_EXPORT()) */
#ifdef RT_USING_COMPONENTS_INITrt_components_board_init();
#endif#if defined(RT_USING_USER_MAIN) && defined(RT_USING_HEAP)rt_system_heap_init(rt_heap_begin_get(), rt_heap_end_get());
#endif
}#ifdef RT_USING_CONSOLEstatic int uart_init(void)
{USART_InitTypeDef USART_InitStructure;GPIO_InitTypeDef GPIO_InitStructure;/* 使能外设时钟 */RCC_APB2PeriphClockCmd(RCC_APB2Periph_USART1 | RCC_APB2Periph_GPIOA, ENABLE);/* 配置USART1 Tx (PA.9)为复用推挽输出 */GPIO_InitStructure.GPIO_Pin = GPIO_Pin_9;GPIO_InitStructure.GPIO_Speed = GPIO_Speed_50MHz;GPIO_InitStructure.GPIO_Mode = GPIO_Mode_AF_PP;GPIO_Init(GPIOA, &GPIO_InitStructure);/* 配置USART1 Rx (PA.10)为浮空输入 */GPIO_InitStructure.GPIO_Pin = GPIO_Pin_10;GPIO_InitStructure.GPIO_Mode = GPIO_Mode_IN_FLOATING;GPIO_Init(GPIOA, &GPIO_InitStructure);/* 配置USART1参数 */USART_InitStructure.USART_BaudRate = 115200;USART_InitStructure.USART_WordLength = USART_WordLength_8b;USART_InitStructure.USART_StopBits = USART_StopBits_1;USART_InitStructure.USART_Parity = USART_Parity_No;USART_InitStructure.USART_HardwareFlowControl = USART_HardwareFlowControl_None;USART_InitStructure.USART_Mode = USART_Mode_Tx;/* 初始化USART1 */USART_Init(USART1, &USART_InitStructure);/* 使能USART1 */USART_Cmd(USART1, ENABLE);return 0;
}
INIT_BOARD_EXPORT(uart_init);void rt_hw_console_output(const char *str)
{rt_size_t i = 0, size = 0;char a = '\r';size = rt_strlen(str);for (i = 0; i < size; i++){/* 遇到'\n',需要先发送'\r' */if (*(str + i) == '\n'){/* 等待发送缓冲区为空 */while (USART_GetFlagStatus(USART1, USART_FLAG_TXE) == RESET);USART_SendData(USART1, a);}/* 等待发送缓冲区为空 */while (USART_GetFlagStatus(USART1, USART_FLAG_TXE) == RESET);USART_SendData(USART1, *(str + i));}
}#endif
rtconfig.h
/* RT-Thread config file */#ifndef __RTTHREAD_CFG_H__
#define __RTTHREAD_CFG_H__// <<< Use Configuration Wizard in Context Menu >>>// <h>Basic Configuration
// <o>Maximal level of thread priority <8-256>
// <i>Default: 32
#define RT_THREAD_PRIORITY_MAX 32
// <o>OS tick per second
// <i>Default: 1000 (1ms)
#define RT_TICK_PER_SECOND 1000
// <o>Alignment size for CPU architecture data access
// <i>Default: 4
#define RT_ALIGN_SIZE 4
// <o>the max length of object name<2-16>
// <i>Default: 8
#define RT_NAME_MAX 8
// <c1>Using RT-Thread components initialization
// <i>Using RT-Thread components initialization
#define RT_USING_COMPONENTS_INIT
// </c>#define RT_USING_USER_MAIN// <o>the stack size of main thread<1-4086>
// <i>Default: 512
#define RT_MAIN_THREAD_STACK_SIZE 256// </h>// <h>Debug Configuration
// <c1>enable kernel debug configuration
// <i>Default: enable kernel debug configuration
//#define RT_DEBUG
// </c>
// <o>enable components initialization debug configuration<0-1>
// <i>Default: 0
#define RT_DEBUG_INIT 0
// <c1>thread stack over flow detect
// <i> Diable Thread stack over flow detect
//#define RT_USING_OVERFLOW_CHECK
// </c>
// </h>// <h>Hook Configuration
// <c1>using hook
// <i>using hook
//#define RT_USING_HOOK
// </c>
// <c1>using idle hook
// <i>using idle hook
//#define RT_USING_IDLE_HOOK
// </c>
// </h>// <e>Software timers Configuration
// <i> Enables user timers
#define RT_USING_TIMER_SOFT 0
#if RT_USING_TIMER_SOFT == 0#undef RT_USING_TIMER_SOFT
#endif
// <o>The priority level of timer thread <0-31>
// <i>Default: 4
#define RT_TIMER_THREAD_PRIO 4
// <o>The stack size of timer thread <0-8192>
// <i>Default: 512
#define RT_TIMER_THREAD_STACK_SIZE 512
// </e>// <h>IPC(Inter-process communication) Configuration
// <c1>Using Semaphore
// <i>Using Semaphore
#define RT_USING_SEMAPHORE
// </c>
// <c1>Using Mutex
// <i>Using Mutex
//#define RT_USING_MUTEX
// </c>
// <c1>Using Event
// <i>Using Event
//#define RT_USING_EVENT
// </c>
// <c1>Using MailBox
// <i>Using MailBox
#define RT_USING_MAILBOX
// </c>
// <c1>Using Message Queue
// <i>Using Message Queue
//#define RT_USING_MESSAGEQUEUE
// </c>
// </h>// <h>Memory Management Configuration
// <c1>Memory Pool Management
// <i>Memory Pool Management
//#define RT_USING_MEMPOOL
// </c>
// <c1>Dynamic Heap Management(Algorithm: small memory )
// <i>Dynamic Heap Management
#define RT_USING_HEAP
#define RT_USING_SMALL_MEM
// </c>
// <c1>using tiny size of memory
// <i>using tiny size of memory
//#define RT_USING_TINY_SIZE
// </c>
// </h>// <h>Console Configuration
// <c1>Using console
// <i>Using console
#define RT_USING_CONSOLE
// </c>
// <o>the buffer size of console <1-1024>
// <i>the buffer size of console
// <i>Default: 128 (128Byte)
#define RT_CONSOLEBUF_SIZE 256
// </h>// <h>FinSH Configuration
// <c1>include finsh config
// <i>Select this choice if you using FinSH
//#include "finsh_config.h"
// </c>
// </h>// <h>Device Configuration
// <c1>using device framework
// <i>using device framework
//#define RT_USING_DEVICE
// </c>
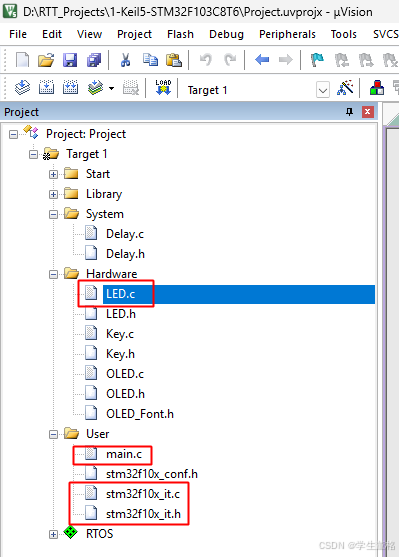
// </h>// <<< end of configuration section >>>#endif3.4修改部分stm32的代码
stm32f10x_it.c
/********************************************************************************* @file Project/STM32F10x_StdPeriph_Template/stm32f10x_it.c * @author MCD Application Team* @version V3.5.0* @date 08-April-2011* @brief Main Interrupt Service Routines.* This file provides template for all exceptions handler and * peripherals interrupt service routine.******************************************************************************* @attention** THE PRESENT FIRMWARE WHICH IS FOR GUIDANCE ONLY AIMS AT PROVIDING CUSTOMERS* WITH CODING INFORMATION REGARDING THEIR PRODUCTS IN ORDER FOR THEM TO SAVE* TIME. AS A RESULT, STMICROELECTRONICS SHALL NOT BE HELD LIABLE FOR ANY* DIRECT, INDIRECT OR CONSEQUENTIAL DAMAGES WITH RESPECT TO ANY CLAIMS ARISING* FROM THE CONTENT OF SUCH FIRMWARE AND/OR THE USE MADE BY CUSTOMERS OF THE* CODING INFORMATION CONTAINED HEREIN IN CONNECTION WITH THEIR PRODUCTS.** <h2><center>© COPYRIGHT 2011 STMicroelectronics</center></h2>*******************************************************************************//* Includes ------------------------------------------------------------------*/
#include "stm32f10x_it.h"
#include <rthw.h>
#include <rtthread.h>/* 函数声明 */
void rt_os_tick_callback(void);/** @addtogroup STM32F10x_StdPeriph_Template* @{*//* Private typedef -----------------------------------------------------------*/
/* Private define ------------------------------------------------------------*/
/* Private macro -------------------------------------------------------------*/
/* Private variables ---------------------------------------------------------*/
/* Private function prototypes -----------------------------------------------*/
/* Private functions ---------------------------------------------------------*//******************************************************************************/
/* Cortex-M3 Processor Exceptions Handlers */
/******************************************************************************//*** @brief This function handles NMI exception.* @param None* @retval None*/
void NMI_Handler(void)
{
}/*** @brief This function handles Hard Fault exception.* @param None* @retval None*/
//void HardFault_Handler(void)
//{
// /* Go to infinite loop when Hard Fault exception occurs */
// while (1)
// {
// }
//}/*** @brief This function handles Memory Manage exception.* @param None* @retval None*/
void MemManage_Handler(void)
{/* Go to infinite loop when Memory Manage exception occurs */while (1){}
}/*** @brief This function handles Bus Fault exception.* @param None* @retval None*/
void BusFault_Handler(void)
{/* Go to infinite loop when Bus Fault exception occurs */while (1){}
}/*** @brief This function handles Usage Fault exception.* @param None* @retval None*/
void UsageFault_Handler(void)
{/* Go to infinite loop when Usage Fault exception occurs */while (1){}
}/*** @brief This function handles SVCall exception.* @param None* @retval None*/
void SVC_Handler(void)
{
}/*** @brief This function handles Debug Monitor exception.* @param None* @retval None*/
void DebugMon_Handler(void)
{
}/*** @brief This function handles PendSVC exception.* @param None* @retval None*/
//void PendSV_Handler(void)
//{
//}/*** @brief This function handles SysTick Handler.* @param None* @retval None*/
void SysTick_Handler(void)
{rt_os_tick_callback();
}/******************************************************************************/
/* STM32F10x Peripherals Interrupt Handlers */
/* Add here the Interrupt Handler for the used peripheral(s) (PPP), for the */
/* available peripheral interrupt handler's name please refer to the startup */
/* file (startup_stm32f10x_xx.s). */
/******************************************************************************//*** @brief This function handles PPP interrupt request.* @param None* @retval None*/
/*void PPP_IRQHandler(void)
{
}*//*** @}*/ /******************* (C) COPYRIGHT 2011 STMicroelectronics *****END OF FILE****/stm32f10x_it.h
/********************************************************************************* @file Project/STM32F10x_StdPeriph_Template/stm32f10x_it.h * @author MCD Application Team* @version V3.5.0* @date 08-April-2011* @brief This file contains the headers of the interrupt handlers.******************************************************************************* @attention** THE PRESENT FIRMWARE WHICH IS FOR GUIDANCE ONLY AIMS AT PROVIDING CUSTOMERS* WITH CODING INFORMATION REGARDING THEIR PRODUCTS IN ORDER FOR THEM TO SAVE* TIME. AS A RESULT, STMICROELECTRONICS SHALL NOT BE HELD LIABLE FOR ANY* DIRECT, INDIRECT OR CONSEQUENTIAL DAMAGES WITH RESPECT TO ANY CLAIMS ARISING* FROM THE CONTENT OF SUCH FIRMWARE AND/OR THE USE MADE BY CUSTOMERS OF THE* CODING INFORMATION CONTAINED HEREIN IN CONNECTION WITH THEIR PRODUCTS.** <h2><center>© COPYRIGHT 2011 STMicroelectronics</center></h2>*******************************************************************************/ /* Define to prevent recursive inclusion -------------------------------------*/
#ifndef __STM32F10x_IT_H
#define __STM32F10x_IT_H#ifdef __cplusplusextern "C" {
#endif /* Includes ------------------------------------------------------------------*/
#include "stm32f10x.h"/* Exported types ------------------------------------------------------------*/
/* Exported constants --------------------------------------------------------*/
/* Exported macro ------------------------------------------------------------*/
/* Exported functions ------------------------------------------------------- */void NMI_Handler(void);
//void HardFault_Handler(void);
void MemManage_Handler(void);
void BusFault_Handler(void);
void UsageFault_Handler(void);
void SVC_Handler(void);
void DebugMon_Handler(void);
//void PendSV_Handler(void);
void SysTick_Handler(void);#ifdef __cplusplus
}
#endif#endif /* __STM32F10x_IT_H *//******************* (C) COPYRIGHT 2011 STMicroelectronics *****END OF FILE****/LED.c
#include "stm32f10x.h"                  // Device header/*** 函    数:LED初始化* 参    数:无* 返 回 值:无*/
void LED_Init(void)
{/*开启时钟*/RCC_APB2PeriphClockCmd(RCC_APB2Periph_GPIOA, ENABLE);		//开启GPIOA的时钟/*GPIO初始化*/GPIO_InitTypeDef GPIO_InitStructure;GPIO_InitStructure.GPIO_Mode = GPIO_Mode_Out_PP;GPIO_InitStructure.GPIO_Pin = GPIO_Pin_0 | GPIO_Pin_1;GPIO_InitStructure.GPIO_Speed = GPIO_Speed_50MHz;GPIO_Init(GPIOA, &GPIO_InitStructure);						//将PA1和PA2引脚初始化为推挽输出/*设置GPIO初始化后的默认电平*/GPIO_SetBits(GPIOA, GPIO_Pin_0 | GPIO_Pin_1);				//设置PA1和PA2引脚为高电平
}/*** 函    数:LED1开启* 参    数:无* 返 回 值:无*/
void LED1_ON(void)
{GPIO_ResetBits(GPIOA, GPIO_Pin_0);		//设置PA1引脚为低电平
}/*** 函    数:LED1关闭* 参    数:无* 返 回 值:无*/
void LED1_OFF(void)
{GPIO_SetBits(GPIOA, GPIO_Pin_0);		//设置PA1引脚为高电平
}/*** 函    数:LED1状态翻转* 参    数:无* 返 回 值:无*/
void LED1_Turn(void)
{if (GPIO_ReadOutputDataBit(GPIOA, GPIO_Pin_0) == 0)		//获取输出寄存器的状态,如果当前引脚输出低电平{GPIO_SetBits(GPIOA, GPIO_Pin_0);					//则设置PA1引脚为高电平}else													//否则,即当前引脚输出高电平{GPIO_ResetBits(GPIOA, GPIO_Pin_0);					//则设置PA1引脚为低电平}
}/*** 函    数:LED2开启* 参    数:无* 返 回 值:无*/
void LED2_ON(void)
{GPIO_ResetBits(GPIOA, GPIO_Pin_1);		//设置PA2引脚为低电平
}/*** 函    数:LED2关闭* 参    数:无* 返 回 值:无*/
void LED2_OFF(void)
{GPIO_SetBits(GPIOA, GPIO_Pin_1);		//设置PA2引脚为高电平
}/*** 函    数:LED2状态翻转* 参    数:无* 返 回 值:无*/
void LED2_Turn(void)
{if (GPIO_ReadOutputDataBit(GPIOA, GPIO_Pin_1) == 0)		//获取输出寄存器的状态,如果当前引脚输出低电平{                                                  GPIO_SetBits(GPIOA, GPIO_Pin_1);               		//则设置PA2引脚为高电平}                                                  else                                               		//否则,即当前引脚输出高电平{                                                  GPIO_ResetBits(GPIOA, GPIO_Pin_1);             		//则设置PA2引脚为低电平}
}
main.c
#include "stm32f10x.h"                  // Device header
#include "Delay.h"
#include "OLED.h"
#include "LED.h"
#include <rtthread.h>
#include <rtdbg.h>rt_thread_t thread1;
uint8_t flag;void thread1_entry(void *p){while(1){rt_kprintf("thread1 running\n");flag = !flag;if (flag){LED1_ON();LED2_OFF();OLED_ShowString(4, 1, "thread1 run");}else{LED1_OFF();LED2_ON();OLED_ShowString(3, 1, "thread1 run");}rt_thread_mdelay(500);}
}int main(void)
{/*模块初始化*/OLED_Init();		//OLED初始化LED_Init();thread1 = rt_thread_create("thread1", thread1_entry, RT_NULL, 512, 15, 5);if (thread1 != RT_NULL){rt_thread_startup(thread1);rt_kprintf("thread1 create success\n");}else{rt_kprintf("thread1 create error\n");}
}
4.查看效果
led闪烁+oled显示

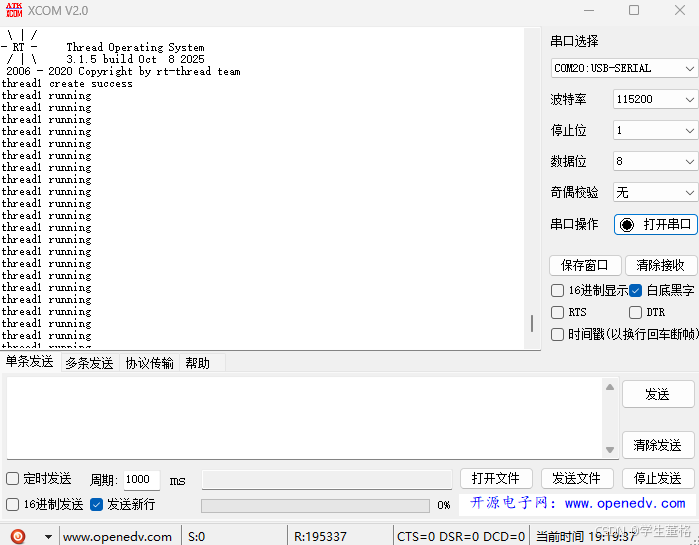
串口serial输出
5.百度云
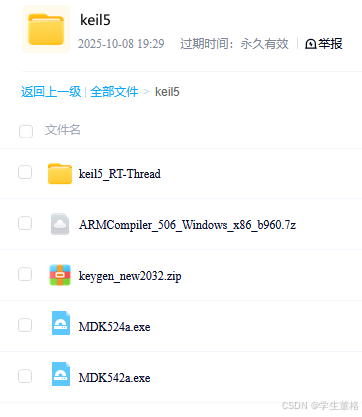
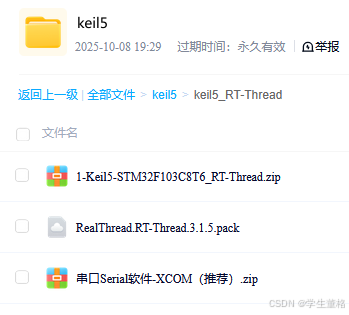
keil5+rt_thread离线安装包+串口工具+keil5_STM32F103C8T6_RT-Thread项目