如何在 vscode 里配置 MCP 并连接到 Elasticsearch
在之前的文章 “使用 MCP 将代理连接到 Elasticsearch 并对索引进行查询”,我详细地描述了如何在 Claude Desktop 里配置 Elasticsearch MCP server 并连接到 Elasticsearch。对于很多的开发者来说,处于一些原因。Claude Destop 并不为我们中国开发者所能使用。在今天的文章里,我们来详述如何在 VS code 里来配置 Elasticsearch MCP server。
更多阅读:将 agents 连接到 Elasticsearch 使用模型上下文协议 - docker
安装
Elasticseach 及 Kibana
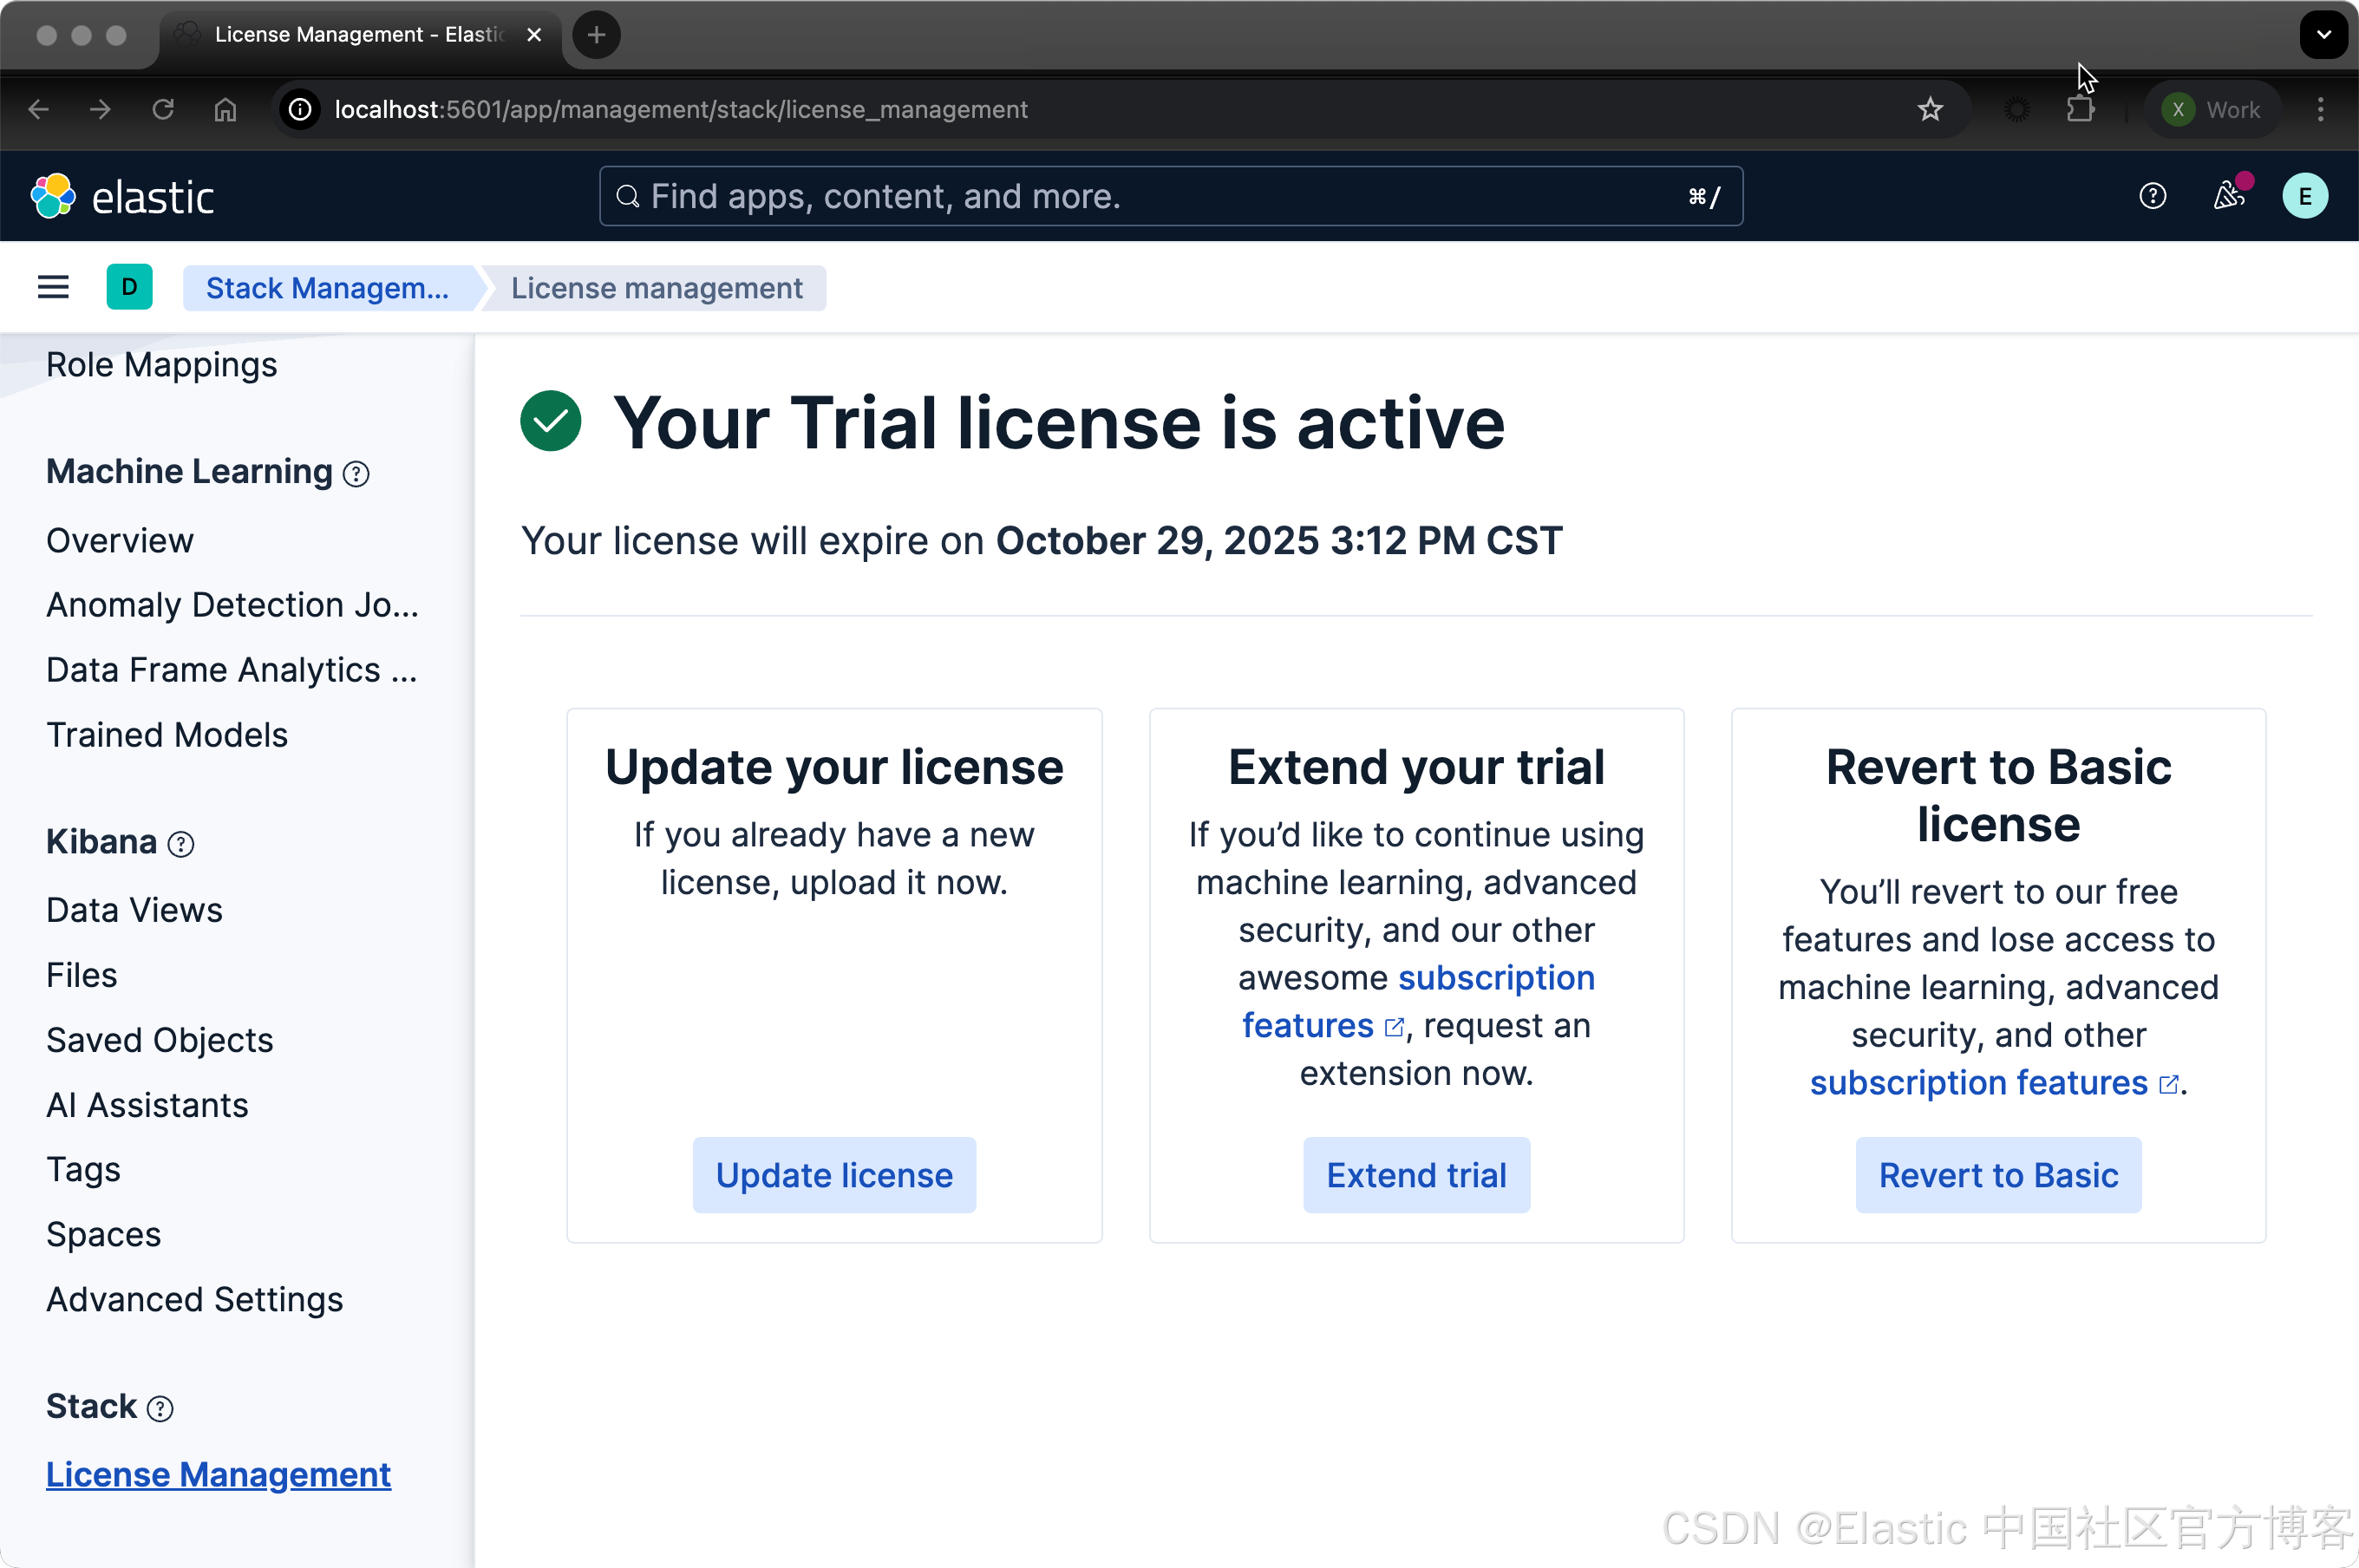
如果你还没有安装好自己的 Elasticsearch 及 Kibana,那么请你按照之前的文章 “使用 MCP 将代理连接到 Elasticsearch 并对索引进行查询” 进行安装。在这里就不一一赘述了。我们需要启动白金试用:
VS Code
我们需要针对 VS Code 来做一些安装:
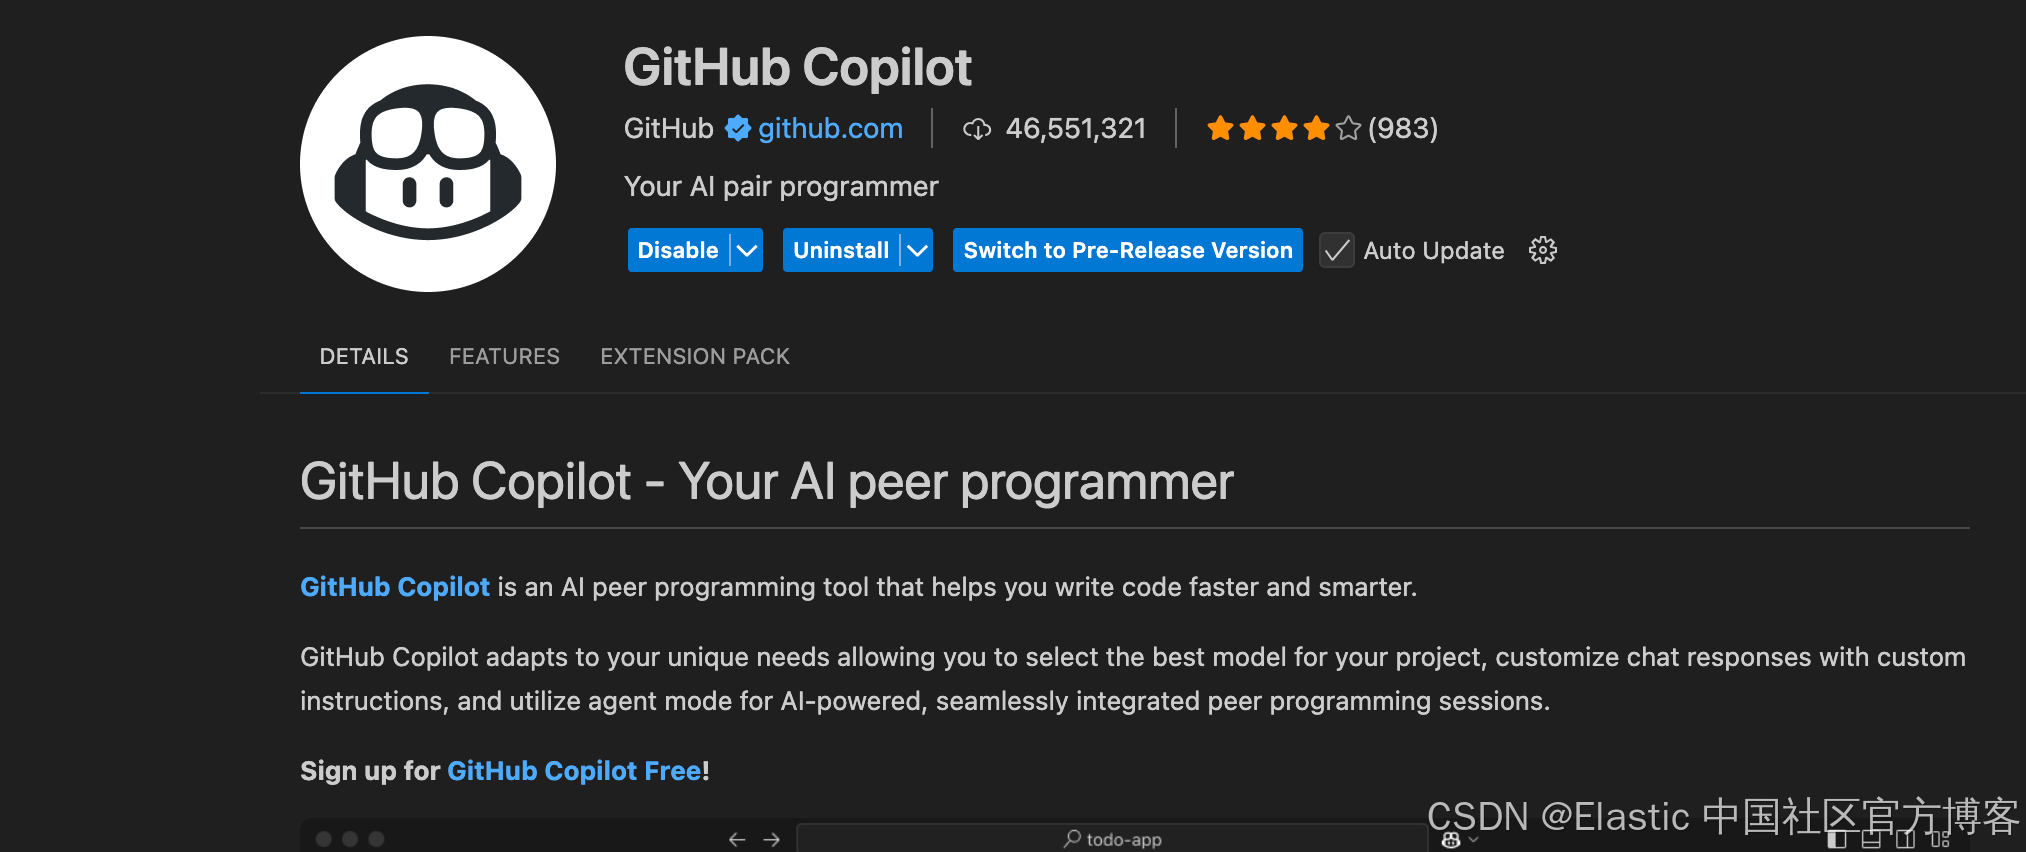
- Github Copilot
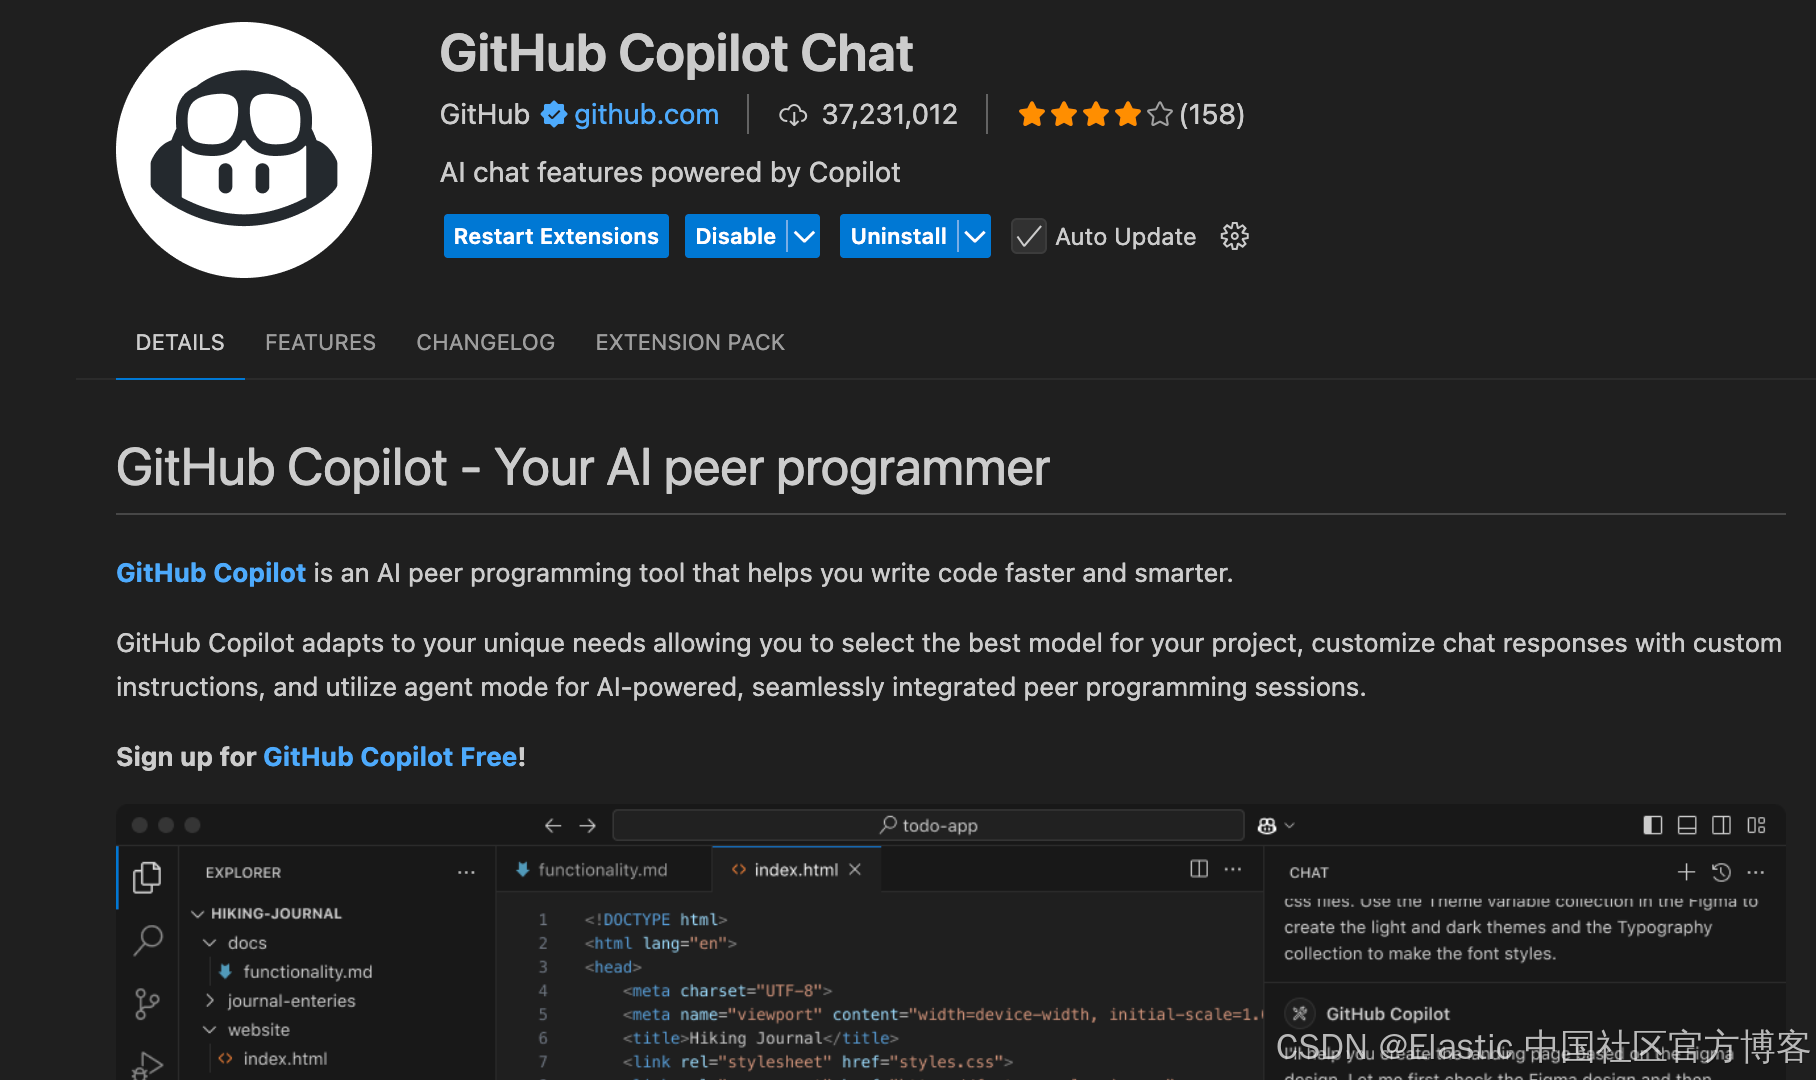
- Github Copilot Chat:
- Gemini Code Assist:
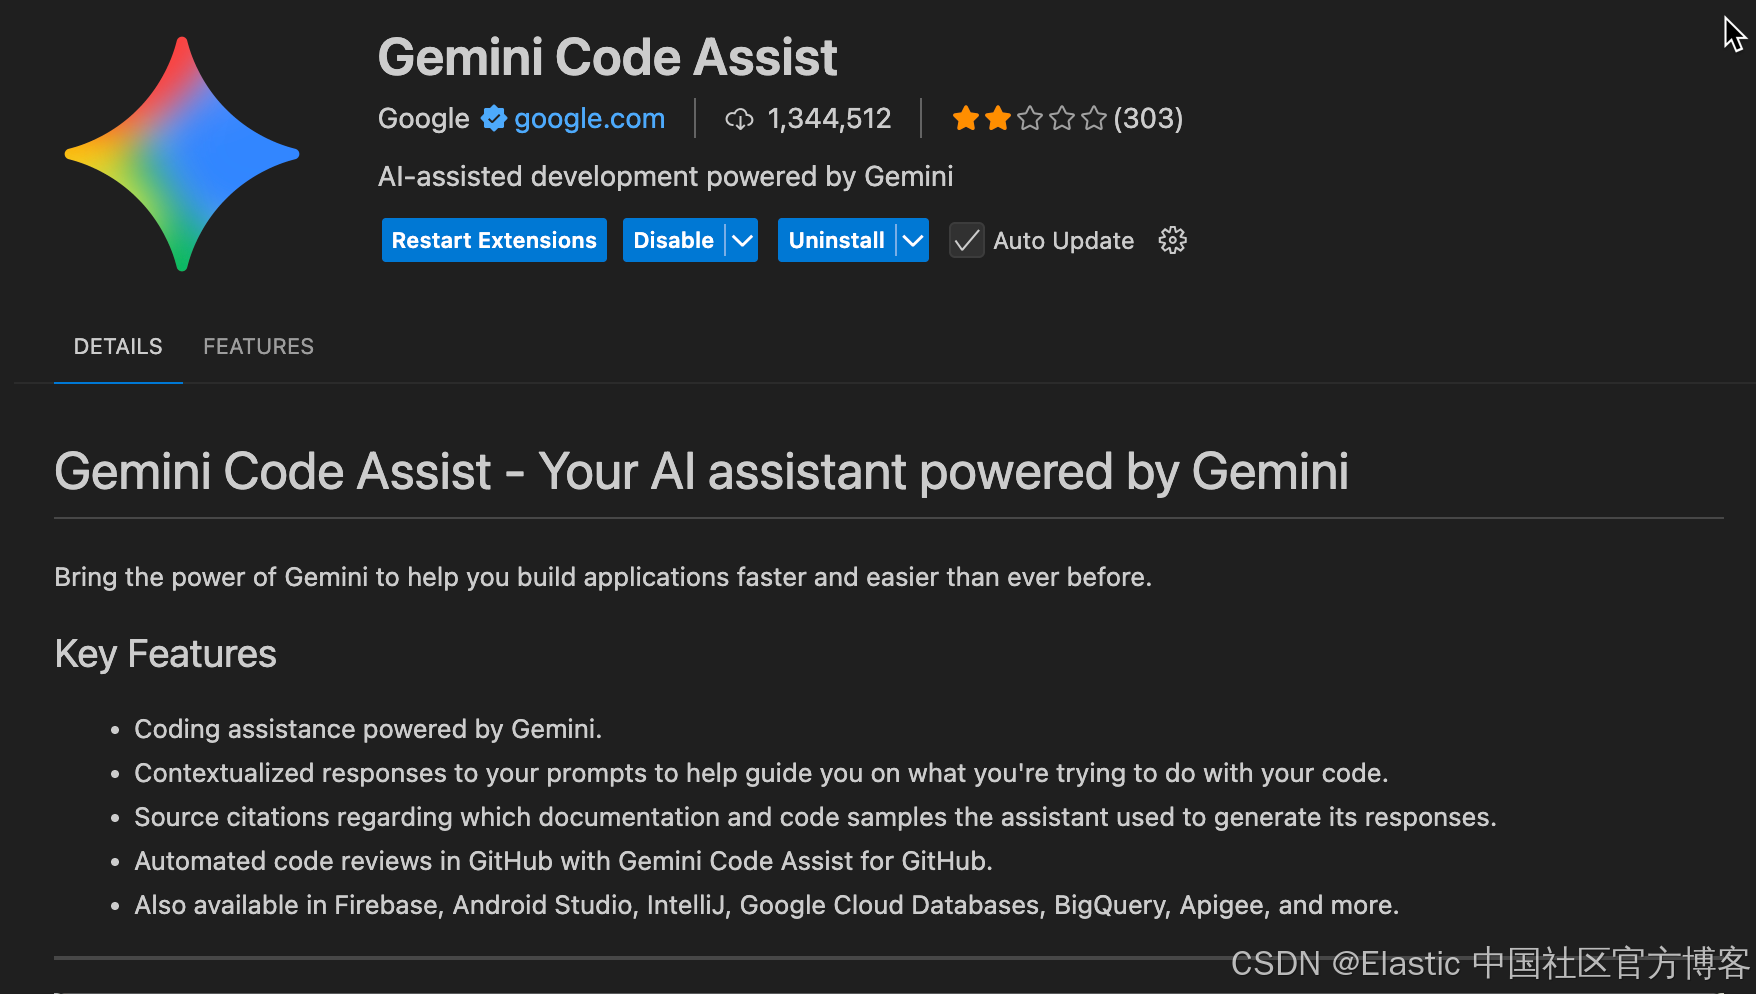
Gemini code assist 可以轻松地帮我们在 VS code 里生成我们所需要的代码:
- 按 Command+I 来转换你的代码并执行自定义命令
- 在编辑器中将注释选为提示,然后按 Control+Return 生成代码
- 点击 Activity Bar 中的 Gemini Logo () 使用 Gemini Code Assist 聊天,向它提问并改进你的代码
- 向聊天上下文中添加文件、文件夹和工具
- 添加自定义规则以增强聊天响应
比如,我们可以在 Github Copilot chat 里打入如下的提示:
我的 Elasticsearch 地址是:https://localhost:9200, 连接的 fingerprint 是:0e62f7b65c1aef92bac30593a98ae761e198514282363074326f5c81a5f341e8,超级用户 elastic 的密码是 kR8H8V3G2bgU7rvqk2rX。请创建 python 代码连接到 Elasticsearch,并使用 ping 来查看连接的状态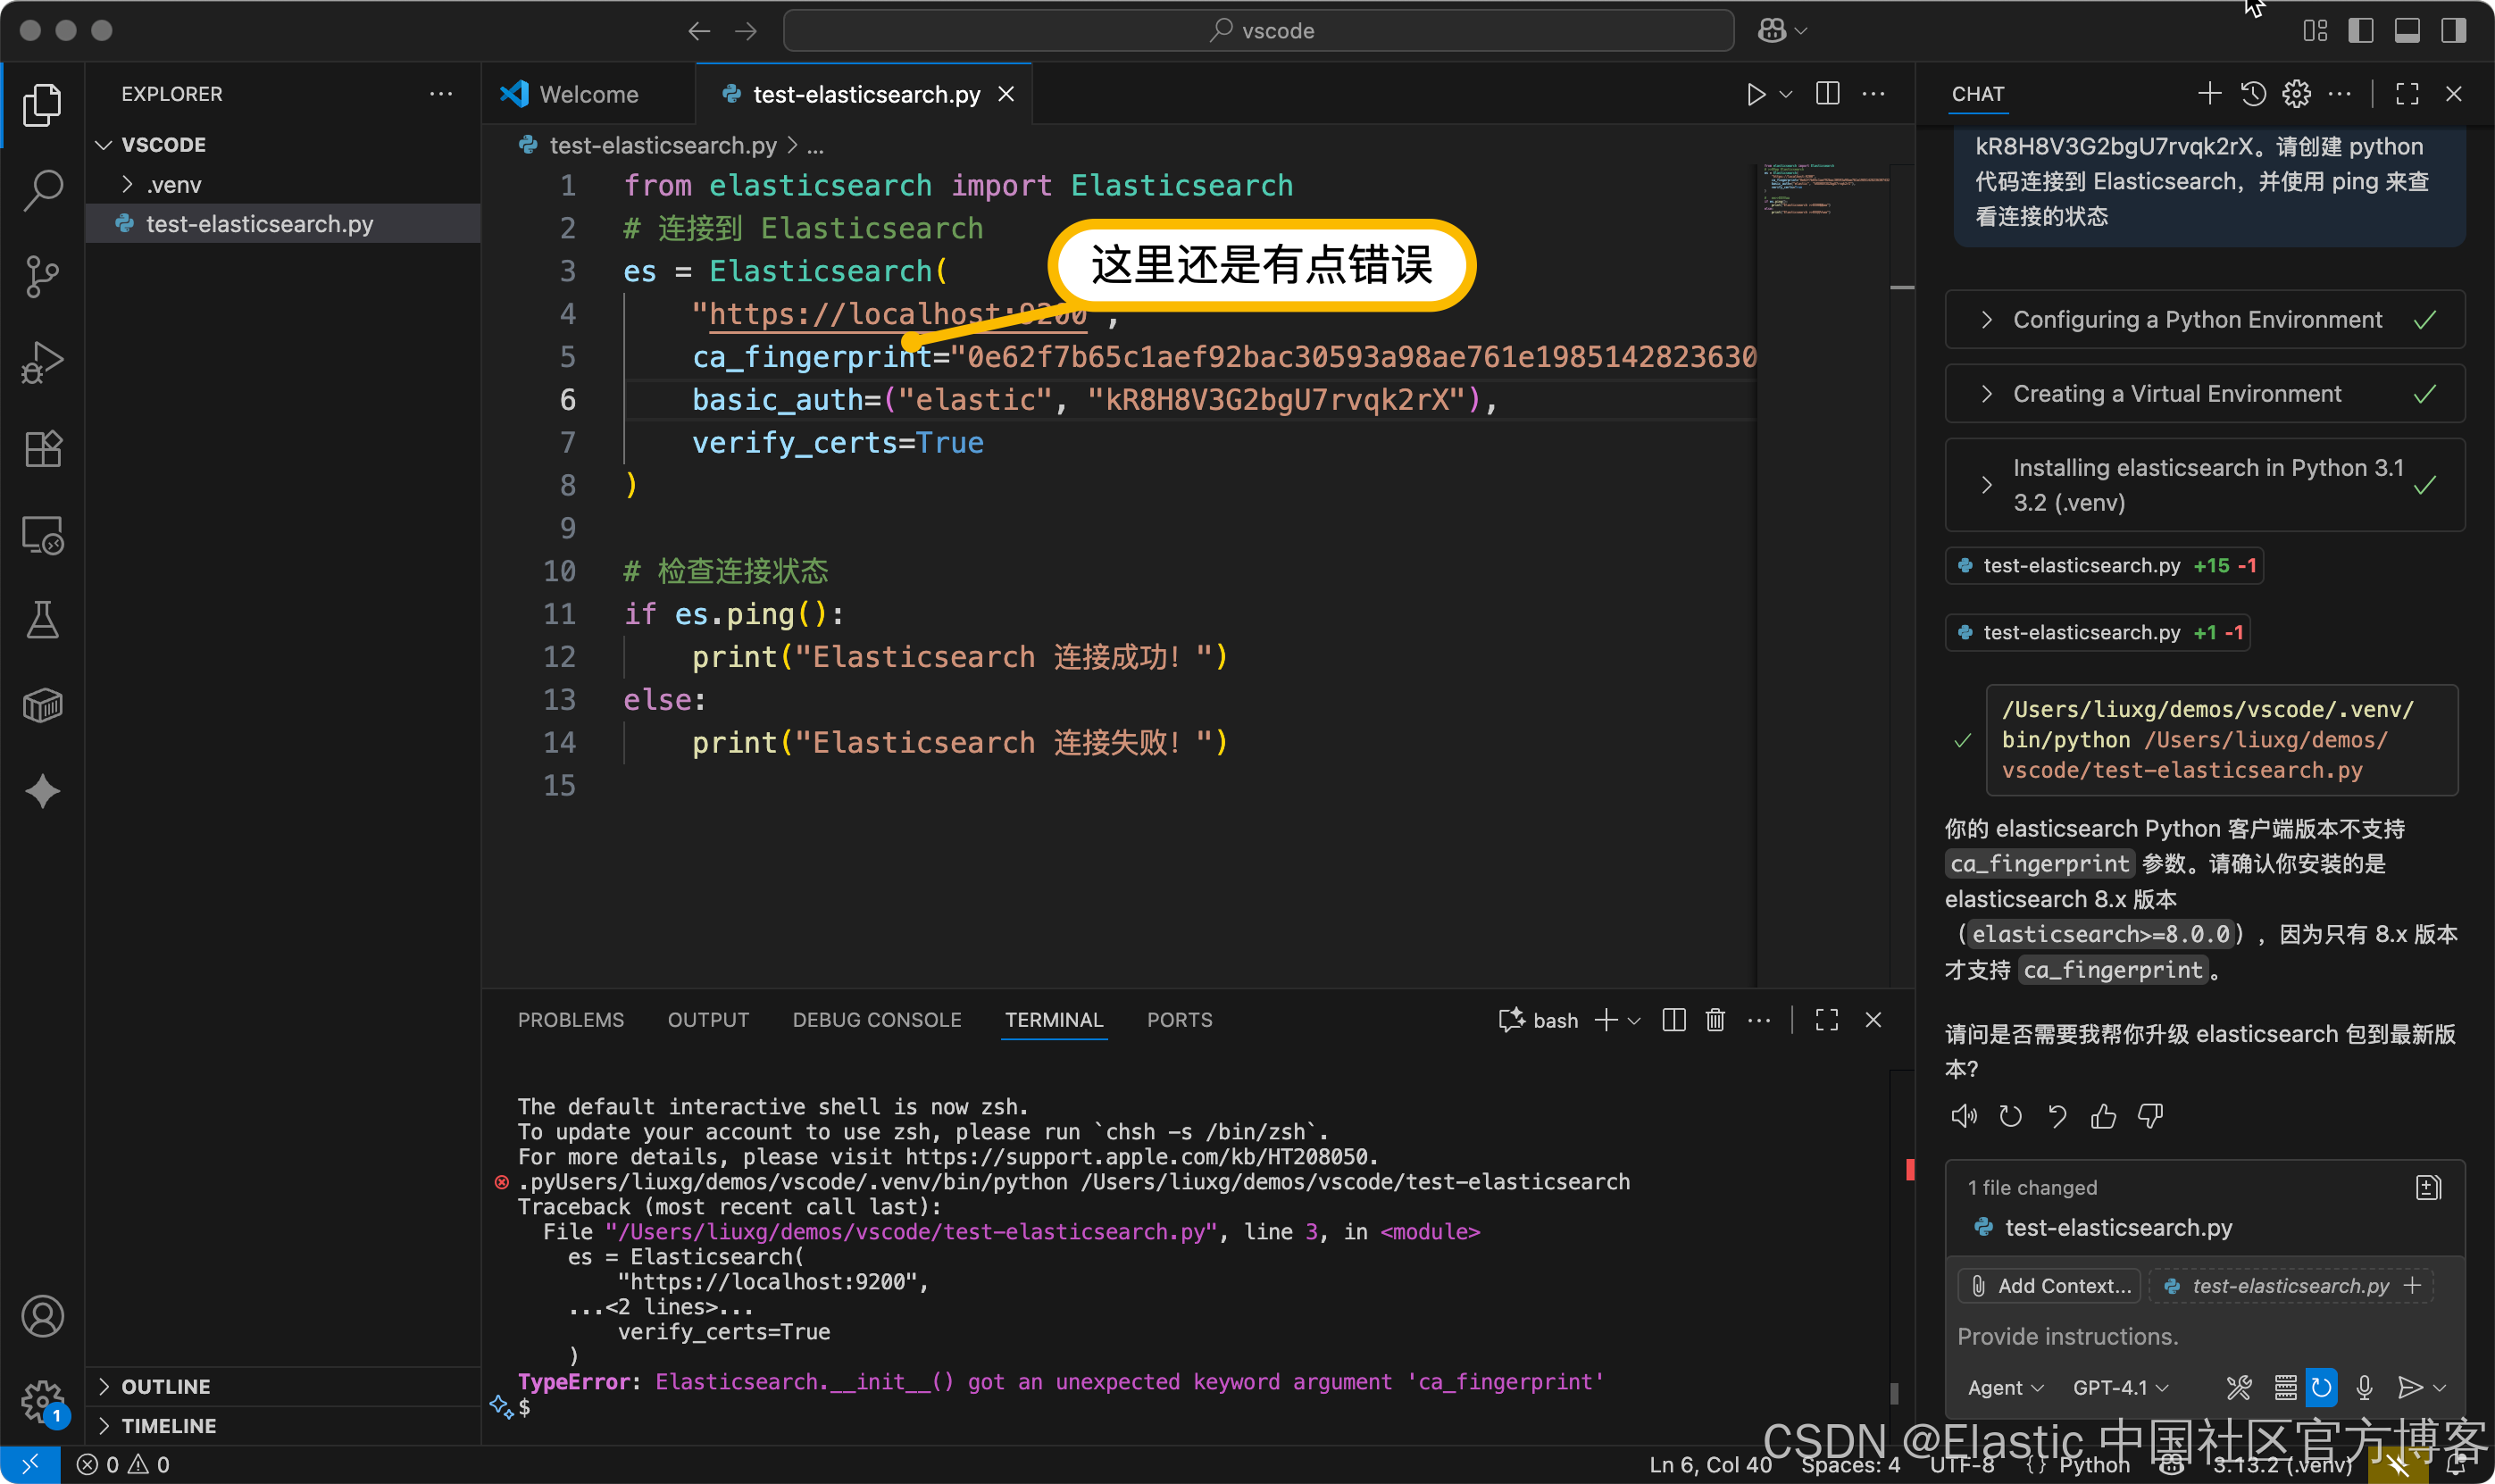
我们可以参考文章 “Elasticsearch:关于在 Python 中使用 Elasticsearch 你需要知道的一切 - 8.x” 来进行修正我们的 prompt:
我的 Elasticsearch 地址是:https://localhost:9200, 连接的 fingerprint 是:0e62f7b65c1aef92bac30593a98ae761e198514282363074326f5c81a5f341e8,超级用户 elastic 的密码是 kR8H8V3G2bgU7rvqk2rX。请创建 python 代码连接到 Elasticsearch,并使用 ping 来查看连接的状态。请使用 python client 版本 9.1,并使用 ssl_assert_fingerprint 来进行配置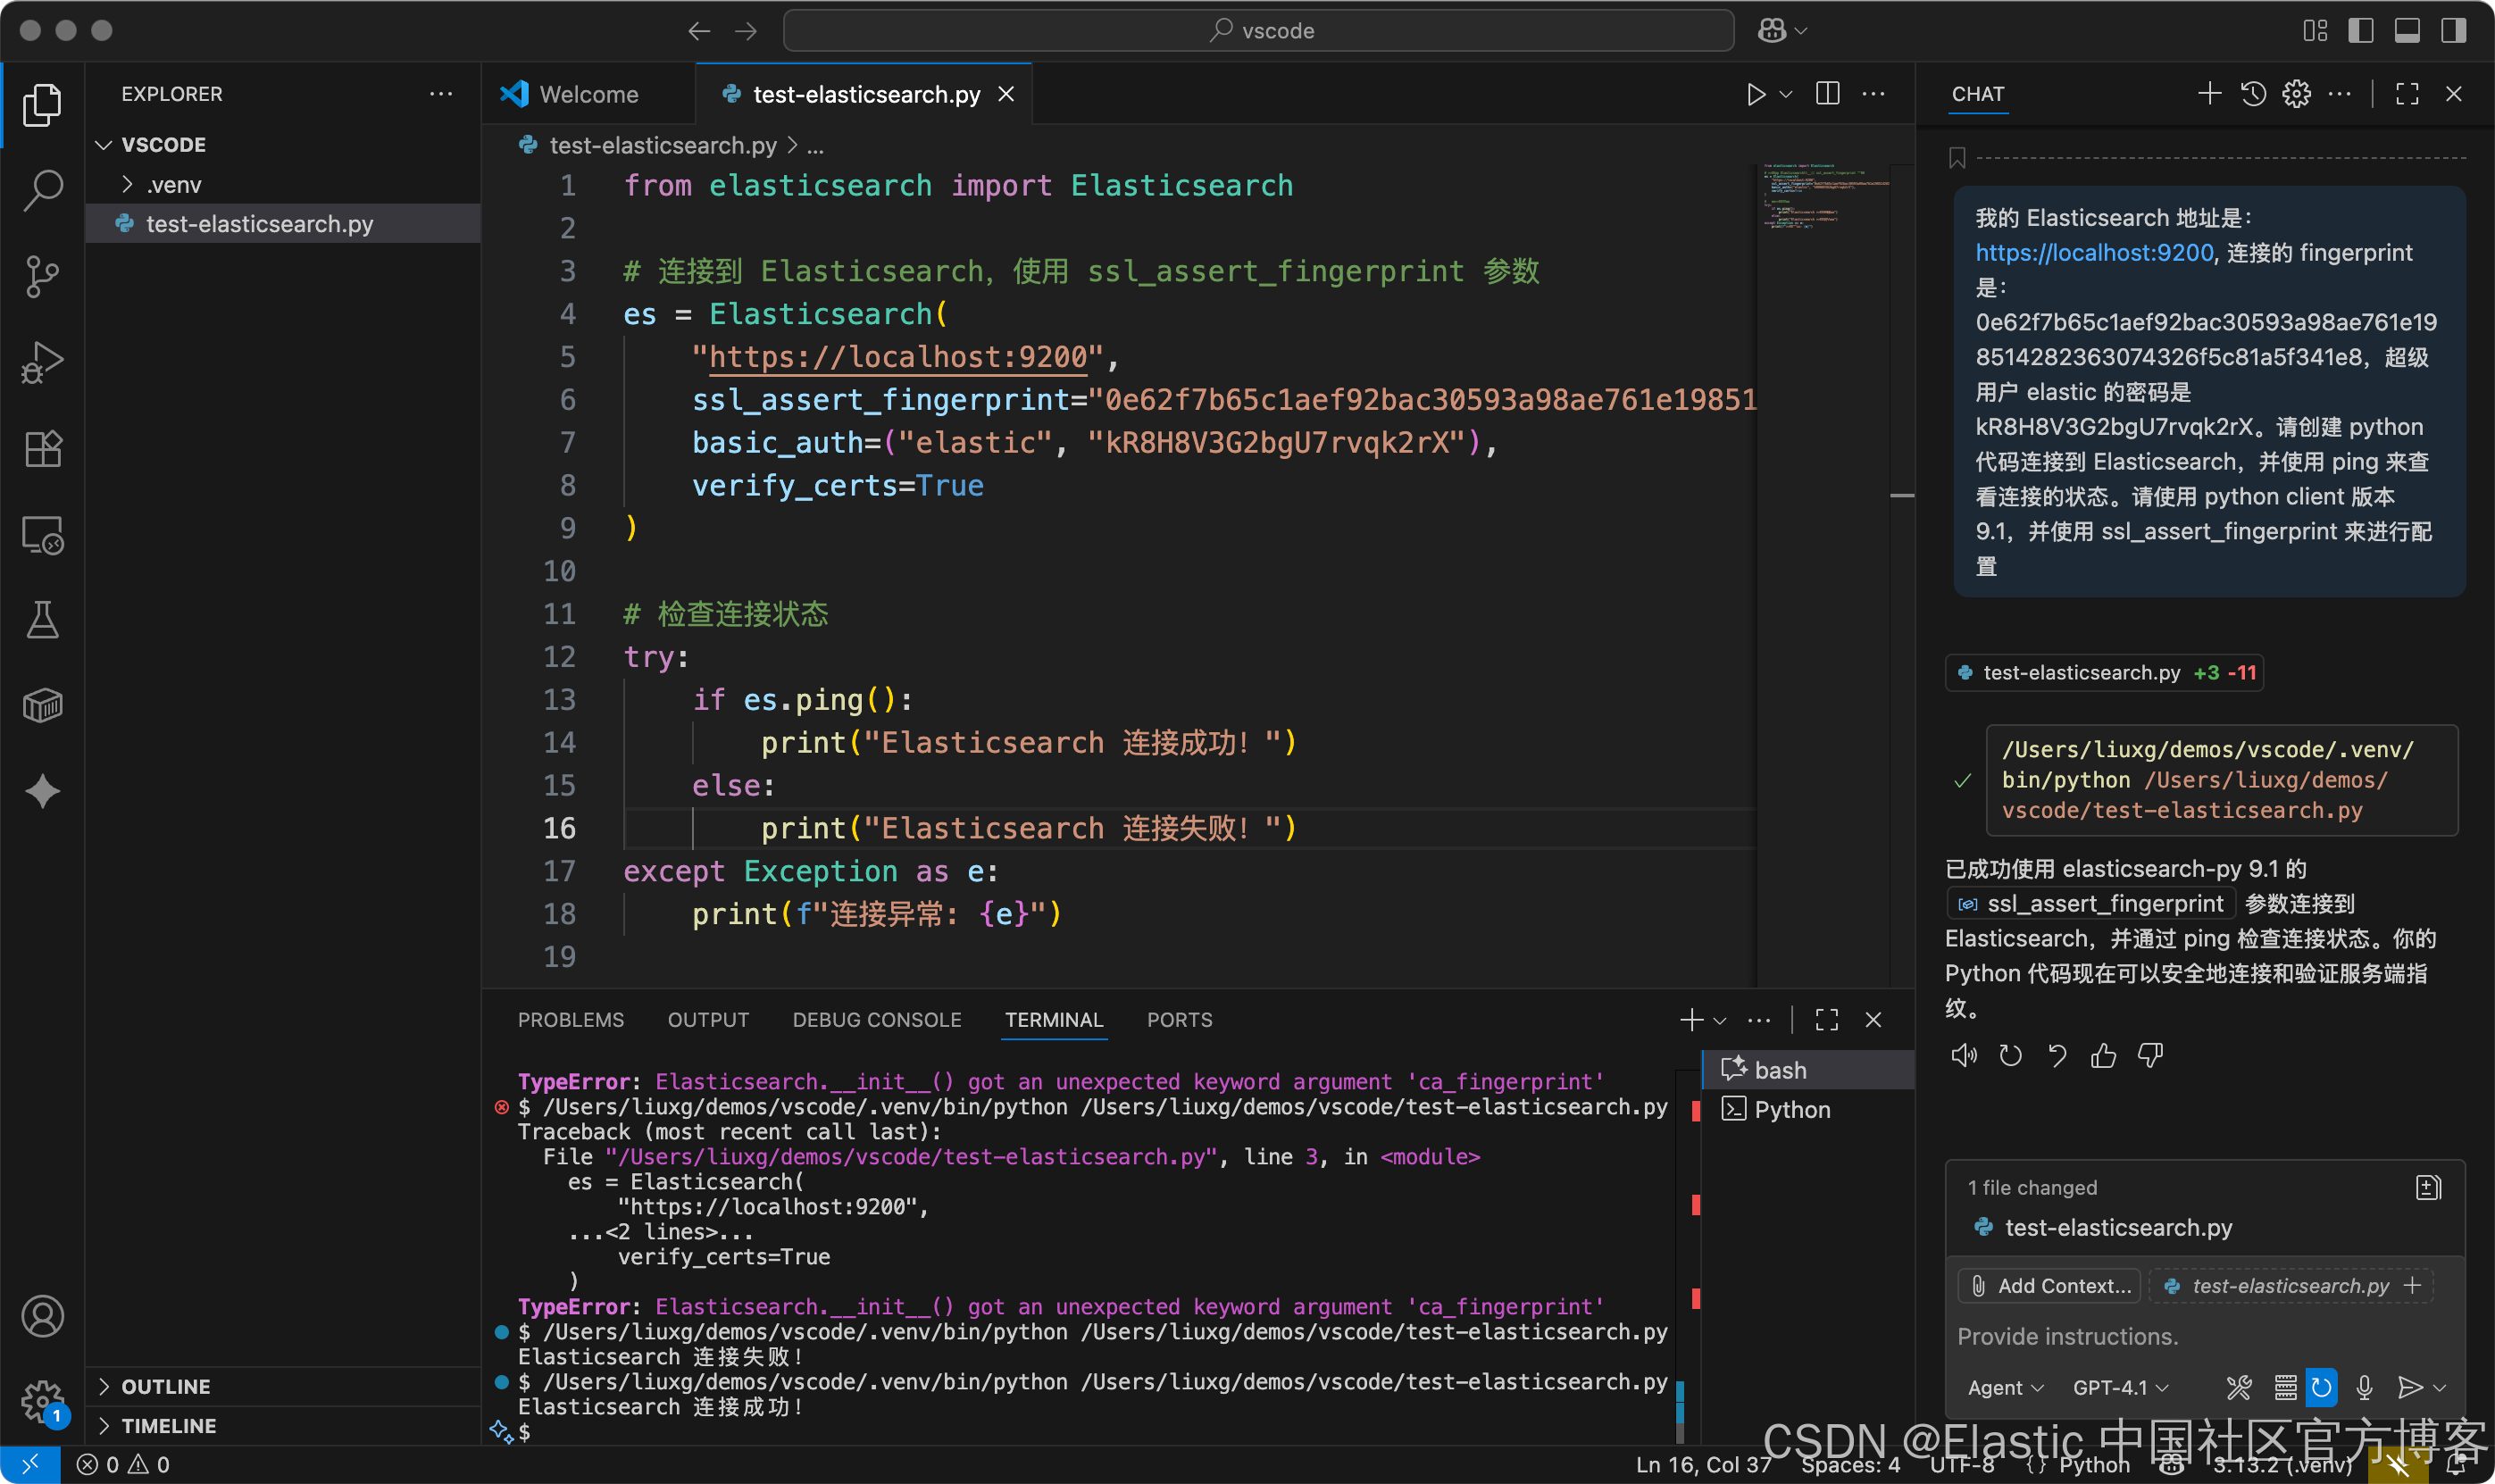
很显然,这次它生成了正确的代码,并且测试正确。从这里我们可以看到 AI 生成代码的优势 :)
安装第一个 MCP 服务器
Time MCP server
我们接下来安装一个简单的 MCP 服务器来尝试一下如何在 VS Code 下来安装 MCP server。首先我们访问 MCP 服务器的官方 github 网站 https://github.com/modelcontextprotocol/servers。在这个网站中,我们可以看到已经发布的一些 MCP 服务器。我们也可以看到 Elastcsearch 也在之列。
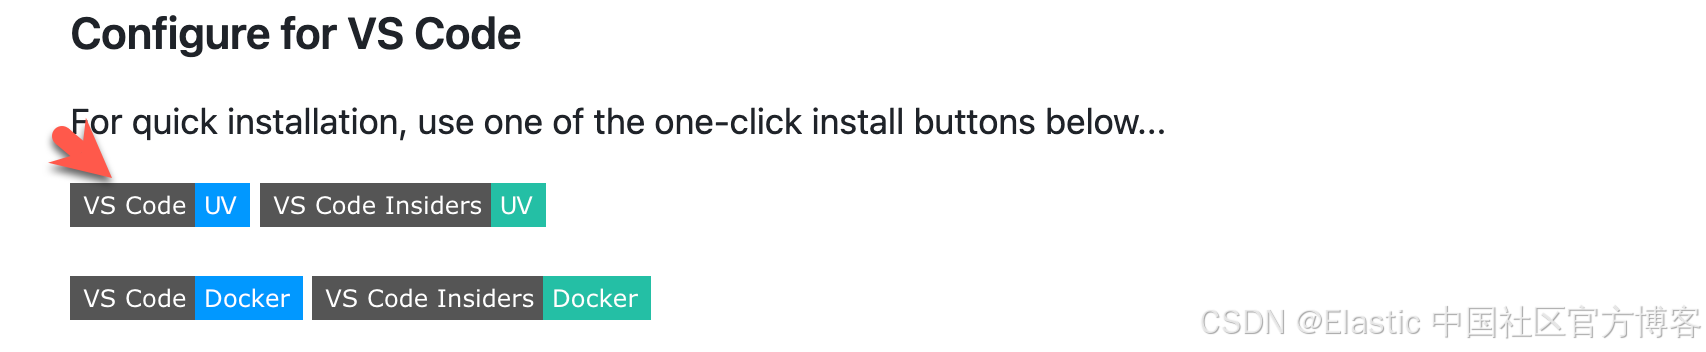
我们先来安装一个简单的 time MCP 服务器。按照 https://github.com/modelcontextprotocol/servers/tree/main/src/time 上面所示。我们可以做如下的安装步骤:
pip install mcp-server-time安装完成后,你可以通过以下方式将其作为脚本运行:
$ python -m mcp_server_time这样我们的 time MCP 服务器已经运行起来了。
我们需要在 VS code 里进行一些配置:
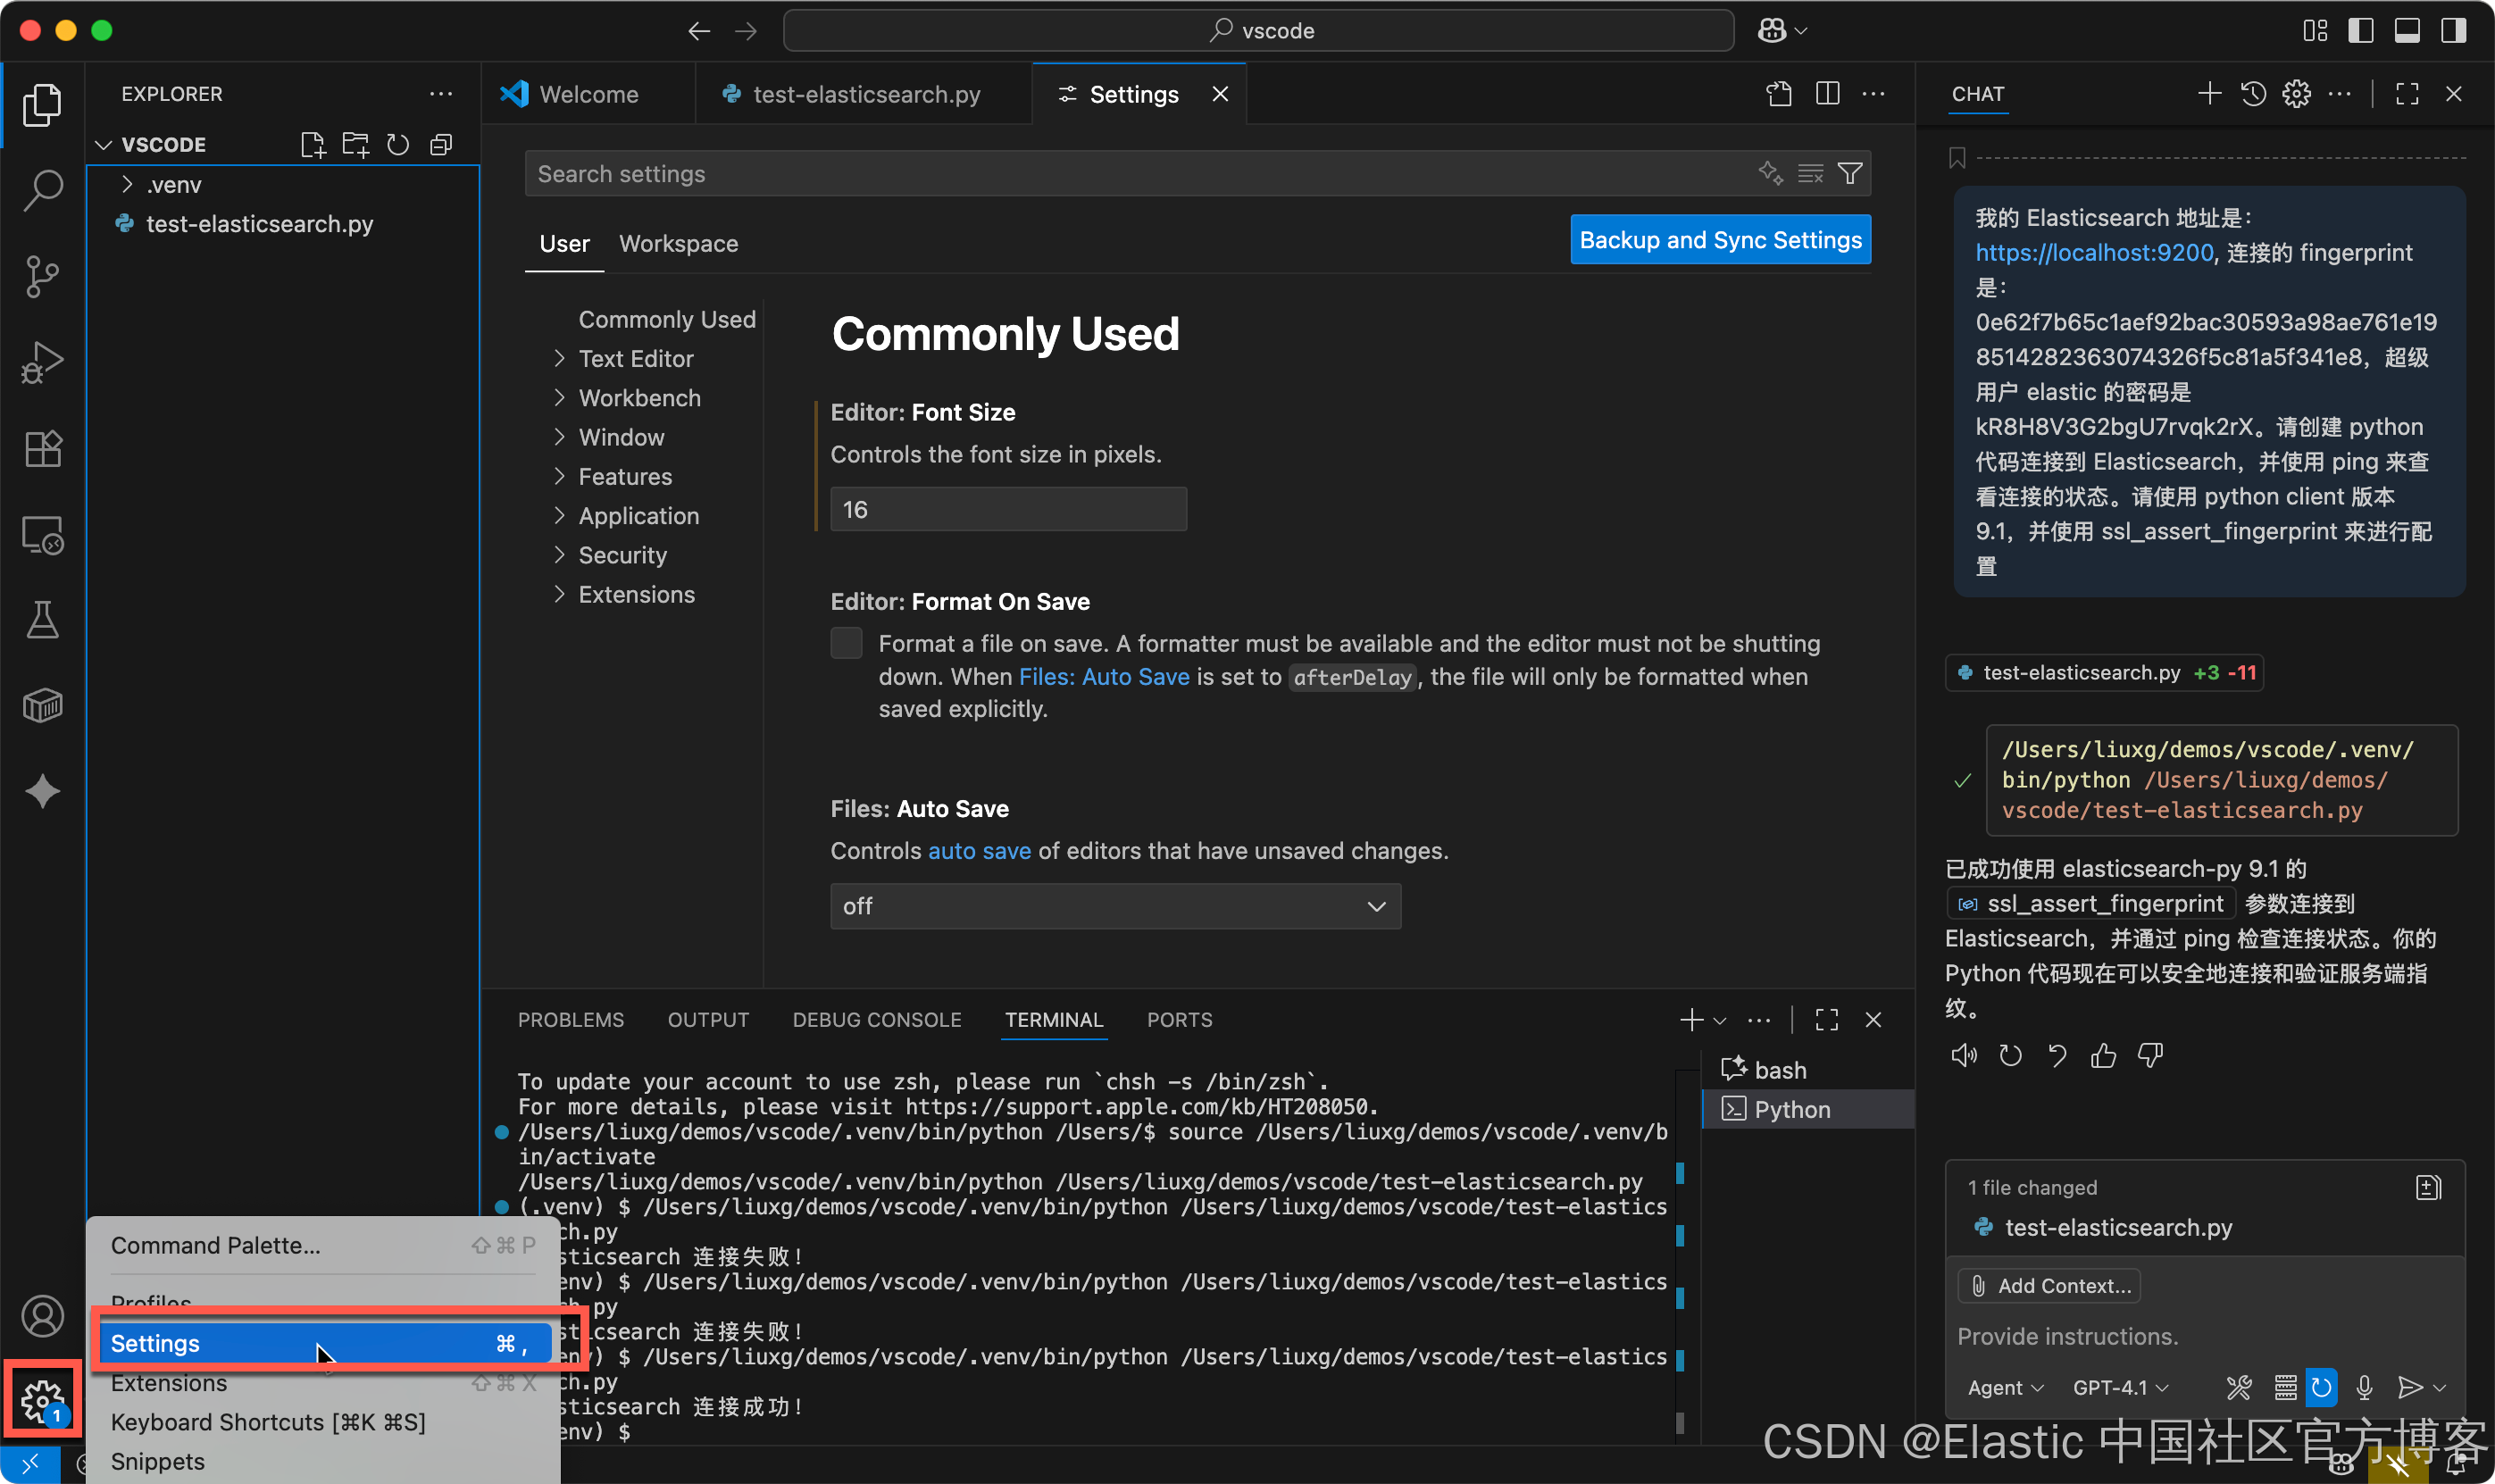
点击 VS code 左下角的设置图标:
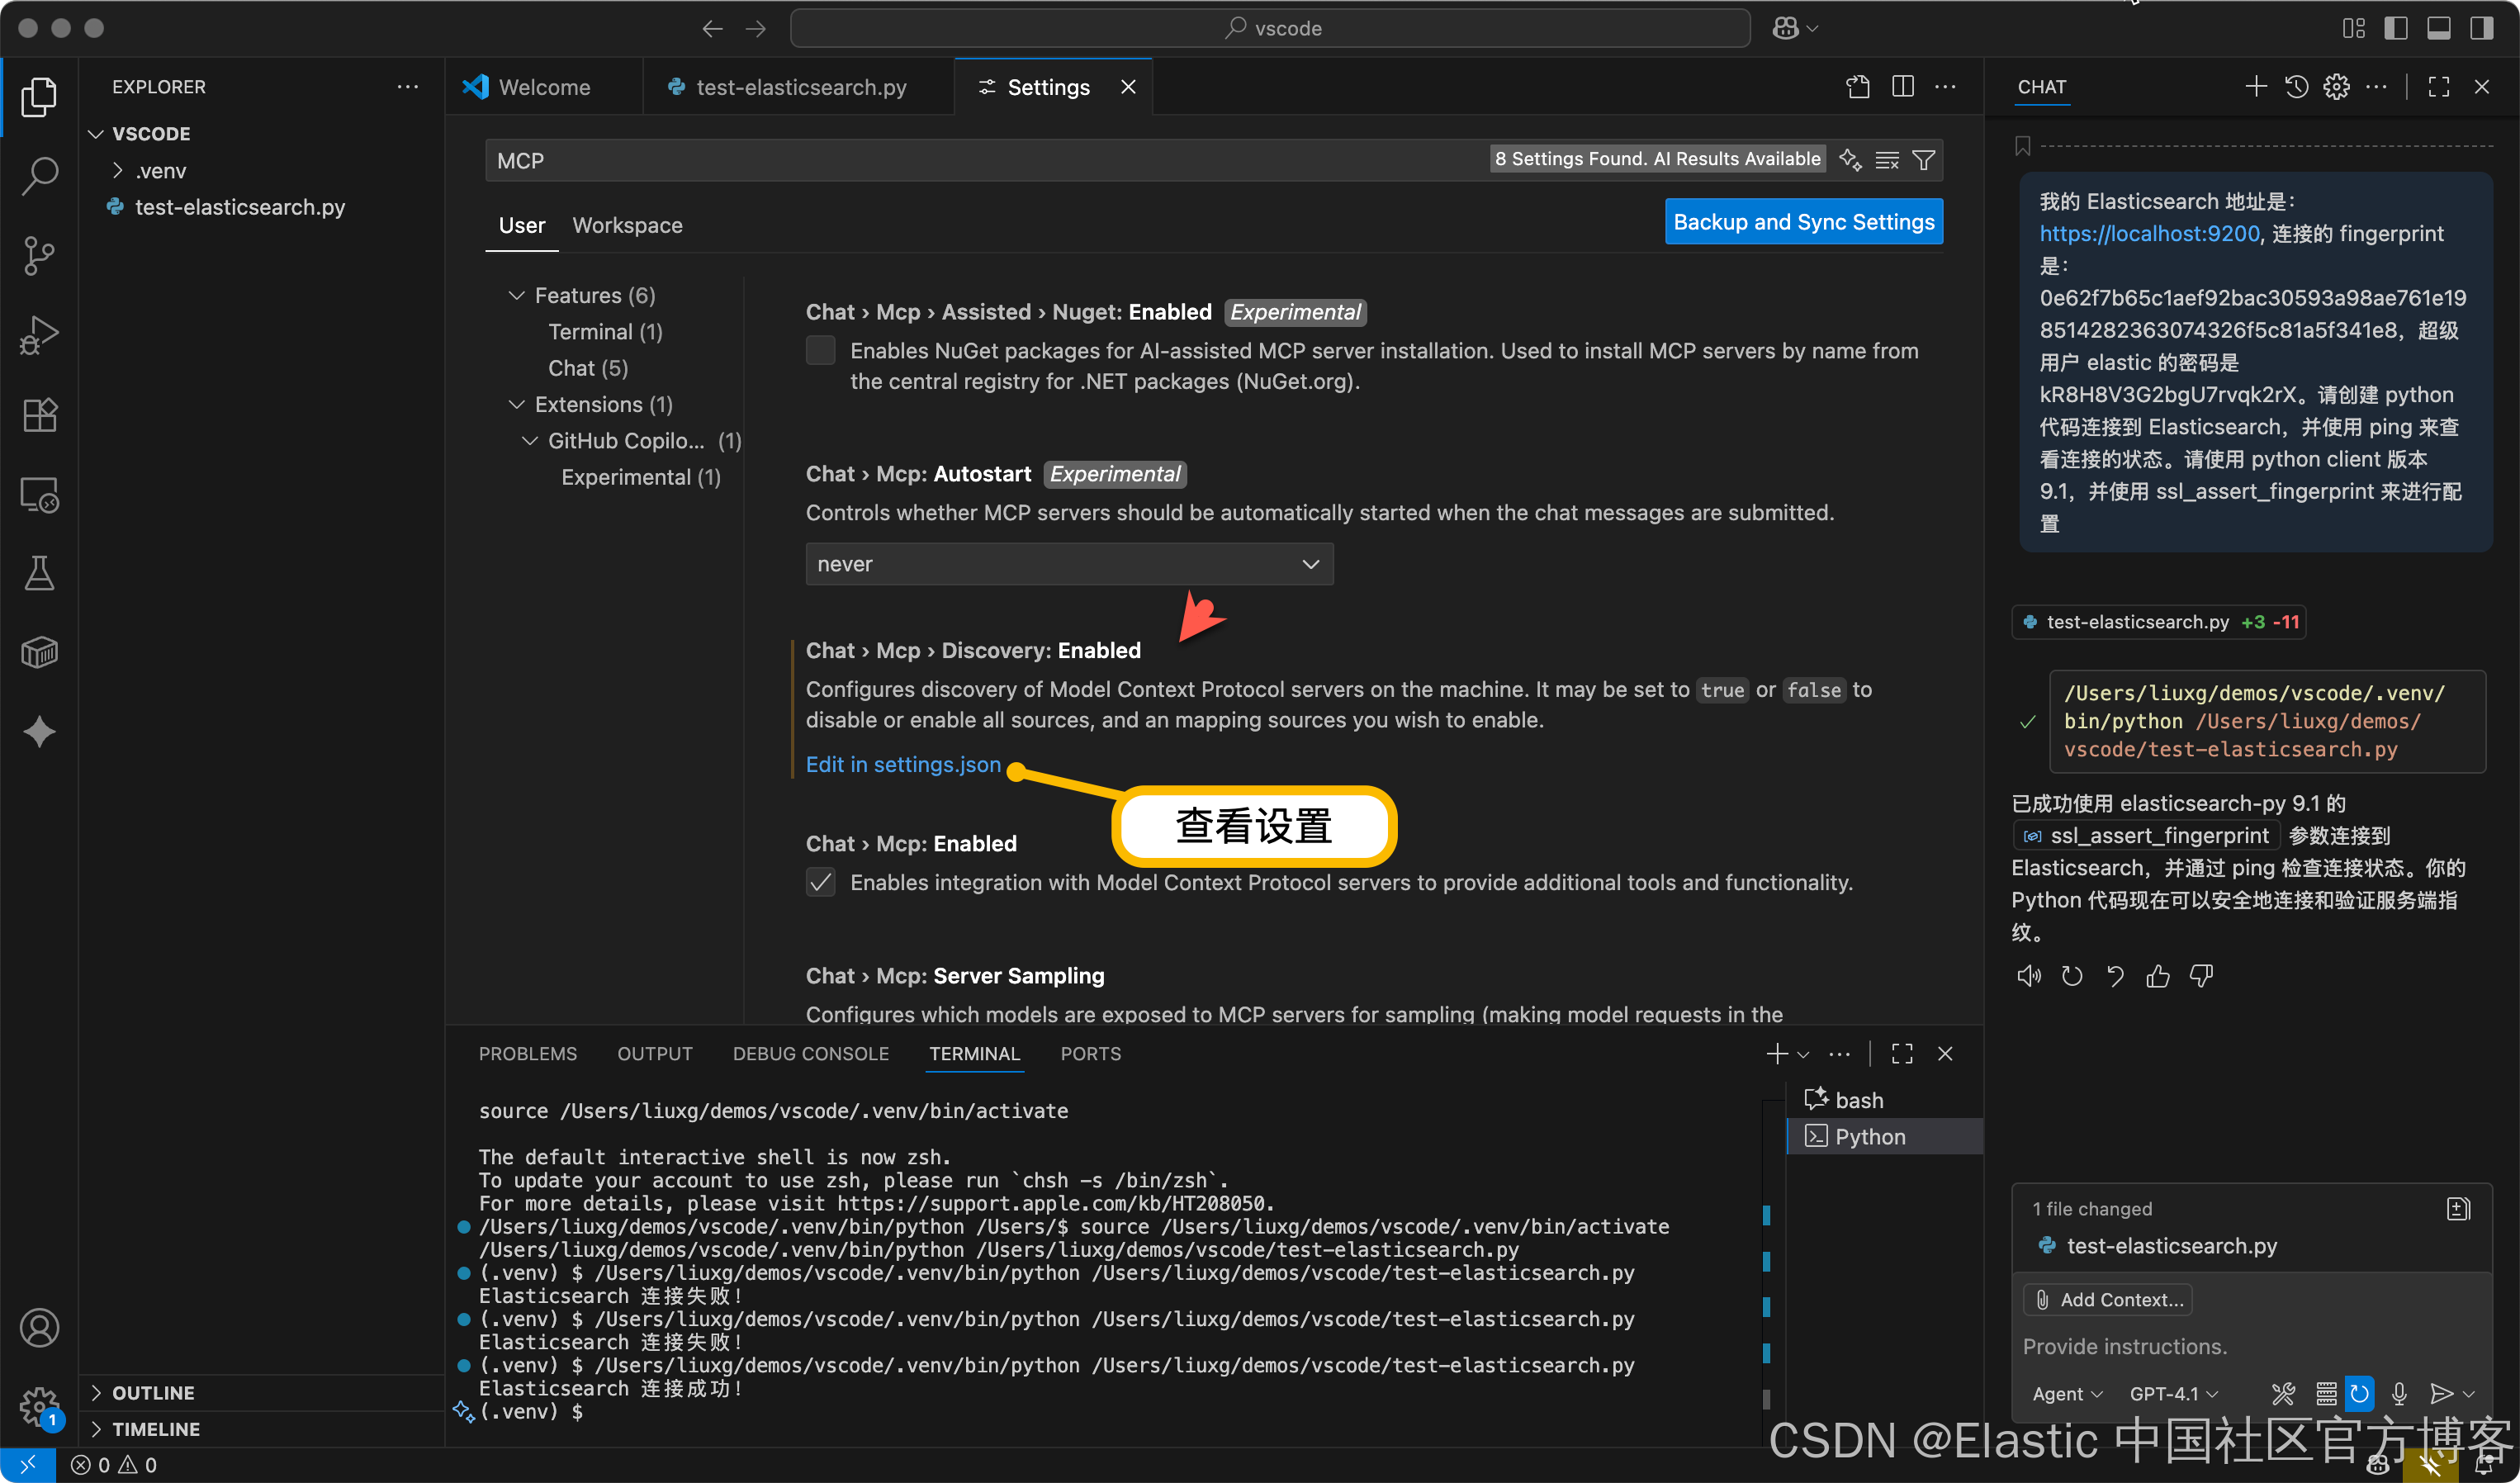
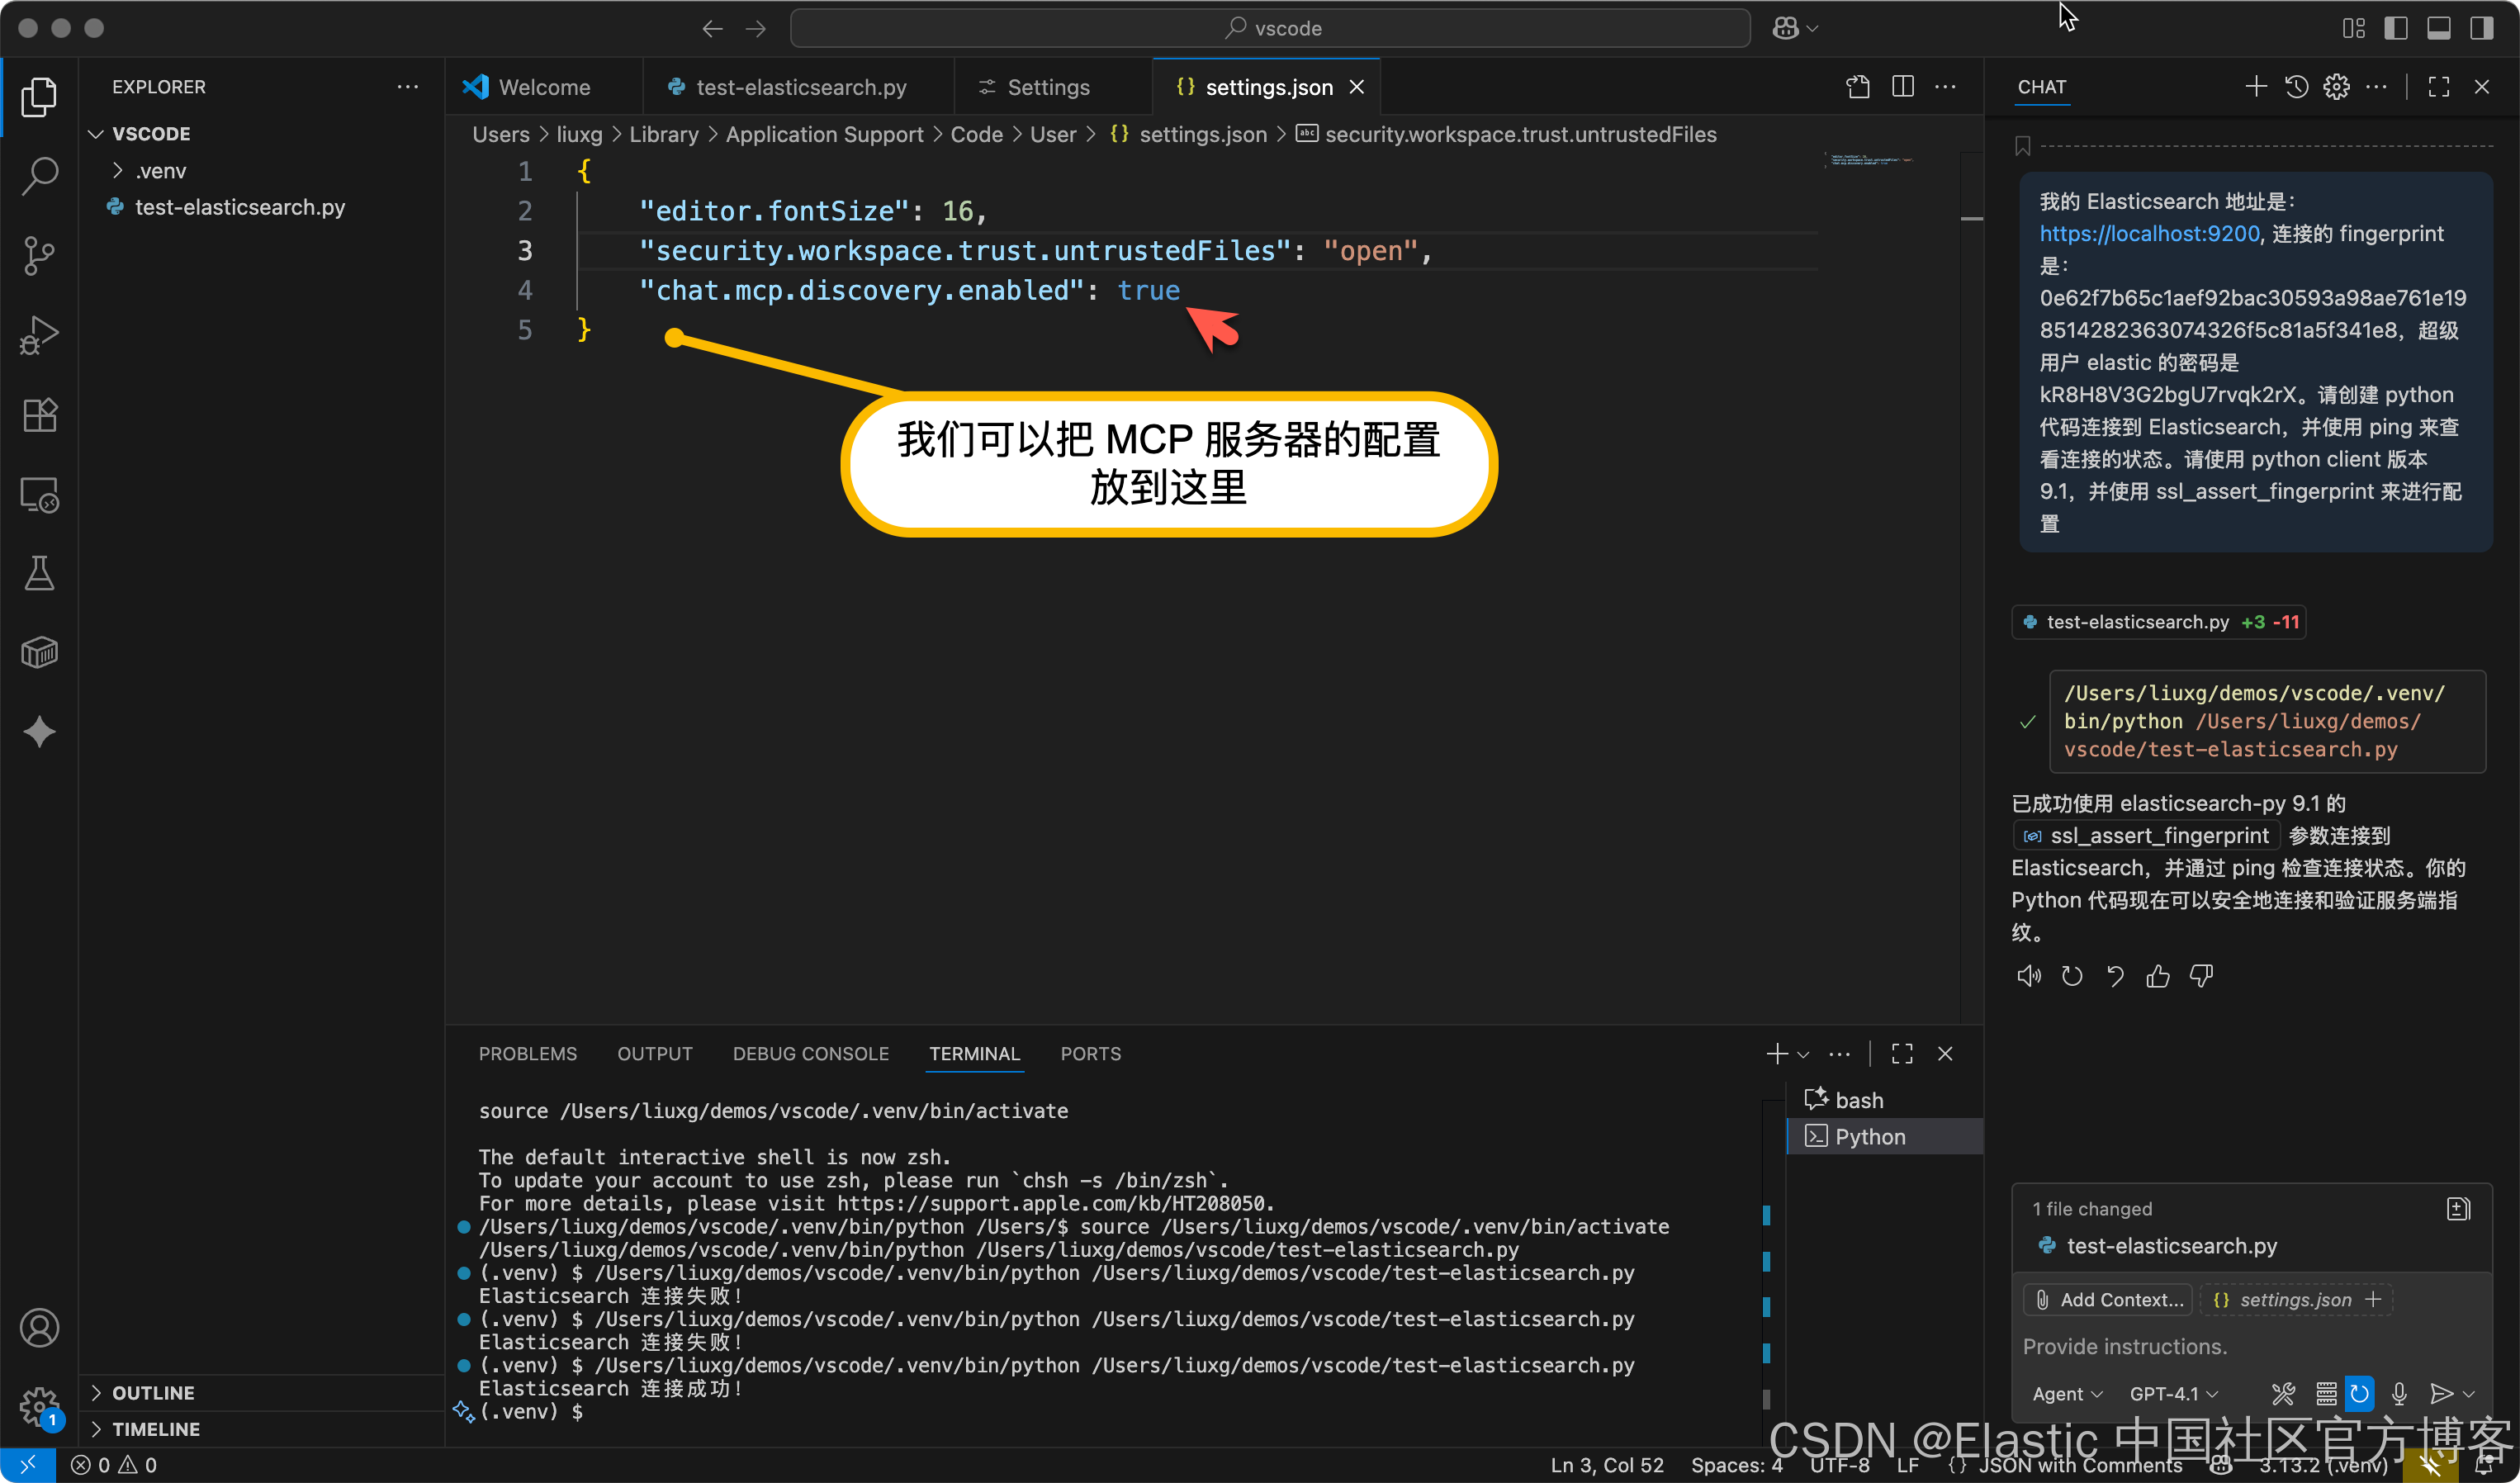
如上所示,在默认的情况下 chat.mcp.discovery.enabled 默认为 true。我们在这行的下面,可以针对 MCP 服务器进行配置。在 https://github.com/modelcontextprotocol/servers/tree/main/src/time 点击如下的链接:
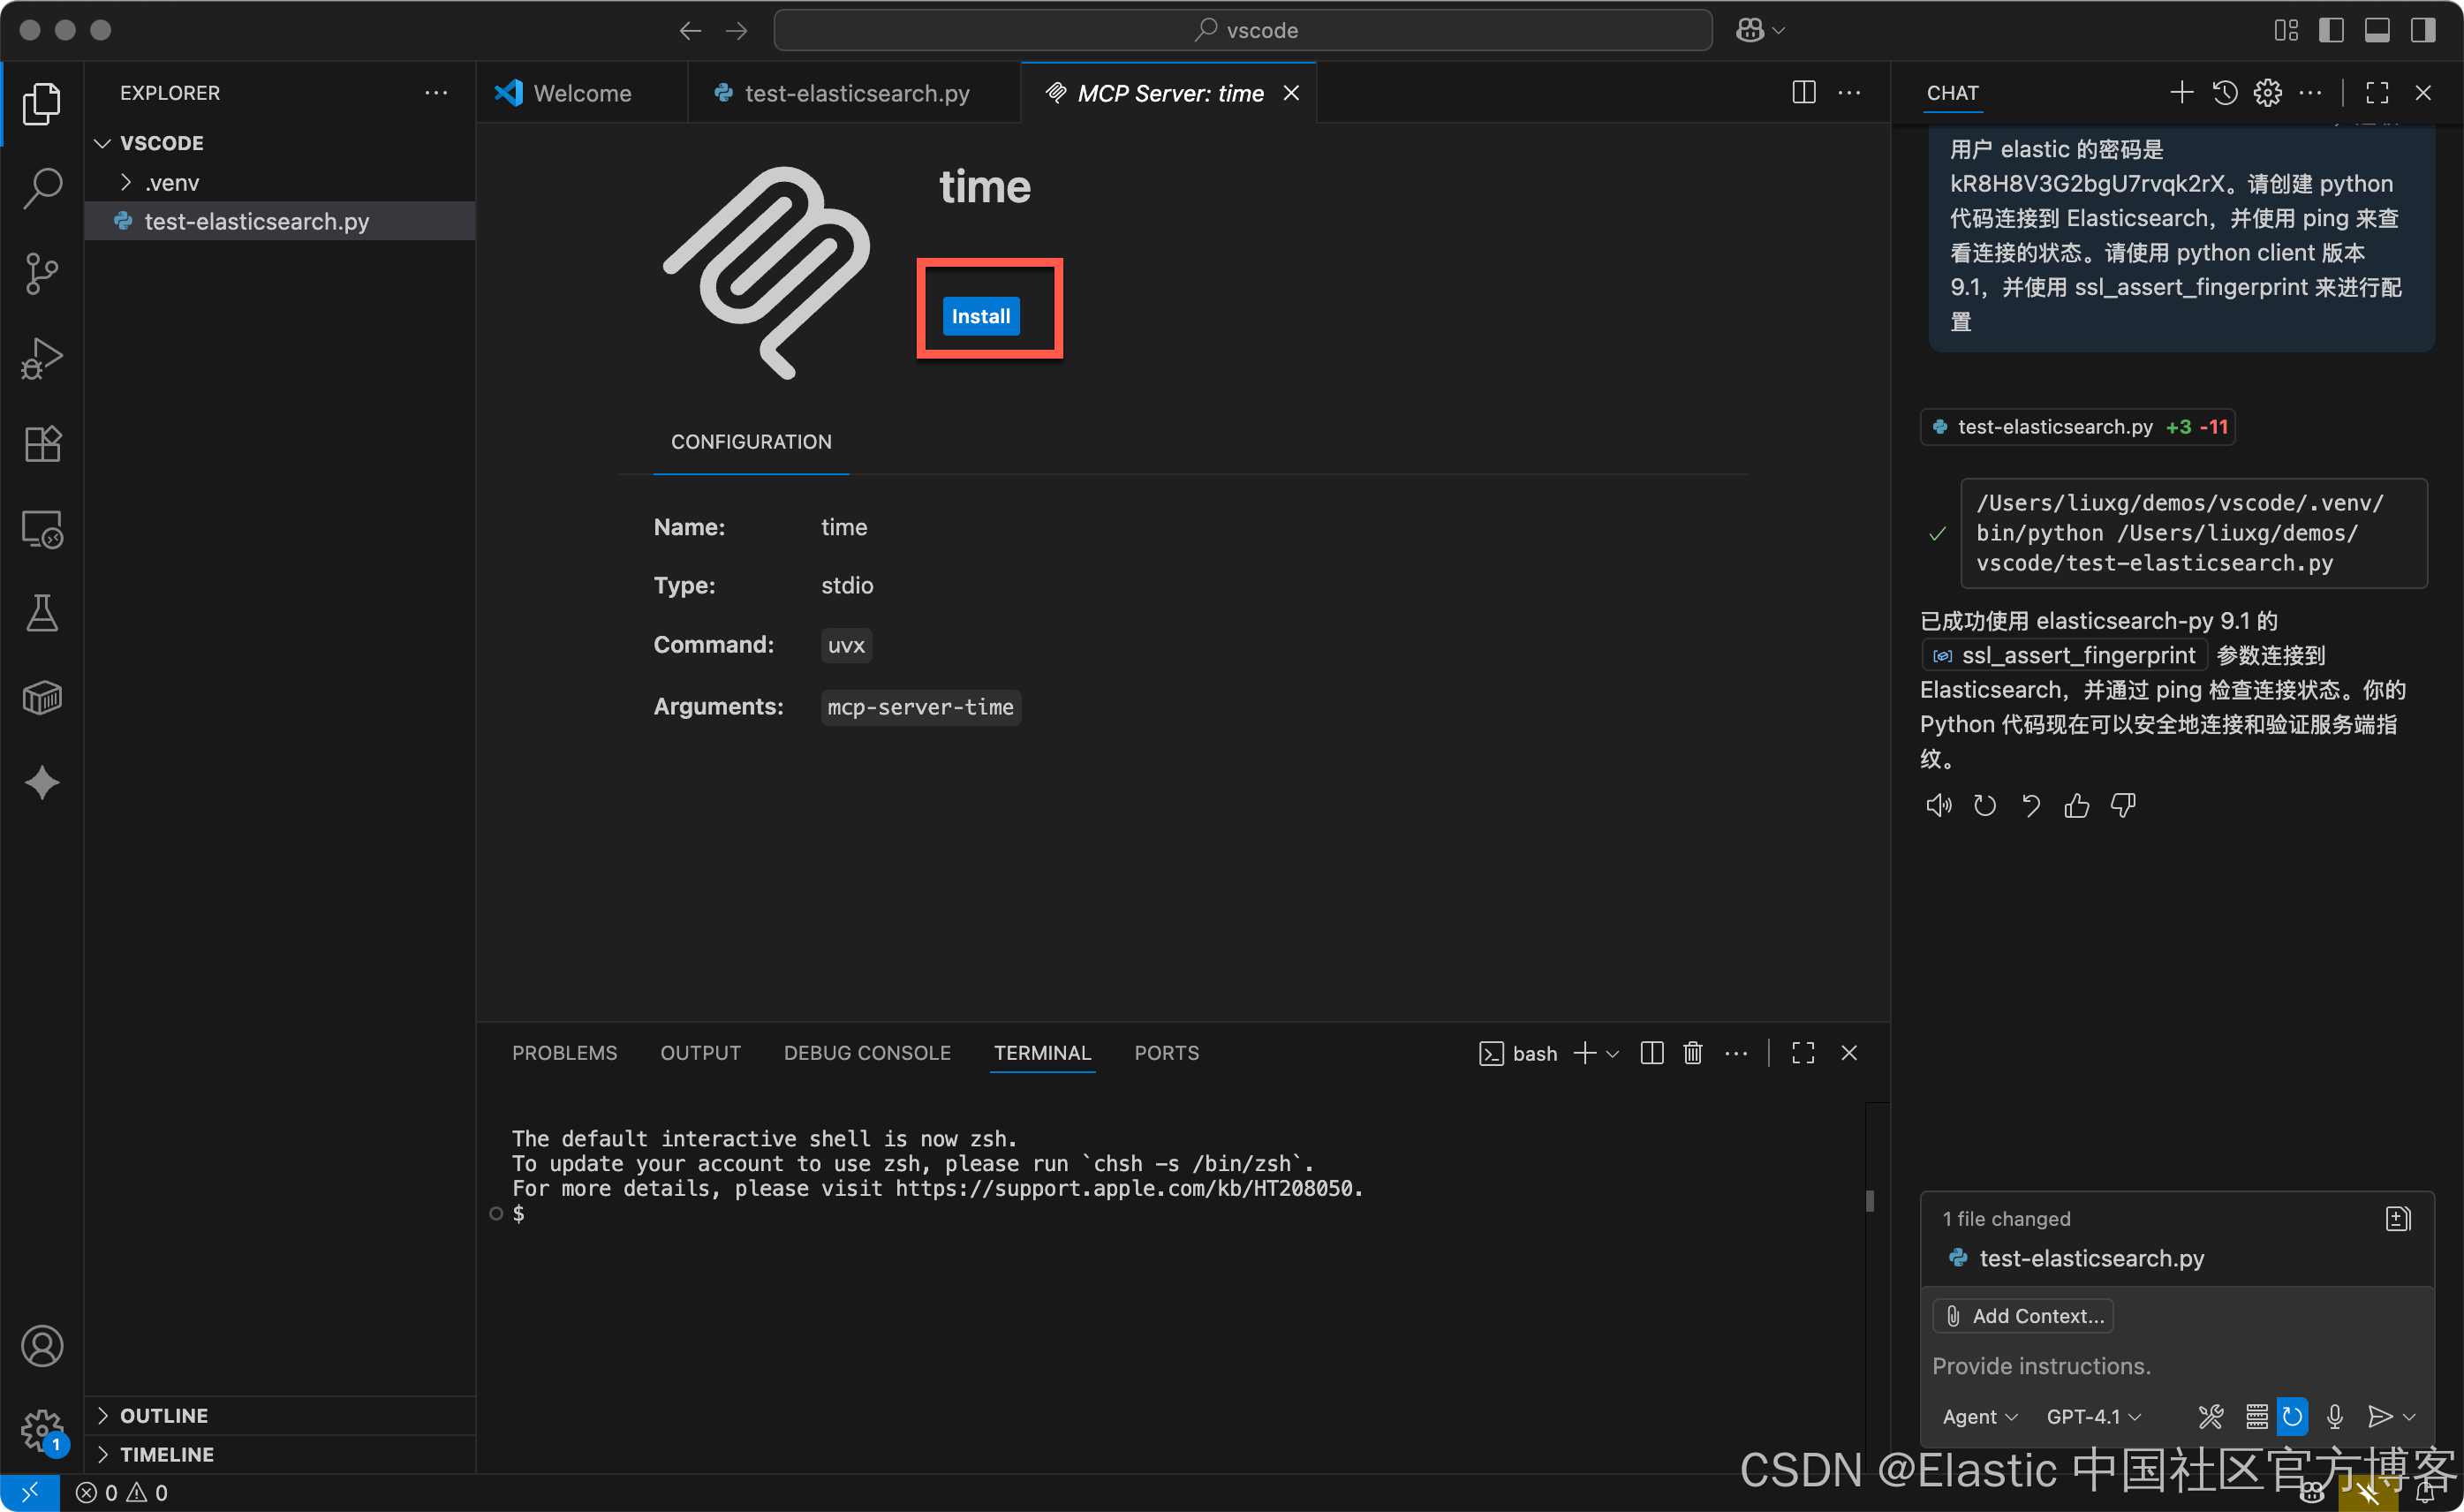
在安装上面的命令之前,我们需要安装 uv 及 uvx 包以使得安装顺利:
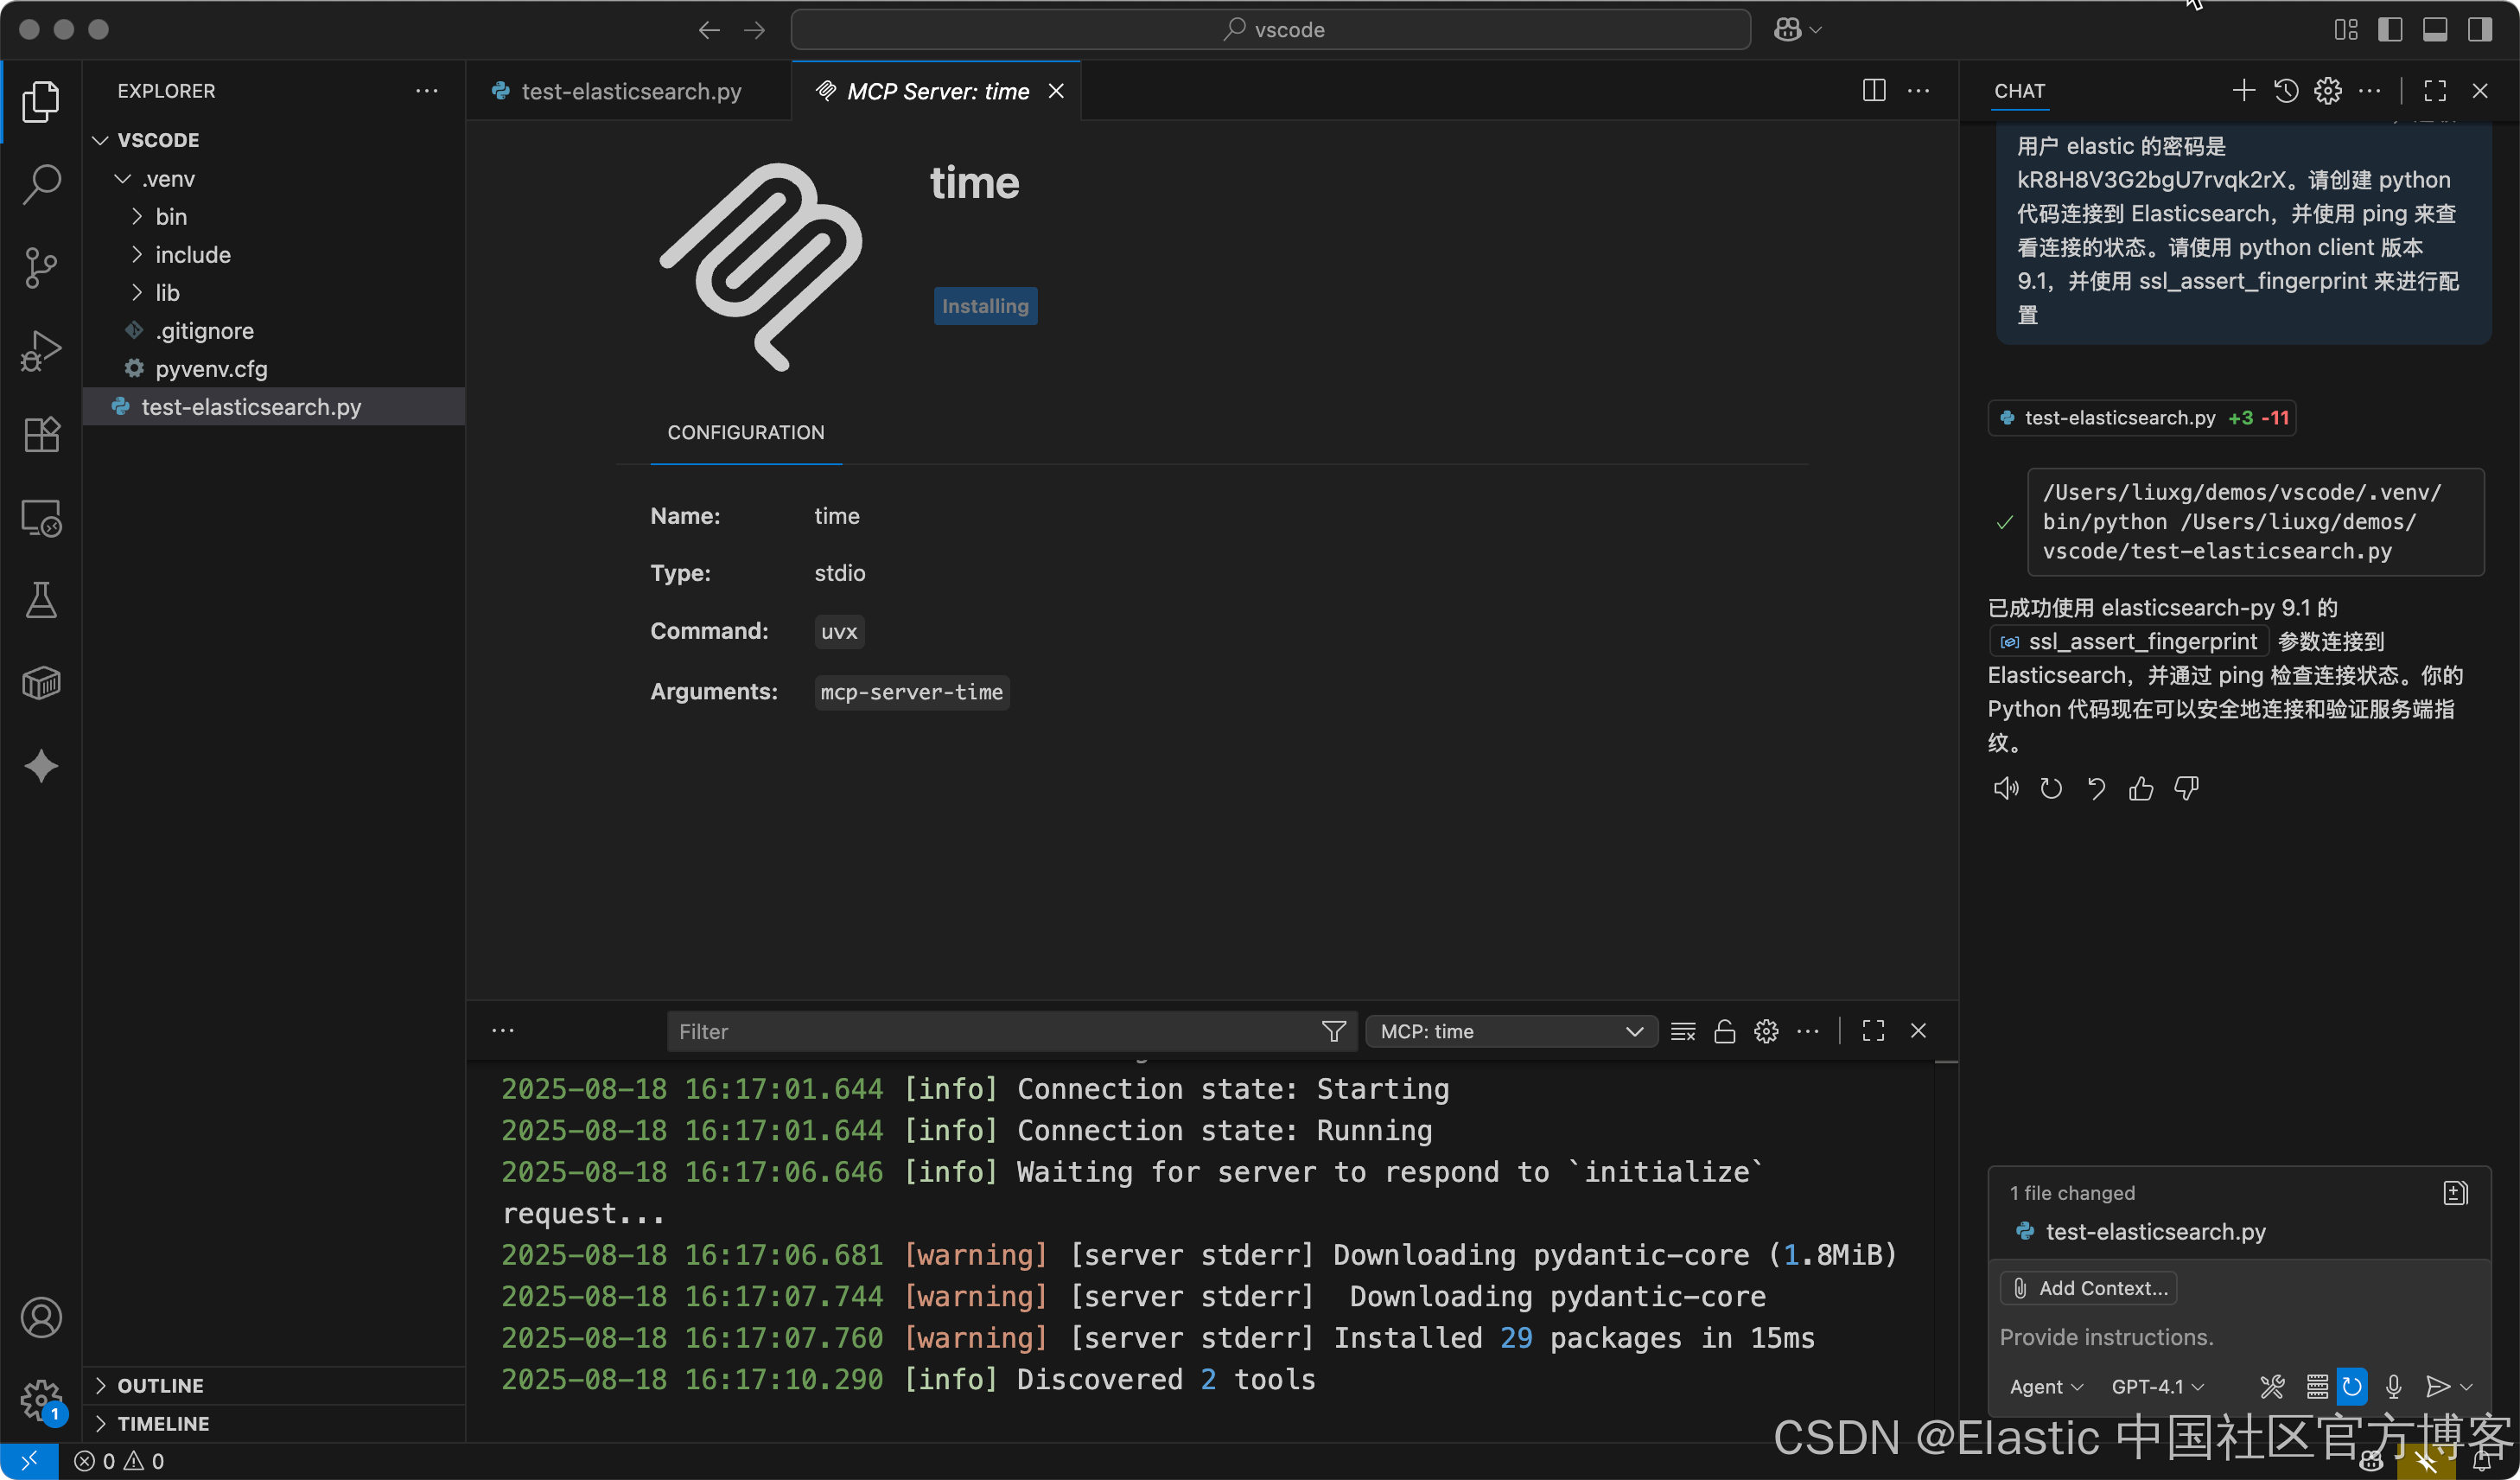
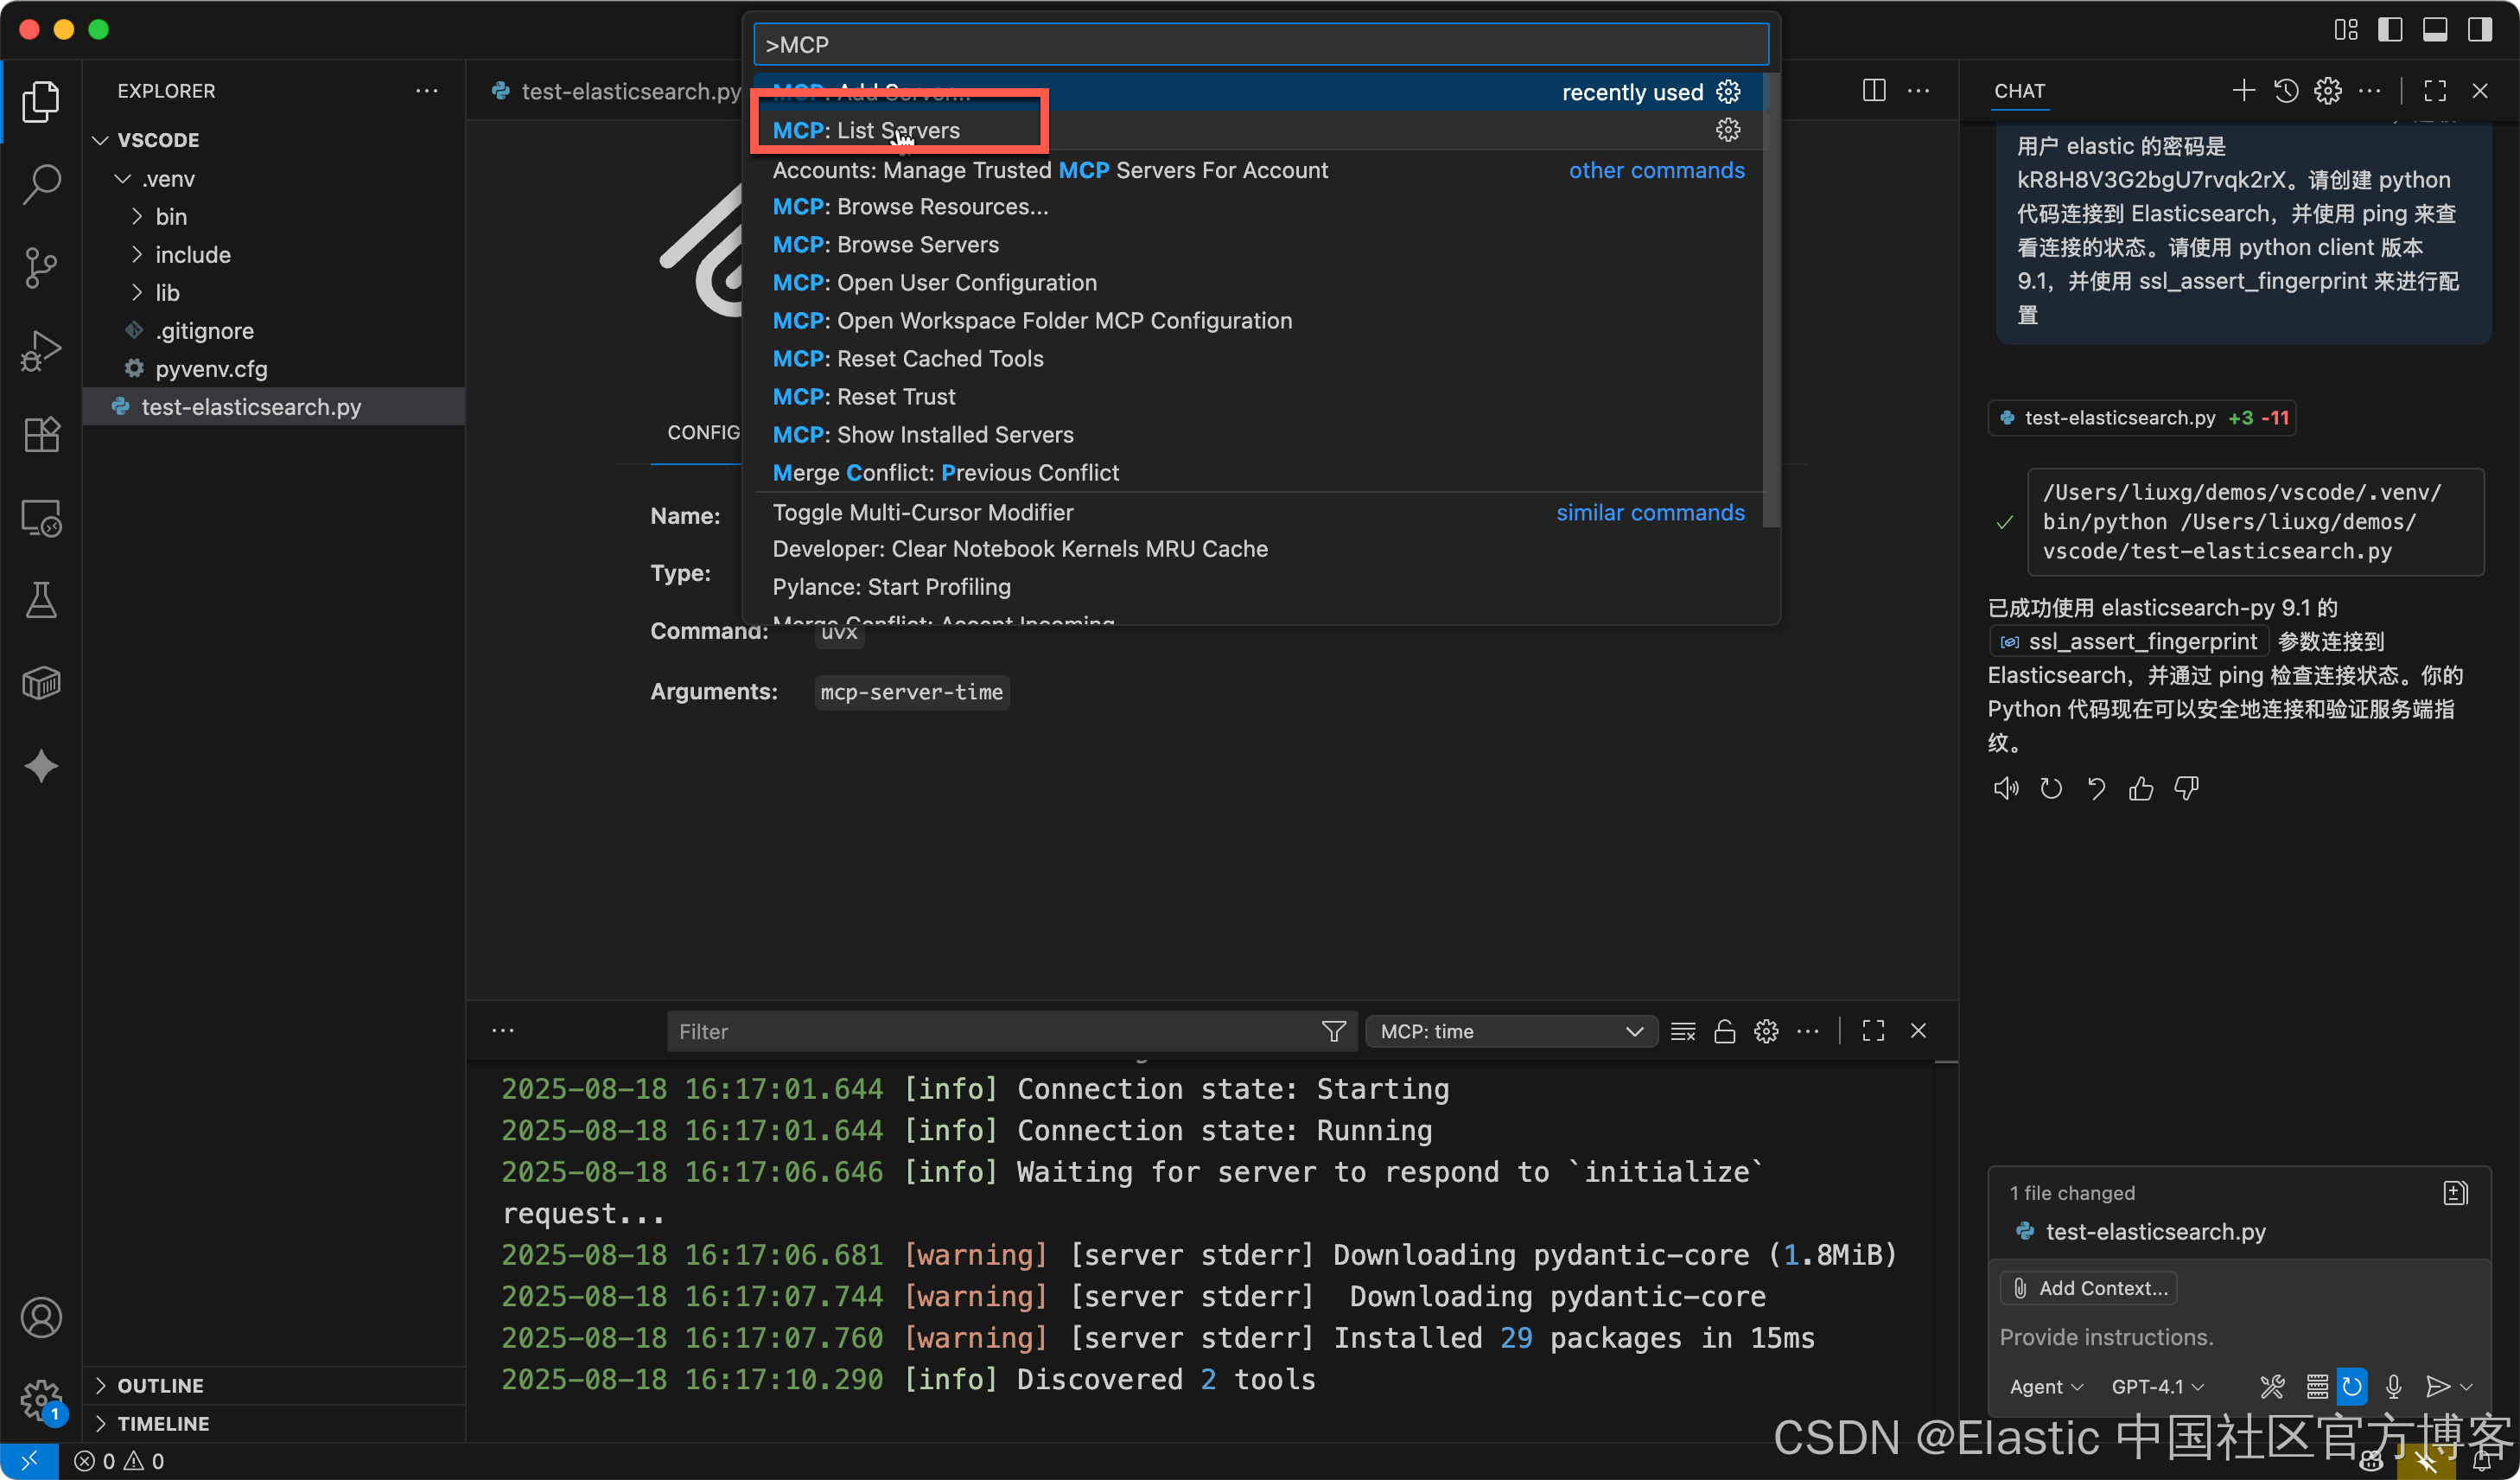
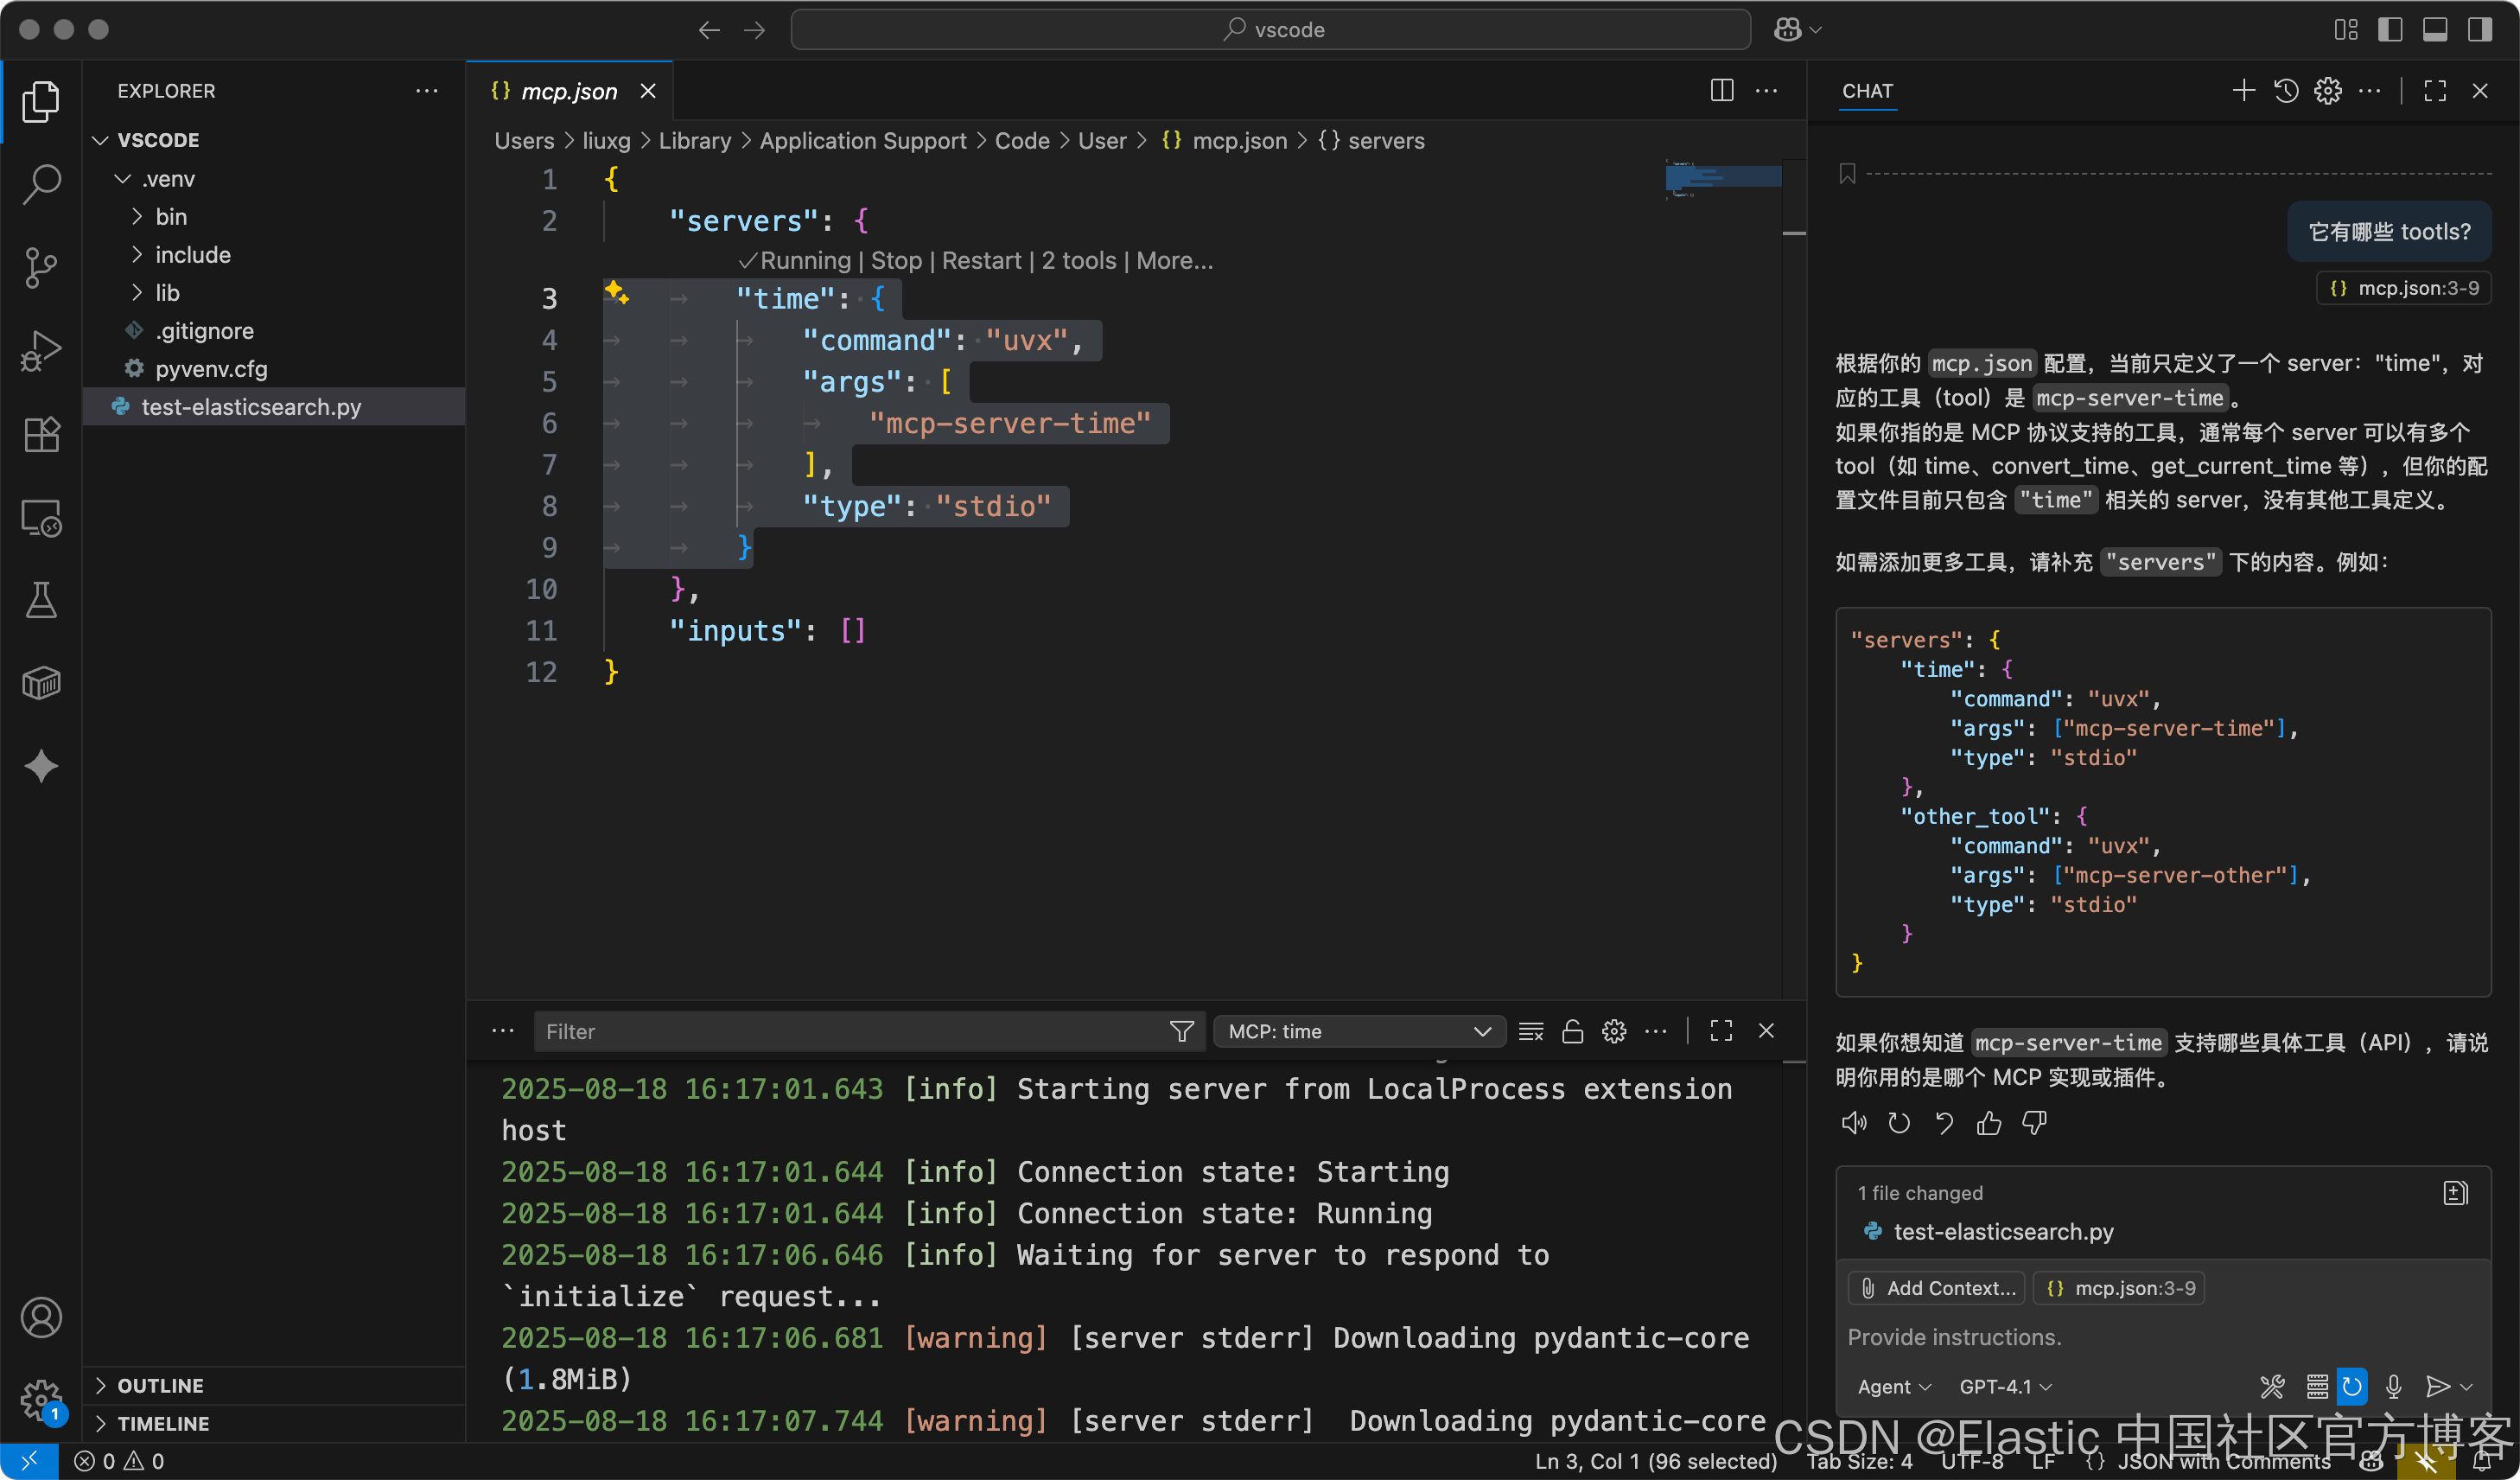
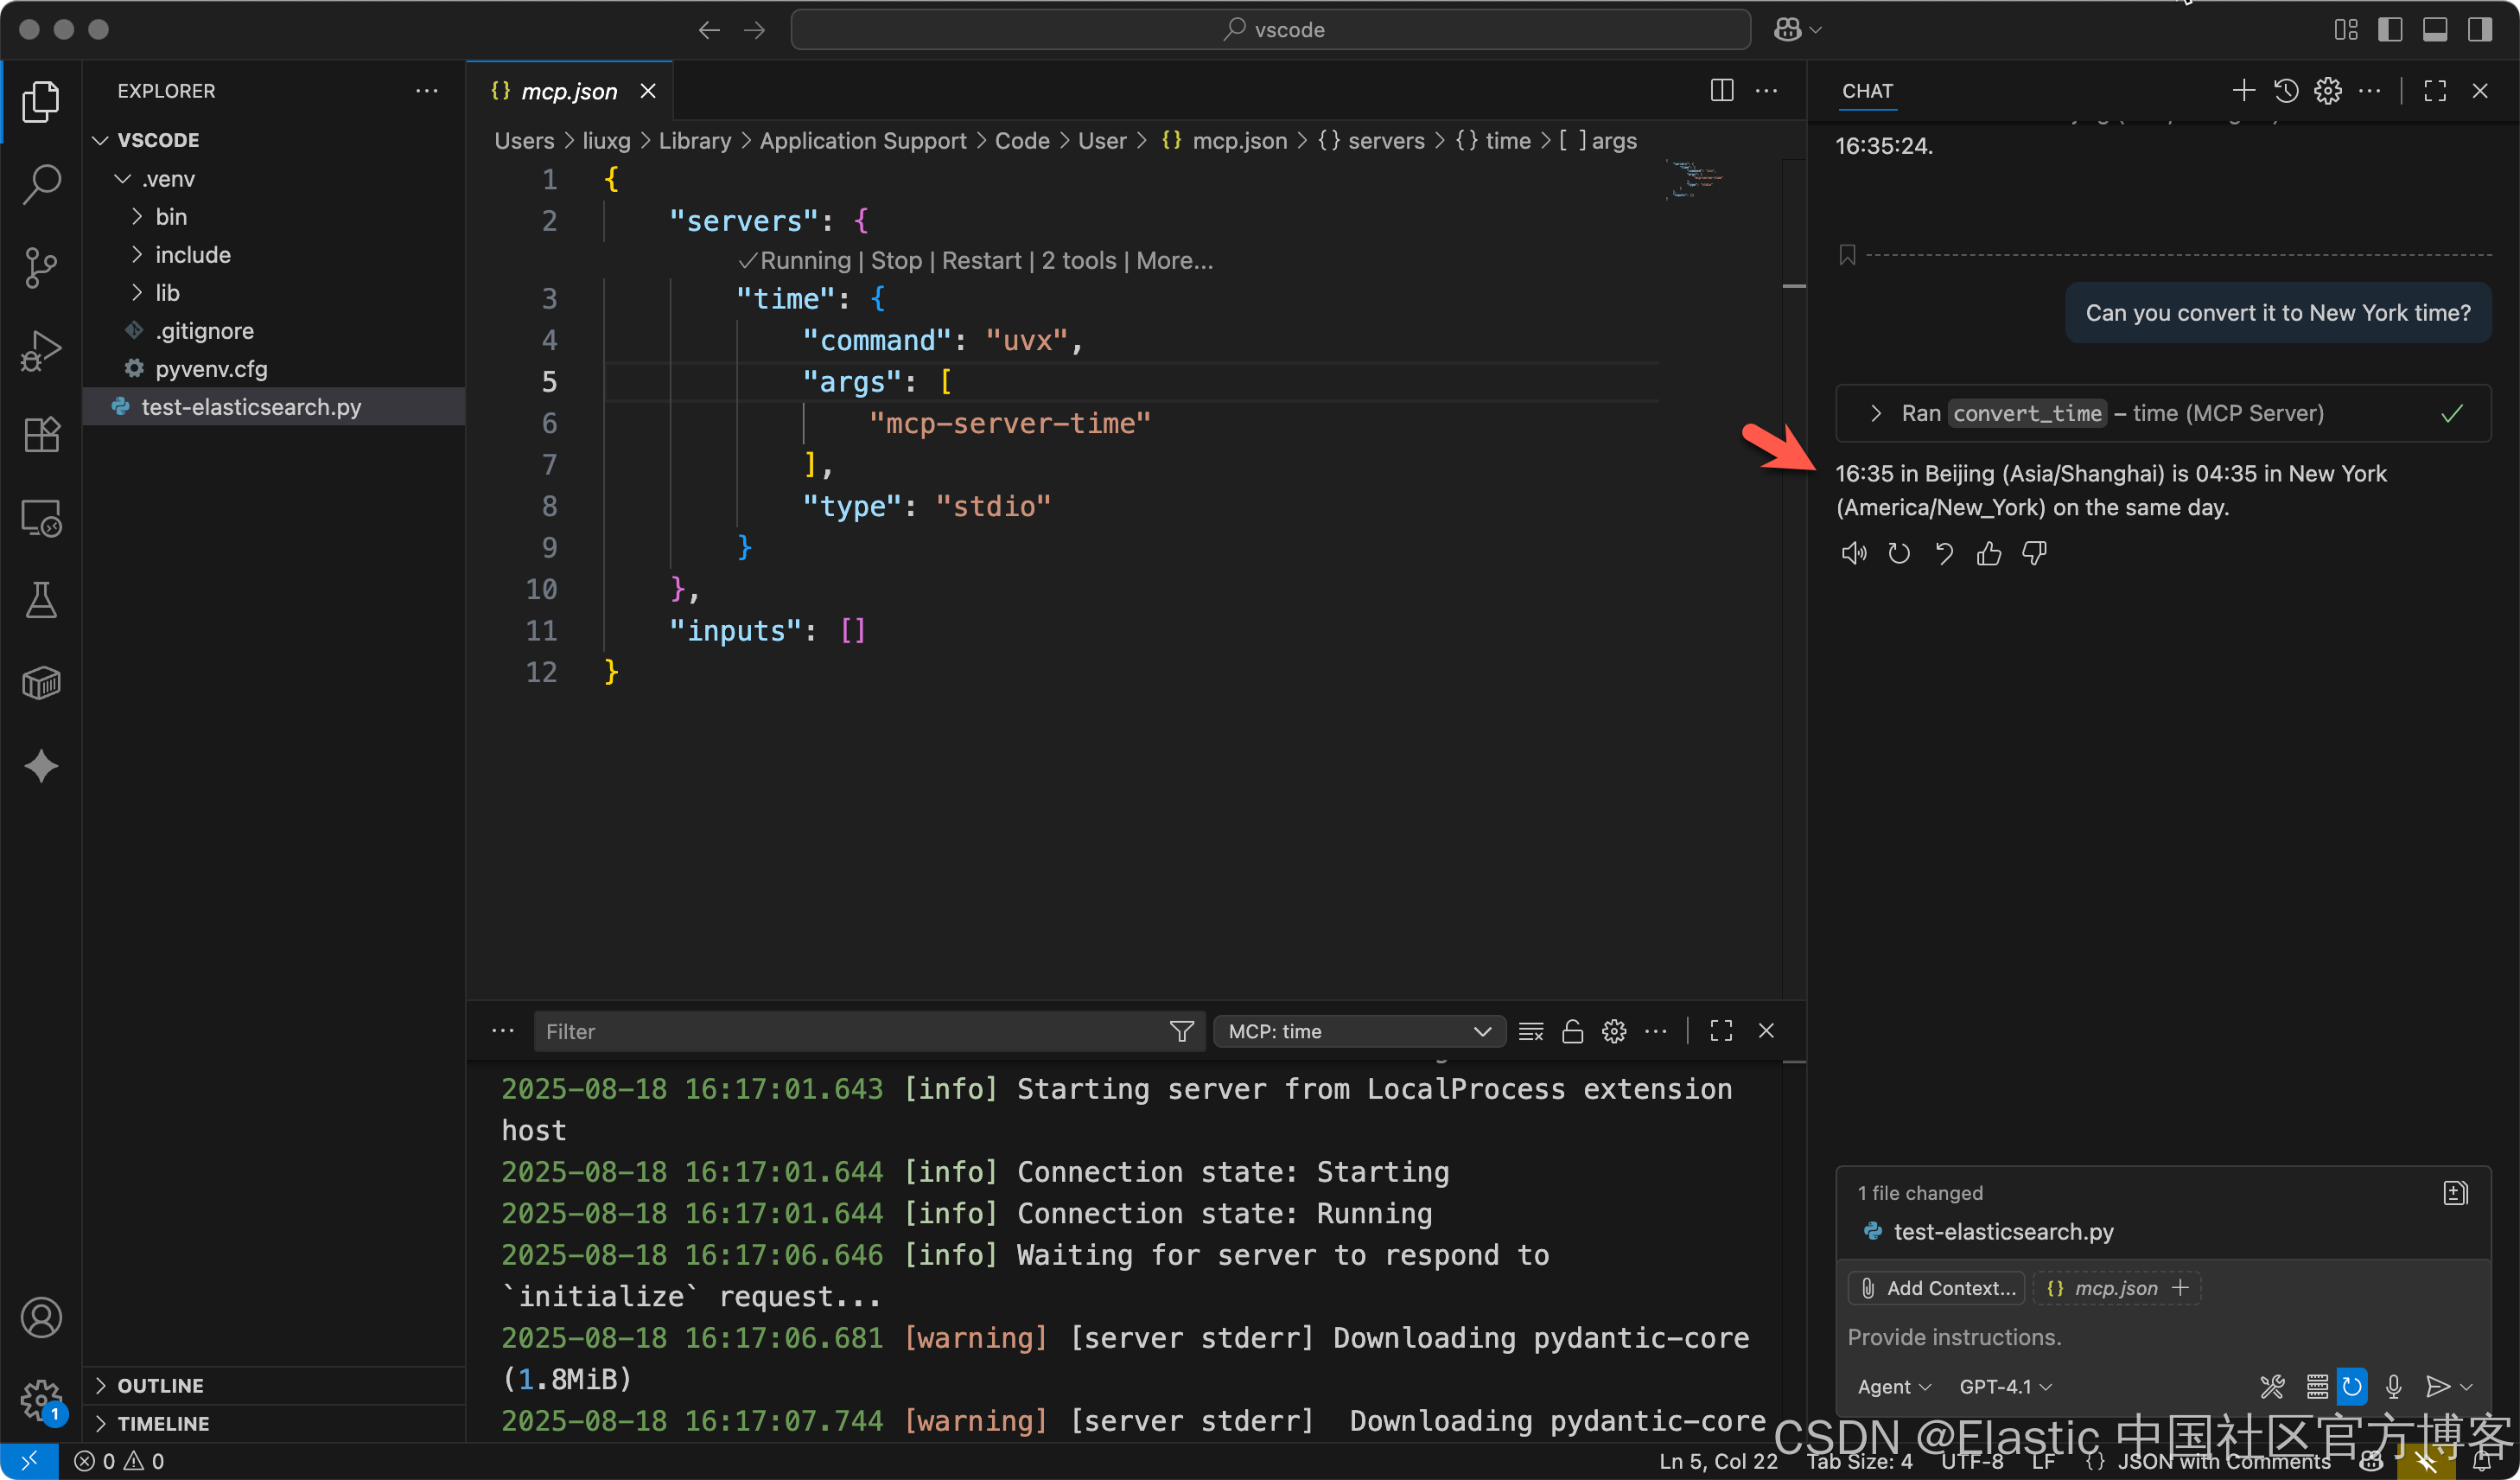
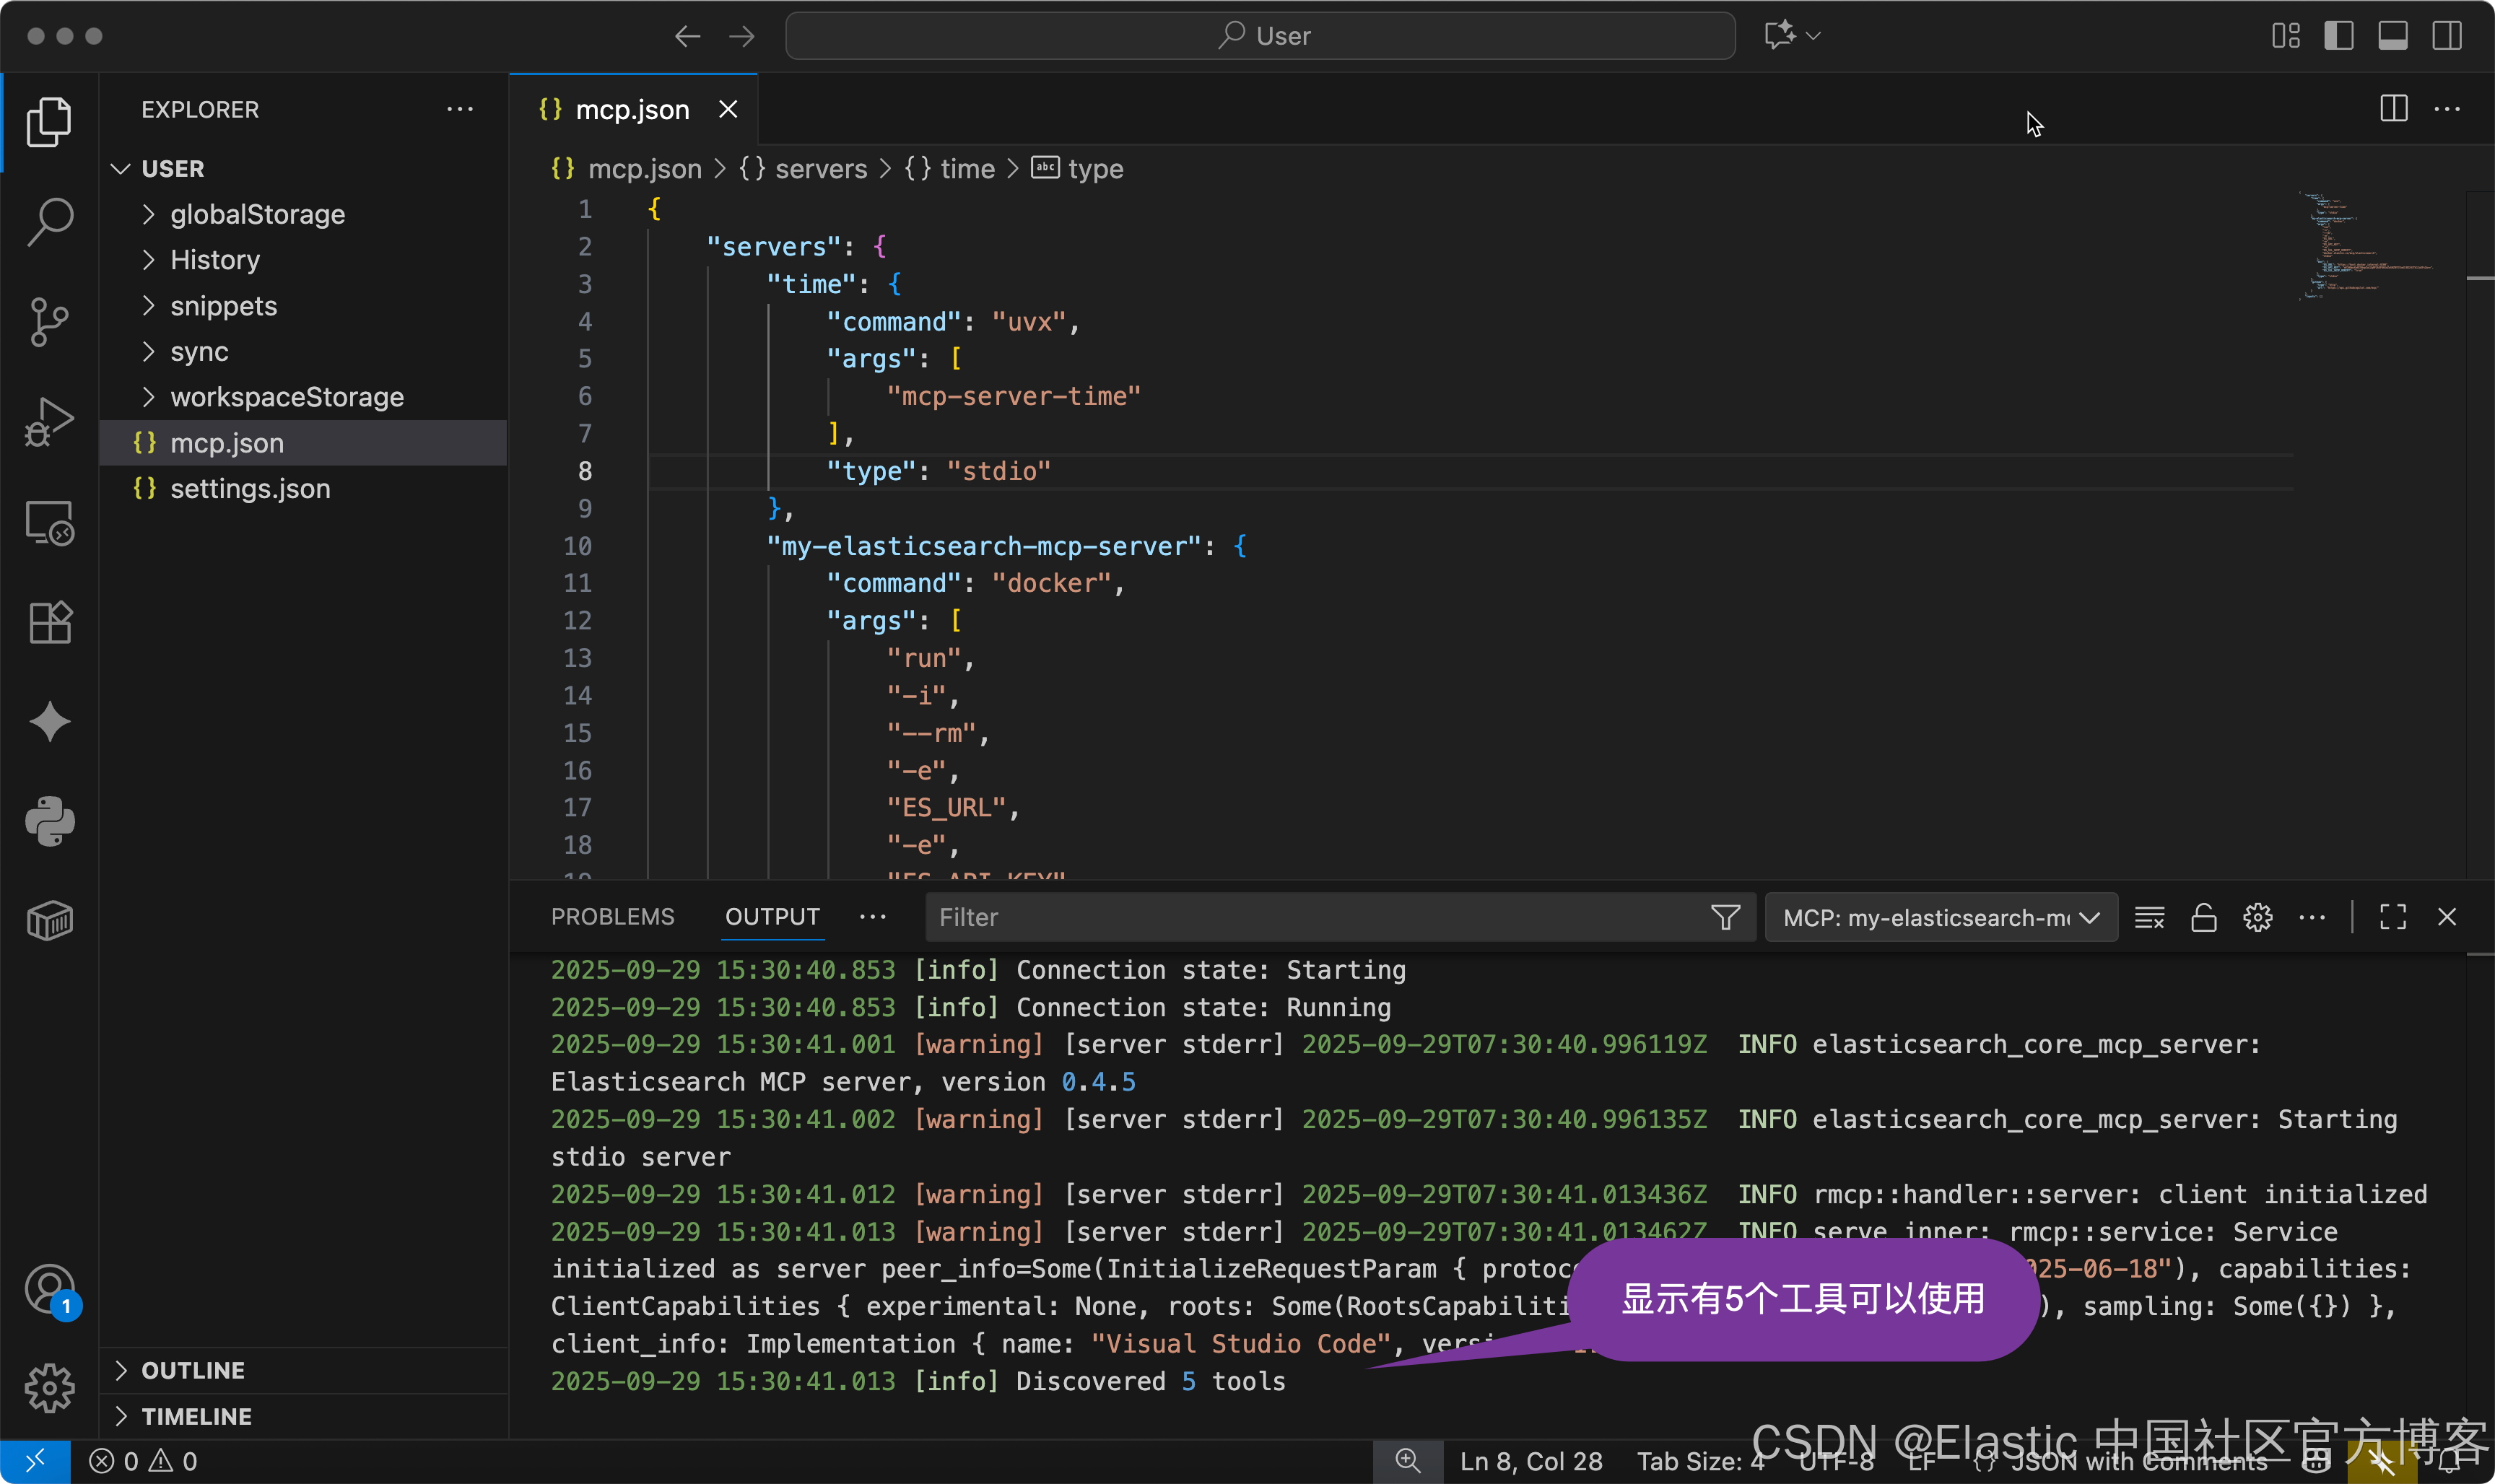
从上面我们可以看到有两个工具被发现。我们我们使用 Ctrl/Command + Shift + P 热键组合来进行查看:
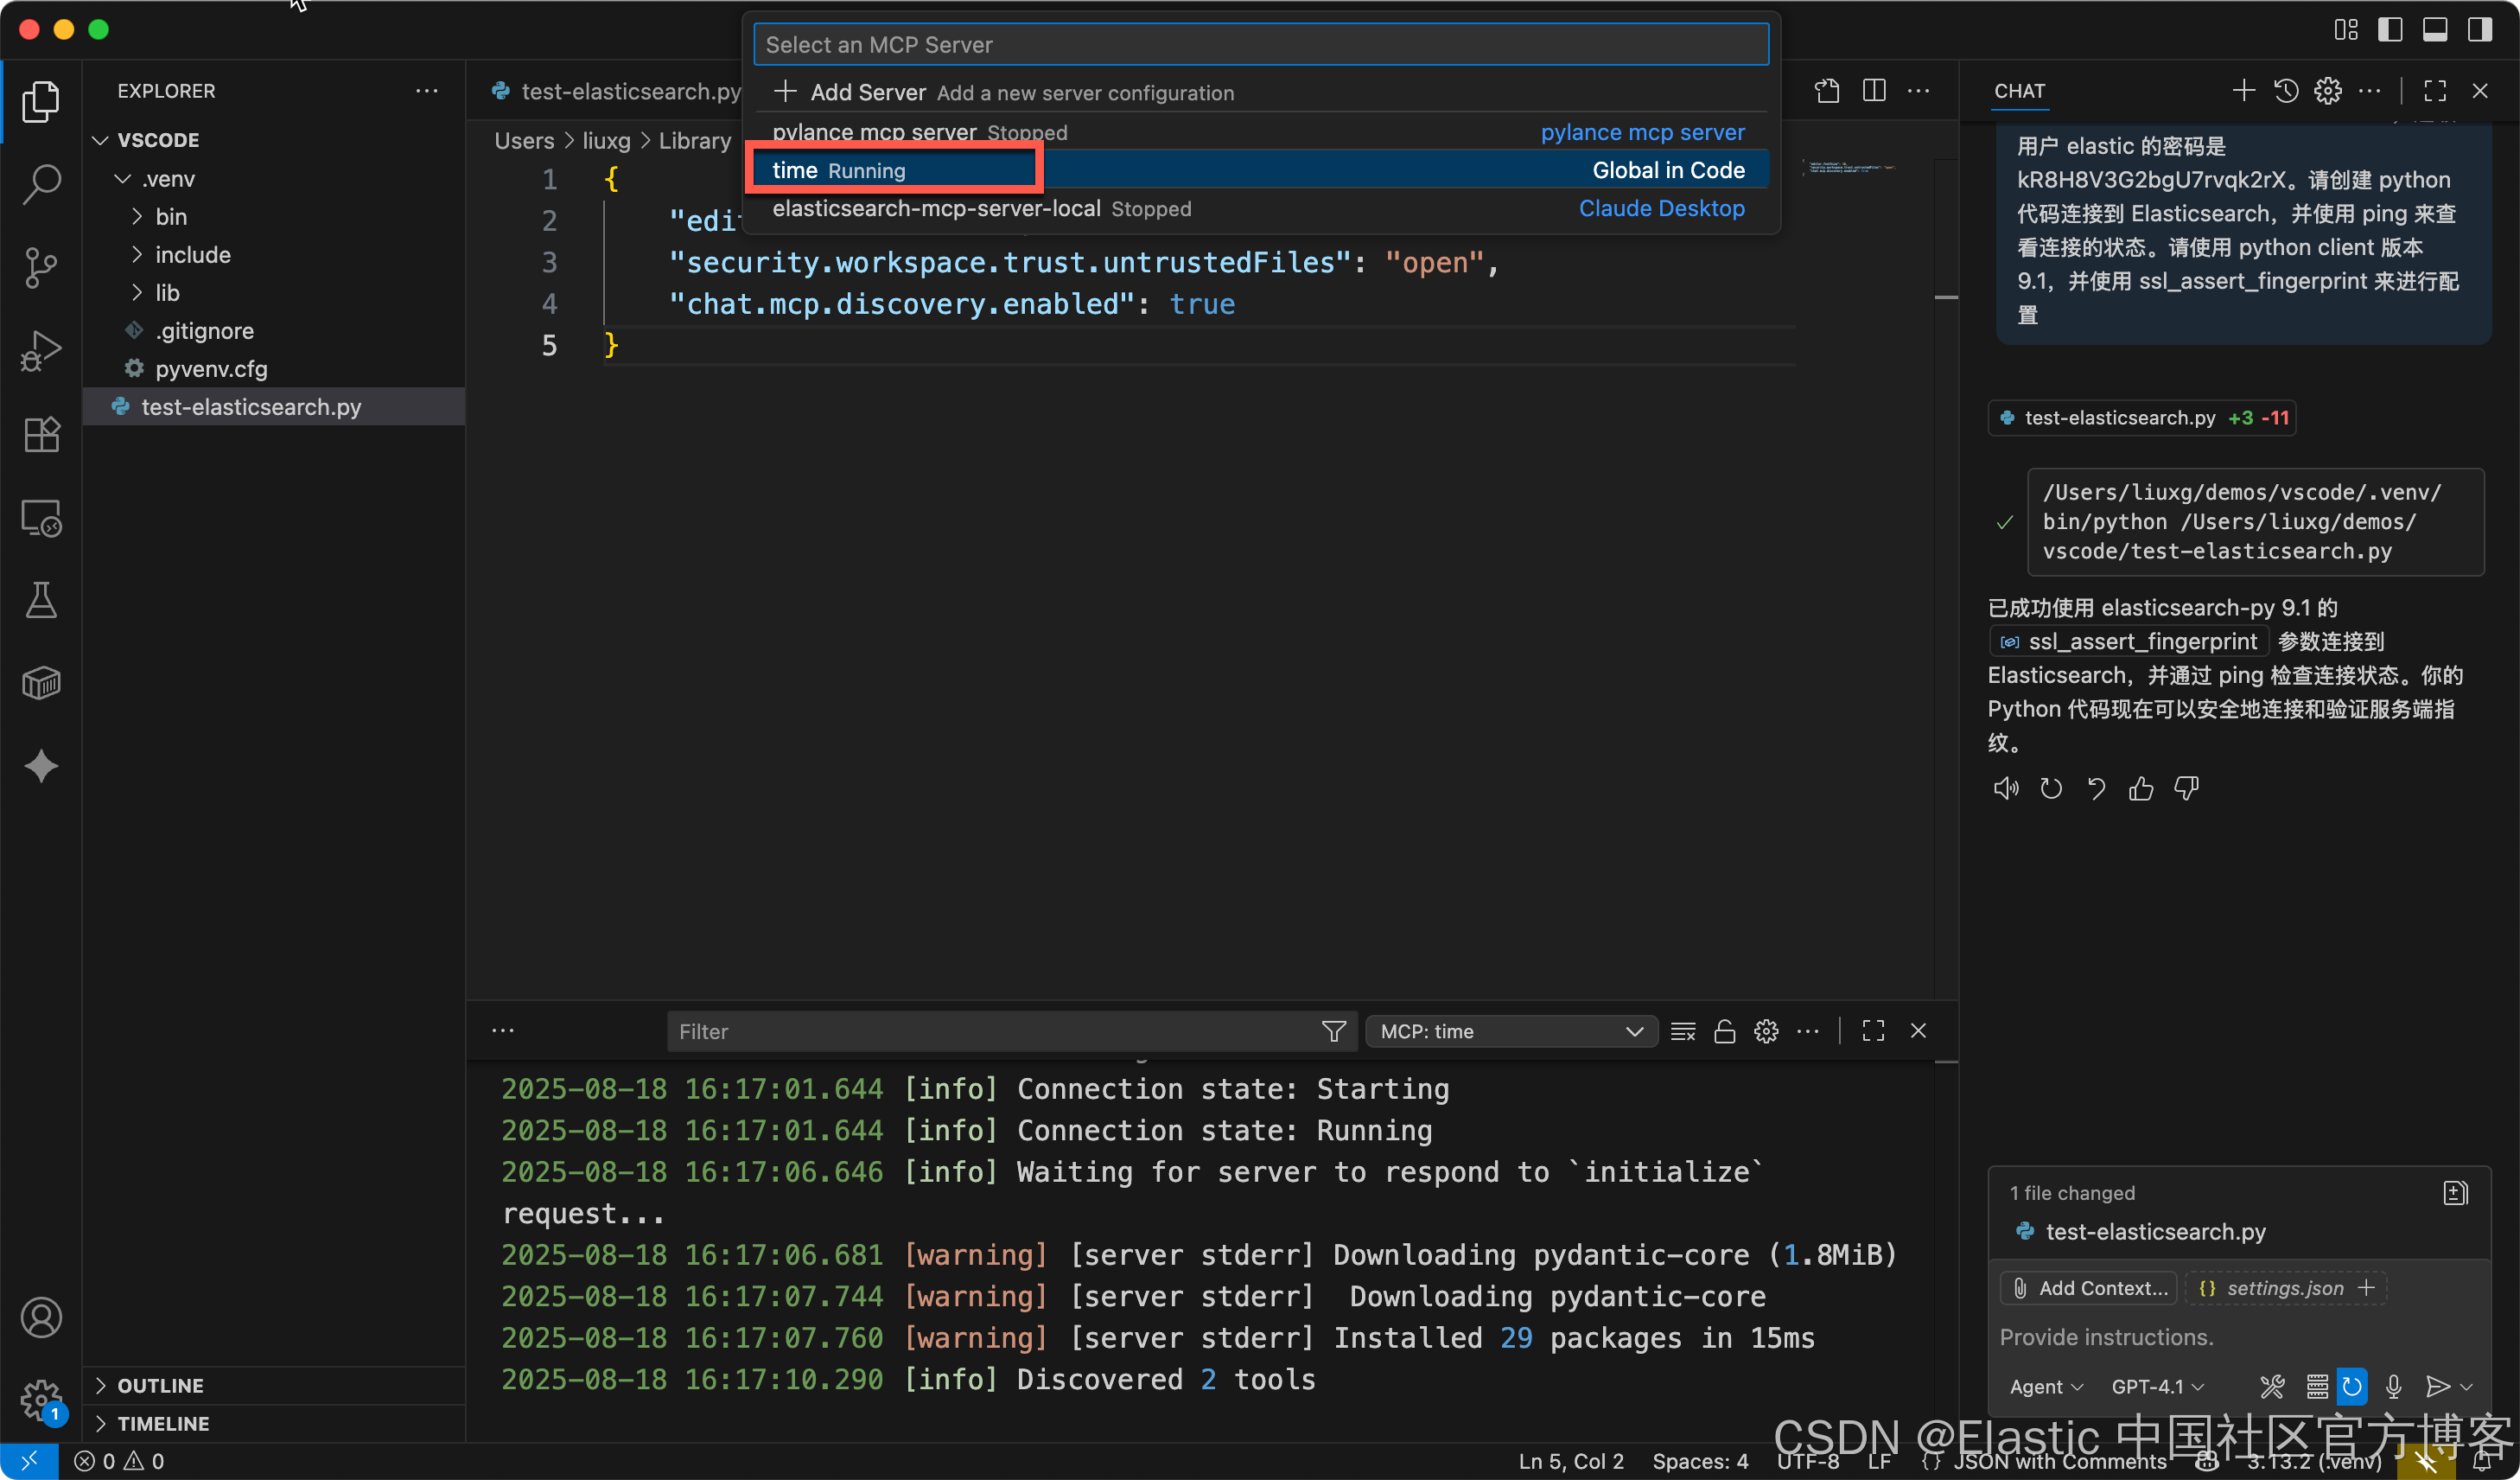
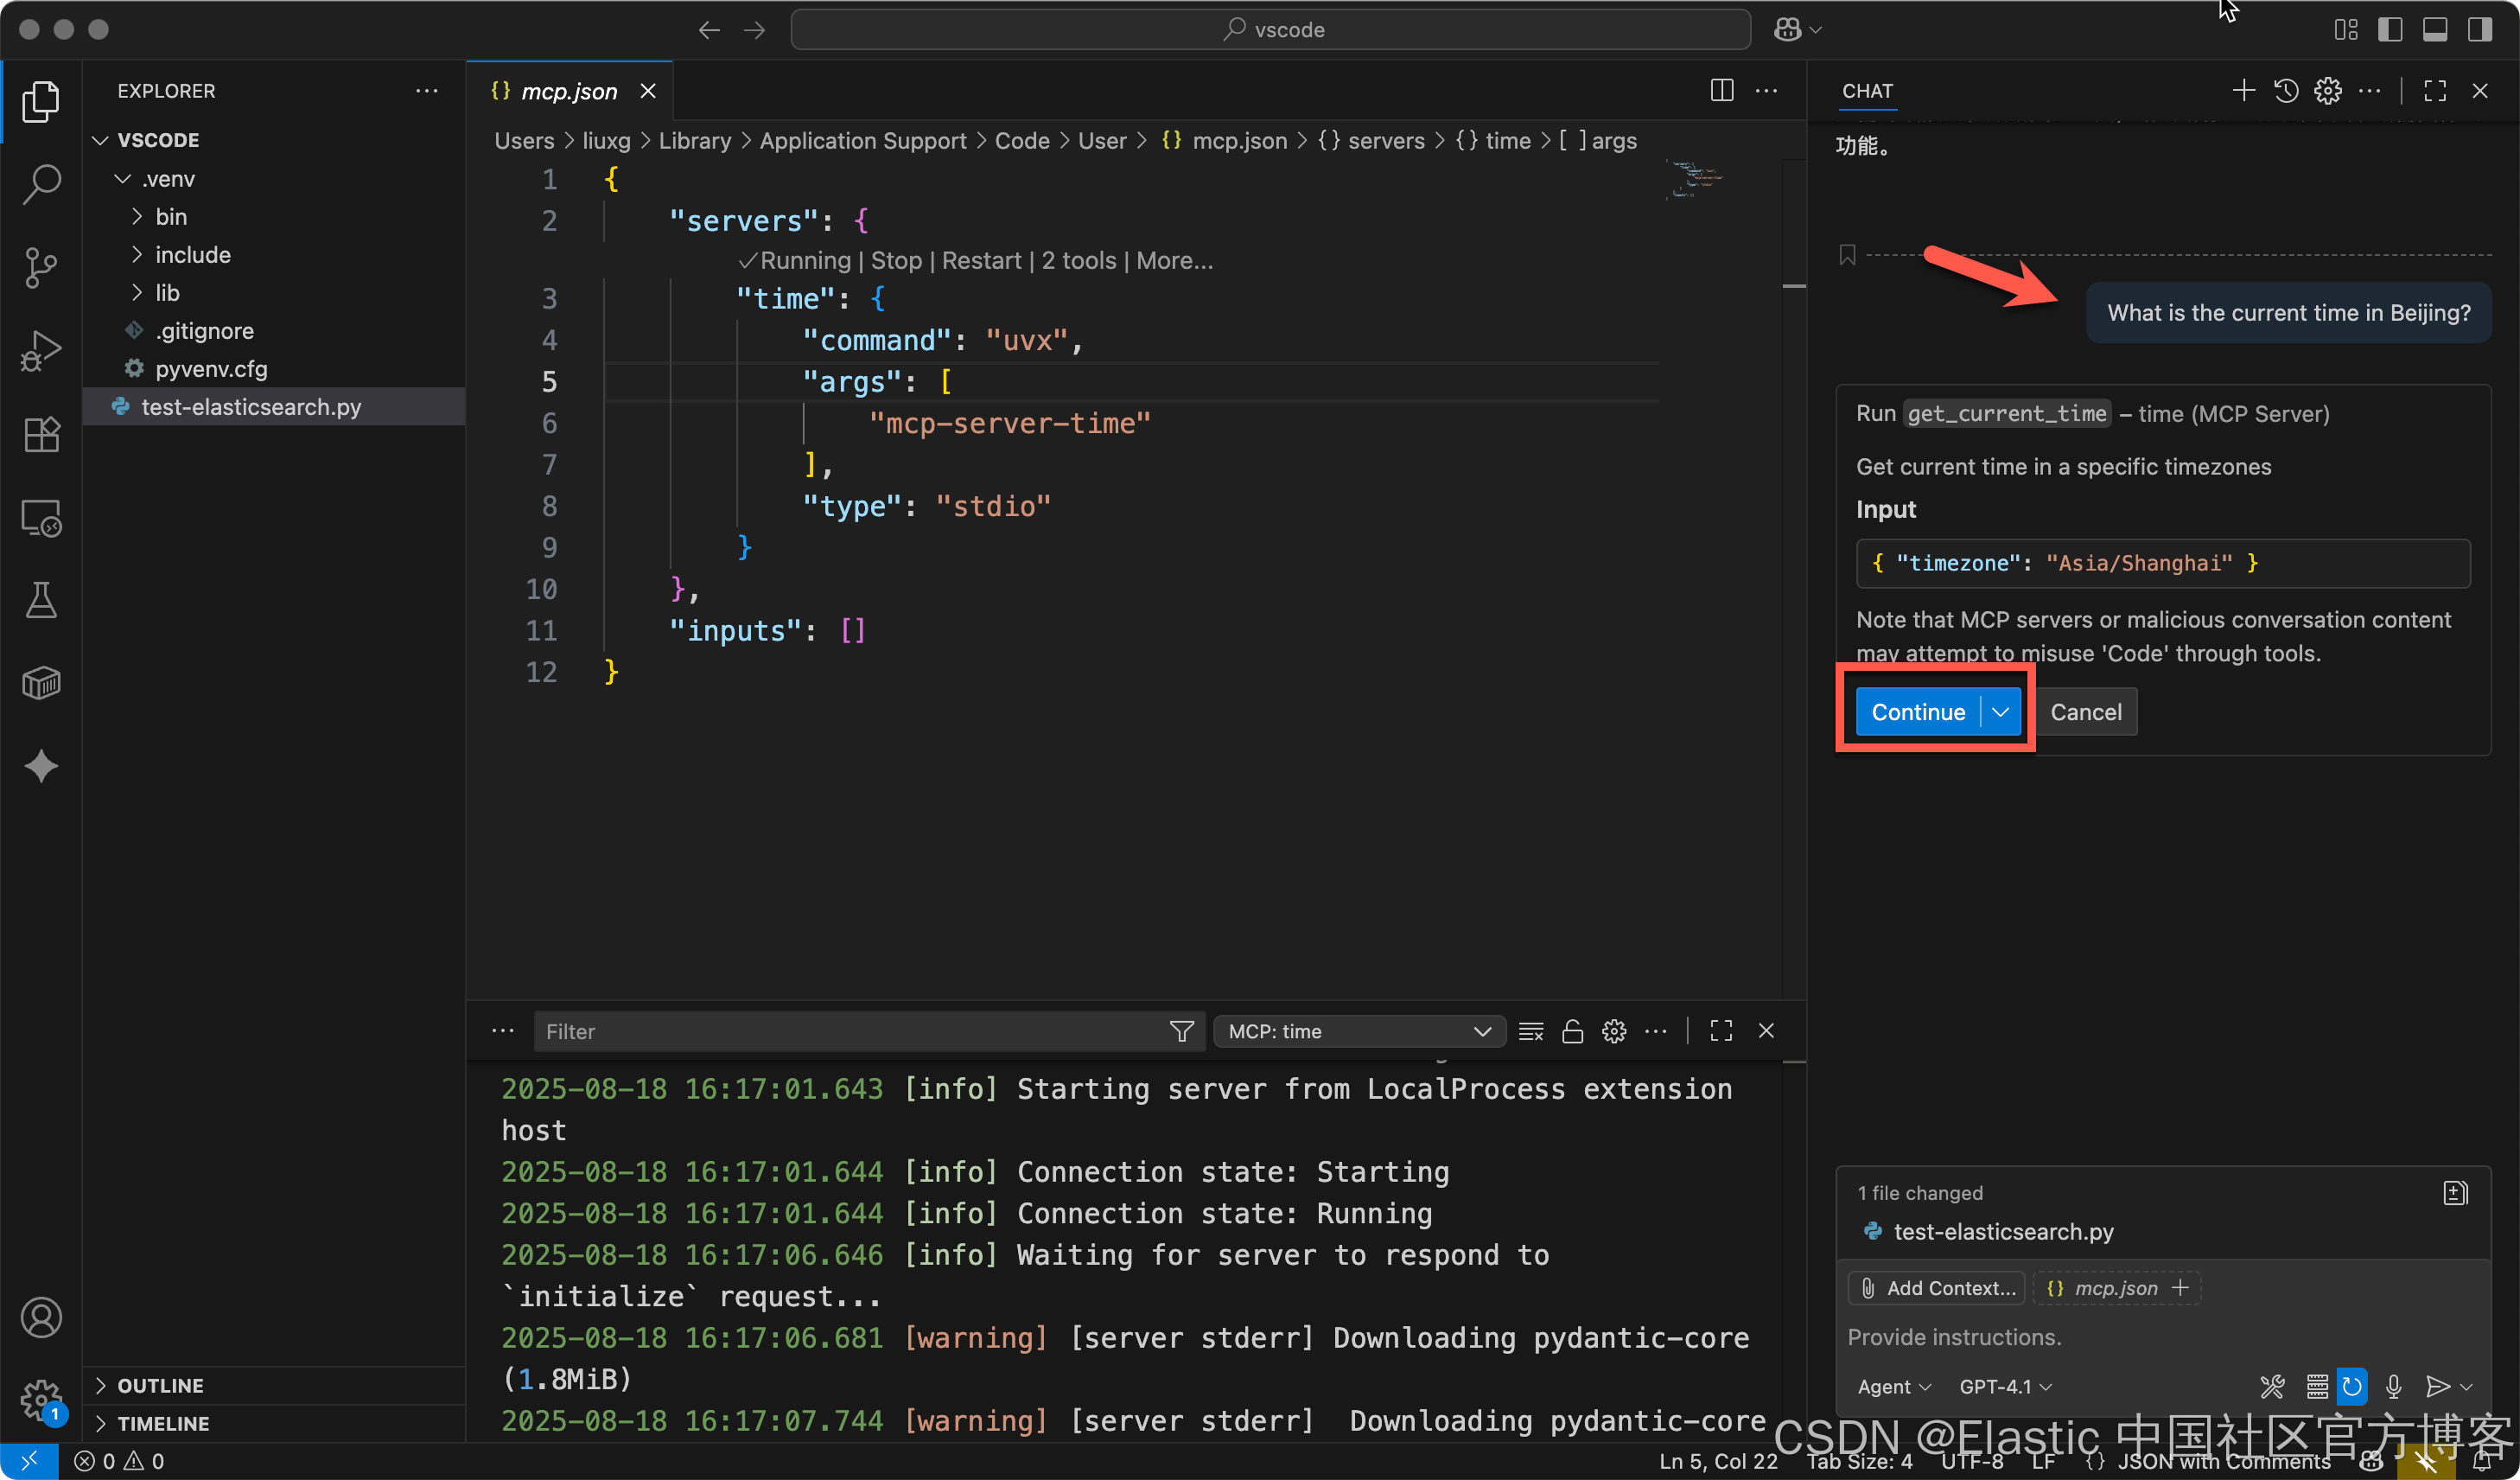
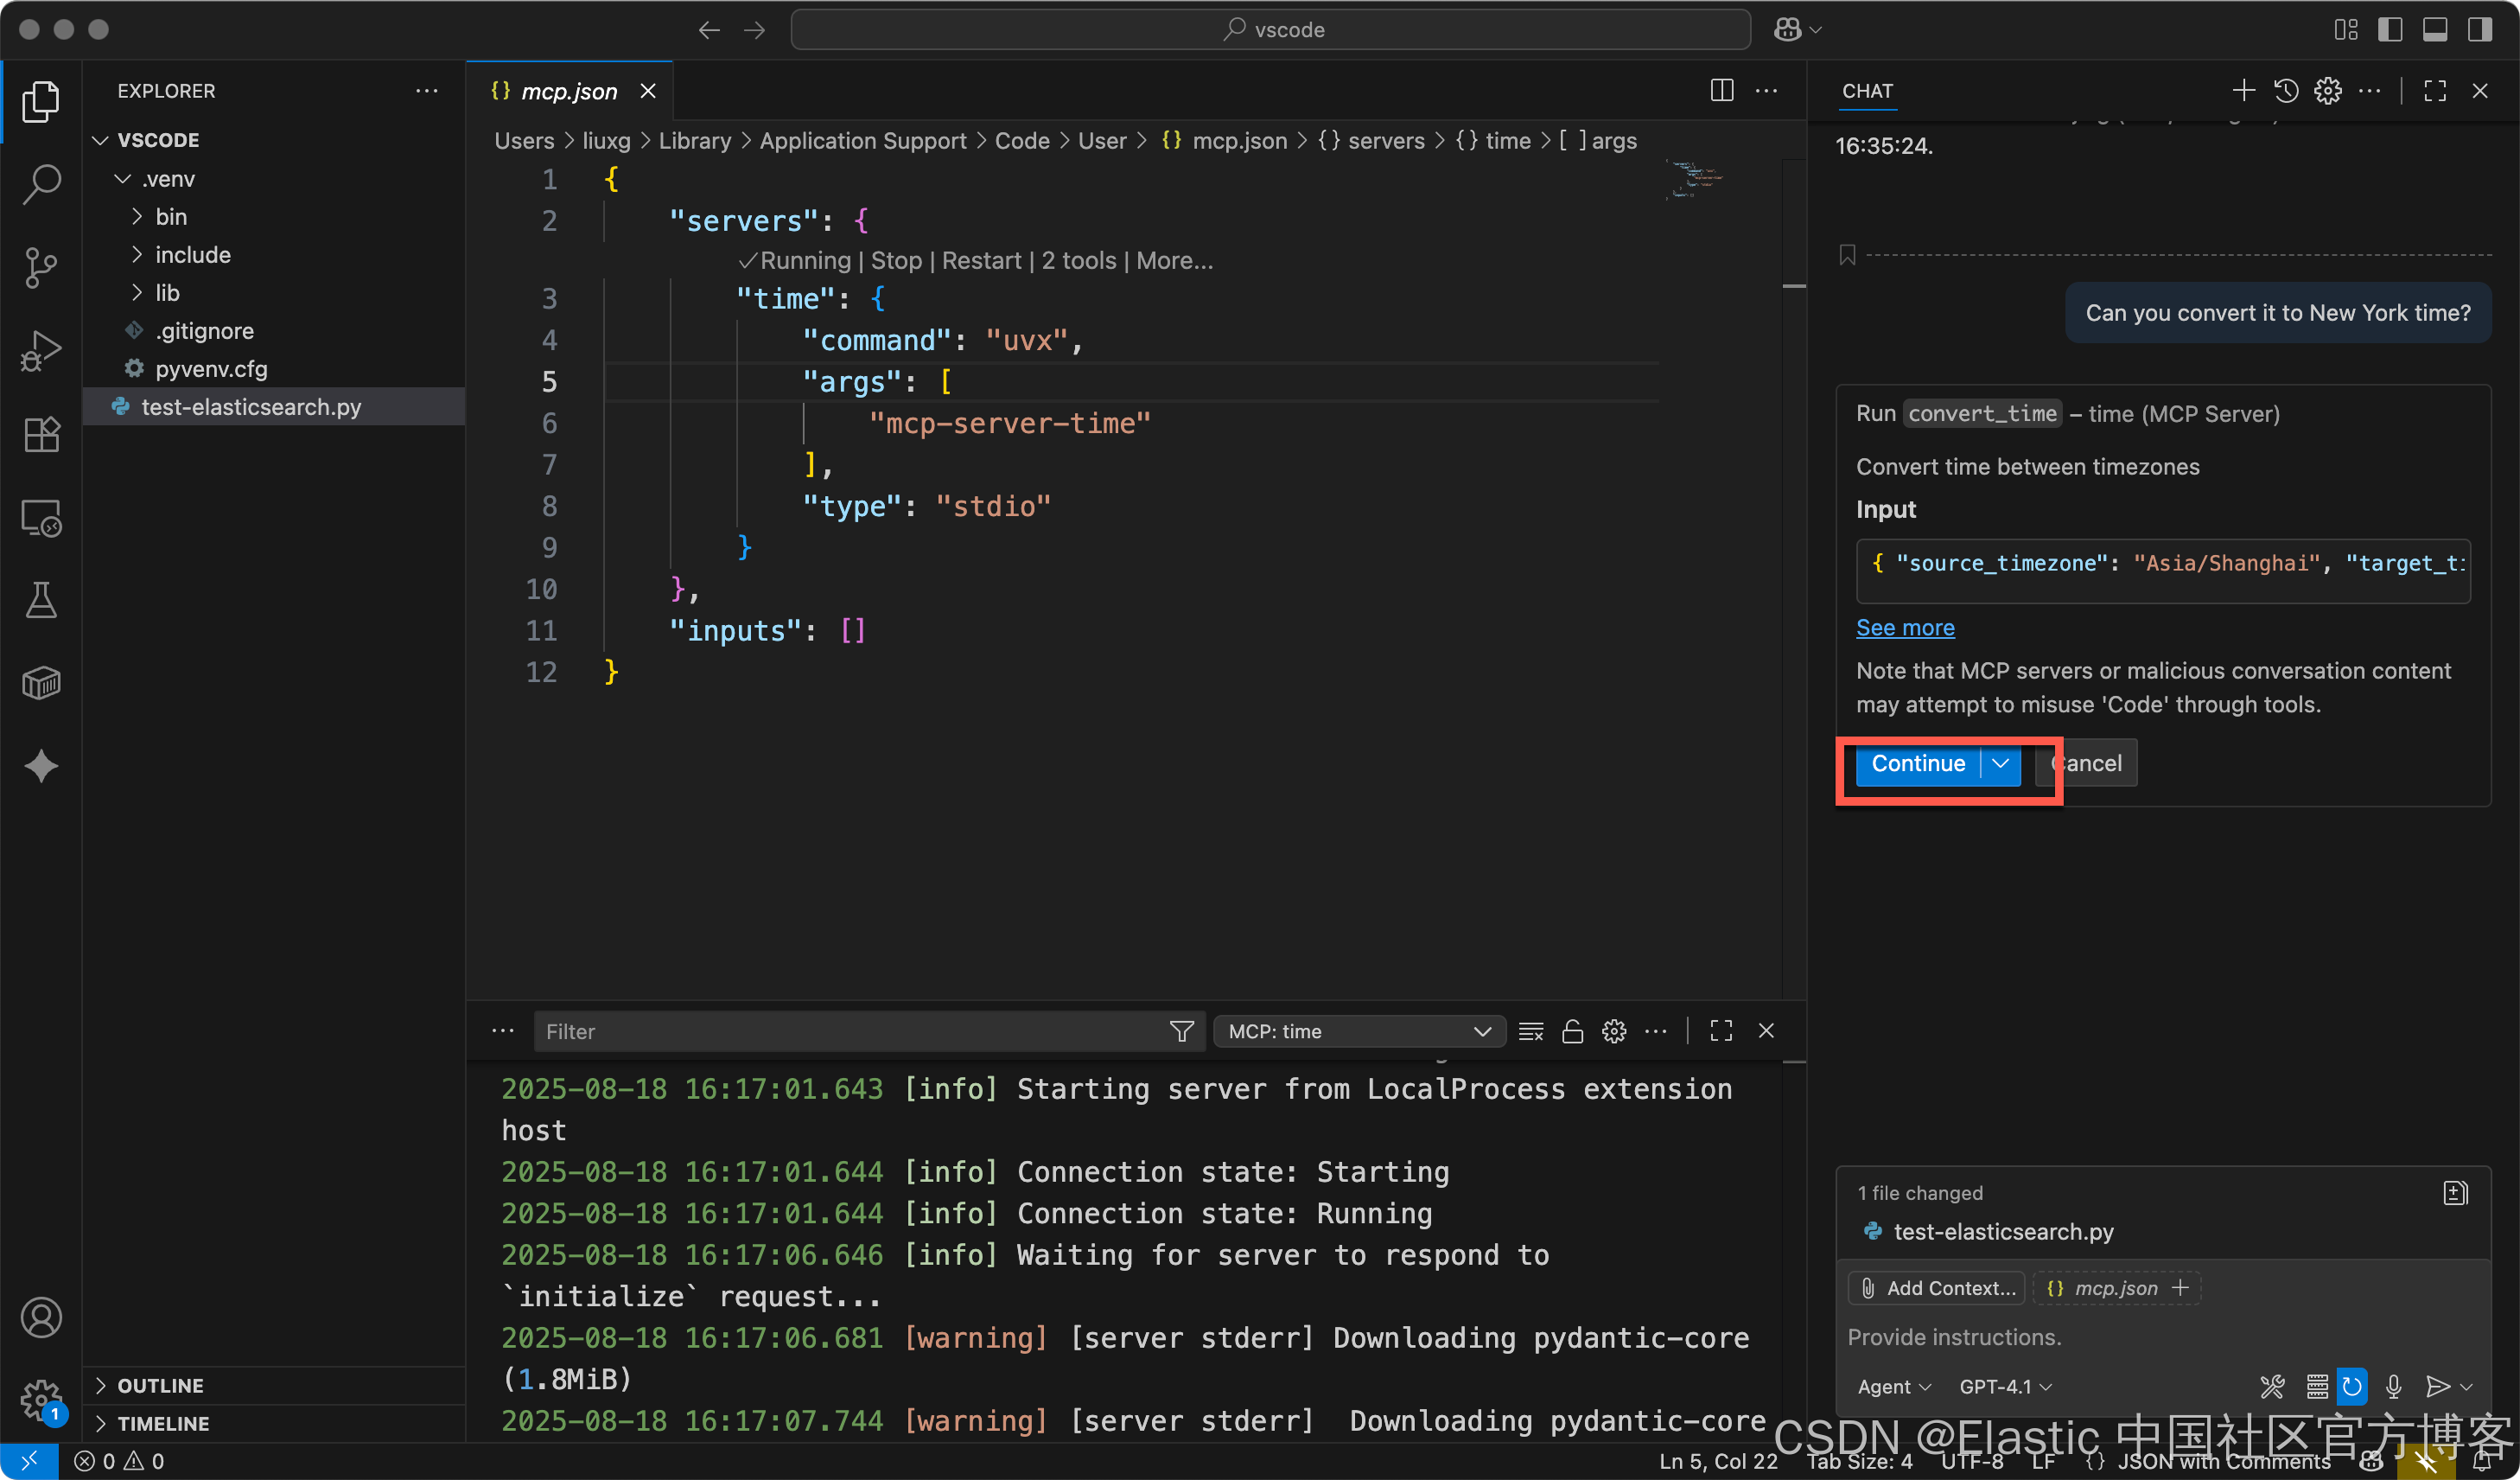
这次,我们看到一个 time 的 MCP 服务器正在运行中:
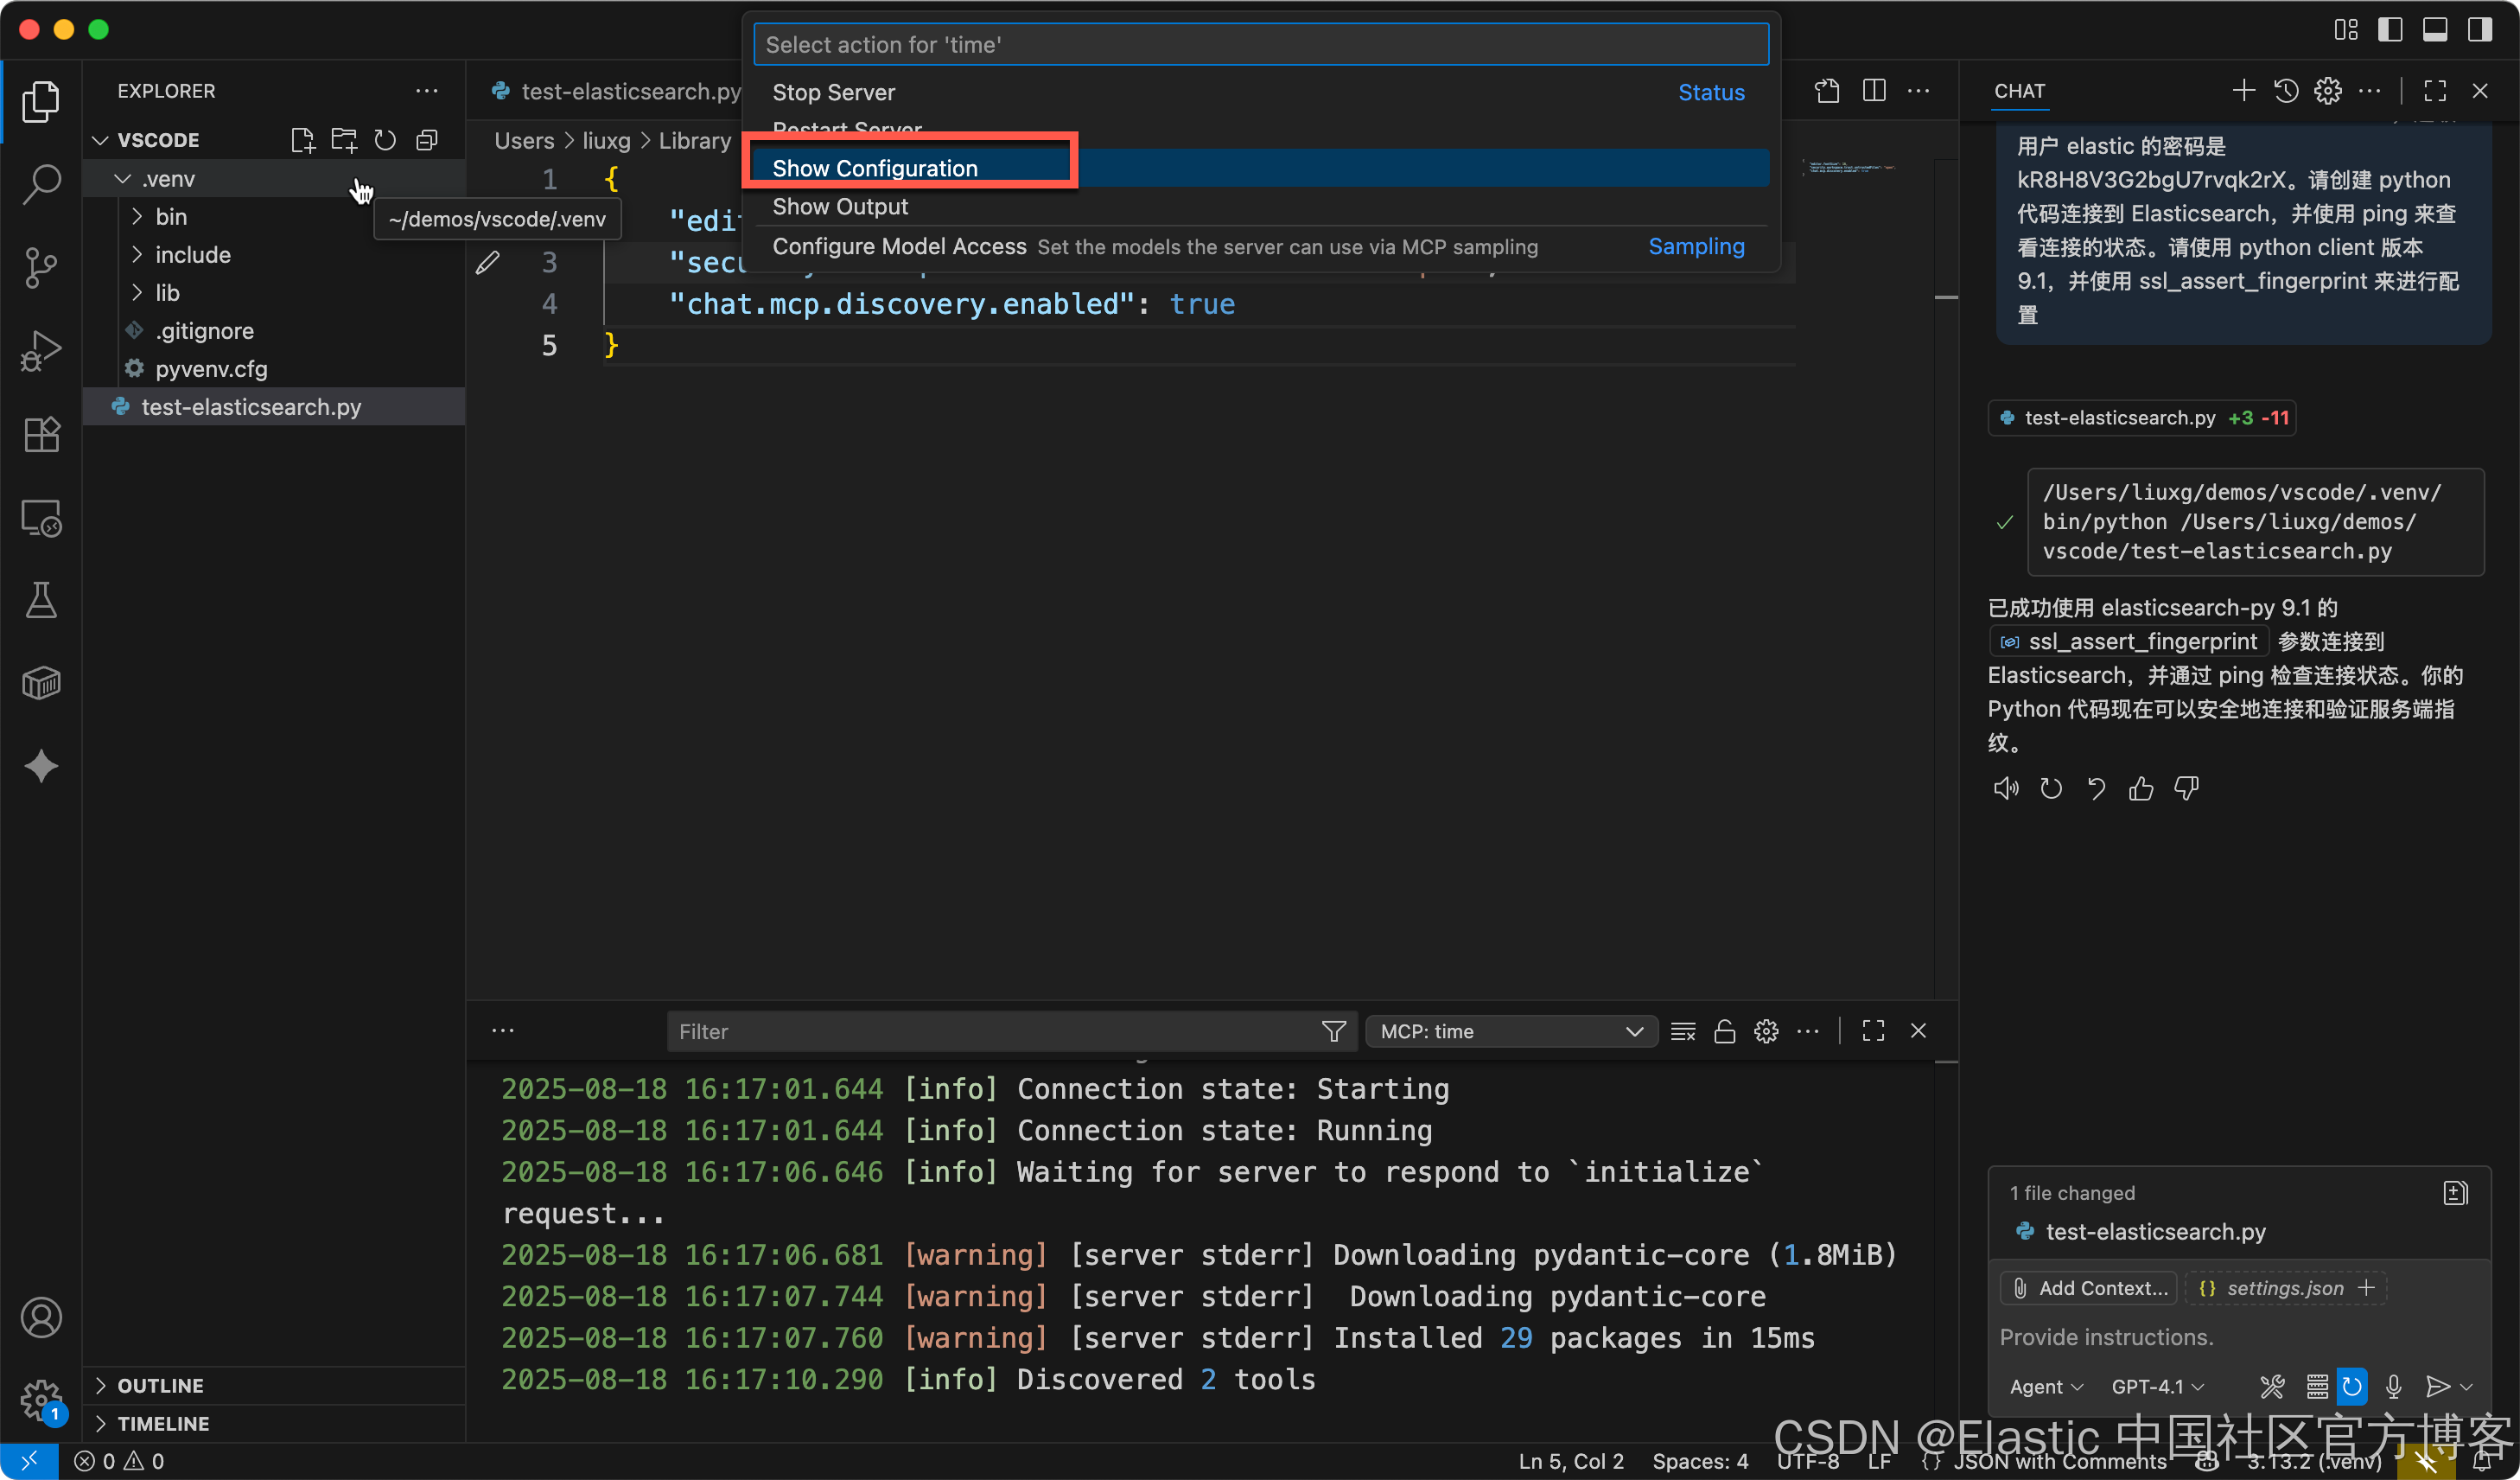
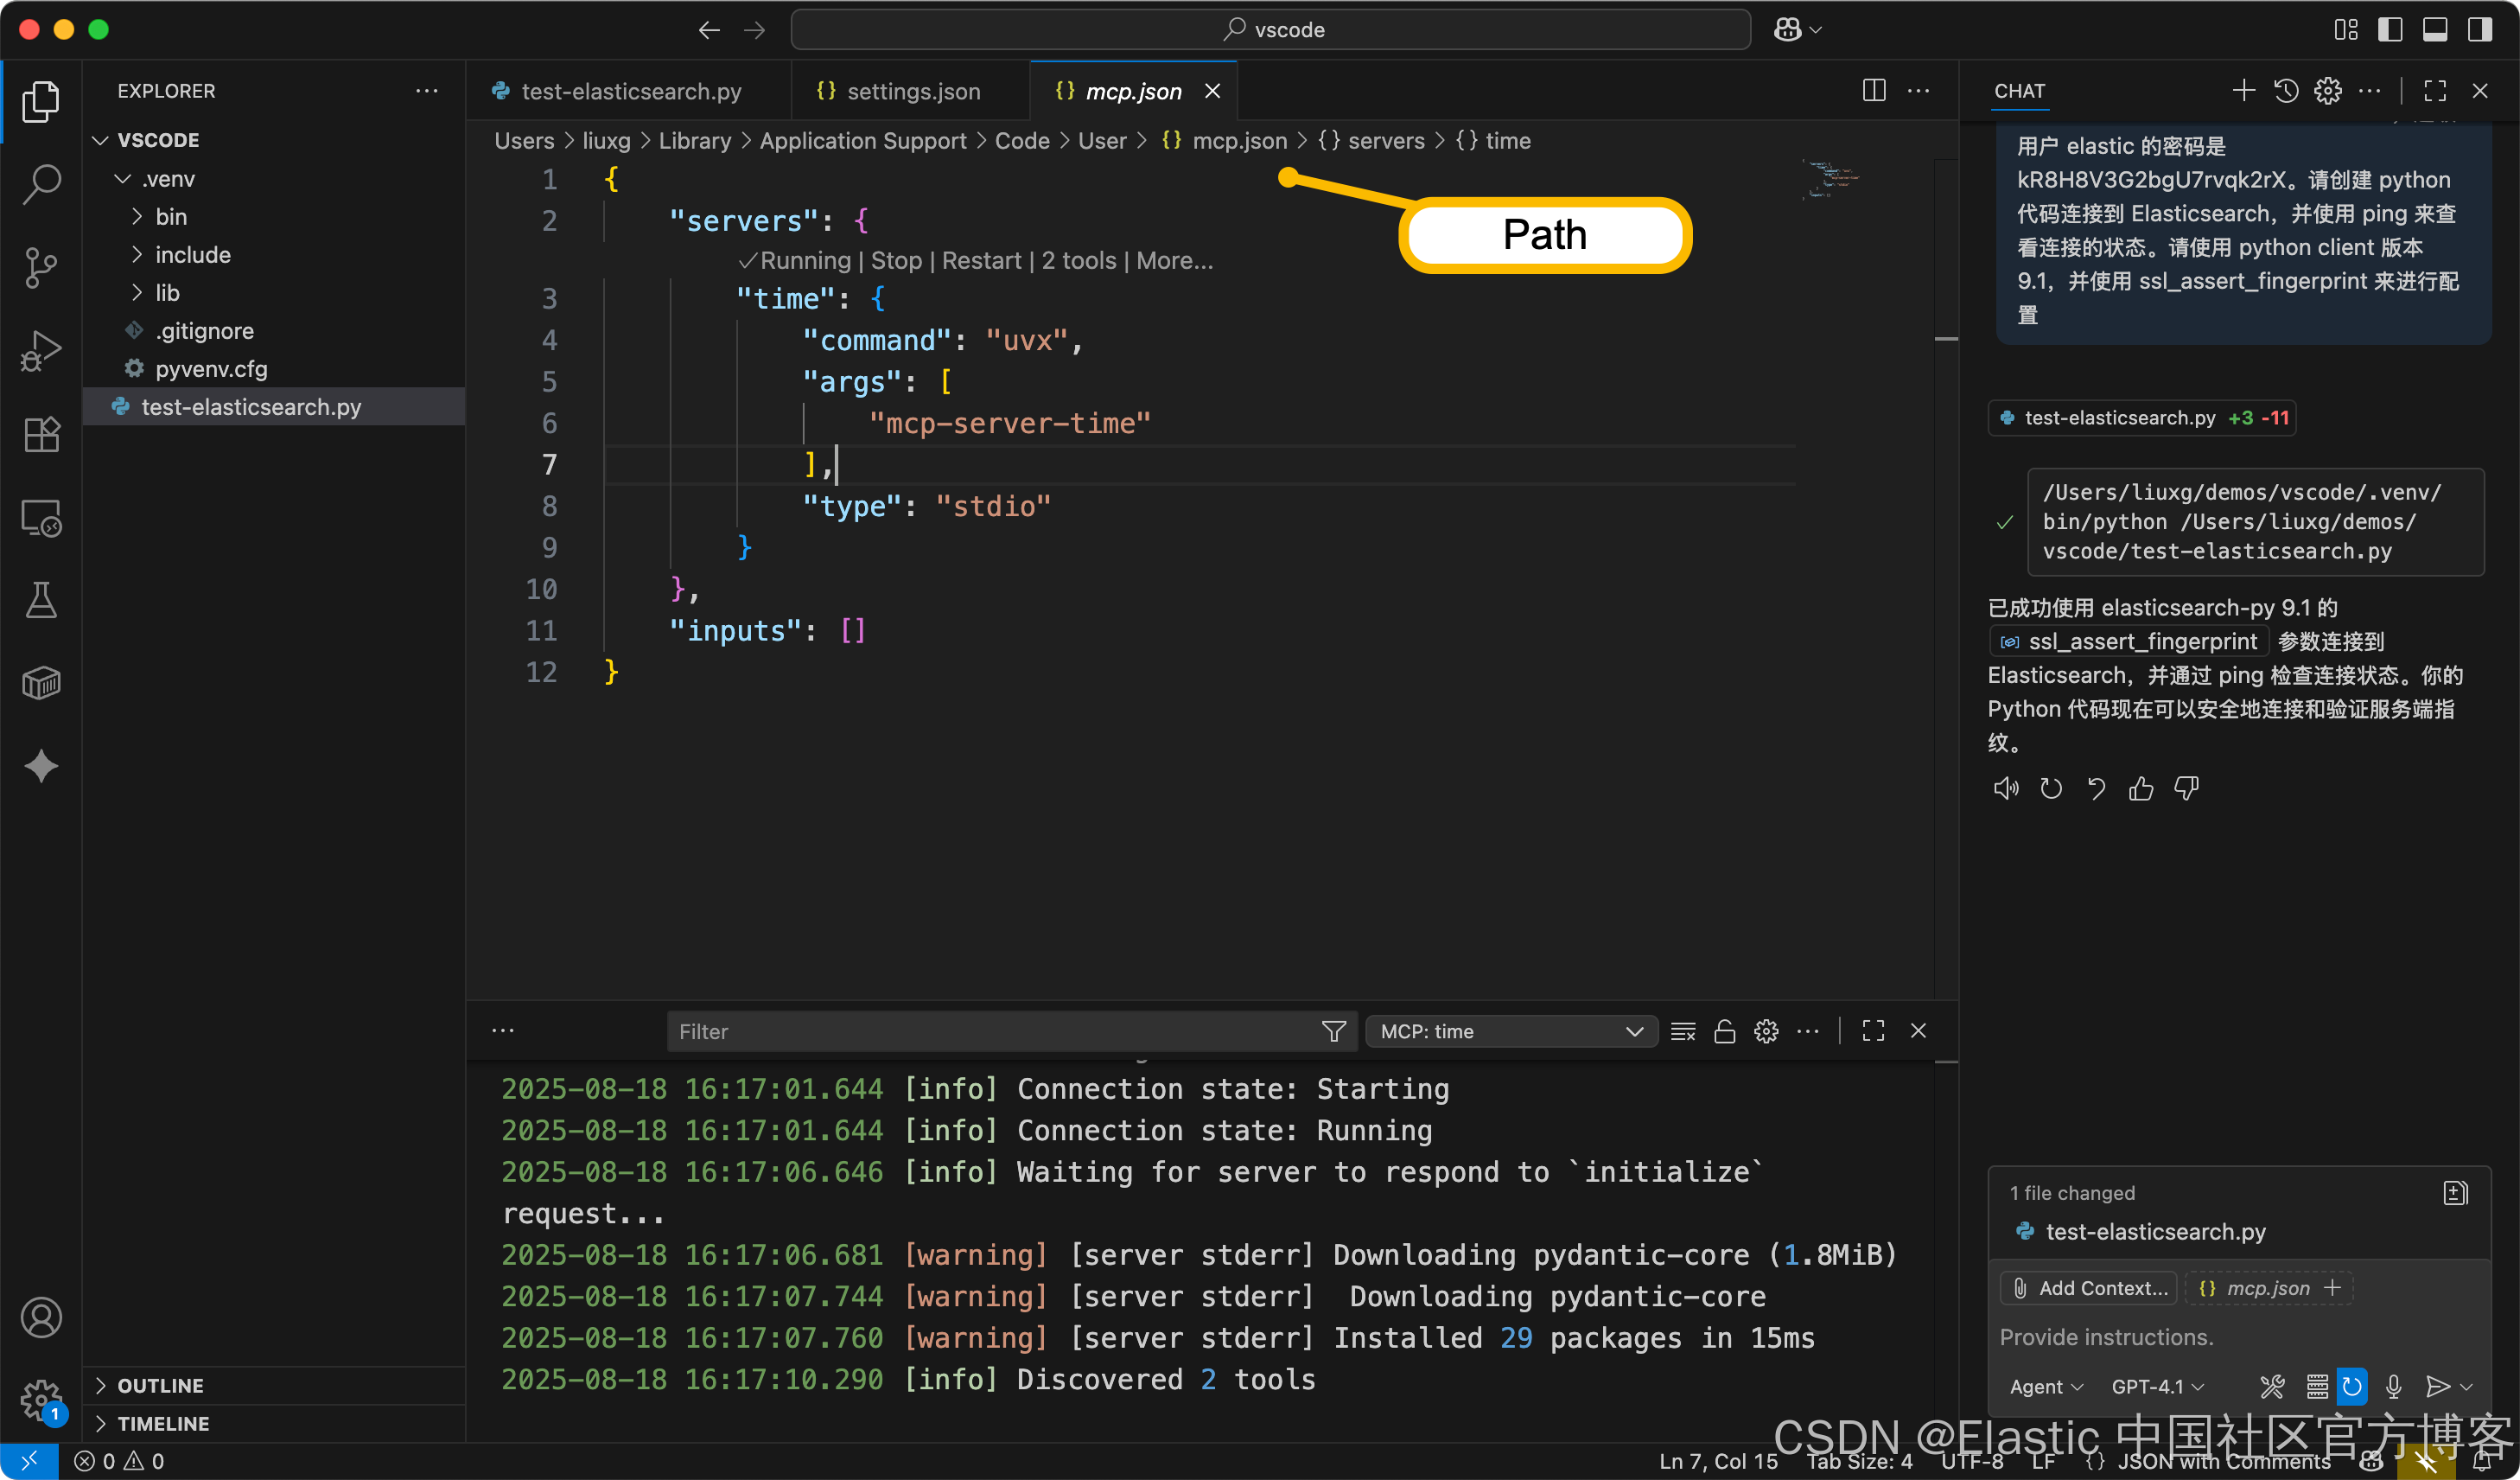
上面显示它的完整路径:~/Library/Application\ Support/Code/User
$ pwd
/Users/liuxg/Library/Application Support/Code/User
$ cd ~/Library/Application\ Support/Code/User
$ ls
History          mcp.json         snippets         workspaceStorage
globalStorage    settings.json    sync
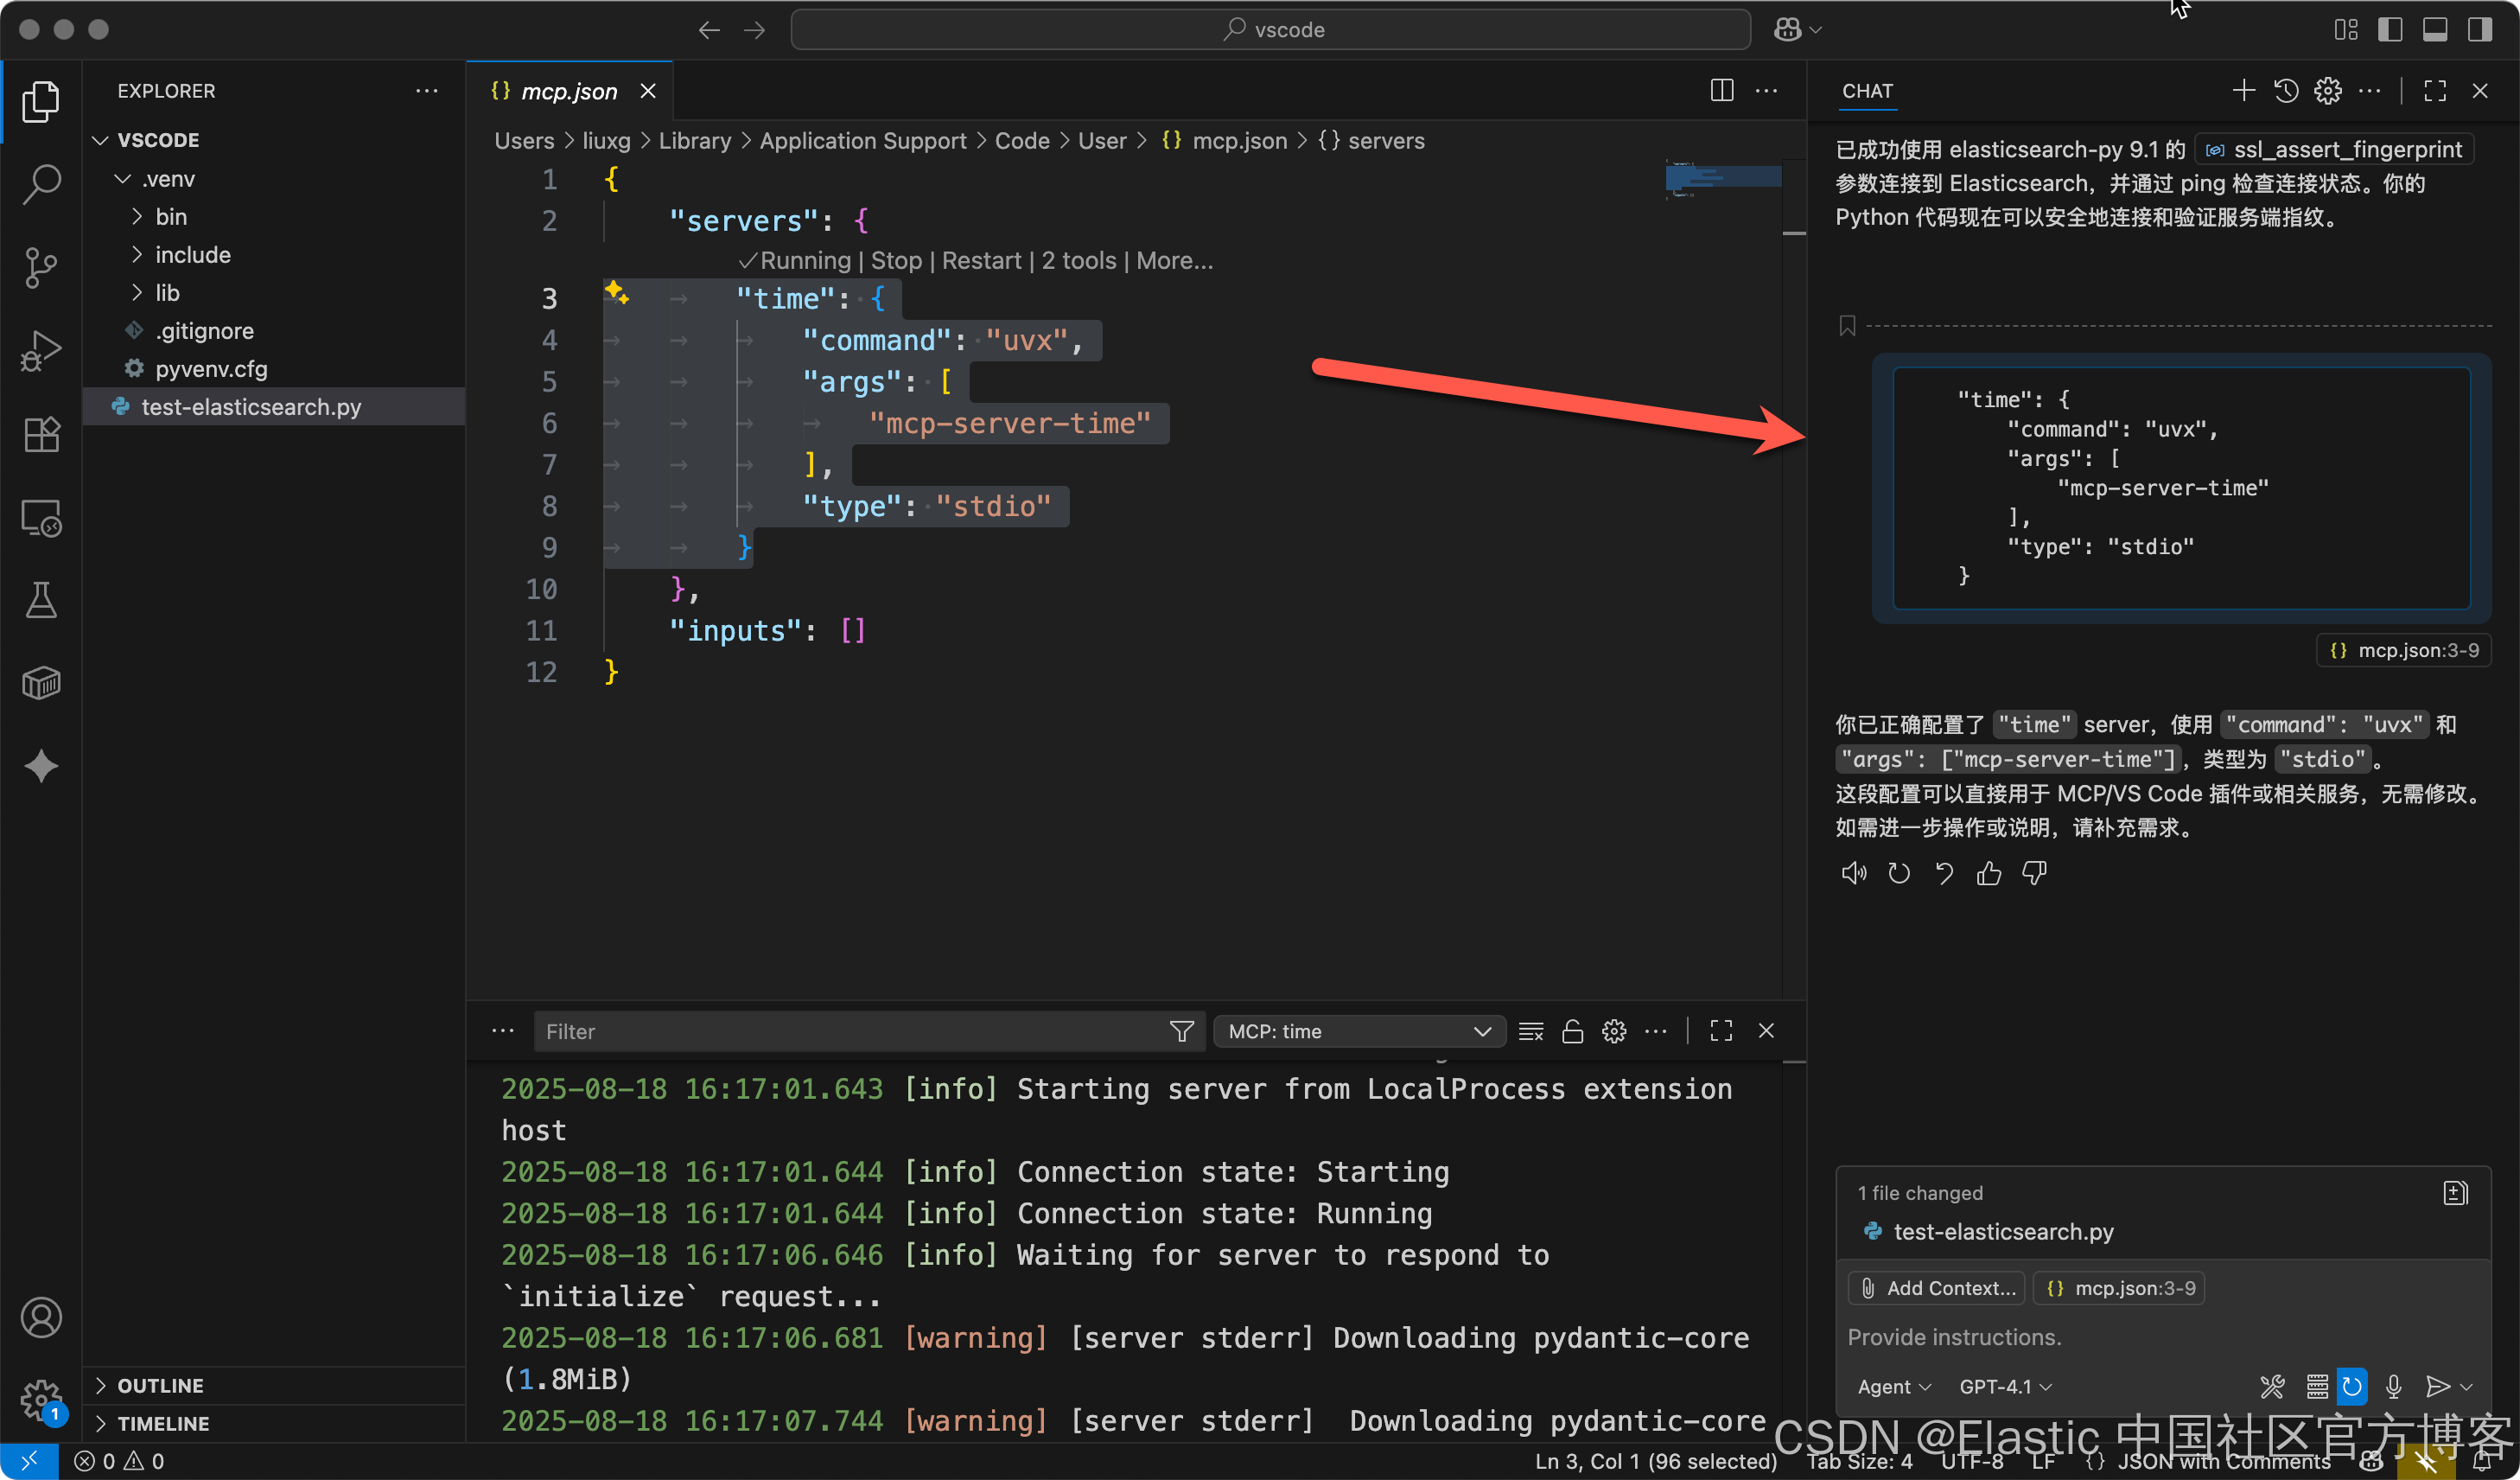
我们把上面的配置拷贝到 Copilot 的 Chat box 里,然后我们可以看到上面的显示结果。
如上所示,我们也可以在同样的配置文件里配置多个 MCP 服务器。我们可以在下面的 Elasticsearch 中来进行尝试。

Elasticsearch MCP server
我们来安装官方的 Elasticsearch server https://github.com/elastic/mcp-server-elasticsearch 来进行安装:
docker run docker.elastic.co/mcp/elasticsearch$ docker run docker.elastic.co/mcp/elasticsearch
Unable to find image 'docker.elastic.co/mcp/elasticsearch:latest' locally
latest: Pulling from mcp/elasticsearch
55d734509148: Pull complete
48ce42b85919: Pull complete
32d7fa1a9d53: Pull complete
9bc4ec11f99c: Pull complete
d9a04cb2562d: Pull complete
9985f8349d92: Pull complete
1067966164c0: Pull complete
a9652bf076e3: Pull complete
d6895a67259c: Pull complete
0e35197cc05e: Pull complete
604b5830399d: Pull complete
71f017a1c73a: Pull complete
Digest: sha256:41865d190dbdd3acf93e15eece81a60e84b9737bc36bf0b6e3c7411ee7eb2455
Status: Downloaded newer image for docker.elastic.co/mcp/elasticsearch:latest
Elastic MCP serverUsage: elasticsearch-core-mcp-server <COMMAND>Commands:stdio Start a stdio serverhttp Start a streamable-HTTP server with optional SSE supporthelp Print this message or the help of the given subcommand(s)Options:-h, --help Print helpMCP 服务器使用以下命令以 stdio 模式启动:
ES_URL=https://host.docker.internal:9200 ES_API_KEY=eE1WQmxKa0I5NnpZa1ZqRFZkUF86SnZoSHZNYXlheXlBX243Tk1Ja3FsZw== ES_SSL_SKIP_VERIFY=true docker run -i --rm -e ES_URL -e ES_API_KEY -e ES_SSL_SKIP_VERIFY docker.elastic.co/mcp/elasticsearch stdio$ ES_URL=https://host.docker.internal:9200 ES_API_KEY=eE1WQmxKa0I5NnpZa1ZqRFZkUF86SnZoSHZNYXlheXlBX243Tk1Ja3FsZw== ES_SSL_SKIP_VERIFY=true docker run -i --rm -e ES_URL -e ES_API_KEY -e ES_SSL_SKIP_VERIFY docker.elastic.co/mcp/elasticsearch stdio
Unable to find image 'docker.elastic.co/mcp/elasticsearch:latest' locally
latest: Pulling from mcp/elasticsearch
55d734509148: Pull complete
48ce42b85919: Pull complete
32d7fa1a9d53: Pull complete
9bc4ec11f99c: Pull complete
d9a04cb2562d: Pull complete
9985f8349d92: Pull complete
1067966164c0: Pull complete
a9652bf076e3: Pull complete
d6895a67259c: Pull complete
0e35197cc05e: Pull complete
604b5830399d: Pull complete
71f017a1c73a: Pull complete
Digest: sha256:41865d190dbdd3acf93e15eece81a60e84b9737bc36bf0b6e3c7411ee7eb2455
Status: Downloaded newer image for docker.elastic.co/mcp/elasticsearch:latest
2025-08-28T06:24:12.681905Z INFO elasticsearch_core_mcp_server: Elasticsearch MCP server, version 0.4.5
2025-08-28T06:24:12.681918Z INFO elasticsearch_core_mcp_server: Starting stdio server
time="2025-08-29T16:24:32+08:00" level=error msg="error waiting for container: unexpected EOF"
$ ES_URL=https://host.docker.internal:9200 ES_API_KEY=ZWRqdDBKZ0JDUHpOTGZoR0E0UzA6Z1B2TlBpUUppTUNvUHlCWEdQSGtrdw== ES_SSL_SKIP_VERIFY=true docker run -i --rm -e ES_URL -e ES_API_KEY -e ES_SSL_SKIP_VERIFY docker.elastic.co/mcp/elasticsearch stdio
2025-09-01T07:28:37.990732Z INFO elasticsearch_core_mcp_server: Elasticsearch MCP server, version 0.4.5
2025-09-01T07:28:37.990779Z INFO elasticsearch_core_mcp_server: Starting stdio server
请注意:在上面,我们使用地址 https://host.docker.internal:9200 来代替 Elasticsearch 地址:https://localhost:9200。可以详细阅读文章 “将 agents 连接到 Elasticsearch 使用模型上下文协议 - docker”。
我们使用如下的格式来进行配置:
{"servers": {"elasticsearch-mcp-server": {"command": "docker","args": ["run", "-i", "--rm", "-e", "ES_URL", "-e", "ES_API_KEY", "docker.elastic.co/mcp/elasticsearch", "stdio"],"env": {"ES_URL": "<elasticsearch-cluster-url>","ES_API_KEY": "<elasticsearch-API-key>"}}}
}
{"servers": {"time": {"command": "uvx","args": ["mcp-server-time"],"type": "stdio"},"my-elasticsearch-mcp-server": {"command": "docker","args": ["run","-i","--rm","-e","ES_URL","-e","ES_API_KEY","-e","ES_SSL_SKIP_VERIFY","docker.elastic.co/mcp/elasticsearch","stdio"],"env": {"ES_URL": "https://host.docker.internal:9200","ES_API_KEY": "eE1WQmxKa0I5NnpZa1ZqRFZkUF86SnZoSHZNYXlheXlBX243Tk1Ja3FsZw==","ES_SSL_SKIP_VERIFY": "true"},"type": "stdio"},"github": {"type": "http","url": "https://api.githubcopilot.com/mcp/"}},"inputs": []
}
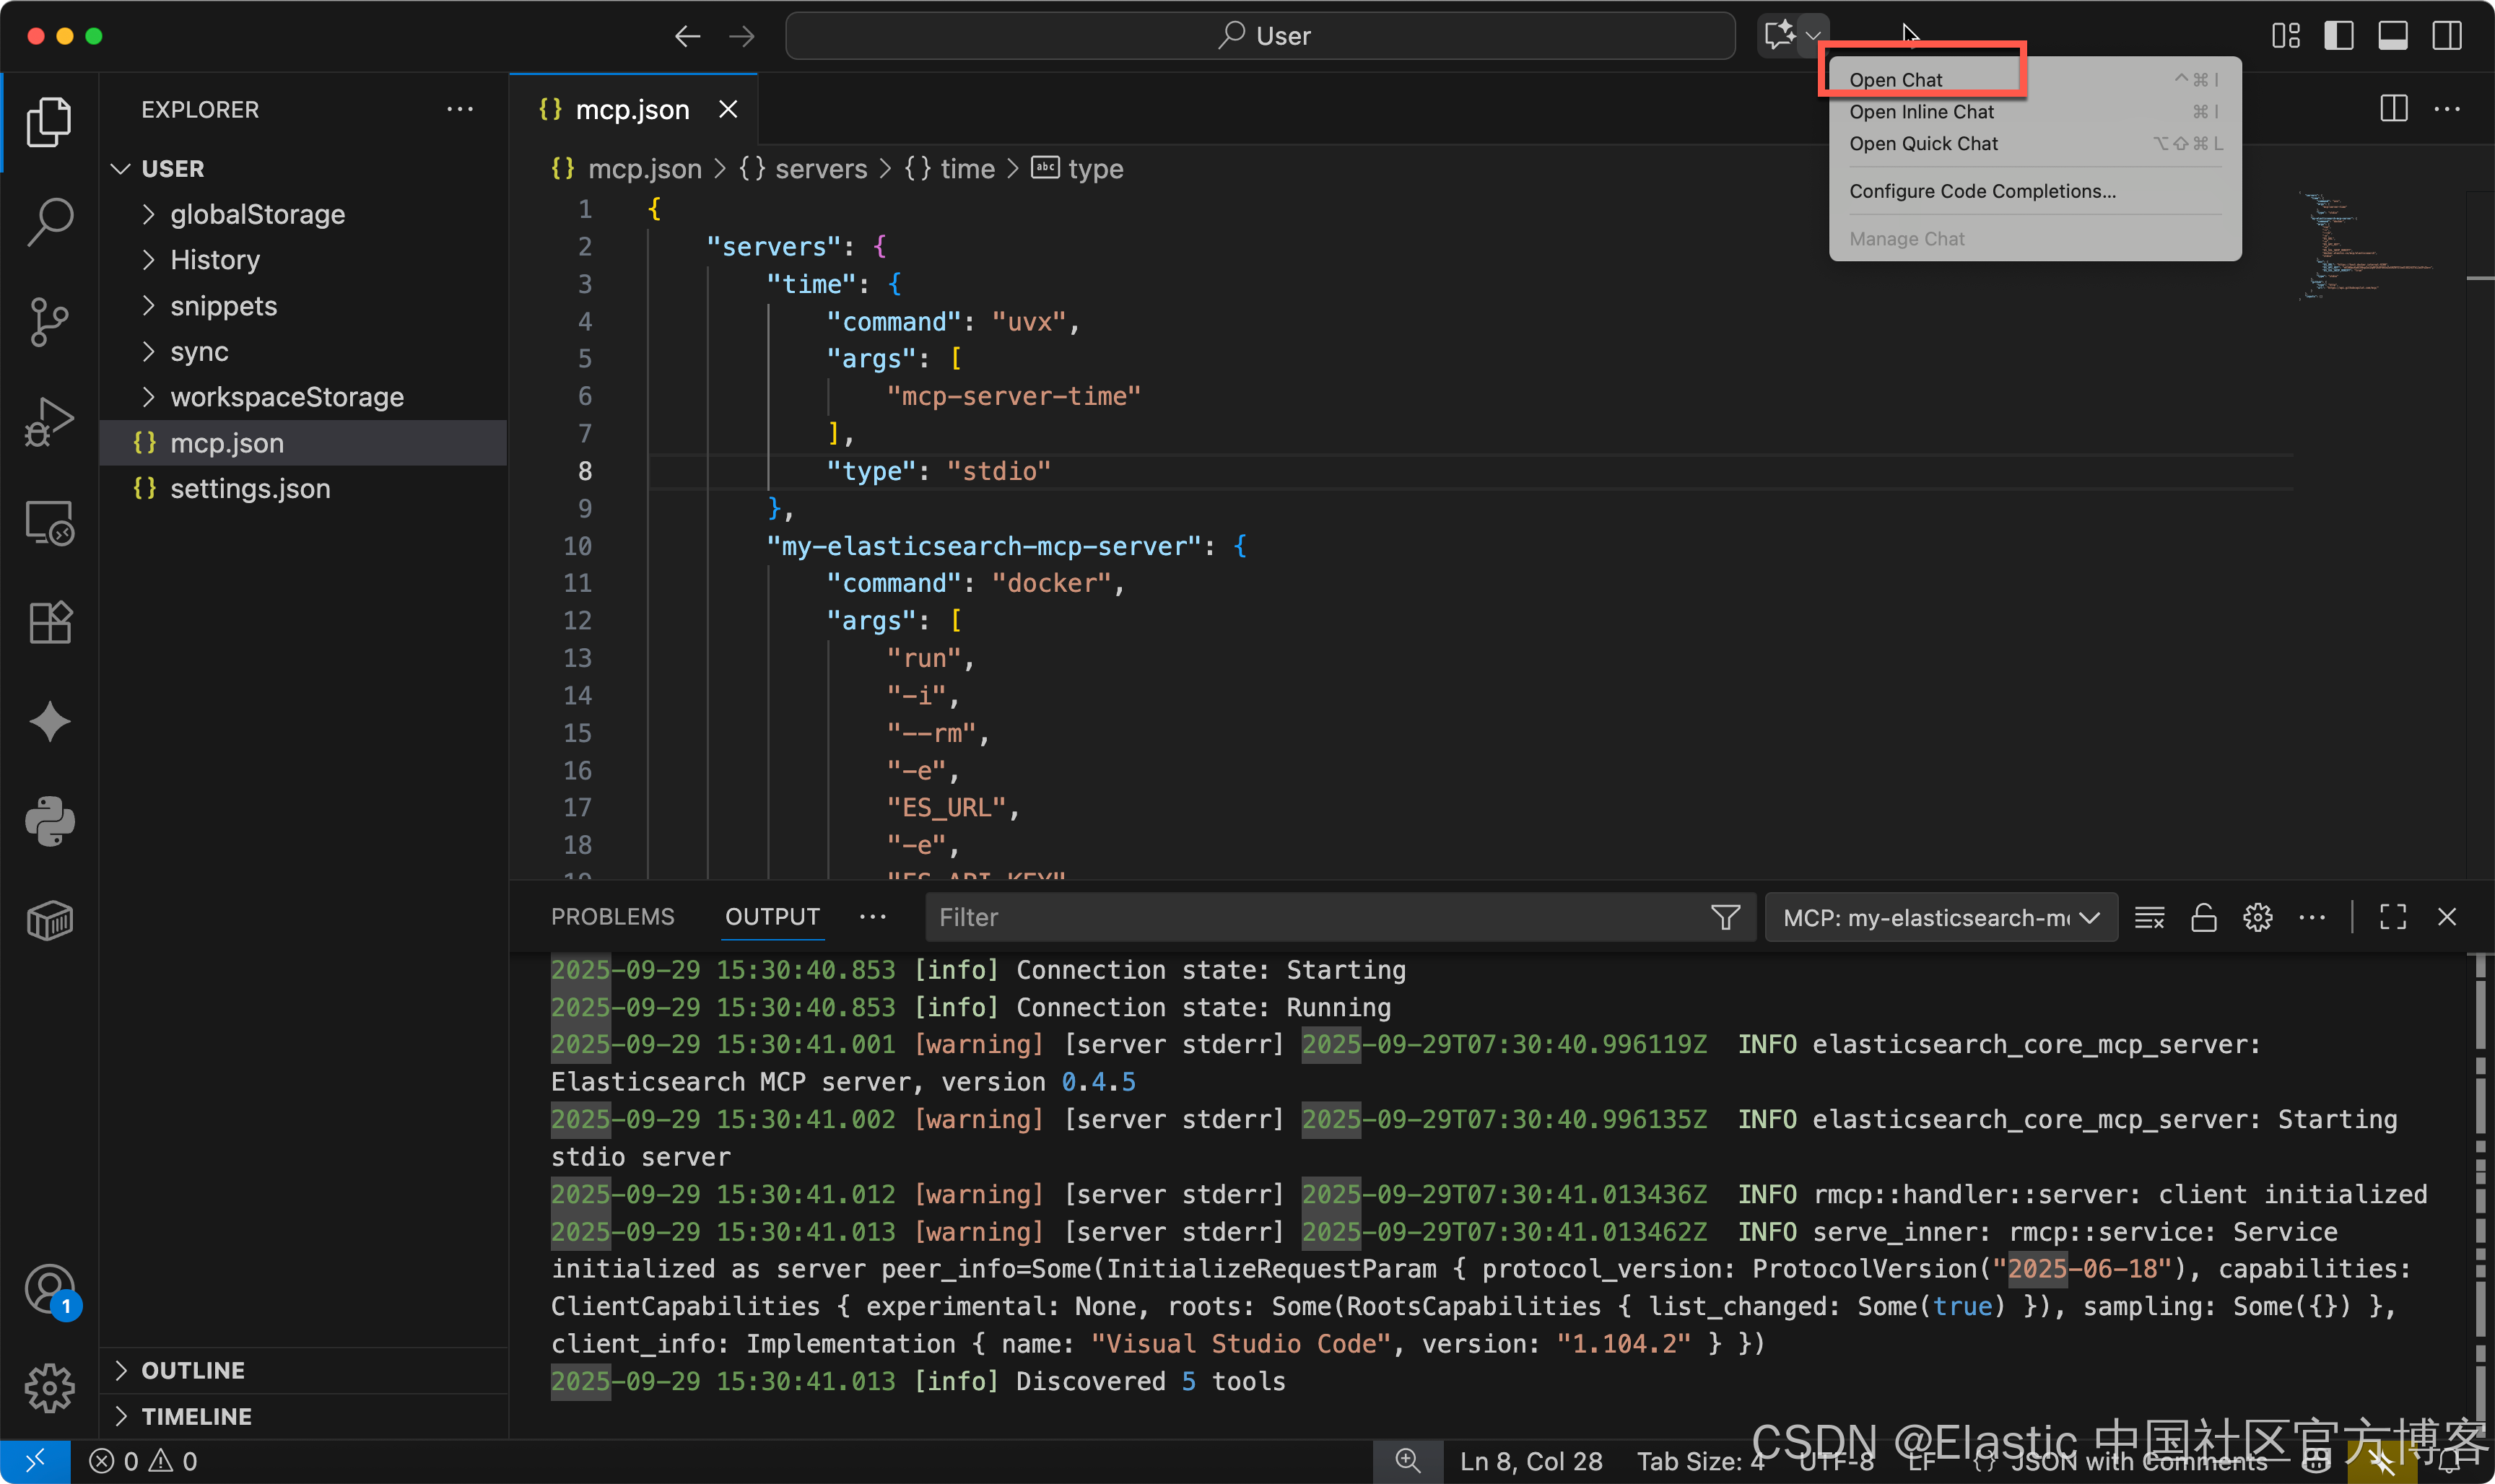
我们再次同时按下 Ctrl/Command + Shift + P:
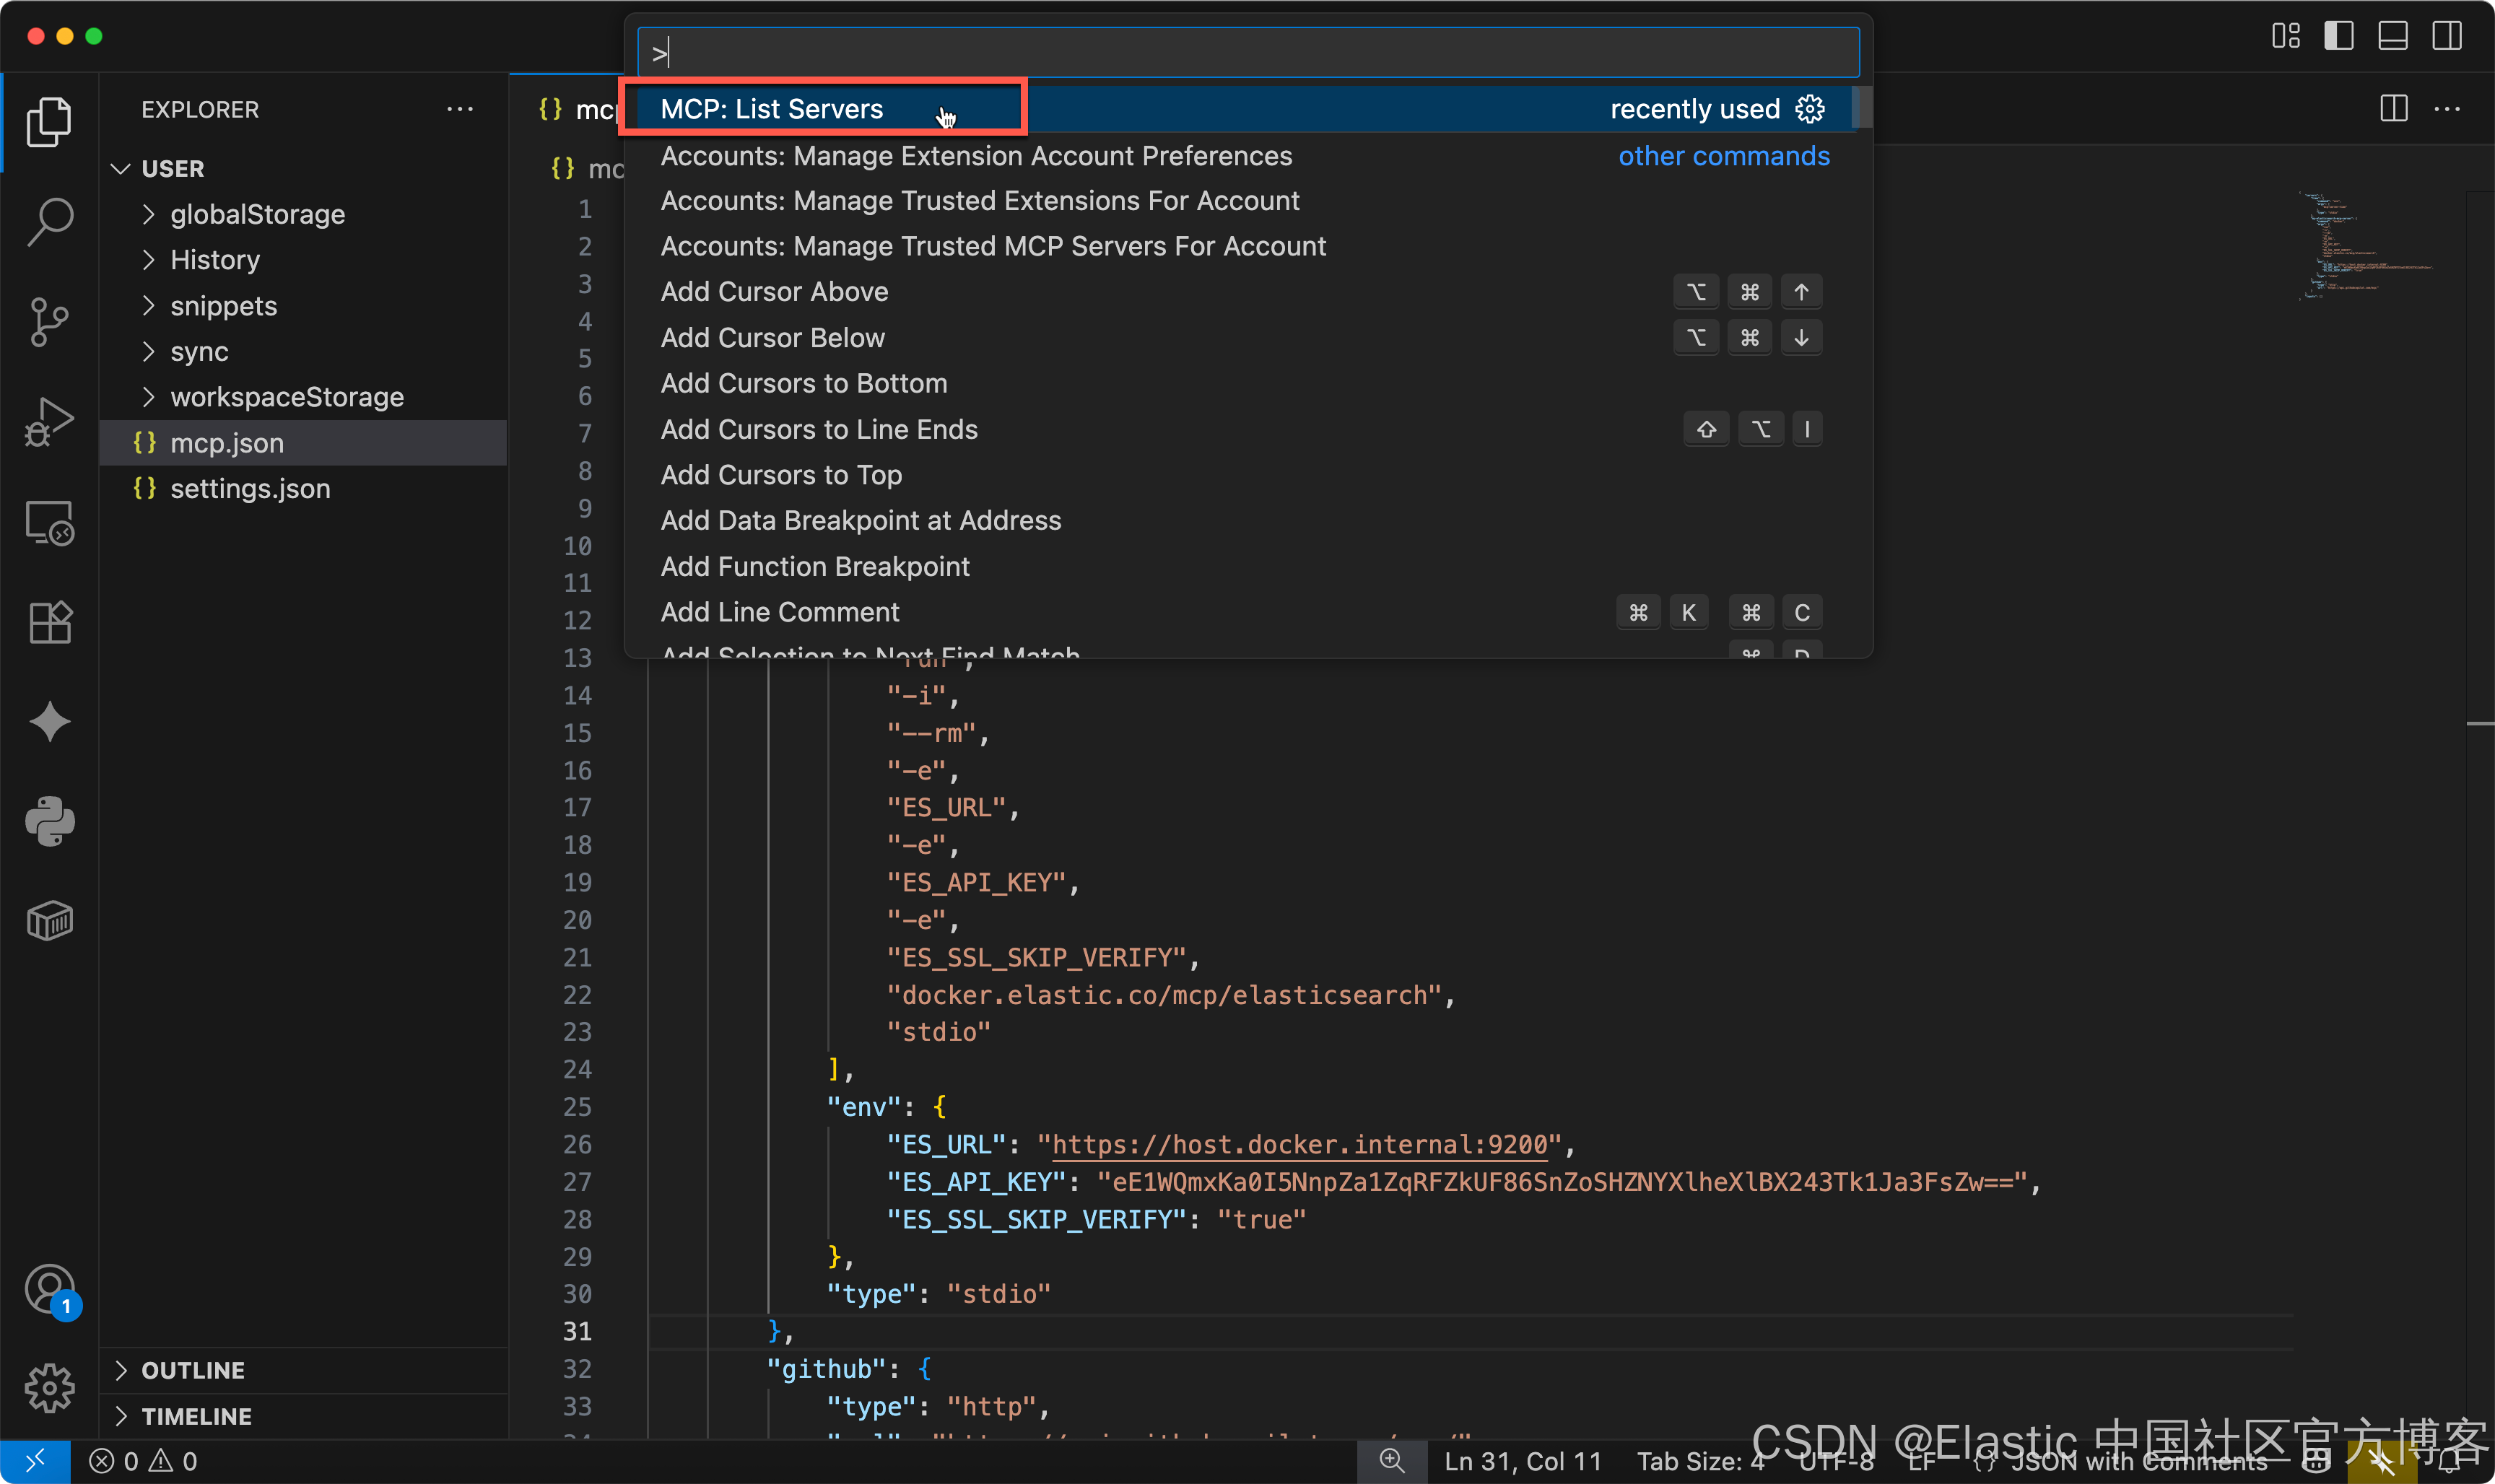
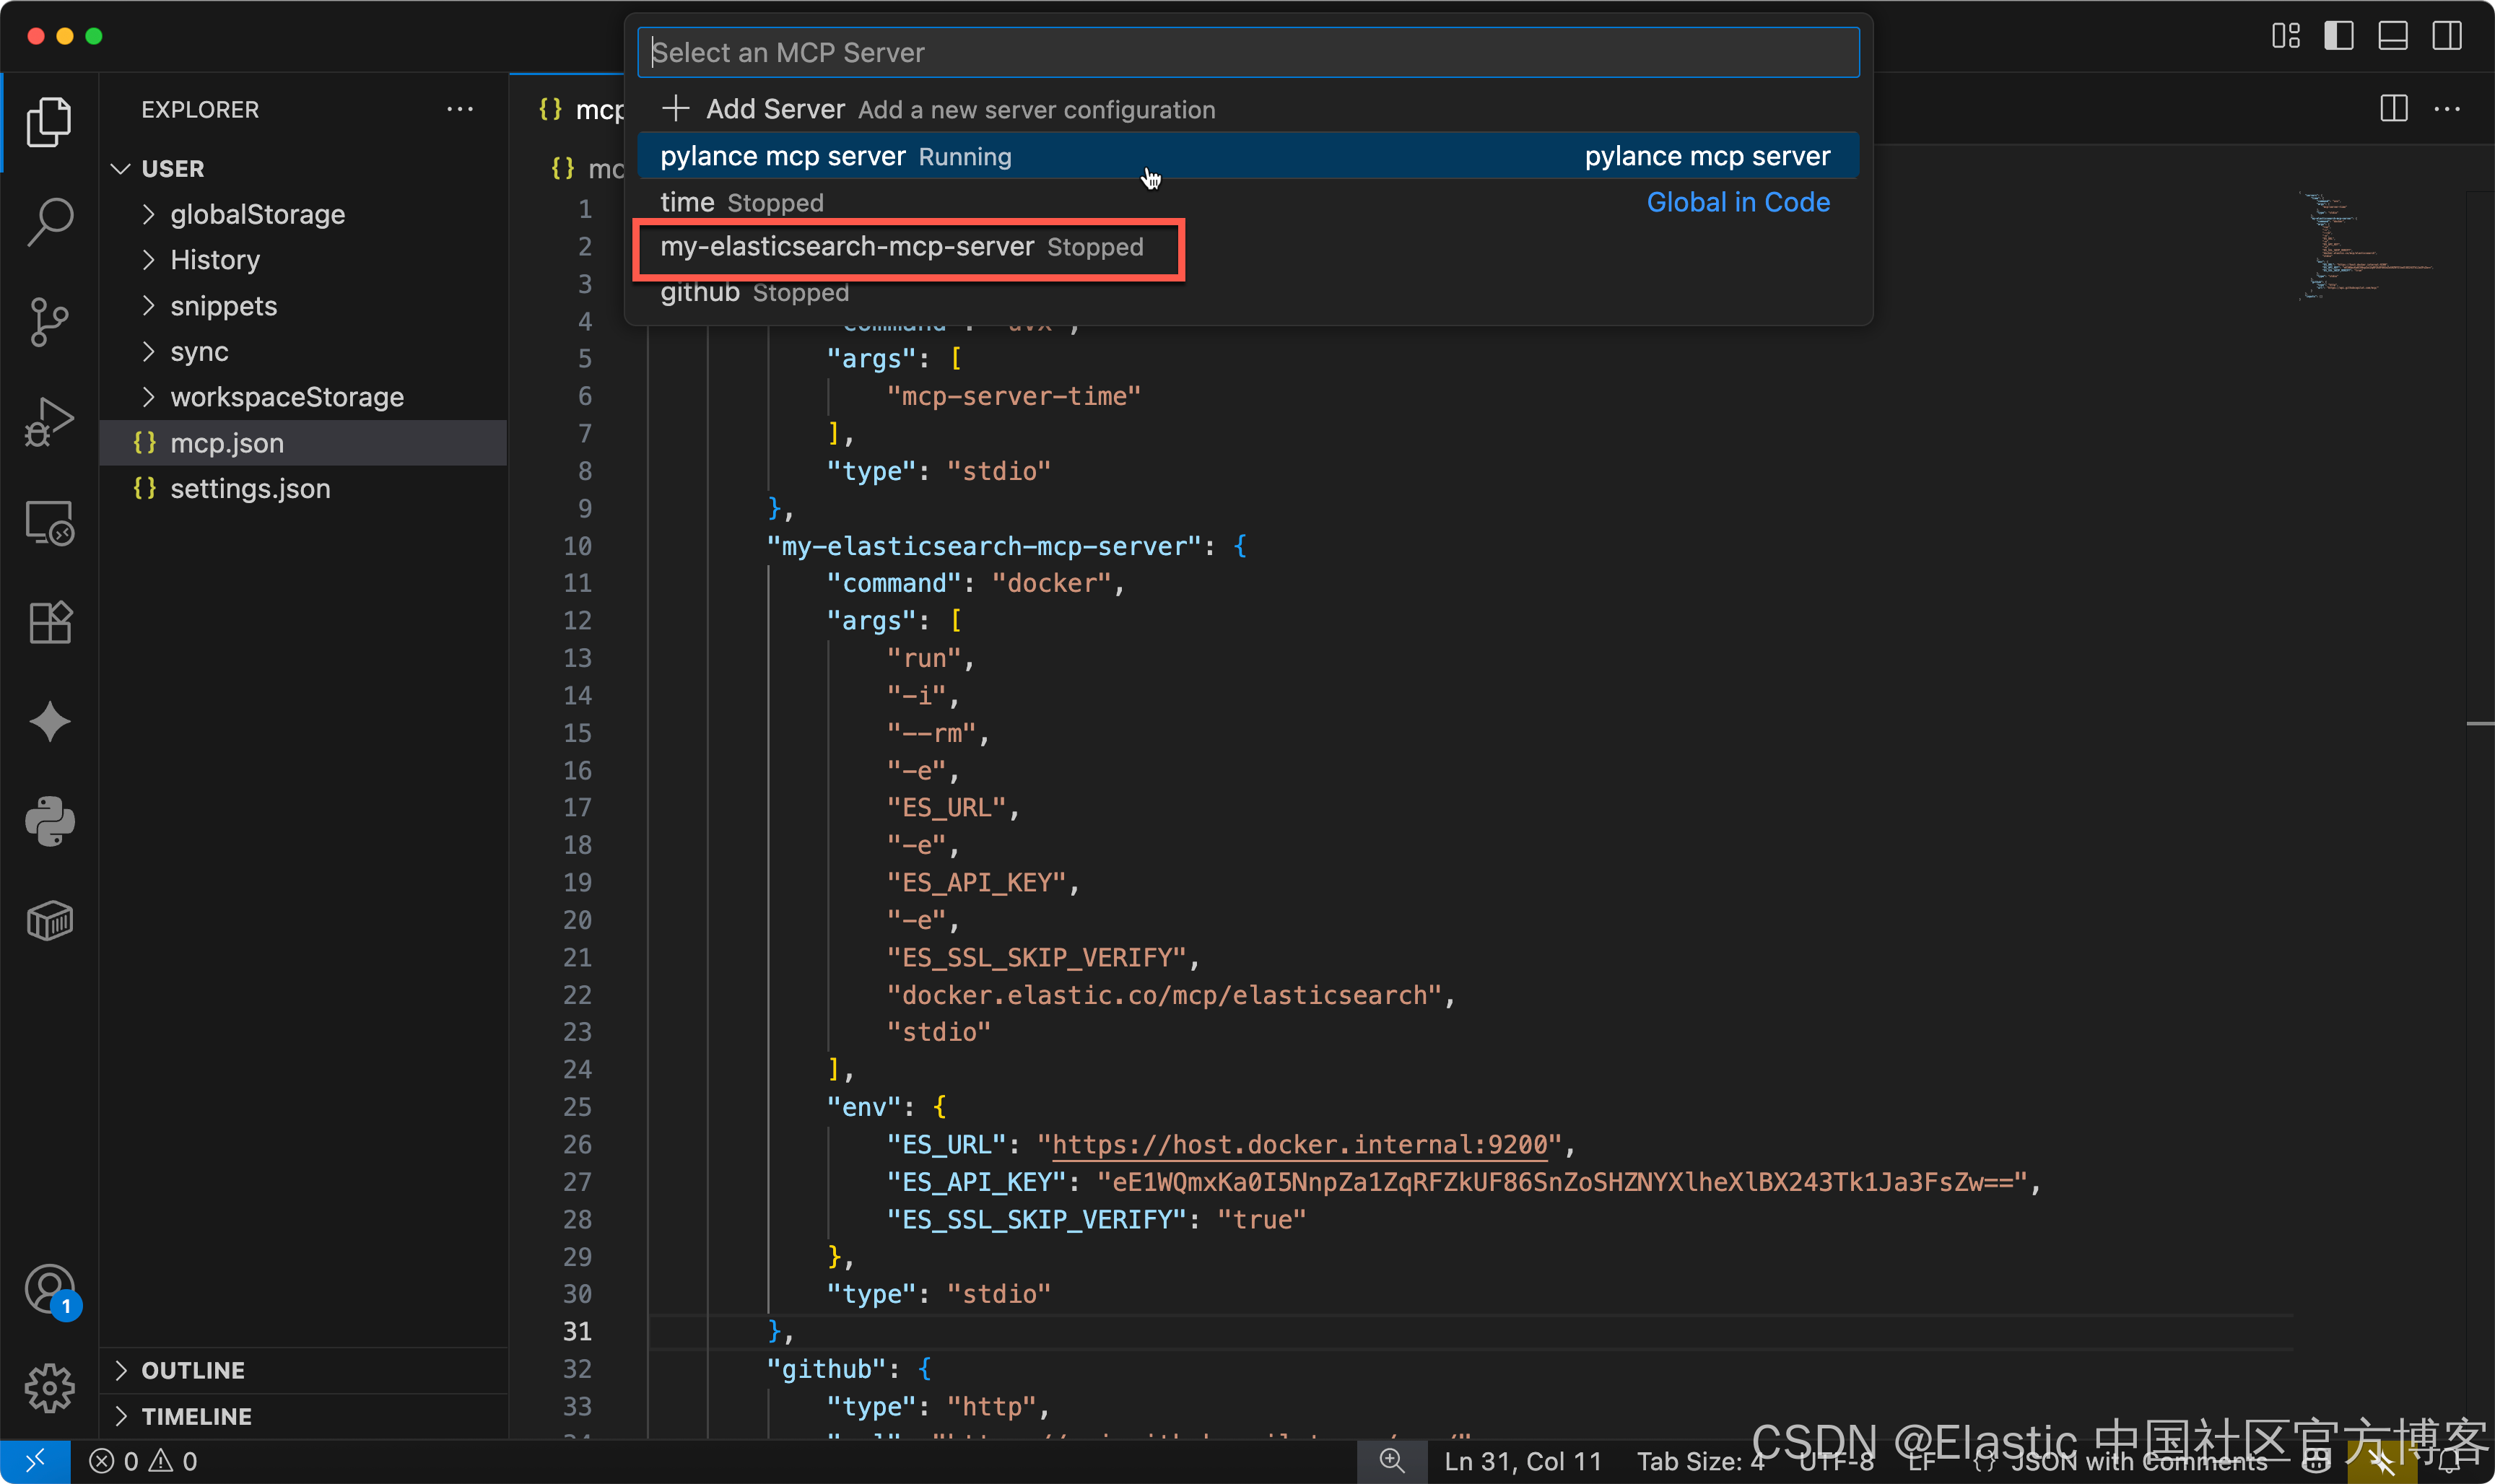
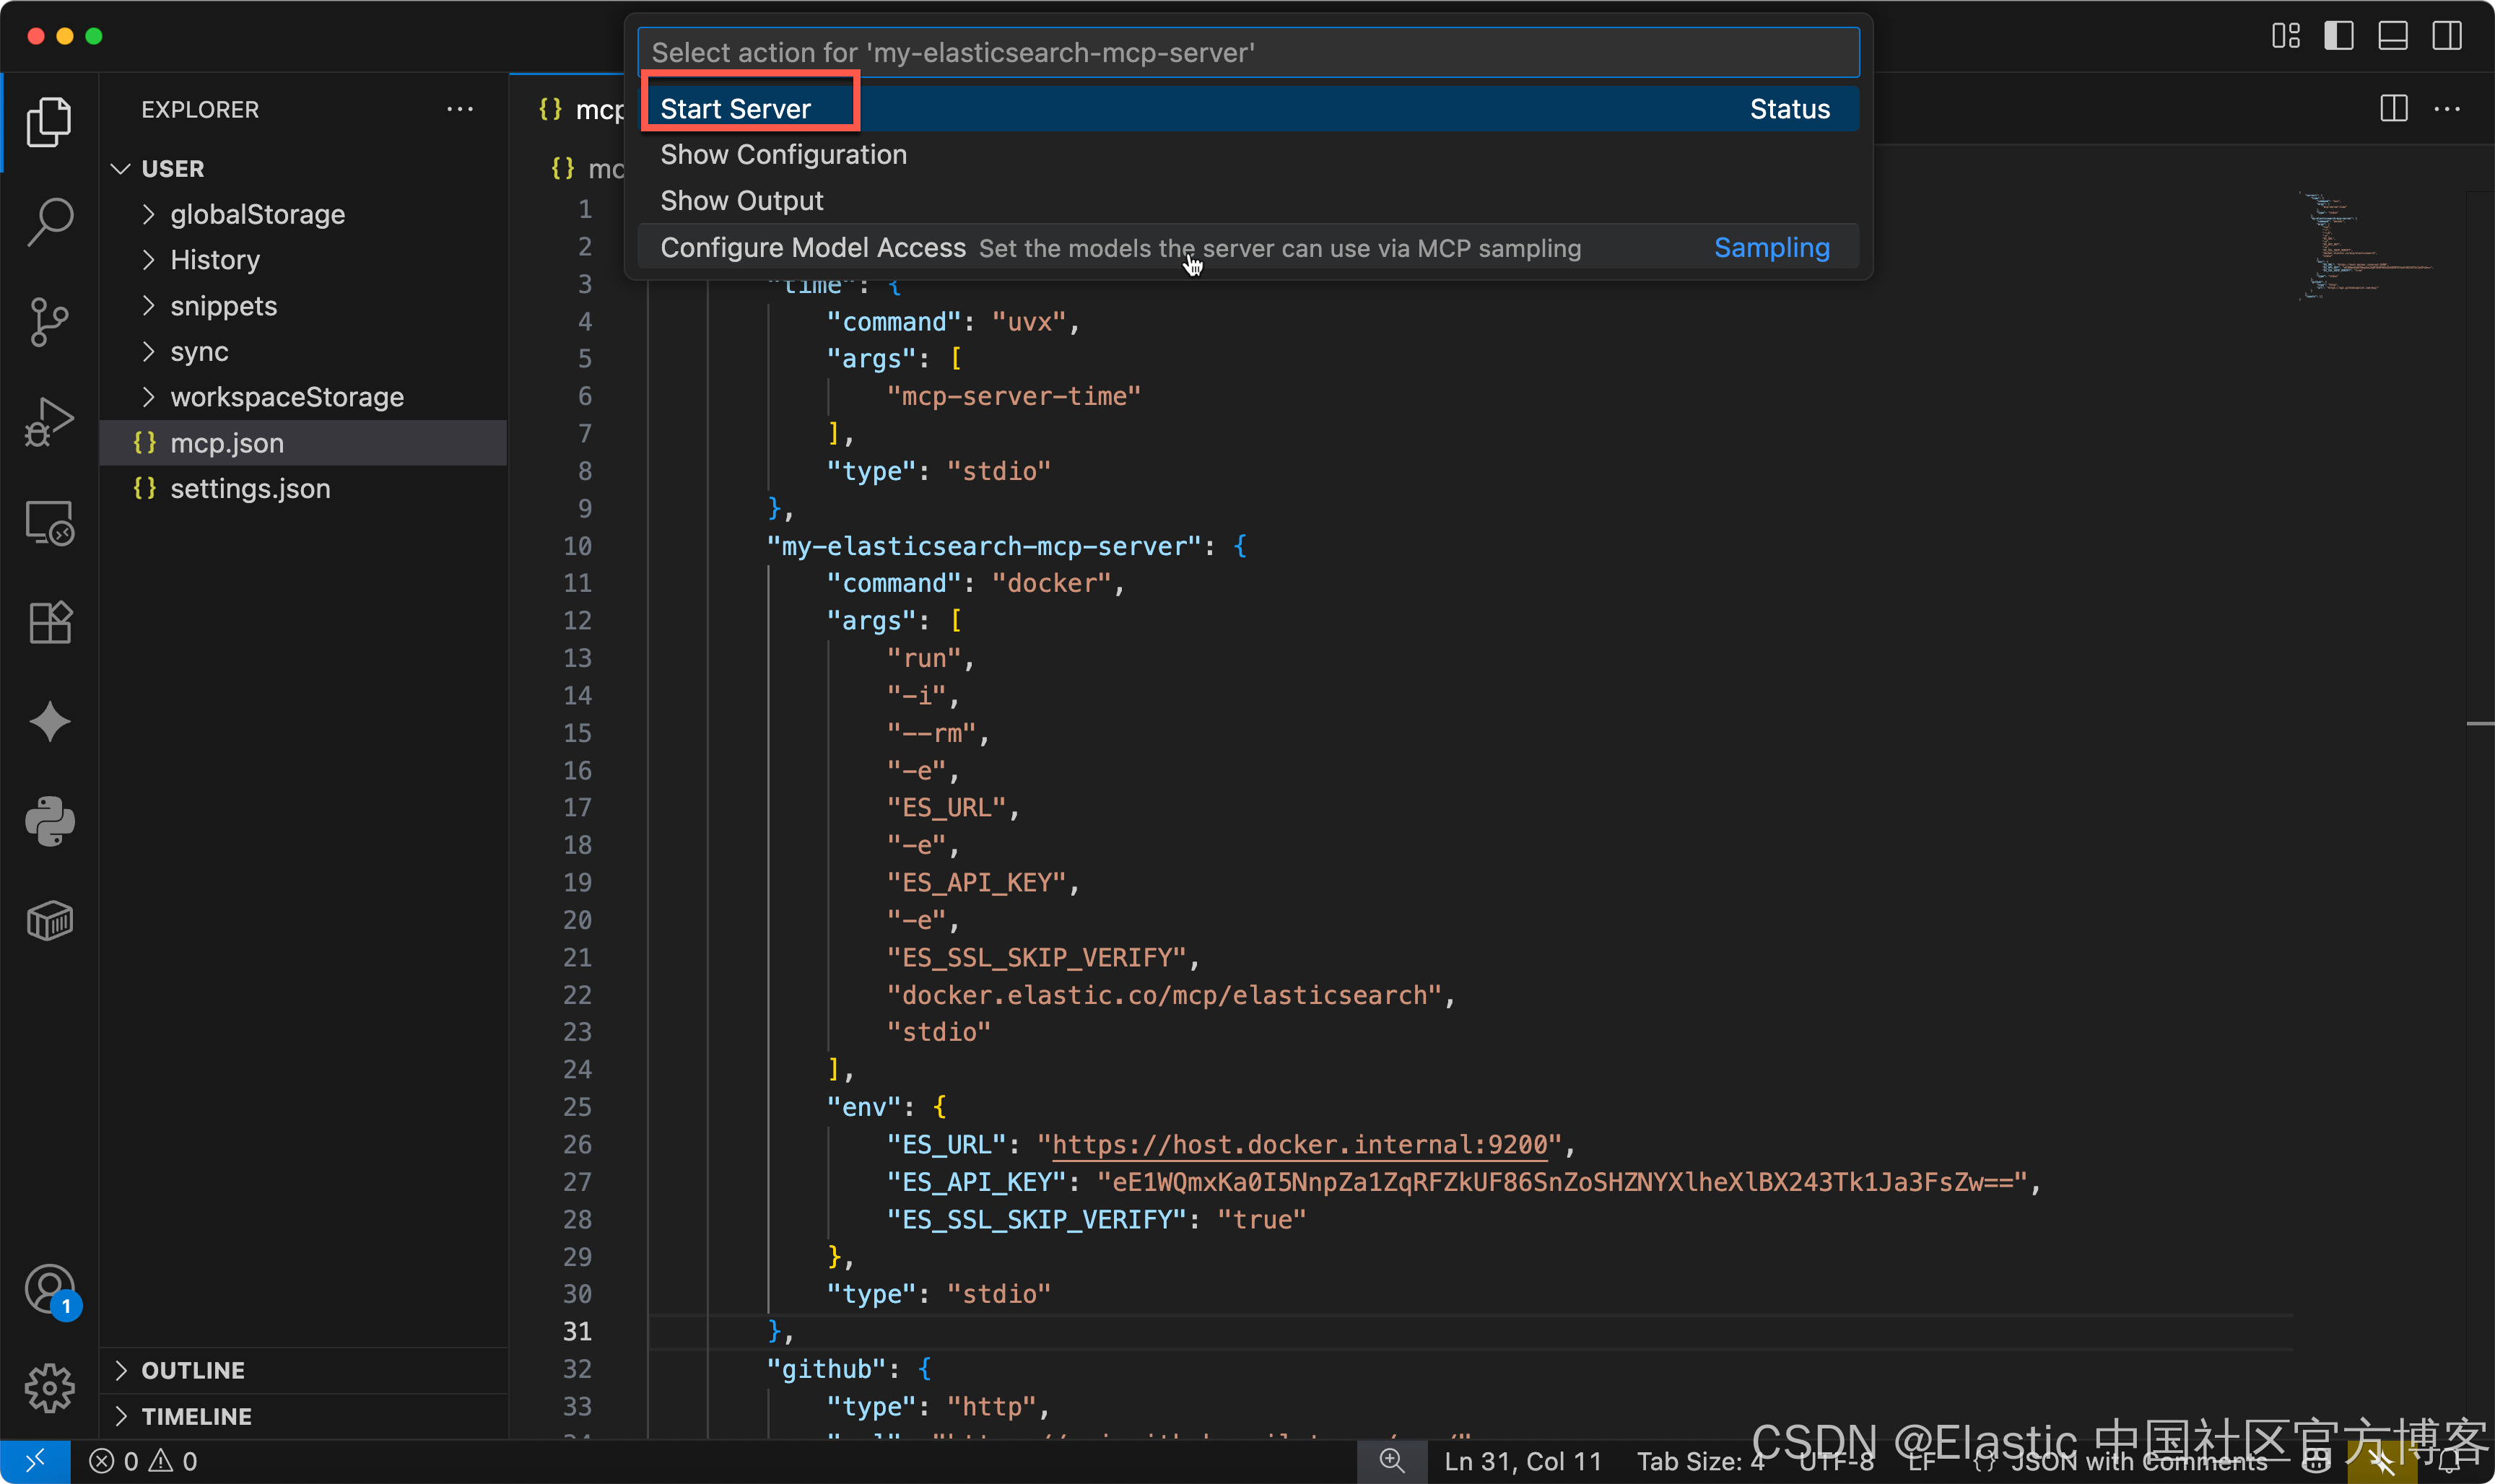
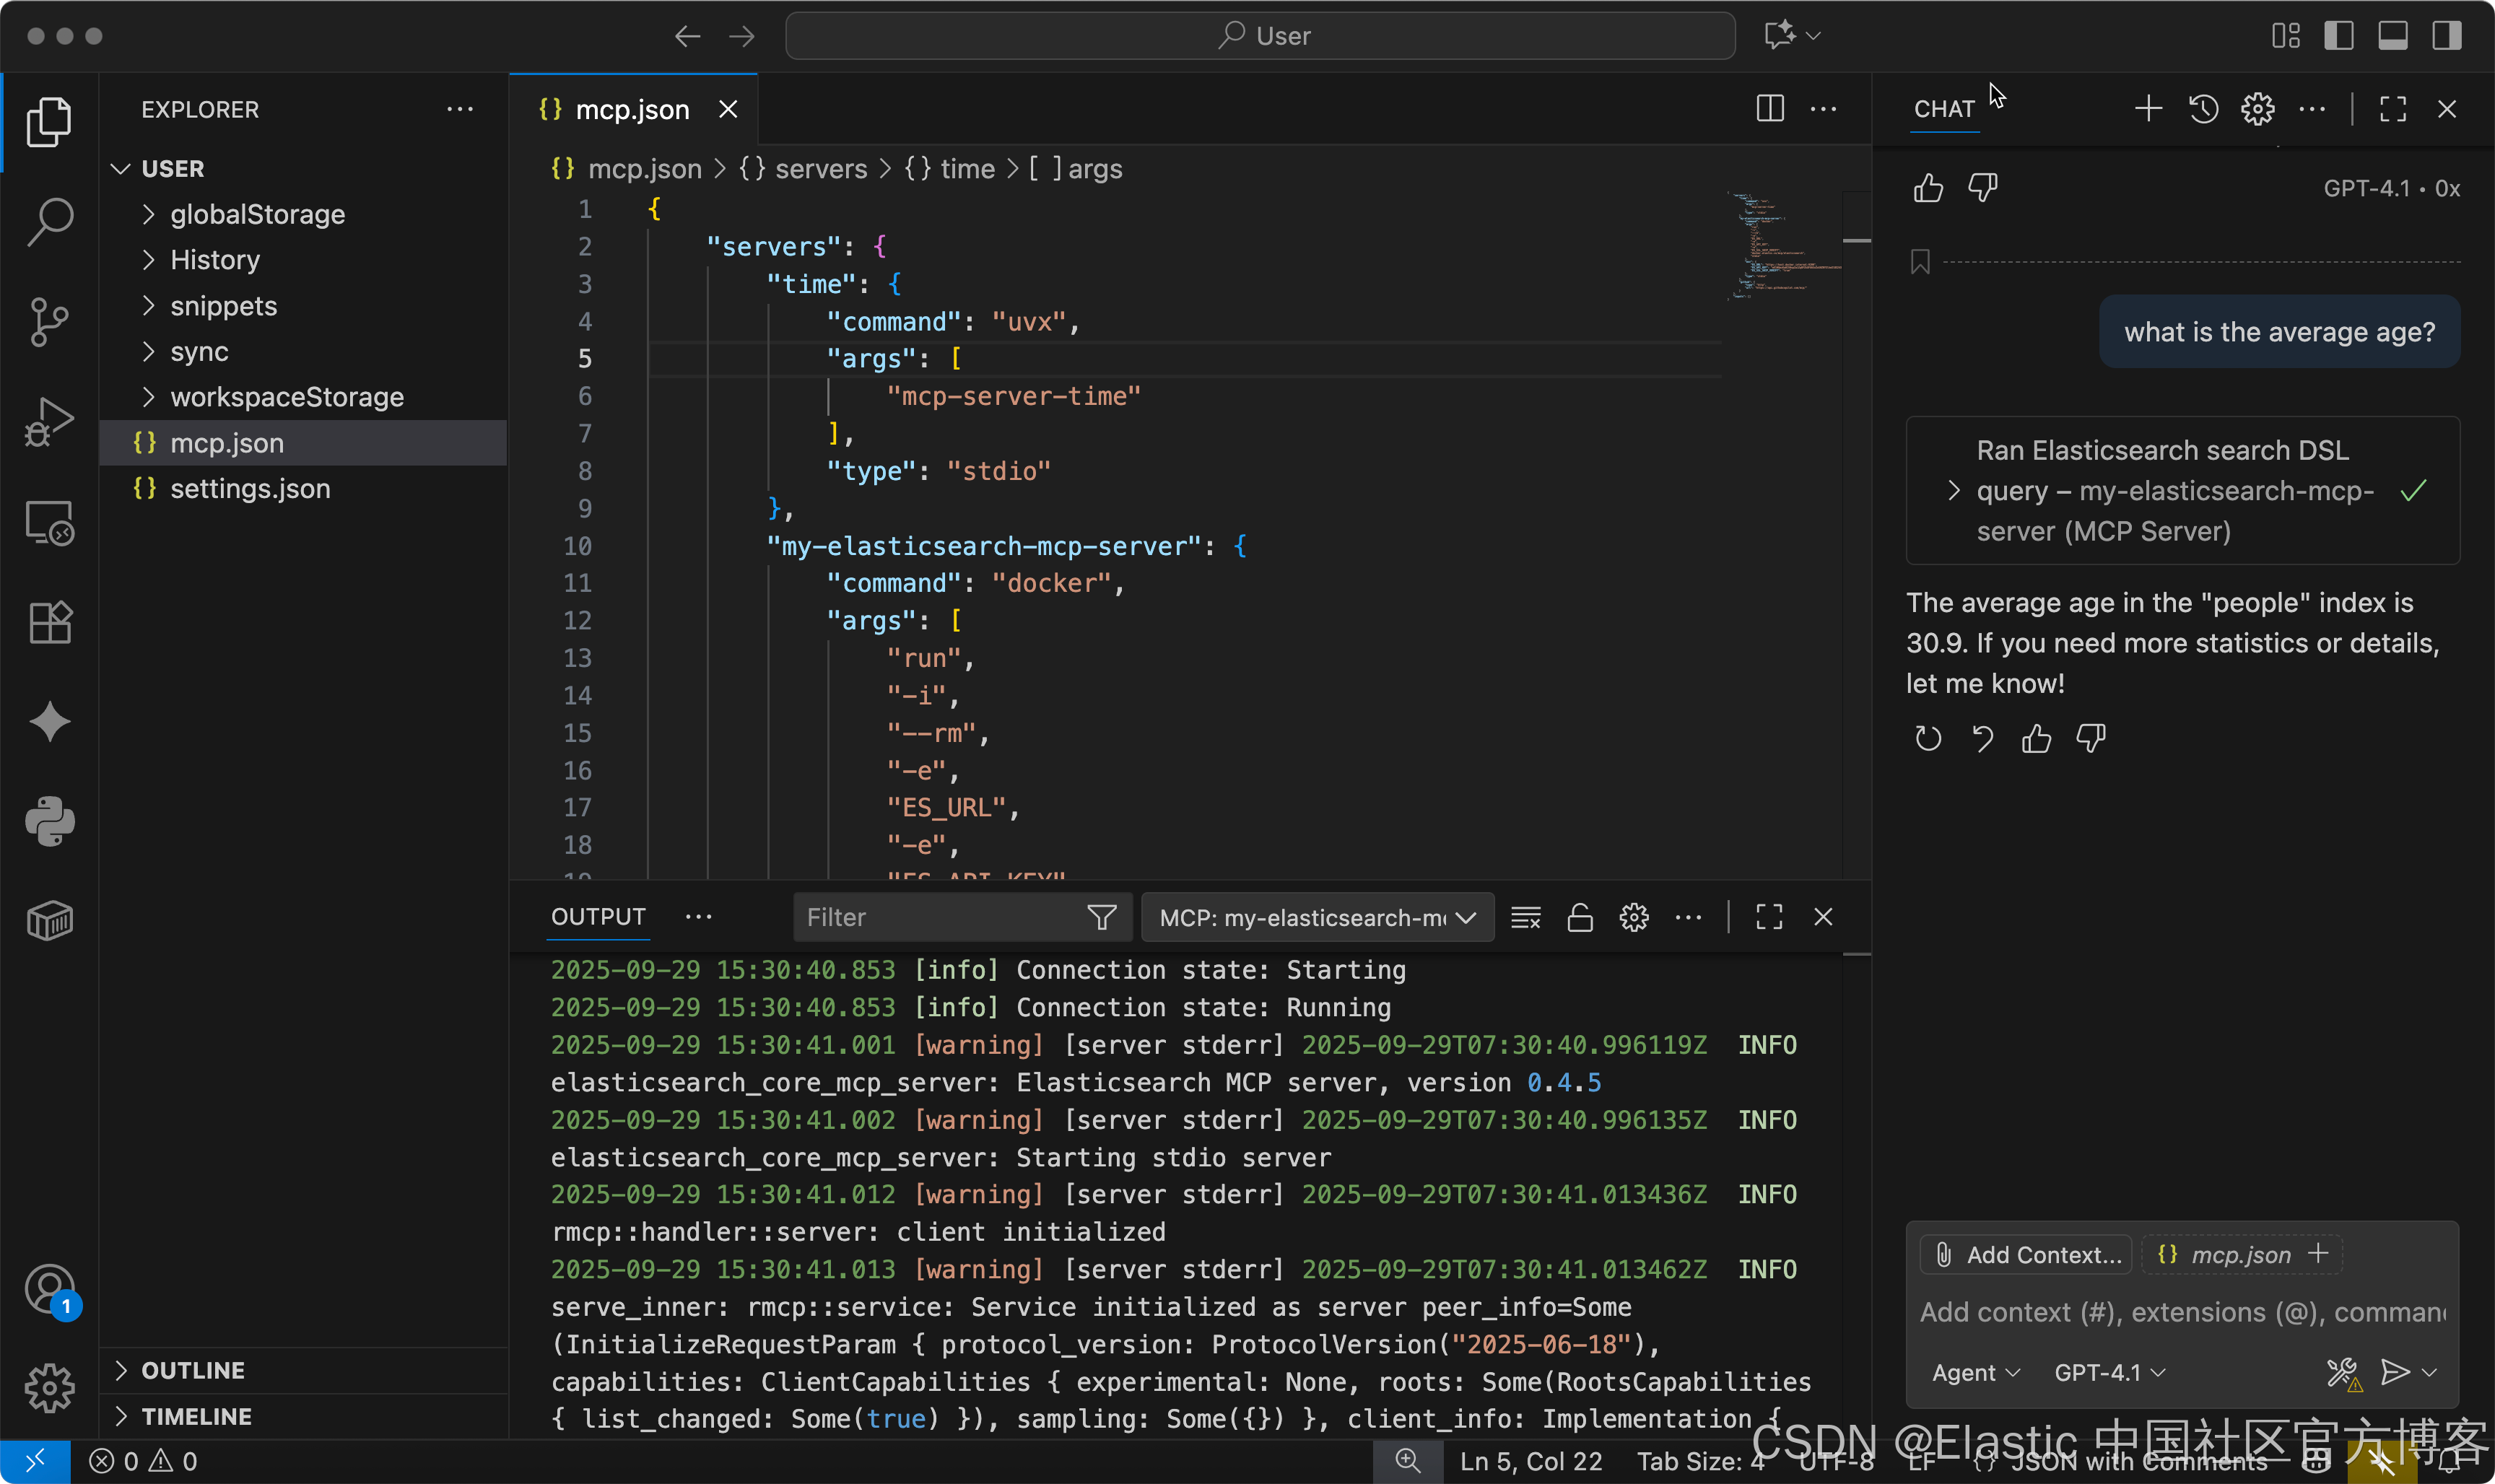
我们之间使用 VS code 里的 Chat 功能来进行聊天:

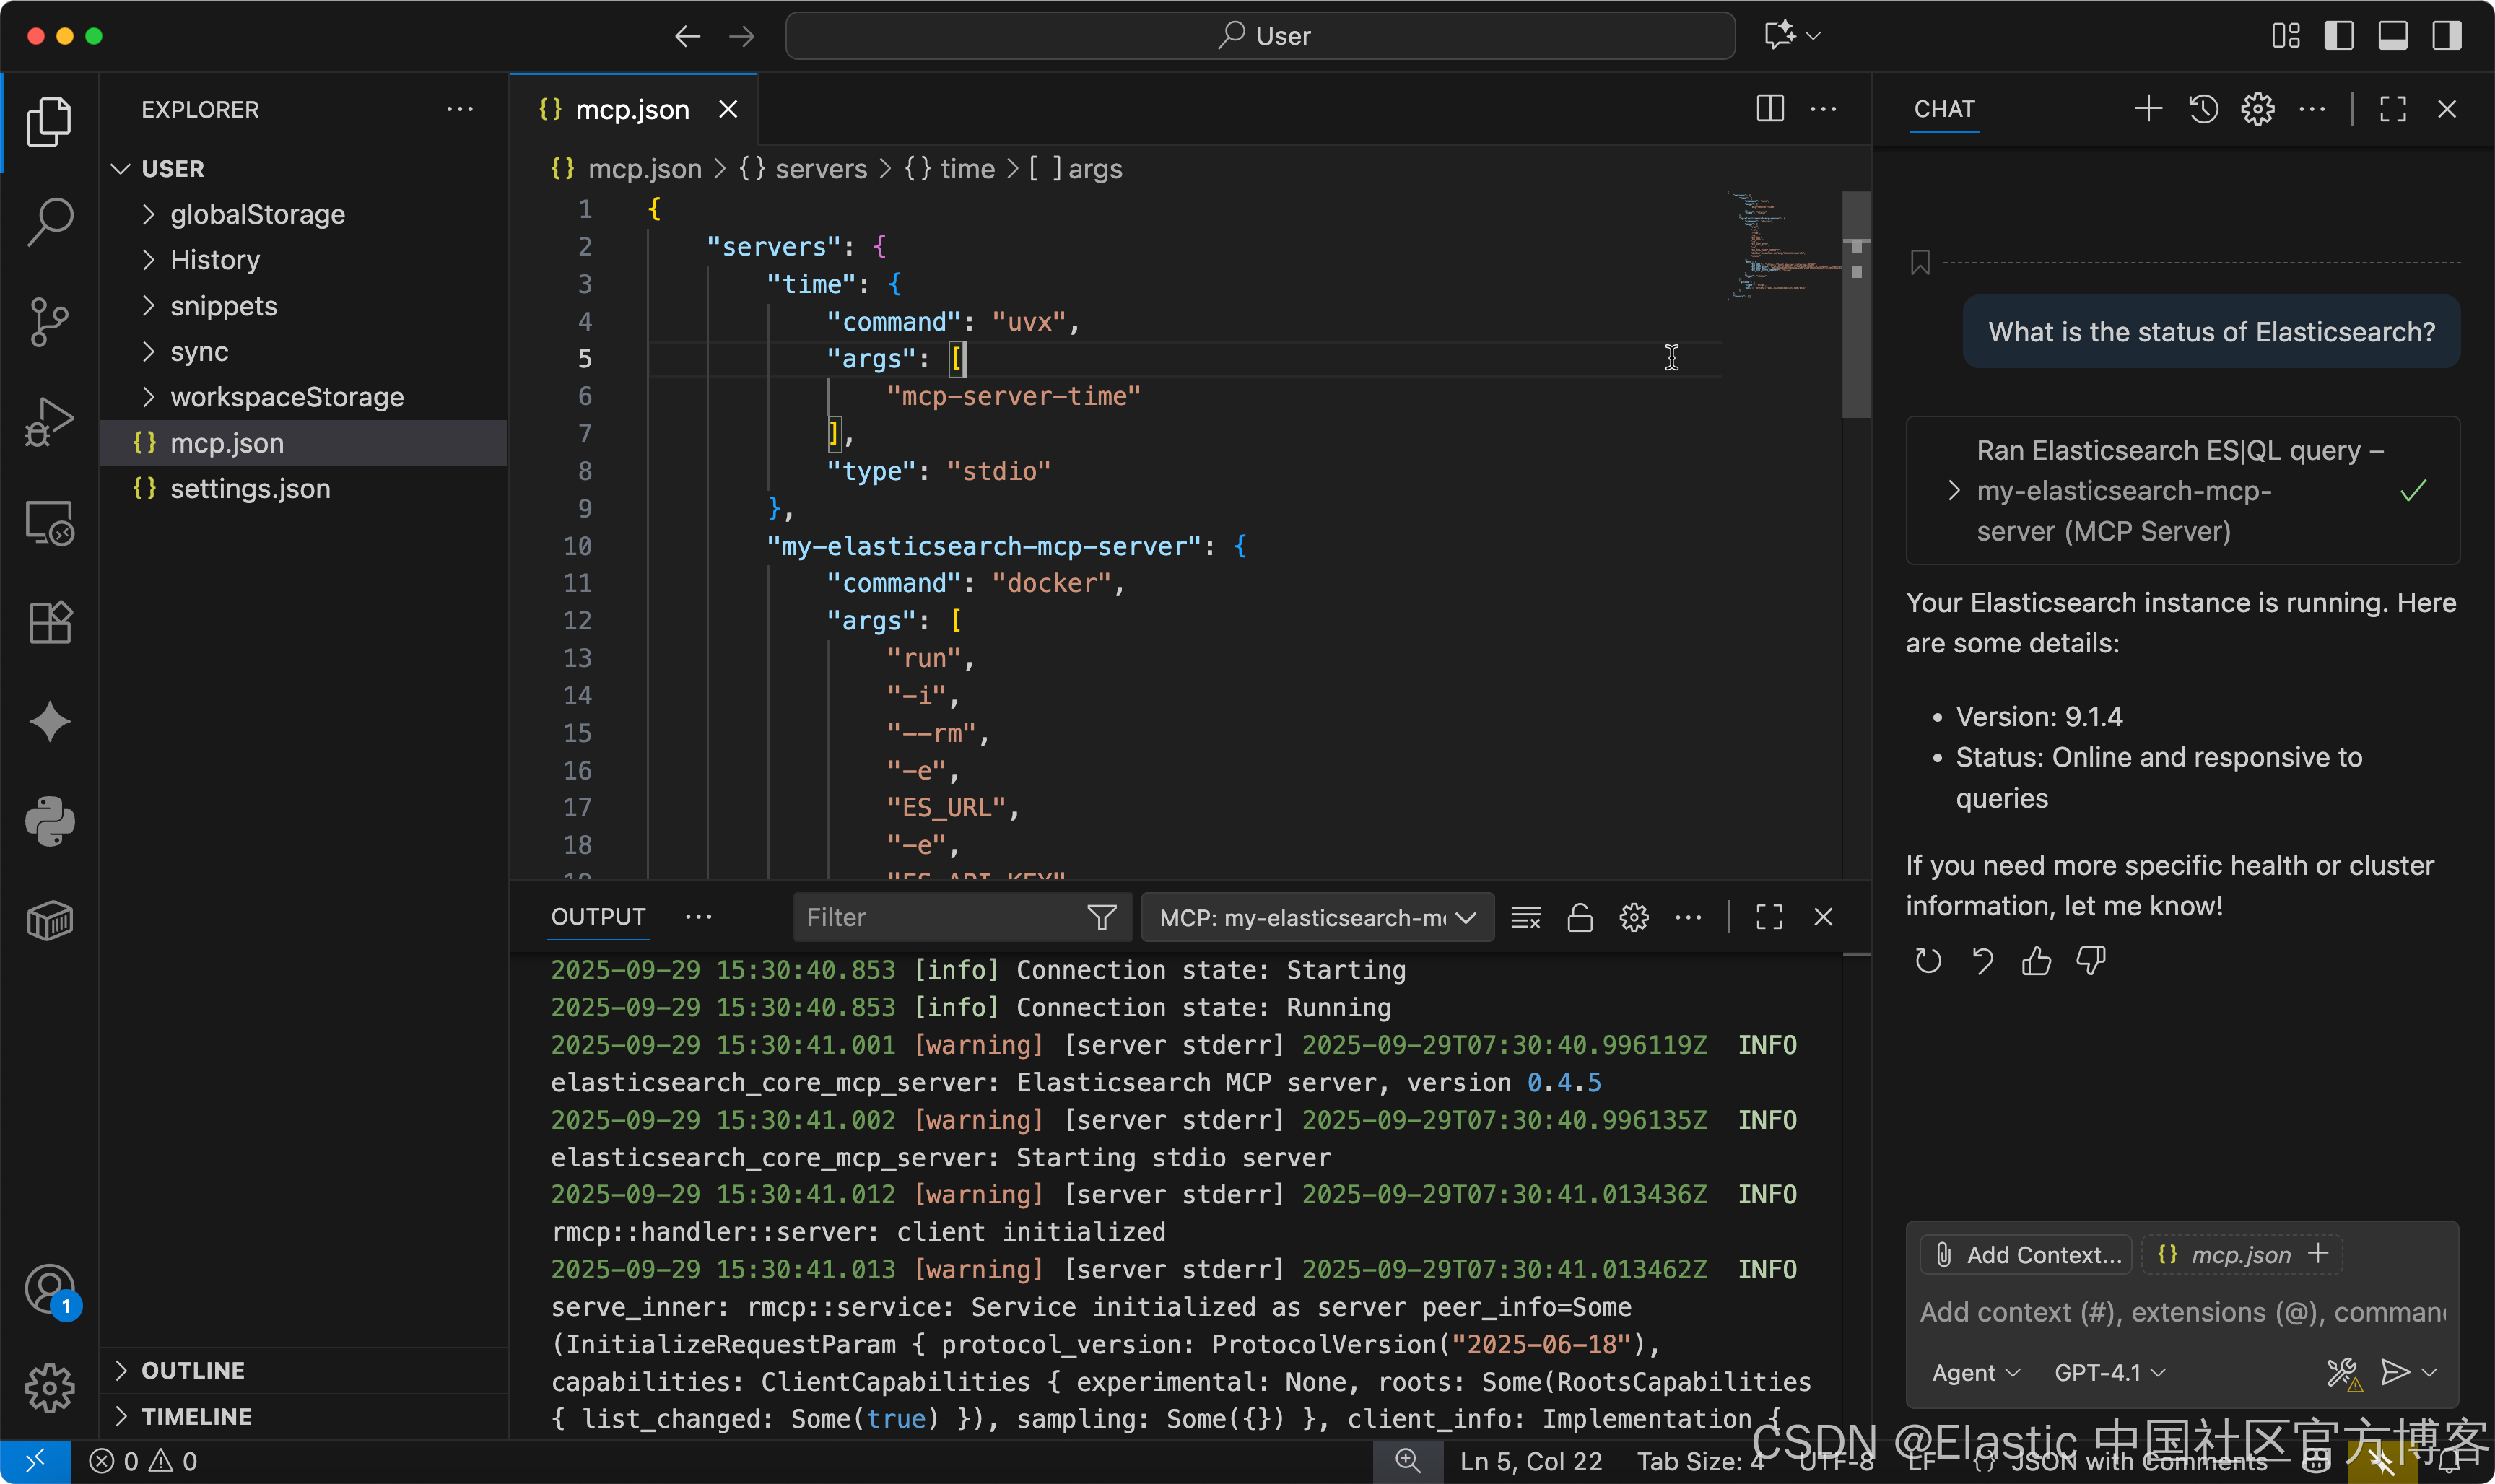
测试 Elasticsearch MCP server:
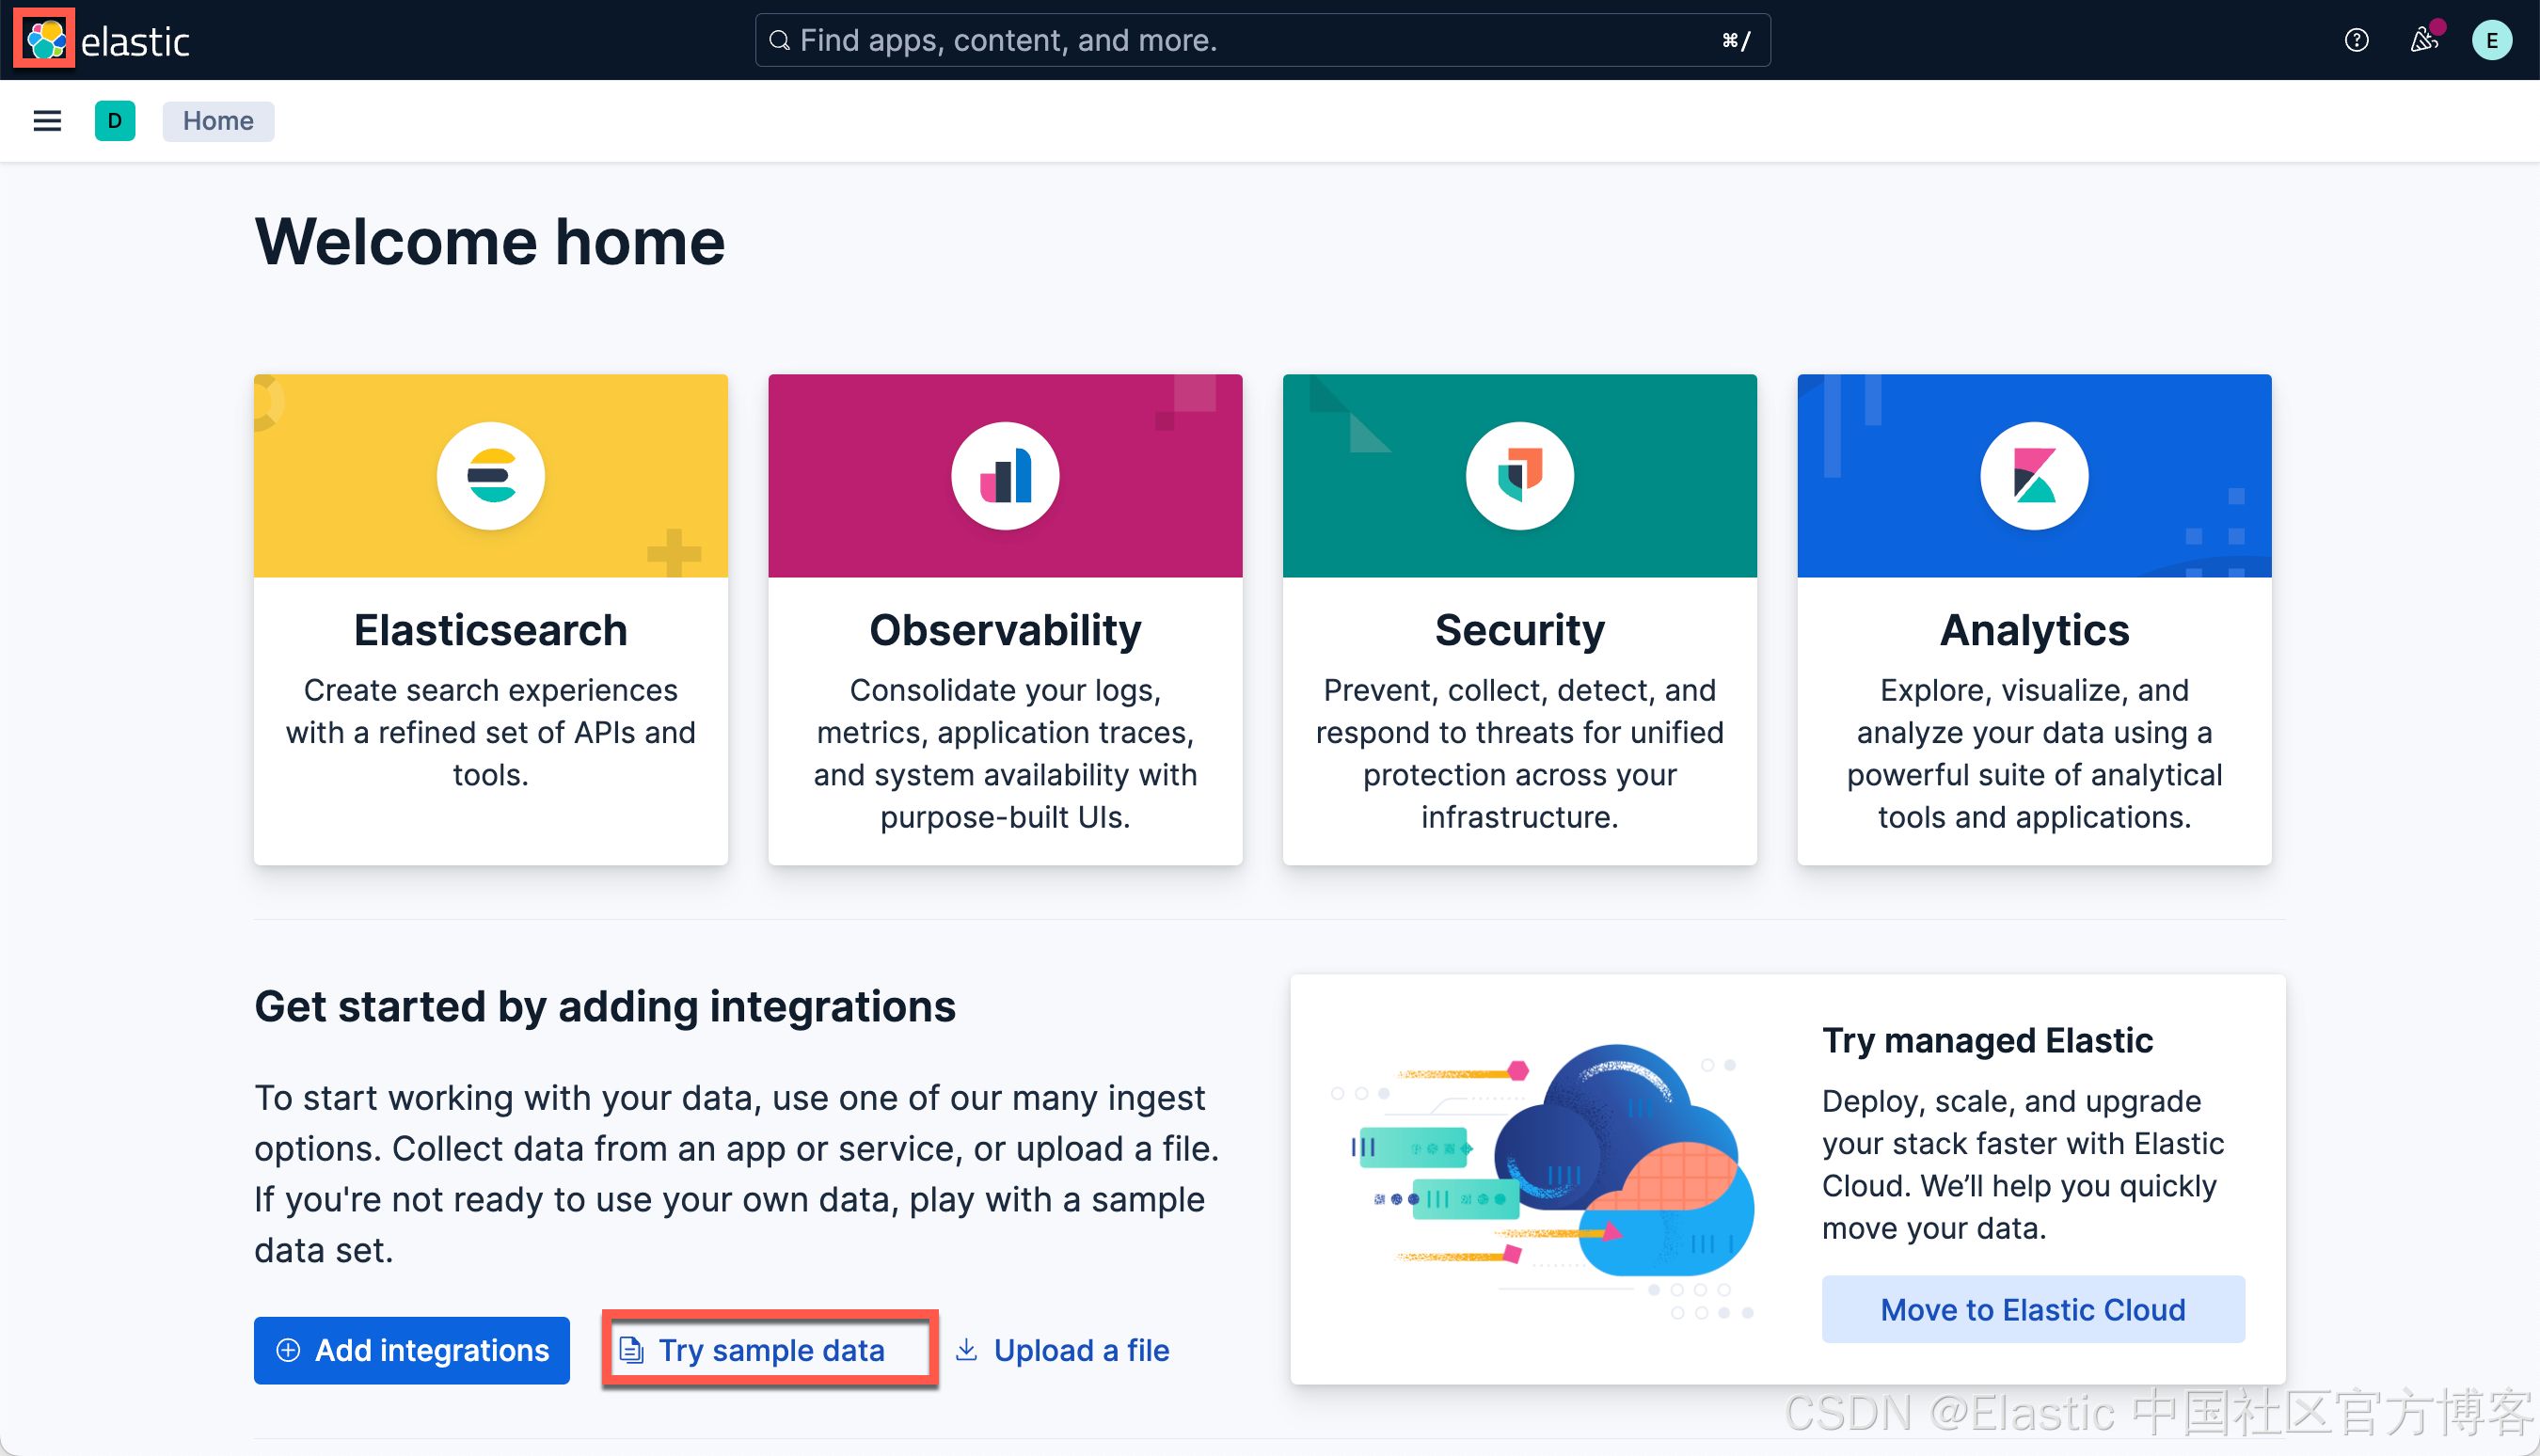
我们按照如下的步骤来导入 Elasticsearch 索引:
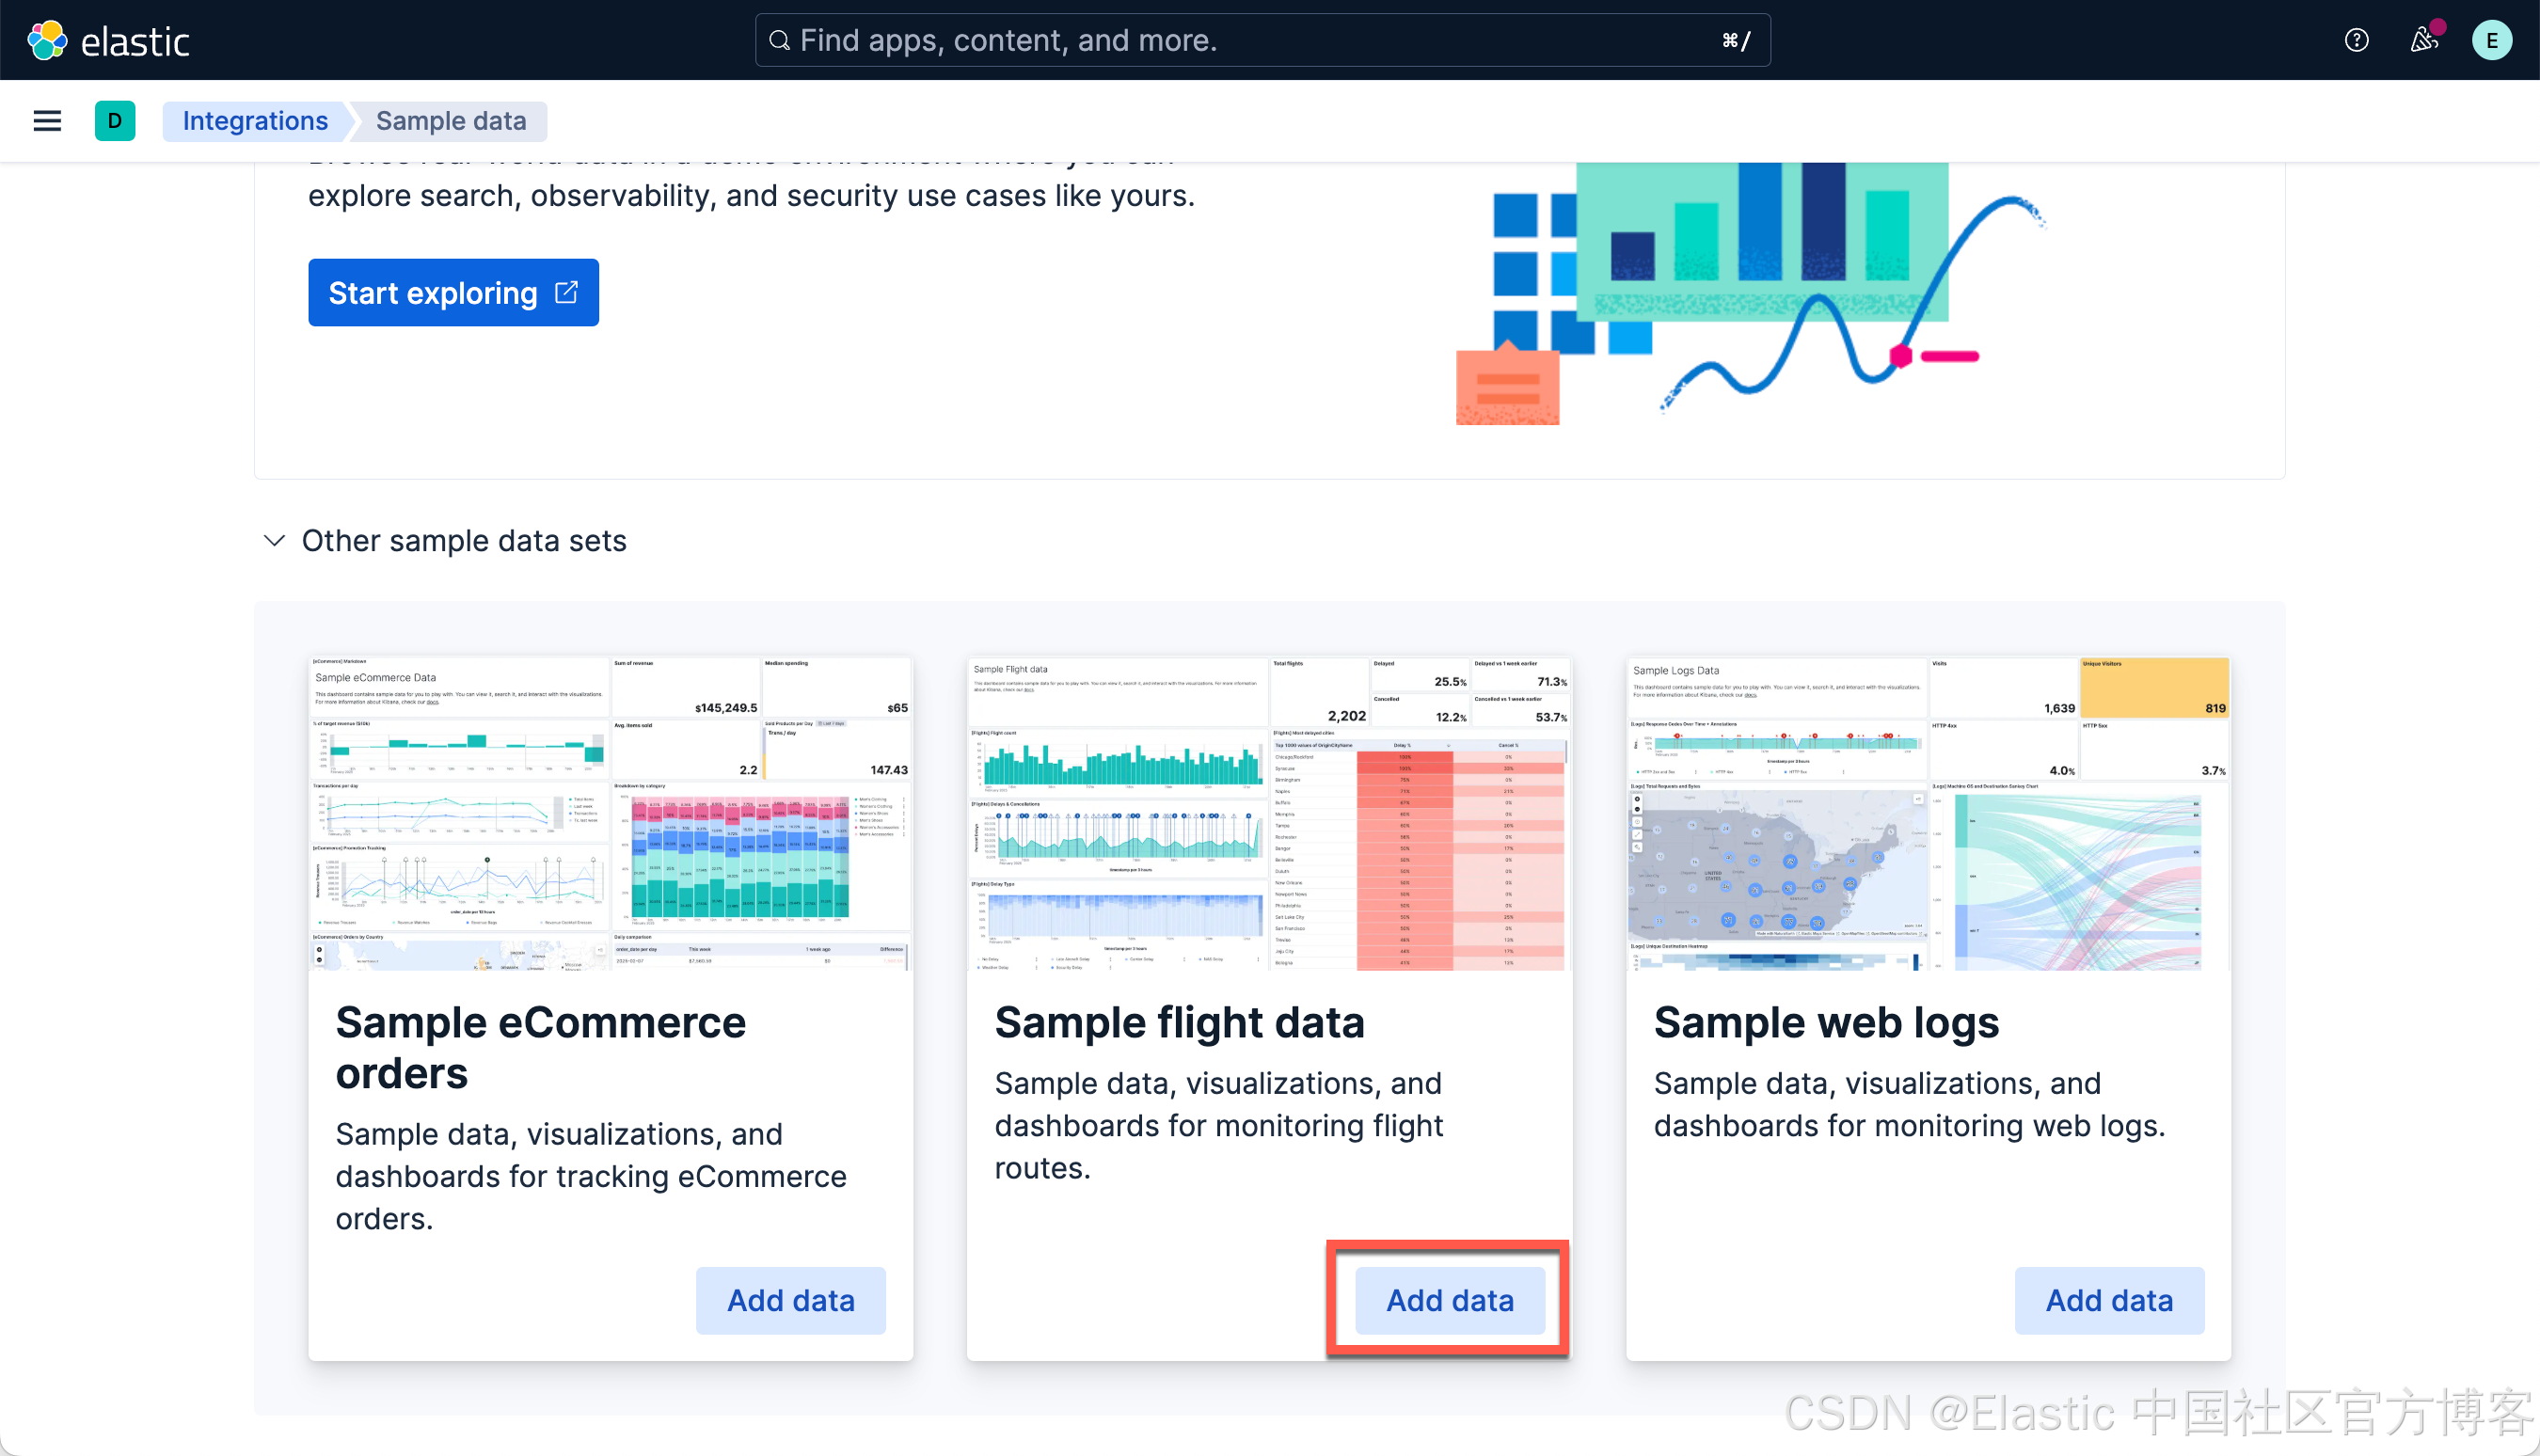
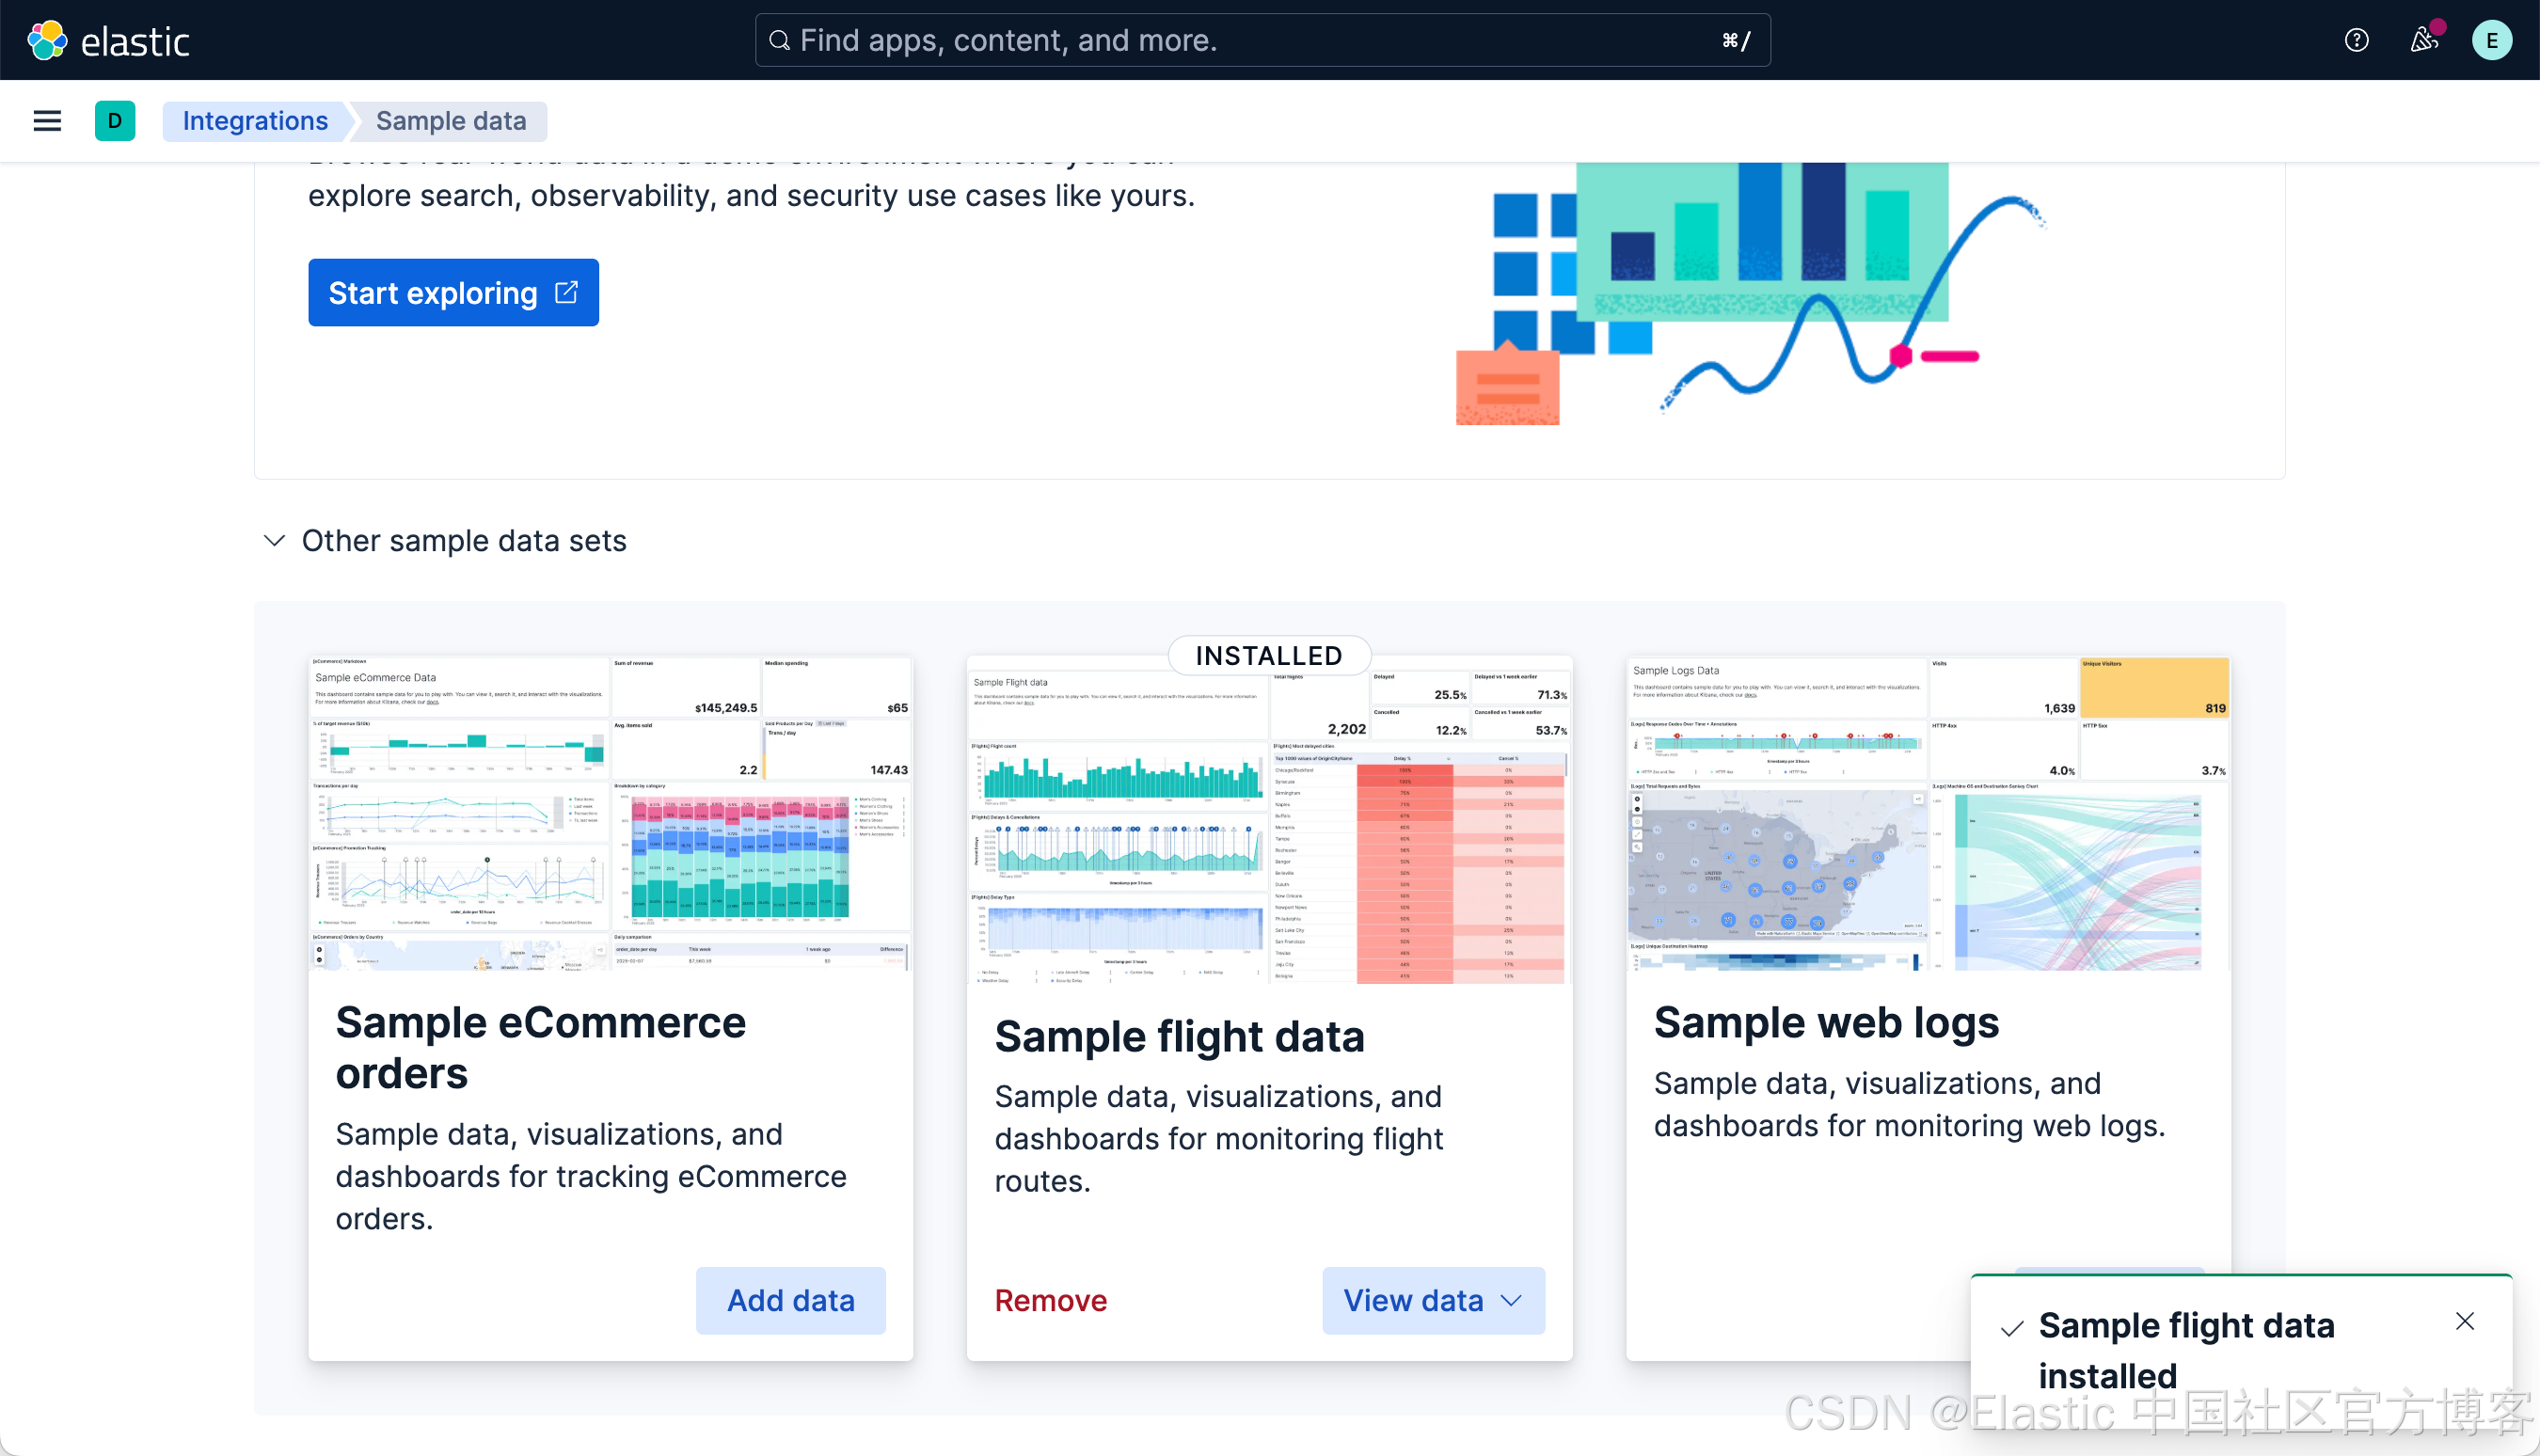
我们同时打入如下的命令来创建一个叫做 people 的索引:
PUT /people
{"mappings": {"properties": {"name": {"type": "text"},"description": {"type": "text"},"sex": {"type": "keyword"},"age": {"type": "integer"},"address": {"type": "text"}}}
}
POST /_bulk
{ "index" : { "_index" : "people", "_id" : "1" } }
{ "name" : "John Doe", "description" : "A software developer", "sex" : "Male", "age" : 30, "address" : "123 Elm Street, Springfield" }
{ "index" : { "_index" : "people", "_id" : "2" } }
{ "name" : "Jane Smith", "description" : "A project manager", "sex" : "Female", "age" : 28, "address" : "456 Maple Avenue, Anytown" }
{ "index" : { "_index" : "people", "_id" : "3" } }
{ "name" : "Alice Johnson", "description" : "A graphic designer", "sex" : "Female", "age" : 26, "address" : "789 Oak Lane, Metropolis" }
{ "index" : { "_index" : "people", "_id" : "4" } }
{ "name" : "Bob Brown", "description" : "A marketing specialist", "sex" : "Male", "age" : 32, "address" : "321 Pine Street, Gotham" }
{ "index" : { "_index" : "people", "_id" : "5" } }
{ "name" : "Charlie Davis", "description" : "An IT analyst", "sex" : "Male", "age" : 29, "address" : "654 Cedar Blvd, Star City" }
{ "index" : { "_index" : "people", "_id" : "6" } }
{ "name" : "Diana Prince", "description" : "A diplomat", "sex" : "Female", "age" : 35, "address" : "987 Birch Road, Themyscira" }
{ "index" : { "_index" : "people", "_id" : "7" } }
{ "name" : "Evan Wright", "description" : "A journalist", "sex" : "Male", "age" : 27, "address" : "213 Willow Lane, Central City" }
{ "index" : { "_index" : "people", "_id" : "8" } }
{ "name" : "Fiona Gallagher", "description" : "A nurse", "sex" : "Female", "age" : 31, "address" : "546 Spruce Street, South Side" }
{ "index" : { "_index" : "people", "_id" : "9" } }
{ "name" : "George King", "description" : "A teacher", "sex" : "Male", "age" : 34, "address" : "879 Elm St, Smallville" }
{ "index" : { "_index" : "people", "_id" : "10" } }
{ "name" : "Helen Parr", "description" : "A full-time superhero", "sex" : "Female", "age" : 37, "address" : "123 Metro Avenue, Metroville" }在上面的例子中,我们可以看到有5个男的5个女的。我们打入如下的问题:
How many are males and how many are females?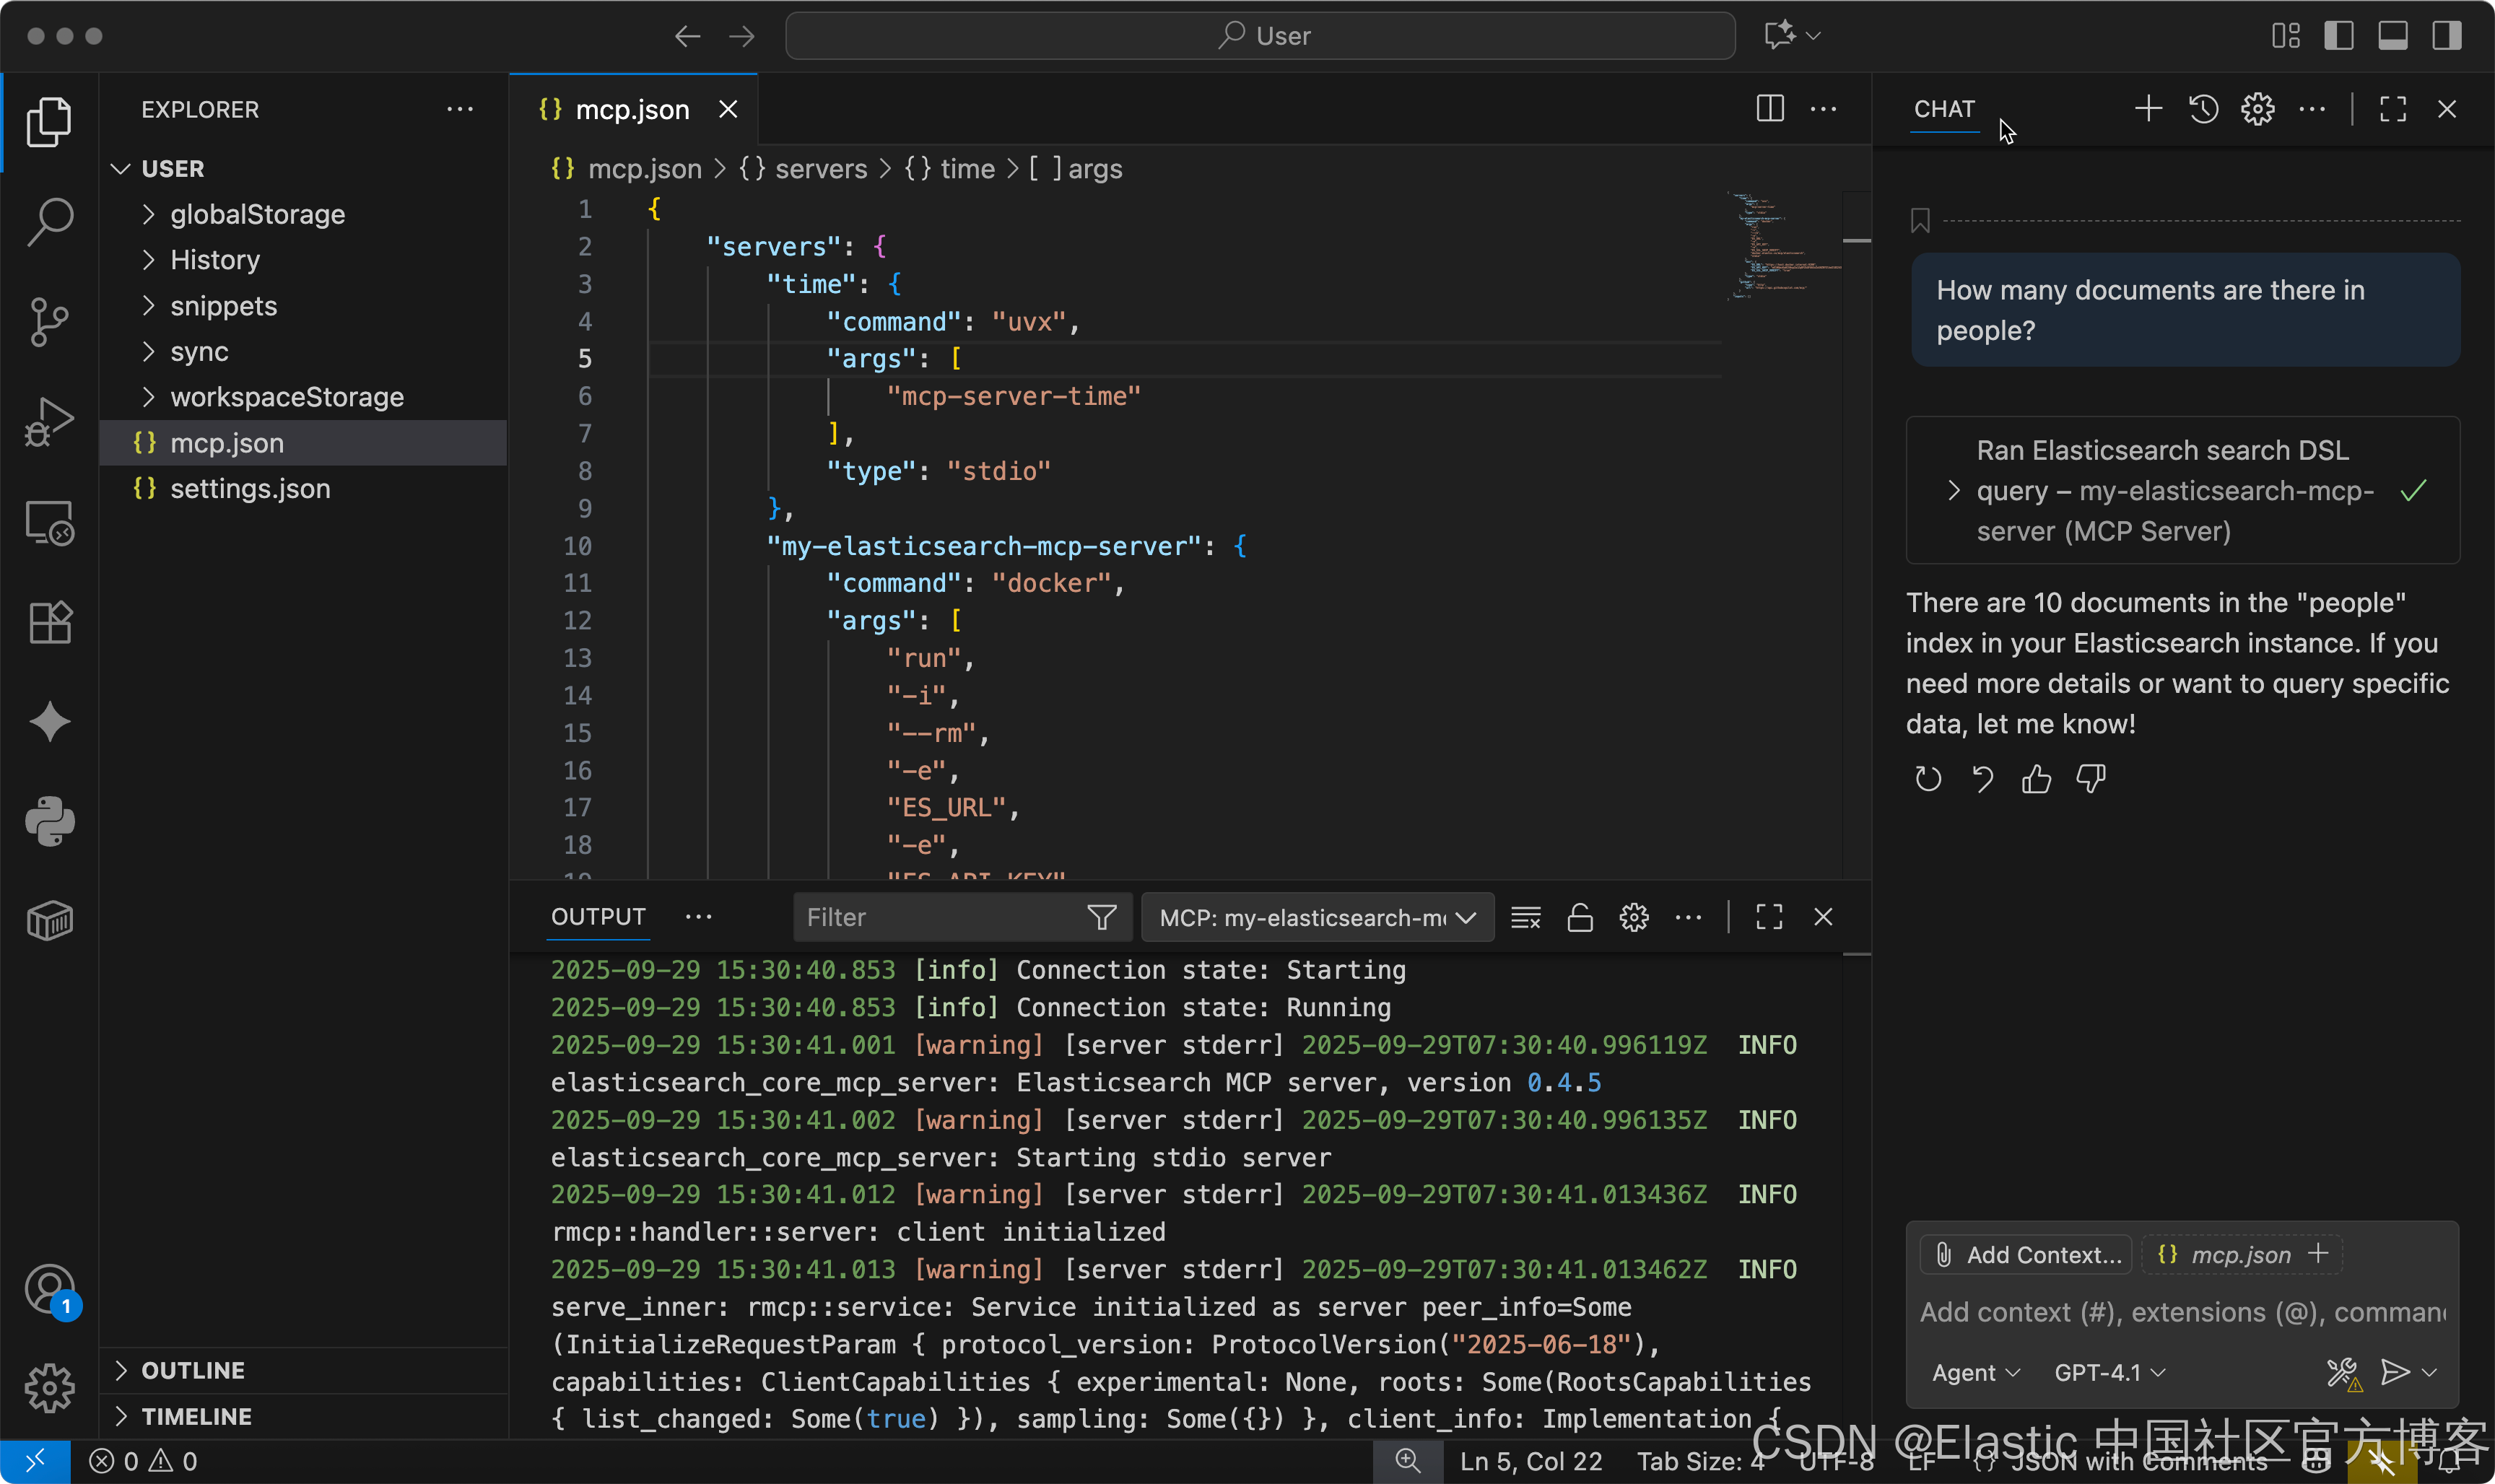
Please use index kibana_sample_data_flights to find out the cheapest price from CN to US and tell me the OriginCityName and DestCityName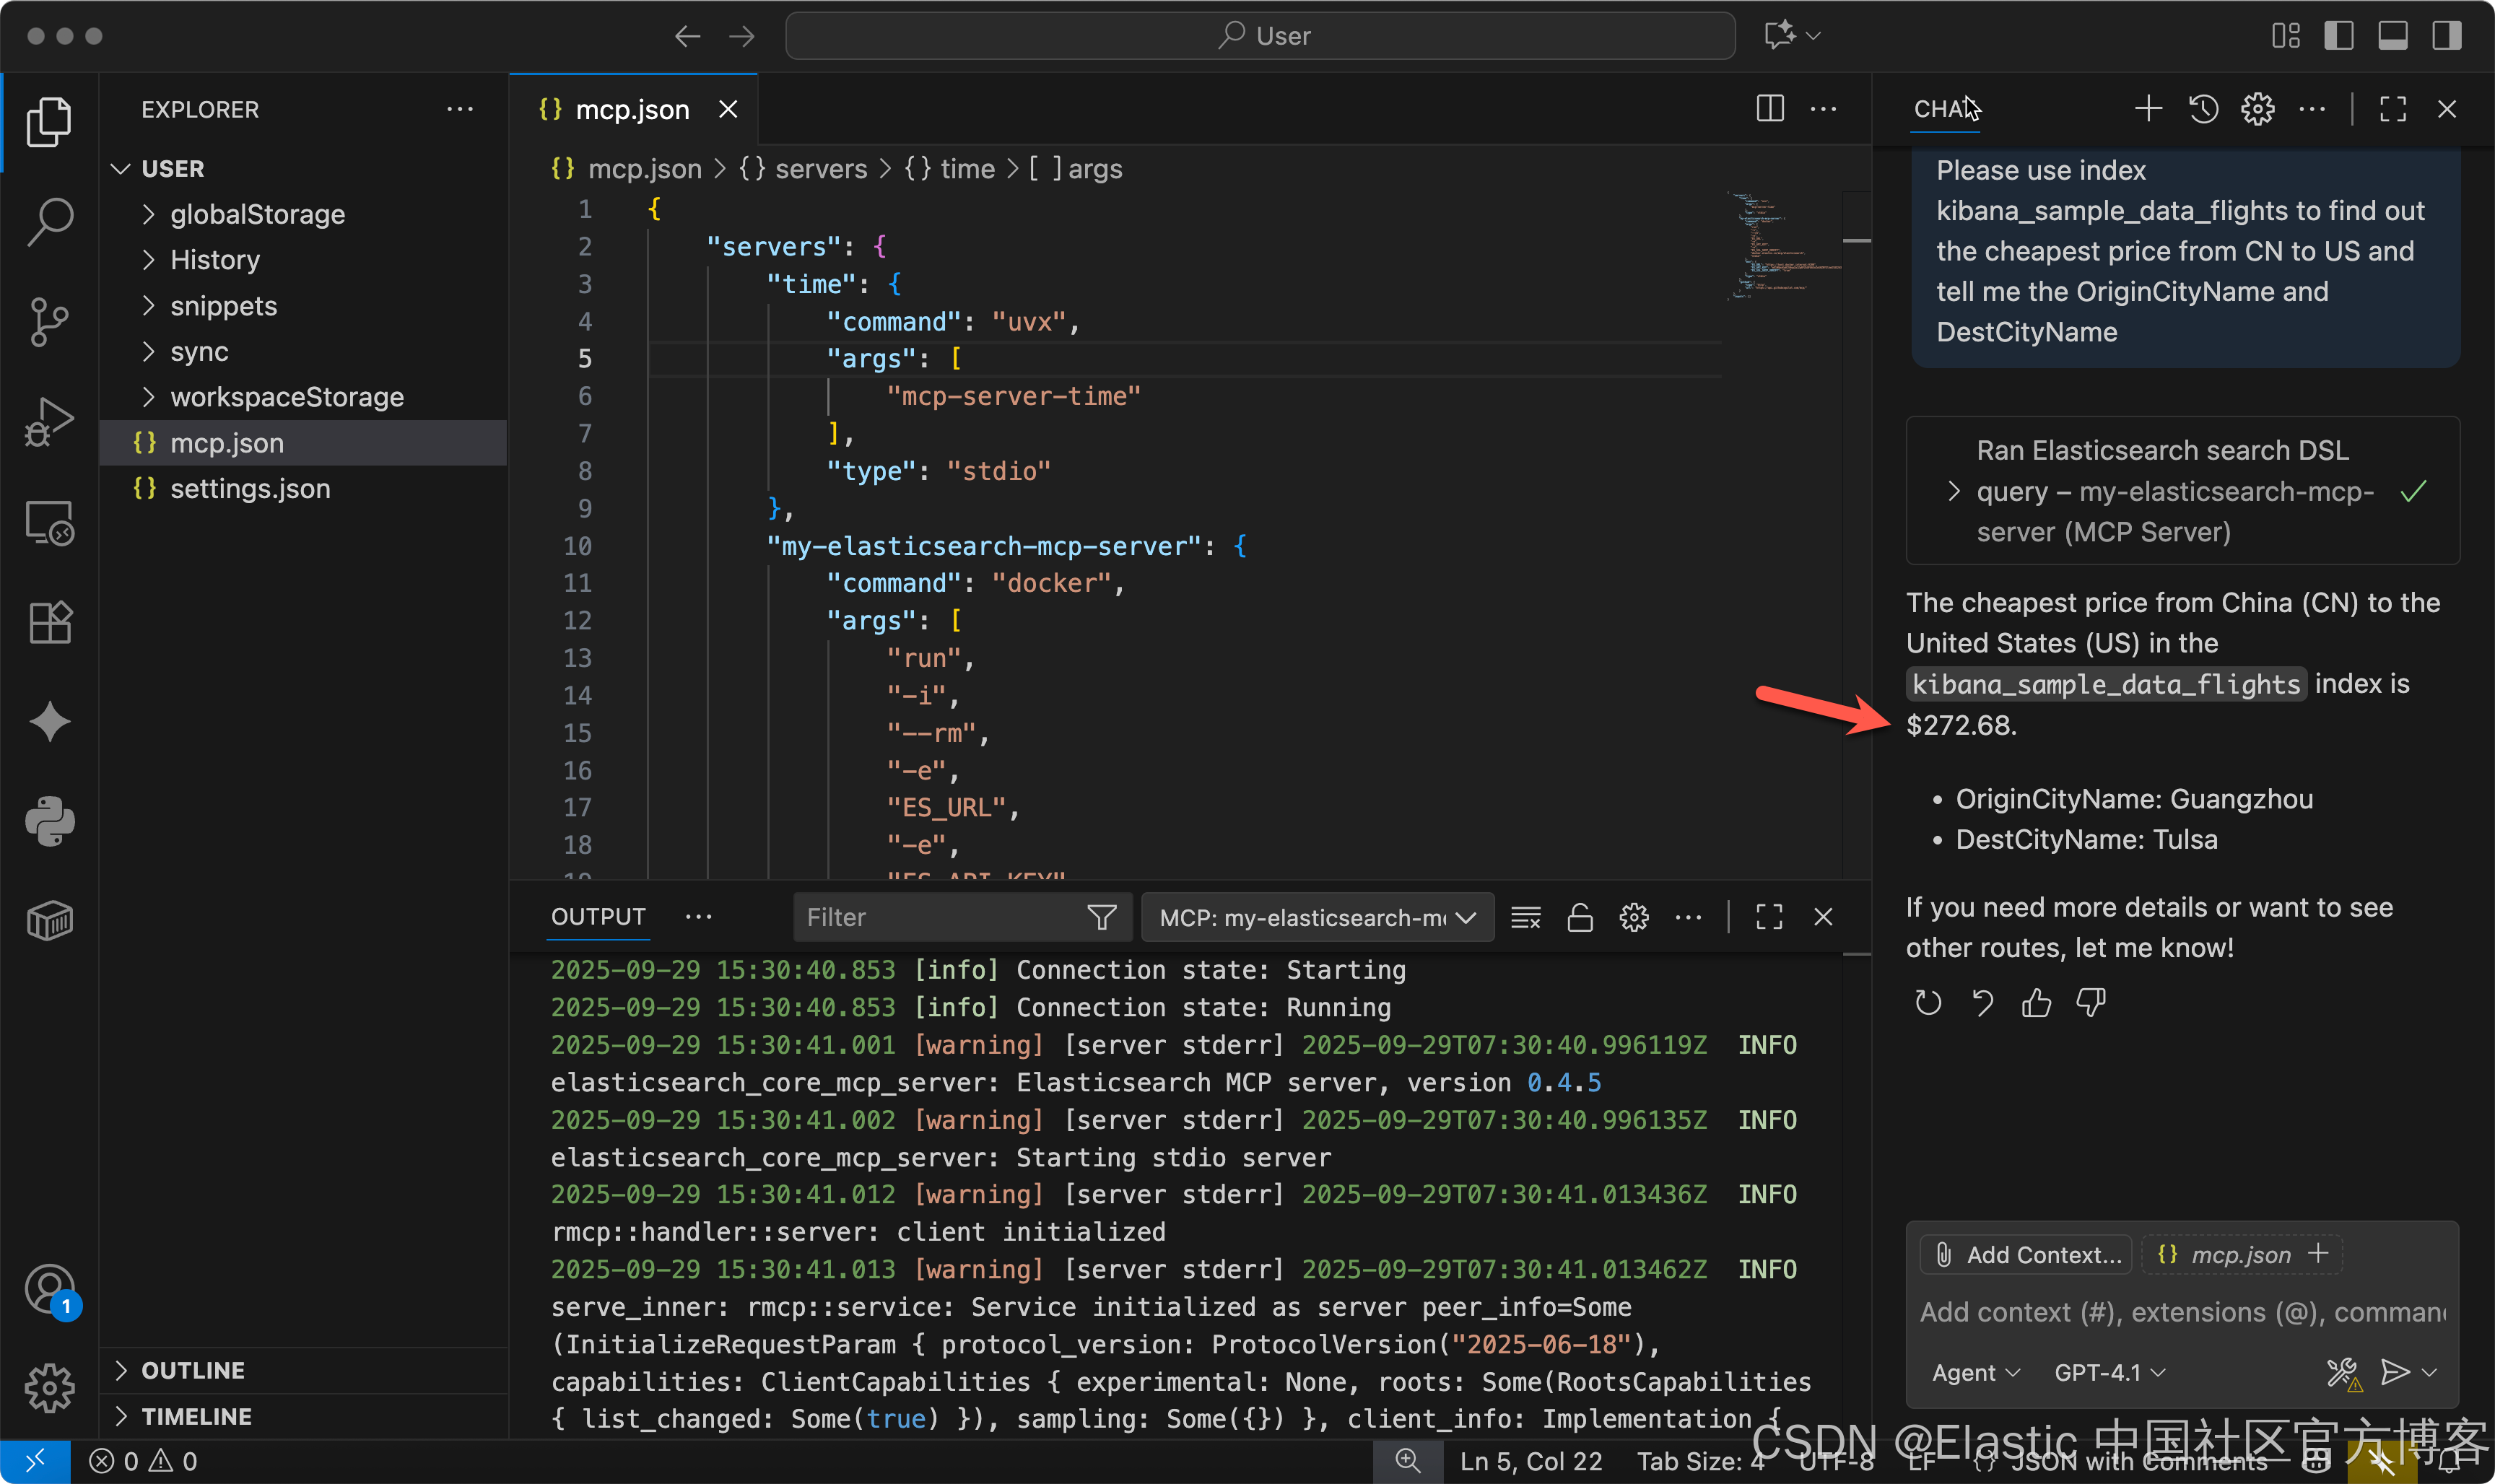
请使用索引 kibana_sample_data_flights 查找从 中国 到 美国 的最便宜价格,并告诉我 OriginCityName 和 DestCityName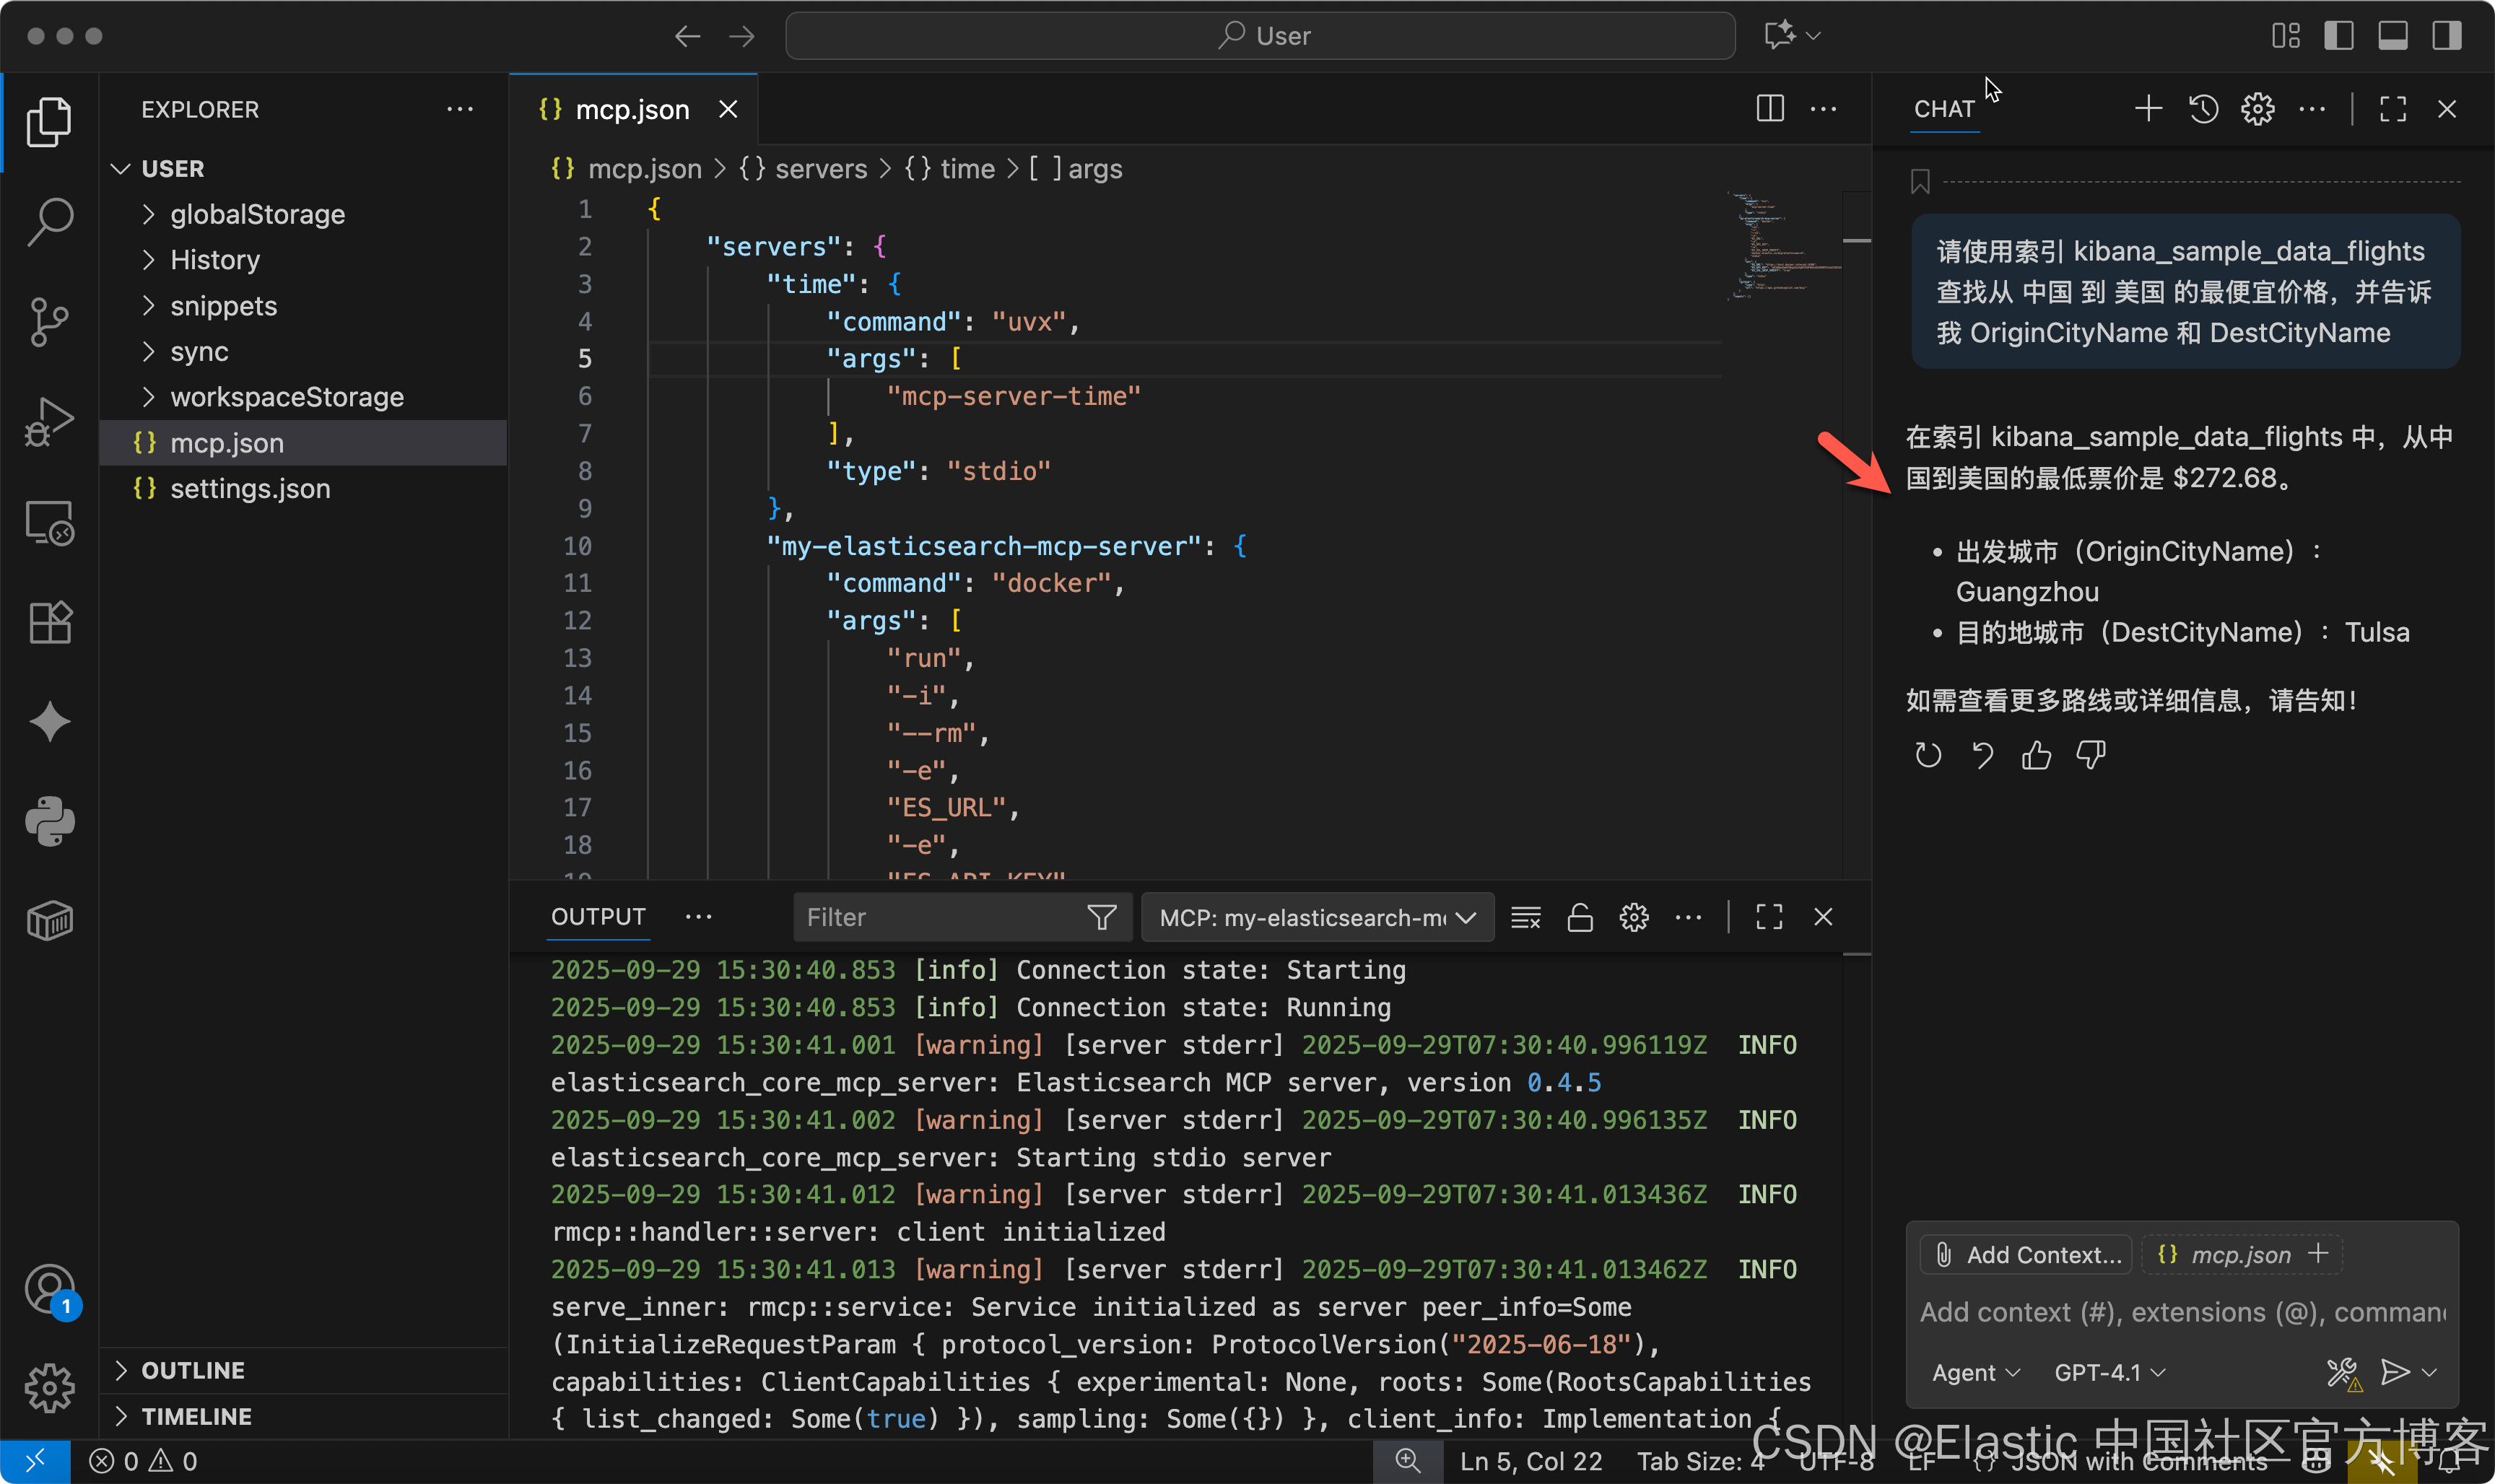
祝大家使用 VS code 顺序!