极简 Python 语言教程:从 Java 开发者视角入门实战
引言:为什么 Java 开发者需要学 Python?
作为一名 Java 开发者,你可能已经习惯了强类型、编译型、面向对象的编程范式。Java 以其严谨性、健壮性和广泛的企业级应用而闻名,但在某些场景下,它的 "重量级" 特性反而成为了束缚。
Python,作为一门解释型、动态类型的语言,正在人工智能、数据分析、自动化脚本、快速原型开发等领域大放异彩。对于 Java 开发者来说,掌握 Python 不仅能拓宽技术视野,更能在合适的场景下选择更高效的工具。
本教程将从 Java 开发者的视角,通过对比两种语言的异同,带你快速掌握 Python 的核心语法和实战技巧。我们不会面面俱到,但会直击要点,让你用最短的时间具备 Python 开发能力。
1. 环境搭建:从 JDK 到 Python 解释器
1.1 Java 与 Python 环境对比
在 Java 世界,我们需要安装 JDK(Java Development Kit),配置环境变量,通常还会使用 Maven 或 Gradle 进行项目管理。
Python 的环境搭建则简单得多:
- 安装 Python 解释器(相当于 JRE)
- 可选安装 pip(Python 包管理工具,相当于 Maven)
- 可选安装虚拟环境(用于隔离不同项目的依赖)
1.2 Python 环境安装步骤
- 访问 Python 官网(https://www.python.org/)下载最新稳定版(推荐 3.11+)
- 安装时勾选 "Add Python to PATH"(相当于 Java 的环境变量配置)
- 验证安装:
python --version  # 或 python3 --version
pip --version     # 或 pip3 --version
1.3 开发工具选择
Java 开发者常用的 IDE 如 IntelliJ IDEA、Eclipse 都有优秀的 Python 插件支持。此外,PyCharm(与 IDEA 同属 JetBrains)是 Python 专用 IDE,VS Code 也有出色的 Python 支持。
2. 语法基础:从 HelloWorld 看两种语言的差异
2.1 第一个程序:Hello World
Java 版本:
import lombok.extern.slf4j.Slf4j;/*** 第一个Java程序* 输出"Hello, World!"* @author ken*/
@Slf4j
public class HelloWorld {public static void main(String[] args) {log.info("Hello, World!");}
}
Python 版本:
# 第一个Python程序
# 输出"Hello, World!"
# @author ken
print("Hello, World!")
2.2 核心差异解析
-
结构差异:
- Java 需要类(class)作为容器,包含 main 方法作为入口
- Python 可以直接写执行语句,无需类和方法包裹
-
语法元素:
- Java 使用分号 (;) 结束语句,Python 依靠换行
- Java 使用大括号 ({}) 划分代码块,Python 使用缩进
- Java 需要显式导入,Python 部分功能需要导入,基础功能直接可用
-
日志输出:
- Java 中推荐使用 SLF4J 等日志框架
- Python 内置 print 函数用于简单输出,复杂日志可使用 logging 模块
3. 数据类型:动态类型与静态类型的碰撞
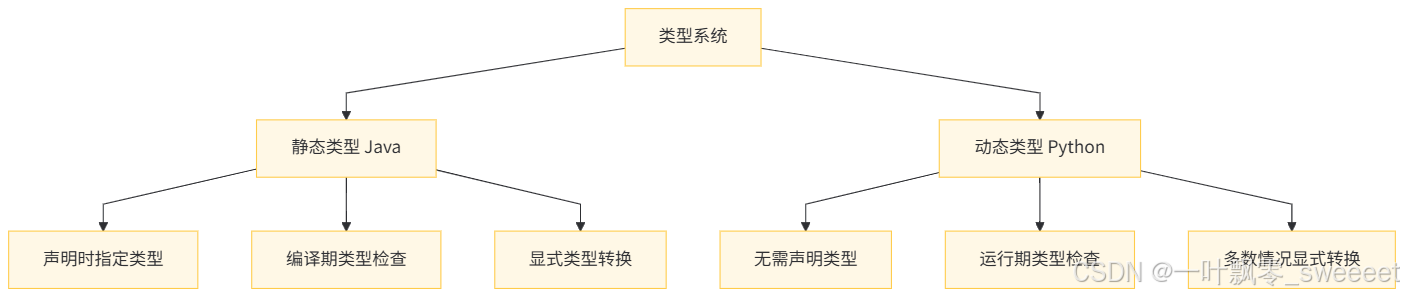
3.1 类型系统对比
Java 是静态类型语言:
- 变量声明时必须指定类型
- 编译期检查类型正确性
- 类型转换需要显式进行
Python 是动态类型语言:
- 变量无需声明类型,赋值时自动确定
- 运行期检查类型
- 类型转换通常需要显式进行
类型系统
3.2 基本数据类型对比
| Java 类型 | Python 类型 | 说明 |
|---|---|---|
| int | int | 整数,Python3 中 int 可表示任意大小整数 |
| long | int | Python 中没有 long,int 可自动扩展 |
| float | float | 单精度浮点数 |
| double | float | Python 中 float 实际是双精度 |
| boolean | bool | 布尔值,Python 中是 True/False |
| char | str | Python 中没有 char,用长度为 1 的字符串表示 |
| String | str | 字符串,Python 中用单引号或双引号 |
3.3 变量定义与使用
Java:
import lombok.extern.slf4j.Slf4j;
import org.springframework.util.StringUtils;/*** 变量定义与使用示例* @author ken*/
@Slf4j
public class VariableDemo {public static void main(String[] args) {// 声明并初始化各种类型变量int age = 30;double height = 1.85;boolean isStudent = false;String name = "Alice";// 变量使用log.info("姓名: {}", name);log.info("年龄: {}", age);// 类型转换String ageStr = String.valueOf(age);if (StringUtils.hasText(ageStr)) {log.info("年龄字符串: {}", ageStr);}}
}
Python:
# 变量定义与使用示例
# @author ken# 直接赋值,无需声明类型
age = 30
height = 1.85
is_student = False
name = "Alice"# 变量使用
print(f"姓名: {name}")
print(f"年龄: {age}")# 类型转换
age_str = str(age)
if age_str:  # Python中非空字符串即为Trueprint(f"年龄字符串: {age_str}")
3.4 字符串操作
Java:
import lombok.extern.slf4j.Slf4j;
import org.springframework.util.StringUtils;/*** 字符串操作示例* @author ken*/
@Slf4j
public class StringDemo {public static void main(String[] args) {String str1 = "Hello";String str2 = "World";// 字符串拼接String greeting = str1 + ", " + str2 + "!";log.info(greeting);// 字符串长度log.info("长度: {}", greeting.length());// 字符串截取String substr = greeting.substring(0, 5);log.info("子串: {}", substr);// 字符串分割String[] parts = "a,b,c,d".split(",");log.info("分割后第一个元素: {}", parts[0]);// 字符串格式化String formatted = String.format("Name: %s, Age: %d", "Bob", 25);log.info(formatted);}
}
Python:
# 字符串操作示例
# @author kenstr1 = "Hello"
str2 = "World"# 字符串拼接
greeting = f"{str1}, {str2}!"
print(greeting)# 字符串长度
print(f"长度: {len(greeting)}")# 字符串截取(切片)
substr = greeting[0:5]
print(f"子串: {substr}")# 字符串分割
parts = "a,b,c,d".split(",")
print(f"分割后第一个元素: {parts[0]}")# 字符串格式化
formatted = f"Name: {'Bob'}, Age: {25}"
print(formatted)
4. 控制流:程序的执行路径
4.1 条件语句
Java:
import lombok.extern.slf4j.Slf4j;/*** 条件语句示例* @author ken*/
@Slf4j
public class ConditionDemo {public static void main(String[] args) {int score = 85;if (score >= 90) {log.info("优秀");} else if (score >= 80) {log.info("良好");} else if (score >= 60) {log.info("及格");} else {log.info("不及格");}// 三元运算符String result = score >= 60 ? "通过" : "未通过";log.info(result);}
}
Python:
# 条件语句示例
# @author kenscore = 85if score >= 90:print("优秀")
elif score >= 80:print("良好")
elif score >= 60:print("及格")
else:print("不及格")# 三元运算符
result = "通过" if score >= 60 else "未通过"
print(result)
4.2 循环语句
Java:
import lombok.extern.slf4j.Slf4j;
import com.google.common.collect.Lists;
import java.util.List;/*** 循环语句示例* @author ken*/
@Slf4j
public class LoopDemo {public static void main(String[] args) {List<String> fruits = Lists.newArrayList("苹果", "香蕉", "橙子");// for循环遍历集合for (String fruit : fruits) {log.info(fruit);}// 传统for循环for (int i = 0; i < 5; i++) {log.info("计数: {}", i);}// while循环int count = 0;while (count < 3) {log.info("While计数: {}", count);count++;}}
}
Python:
# 循环语句示例
# @author kenfruits = ["苹果", "香蕉", "橙子"]# for循环遍历集合
for fruit in fruits:print(fruit)# for循环遍历范围
for i in range(5):print(f"计数: {i}")# while循环
count = 0
while count < 3:print(f"While计数: {count}")count += 1
4.3 循环控制
Java:
import lombok.extern.slf4j.Slf4j;/*** 循环控制示例* @author ken*/
@Slf4j
public class LoopControlDemo {public static void main(String[] args) {// break示例for (int i = 0; i < 10; i++) {if (i == 5) {break;  // 跳出循环}log.info("Break示例: {}", i);}// continue示例for (int i = 0; i < 10; i++) {if (i % 2 == 0) {continue;  // 跳过本次循环}log.info("Continue示例: {}", i);}}
}
Python:
# 循环控制示例
# @author ken# break示例
for i in range(10):if i == 5:break  # 跳出循环print(f"Break示例: {i}")# continue示例
for i in range(10):if i % 2 == 0:continue  # 跳过本次循环print(f"Continue示例: {i}")
5. 数据结构:从 Collection 到 Python 内置结构
5.1 数据结构对比概览
Java集合框架
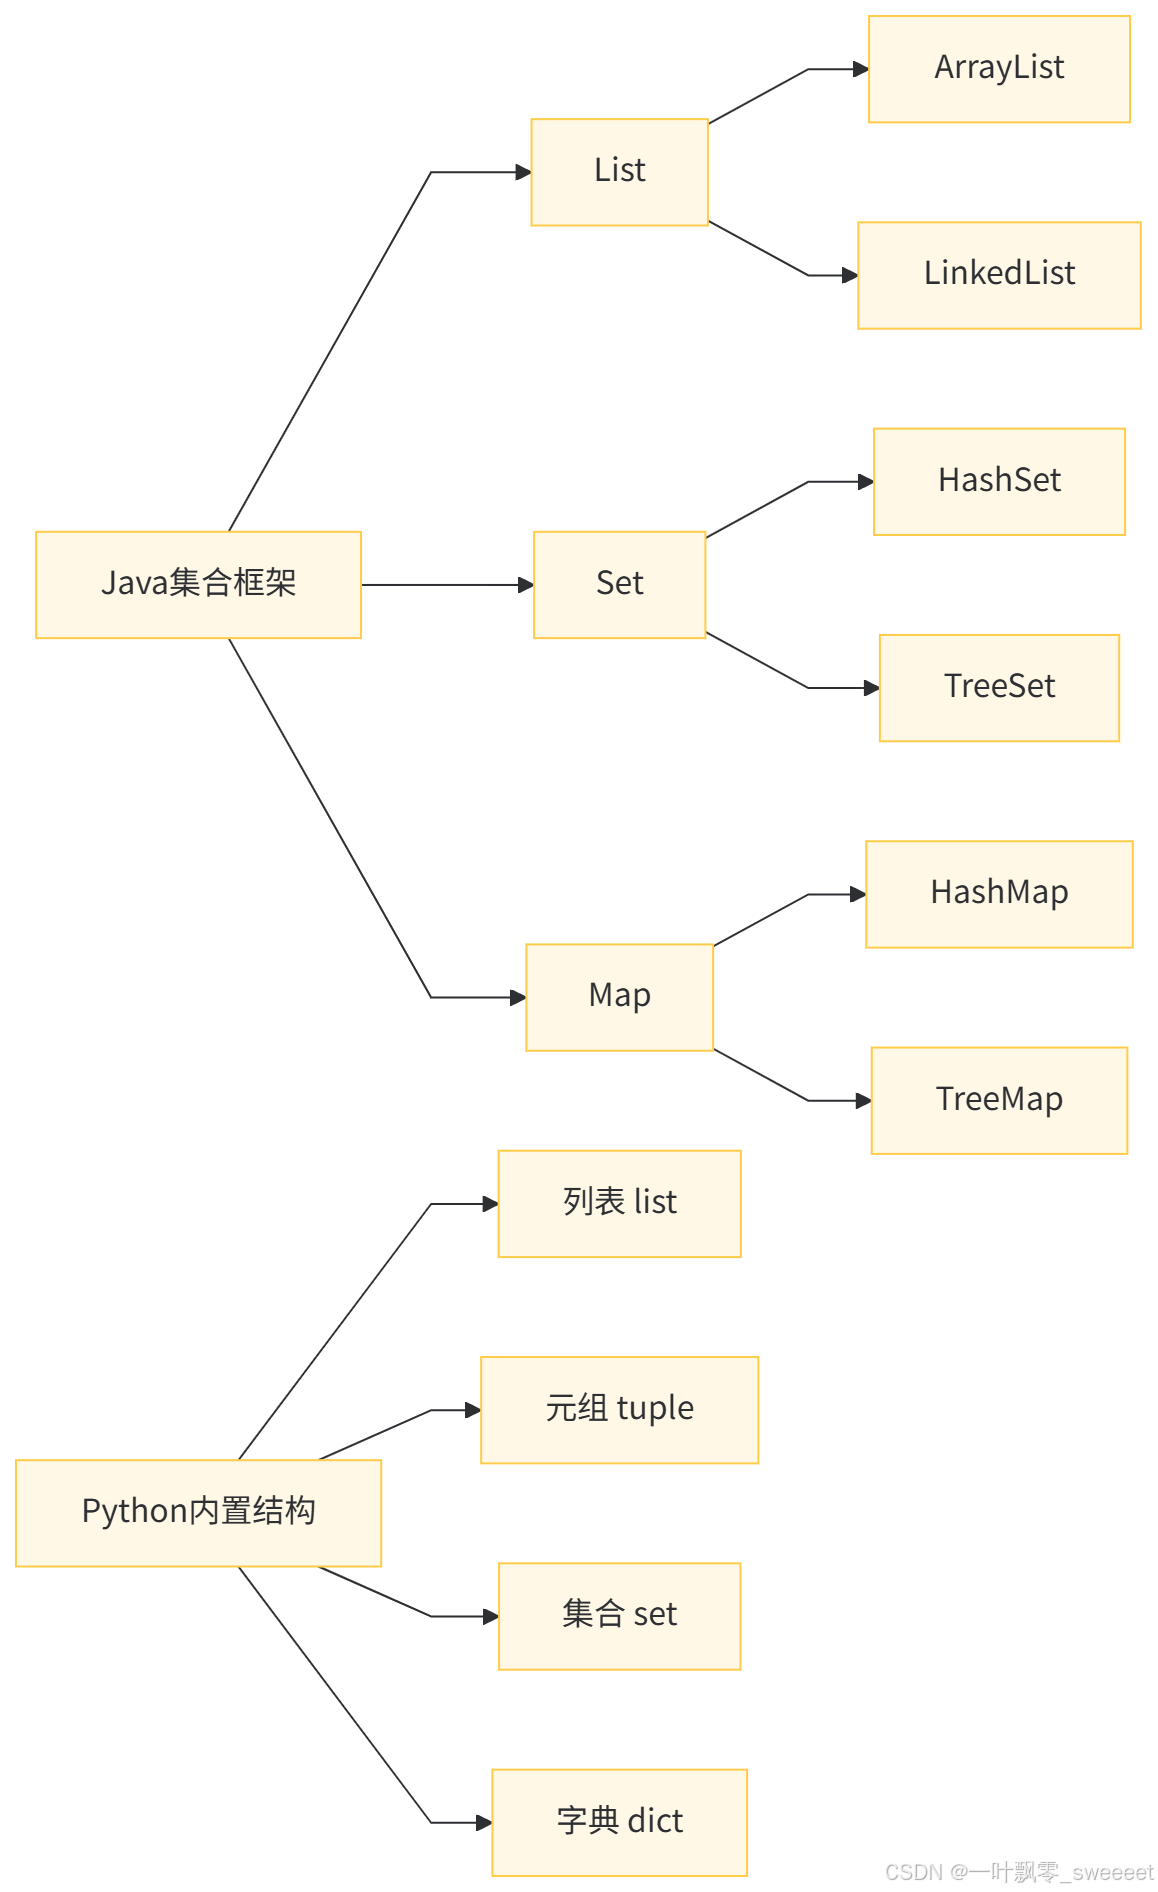
5.2 列表(List)
Java 的 ArrayList 对应 Python 的 list:
Java:
import lombok.extern.slf4j.Slf4j;
import com.google.common.collect.Lists;
import org.springframework.util.CollectionUtils;
import java.util.List;/*** List操作示例* @author ken*/
@Slf4j
public class ListDemo {public static void main(String[] args) {// 创建列表List<String> fruits = Lists.newArrayList("苹果", "香蕉", "橙子");// 添加元素fruits.add("葡萄");// 获取元素String firstFruit = fruits.get(0);log.info("第一个水果: {}", firstFruit);// 修改元素fruits.set(1, "草莓");// 删除元素fruits.remove(2);// 检查元素是否存在boolean hasApple = fruits.contains("苹果");log.info("是否包含苹果: {}", hasApple);// 列表大小log.info("列表大小: {}", fruits.size());// 遍历列表if (!CollectionUtils.isEmpty(fruits)) {for (String fruit : fruits) {log.info(fruit);}}}
}
Python:
# 列表操作示例
# @author ken# 创建列表
fruits = ["苹果", "香蕉", "橙子"]# 添加元素
fruits.append("葡萄")# 获取元素
first_fruit = fruits[0]
print(f"第一个水果: {first_fruit}")# 修改元素
fruits[1] = "草莓"# 删除元素
del fruits[2]# 检查元素是否存在
has_apple = "苹果" in fruits
print(f"是否包含苹果: {has_apple}")# 列表大小
print(f"列表大小: {len(fruits)}")# 遍历列表
if fruits:  # 非空列表即为Truefor fruit in fruits:print(fruit)
5.3 集合(Set)
Java 的 HashSet 对应 Python 的 set:
Java:
import lombok.extern.slf4j.Slf4j;
import com.google.common.collect.Sets;
import org.springframework.util.CollectionUtils;
import java.util.Set;/*** Set操作示例* @author ken*/
@Slf4j
public class SetDemo {public static void main(String[] args) {// 创建集合Set<String> fruits = Sets.newHashSet("苹果", "香蕉", "橙子", "苹果");// 添加元素fruits.add("葡萄");// 检查元素是否存在boolean hasApple = fruits.contains("苹果");log.info("是否包含苹果: {}", hasApple);// 集合大小log.info("集合大小: {}", fruits.size());// 删除元素fruits.remove("香蕉");// 遍历集合if (!CollectionUtils.isEmpty(fruits)) {for (String fruit : fruits) {log.info(fruit);}}// 集合运算Set<String> set1 = Sets.newHashSet("a", "b", "c");Set<String> set2 = Sets.newHashSet("b", "c", "d");// 交集Set<String> intersection = Sets.intersection(set1, set2);log.info("交集: {}", intersection);// 并集Set<String> union = Sets.union(set1, set2);log.info("并集: {}", union);}
}
Python:
# 集合操作示例
# @author ken# 创建集合
fruits = {"苹果", "香蕉", "橙子", "苹果"}  # 自动去重# 添加元素
fruits.add("葡萄")# 检查元素是否存在
has_apple = "苹果" in fruits
print(f"是否包含苹果: {has_apple}")# 集合大小
print(f"集合大小: {len(fruits)}")# 删除元素
fruits.remove("香蕉")# 遍历集合
if fruits:  # 非空集合即为Truefor fruit in fruits:print(fruit)# 集合运算
set1 = {"a", "b", "c"}
set2 = {"b", "c", "d"}# 交集
intersection = set1 & set2
print(f"交集: {intersection}")# 并集
union = set1 | set2
print(f"并集: {union}")
5.4 字典(Dictionary)
Java 的 HashMap 对应 Python 的 dict:
Java:
import lombok.extern.slf4j.Slf4j;
import com.google.common.collect.Maps;
import org.springframework.util.CollectionUtils;
import java.util.Map;/*** Map操作示例* @author ken*/
@Slf4j
public class MapDemo {public static void main(String[] args) {// 创建映射Map<String, Integer> fruitPrices = Maps.newHashMap();// 添加键值对fruitPrices.put("苹果", 10);fruitPrices.put("香蕉", 5);fruitPrices.put("橙子", 8);// 获取值int applePrice = fruitPrices.get("苹果");log.info("苹果价格: {}", applePrice);// 检查键是否存在boolean hasBanana = fruitPrices.containsKey("香蕉");log.info("是否有香蕉: {}", hasBanana);// 映射大小log.info("映射大小: {}", fruitPrices.size());// 删除键值对fruitPrices.remove("香蕉");// 遍历映射if (!CollectionUtils.isEmpty(fruitPrices)) {for (Map.Entry<String, Integer> entry : fruitPrices.entrySet()) {log.info("{}: {}", entry.getKey(), entry.getValue());}}}
}
Python:
# 字典操作示例
# @author ken# 创建字典
fruit_prices = {}# 添加键值对
fruit_prices["苹果"] = 10
fruit_prices["香蕉"] = 5
fruit_prices["橙子"] = 8# 获取值
apple_price = fruit_prices["苹果"]
print(f"苹果价格: {apple_price}")# 检查键是否存在
has_banana = "香蕉" in fruit_prices
print(f"是否有香蕉: {has_banana}")# 字典大小
print(f"字典大小: {len(fruit_prices)}")# 删除键值对
del fruit_prices["香蕉"]# 遍历字典
if fruit_prices:  # 非空字典即为Truefor fruit, price in fruit_prices.items():print(f"{fruit}: {price}")
5.5 元组(Tuple)
Python 特有的元组类型,类似不可变的列表:
# 元组操作示例
# @author ken# 创建元组
point = (10, 20)
colors = ("红", "绿", "蓝")# 获取元素
x = point[0]
print(f"X坐标: {x}")# 元组大小
print(f"颜色数量: {len(colors)}")# 遍历元组
for color in colors:print(color)# 元组不可修改,以下代码会报错
# point[0] = 15# 元组解包
a, b, c = colors
print(f"解包后: a={a}, b={b}, c={c}")# 单元素元组需要加逗号
single_element = (5,)
print(f"单元素元组: {single_element}")
6. 函数:从方法到函数
6.1 函数定义与调用
Java:
import lombok.extern.slf4j.Slf4j;/*** 方法定义与调用示例* @author ken*/
@Slf4j
public class MethodDemo {/*** 计算两个整数的和* @param a 第一个整数* @param b 第二个整数* @return 两个整数的和*/public static int add(int a, int b) {return a + b;}/*** 打印问候语* @param name 姓名*/public static void greet(String name) {log.info("Hello, {}!", name);}public static void main(String[] args) {// 调用有返回值的方法int sum = add(3, 5);log.info("3 + 5 = {}", sum);// 调用无返回值的方法greet("Alice");}
}
Python:
# 函数定义与调用示例
# @author kendef add(a, b):"""计算两个数的和@param a: 第一个数@param b: 第二个数@return: 两个数的和"""return a + bdef greet(name):"""打印问候语@param name: 姓名"""print(f"Hello, {name}!")# 调用有返回值的函数
sum_result = add(3, 5)
print(f"3 + 5 = {sum_result}")# 调用无返回值的函数
greet("Alice")
6.2 函数参数
Python 支持多种灵活的参数形式,这是与 Java 方法参数的主要区别:
# 函数参数示例
# @author ken# 位置参数
def power(base, exponent):"""计算base的exponent次方"""result = 1for _ in range(exponent):result *= basereturn resultprint(power(2, 3))  # 8# 默认参数
def greet(name, greeting="Hello"):"""带默认值的问候函数"""print(f"{greeting}, {name}!")greet("Alice")  # Hello, Alice!
greet("Bob", "Hi")  # Hi, Bob!# 关键字参数
def describe_person(name, age, city):"""描述一个人的信息"""print(f"{name} is {age} years old and lives in {city}")# 可以不按顺序传递参数
describe_person(age=30, name="Charlie", city="New York")# 可变参数
def sum_numbers(*numbers):"""计算任意数量数字的和"""total = 0for num in numbers:total += numreturn totalprint(sum_numbers(1, 2, 3, 4))  # 10# 关键字可变参数
def print_info(**info):"""打印任意关键字参数"""for key, value in info.items():print(f"{key}: {value}")print_info(name="David", age=25, occupation="Engineer")
6.3 函数返回值
Python 函数可以返回多个值,这在 Java 中需要通过自定义对象或数组实现:
Java:
import lombok.Data;
import lombok.extern.slf4j.Slf4j;/*** 方法返回多个值示例* @author ken*/
@Slf4j
public class MultipleReturnDemo {/*** 存储两个整数的结果*/@Datapublic static class IntResult {private int sum;private int product;public IntResult(int sum, int product) {this.sum = sum;this.product = product;}}/*** 计算两个整数的和与积* @param a 第一个整数* @param b 第二个整数* @return 包含和与积的IntResult对象*/public static IntResult calculate(int a, int b) {int sum = a + b;int product = a * b;return new IntResult(sum, product);}public static void main(String[] args) {IntResult result = calculate(3, 4);log.info("和: {}", result.getSum());log.info("积: {}", result.getProduct());}
}
Python:
# 函数返回多个值示例
# @author kendef calculate(a, b):"""计算两个数的和与积@param a: 第一个数@param b: 第二个数@return: 包含和与积的元组"""sum_result = a + bproduct_result = a * breturn sum_result, product_result  # 实际返回一个元组# 接收多个返回值
sum_val, product_val = calculate(3, 4)
print(f"和: {sum_val}")
print(f"积: {product_val}")# 也可以作为单个元组接收
result = calculate(3, 4)
print(f"结果元组: {result}")
7. 面向对象编程:从类到对象
7.1 类与对象基础
Java:
import lombok.Data;
import lombok.extern.slf4j.Slf4j;/*** 类与对象基础示例* @author ken*/
@Slf4j
public class OOPBasics {/*** 学生类*/@Datapublic static class Student {private String name;private int age;private String major;/*** 构造方法* @param name 姓名* @param age 年龄* @param major 专业*/public Student(String name, int age, String major) {this.name = name;this.age = age;this.major = major;}/*** 学生自我介绍*/public void introduce() {log.info("大家好,我叫{},今年{}岁,专业是{}", name, age, major);}/*** 学生学习* @param course 课程名称*/public void study(String course) {log.info("{}正在学习{}", name, course);}}public static void main(String[] args) {// 创建对象Student student = new Student("张三", 20, "计算机科学");// 调用对象方法student.introduce();student.study("Python编程");// 访问对象属性log.info("学生姓名: {}", student.getName());// 修改对象属性student.setAge(21);log.info("修改后的年龄: {}", student.getAge());}
}
Python:
# 类与对象基础示例
# @author kenclass Student:"""学生类"""def __init__(self, name, age, major):"""构造方法@param name: 姓名@param age: 年龄@param major: 专业"""self.name = nameself.age = ageself.major = majordef introduce(self):"""学生自我介绍"""print(f"大家好,我叫{self.name},今年{self.age}岁,专业是{self.major}")def study(self, course):"""学生学习@param course: 课程名称"""print(f"{self.name}正在学习{course}")# 创建对象
student = Student("张三", 20, "计算机科学")# 调用对象方法
student.introduce()
student.study("Python编程")# 访问对象属性
print(f"学生姓名: {student.name}")# 修改对象属性
student.age = 21
print(f"修改后的年龄: {student.age}")
7.2 继承
Java:
import lombok.extern.slf4j.Slf4j;/*** 继承示例* @author ken*/
@Slf4j
public class InheritanceDemo {/*** 动物类(父类)*/public static class Animal {protected String name;public Animal(String name) {this.name = name;}public void eat() {log.info("{}在吃东西", name);}public void sleep() {log.info("{}在睡觉", name);}}/*** 狗类(子类)*/public static class Dog extends Animal {public Dog(String name) {super(name);}// 重写父类方法@Overridepublic void eat() {log.info("{}在吃骨头", name);}// 子类特有方法public void bark() {log.info("{}在汪汪叫", name);}}/*** 猫类(子类)*/public static class Cat extends Animal {public Cat(String name) {super(name);}// 重写父类方法@Overridepublic void eat() {log.info("{}在吃鱼", name);}// 子类特有方法public void meow() {log.info("{}在喵喵叫", name);}}public static void main(String[] args) {Animal dog = new Dog("旺财");Animal cat = new Cat("咪咪");dog.eat();dog.sleep();((Dog) dog).bark();  // 需要强制类型转换cat.eat();cat.sleep();((Cat) cat).meow();  // 需要强制类型转换}
}
Python:
# 继承示例
# @author kenclass Animal:"""动物类(父类)"""def __init__(self, name):self.name = namedef eat(self):print(f"{self.name}在吃东西")def sleep(self):print(f"{self.name}在睡觉")class Dog(Animal):"""狗类(子类)"""def eat(self):"""重写父类方法"""print(f"{self.name}在吃骨头")def bark(self):"""子类特有方法"""print(f"{self.name}在汪汪叫")class Cat(Animal):"""猫类(子类)"""def eat(self):"""重写父类方法"""print(f"{self.name}在吃鱼")def meow(self):"""子类特有方法"""print(f"{self.name}在喵喵叫")# 创建对象
dog = Dog("旺财")
cat = Cat("咪咪")dog.eat()
dog.sleep()
dog.bark()  # 无需类型转换cat.eat()
cat.sleep()
cat.meow()  # 无需类型转换
7.3 封装
Java:
import lombok.Getter;
import lombok.Setter;
import lombok.extern.slf4j.Slf4j;/*** 封装示例* @author ken*/
@Slf4j
public class EncapsulationDemo {/*** 银行账户类*/@Getterpublic static class BankAccount {private String accountNumber;@Setterprivate String ownerName;private double balance;/*** 构造方法* @param accountNumber 账号* @param ownerName 所有者姓名* @param initialBalance 初始余额*/public BankAccount(String accountNumber, String ownerName, double initialBalance) {this.accountNumber = accountNumber;this.ownerName = ownerName;this.balance = initialBalance > 0 ? initialBalance : 0;}/*** 存款* @param amount 存款金额*/public void deposit(double amount) {if (amount > 0) {balance += amount;log.info("存款成功,金额: {}", amount);} else {log.error("存款金额必须为正数");}}/*** 取款* @param amount 取款金额* @return 是否取款成功*/public boolean withdraw(double amount) {if (amount > 0 && amount <= balance) {balance -= amount;log.info("取款成功,金额: {}", amount);return true;}log.error("取款失败,金额无效或余额不足");return false;}/*** 获取余额* @return 当前余额*/public double getBalance() {log.info("查询余额");return balance;}}public static void main(String[] args) {BankAccount account = new BankAccount("123456789", "张三", 1000);log.info("账号: {}", account.getAccountNumber());log.info("户主: {}", account.getOwnerName());log.info("余额: {}", account.getBalance());account.deposit(500);log.info("存款后余额: {}", account.getBalance());boolean withdrawSuccess = account.withdraw(300);if (withdrawSuccess) {log.info("取款后余额: {}", account.getBalance());}// 尝试直接修改私有属性(编译错误)// account.balance = 1000000;account.setOwnerName("李四");log.info("修改后户主: {}", account.getOwnerName());}
}
Python:
# 封装示例
# @author kenclass BankAccount:"""银行账户类"""def __init__(self, account_number, owner_name, initial_balance):self._account_number = account_number  # 单下划线表示受保护self._owner_name = owner_nameself.__balance = initial_balance if initial_balance > 0 else 0  # 双下划线表示私有@propertydef account_number(self):"""账号的 getter 方法"""return self._account_number@propertydef owner_name(self):"""户主姓名的 getter 方法"""return self._owner_name@owner_name.setterdef owner_name(self, new_name):"""户主姓名的 setter 方法"""self._owner_name = new_namedef deposit(self, amount):"""存款@param amount: 存款金额"""if amount > 0:self.__balance += amountprint(f"存款成功,金额: {amount}")else:print("存款金额必须为正数")def withdraw(self, amount):"""取款@param amount: 取款金额@return: 是否取款成功"""if amount > 0 and amount <= self.__balance:self.__balance -= amountprint(f"取款成功,金额: {amount}")return Trueprint("取款失败,金额无效或余额不足")return Falsedef get_balance(self):"""获取余额"""print("查询余额")return self.__balance# 创建账户对象
account = BankAccount("123456789", "张三", 1000)print(f"账号: {account.account_number}")
print(f"户主: {account.owner_name}")
print(f"余额: {account.get_balance()}")account.deposit(500)
print(f"存款后余额: {account.get_balance()}")withdraw_success = account.withdraw(300)
if withdraw_success:print(f"取款后余额: {account.get_balance()}")# 尝试直接访问私有属性(会失败,实际访问的是一个新的属性)
account.__balance = 1000000
print(f"尝试修改后余额: {account.get_balance()}")  # 余额并未改变# 通过 setter 方法修改属性
account.owner_name = "李四"
print(f"修改后户主: {account.owner_name}")
8. 异常处理:从 try-catch 到 Python 的异常机制
8.1 异常处理基础
Java:
import lombok.extern.slf4j.Slf4j;/*** 异常处理示例* @author ken*/
@Slf4j
public class ExceptionHandlingDemo {/*** 除法运算* @param a 被除数* @param b 除数* @return 商* @throws ArithmeticException 当除数为0时抛出*/public static double divide(double a, double b) {if (b == 0) {throw new ArithmeticException("除数不能为0");}return a / b;}public static void main(String[] args) {try {double result = divide(10, 2);log.info("10 / 2 = {}", result);result = divide(10, 0);log.info("10 / 0 = {}", result);} catch (ArithmeticException e) {log.error("发生算术异常: {}", e.getMessage());} finally {log.info("运算结束");}// 处理多种异常String[] fruits = {"苹果", "香蕉", "橙子"};try {int index = Integer.parseInt("abc");log.info(fruits[index]);} catch (NumberFormatException e) {log.error("数字格式异常: 无法将字符串转换为整数");} catch (ArrayIndexOutOfBoundsException e) {log.error("数组索引越界异常: 索引超出数组范围");} catch (Exception e) {log.error("发生未知异常: {}", e.getMessage());}}
}
Python:
# 异常处理示例
# @author kendef divide(a, b):"""除法运算@param a: 被除数@param b: 除数@return: 商@raise ArithmeticError: 当除数为0时抛出"""if b == 0:raise ArithmeticError("除数不能为0")return a / btry:result = divide(10, 2)print(f"10 / 2 = {result}")result = divide(10, 0)print(f"10 / 0 = {result}")
except ArithmeticError as e:print(f"发生算术异常: {str(e)}")
finally:print("运算结束")# 处理多种异常
fruits = ["苹果", "香蕉", "橙子"]
try:index = int("abc")print(fruits[index])
except ValueError:print("值错误: 无法将字符串转换为整数")
except IndexError:print("索引错误: 索引超出数组范围")
except Exception as e:print(f"发生未知异常: {str(e)}")
8.2 自定义异常
Java:
import lombok.extern.slf4j.Slf4j;/*** 自定义异常示例* @author ken*/
@Slf4j
public class CustomExceptionDemo {/*** 自定义异常:用户不存在异常*/public static class UserNotFoundException extends Exception {public UserNotFoundException(String message) {super(message);}}/*** 自定义异常:权限不足异常*/public static class PermissionDeniedException extends Exception {public PermissionDeniedException(String message) {super(message);}}/*** 检查用户是否存在* @param userId 用户ID* @throws UserNotFoundException 当用户不存在时抛出*/public static void checkUserExists(String userId) throws UserNotFoundException {// 模拟检查用户是否存在if ("000".equals(userId)) {throw new UserNotFoundException("用户不存在: " + userId);}}/*** 检查用户权限* @param userId 用户ID* @throws PermissionDeniedException 当权限不足时抛出*/public static void checkPermission(String userId) throws PermissionDeniedException {// 模拟检查权限if ("123".equals(userId)) {throw new PermissionDeniedException("用户权限不足: " + userId);}}public static void main(String[] args) {String userId = "123";try {checkUserExists(userId);checkPermission(userId);log.info("用户 {} 验证通过", userId);} catch (UserNotFoundException | PermissionDeniedException e) {log.error("验证失败: {}", e.getMessage());} catch (Exception e) {log.error("发生未知错误: {}", e.getMessage());}}
}
Python:
# 自定义异常示例
# @author kenclass UserNotFoundException(Exception):"""自定义异常:用户不存在异常"""passclass PermissionDeniedException(Exception):"""自定义异常:权限不足异常"""passdef check_user_exists(user_id):"""检查用户是否存在@param user_id: 用户ID@raise UserNotFoundException: 当用户不存在时抛出"""# 模拟检查用户是否存在if user_id == "000":raise UserNotFoundException(f"用户不存在: {user_id}")def check_permission(user_id):"""检查用户权限@param user_id: 用户ID@raise PermissionDeniedException: 当权限不足时抛出"""# 模拟检查权限if user_id == "123":raise PermissionDeniedException(f"用户权限不足: {user_id}")user_id = "123"try:check_user_exists(user_id)check_permission(user_id)print(f"用户 {user_id} 验证通过")
except (UserNotFoundException, PermissionDeniedException) as e:print(f"验证失败: {str(e)}")
except Exception as e:print(f"发生未知错误: {str(e)}")
9. 模块与包:从 Jar 到 Python 模块
9.1 模块的导入与使用
Java 中我们通过 import 语句导入类,Python 中则通过 import 语句导入模块:
Python 模块示例(创建一个名为math_utils.py的文件):
# 数学工具模块
# @author kenPI = 3.1415926535def add(a, b):"""加法运算"""return a + bdef subtract(a, b):"""减法运算"""return a - bdef multiply(a, b):"""乘法运算"""return a * bdef divide(a, b):"""除法运算"""if b == 0:raise ValueError("除数不能为0")return a / bdef circle_area(radius):"""计算圆的面积"""return PI * radius * radius
使用模块:
# 模块使用示例
# @author ken# 导入整个模块
import math_utilsprint(f"PI的值: {math_utils.PI}")
print(f"3 + 5 = {math_utils.add(3, 5)}")
print(f"半径为2的圆面积: {math_utils.circle_area(2)}")# 导入模块并指定别名
import math_utils as mu
print(f"10 - 4 = {mu.subtract(10, 4)}")# 导入模块中的特定函数或变量
from math_utils import multiply, PI
print(f"6 * 7 = {multiply(6, 7)}")
print(f"再次打印PI: {PI}")# 导入模块中的所有内容(不推荐)
from math_utils import *
print(f"10 / 2 = {divide(10, 2)}")
9.2 包的结构与使用
Python 的包类似于 Java 的包,是模块的集合。一个包含__init__.py文件的目录就是一个 Python 包。
包结构示例:
my_package/
├── __init__.py
├── math_utils.py
└── string_utils.py
__init__.py文件可以为空,也可以包含包的初始化代码:
# 包初始化文件
# @author ken# 声明包中可以导出的模块或函数
__all__ = ['math_utils', 'string_utils']print("my_package 包被导入了")
string_utils.py文件:
# 字符串工具模块
# @author kendef to_upper(s):"""转换为大写"""return s.upper()def to_lower(s):"""转换为小写"""return s.lower()def reverse(s):"""反转字符串"""return s[::-1]
使用包:
# 包使用示例
# @author ken# 从包中导入模块
from my_package import math_utils, string_utilsprint(f"5 * 8 = {math_utils.multiply(5, 8)}")
print(f"反转字符串: {string_utils.reverse('hello')}")# 导入模块并指定别名
from my_package import math_utils as mu
print(f"圆面积: {mu.circle_area(3)}")# 从包的模块中导入特定函数
from my_package.string_utils import to_upper
print(f"转换为大写: {to_upper('hello world')}")# 使用通配符导入(受__init__.py中__all__的限制)
from my_package import *
print(f"3.14 / 2 = {math_utils.divide(3.14, 2)}")
print(f"转换为小写: {string_utils.to_lower('HELLO')}")
9.3 常用标准库
Python 拥有丰富的标准库,相当于 Java 的 JDK 类库:
# 常用标准库示例
# @author ken# 时间日期处理
import time
import datetimeprint(f"当前时间戳: {time.time()}")
print(f"本地时间: {time.localtime()}")
print(f"格式化时间: {time.strftime('%Y-%m-%d %H:%M:%S')}")today = datetime.date.today()
print(f"今天日期: {today}")
tomorrow = today + datetime.timedelta(days=1)
print(f"明天日期: {tomorrow}")# 数学运算
import math
import randomprint(f"圆周率: {math.pi}")
print(f"正弦值: {math.sin(math.pi / 2)}")
print(f"平方根: {math.sqrt(16)}")print(f"随机整数: {random.randint(1, 100)}")
print(f"随机选择: {random.choice(['红', '绿', '蓝'])}")# 文件处理
import os
import shutilprint(f"当前目录: {os.getcwd()}")
print(f"目录内容: {os.listdir('.')}")# 注意:实际运行时请小心操作文件系统
# if not os.path.exists("test_dir"):
#     os.mkdir("test_dir")
#     print("创建目录成功")
#
# if os.path.exists("test_dir"):
#     os.rmdir("test_dir")
#     print("删除目录成功")# 数据压缩
import gzip
import json# 演示JSON处理
data = {"name": "张三", "age": 30, "hobbies": ["读书", "运动"]}
json_str = json.dumps(data, ensure_ascii=False)
print(f"JSON字符串: {json_str}")parsed_data = json.loads(json_str)
print(f"解析后的姓名: {parsed_data['name']}")
10. 文件操作:从 InputStream 到 Python 文件处理
10.1 文件读写基础
Java:
import lombok.extern.slf4j.Slf4j;
import java.io.*;
import java.nio.charset.StandardCharsets;
import java.nio.file.Files;
import java.nio.file.Paths;
import java.util.List;/*** 文件操作示例* @author ken*/
@Slf4j
public class FileOperationDemo {public static void main(String[] args) {String filename = "example.txt";// 写入文件try (BufferedWriter writer = new BufferedWriter(new OutputStreamWriter(new FileOutputStream(filename), StandardCharsets.UTF_8))) {writer.write("Hello, World!");writer.newLine();writer.write("这是一个文件写入示例。");log.info("文件写入成功");} catch (IOException e) {log.error("文件写入失败: {}", e.getMessage());}// 读取文件(按行读取)try (BufferedReader reader = new BufferedReader(new InputStreamReader(new FileInputStream(filename), StandardCharsets.UTF_8))) {String line;log.info("文件内容:");while ((line = reader.readLine()) != null) {log.info(line);}} catch (IOException e) {log.error("文件读取失败: {}", e.getMessage());}// 使用NIO读取所有行(Java 8+)try {List<String> lines = Files.readAllLines(Paths.get(filename), StandardCharsets.UTF_8);log.info("使用NIO读取文件内容:");for (String line : lines) {log.info(line);}} catch (IOException e) {log.error("NIO文件读取失败: {}", e.getMessage());}}
}
Python:
# 文件操作示例
# @author kenfilename = "example.txt"# 写入文件
try:with open(filename, "w", encoding="utf-8") as writer:writer.write("Hello, World!\n")writer.write("这是一个文件写入示例。")print("文件写入成功")
except IOError as e:print(f"文件写入失败: {str(e)}")# 读取文件(按行读取)
try:with open(filename, "r", encoding="utf-8") as reader:print("文件内容:")for line in reader:print(line.strip())  # strip()用于去除换行符
except IOError as e:print(f"文件读取失败: {str(e)}")# 读取所有内容
try:with open(filename, "r", encoding="utf-8") as reader:content = reader.read()print("所有文件内容:")print(content)
except IOError as e:print(f"文件读取失败: {str(e)}")# 读取所有行到列表
try:with open(filename, "r", encoding="utf-8") as reader:lines = reader.readlines()print("所有行:")for line in lines:print(line.strip())
except IOError as e:print(f"文件读取失败: {str(e)}")
10.2 二进制文件操作
Java:
import lombok.extern.slf4j.Slf4j;
import java.io.*;/*** 二进制文件操作示例* @author ken*/
@Slf4j
public class BinaryFileDemo {public static void main(String[] args) {String sourceFile = "source.bin";String destFile = "dest.bin";// 写入二进制文件try (DataOutputStream dos = new DataOutputStream(new FileOutputStream(sourceFile))) {dos.writeInt(42);dos.writeDouble(3.14159);dos.writeUTF("Hello, Binary World!");log.info("二进制文件写入成功");} catch (IOException e) {log.error("二进制文件写入失败: {}", e.getMessage());}// 读取二进制文件try (DataInputStream dis = new DataInputStream(new FileInputStream(sourceFile))) {int intValue = dis.readInt();double doubleValue = dis.readDouble();String stringValue = dis.readUTF();log.info("读取二进制数据:");log.info("整数: {}", intValue);log.info("浮点数: {}", doubleValue);log.info("字符串: {}", stringValue);} catch (IOException e) {log.error("二进制文件读取失败: {}", e.getMessage());}// 复制二进制文件try (InputStream in = new FileInputStream(sourceFile);OutputStream out = new FileOutputStream(destFile)) {byte[] buffer = new byte[1024];int bytesRead;while ((bytesRead = in.read(buffer)) != -1) {out.write(buffer, 0, bytesRead);}log.info("二进制文件复制成功");} catch (IOException e) {log.error("二进制文件复制失败: {}", e.getMessage());}}
}
Python:
# 二进制文件操作示例
# @author kensource_file = "source.bin"
dest_file = "dest.bin"# 写入二进制文件
try:with open(source_file, "wb") as f:# 写入整数(4字节,大端模式)f.write((42).to_bytes(4, byteorder='big'))# 写入双精度浮点数(8字节)import structf.write(struct.pack('d', 3.14159))# 写入字符串(UTF-8编码)f.write("Hello, Binary World!".encode('utf-8'))print("二进制文件写入成功")
except IOError as e:print(f"二进制文件写入失败: {str(e)}")# 读取二进制文件
try:with open(source_file, "rb") as f:# 读取整数int_bytes = f.read(4)int_value = int.from_bytes(int_bytes, byteorder='big')# 读取双精度浮点数double_bytes = f.read(8)double_value = struct.unpack('d', double_bytes)[0]# 读取字符串str_bytes = f.read()str_value = str_bytes.decode('utf-8')print("读取二进制数据:")print(f"整数: {int_value}")print(f"浮点数: {double_value}")print(f"字符串: {str_value}")
except IOError as e:print(f"二进制文件读取失败: {str(e)}")# 复制二进制文件
try:with open(source_file, "rb") as in_file, open(dest_file, "wb") as out_file:while True:buffer = in_file.read(1024)if not buffer:breakout_file.write(buffer)print("二进制文件复制成功")
except IOError as e:print(f"二进制文件复制失败: {str(e)}")
11. 数据库操作:从 JDBC 到 Python DB API
11.1 MySQL 数据库操作
Java(使用 MyBatis-Plus):
首先,添加 Maven 依赖(pom.xml):
<dependencies><!-- Lombok --><dependency><groupId>org.projectlombok</groupId><artifactId>lombok</artifactId><version>1.18.30</version><scope>provided</scope></dependency><!-- SLF4J API --><dependency><groupId>org.slf4j</groupId><artifactId>slf4j-api</artifactId><version>2.0.9</version></dependency><!-- SLF4J Simple binding for demonstration --><dependency><groupId>org.slf4j</groupId><artifactId>slf4j-simple</artifactId><version>2.0.9</version></dependency><!-- MySQL Connector --><dependency><groupId>com.mysql</groupId><artifactId>mysql-connector-j</artifactId><version>8.1.0</version></dependency><!-- MyBatis-Plus --><dependency><groupId>com.baomidou</groupId><artifactId>mybatis-plus-boot-starter</artifactId><version>3.5.3.1</version></dependency><!-- Spring Boot Starter (for demonstration) --><dependency><groupId>org.springframework.boot</groupId><artifactId>spring-boot-starter</artifactId><version>3.1.3</version></dependency>
</dependencies>
实体类:
import com.baomidou.mybatisplus.annotation.IdType;
import com.baomidou.mybatisplus.annotation.TableId;
import com.baomidou.mybatisplus.annotation.TableName;
import lombok.Data;
import io.swagger.v3.oas.annotations.media.Schema;
import java.time.LocalDateTime;/*** 用户实体类* @author ken*/
@Data
@TableName("user")
@Schema(description = "用户实体")
public class User {@TableId(type = IdType.AUTO)@Schema(description = "用户ID")private Long id;@Schema(description = "用户名")private String username;@Schema(description = "年龄")private Integer age;@Schema(description = "邮箱")private String email;@Schema(description = "创建时间")private LocalDateTime createTime;
}
Mapper 接口:
import com.baomidou.mybatisplus.core.mapper.BaseMapper;
import com.baomidou.mybatisplus.core.metadata.IPage;
import com.baomidou.mybatisplus.extension.plugins.pagination.Page;
import org.apache.ibatis.annotations.Mapper;
import org.apache.ibatis.annotations.Param;/*** 用户Mapper接口* @author ken*/
@Mapper
public interface UserMapper extends BaseMapper<User> {/*** 根据年龄查询用户* @param page 分页对象* @param age 年龄* @return 分页用户列表*/IPage<User> selectByAge(Page<User> page, @Param("age") Integer age);
}
服务类:
import com.baomidou.mybatisplus.core.metadata.IPage;
import com.baomidou.mybatisplus.extension.plugins.pagination.Page;
import com.baomidou.mybatisplus.extension.service.impl.ServiceImpl;
import lombok.extern.slf4j.Slf4j;
import org.springframework.stereotype.Service;
import java.time.LocalDateTime;
import java.util.List;/*** 用户服务类* @author ken*/
@Service
@Slf4j
public class UserService extends ServiceImpl<UserMapper, User> {/*** 创建用户* @param user 用户对象* @return 是否创建成功*/public boolean createUser(User user) {user.setCreateTime(LocalDateTime.now());return save(user);}/*** 根据ID查询用户* @param id 用户ID* @return 用户对象*/public User getUserById(Long id) {return getById(id);}/*** 查询所有用户* @return 用户列表*/public List<User> getAllUsers() {return list();}/*** 更新用户信息* @param user 用户对象* @return 是否更新成功*/public boolean updateUser(User user) {return updateById(user);}/*** 根据ID删除用户* @param id 用户ID* @return 是否删除成功*/public boolean deleteUser(Long id) {return removeById(id);}/*** 分页查询用户* @param pageNum 页码* @param pageSize 每页大小* @return 分页用户列表*/public IPage<User> getUsersByPage(int pageNum, int pageSize) {Page<User> page = new Page<>(pageNum, pageSize);return page(page);}/*** 根据年龄分页查询用户* @param pageNum 页码* @param pageSize 每页大小* @param age 年龄* @return 分页用户列表*/public IPage<User> getUsersByAge(int pageNum, int pageSize, Integer age) {Page<User> page = new Page<>(pageNum, pageSize);return baseMapper.selectByAge(page, age);}
}
使用示例:
import com.baomidou.mybatisplus.core.metadata.IPage;
import lombok.extern.slf4j.Slf4j;
import org.springframework.beans.factory.annotation.Autowired;
import org.springframework.boot.CommandLineRunner;
import org.springframework.boot.SpringApplication;
import org.springframework.boot.autoconfigure.SpringBootApplication;
import org.springframework.context.annotation.Bean;
import com.baomidou.mybatisplus.extension.plugins.MybatisPlusInterceptor;
import com.baomidou.mybatisplus.extension.plugins.inner.PaginationInnerInterceptor;/*** 数据库操作示例* @author ken*/
@SpringBootApplication
@Slf4j
public class DatabaseDemoApplication {@Autowiredprivate UserService userService;public static void main(String[] args) {SpringApplication.run(DatabaseDemoApplication.class, args);}/*** 配置MyBatis-Plus分页插件* @return MyBatis-Plus拦截器*/@Beanpublic MybatisPlusInterceptor mybatisPlusInterceptor() {MybatisPlusInterceptor interceptor = new MybatisPlusInterceptor();interceptor.addInnerInterceptor(new PaginationInnerInterceptor());return interceptor;}/*** 演示数据库操作* @return CommandLineRunner*/@Beanpublic CommandLineRunner demo() {return args -> {// 创建用户User user = new User();user.setUsername("张三");user.setAge(25);user.setEmail("zhangsan@example.com");boolean created = userService.createUser(user);log.info("创建用户: {}", created ? "成功" : "失败");Long userId = user.getId();log.info("新创建用户ID: {}", userId);// 查询用户User foundUser = userService.getUserById(userId);log.info("查询到用户: {}", foundUser);// 更新用户if (foundUser != null) {foundUser.setAge(26);boolean updated = userService.updateUser(foundUser);log.info("更新用户: {}", updated ? "成功" : "失败");}// 分页查询IPage<User> page = userService.getUsersByPage(1, 10);log.info("分页查询: 总记录数={}, 总页数={}", page.getTotal(), page.getPages());log.info("当前页数据: {}", page.getRecords());// 根据年龄查询IPage<User> agePage = userService.getUsersByAge(1, 10, 26);log.info("根据年龄查询: {}", agePage.getRecords());// 删除用户if (userId != null) {boolean deleted = userService.deleteUser(userId);log.info("删除用户: {}", deleted ? "成功" : "失败");}};}
}
Python(使用 PyMySQL 和 SQLAlchemy):
首先安装依赖:
pip install pymysql sqlalchemy
Python 代码:
# MySQL数据库操作示例
# @author kenfrom sqlalchemy import create_engine, Column, Integer, String, DateTime
from sqlalchemy.ext.declarative import declarative_base
from sqlalchemy.orm import sessionmaker
from datetime import datetime
import pymysql# 数据库连接配置
DB_CONFIG = {'host': 'localhost','port': 3306,'user': 'root','password': 'password',  # 替换为你的密码'database': 'test_db','charset': 'utf8mb4'
}# 创建数据库引擎
engine = create_engine(f"mysql+pymysql://{DB_CONFIG['user']}:{DB_CONFIG['password']}@{DB_CONFIG['host']}:"f"{DB_CONFIG['port']}/{DB_CONFIG['database']}?charset={DB_CONFIG['charset']}"
)# 创建会话工厂
Session = sessionmaker(bind=engine)# 声明基类
Base = declarative_base()class User(Base):"""用户模型类"""__tablename__ = 'user'id = Column(Integer, primary_key=True, autoincrement=True)username = Column(String(50), nullable=False)age = Column(Integer)email = Column(String(100))create_time = Column(DateTime, default=datetime.now)def __repr__(self):return f"<User(id={self.id}, username='{self.username}', age={self.age}, email='{self.email}')>"# 创建表(如果不存在)
Base.metadata.create_all(engine)def create_user(username, age, email):"""创建用户@param username: 用户名@param age: 年龄@param email: 邮箱@return: 创建的用户对象"""session = Session()try:user = User(username=username, age=age, email=email)session.add(user)session.commit()print(f"创建用户成功: {user}")return userexcept Exception as e:session.rollback()print(f"创建用户失败: {str(e)}")return Nonefinally:session.close()def get_user_by_id(user_id):"""根据ID查询用户@param user_id: 用户ID@return: 用户对象"""session = Session()try:user = session.query(User).filter_by(id=user_id).first()if user:print(f"查询到用户: {user}")else:print(f"未找到ID为{user_id}的用户")return userexcept Exception as e:print(f"查询用户失败: {str(e)}")return Nonefinally:session.close()def get_all_users():"""查询所有用户@return: 用户列表"""session = Session()try:users = session.query(User).all()print(f"查询到{len(users)}个用户")return usersexcept Exception as e:print(f"查询所有用户失败: {str(e)}")return []finally:session.close()def update_user(user_id, **kwargs):"""更新用户信息@param user_id: 用户ID@param kwargs: 要更新的字段@return: 是否更新成功"""session = Session()try:user = session.query(User).filter_by(id=user_id).first()if not user:print(f"未找到ID为{user_id}的用户")return False# 更新字段for key, value in kwargs.items():if hasattr(user, key):setattr(user, key, value)session.commit()print(f"更新用户成功: {user}")return Trueexcept Exception as e:session.rollback()print(f"更新用户失败: {str(e)}")return Falsefinally:session.close()def delete_user(user_id):"""根据ID删除用户@param user_id: 用户ID@return: 是否删除成功"""session = Session()try:user = session.query(User).filter_by(id=user_id).first()if not user:print(f"未找到ID为{user_id}的用户")return Falsesession.delete(user)session.commit()print(f"删除用户成功: ID={user_id}")return Trueexcept Exception as e:session.rollback()print(f"删除用户失败: {str(e)}")return Falsefinally:session.close()def get_users_by_page(page_num=1, page_size=10):"""分页查询用户@param page_num: 页码@param page_size: 每页大小@return: 分页用户列表和总记录数"""session = Session()try:# 计算偏移量offset = (page_num - 1) * page_size# 查询总数total = session.query(User).count()# 分页查询users = session.query(User).offset(offset).limit(page_size).all()print(f"分页查询: 页码={page_num}, 每页大小={page_size}, 总记录数={total}")return users, totalexcept Exception as e:print(f"分页查询失败: {str(e)}")return [], 0finally:session.close()def get_users_by_age(age, page_num=1, page_size=10):"""根据年龄分页查询用户@param age: 年龄@param page_num: 页码@param page_size: 每页大小@return: 分页用户列表和总记录数"""session = Session()try:# 计算偏移量offset = (page_num - 1) * page_size# 查询总数total = session.query(User).filter_by(age=age).count()# 分页查询users = session.query(User).filter_by(age=age).offset(offset).limit(page_size).all()print(f"根据年龄查询: 年龄={age}, 页码={page_num}, 总记录数={total}")return users, totalexcept Exception as e:print(f"根据年龄查询失败: {str(e)}")return [], 0finally:session.close()# 演示数据库操作
if __name__ == "__main__":# 创建用户user = create_user("张三", 25, "zhangsan@example.com")if user:user_id = user.id# 查询用户get_user_by_id(user_id)# 更新用户update_user(user_id, age=26)# 分页查询users, total = get_users_by_page(1, 10)print(f"当前页用户: {users}")# 根据年龄查询age_users, age_total = get_users_by_age(26)print(f"年龄为26的用户: {age_users}")# 删除用户delete_user(user_id)
12. 并发编程:从线程到 Python 的并发模型
12.1 多线程基础
Java:
import lombok.extern.slf4j.Slf4j;
import java.util.concurrent.ExecutorService;
import java.util.concurrent.Executors;
import java.util.concurrent.TimeUnit;/*** 多线程示例* @author ken*/
@Slf4j
public class MultithreadingDemo {/*** 计数器类*/public static class Counter {private int count = 0;/*** 增加计数(线程安全)*/public synchronized void increment() {count++;}/*** 获取当前计数* @return 当前计数值*/public int getCount() {return count;}}/*** 线程任务:计数*/public static class CountingTask implements Runnable {private final Counter counter;private final int iterations;public CountingTask(Counter counter, int iterations) {this.counter = counter;this.iterations = iterations;}@Overridepublic void run() {String threadName = Thread.currentThread().getName();log.info("线程 {} 开始执行", threadName);for (int i = 0; i < iterations; i++) {counter.increment();// 模拟耗时操作try {Thread.sleep(1);} catch (InterruptedException e) {log.error("线程 {} 被中断", threadName);Thread.currentThread().interrupt();return;}}log.info("线程 {} 执行完毕", threadName);}}public static void main(String[] args) throws InterruptedException {// 创建计数器Counter counter = new Counter();int iterationsPerThread = 1000;int threadCount = 5;// 创建线程池ExecutorService executor = Executors.newFixedThreadPool(threadCount);// 提交任务for (int i = 0; i < threadCount; i++) {executor.submit(new CountingTask(counter, iterationsPerThread));}// 关闭线程池executor.shutdown();// 等待所有任务完成if (executor.awaitTermination(1, TimeUnit.MINUTES)) {log.info("所有线程执行完毕");log.info("最终计数: {} (预期: {})", counter.getCount(), threadCount * iterationsPerThread);} else {log.error("等待超时,仍有线程在运行");}}
}
Python:
# 多线程示例
# @author kenimport threading
import time
from concurrent.futures import ThreadPoolExecutorclass Counter:"""计数器类"""def __init__(self):self.count = 0self.lock = threading.Lock()  # 锁对象,用于保证线程安全def increment(self):"""增加计数(线程安全)"""with self.lock:  # 使用上下文管理器自动获取和释放锁self.count += 1def get_count(self):"""获取当前计数"""return self.countdef counting_task(counter, iterations, thread_name):"""计数任务函数"""print(f"线程 {thread_name} 开始执行")for _ in range(iterations):counter.increment()# 模拟耗时操作time.sleep(0.001)print(f"线程 {thread_name} 执行完毕")def main():# 创建计数器counter = Counter()iterations_per_thread = 1000thread_count = 5# 创建线程池with ThreadPoolExecutor(max_workers=thread_count) as executor:# 提交任务for i in range(thread_count):executor.submit(counting_task, counter, iterations_per_thread, f"Thread-{i+1}")# 所有任务完成后print("所有线程执行完毕")print(f"最终计数: {counter.get_count()} (预期: {thread_count * iterations_per_thread})")if __name__ == "__main__":main()
12.2 Python 的 GIL 与多进程
由于 Python 的全局解释器锁(GIL),多线程在 CPU 密集型任务中并不能真正并行。对于这类任务,应该使用多进程:
# 多进程示例(适用于CPU密集型任务)
# @author kenimport multiprocessing
import timedef cpu_intensive_task(start, end):"""CPU密集型任务:计算从start到end的和"""process_name = multiprocessing.current_process().nameprint(f"进程 {process_name} 开始执行: 计算 {start} 到 {end} 的和")total = 0for i in range(start, end):total += iprint(f"进程 {process_name} 执行完毕,结果: {total}")return totaldef main():# 定义任务范围ranges = [(1, 25000000),(25000000, 50000000),(50000000, 75000000),(75000000, 100000000)]# 记录开始时间start_time = time.time()# 使用多进程with multiprocessing.Pool(processes=4) as pool:# 映射任务到进程池results = pool.starmap(cpu_intensive_task, ranges)# 计算总结果total = sum(results)# 记录结束时间end_time = time.time()print(f"所有进程执行完毕,总和: {total}")print(f"总耗时: {end_time - start_time:.2f} 秒")if __name__ == "__main__":main()
13. 实战项目:简易 RESTful API 服务
13.1 Java 版本(Spring Boot + Spring MVC)
首先,添加 Maven 依赖(pom.xml):
<dependencies><!-- Lombok --><dependency><groupId>org.projectlombok</groupId><artifactId>lombok</artifactId><version>1.18.30</version><scope>provided</scope></dependency><!-- SLF4J API --><dependency><groupId>org.slf4j</groupId><artifactId>slf4j-api</artifactId><version>2.0.9</version></dependency><!-- Spring Boot Starter Web --><dependency><groupId>org.springframework.boot</groupId><artifactId>spring-boot-starter-web</artifactId><version>3.1.3</version></dependency><!-- Spring Boot Starter Validation --><dependency><groupId>org.springframework.boot</groupId><artifactId>spring-boot-starter-validation</artifactId><version>3.1.3</version></dependency><!-- Swagger 3 --><dependency><groupId>org.springdoc</groupId><artifactId>springdoc-openapi-starter-webmvc-ui</artifactId><version>2.1.0</version></dependency>
</dependencies>
实体类:
import io.swagger.v3.oas.annotations.media.Schema;
import jakarta.validation.constraints.Email;
import jakarta.validation.constraints.NotBlank;
import jakarta.validation.constraints.PositiveOrZero;
import lombok.Data;/*** 用户实体类* @author ken*/
@Data
@Schema(description = "用户实体")
public class User {@Schema(description = "用户ID", example = "1")private Long id;@NotBlank(message = "用户名不能为空")@Schema(description = "用户名", example = "张三")private String username;@PositiveOrZero(message = "年龄不能为负数")@Schema(description = "年龄", example = "25")private Integer age;@Email(message = "邮箱格式不正确")@Schema(description = "邮箱", example = "zhangsan@example.com")private String email;
}
服务类:
import lombok.extern.slf4j.Slf4j;
import org.springframework.stereotype.Service;
import org.springframework.util.CollectionUtils;
import java.util.*;
import java.util.concurrent.ConcurrentHashMap;
import java.util.concurrent.atomic.AtomicLong;/*** 用户服务类* @author ken*/
@Service
@Slf4j
public class UserService {// 内存存储用户数据private final Map<Long, User> userMap = new ConcurrentHashMap<>();// 自增ID生成器private final AtomicLong idGenerator = new AtomicLong(1);/*** 创建用户* @param user 用户对象* @return 创建的用户对象(包含ID)*/public User createUser(User user) {log.info("创建用户: {}", user);Long userId = idGenerator.getAndIncrement();user.setId(userId);userMap.put(userId, user);return user;}/*** 根据ID查询用户* @param id 用户ID* @return 用户对象,不存在则返回null*/public User getUserById(Long id) {log.info("查询用户: ID={}", id);return userMap.get(id);}/*** 查询所有用户* @return 用户列表*/public List<User> getAllUsers() {log.info("查询所有用户");Collection<User> users = userMap.values();return CollectionUtils.isEmpty(users) ? Collections.emptyList() : new ArrayList<>(users);}/*** 更新用户信息* @param id 用户ID* @param user 用户对象(包含更新信息)* @return 更新后的用户对象,用户不存在则返回null*/public User updateUser(Long id, User user) {log.info("更新用户: ID={}, 新信息={}", id, user);if (!userMap.containsKey(id)) {return null;}User existingUser = userMap.get(id);if (user.getUsername() != null) {existingUser.setUsername(user.getUsername());}if (user.getAge() != null) {existingUser.setAge(user.getAge());}if (user.getEmail() != null) {existingUser.setEmail(user.getEmail());}userMap.put(id, existingUser);return existingUser;}/*** 根据ID删除用户* @param id 用户ID* @return 是否删除成功*/public boolean deleteUser(Long id) {log.info("删除用户: ID={}", id);return userMap.remove(id) != null;}
}
控制器:
import io.swagger.v3.oas.annotations.Operation;
import io.swagger.v3.oas.annotations.Parameter;
import io.swagger.v3.oas.annotations.media.Content;
import io.swagger.v3.oas.annotations.media.Schema;
import io.swagger.v3.oas.annotations.responses.ApiResponse;
import io.swagger.v3.oas.annotations.responses.ApiResponses;
import io.swagger.v3.oas.annotations.tags.Tag;
import jakarta.validation.Valid;
import lombok.extern.slf4j.Slf4j;
import org.springframework.http.HttpStatus;
import org.springframework.http.ResponseEntity;
import org.springframework.web.bind.annotation.*;
import java.util.List;/*** 用户控制器* 提供RESTful API接口* @author ken*/
@RestController
@RequestMapping("/api/users")
@Slf4j
@Tag(name = "用户管理", description = "用户CRUD操作的API接口")
public class UserController {private final UserService userService;public UserController(UserService userService) {this.userService = userService;}/*** 创建用户* @param user 用户对象* @return 创建的用户对象*/@PostMapping@Operation(summary = "创建用户", description = "添加新用户到系统")@ApiResponses({@ApiResponse(responseCode = "201", description = "用户创建成功",content = @Content(schema = @Schema(implementation = User.class))),@ApiResponse(responseCode = "400", description = "请求参数错误")})public ResponseEntity<User> createUser(@Valid @RequestBody @Parameter(description = "用户信息") User user) {User createdUser = userService.createUser(user);return new ResponseEntity<>(createdUser, HttpStatus.CREATED);}/*** 根据ID查询用户* @param id 用户ID* @return 用户对象*/@GetMapping("/{id}")@Operation(summary = "查询用户", description = "根据ID查询用户信息")@ApiResponses({@ApiResponse(responseCode = "200", description = "查询成功",content = @Content(schema = @Schema(implementation = User.class))),@ApiResponse(responseCode = "404", description = "用户不存在")})public ResponseEntity<User> getUserById(@PathVariable @Parameter(description = "用户ID") Long id) {User user = userService.getUserById(id);if (user == null) {return new ResponseEntity<>(HttpStatus.NOT_FOUND);}return ResponseEntity.ok(user);}/*** 查询所有用户* @return 用户列表*/@GetMapping@Operation(summary = "查询所有用户", description = "获取系统中所有用户的列表")@ApiResponse(responseCode = "200", description = "查询成功",content = @Content(schema = @Schema(implementation = User.class)))public ResponseEntity<List<User>> getAllUsers() {List<User> users = userService.getAllUsers();return ResponseEntity.ok(users);}/*** 更新用户信息* @param id 用户ID* @param user 用户对象(包含更新信息)* @return 更新后的用户对象*/@PutMapping("/{id}")@Operation(summary = "更新用户", description = "根据ID更新用户信息")@ApiResponses({@ApiResponse(responseCode = "200", description = "更新成功",content = @Content(schema = @Schema(implementation = User.class))),@ApiResponse(responseCode = "400", description = "请求参数错误"),@ApiResponse(responseCode = "404", description = "用户不存在")})public ResponseEntity<User> updateUser(@PathVariable @Parameter(description = "用户ID") Long id,@Valid @RequestBody @Parameter(description = "更新的用户信息") User user) {User updatedUser = userService.updateUser(id, user);if (updatedUser == null) {return new ResponseEntity<>(HttpStatus.NOT_FOUND);}return ResponseEntity.ok(updatedUser);}/*** 根据ID删除用户* @param id 用户ID* @return 无内容*/@DeleteMapping("/{id}")@Operation(summary = "删除用户", description = "根据ID删除用户")@ApiResponses({@ApiResponse(responseCode = "204", description = "删除成功"),@ApiResponse(responseCode = "404", description = "用户不存在")})public ResponseEntity<Void> deleteUser(@PathVariable @Parameter(description = "用户ID") Long id) {boolean deleted = userService.deleteUser(id);if (!deleted) {return new ResponseEntity<>(HttpStatus.NOT_FOUND);}return new ResponseEntity<>(HttpStatus.NO_CONTENT);}
}
启动类:
import org.springframework.boot.SpringApplication;
import org.springframework.boot.autoconfigure.SpringBootApplication;
import io.swagger.v3.oas.annotations.OpenAPIDefinition;
import io.swagger.v3.oas.annotations.info.Info;/*** RESTful API服务启动类* @author ken*/
@SpringBootApplication
@OpenAPIDefinition(info = @Info(title = "用户管理API",version = "1.0",description = "简易用户管理系统的RESTful API接口文档")
)
public class RestApiApplication {public static void main(String[] args) {SpringApplication.run(RestApiApplication.class, args);}
}
13.2 Python 版本(FastAPI)
首先安装依赖:
pip install fastapi uvicorn pydantic
Python 代码:
# 简易RESTful API服务(FastAPI)
# @author kenfrom fastapi import FastAPI, HTTPException, status
from pydantic import BaseModel, EmailStr, field_validator
from typing import List, Optional, Dict
import uvicorn
from fastapi.middleware.cors import CORSMiddleware
import logging# 配置日志
logging.basicConfig(level=logging.INFO)
logger = logging.getLogger(__name__)# 创建FastAPI应用
app = FastAPI(title="用户管理API",description="简易用户管理系统的RESTful API接口",version="1.0.0"
)# 配置CORS
app.add_middleware(CORSMiddleware,allow_origins=["*"],allow_credentials=True,allow_methods=["*"],allow_headers=["*"],
)# 数据模型
class User(BaseModel):"""用户模型"""id: Optional[int] = Noneusername: strage: Optional[int] = Noneemail: Optional[EmailStr] = None@field_validator('age')def age_must_be_non_negative(cls, v):"""验证年龄必须为非负数"""if v is not None and v < 0:raise ValueError('年龄不能为负数')return v# 内存存储
users: Dict[int, User] = {}
next_id = 1# API接口
@app.post("/api/users", response_model=User, status_code=status.HTTP_201_CREATED)
def create_user(user: User):"""创建新用户@param user: 用户信息@return: 创建的用户对象(包含ID)"""global next_idlogger.info(f"创建用户: {user}")# 为新用户分配IDuser.id = next_idusers[next_id] = usernext_id += 1return user@app.get("/api/users/{user_id}", response_model=User)
def get_user(user_id: int):"""根据ID查询用户@param user_id: 用户ID@return: 用户对象"""logger.info(f"查询用户: ID={user_id}")if user_id not in users:raise HTTPException(status_code=status.HTTP_404_NOT_FOUND,detail=f"用户ID {user_id} 不存在")return users[user_id]@app.get("/api/users", response_model=List[User])
def get_all_users():"""查询所有用户@return: 用户列表"""logger.info("查询所有用户")return list(users.values())@app.put("/api/users/{user_id}", response_model=User)
def update_user(user_id: int, user_update: User):"""更新用户信息@param user_id: 用户ID@param user_update: 包含更新信息的用户对象@return: 更新后的用户对象"""logger.info(f"更新用户: ID={user_id}, 新信息={user_update}")if user_id not in users:raise HTTPException(status_code=status.HTTP_404_NOT_FOUND,detail=f"用户ID {user_id} 不存在")# 获取现有用户existing_user = users[user_id]# 更新字段(只更新提供的字段)if user_update.username is not None:existing_user.username = user_update.usernameif user_update.age is not None:existing_user.age = user_update.ageif user_update.email is not None:existing_user.email = user_update.emailusers[user_id] = existing_userreturn existing_user@app.delete("/api/users/{user_id}", status_code=status.HTTP_204_NO_CONTENT)
def delete_user(user_id: int):"""根据ID删除用户@param user_id: 用户ID"""logger.info(f"删除用户: ID={user_id}")if user_id not in users:raise HTTPException(status_code=status.HTTP_404_NOT_FOUND,detail=f"用户ID {user_id} 不存在")del users[user_id]return None# 启动服务
if __name__ == "__main__":uvicorn.run(app, host="0.0.0.0", port=8000)
14. Java 与 Python 的核心差异总结
| 特性 | Java | Python |
|---|---|---|
| 类型系统 | 静态类型,编译时检查 | 动态类型,运行时检查 |
| 语法风格 | 强调显式声明,使用大括号和分号 | 简洁,使用缩进来划分代码块 |
| 性能 | 编译为字节码,性能较好 | 解释执行,通常性能较低 |
| 并发模型 | 多线程,真正并行 | 受 GIL 限制,多线程不适合 CPU 密集型任务,常用多进程 |
| 生态系统 | 强大的企业级库,Spring 生态 | 丰富的数据科学、AI 库,简洁的 Web 框架 |
| 代码量 | 相对冗长 | 简洁,代码量通常较少 |
| 学习曲线 | 较陡峭 | 较平缓,易于上手 |
| 应用场景 | 企业级应用,Android 开发 | 数据分析,AI,脚本,快速原型开发 |
Java vs Python

15. 总结与下一步学习建议
通过本教程,我们从 Java 开发者的视角快速了解了 Python 的核心语法和特性。我们对比了两种语言在数据类型、控制流、函数、面向对象、异常处理、文件操作、数据库访问和并发编程等方面的异同。
作为 Java 开发者,学习 Python 有以下优势:
- 可以快速理解面向对象概念,只需适应 Python 的语法差异
- 熟悉的编程思想(如封装、继承、多态)在 Python 中同样适用
- 已有的数据库和网络编程知识可以迁移应用
下一步学习建议:
- 深入学习 Python 特有的高级特性:装饰器、生成器、上下文管理器等
- 探索 Python 丰富的第三方库:NumPy/Pandas(数据分析)、Django/Flask(Web 开发)、TensorFlow/PyTorch(机器学习)
- 实践更多项目,如 Web 服务、数据处理脚本、自动化工具等
- 学习 Python 的测试框架(如 pytest)和代码规范(PEP 8)
Python 以其简洁、灵活和强大的生态系统,为开发者提供了另一种高效的编程选择。作为 Java 开发者,掌握 Python 不仅能拓宽技术视野,更能在合适的场景下选择最适合的工具,提高开发效率。
祝你在 Python 的学习之旅中取得更多收获!