Windows安装mamba最佳实践(WSL ubuntu丝滑版)
Windows安装mamba最佳实践(WSL丝滑版)
- 1. WSL基本配置及使用WSL安装ubuntu
- (1) WSL配置
- (2) 使用WSL安装ubuntu
- (3)ubuntu安装更改盘符
- 2. Conda环境准备
- (1)更换清华镜像源
- (2) conda环境安装
- (3)创建mamba相关的conda环境
- 3. Toolkit12.4安装
- 4. pytorch相关安装
- 5. triton安装
- 6. causal-conv1d源码安装
- 7. mamba的安装
实践参考于:https://www.cnblogs.com/stribik/articles/18823234
本人电脑配置:
win11 ,RTX3080 ,16G运行内存
CUDA Driver 12.7 + CUDA Toolkit 12.4
Python 3.10
PyTorch 2.4.1 + cu124
CUDA 12.4
1. WSL基本配置及使用WSL安装ubuntu
(1) WSL配置
cmd管理员模式运行以下指令:
启用 Windows 子系统(WSL)功能
dism.exe /online /enable-feature /featurename:Microsoft-Windows-Subsystem-Linux /all /norestart
WSL2 依赖 Windows 虚拟机功能,需要额外启用:
dism.exe /online /enable-feature /featurename:VirtualMachinePlatform /all /norestart
设置wsl版本为wsl2:(win11 默认wsl2,如果是win10必须执行一下)
wsl --set-default-version 2
更新wsl:
wsl --update
修改一下WSL子系统的网络模式,否则可能在之后的安装中出现网络问题。
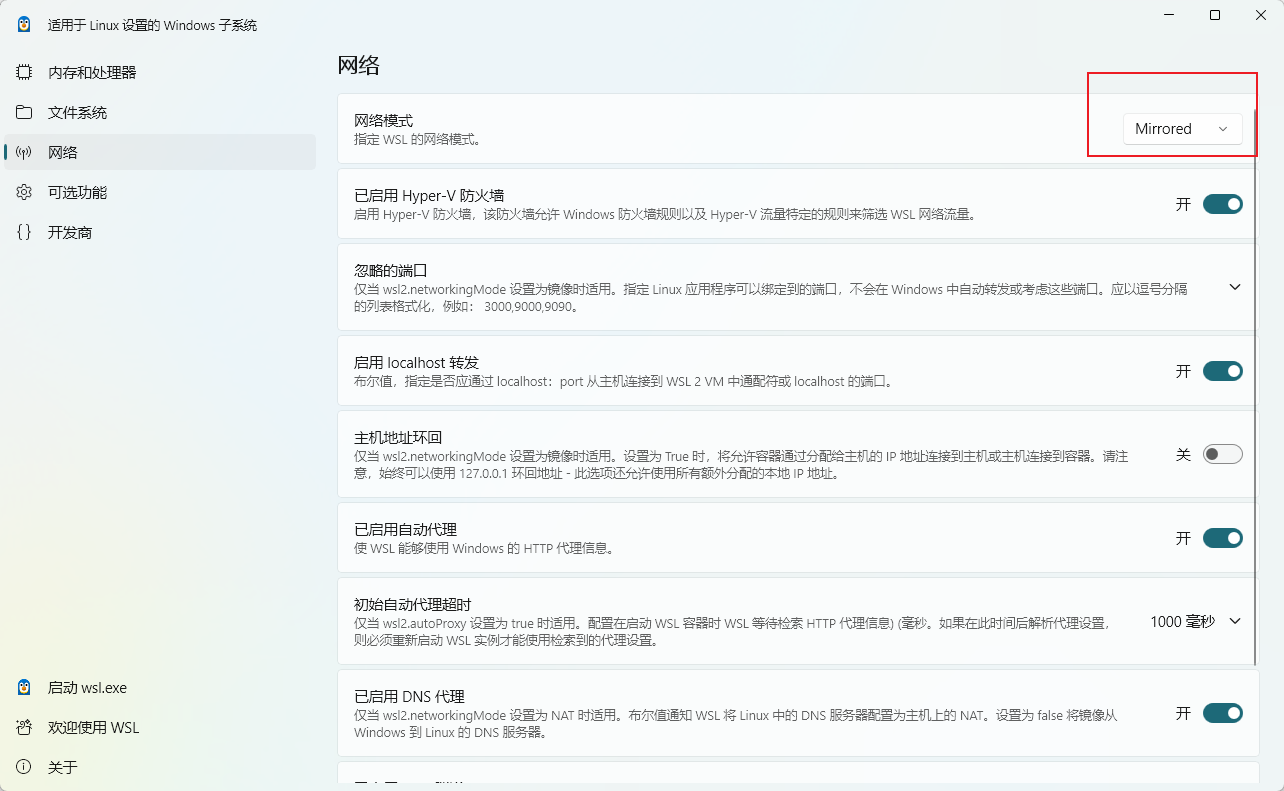
重启一下电脑确保生效。
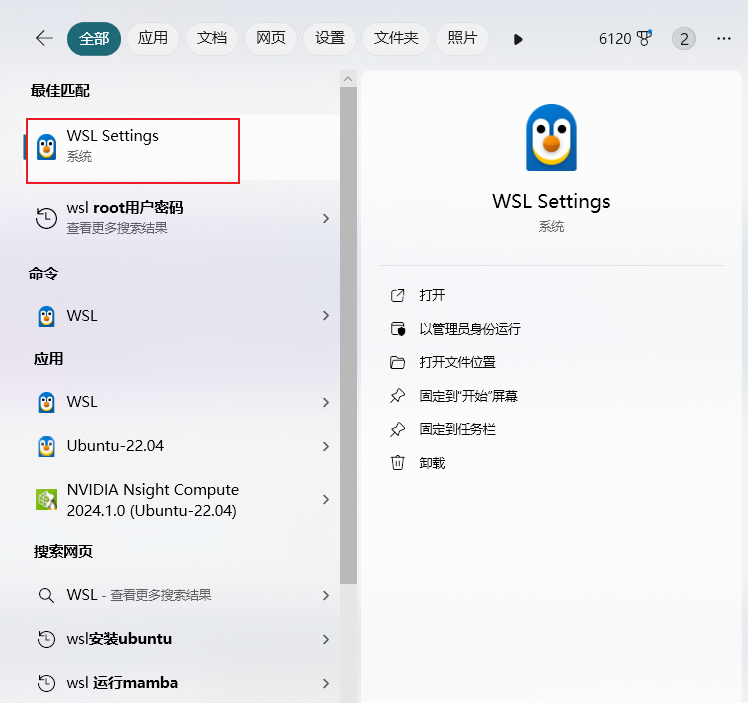
(2) 使用WSL安装ubuntu
查看可以安装的wsl列表:
wsl --list --online
选择你要安装的版本(这里我本地安装的是ubuntu 22.04)
wsl --install -d Ubuntu-22.04
然后按照提示设置用户名密码,之后如果顺利可以安装成果。
【踩坑记录1】如果你顺利安装,可跳过该段内容:
在执行 wsl --install -d Ubuntu-22.04 命令时出现了报错,或者说没出现报错安装一直在等待,无法执行。这可能是本机网络出现了问题或者域名解析服务器。可以尝试修改WSL子系统的网络模式,或本机的域名解析地址,或按照以下方式尝试。
报错内容:
无法从 'https://raw.githubusercontent.com/microsoft/WSL/master/distributions/DistributionInfo.json’提取列表分发。无法解析服务器的名称或地址
Error code: Wsl/WININET_E_NAME_NOT_RESOLVED
解决方案:
找到hosts文件,修改hosts
大概在这个文件夹下:C:\WINDOWS\System32\drivers\etc

在hosts文本文件中,添加任意一个以下一行
185.199.108.133 raw.githubusercontent.com
185.199.109.133 raw.githubusercontent.com
185.199.110.133 raw.githubusercontent.com
185.199.111.133 raw.githubusercontent.com
参考文档:
https://blog.csdn.net/libusi001/article/details/108516673
https://www.cnblogs.com/edeny/p/18440288
(3)ubuntu安装更改盘符
WSL安装ubuntu默认安装在C盘,该操作是将ubuntu转移至别的盘中,避免之后C盘爆满,影响使用,如果你的C盘内存足够用,可跳过该步骤。
查看wsl运行的Ubuntu版本:
wsl -l --all -v
导出tar文件到我想要的盘里面,这里我导出到我的D盘:
wsl --export Ubuntu-22.04 d:\WSL_EX\wsl-ubuntu22.04.tar
注销当前的发行版本:
wsl --unregister Ubuntu-22.04
重新导入刚刚导出的东西:
wsl --import Ubuntu-22.04 d:\WSL_EX d:\WSL_EX\wsl-ubuntu22.04.tar --version 2
可以在D盘对应文件夹下看到:
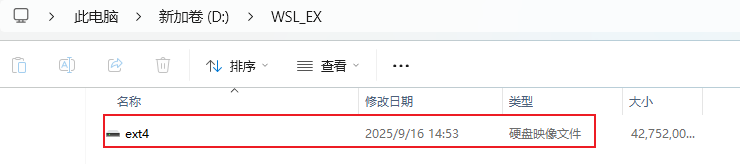
安装目录迁移完成,tar文件可删除。
至此,ubuntu22.04准备好了。
2. Conda环境准备
(1)更换清华镜像源
更换清华镜像源是为了更顺畅的安装ubuntu的相关软件,提高apt update 速度,点击下面链接,选择自己的ubuntu版本,将给出的内容贴到本机的ubuntu配置文件中。
https://mirror.tuna.tsinghua.edu.cn/help/ubuntu/
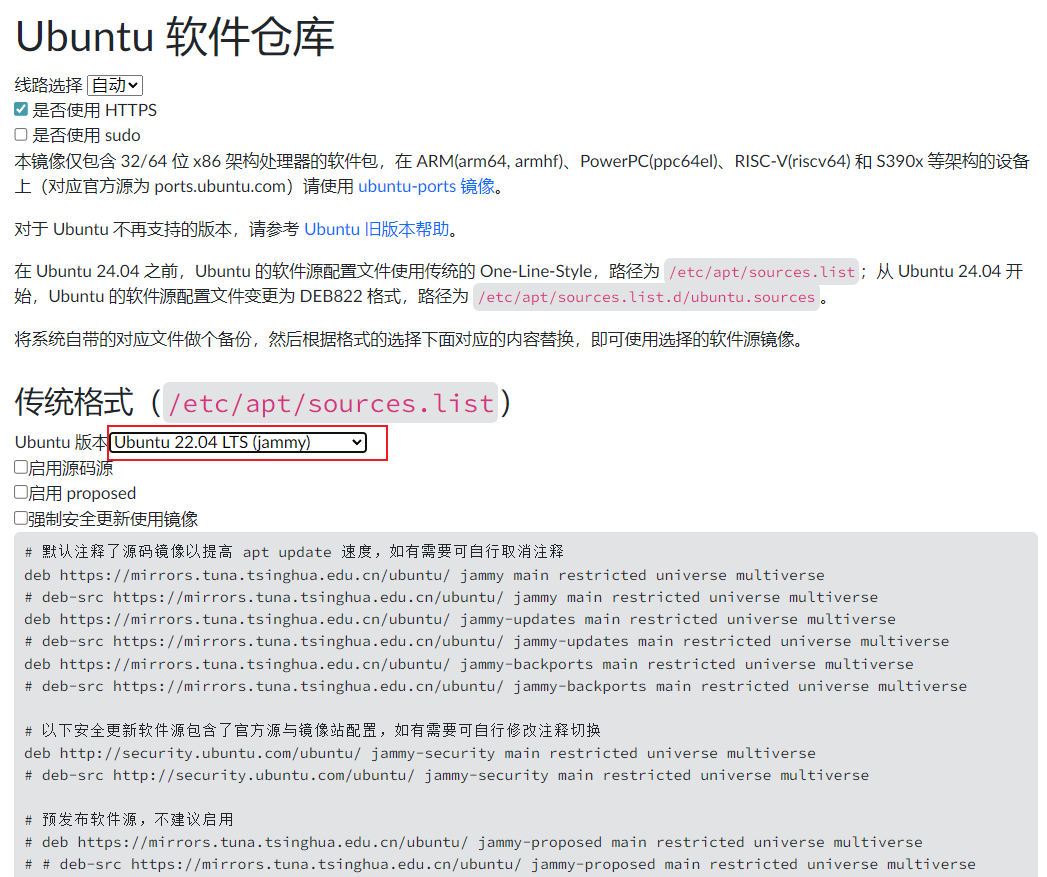
打开本机的ubuntu命令行,编辑sources.list文件,将从网站复制的内容,贴进该文件,原来的文件内容注释掉。
vim /etc/apt/sources.list
粘贴好后,保存退出。(ESC + : + wq + 回车)
刷新
sudo apt-get update
sudo apt-get upgrade
(2) conda环境安装
Conda环境可以安装anaconda,也可以采用miniconda,这里我使用的是miniconda。需要注意的是,每一个miniconda版本对应着不同的python版本,不能盲目安装!
我想用的python版本是3.10,所以不能采用默认的下载方式安装最新版本的miniconda,所以选择了24.5.0,具体的版本可以在以下的链接查看,这里给出我选择的版本。
https://docs.anaconda.net.cn/miniconda/miniconda-other-installer-links/
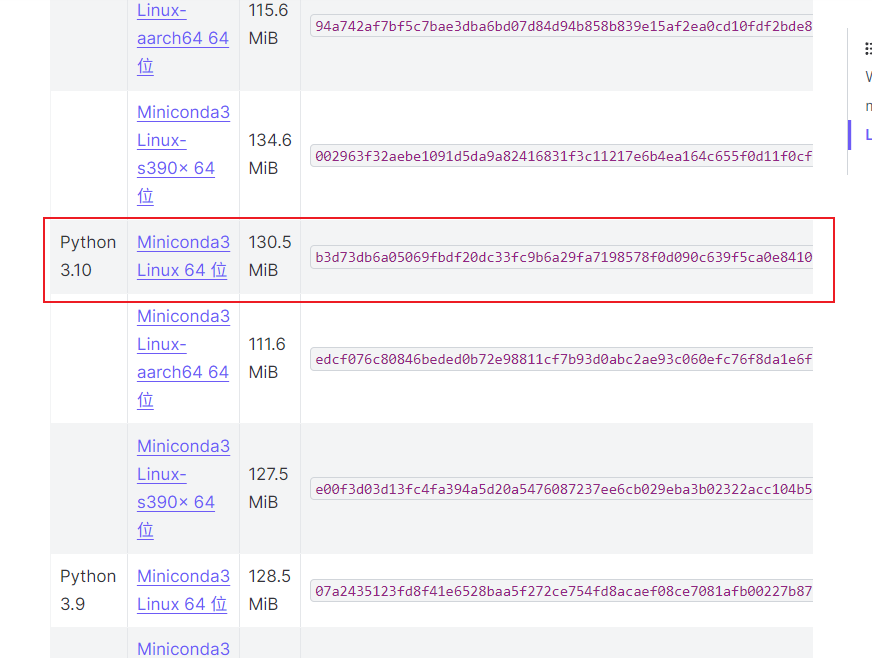
下载下来是.sh文件,将它放到ubuntu系统目录的/root/下,用参考文档中的方式进行安装即可,具体安装命令如下所示:
cd /root
chmod ++x Miniconda3-py310_24.5.0-0-Linux-x86_64.sh
./Miniconda3-py310_24.5.0-0-Linux-x86_64.sh
安装过程中,有的地方需要回车和选择yes,一路回车+yes即可。
安装好后可以进行换源,切换为Conda的清华源,但是!
我切换到清华源后发现很多第三方包下载不了,所以之后就先没有切换到清华源,直接使用默认的下载源进行安装。这里建议先不要换清华源,先尝试使用默认下载源,如果下载速度太慢,再尝试清华源。下面先贴出换源的命令。
conda config --add channels https://mirrors.tuna.tsinghua.edu.cn/anaconda/cloud/msys2/
conda config --add channels https://mirrors.tuna.tsinghua.edu.cn/anaconda/cloud/conda-forge
conda config --add channels https://mirrors.tuna.tsinghua.edu.cn/anaconda/pkgs/free/
conda config --add channels https://mirrors.tuna.tsinghua.edu.cn/anaconda/cloud/pytorch/
conda config --add channels https://mirrors.tuna.tsinghua.edu.cn/anaconda/pkgs/main/
conda config --set show_channel_urls yes
(3)创建mamba相关的conda环境
创建一个mamba的conda环境
conda create -n mamba python=3.10
然后激活这个这个conda环境
conda activate mamba
接下来所有的安装都在该Conda环境下进行,一定要注意!
3. Toolkit12.4安装
我的CUDA驱动版本是12.7,我使用的CUDA Toolkit是12.4,即Driver 12.7 + Toolkit 12.4。
(注意: CUDA Toolkit版本一定要 <= CUDA驱动版本)
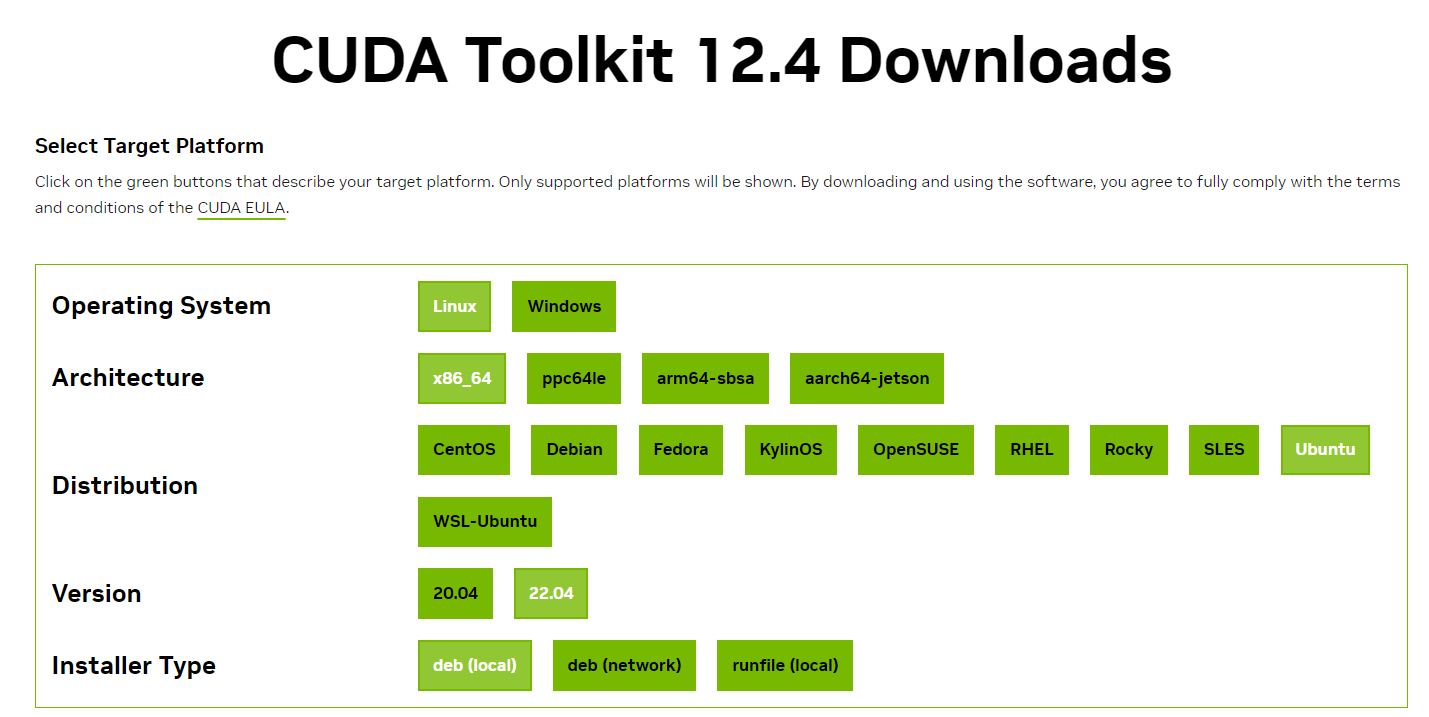
CUDA Toolkit 12.4 下载地址
https://developer.nvidia.com/cuda-12-4-0-download-archive?target_os=Linux&target_arch=x86_64&Distribution=Ubuntu&target_version=22.04&target_type=deb_local
(其他版本的Toolkit下载查询地址:https://developer.nvidia.com/cuda-toolkit-archive)
我的选项:
安装命令:
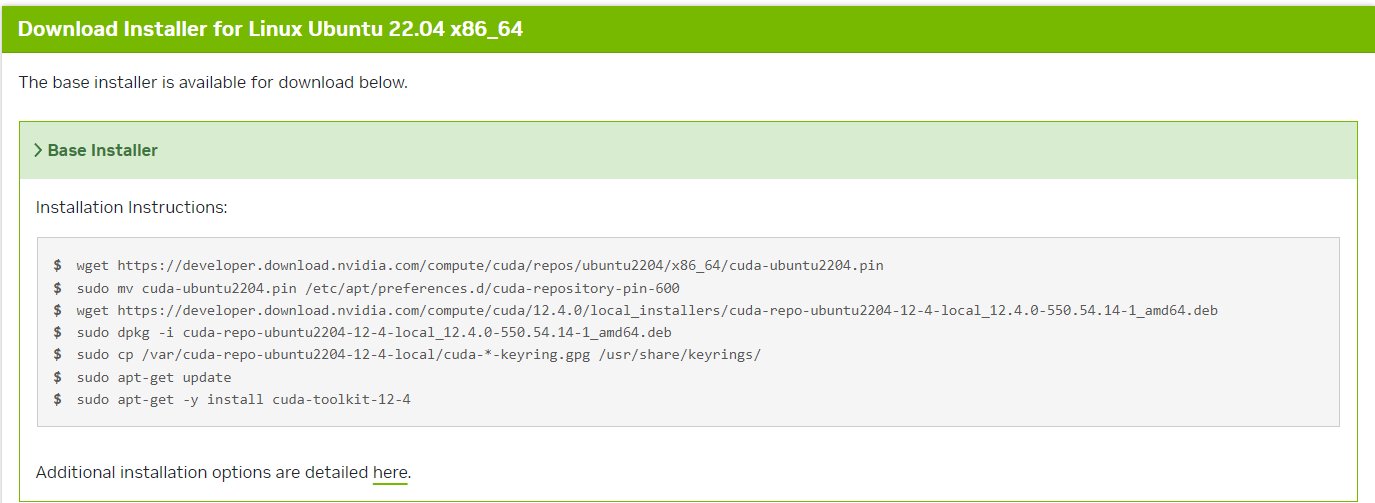
cd /root
wget https://developer.download.nvidia.com/compute/cuda/repos/ubuntu2204/x86_64/cuda-ubuntu2204.pin
sudo mv cuda-ubuntu2204.pin /etc/apt/preferences.d/cuda-repository-pin-600
wget https://developer.download.nvidia.com/compute/cuda/12.4.0/local_installers/cuda-repo-ubuntu2204-12-4-local_12.4.0-550.54.14-1_amd64.deb
sudo dpkg -i cuda-repo-ubuntu2204-12-4-local_12.4.0-550.54.14-1_amd64.deb
sudo cp /var/cuda-repo-ubuntu2204-12-4-local/cuda-*-keyring.gpg /usr/share/keyrings/
sudo apt-get update
#ubuntu22.04和24.04先安装一下libtinfo5
sudo apt update
wget http://security.ubuntu.com/ubuntu/pool/universe/n/ncurses/libtinfo5_6.3-2ubuntu0.1_amd64.deb
sudo apt install ./libtinfo5_6.3-2ubuntu0.1_amd64.deb
#再执行
sudo apt-get -y install cuda-toolkit-12-4
安装完成后,手动导入路径,注意是自己的cuda所在路径!
export PATH=/usr/local/cuda-12.4/bin:$PATH
export LD_LIBRARY_PATH=/usr/local/cuda-12.4/lib64:$LD_LIBRARY_PATH
验证是否安装成功
(mamba) root@DESKTOP-BQ4EVDH:~# nvcc -V
nvcc: NVIDIA (R) Cuda compiler driver
Copyright (c) 2005-2024 NVIDIA Corporation
Built on Tue_Feb_27_16:19:38_PST_2024
Cuda compilation tools, release 12.4, V12.4.99
Build cuda_12.4.r12.4/compiler.33961263_0
【踩坑记录2】如果安装顺利可以不看,因为该坑已经在上面的命令中填上了
在安装过程中可能出现以下问题:
root@DESKTOP-BQ4EVDH:~# sudo apt-get -y install cuda-toolkit-12-4
cuda Reading package lists... Done
Building dependency tree... Done
Reading state information... Done
Some packages could not be installed. This may mean that you have
requested an impossible situation or if you are using the unstable
distribution that some required packages have not yet been created
or been moved out of Incoming.
The following information may help to resolve the situation: The following packages have unmet dependencies: nsight-systems-2023.1.2 :
Depends: libtinfo5 but it is not installable
E: Unable to correct problems, you have held broken packages.
原因:
安装 nsight-systems-2023.1.2 时需要依赖 libtinfo5,但是你当前系统的软件源里没有这个包,或者被替换成了 libtinfo6。
这是 CUDA 在新版本 Ubuntu 上的常见问题。
通常 Ubuntu 20.04 默认有 libtinfo5,但在 Ubuntu 22.04/24.04 已经被 libtinfo6 取代,所以直接安装 cuda 就会依赖失败。
解决:单独安装依赖
sudo apt update
wget http://security.ubuntu.com/ubuntu/pool/universe/n/ncurses/libtinfo5_6.3-2ubuntu0.1_amd64.deb
sudo apt install ./libtinfo5_6.3-2ubuntu0.1_amd64.deb
4. pytorch相关安装
各种pytorch版本按需求安装 https://pytorch.org/get-started/previous-versions/
我的安装命令
pip install torch==2.4.1 torchvision==0.19.1 torchaudio==2.4.1 --index-url https://download.pytorch.org/whl/cu124
漫长的等待后,安装完成,测试一下:
python -c "import torch;print(torch.version.cuda, torch.__version__)"
12.4 2.4.1+cu124
5. triton安装
在安装pytorch相关依赖时其实已经安装了triton,可以使用pip list查看确认一下。如果没有就手动安装一下,但需要注意版本,triton要与pytorch适配! 否则后续导入使用会出问题。
一般使用 pip install triton自动匹配版本即可
我的电脑配置使用的是 pip install triton=3.0.0
安装完成后,导入测试一下:
(mamba) root@DESKTOP-BQ4EVDH:~# python
Python 3.10.18 (main, Jun  5 2025, 13:14:17) [GCC 11.2.0] on linux
Type "help", "copyright", "credits" or "license" for more information.
>>> import triton
>>>
没问题就进行下一步,有问题就查查与自己pytorch对应的triton版本
6. causal-conv1d源码安装
由于我的CUDA版本较高,所以我尝试了用现成的whl,都没有装成功,都有问题。所以选择了源码安装。这里我给一下已经编译好的whl版本,如果有适配的可以直接下载安装,无需采用源码安装。https://github.com/Dao-AILab/causal-conv1d/releases
【源码安装】
cd /root
git clone https://github.com/Dao-AILab/causal-conv1d.git
cd causal-conv1d
CAUSAL_CONV1D_FORCE_BUILD=TRUE pip install --no-build-isolation .
cd ..
注意: 一定一定要加 --no-build-isolation!! 这是我在安装过程中踩的最大最大的坑,反复安装数次依旧导入报错。具体原因是不加 --no-build-isolation,pip 在 build wheel 时会创建一个临时 “build env”,默认安装最新 torch 会与当前环境不匹配。所以, 在安装时指定不自动升级依赖, 这样会使用你当前环境里的 torch,而不是临时环境。
编译选项说明:
# FORCE_BUILD: Force a fresh build locally, instead of attempting to find prebuilt wheels
# SKIP_CUDA_BUILD: Intended to allow CI to use a simple `python setup.py sdist` run to copy over raw files, without any cuda compilation
FORCE_BUILD = os.getenv("CAUSAL_CONV1D_FORCE_BUILD", "FALSE") == "TRUE"
SKIP_CUDA_BUILD = os.getenv("CAUSAL_CONV1D_SKIP_CUDA_BUILD", "FALSE") == "TRUE"
# For CI, we want the option to build with C++11 ABI since the nvcr images use C++11 ABI
FORCE_CXX11_ABI = os.getenv("CAUSAL_CONV1D_FORCE_CXX11_ABI", "FALSE") == "TRUE"
CAUSAL_CONV1D_FORCE_BUILD=True 表示强制本地编译。
验证:
(mamba) root@DESKTOP-BQ4EVDH:~/causal-conv1d# python
Python 3.10.18 (main, Jun  5 2025, 13:14:17) [GCC 11.2.0] on linux
Type "help", "copyright", "credits" or "license" for more information.
>>> import causal_conv1d
>>>
7. mamba的安装
sudo apt-get install build-essential python3-dev
git clone https://github.com/state-spaces/mamba.git
cd mamba
MAMBA_FORCE_BUILD=TRUE pip install --no-build-isolation . -v
要加--no-build-isolation
在mamba的setup.py文件中,以下部分是编译选项的控制:
# FORCE_BUILD: Force a fresh build locally, instead of attempting to find prebuilt wheels
# SKIP_CUDA_BUILD: Intended to allow CI to use a simple `python setup.py sdist` run to copy over raw files, without any cuda compilation
FORCE_BUILD = os.getenv("MAMBA_FORCE_BUILD", "FALSE") == "TRUE"
SKIP_CUDA_BUILD = os.getenv("MAMBA_SKIP_CUDA_BUILD", "FALSE") == "TRUE"
# For CI, we want the option to build with C++11 ABI since the nvcr images use C++11 ABI
FORCE_CXX11_ABI = os.getenv("MAMBA_FORCE_CXX11_ABI", "FALSE") == "TRUE"
- FORCE_BUILD
读取环境变量 MAMBA_FORCE_BUILD,如果等于 “TRUE”,则强制本地编译,而不是去找预编译好的 .whl。
即使你本地有匹配的 wheel,也会重新编译。 - SKIP_CUDA_BUILD
读取环境变量 MAMBA_SKIP_CUDA_BUILD,如果等于 “TRUE”,则跳过 CUDA 相关的编译步骤。
使用场景:在 CI/CD 或不需要 GPU 的环境里,仅复制 Python 文件,而不去调用 nvcc 编译 CUDA 内核。 - FORCE_CXX11_ABI
读取环境变量 MAMBA_FORCE_CXX11_ABI,如果等于 “TRUE”,则强制使用 C++11 ABI 来编译。
背景:PyTorch 编译扩展时可能涉及到 ABI(Application Binary Interface)差异。
比如 libstdc++ 在 GCC 5+ 引入了一个 _GLIBCXX_USE_CXX11_ABI 宏:- 0 → 旧 ABI(C++98 风格的 std::string/vector)
- 1 → 新 ABI(C++11 风格,默认)
有些官方 Docker 镜像(如 NVIDIA NGC 的 nvcr.io)是用 C++11 ABI 编译的,所以需要强制对齐。
验证:
(mamba) root@DESKTOP-BQ4EVDH:~/mamba# python
Python 3.10.18 (main, Jun  5 2025, 13:14:17) [GCC 11.2.0] on linux
Type "help", "copyright", "credits" or "license" for more information.
>>> import torch
>>> import selective_scan_cuda
>>> import causal_conv1d_cuda
>>> import mamba_ssm
>>>
至此,mamba安装完成。
【踩坑记录3】按照参考文档进行安装的,安装过程没有问题,但是安装导入时causal_conv1d和mamba_ssm都有问题,都有undefined symbol 的报错。
报错记录:
(mamba) root@DESKTOP-BQ4EVDH:~# python
Python 3.10.18 (main, Jun  5 2025, 13:14:17) [GCC 11.2.0] on linux
Type "help", "copyright", "credits" or "license" for more information.
>>> import torch
>>> import selective_scan_cuda
Traceback (most recent call last):File "<stdin>", line 1, in <module>
ImportError: /root/miniconda3/envs/mamba/lib/python3.10/site-packages/selective_scan_cuda.cpython-310-x86_64-linux-gnu.so: undefined symbol: _ZN3c104cuda9SetDeviceEab
>>> import causal_conv1d_cuda
Traceback (most recent call last):File "<stdin>", line 1, in <module>
ImportError: /root/miniconda3/envs/mamba/lib/python3.10/site-packages/causal_conv1d_cuda.cpython-310-x86_64-linux-gnu.so: undefined symbol: _ZN3c106detail14torchCheckFailEPKcS2_jRKNSt7__cxx1112basic_stringIcSt11char_traitsIcESaIcEEE
>>> import mamba
>>> exit()
>>> import mamba_ssm
Traceback (most recent call last):File "<stdin>", line 1, in <module>File "/root/miniconda3/envs/mamba/lib/python3.10/site-packages/mamba_ssm/__init__.py", line 3, in <module>from mamba_ssm.ops.selective_scan_interface import selective_scan_fn, mamba_inner_fnFile "/root/miniconda3/envs/mamba/lib/python3.10/site-packages/mamba_ssm/ops/selective_scan_interface.py", line 20, in <module>import selective_scan_cuda
ImportError: /root/miniconda3/envs/mamba/lib/python3.10/site-packages/selective_scan_cuda.cpython-310-x86_64-linux-gnu.so: undefined symbol: _ZN3c104cuda9SetDeviceEab
我经过了反复的卸载安装尝试,找别人编译好的whl也是不可以的,都会出现undefined symbol的问题。
后来我以为是GCC编译器的问题,因为我的GCC编译器竟然是13.3的(我是个傻子,以为我的系统只有一个gcc编译器,原来有多个!)
我看到过 PyTorch 2.4.x + cu124 下,GCC 11 是最佳选择 这样子的说法,所以我将GCC13卸载了,安装了GCC11的编译器。重要命令如下:
141 gcc --version142 sudo apt-get remove --purge gcc-13 g++-13 -y143 sudo apt-get autoremove -y145 sudo apt-get autoclean146 sudo apt-get install gcc-11 g++-11 -y147 sudo update-alternatives --install /usr/bin/gcc gcc /usr/bin/gcc-11 100148 sudo update-alternatives --install /usr/bin/g++ g++ /usr/bin/g++-11 100149 gcc --version
[温馨提示]
在怀疑GCC编译器版本有问题时,先检查一下有没有gcc11,不要盲目卸载gcc13
ls /usr/bin/gcc*
如果有就不要瞎折腾!
在改了GCC编译器版本后,我又重新采用源码编译的方式进行了causal_conv1d安装,结果,还是出现了 undefined symbol的报错。
后来在进行源码编译过程中,我惊恐的发现命令行中竟然出现了pytorch2.8+cu12.8 我一下子恍然大悟,意识到在编译过程中所用的pytorch环境,跟我本地pytroch是不一样的,所以我添加了 --no-build-isolation 设置重新编译,可以导入成功了,mamba模块也是如此。
undefined symbol 是causal_conv1d和mamba在安装使用过程中常见的问题,这个问题的关键就是你安装的版本一定要与你本地的配置和包的版本相匹配,别人编译好的版本当然好用,但是源码编译的方式更加适配,注意添加 --no-build-isolation 即可。
最后给出一个CUDA11.8版本的mamba源码安装版本,这个版本需要修改源码。
https://github.com/AlwaysFHao/Mamba-Install
最后的最后再吐槽一下Windows不使用WSL直接安装mamba,简直一把辛酸泪,由于电脑的系统文件有损坏,导致安装到triton就直接无法进行下去,所以果断放弃在Windows折腾。WSL ubuntu 安装 mamba遇到的坑比起Windows,简直可以说是九牛一毛了。
祝大家安装顺利,Bye~