Python单元测试框架之pytest -- 生成测试报告
继续pytest单元测试框架的学习,pytest可以生成多种类型的测试报告。这一节就来学习pytest如何生成测试报告。
零基础1小时快速入门pytest自动化测试教程,全套项目框架实战
创建test_calss.py 测试用例文件,这里以测试该文件为例。
#coding=utf-8class TestClass:def test_one(self):x = "this"assert "h" in xdef test_two(self):x = "hello"assert x == "hi"
生成resultlog文件
创建普通的结果文件:
> py.test test_class.py --resultlog=./log.txt
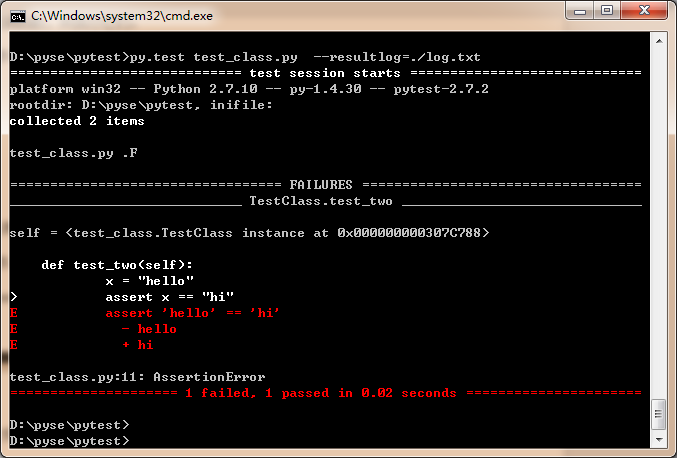
指定当前路径下生成log.txt文件,打开文件,内容如下:

. test_class.py::TestClass::()::test_one
F test_class.py::TestClass::()::test_twoself = <test_class.TestClass instance at 0x000000000307C788>def test_two(self):x = "hello">           assert x == "hi"E           assert 'hello' == 'hi'E             - helloE             + hitest_class.py:11: AssertionError

生成JunitXML文件
> py.test test_class.py --junitxml=./log.xml
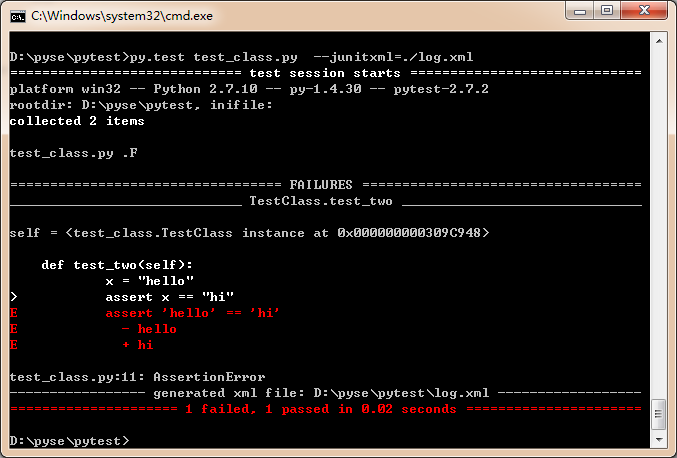
同样指定在当前目录下生成log.xml文件,打开文件内容如下:

<?xml version="1.0" encoding="utf-8"?> <testsuite errors="0" failures="1" name="pytest" skips="0" tests="2" time="0.015"><testcase classname="test_class.TestClass" name="test_one" time="0.0"/><testcase classname="test_class.TestClass" name="test_two" time="0.00300002098083"><failure message="assert 'hello' == 'hi'- hello+ hi">self = <test_class.TestClass instance at 0x000000000309C948>def test_two(self):x = "hello"> assert x == "hi"E assert 'hello' == 'hi'E - helloE + hitest_class.py:11: AssertionError</failure></testcase> </testsuite>

创建这样的XML文件有有什么用? 主要是为了方便Jenkin或其它的持续集成工具俱读取。
创建测试用例的URL
> py.test test_class.py --pastebin=all
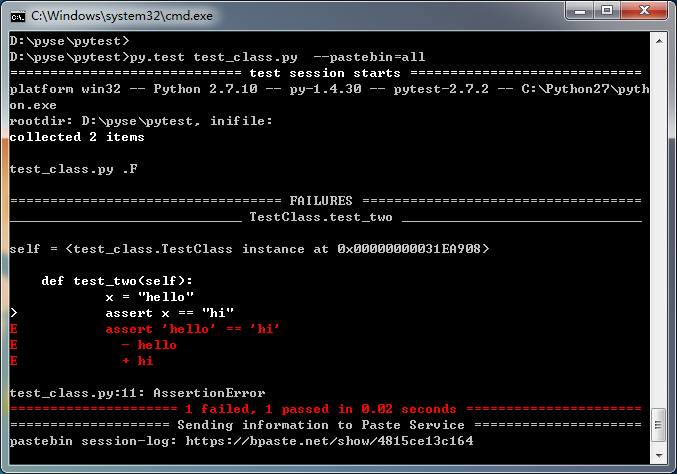
复制打印结果最后生成的session-log测试报告链接到浏览器:
https://bpaste.net/show/4815ce13c164
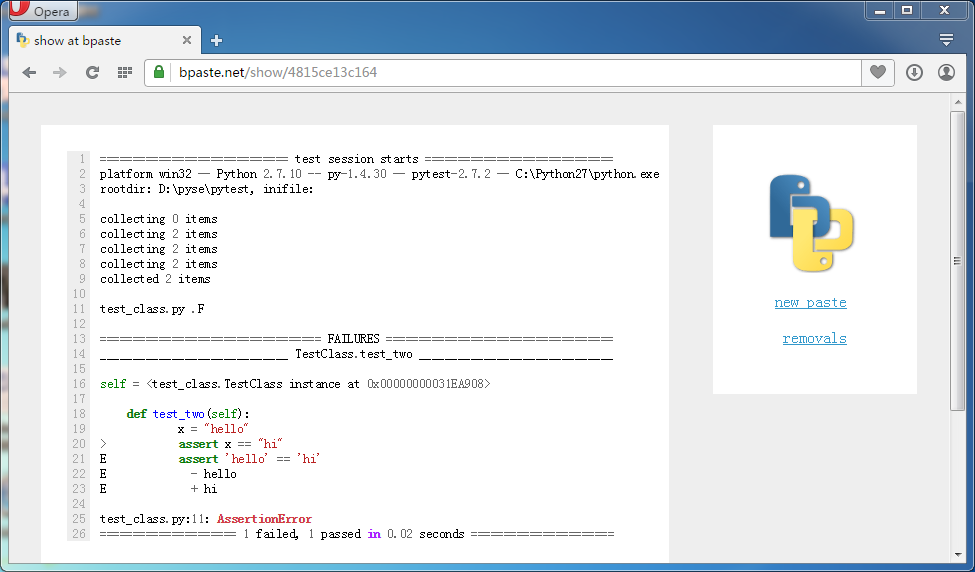
这样的结果展示将非常友好。
当然,你也可以只选择展示faile的测试用例
> py.test test_class.py --pastebin=failed
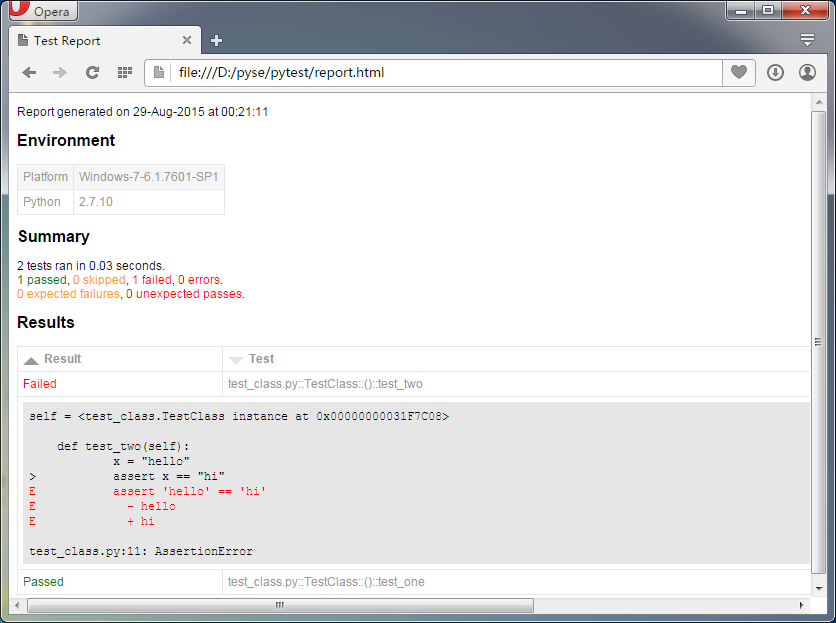
生成html测试报告
当然,更多时候,我们希望pytest能生成漂亮的测试报告。这需要安装pytest的扩展--pytest-html。
> pip install pytest-html # 通过pip安装pytest-html
cmd命令提示符下执行测试文件:
>py.test test_class.py --html=./report.html
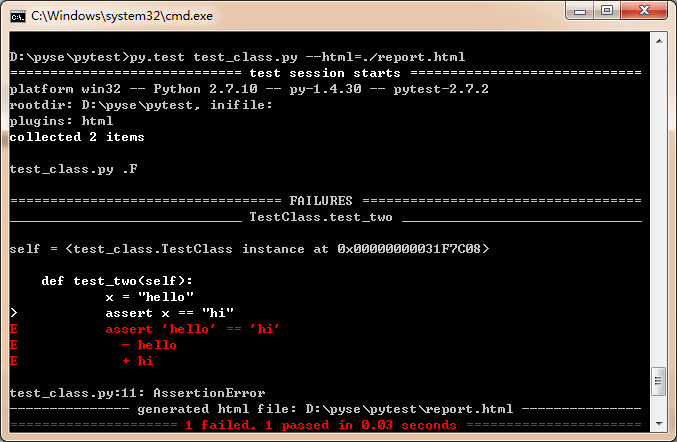
指定在当前目录下生成report.html文件,打开测试文件: