REDPlayer 鸿蒙原生视频播放库组件介绍与使用指南
REDPlayer 是由小红书独立开发的一款跨平台媒体播放器,支持 Android、iOS、HarmonyOS 等多种操作系统。与市面上其他媒体播放器相比,REDPlayer 具有简洁的结构、低耦合度和清晰的功能边界的特点,这使得它在集成与开发上更加灵活。此外REDPlayer 还支持多种音视频协议和格式,能够满足不同场景下的需求。
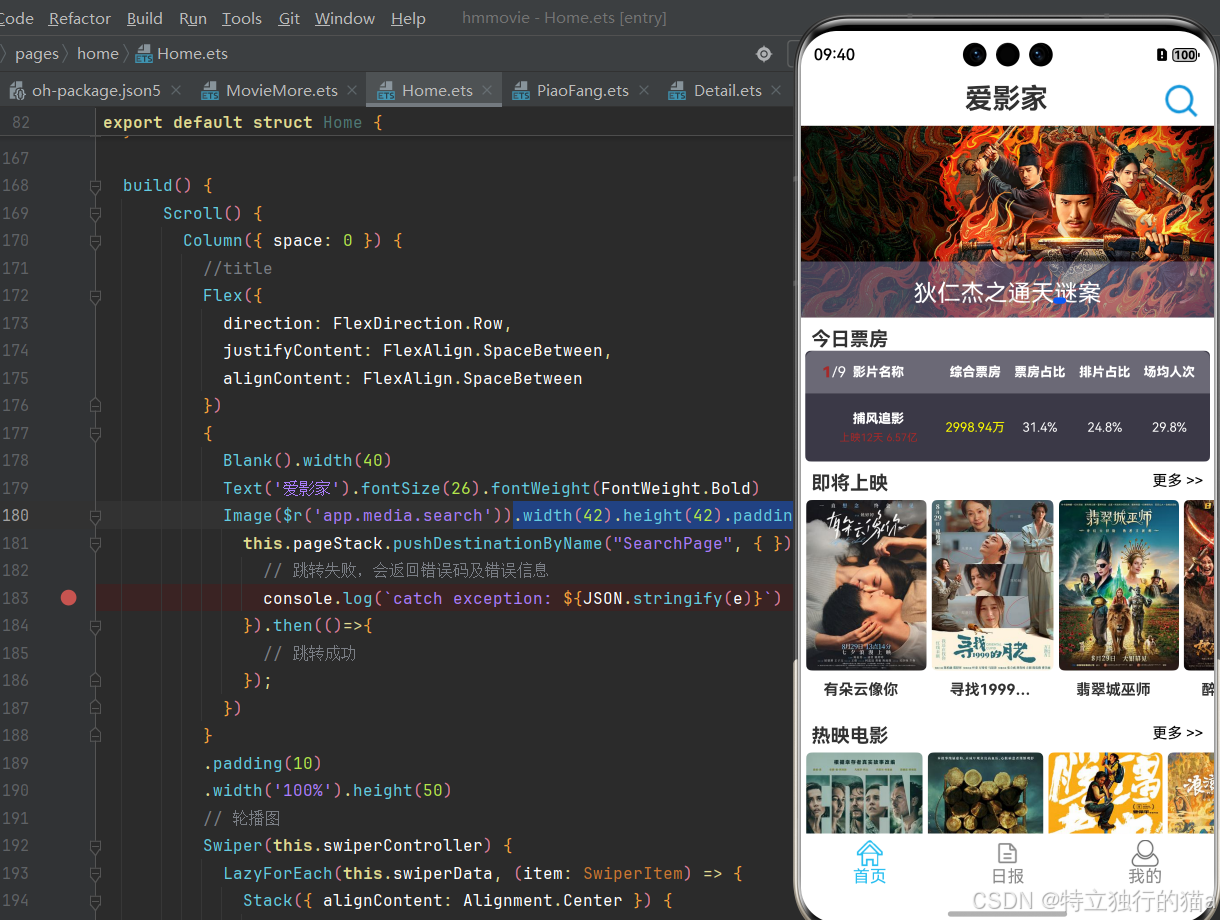
接下来,本文将详细介绍 REDPlayer 的安装、功能特点以及集成与使用的具体步骤,帮助开发者快速上手并根据需要进行扩展。并以一个爱影家影视app的练手项目为例,详细介绍下REDPlayer 的使用。
REDPlayer 三方库地址:https://ohpm.openharmony.cn/#/cn/detail/@rte-xhs%2Fredplayer
爱影家App的项目地址: https://gitcode.com/nutpi/hmmovie
REDPlayer 介绍
REDPlayer 是一款专门为开发人员设计的媒体播放器组件,其主要目的是提供一个简洁、清晰的播放器结构,使得开发人员能够快速理解并在此基础上进行功能扩展。REDPlayer 的设计理念是简单易用,同时支持丰富的媒体格式和协议,满足从学习到商业应用的多样化需求。具体来说,REDPlayer 支持以下功能:
- 丰富的媒体格式:支持包括 FLV、HLS、MP4、MP3、Vorbis 在内的多种音频和视频格式。
- HDR 支持:提供对 HDR10/HLG 等 HDR 格式的支持,根据不同的设备型号提供播放和分发支持。
- URL 播放:支持通过 URL 播放本地和网络视频。
- 日志报告:支持播放器日志的报告和播放点信息相关的统计。
- 异常分析:通过日志分析获取对应的异常信息。
- 硬件解码:支持 H.264 和 H.265 视频源的播放和硬件解码。
- 自动切换解码方式:当终端不支持硬件解码时,会自动切换到软件解码。
- 播放控制:支持播放控制功能,包括开始、暂停、恢复和停止等。
- 精准定位:提供精准的跳转功能,能够精确到帧级别。
- 动态丢帧:当帧率超过 60fps 时,开始动态丢帧。
- 循环播放:支持视频播放结束后的自动循环播放,但需要进行参数配置。
- 自适应码率:在播放 HLS/DASH 时,支持根据带宽预测自动选择播放码率,但目前只支持播放前的码率选择。
- 加密流播放:支持对加密流的按需转码,但需要进行定制开发。
安装 REDPlayer for HarmonyOS
在 HarmonyOS 平台上,开发者可以通过 ohpm(OH Package Manager)来安装 REDPlayer。ohpm 是 HarmonyOS 的包管理工具,用于管理和安装应用的依赖包。安装 REDPlayer 的命令如下:
ohpm install @rte-xhs/redplayer
执行上述命令后,ohpm 会自动从指定的仓库下载并安装 REDPlayer SDK,使得开发者可以在自己的项目中引用和使用。
REDPlayer 的使用
REDPlayer 的集成与使用步骤如下:
第一步:构建 SDK HAR 文件
首先需要配置编译环境,这可以通过编辑 build.sh 文件来完成。配置完成后,运行 build.sh 脚本,HAR 文件(HarmonyOS Archive)会在 /output/redplayerproxy.har 路径下生成。HAR 是 HarmonyOS 的标准库文件格式,用于在应用中集成和使用第三方库。
第二步:将 SDK HAR 集成到项目中
- 将 HAR 文件复制到项目的目标模块下的
libs文件夹。 - 打开项目目标模块下的
oh-package.json5文件,添加 HAR 文件作为依赖:
{// ..."dependencies": {"@xhs/redplayer": "file:./libs/redplayerproxy.har" // your HAR path}// ...
}
- 从 REDPlayer SDK HAR 文件中导入所需的模块:
import { IMediaPlayer } from '@xhs/redplayer'
第三步:初始化 RedPlayer 全局配置
在使用 REDPlayer 之前,需要先初始化其组件。通常建议在应用启动时(即在 AbilityStage#onCreate 方法中)进行初始化,以确保在应用启动时就能准备好播放器。
class YourAbilityStage extends AbilityStage {onCreate() {let configBuilder = new RedPlayerConfigBuilder()configBuilder.cachePath = 'your player cache path'configBuilder.logger = 'your custom logger'// TIPS: See more global config in RedPlayerInitManager.RedPlayerConfigBuilderRedPlayerInitManager.initPlayer(configBuilder) // Init RedPlayerRedPlayerPreload.globalInit('your preload cache path', 20, 4, 0) // Init RedPlayer preload component}
}
第四步:创建播放器并配置
创建播放器实例并设置监听器:
let listener: IMediaPlayerStateListener = new YourListenerImpl()
let player: IMediaPlayer | null = null
RedPlayerFactory.createMediaPlayer(listener).then((p) => {// player createdplayer = p
})
第五步:添加和配置播放渲染视图
在页面中添加 XComponent 并配置其用于播放渲染:
@Entry
@Component
struct PlayerPage {// step1: create controller for XComponentxComponentController: RedPlayerXComponentController = new RedPlayerXComponentController()build() {Stack() {// ...// step2: add and config XComponent to your page for player renderXComponent({id: this.xComponentController.getSurfaceId(),type: this.xComponentController.getSurfaceType(),libraryname: this.xComponentController.getLibraryName(),controller: this.xComponentController}).onLoad(() => {// step3: setSurfaceId to player after XComponent onLoadplayer.setSurfaceId(this.xComponentController._id)// if AVPlayer core:// this.playerController.setSurfaceId(this.xComponentController.getXComponentSurfaceId())}).width('100%').height('100%')// ...}}
}
第六步:设置播放源并进行配置
设置播放源及配置选项:
// Must call after player created
player.setDataSource({url: this.url, // url to play useSoftDecoder: false, // If use soft decoder to play. Hard decoder is used by default// other play option
}).then(() => {// source data set finished
})
在开发过程中,如果使用的是 DevEco Studio 模拟器进行调试,建议强制使用软件解码,因为目前模拟器不支持硬件解码。
第七步:准备播放器
准备播放器以进行播放:
// Must call after source data set finished
player.prepare().then(() => {// player prepared
})
第八步:开始播放
当播放器准备好后,可以调用 start() 方法开始播放:
// Must call after player prepared
player.start()
第九步:其他核心播放控制 API
REDPlayer 提供了丰富的控制 API,可以用来控制播放器的行为:
player.pause() // 暂停播放
player.stop() // 停止播放
player.release() // 释放播放器资源
简单示例
下面是一个简单的 REDPlayer 使用示例,展示了如何控制播放器以及如何配置播放视图:
播放控制部分:
let listener: IMediaPlayerStateListener = new YourListenerImpl()
RedPlayerFactory.createMediaPlayer(listener).then((player) => {player.setDataSource({url: this.url, // 要播放的 URL}).then(() => {// 源数据设置完毕player.prepare().then(() => {// 播放器准备完毕player.start()})})
})
播放视图部分:
@Entry
@Component
struct PlayerPage {// step1: create controller for XComponentxComponentController: RedPlayerXComponentController = new RedPlayerXComponentController()build() {Stack() {// ...// step2: add and config XComponent to your page for player renderXComponent({id: this.xComponentController.getSurfaceId(),type: this.xComponentController.getSurfaceType(),libraryname: this.xComponentController.getLibraryName(),controller: this.xComponentController}).onLoad(() => {// step3: setSurfaceId to player after XComponent onLoadplayer.setSurfaceId(this.xComponentController._id)// if AVPlayer core:// this.playerController.setSurfaceId(this.xComponentController.getXComponentSurfaceId())}).width('100%').height('100%')// ...}}
}
爱影家影视播放RedPlayer 使用
RedPlayer 是一个跨平台的媒体播放器 SDK,支持多种音视频格式和协议,具有高性能和易于集成的特点。
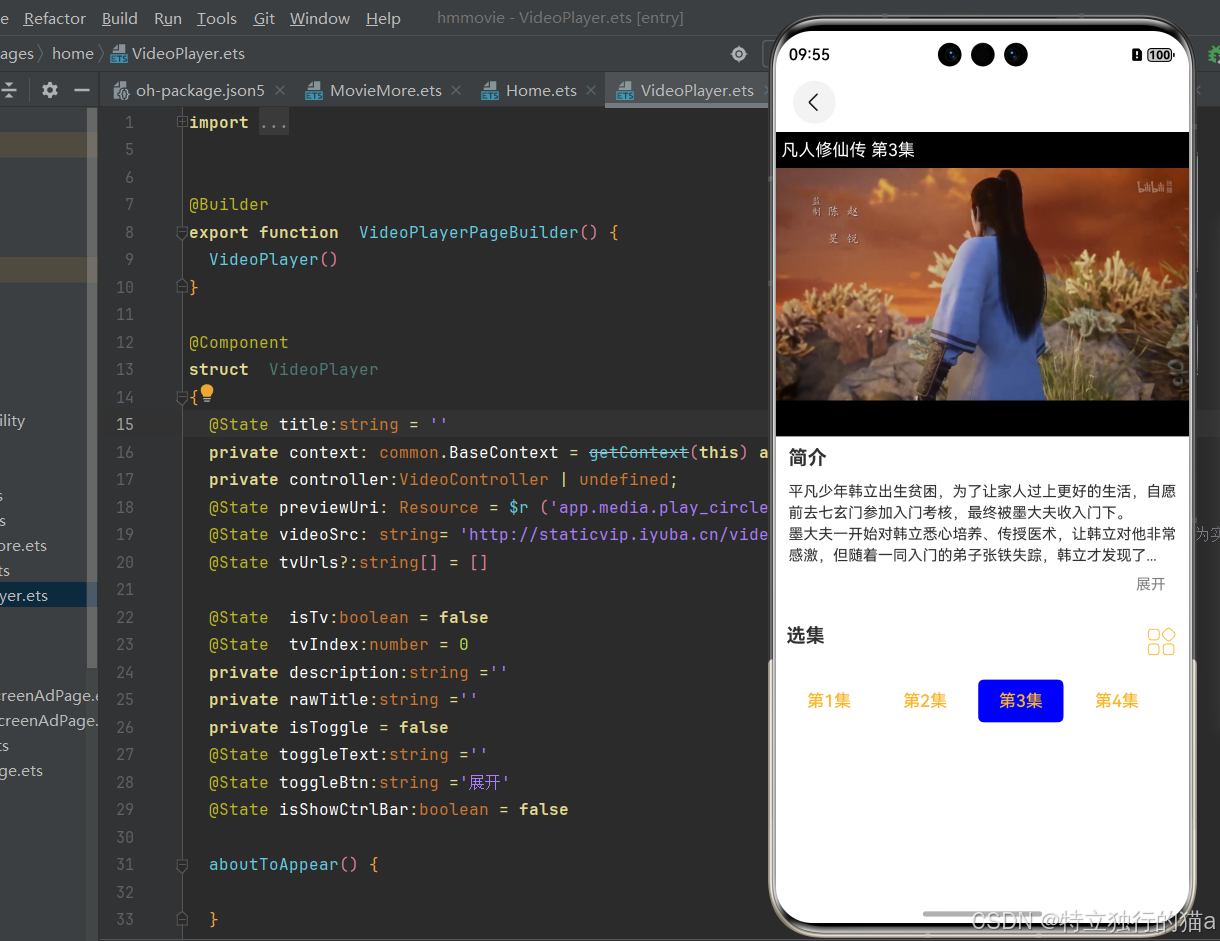
以下为使用RedPlayer 实现的播放源码:
import { VideoItem } from "../../common/bean/ApiTypes";
import { window } from "@kit.ArkUI";
import { common } from "@kit.AbilityKit";
import { EpisodeDialogView } from "../../common/dialog/EpisodeDialogView";
import { IMediaPlayer, RedPlayerConfigBuilder, RedPlayerFactory, RedPlayerInitManager, RedPlayerXComponentController } from "@rte-xhs/redplayer";@Builder
export function VideoPlayerPageBuilder() {return VideoPlayer();
}@Component
struct VideoPlayer {@State title: string = '';private context: common.BaseContext = getContext(this) as common.BaseContext;private controller: IMediaPlayer | undefined;@State previewUri: Resource = $r('app.media.play_circle_fill');@State videoSrc: string = 'http://staticpip.iyuba.cn/video/small/202412/1009544_c.mp4'; // 使用时请替换为实际视频加载网址@State tvUrls?: string[] = [];@State isTv: boolean = false;@State tvIndex: number = 0;private description: string = '';private rawTitle: string = '';private isToggle = false;@State toggleText: string = '';@State toggleBtn: string = '展开';@State isShowCtrlBar: boolean = false;aboutToAppear() {this.initRedPlayer();}async initRedPlayer() {let configBuilder = new RedPlayerConfigBuilder();configBuilder.cachePath = 'your player cache path';configBuilder.logger = 'your custom logger';RedPlayerInitManager.initPlayer(configBuilder); // 初始化 RedPlayerRedPlayerFactory.createMediaPlayer(this.listener).then((p) => {this.controller = p;this.setupVideoSource();});}private setupVideoSource() {if (this.controller) {this.controller.setDataSource({url: this.videoSrc,useSoftDecoder: false, // 硬件解码}).then(() => {this.controller.prepare().then(() => {this.controller.start();});});}}private changeOrientation(isLandscape: boolean) {let context = getContext(this) as common.UIAbilityContext;window.getLastWindow(context).then((lastWindow) => {lastWindow.setPreferredOrientation(isLandscape ? window.Orientation.LANDSCAPE : window.Orientation.PORTRAIT);});}// 电视剧集数选择框episodeDialogController: CustomDialogController = new CustomDialogController({builder: EpisodeDialogView({current: this.tvIndex,tvUrls: this.tvUrls,clickCallback: (item: string, index: number) => { this.onDialogClickCallback(item, index) }}),alignment: DialogAlignment.Bottom,offset: { dx: 0, dy: -30 },customStyle: true});// 电视剧集播放按钮回调private onDialogClickCallback(item: string, index: number) {this.videoSrc = item;this.tvIndex = index;this.title = this.rawTitle + ' 第' + (index + 1) + '集';this.episodeDialogController.close();this.setupVideoSource();}// 添加一个方法来获取按钮的背景颜色private getButtonColor(idx: number): Color {if (this.tvIndex === idx) {return Color.Blue; // 当前选中的按钮背景色为蓝色} else {return Color.White; // 其他按钮背景色为白色}}private listener: IMediaPlayerStateListener = {onPlayerError: () => {console.info("Video error.");this.keepScreenOn(false);},onPlayerStart: () => {this.keepScreenOn(true);},onPlayerPause: () => {this.keepScreenOn(false);},onFullscreenChange: (event) => {if (event.fullscreen) {this.changeOrientation(true);} else {this.changeOrientation(false);}},onTouch: () => {this.isShowCtrlBar = true;setTimeout(() => {this.isShowCtrlBar = false;}, 3000);}};async keepScreenOn(isOn: boolean) {let windowClass = await window.getLastWindow(this.context); // 获取窗口实例await windowClass.setWindowKeepScreenOn(isOn); // 设置窗口常亮或取消}build() {NavDestination() {Column() {Row() {Stack() {XComponent({id: this.xComponentController.getSurfaceId(),type: this.xComponentController.getSurfaceType(),libraryname: this.xComponentController.getLibraryName(),controller: this.xComponentController}).width('100%').height('100%').onLoad(() => {if (this.controller) {this.controller.setSurfaceId(this.xComponentController.getSurfaceId());}}).zIndex(1);Text(this.title).fontColor(Color.White).width('100%').padding(5).alignSelf(ItemAlign.Start).margin({ bottom: 280 }).zIndex(2);}}.width('100%').height('40%');Column() {Text('简介').fontSize(18).padding({ bottom: 10 }).fontWeight(FontWeight.Bold).alignSelf(ItemAlign.Start);Text(this.toggleText).fontSize(14).lineHeight(20).alignSelf(ItemAlign.Start);Text(this.toggleBtn).fontSize(14).fontColor(Color.Gray).padding(10).alignSelf(ItemAlign.End).onClick(() => {this.isToggle = !this.isToggle;if (this.isToggle) {this.toggleBtn = '收起';this.toggleText = this.description;} else {this.toggleBtn = '展开';this.toggleText = this.description.substring(0, 100) + '...';}});}.padding(10);if (this.isTv) {Flex({direction: FlexDirection.Row,justifyContent: FlexAlign.SpaceBetween,alignContent: FlexAlign.SpaceBetween}) {Text('选集').fontSize(18).fontWeight(FontWeight.Bold);SymbolGlyph($r('sys.symbol.more')).fontWeight(FontWeight.Lighter).fontSize(32).fontColor(['#fffab52a']).onClick(() => {this.episodeDialogController.open();});}.padding(10);Scroll() {Row({ space: 10 }) {ForEach(this.tvUrls, (item: string, idx) => {Button('第' + (idx + 1) + '集', { buttonStyle: ButtonStyleMode.NORMAL, role: ButtonRole.NORMAL }).borderRadius(5).fontColor('#fffab52a').width(80).height(40).padding(5).backgroundColor(this.getButtonColor(idx)).onClick(() => {this.onDialogClickCallback(item, idx);});});}.alignItems(VerticalAlign.Center).padding(10);}.scrollable(ScrollDirection.Horizontal);}}.width('100%');}.width("100%").height("100%").onReady(ctx => {interface params {item: VideoItem;}let par = ctx.pathInfo.param as params;this.videoSrc = par.item.video;this.rawTitle = par.item.title;this.title = this.rawTitle;this.description = par.item.desc;this.tvUrls = par.item.tvurls;if (this.tvUrls?.length ?? 0 > 0) {this.isTv = true;this.videoSrc = this.tvUrls?.[this.tvIndex] ?? '';}this.tvIndex = 0;this.toggleText = this.description.substring(0, 100) + '...';this.setupVideoSource();}).onShown(() => {console.info('VideoPlayer onShown');}).onBackPressed(() => {this.keepScreenOn(false);return false;});
}struct EpisodeDialogView {@Prop current: number;@Prop tvUrls: string[];@Prop clickCallback: (item: string, index: number) => void;build() {Column() {ForEach(this.tvUrls, (item: string, index: number) => {Button('第' + (index + 1) + '集').onClick(() => {this.clickCallback(item, index);}).width('100%').height(40).padding(10).fontColor(index === this.current ? Color.Blue : Color.Black);});}.padding(10).backgroundColor('#ffffff');}
}class YourListenerImpl implements IMediaPlayerStateListener {onPlayerError() {console.info("Video error.");}onPlayerStart() {console.info("Video started.");}onPlayerPause() {console.info("Video paused.");}onFullscreenChange(event: FullscreenChangeEvent) {console.info("Fullscreen change:", event.fullscreen);}onTouch() {console.info("Video touched.");}
}class RedPlayerXComponentController {private _id: string = '';private _type: string = '';private _libraryName: string = '';getSurfaceId(): string {return this._id;}getSurfaceType(): string {return this._type;}getLibraryName(): string {return this._libraryName;}setSurfaceId(id: string) {this._id = id;}
}
详细使用说明
1. 初始化 RedPlayer
在 aboutToAppear 生命周期方法中调用 initRedPlayer 方法来初始化 RedPlayer。
aboutToAppear() {this.initRedPlayer();
}
2. 配置 RedPlayer
initRedPlayer 方法中,首先创建并配置 RedPlayer 的全局配置,然后创建 IMediaPlayer 实例。
private initRedPlayer() {let configBuilder = new RedPlayerConfigBuilder();configBuilder.cachePath = 'your player cache path';configBuilder.logger = 'your custom logger';RedPlayerInitManager.initPlayer(configBuilder); // 初始化 RedPlayerRedPlayerFactory.createMediaPlayer(this.listener).then((p) => {this.controller = p;this.setupVideoSource();});
}
3. 设置视频源
在 RedPlayer 实例创建后,设置视频源并准备播放。
private setupVideoSource() {if (this.controller) {this.controller.setDataSource({url: this.videoSrc,useSoftDecoder: false, // 使用硬件解码}).then(() => {this.controller.prepare().then(() => {this.controller.start();});});}
}
4. 处理视频事件
定义 listener 对象来处理视频的各种事件,包括错误、开始、暂停和全屏变化。
private listener: IMediaPlayerStateListener = {onPlayerError: () => {console.info("Video error.");this.keepScreenOn(false);},onPlayerStart: () => {console.info("Video started.");this.keepScreenOn(true);},onPlayerPause: () => {console.info("Video paused.");this.keepScreenOn(false);},onFullscreenChange: (event) => {if (event.fullscreen) {this.changeOrientation(true);} else {this.changeOrientation(false);}},onTouch: () => {this.isShowCtrlBar = true;setTimeout(() => {this.isShowCtrlBar = false;}, 3000);}
};
5. 触摸事件处理
通过 onTouch 事件控制控制条的显示与隐藏。
.onTouch(() => {this.isShowCtrlBar = true;setTimeout(() => {this.isShowCtrlBar = false;}, 3000);
})
6. 使用 XComponent 渲染视频
在 HarmonyOS 应用中,使用 XComponent 来渲染视频内容。在 onLoad 事件中设置 surfaceId。
XComponent({id: this.xComponentController.getSurfaceId(),type: this.xComponentController.getSurfaceType(),libraryname: this.xComponentController.getLibraryName(),controller: this.xComponentController
}).width('100%').height('100%').onLoad(() => {if (this.controller) {this.controller.setSurfaceId(this.xComponentController.getSurfaceId());}}).zIndex(1);
7. 电视剧集数选择框
使用 CustomDialogController 来管理电视剧集数选择对话框。
episodeDialogController: CustomDialogController = new CustomDialogController({builder: EpisodeDialogView({ current: this.tvIndex, tvUrls: this.tvUrls, clickCallback: (item: string, index: number) => { this.onDialogClickCallback(item, index) } }),alignment: DialogAlignment.Bottom,offset: { dx: 0, dy: -30 },customStyle: true
});
8. 电视剧集播放按钮回调
当用户选择某个集数后,更新 videoSrc 和 tvIndex,并重新设置视频源并开始播放。
private onDialogClickCallback(item: string, index: number) {this.videoSrc = item;this.tvIndex = index;this.title = this.rawTitle + ' 第' + (index + 1) + '集';this.episodeDialogController.close();this.setupVideoSource();
}
9. 获取按钮背景颜色
根据当前选中的集数,设置按钮的背景颜色。
private getButtonColor(idx: number): Color {if (this.tvIndex === idx) {return Color.Blue; // 当前选中的按钮背景色为蓝色} else {return Color.White; // 其他按钮背景色为白色}
}
10. 使用 NavDestination 和 Column
在 build 方法中,使用 NavDestination 和 Column 来构建页面布局。
build() {NavDestination() {Column() {Row() {Stack() {XComponent({id: this.xComponentController.getSurfaceId(),type: this.xComponentController.getSurfaceType(),libraryname: this.xComponentController.getLibraryName(),controller: this.xComponentController}).width('100%').height('100%').onLoad(() => {if (this.controller) {this.controller.setSurfaceId(this.xComponentController.getSurfaceId());}}).zIndex(1);Text(this.title).fontColor(Color.White).width('100%').padding(5).alignSelf(ItemAlign.Start).margin({ bottom: 280 }).zIndex(2);}}.width('100%').height('40%');Column() {Text('简介').fontSize(18).padding({ bottom: 10 }).fontWeight(FontWeight.Bold).alignSelf(ItemAlign.Start);Text(this.toggleText).fontSize(14).lineHeight(20).alignSelf(ItemAlign.Start);Text(this.toggleBtn).fontSize(14).fontColor(Color.Gray).padding(10).alignSelf(ItemAlign.End).onClick(() => {this.isToggle = !this.isToggle;if (this.isToggle) {this.toggleBtn = '收起';this.toggleText = this.description;} else {this.toggleBtn = '展开';this.toggleText = this.description.substring(0, 100) + '...';}});}.padding(10);if (this.isTv) {Flex({direction: FlexDirection.Row,justifyContent: FlexAlign.SpaceBetween,alignContent: FlexAlign.SpaceBetween}) {Text('选集').fontSize(18).fontWeight(FontWeight.Bold);SymbolGlyph($r('sys.symbol.more')).fontWeight(FontWeight.Lighter).fontSize(32).fontColor(['#fffab52a']).onClick(() => {this.episodeDialogController.open();});}.padding(10);Scroll() {Row({ space: 10 }) {ForEach(this.tvUrls, (item: string, index: number) => {Button('第' + (index + 1) + '集', { buttonStyle: ButtonStyleMode.NORMAL, role: ButtonRole.NORMAL }).borderRadius(5).fontColor('#fffab52a').width(80).height(40).padding(5).backgroundColor(this.getButtonColor(index)).onClick(() => {this.onDialogClickCallback(item, index);});});}.alignItems(VerticalAlign.Center).padding(10);}.scrollable(ScrollDirection.Horizontal);}}.width('100%');}.width("100%").height("100%").onReady(ctx => {interface params {item: VideoItem;}let par = ctx.pathInfo.param as params;this.videoSrc = par.item.video;this.rawTitle = par.item.title;this.title = this.rawTitle;this.description = par.item.desc;this.tvUrls = par.item.tvurls;if (this.tvUrls?.length ?? 0 > 0) {this.isTv = true;this.videoSrc = this.tvUrls?.[this.tvIndex] ?? '';}this.tvIndex = 0;this.toggleText = this.description.substring(0, 100) + '...';this.setupVideoSource();}).onShown(() => {console.info('VideoPlayer onShown');}).onBackPressed(() => {this.keepScreenOn(false);return false;});
}
总结
REDPlayer 是一款功能强大且易于集成的媒体播放器 SDK,适用于多种操作系统平台。通过本文的详细介绍,相信开发者们已经掌握了 REDPlayer 的基本使用和集成方法。REDPlayer 的低耦合度和模块化设计使得它成为了一个优秀的开发工具,无论是用于学习还是商业开发,都能提供强大的功能支持。开发者们可以通过自定义解码模块、渲染器等进一步扩展 REDPlayer 的功能,满足更多的应用场景需求。希望 REDPlayer 能够帮助开发者们在媒体播放领域取得更大的帮助。