【Docker】Docker安装
目录
各版本平台支持情况
Server版本安装
Ubuntu 安装(以华为云Ubuntu 20.04为例)
安装依赖
安装docker
常见报错
实战经验
Docker镜像源修改
Docker目录修改
CentOS 安装
安装依赖
安装Docker
实战经验
Docker镜像源修改
Docker目录修改
GUI版本安装(以windows 11为例)
安装依赖
确定开启虚拟化
安装docker
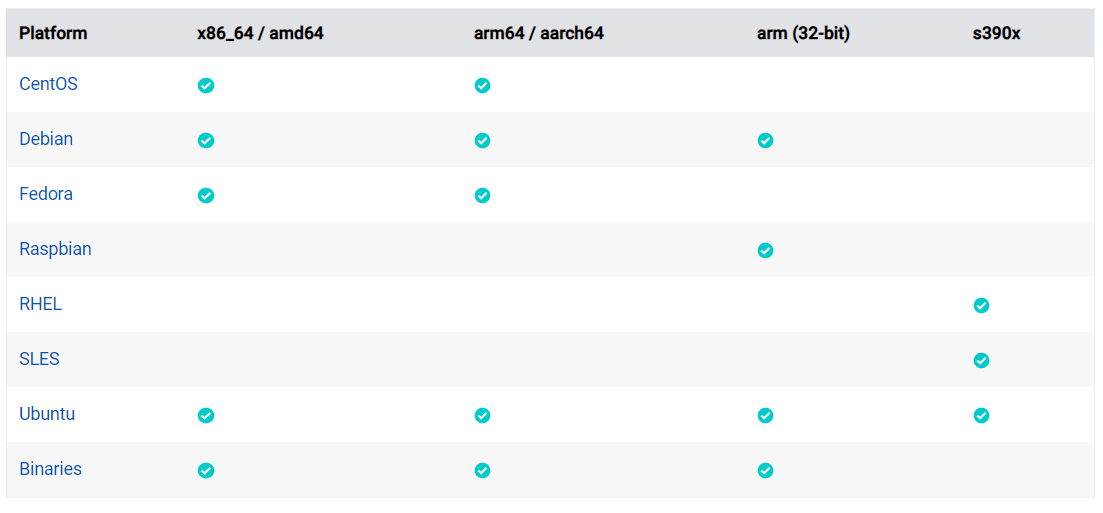
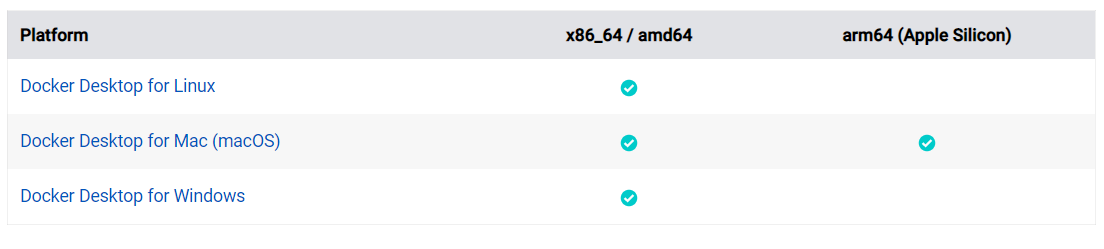
各版本平台支持情况
• Server版本
•桌面版本
Server版本安装
Ubuntu 安装(以华为云Ubuntu 20.04为例)
安装依赖
1. 操作系统版本
Plain Text
Ubuntu Kinetic 22.10
Ubuntu Jammy 22.04 (LTS)
Ubuntu Focal 20.04 (LTS)
Ubuntu Bionic 18.04 (LTS)
2. CPU支持
ARM和X86_64
安装docker
1. 确定CPU,可以看到我们的是X86_64,是支持的,如果是arm一般会显示aarch64
Shell root@ecs-144421:~# uname -a
Linux 139-159-150-152 5.4.0-100-generic #113-Ubuntu SMP Thu Feb 3
18:43:29 UTC 2022 x86_64 x86_64 x86_64 GNU/Linux
2. 确定操作系统版本,本次我们使用的是Ubuntu 20.04
Shell
root@ecs-144421:~# cat /etc/*release* DISTRIB_ID=Ubuntu DISTRIB_RELEASE=20.04
DISTRIB_CODENAME=focal
DISTRIB_DESCRIPTION="Ubuntu 20.04.4 LTS"
NAME="Ubuntu"
VERSION="20.04.4 LTS (Focal Fossa)"
ID=ubuntu ID_LIKE=debian
PRETTY_NAME="Ubuntu 20.04.4 LTS" VERSION_ID="20.04"
HOME_URL="https://www.ubuntu.com/" SUPPORT_URL="https://help.ubuntu.com/"
BUG_REPORT_URL="https://bugs.launchpad.net/ubuntu/"
PRIVACY_POLICY_URL="https://www.ubuntu.com/legal/terms-and- policies/privacy-policy"
VERSION_CODENAME=focal
UBUNTU_CODENAME=focal
3. 卸载旧版本,如果是新购买的云服务器是没有的,比如输入docker并没有这个命令,就不需要卸载
Shell
root@ecs-144421:~#  sudo apt-get remove docker docker-engine
docker.io containerd runc Reading package lists... Done Building dependency tree
Reading state information... Done
E: Unable to locate package docker-engine
4. 卸载历史版本
Shell
#卸载软件
sudo apt-get purge docker-ce docker-ce-cli containerd.io docker- buildx-plugin
docker-compose-plugin docker-ce-rootless-extras -y
#删除目录
sudo rm -rf /var/lib/docker sudo rm -rf /var/lib/containerd#这个是修改后的目录,根据实际情况设置
sudo rm -rf /data/var/lib/docker
sudo rm -rf  /etc/docker/daemon.json
5. 配置docker下载源
Shell
#curl 命令安装
sudo apt install curl -y #创建gpg key 目录
sudo mkdir -m 0755 -p /etc/apt/keyrings #下载gpg key
curl -fsSL https://download.docker.com/linux/ubuntu/gpg | sudo gpg
--dearmor --yes -o /etc/apt/keyrings/docker.gpg echo \
"deb [arch=$(dpkg --print-architecture) signed- by=/etc/apt/keyrings/docker.gpg]
https://download.docker.com/linux/ubuntu \
$(lsb_release -cs) stable" | sudo tee
/etc/apt/sources.list.d/docker.list > /dev/null
6. 安装
Shell
sudo apt-get update
sudo apt-get install docker-ce docker-ce-cli containerd.io docker-
buildx-plugin docker-compose-plugin -y
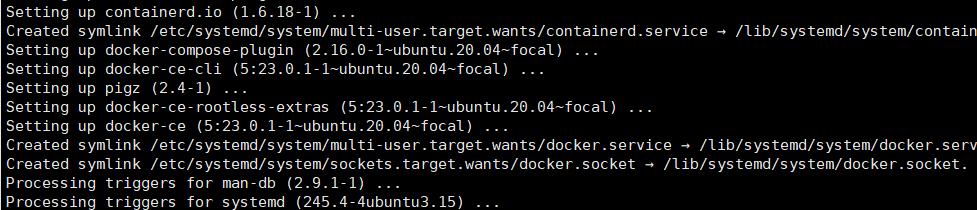
查看安装结果
7. 自动启动配置
Shell
#配置加载
sudo systemctl daemon-reload #启动服务
sudo systemctl start docker #开启启动
sudo systemctl enable docker #查看服务状态
sudo systemctl status docker
8. 检查安装结果查看版本
Shell
root@ecs-144421:~# docker version Client: Docker Engine - Community Version:           23.0.1
API version:       1.42
Go version:        go1.19.5
Git commit:        a5ee5b1
Built:             Thu Feb  9 19:46:56 2023
OS/Arch:           linux/amd64
Context:           default
Server: Docker Engine - Community
Engine:
Version:          23.0.1
API version:      1.42 (minimum version 1.12) Go version:       go1.19.5
Git commit:       bc3805a
Built:            Thu Feb  9 19:46:56 2023
OS/Arch:          linux/amd64
Experimental:     false containerd:
Version:          1.6.18
GitCommit:        2456e983eb9e37e47538f59ea18f2043c9a73640
runc:
Version:          1.1.4
GitCommit:        v1.1.4-0-g5fd4c4d docker-init:
Version:          0.19.0
GitCommit:        de40ad0
9. 更详细查看docker 信息
Shell
root@ecs-144421:~# docker info Client:
Context:    default Debug Mode: false Plugins:
buildx: Docker Buildx (Docker Inc.) Version:  v0.10.2
Path:     /usr/libexec/docker/cli-plugins/docker-buildx compose: Docker Compose (Docker Inc.)
Version:  v2.16.0
Path:     /usr/libexec/docker/cli-plugins/docker-compose scan: Docker Scan (Docker Inc.)
Version:  v0.23.0
Path:     /usr/libexec/docker/cli-plugins/docker-scanServer:
Containers: 0
Running: 0
Paused: 0
Stopped: 0
Images: 0
Server Version: 23.0.1 Storage Driver: overlay2 Backing Filesystem: extfs Supports d_type: true
Using metacopy: false Native Overlay Diff: true userxattr: false
Logging Driver: json-file Cgroup Driver: cgroupfs Cgroup Version: 1 Plugins:
Volume: local
Network: bridge host ipvlan macvlan null overlay
Log: awslogs fluentd gcplogs gelf journald json-file local
logentries splunk syslog
Swarm: inactive
Runtimes: io.containerd.runc.v2 runc Default Runtime: runc
Init Binary: docker-init
containerd version: 2456e983eb9e37e47538f59ea18f2043c9a73640 runc version: v1.1.4-0-g5fd4c4d
init version: de40ad0 Security Options:
apparmor seccomp
Profile: builtin
Kernel Version: 5.4.0-100-generic Operating System: Ubuntu 20.04.4 LTS OSType: linux
Architecture: x86_64 CPUs: 1
Total Memory: 1.936GiB Name: 139-159-150-152
ID: 82ec3110-9c2b-4922-90c3-57a9bf3ff082
Docker Root Dir: /var/lib/docker Debug Mode: false
Registry: https://index.docker.io/v1/ Experimental: false
Insecure Registries: 127.0.0.0/8
Live Restore Enabled: false
WARNING: No swap limit support
10. 执行hello-world可以看到Hello from Docker,表面docker服务正常
Shell
root@ecs-144421:~# sudo docker run hello-world Unable to find image 'hello-world:latest' locally
latest: Pulling from library/hello-world 2db29710123e: Pull complete
Digest: sha256:6e8b6f026e0b9c419ea0fd02d3905dd0952ad1feea67543f525c73a0a79 0fefb
Status: Downloaded newer image for hello-world:latestHello from Docker!
This message shows that your installation appears to be working
correctly.
To generate this message, Docker took the following steps:
1. The Docker client contacted the Docker daemon.
2. The Docker daemon pulled the "hello-world" image from the Docker Hub.
(amd64)
3. The Docker daemon created a new container from that image which runs the
executable that produces the output you are currently reading.
4. The Docker daemon streamed that output to the Docker client, which sent it
to your terminal.To try something more ambitious, you can run an Ubuntu container with:
$ docker run -it ubuntu bash
Share images, automate workflows, and more with a free Docker ID: https://hub.docker.com/
For more examples and ideas, visit:
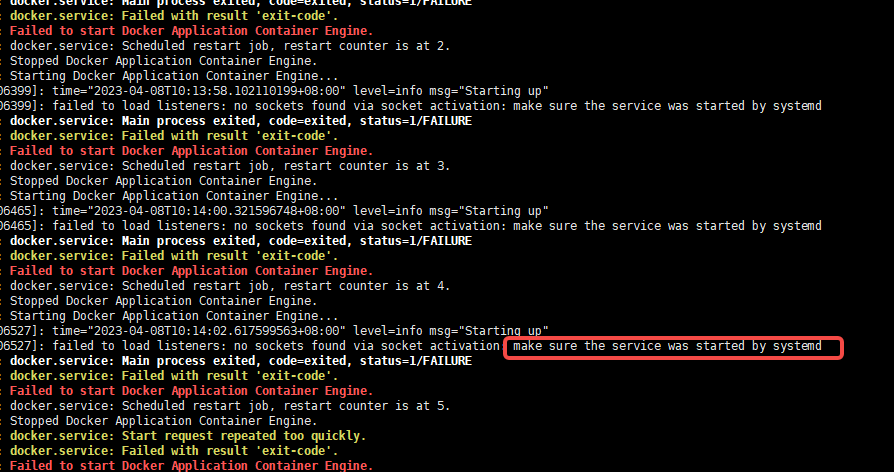
https://docs.docker.com/get-started/常见报错
1. 报错截图:
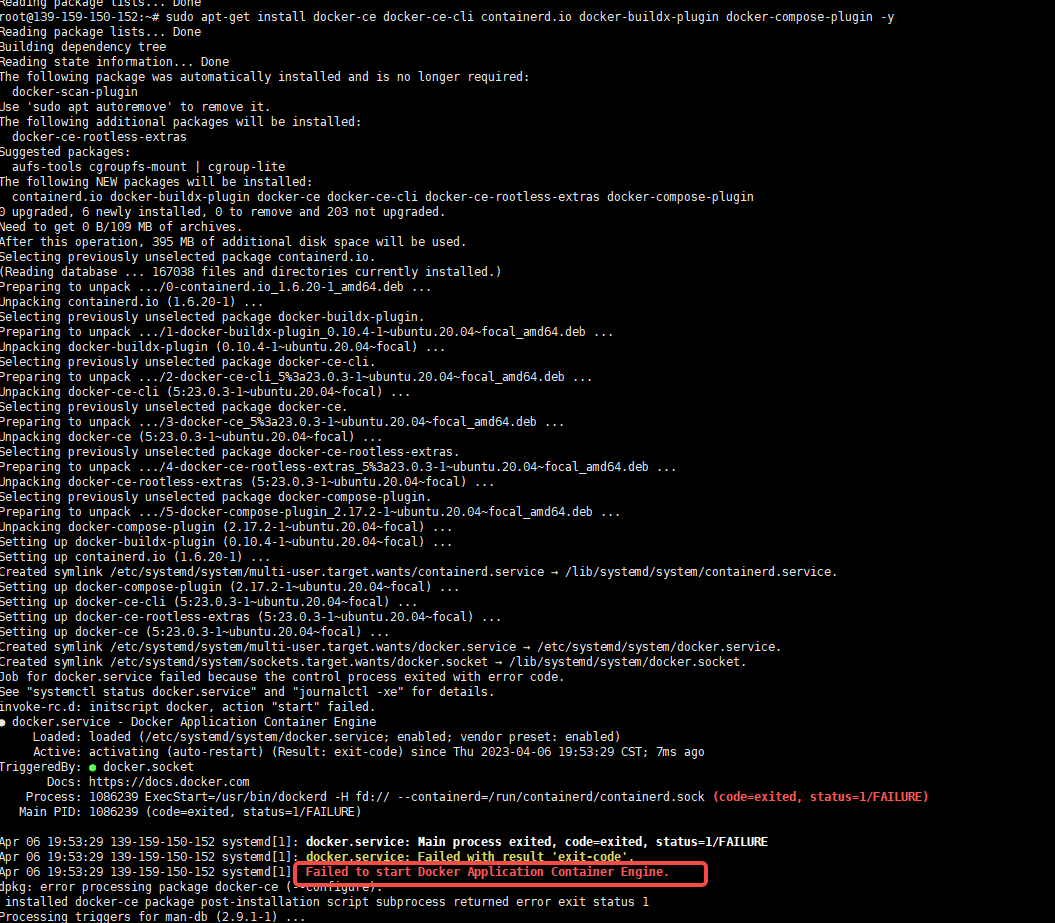
2. 查看日志 Java
Java
#journalctl 是操作系统日志查看命令
#-e 表示从末尾看
#-u 表示看哪个系统组件的,我们的组件是 docker
journalctl -eu docker
查看报错
3. 执行如下命令修复
Shell
systemctl daemon-reload
systemctl start docker
实战经验
Docker镜像源修改
对于使用systemd 的系统(Ubuntu 16.04+、Debian 8+、CentOS 7), 如果是腾讯云在配置文件/etc/docker/daemon.json 中加入
JSON
{
"registry-mirrors": ["https://mirror.ccs.tencentyun.com"]
}
如果是阿里云,因为只对企业开放海外代理,只能找私人的一些开放的源,目前可以使用的源如下
Java
{
"registry-mirrors": [
"https://docker.m.daocloud.io",
"https://dockerhub.timeweb.cloud",
"https://huecker.io"
"https://docker.1ms.run"
"https://docker.mybacc.com/"
"https://dytt.online"
"https://lispy.org"
"https://docker.xiaogenban1993.com"
"https://docker.yomansunter.com"
"https://aicarbon.xyz"
"https://666860.xyz"
"https://docker.zhai.cm"
"https://a.ussh.net"
"https://hub.littlediary.cn"
"https://hub.rat.dev"
"https://docker.m.daocloud.io"]
}
重新启动dockerd:
Plain Text
sudo systemctl daemon-reload
sudo systemctl restart docker
Docker目录修改
Docker 默认的安装目录为/var/lib/docker,这里面会存放很多很多镜像,所以我们在安装的时候需要考虑这个目录的空间,有三种解决方案。
(1)将/var/lib/docker挂载到一个大的磁盘,这种一般我们能控制挂载目录,像腾讯云这种云厂商在安装K8s的节点的时候提供了挂载选项,可以直接挂载这个目录过去
(2)安装之前挂载一个大的磁盘,然后创建一个软链接到/var/lib/docker,这样就自动安装到我们空间比较大的磁盘了
(3)安装了docker,然后发现忘了配置这个目录,我们需要修改docker的配置文件
Shell
#假定我们磁盘的大的目录为 /data mkdir -p /data/var/lib/docker # 编辑配置文件
vi /etc/docker/daemon.json # 输入下面的json
{
"data-root": "/data/var/lib/docker"
}# 加载配置
sudo systemctl daemon-reload # 重启docker
sudo systemctl restart docker #查看docker 状态
sudo systemctl status docker
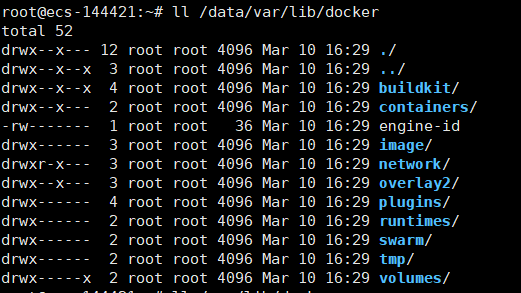
配置文件信息/etc/docker/daemon.json

修改前在/var/lib/docker下
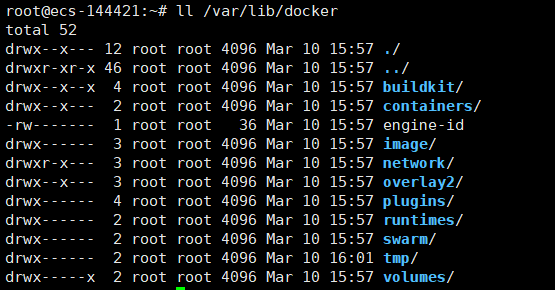
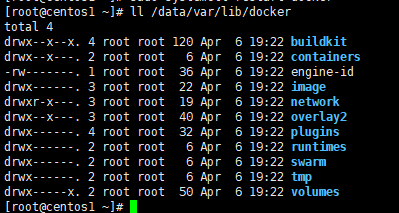
修改后在/data/var/lib/docker下
CentOS 安装
安装依赖
1. 支持的操作系统
Plain Text
CentOS 7 -- 停止更新已经不再支持
CentOS 8 (stream)
CentOS 9 (stream)
2. 支持的CPU
Plain Text
ARM/X86_64
安装Docker
1. 确认操作系统
Bash
[root@centos1 ~]# cat /etc/*release*
2. 确认CPU架构
Shell
[root@centos1 ~]# uname -a
Linux centos1 3.10.0-1160.71.1.el7.x86_64 #1 SMP Tue Jun 28
15:37:28 UTC 2022 x86_64 x86_64 x86_64 GNU/Linux
3. 卸载旧版本
Plain Text
sudo yum remove docker \docker-client \docker-client-latest \ docker-common \docker-latest \docker-latest-logrotate \ docker-logrotate \docker-engine
4. 卸载历史版本
Java
#删除机器上的包
sudo yum remove docker-ce docker-ce-cli containerd.io docker-
buildx-plugin docker-compose-plugin docker-ce-rootless-extras
#执行卸载
sudo rm -rf /var/lib/docker
sudo rm -rf /var/lib/containerd#这个是修改后的目录,根据实际情况设置
sudo rm -rf /data/var/lib/docker
sudo rm -rf  /etc/docker/daemon.json
5. 配置仓库
Shell
[root@centos1 ~]# ll /etc/yum.repos.d/ total 40
-rw-r--r--. 1 root root 1664 Nov 23  2020 CentOS-Base.repo
-rw-r--r--. 1 root root 1309 Nov 23  2020 CentOS-CR.repo
-rw-r--r--. 1 root root  649 Nov 23  2020 CentOS-Debuginfo.repo
-rw-r--r--. 1 root root  314 Nov 23  2020 CentOS-fasttrack.repo
-rw-r--r--. 1 root root  630 Nov 23  2020 CentOS-Media.repo
-rw-r--r--. 1 root root 1331 Nov 23  2020 CentOS-Sources.repo
-rw-r--r--. 1 root root 8515 Nov 23  2020 CentOS-Vault.repo
-rw-r--r--. 1 root root  616 Nov 23  2020 CentOS-x86_64- kernel.repo[root@centos1 ~]# sudo yum install -y yum-utils[root@centos1 ~]# sudo yum-config-manager --add-repo
https://mirrors.aliyun.com/docker-ce/linux/centos/docker-ce.repo
[root@centos1 ~]# ll /etc/yum.repos.d/
total 44
-rw-r--r--. 1 root root 1664 Nov 23  2020 CentOS-Base.repo
-rw-r--r--. 1 root root 1309 Nov 23  2020 CentOS-CR.repo
-rw-r--r--. 1 root root  649 Nov 23  2020 CentOS-Debuginfo.repo
-rw-r--r--. 1 root root  314 Nov 23  2020 CentOS-fasttrack.repo
-rw-r--r--. 1 root root  630 Nov 23  2020 CentOS-Media.repo
-rw-r--r--. 1 root root 1331 Nov 23  2020 CentOS-Sources.repo
-rw-r--r--. 1 root root 8515 Nov 23  2020 CentOS-Vault.repo
-rw-r--r--. 1 root root  616 Nov 23  2020 CentOS-x86_64- kernel.repo
-rw-r--r--. 1 root root 1919 Apr  5  07:45 docker-ce.repo
6. 安装最新版本
Plain Text
sudo yum install -y docker-ce
7. 启动docker
Bash
#配置加载
sudo systemctl daemon-reload #启动服务
sudo systemctl start docker #开启启动
sudo systemctl enable docker #查看服务状态
sudo systemctl status docker
8. 检查安装结果查看版本
Shell
[root@centos1 ~]# docker version Client: Docker Engine - Community Version:           23.0.3
API version:       1.42
Go version:        go1.19.7
Git commit:        3e7cbfd
Built:             Tue Apr  4 22:04:18 2023
OS/Arch:           linux/amd64
Context:           default
Server: Docker Engine - Community
Engine:
Version:          23.0.3
API version:      1.42 (minimum version 1.12) Go version:       go1.19.7
Git commit:       59118bf
Built:            Tue Apr  4 22:02:01 2023
OS/Arch:          linux/amd64
Experimental:     false containerd:
Version:          1.6.20
GitCommit:        2806fc1057397dbaeefbea0e4e17bddfbd388f38 runc:
Version:          1.1.5
GitCommit:        v1.1.5-0-gf19387a
docker-init:
Version:          0.19.0
GitCommit:        de40ad0
9. 更详细查看docker 信息
Shell
[root@centos1 ~]# docker info Client:
Context: default Debug Mode: false Plugins:
buildx: Docker Buildx (Docker Inc.) Version: v0.10.4
Path: /usr/libexec/docker/cli-plugins/docker-buildx compose: Docker Compose (Docker Inc.)
Version: v2.17.2
Path: /usr/libexec/docker/cli-plugins/docker-compose
Server:
Containers: 0
Running: 0
Paused: 0
Stopped: 0
Images: 0
Server Version: 23.0.3 Storage Driver: overlay2 Backing Filesystem: xfs Supports d_type: true Using
metacopy: false Native Overlay Diff: true userxattr: false
Logging Driver: json-file Cgroup Driver: cgroupfs Cgroup Version: 1 Plugins:
Volume: local
Network: bridge host ipvlan macvlan null overlay
Log: awslogs fluentd gcplogs gelf journald json-file local logentries splunk syslog
Swarm: inactive
Runtimes: io.containerd.runc.v2 runc Default Runtime: runc
Init Binary: docker-init
containerd version: 2806fc1057397dbaeefbea0e4e17bddfbd388f38
runc version: v1.1.5-0-gf19387a init version: de40ad0
Security Options:
seccomp
Profile: builtin
Kernel Version: 3.10.0-1160.71.1.el7.x86_64 Operating System: CentOS Linux 7 (Core) OSType: linux
Architecture: x86_64 CPUs: 2
Total Memory: 1.795GiB Name: centos1
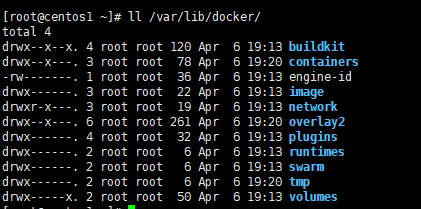
ID: 0b3c79d5-957d-4d04-a856-ac15a2a09db2 Docker Root Dir: /var/lib/docker
Debug Mode: false
Registry: https://index.docker.io/v1/ Experimental: false
Insecure Registries: 127.0.0.0/8
Live Restore Enabled: false10. 执行hello-world可以看到Hello from Docker,表面docker服务正常
Shell
[root@centos1 ~]# sudo docker run hello-world Unable to find image 'hello-world:latest' locally
latest: Pulling from library/hello-world 2db29710123e: Pull complete
Digest: sha256:ffb13da98453e0f04d33a6eee5bb8e46ee50d08ebe17735fc0779d0349e 889e9
Status: Downloaded newer image for hello-world:latest
Hello from Docker!
This message shows that your installation appears to be working correctly.
To generate this message, Docker took the following steps:
1. The Docker client contacted the Docker daemon.
2. The Docker daemon pulled the "hello-world" image from the Docker Hub.
(amd64)
3. The Docker daemon created a new container from that imagewhich runs theexecutable that produces the output you are currently reading.
4. The Docker daemon streamed that output to the Docker client,
which sent itto your terminal.
To try something more ambitious, you can run an Ubuntu container with:
$ docker run -it ubuntu bash
Share images, automate workflows, and more with a free Docker ID: https://hub.docker.com/For more examples and ideas, visit:
https://docs.docker.com/get-started/
实战经验
Docker镜像源修改
对于使用systemd 的系统(Ubuntu 16.04+、Debian 8+、CentOS 7), 如果是腾讯云在配置文件/etc/docker/daemon.json 中加入
JSON
{
"registry-mirrors": ["https://mirror.ccs.tencentyun.com"]
}
如果是阿里云,因为只对企业开放海外代理,只能找私人的一些开放的源,目前可以使用的源如下
Java
{
"registry-mirrors": ["https://docker.m.daocloud.io", "https://dockerhub.timeweb.cloud", "https://huecker.io"]
}
Docker目录修改
Docker 默认的安装目录为/var/lib/docker,这里面会存放很多很多镜像,所以我们在安装的时候需要考虑这个目录的空间,有三种解决方案。
(1)将/var/lib/docker挂载到一个大的磁盘,这种一般我们能控制挂载目录,像腾讯云这种云厂商在安装K8s的节点的时候提供了挂载选项,可以直接挂载这个目录过去
(2)安装之前挂载一个大的磁盘,然后创建一个软链接到/var/lib/docker,这样就自动安装到我们空间比较大的磁盘了
(3)安装了docker,然后发现忘了配置这个目录,我们需要修改docker的配置文件
Shell
#假定我们磁盘的大的目录为 /data
mkdir -p /data/var/lib/docker
# 编辑配置文件
vi /etc/docker/daemon.json
# 输入下面的json
{ "data-root": "/data/var/lib/docker"
}
# 加载配置
sudo systemctl daemon-reload
# 重启docker
sudo systemctl restart docker
#查看docker状态
sudo systemctl status docker
配置文件信息/etc/docker/daemon.json

修改前在/var/lib/docker下
修改后在/data/var/lib/docker下
GUI版本安装(以windows 11为例)
安装依赖
确定开启虚拟化
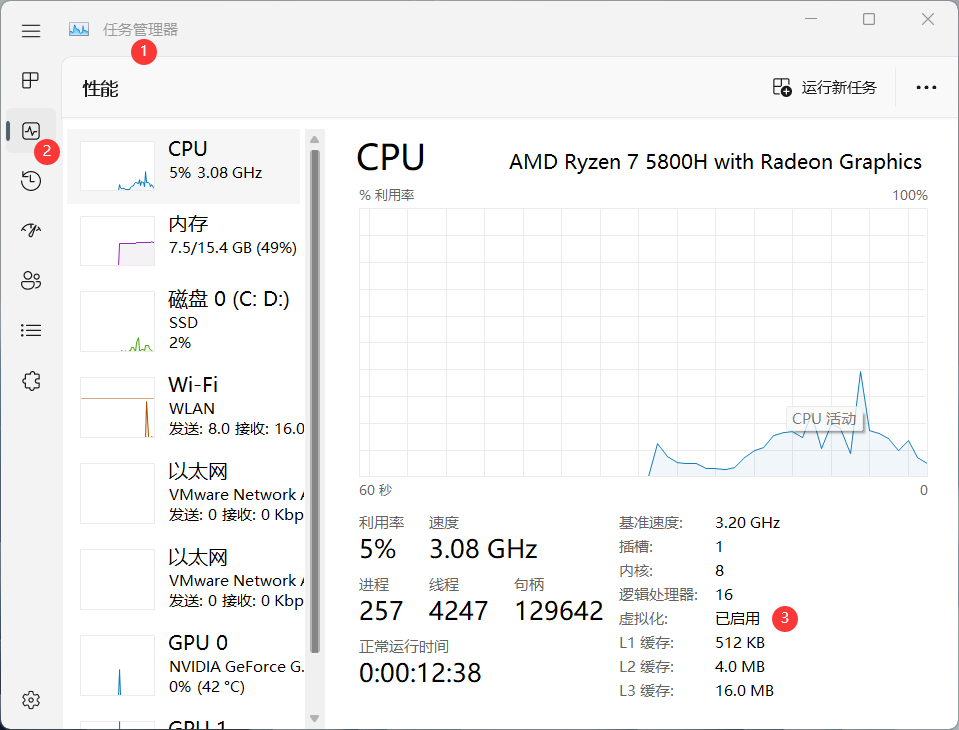
•输入win+i,然后输入启用或者关闭windows功能
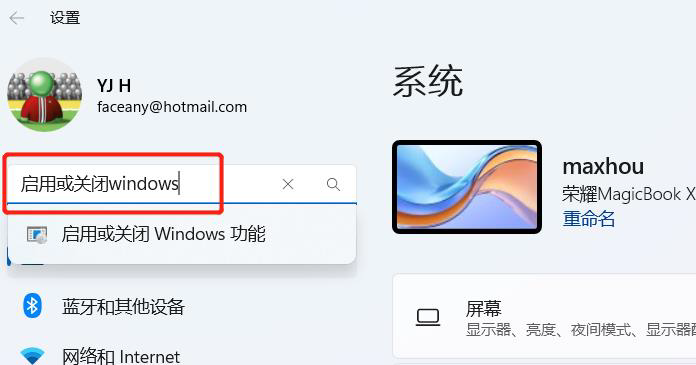
•选择windows子系统和
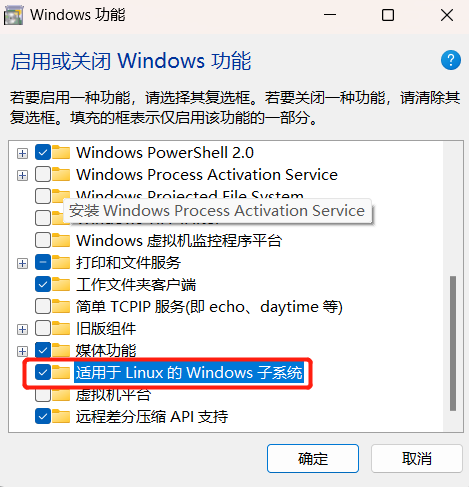
和
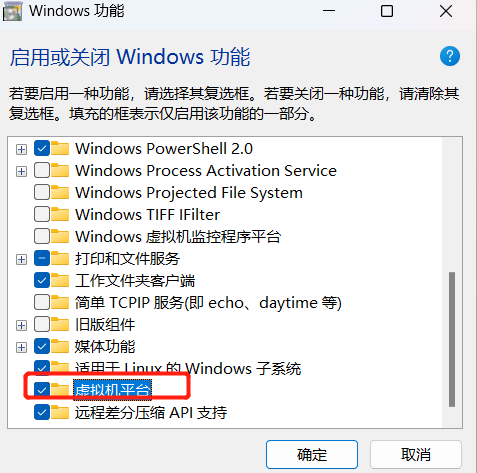
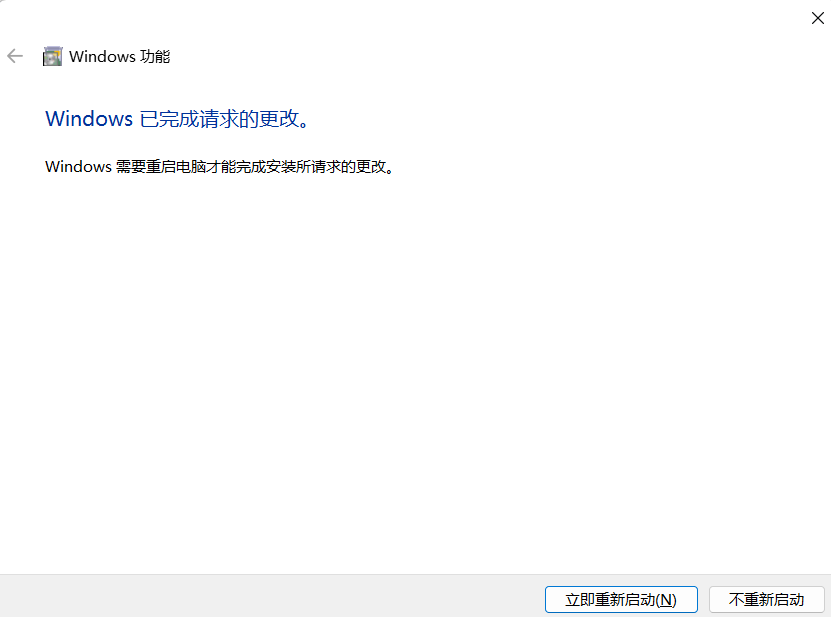
•重启电脑,完成系统设置
•安装WSL2
○以管理员权限运行PowerShell
○查看版本,如果不是2需要更新到2
Shell
wsl --status
○PowerShell运行命令更新wsl到最新版本
Shell
PS C:\WINDOWS\system32> wsl --update
○设置wsl默认版本
Shell
PS C:\WINDOWS\system32> wsl --set-default-version 2
• 通过微软应用商店安装Ubuntu 18.04.5

• 启动安装好的Ubunt18.04,如图表示启动成功
Shell
Installing, this may take a few minutes...
Please create a default UNIX user account. The username does not need to match your Windows username.
For more information visit: https://aka.ms/wslusers
Enter new UNIX username: zsc
Enter new UNIX password:
Retype new UNIX password:
passwd: password updated successfully
Installation successful!
To run a command as administrator (user "root"), use "sudo <command>".
See "man sudo_root" for details.
zsc@LAPTOP-DIG6CK4H:~$
安装docker
•点击链接下载Docker Desktop for Windows
• 下载好之后双击Docker Desktop Installer.exe 开始安装
• 点击Docker Desktop桌面快捷方式运行Dokcer
• 确认Docker安装成功, 在PowerShell中输入docker version命令确认Client和Server是否启动
Shell
PS C:\Users\zsc> docker version Client:
Cloud integration: v1.0.29 Version:           20.10.21
API version:       1.41
Go version:        go1.18.7
Git commit:        baeda1f
Built:             Tue Oct 25 18:08:16 2022
OS/Arch:           windows/amd64
Context:           default
Experimental:      trueServer: Docker Desktop 4.15.0 (93002) Engine:
Version:          20.10.21
API version:      1.41 (minimum version 1.12) Go version:       go1.18.7
Git commit:       3056208
Built:            Tue Oct 25 18:00:19 2022OS/Arch:          linux/amd64
Experimental:     false containerd:
Version:          1.6.10
GitCommit:        770bd0108c32f3fb5c73ae1264f7e503fe7b2661 runc:
Version:          1.1.4
GitCommit:        v1.1.4-0-g5fd4c4d docker-init:
Version:          0.19.0
GitCommit:        de40ad0
因docker源不可用,需要配置代理,目前可以使用的源如下,如果找不到请联系老师获取。
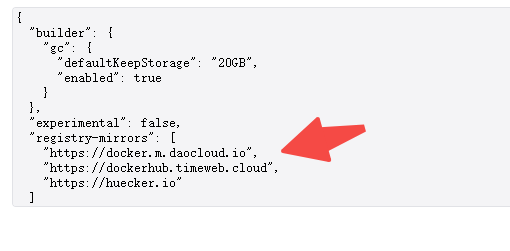
具体值如下
Java
{"registry-mirrors": ["https://docker.m.daocloud.io", "https://dockerhub.timeweb.cloud", "https://huecker.io"]
}