android View详解—自定义ViewGroup,流式布局
重写方法介绍
onMeasure
protected void onMeasure(int widthMeasureSpec, int heightMeasureSpec) {遍历所有子 View:根据业务规则,为每个子 View 计算并设置
MeasureSpec,然后调用child.measure()。合并结果:把所有子 View 的测量结果合并,计算出自身想要的宽高。
调用
setMeasuredDimension():把最终宽高传进去,否则运行时报IllegalStateException。
onLayout
protected void onLayout(boolean changed, int l, int t, int r, int b) {调用时机
在 measure 阶段结束(onMeasure已算出每个子 View 的宽高)之后、draw 阶段之前 触发,系统会把父容器 可用矩形(l,t,r,b)传进来。职责
仅负责摆放(layout)子 View,不能 在这里再次测量或修改子 View 尺寸。
对每个子 View 调用
child.layout(left, top, right, bottom),坐标 相对于父容器。如果自身是 View(非 ViewGroup),则基本不用重写;ViewGroup 必须重写。
changed 基本不用管,除非你想在首次摆放时做一次性工作。
l、t、r、b 是父容器给本 ViewGroup 的绝对坐标,不是子 View 的!
对每个孩子:
3.1 取 margin → 算 left/top;
3.2 调用child.layout(left, top, left + width, top + height);
3.3 千万别忘了 GONE 的孩子直接跳过。结束前不要再改自己的宽高;所有子 View 位置必须用绝对坐标。
onDraw
protected void onDraw(Canvas canvas) {调用时机
在layout完成后,系统需要 真正绘制像素 时触发;只有 View 才需要重写,ViewGroup 默认不画任何东西(willNotDraw=true)。
若想强制让 ViewGroup 走onDraw,需:调用
setWillNotDraw(false)(通常写在构造函数);或者设置
android:background。
职责
使用
Canvas绘制自身内容(线条、文字、Bitmap、Path 等)。不 负责绘制子 View;子 View 由系统递归调用它们的
onDraw。记得在 必要时 做
canvas.save()/canvas.restore(),避免污染坐标系。
自定义 View 添加并使用自定义属性
在
res/values/attrs.xml中声明属性集合在自定义 View 的构造函数里用
obtainStyledAttributes解析在布局 XML 中引用并使用这些属性
一、声明属性(res/values/attrs.xml)
<?xml version="1.0" encoding="utf-8"?>
<resources><!-- 自定义属性集合,名字随意 --><declare-styleable name="ColorCircleView"><!-- 颜色:支持 #RGB / #ARGB / #RRGGBB / #AARRGGBB --><attr name="circleColor" format="color" /><!-- 半径:支持 dp/sp/px --><attr name="circleRadius" format="dimension" /><!-- 是否显示描边 --><attr name="showStroke" format="boolean" /></declare-styleable>
</resources>
二、自定义 View 解析属性
public class ColorCircleView extends View {private int circleColor = Color.RED;private float circleRadius = dp2px(50);private boolean showStroke = false;private final Paint paint = new Paint(Paint.ANTI_ALIAS_FLAG);public ColorCircleView(Context context, AttributeSet attrs) {super(context, attrs);TypedArray ta = context.obtainStyledAttributes(attrs, R.styleable.ColorCircleView);try {circleColor = ta.getColor(R.styleable.ColorCircleView_circleColor, Color.RED);circleRadius = ta.getDimension(R.styleable.ColorCircleView_circleRadius, dp2px(50));showStroke = ta.getBoolean(R.styleable.ColorCircleView_showStroke, false);} finally {ta.recycle();}paint.setColor(circleColor);paint.setStyle(showStroke ? Paint.Style.STROKE : Paint.Style.FILL);paint.setStrokeWidth(dp2px(4));}@Override protected void onDraw(Canvas canvas) {super.onDraw(canvas);canvas.drawCircle(getWidth()/2f, getHeight()/2f, circleRadius, paint);}private float dp2px(float dp) {return TypedValue.applyDimension(TypedValue.COMPLEX_UNIT_DIP, dp, getResources().getDisplayMetrics());}
}
三、在布局 XML 中使用
<!-- 根布局必须添加自定义命名空间,通常用 app: -->
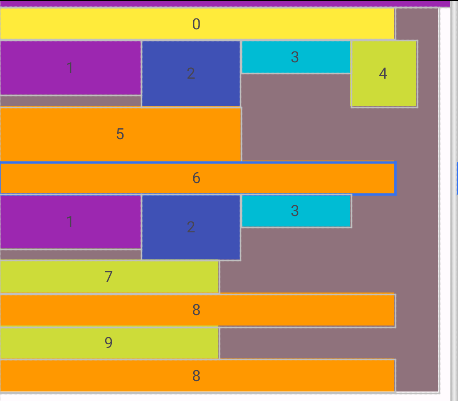
<androidx.constraintlayout.widget.ConstraintLayout xmlns:android="http://schemas.android.com/apk/res/android"xmlns:app="http://schemas.android.com/apk/res-auto"android:layout_width="match_parent"android:layout_height="match_parent"><com.example.app.ColorCircleViewandroid:layout_width="120dp"android:layout_height="120dp"app:circleColor="#FF5722"app:circleRadius="40dp"app:showStroke="true"app:layout_constraintTop_toTopOf="parent"app:layout_constraintStart_toStartOf="parent"/></androidx.constraintlayout.widget.ConstraintLayout>自定义流式布局
/*** 流式布局:像 HTML 的 wrap 一样自动换行。* 子 View 依次从左到右摆放,一行放不下就换到下一行。*/
public class FlowLayout extends ViewGroup {public static final String TAG = "FlowLayout";/* ----------------- 构造函数 ----------------- */public FlowLayout(Context context) {super(context);}public FlowLayout(Context context, AttributeSet attrs) {super(context, attrs);}public FlowLayout(Context context, AttributeSet attrs, int defStyleAttr) {super(context, attrs, defStyleAttr);}/* ----------------- 生命周期 ----------------- */@Overrideprotected void onAttachedToWindow() {super.onAttachedToWindow();// 当前 View 被加载到窗口时调用,可在这里做初始化/注册监听}@Overrideprotected void onDetachedFromWindow() {super.onDetachedFromWindow();// 当前 View 从窗口移除时调用,可在这里释放资源/反注册}/* ----------------- 测量 ----------------- */@Overrideprotected void onMeasure(int widthMeasureSpec, int heightMeasureSpec) {super.onMeasure(widthMeasureSpec, heightMeasureSpec);// 1. 解析父容器给的约束
//        MeasureSpec.EXACTLY =固定死
//        MeasureSpec.AT_MOST =最多到多少(上限)
//        MeasureSpec.UNSPECIFIED =随便你(无限)int widthMode = MeasureSpec.getMode(widthMeasureSpec);int widthSize = MeasureSpec.getSize(widthMeasureSpec);int heightMode = MeasureSpec.getMode(heightMeasureSpec);int heightSize = MeasureSpec.getSize(heightMeasureSpec);Log.d(TAG, "onMeasure mode widthMode " + widthMode+ " widthSize " + widthSize+ " heightMode " + heightMode+ " heightSize " + heightSize);int mode = MeasureSpec.getMode(widthMeasureSpec);switch (mode) {case MeasureSpec.EXACTLY:// 用这个 size 就行Log.d(TAG, "onMeasure mode widthMode " + widthMode+ " widthSize " + widthSize+ " EXACTLY ");break;case MeasureSpec.AT_MOST:// 自己计算 desired,再取 min(desired, size)// 用这个 size 就行Log.d(TAG, "onMeasure mode widthMode " + widthMode+ " widthSize " + widthSize+ " AT_MOST ");break;case MeasureSpec.UNSPECIFIED:// 完全按自己需要Log.d(TAG, "onMeasure mode widthMode " + widthMode+ " widthSize " + widthSize+ " UNSPECIFIED ");break;}// 2. 根据“内容”计算我想要的宽高int paddingWidth = getPaddingLeft() + getPaddingRight();int paddingHeight = getPaddingTop() + getPaddingBottom();int parentHeight = 0;int line = 0; // 行号int lineMaxWidth = paddingWidth; // 当前行已用宽度int lineMaxHeight = 0;// 当前行最高子 Viewint maxChildCount = getChildCount() - 1;// 累计高度(不含最后一行)for (int i = 0; i < getChildCount(); i++) {View child = getChildAt(i);// 根据父约束 + 自身 LayoutParams 产生子 View 的 spec// 让子 View 自己测量measureChild(child, widthMeasureSpec, heightMeasureSpec);int childWidth = child.getMeasuredWidth();int childHeight = child.getMeasuredHeight();if (i == 0) {lineMaxWidth += childWidth;lineMaxHeight = Math.max(childHeight, lineMaxHeight);} else {lineMaxWidth += childWidth;if (lineMaxWidth > widthSize) {line++;parentHeight += lineMaxHeight;Log.d(TAG, "onMeasure "+ " height " + childHeight+ " line " + line+ " lineMaxHeight " + lineMaxHeight+ " parentHeight " + parentHeight+ " lineMaxWidth " + lineMaxWidth+ " 换行 "+ "child " + i);lineMaxHeight = paddingHeight;lineMaxWidth = paddingWidth;lineMaxWidth += childWidth;}lineMaxHeight = Math.max(childHeight, lineMaxHeight);}if (i == maxChildCount) {line++;parentHeight += lineMaxHeight;Log.d(TAG, "onMeasure "+ " height " + childHeight+ " line " + line+ " lineMaxHeight " + lineMaxHeight+ " parentHeight " + parentHeight+ " lineMaxWidth " + lineMaxWidth+ " 换行 "+ "child " + i);}Log.d(TAG, "onMeasure "+ " height " + childHeight+ " line " + line+ " lineMaxHeight " + lineMaxHeight+ " parentHeight " + parentHeight+ " lineMaxWidth " + lineMaxWidth+ " all "+ "child " + i);}int parentWidth;if (line == 0) {parentWidth = lineMaxWidth;} else {parentWidth = widthSize;}Log.d(TAG, "onMeasure size " + " parentWidth " + parentWidth+ " parentHeight " + parentHeight + " line " + line);// 3. 结合父容器约束得出最终尺寸int measuredWidth = resolveSize(parentWidth, widthMeasureSpec);int measuredHeight = resolveSize(parentHeight, heightMeasureSpec);// 4. 必须调用,否则抛 IllegalStateExceptionsetMeasuredDimension(measuredWidth, measuredHeight);}@Overrideprotected void onLayout(boolean changed, int l, int t, int r, int b) {int childLeft = getPaddingLeft();int childTop = getPaddingTop();int maxHeight = 0;for (int i = 0; i < getChildCount(); i++) {View child = getChildAt(i);if (child.getVisibility() == GONE) continue;int measuredWidth = child.getMeasuredWidth();int measuredHeight = child.getMeasuredHeight();int tempChildLeft = childLeft + measuredWidth;// 需要换行if (tempChildLeft > getWidth()) {childTop += maxHeight;maxHeight = 0;childLeft = getPaddingLeft();}maxHeight = Math.max(measuredHeight, maxHeight);// 摆放子 View:坐标相对于 FlowLayoutint left = childLeft;int top = childTop;int right = left + measuredWidth;int bottom = top + measuredHeight;// 真正摆位置child.layout(left, top, right, bottom);childLeft += measuredWidth;}}/* ----------------- 绘制 ----------------- */@Overrideprotected void onDraw(Canvas canvas) {super.onDraw(canvas);// FlowLayout 本身不画内容,留空即可}}
最终效果如下