Unity游戏打包——GooglePlay自动传包
本文由 NRatel 历史笔记整理而来,如有错误欢迎指正。
一、准备工作
参考文档:
https://developer.android.com/games/pgs/publishing/publishing?hl=zh-cn
https://developers.google.com/android-publisher/?hl=zh-cn
https://developers.google.com/android-publisher/getting_started?hl=zh-cn(准备工作)
按照文档
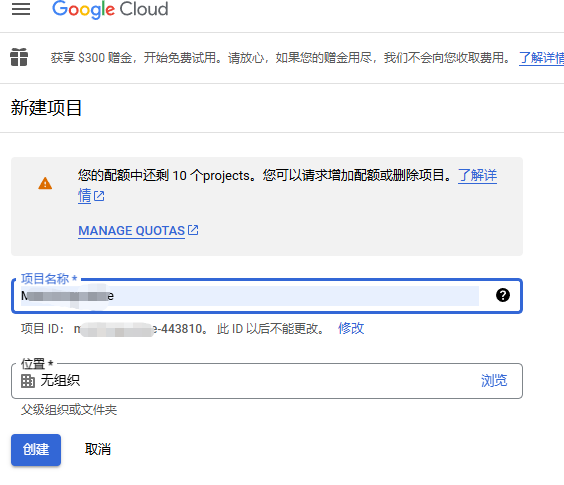
1、创建 Google Cloud 项目。
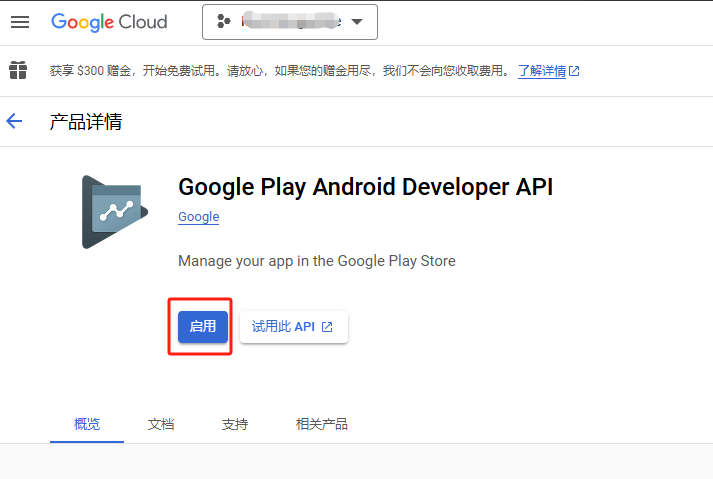
2、为 Google Cloud 项目启用 Google Play Developer API。
点击文档中链接,然后点击启用
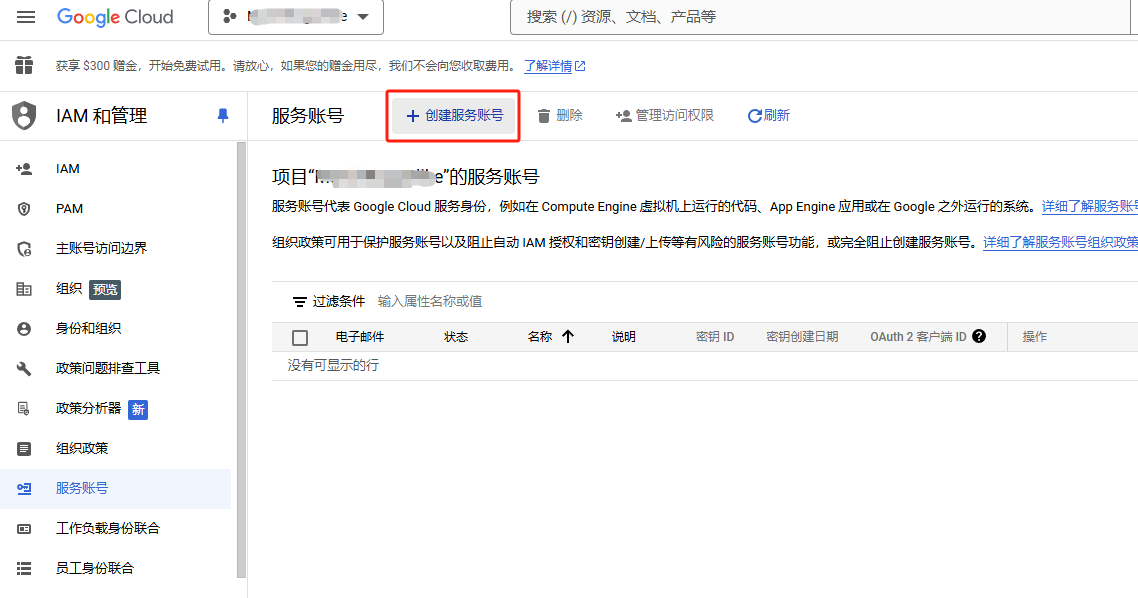
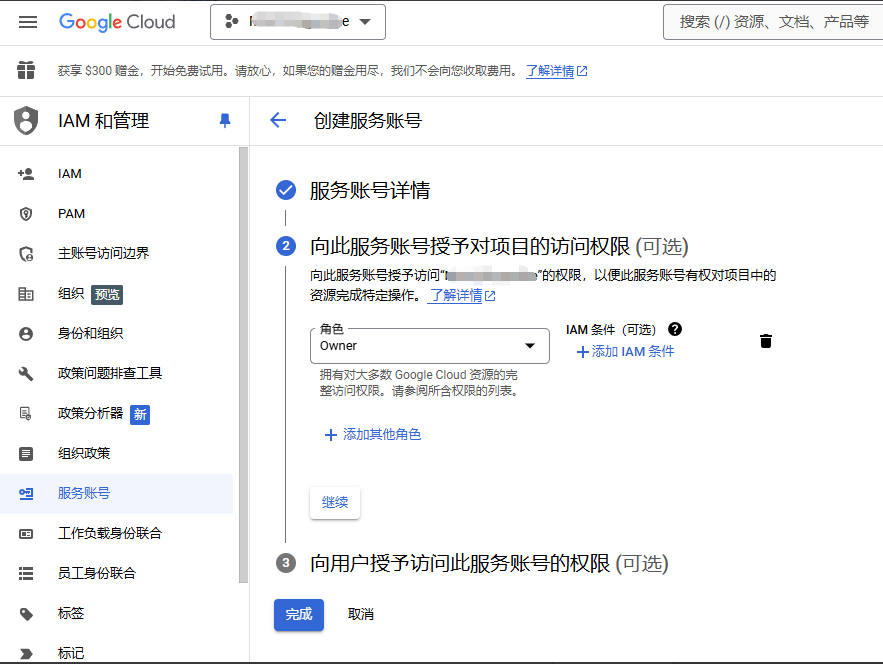
3、设置一个对 Google Play 管理中心具有适当权限的服务账号,以便访问 Google Play Developer API。
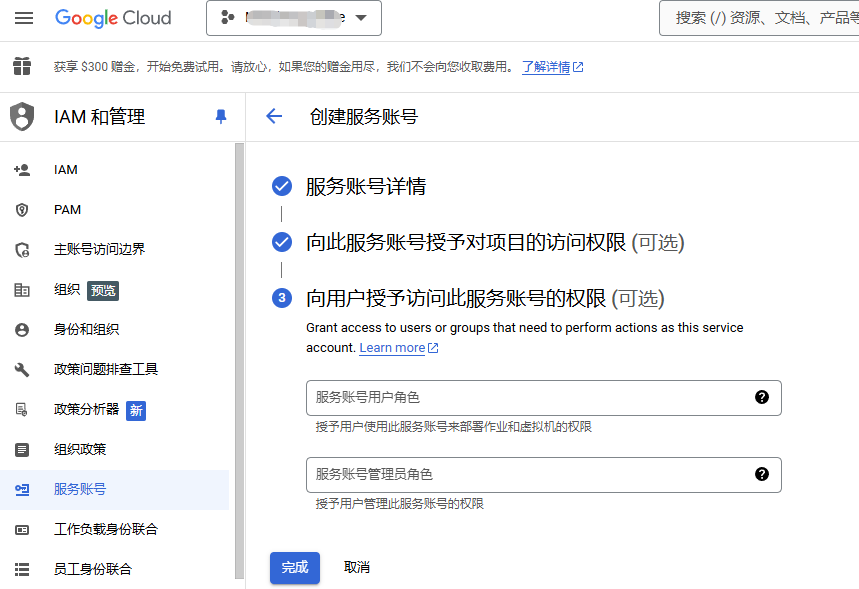
创建服务账号:
https://developers.google.com/identity/protocols/oauth2/service-account?hl=zh-cn
创建服务账号结果:

点击此 电子邮件,在密钥页创建新密钥,选择推荐的Json格式
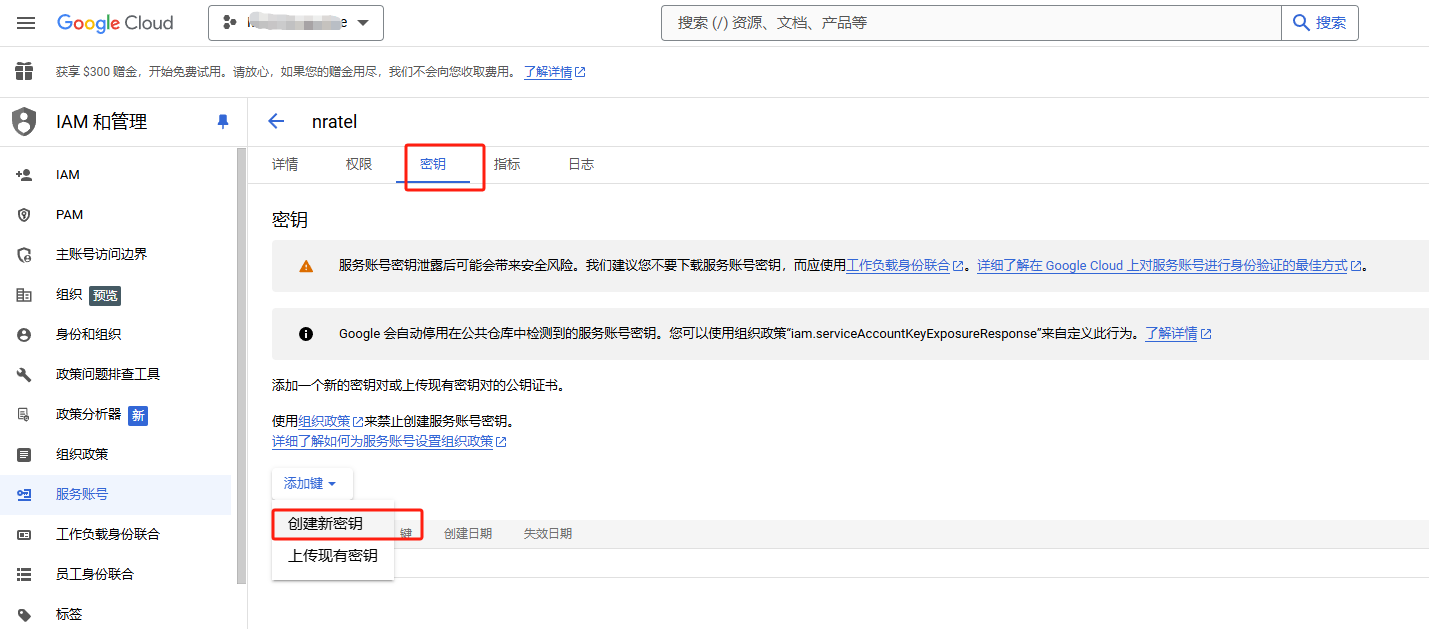
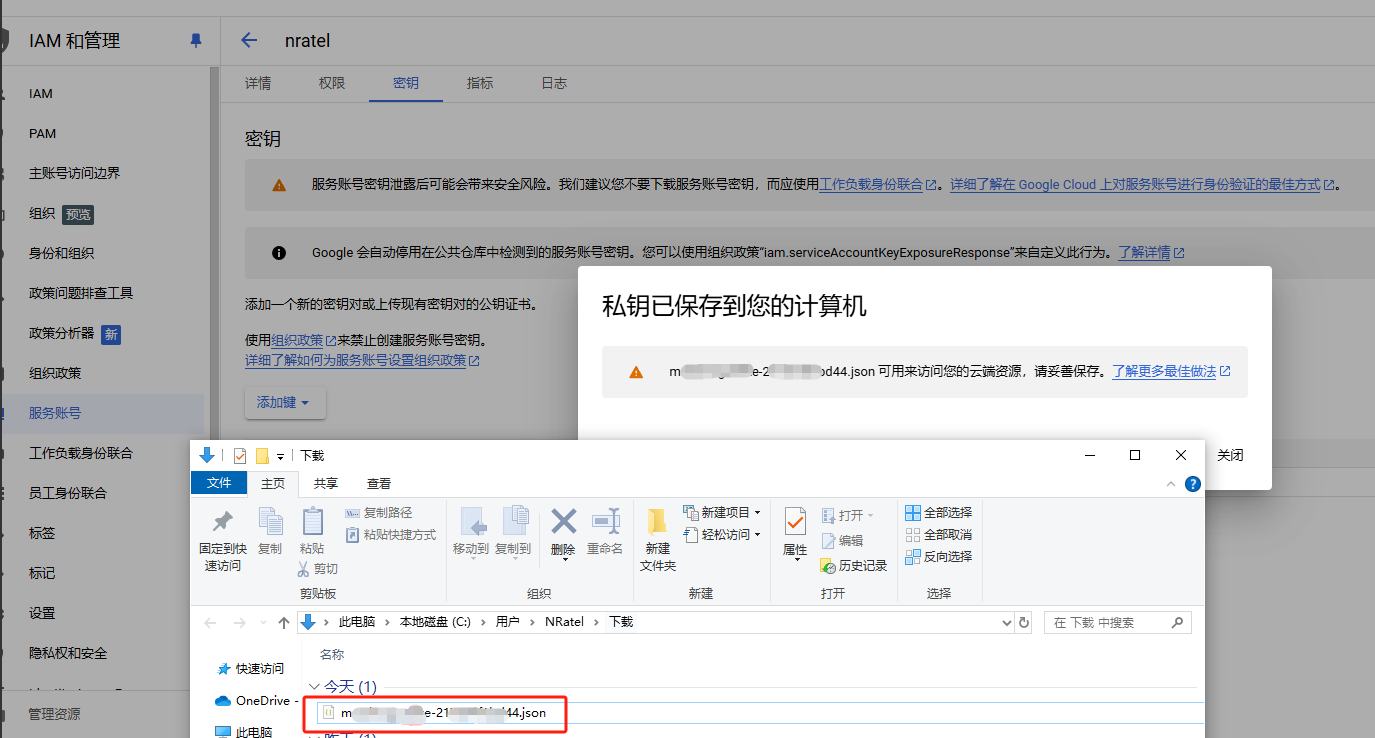
创建密钥结果:
前往 Google Play 管理中心 用户和权限 界面邀请此 电子邮件 账号
(如果自己没有邀请权限,让运营邀请)
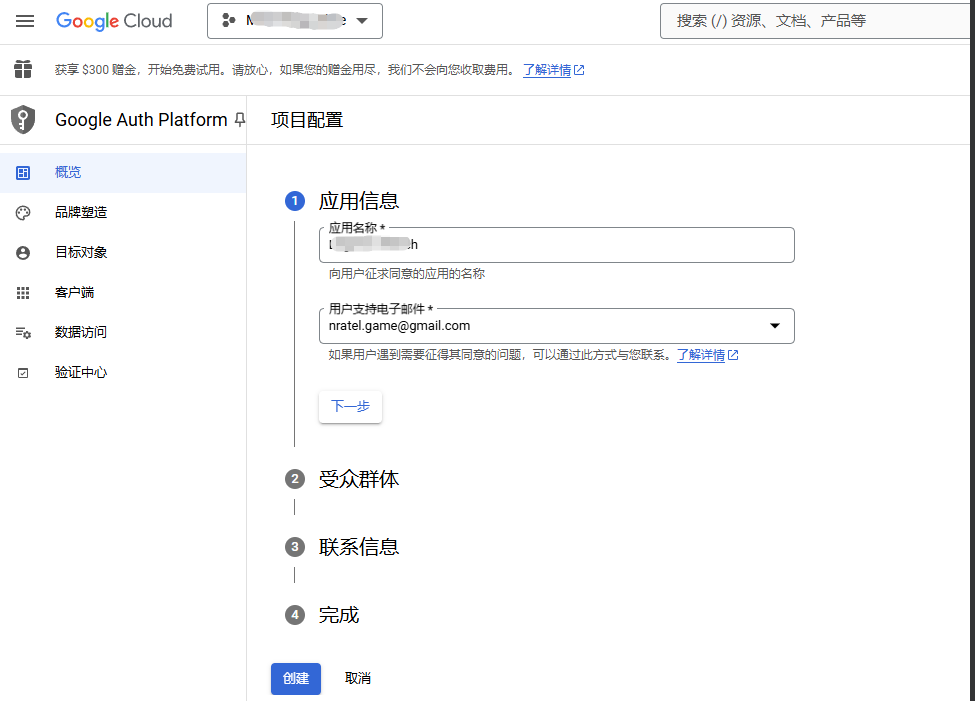
4、准备使用 OAuth 客户端
在 Google Cloud 控制台中,创建 OAuth 权限
二、使用python库上传
Python 库
https://github.com/googleapis/google-api-python-client
1、安装
google-api-python-client/docs/README.md at main · googleapis/google-api-python-client · GitHub
pip3 install google-api-python-client安装注意:
需在命令行和jenkins 运行时,分别查看
python3 --version 和 which python3确保是否是同一个python3
若不是,则执行 pip3 install 时,可指定将库安装到哪个python3中。
否则,安装错误的话,jenkins运行的python将不能识别目标 python库。
安装命令:
/usr/bin/python3 -m pip install google-api-python-client验证命令:
/usr/bin/python3 -m pip show google-api-python-client/usr/bin/python3 -m pip list强制安装:
若 jenkins 使用的是 homebrew 中的 python,则安装三方 python 库时可能会提示失败。
可以考虑装在虚拟环境中,但使用不方便。
可以强制安装(有风险)。
pip3 install google-api-python-client --break-system-packages2、设置、身份验证和授权访问、build a service、传包
https://github.com/googleapis/google-api-python-client/blob/main/docs/start.md
from googleapiclient.discovery import build
service = build('drive', 'v3')
# ...
service.close()
查看支持的API页面,确认使用 androidpublisher v3,并查看其文档:
https://googleapis.github.io/google-api-python-client/docs/dyn/androidpublisher_v3.html
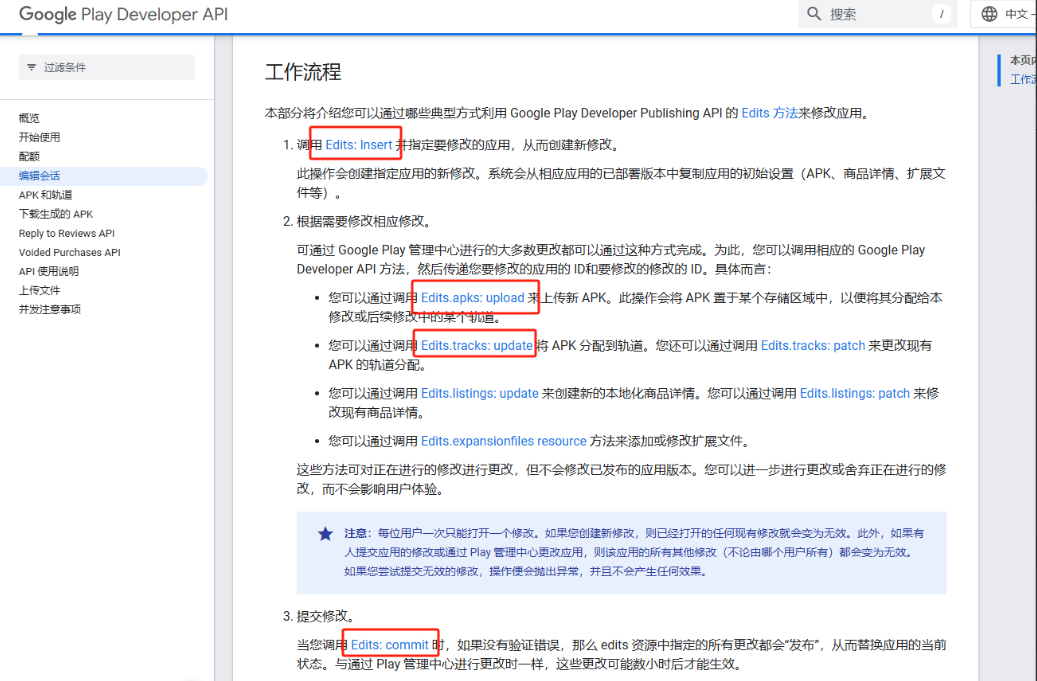
根据文档,调用 Edits下的方法进行传包
(编辑会话)(Edits方法和工作流程介绍)
https://developers.google.com/android-publisher/edits?hl=zh-cn
(APK和轨道介绍)
https://developers.google.com/android-publisher/tracks?hl=zh-cn
(Edits方法API文档)
https://googleapis.github.io/google-api-python-client/docs/dyn/androidpublisher_v3.edits
四步:
1、使用 service.edits().insert 创建新修改,得到 edit_id
https://googleapis.github.io/google-api-python-client/docs/dyn/androidpublisher_v3.edits.html#insert
2、使用 service.edits().bundles().upload 上传 aab,得到 本次上传的 versionCode
(上传到某个存储域中,以便分配给本修改或后续修改中的某个轨道。)
https://googleapis.github.io/google-api-python-client/docs/dyn/androidpublisher_v3.edits.bundles.html#upload
3、使用 service.edits().tracks().update 将 aab 分配到指定轨道
https://googleapis.github.io/google-api-python-client/docs/dyn/androidpublisher_v3.edits.tracks.html#update
4、使用 service.edits().commit 提交 edit 中的更改,从而替换应用的当前状态。
与通过 Play 管理中心进行更改时一样,这些更改可能数小时后才能生效。
https://googleapis.github.io/google-api-python-client/docs/dyn/androidpublisher_v3.edits.html#commit
注意:脚本中需要的service_account_file 来自这里:
credentials = Credentials.from_service_account_file(service_account_file, scopes=['https://www.googleapis.com/auth/androidpublisher'])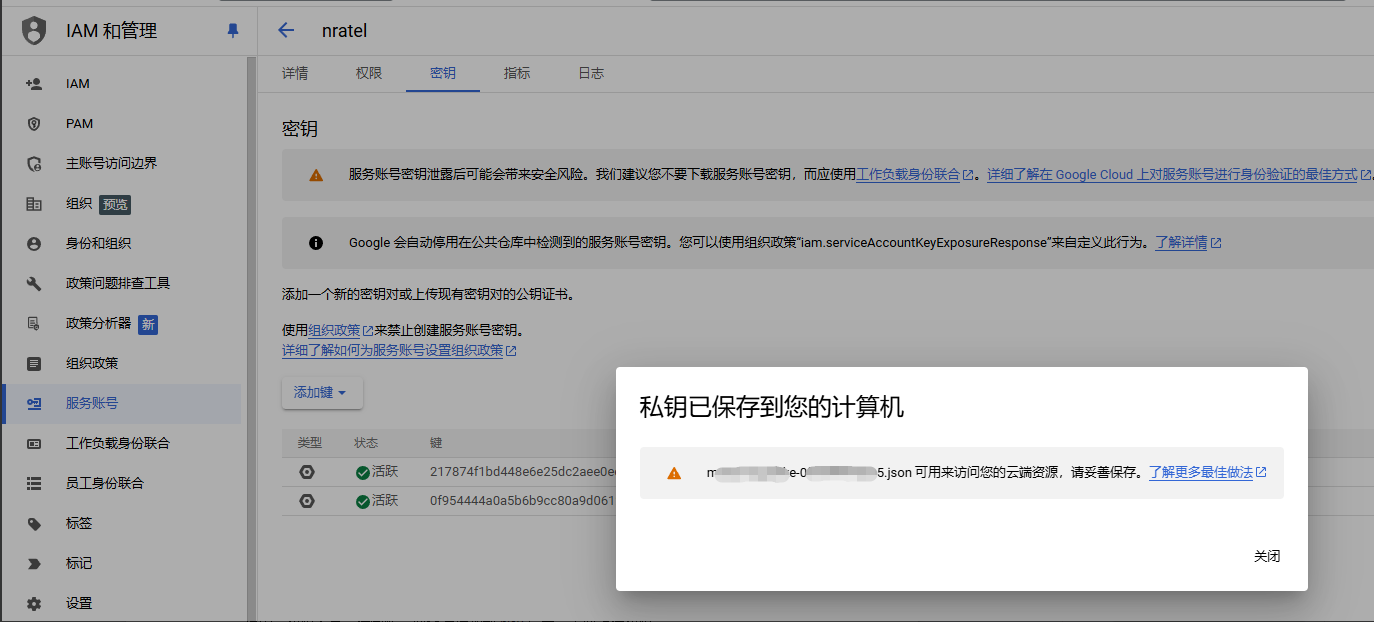
遇到的问题:
1、returned "The caller does not have permission". Details: "The caller does not have permission">
原因:权限不足,传包账号要让运行加到play后台,需要上传权限。
2、超时
TimeoutError: The write operation timed out
raise RemoteDisconnected("Remote end closed connection without response")
解决:网络和超时设置问题
import socketsocket.setdefaulttimeout(300)3、returned "Version code 49 has already been used.". Details: "Version code 49 has already been used.">
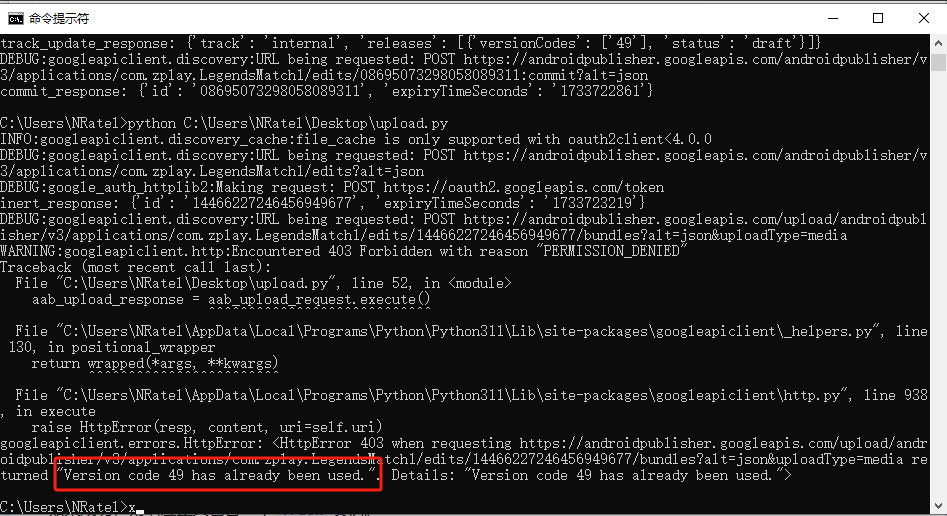
原因:googleplay后台内容库中已存在相同vercode的包。不可重复上传。
其他:
1、service.edits().bundles().upload 时,track 文档中的 qa 实际需要传 internal
https://developers.google.com/android-publisher/tracks#ff-track-name
2、service.edits().tracks().update 时,可设置 inAppUpdatePriority,默认为0
https://googleapis.github.io/google-api-python-client/docs/dyn/androidpublisher_v3.edits.tracks.html#update
若要支持,请参考:
https://developer.android.com/guide/playcore/in-app-updates/unity?hl=zh-cn
三、完整上传代码
# -*- coding: utf-8 -*-import logging
import socketfrom googleapiclient.discovery import build as google_client_build
from google.oauth2.service_account import Credentials
from google.auth.transport.requests import Requestlogging.basicConfig(level=logging.DEBUG)
socket.setdefaulttimeout(300)# 创建服务,自动刷新令牌
service_account_file = "C:/Users/NRatel/Desktop/xxxxx-xxxxx.json"
# service_account_file = "/Users/nratel/.jenkins/workspace/BuildApp_DailyTest_Android/Build/BuildGame/builders/build_app/Credentials/Android/GoogleService/xxxxx-xxxxx.json"
credentials = Credentials.from_service_account_file(service_account_file, scopes=['https://www.googleapis.com/auth/androidpublisher'])
service = google_client_build('androidpublisher', 'v3', credentials=credentials)
if credentials.expired and credentials.refresh_token:credentials.refresh(Request())# 流程文档: https://developers.google.com/android-publisher/edits?hl=zh-cn
# 可选轨道和状态:https://developers.google.com/android-publisher/tracks#ff-track-name
# API文档:https://googleapis.github.io/google-api-python-client/docs/dyn/androidpublisher_v3.edits.htmlpackage_name = "com.xxx.xxx"
aab_file = "/Users/NRatel/Desktop/xxxxx_xxxxx_v1.4.1(49).0_release_1206_2109.aab"
#aab_file = "/Users/nratel/Projects/xxxxx/BuiltResult/BuiltApk/xxxxx_xxxxx_v1.4.1(49).0_release_1206_2109.aab"
track = "internal"              #设为内测轨道(可选:alpha、beta、internal/qa(内测轨道)、production(正式版轨道)
status = "draft"                #设为完成状态(可选:draft(草稿版本)、inProgress(分阶段发布,需配合 userFraction字段)、halted(暂停分阶段发布)、completed(完成)# 1、使用 service.edits().insert 创建新修改,得到 edit_id
# https://googleapis.github.io/google-api-python-client/docs/dyn/androidpublisher_v3.edits.html#insert
inert_request = service.edits().insert(body = {}, packageName = package_name
)
inert_response = inert_request.execute()
edit_id = inert_response['id']
print(f"inert_response: {inert_response}")# 2、使用 service.edits().bundles().upload 上传 aab,得到 本次上传的 versionCode
# (上传到某个存储域中,以便分配给本修改或后续修改中的某个轨道。)
# https://googleapis.github.io/google-api-python-client/docs/dyn/androidpublisher_v3.edits.bundles.html#upload
aab_upload_request = service.edits().bundles().upload(editId = edit_id,packageName = package_name,media_body = aab_file,media_mime_type = 'application/octet-stream'
)
# aab_upload_request.http.timeout = 300
aab_upload_response = aab_upload_request.execute()
versionCode = aab_upload_response['versionCode']
print(f"aab_upload_response: {aab_upload_response}")# 3、使用 service.edits().tracks().update 将 aab 分配到指定轨道
# https://googleapis.github.io/google-api-python-client/docs/dyn/androidpublisher_v3.edits.tracks.html#update
track_update_request = service.edits().tracks().update(editId = edit_id,track = track,packageName = package_name,body = {'releases': [{'versionCodes': [versionCode],'status': status}]}
)
track_update_response = track_update_request.execute()
print(f"track_update_response: {track_update_response}")# 4、使用 service.edits().commit 提交 edit 中的更改,从而替换应用的当前状态。
# 与通过 Play 管理中心进行更改时一样,这些更改可能数小时后才能生效。
# https://googleapis.github.io/google-api-python-client/docs/dyn/androidpublisher_v3.edits.html#commit
commit_request = service.edits().commit(editId = edit_id,packageName = package_name
)
commit_response = commit_request.execute()
print(f"commit_response: {commit_response}")# 关闭服务
service.close()