ansible的搭建与安装
ansible的搭建与安装
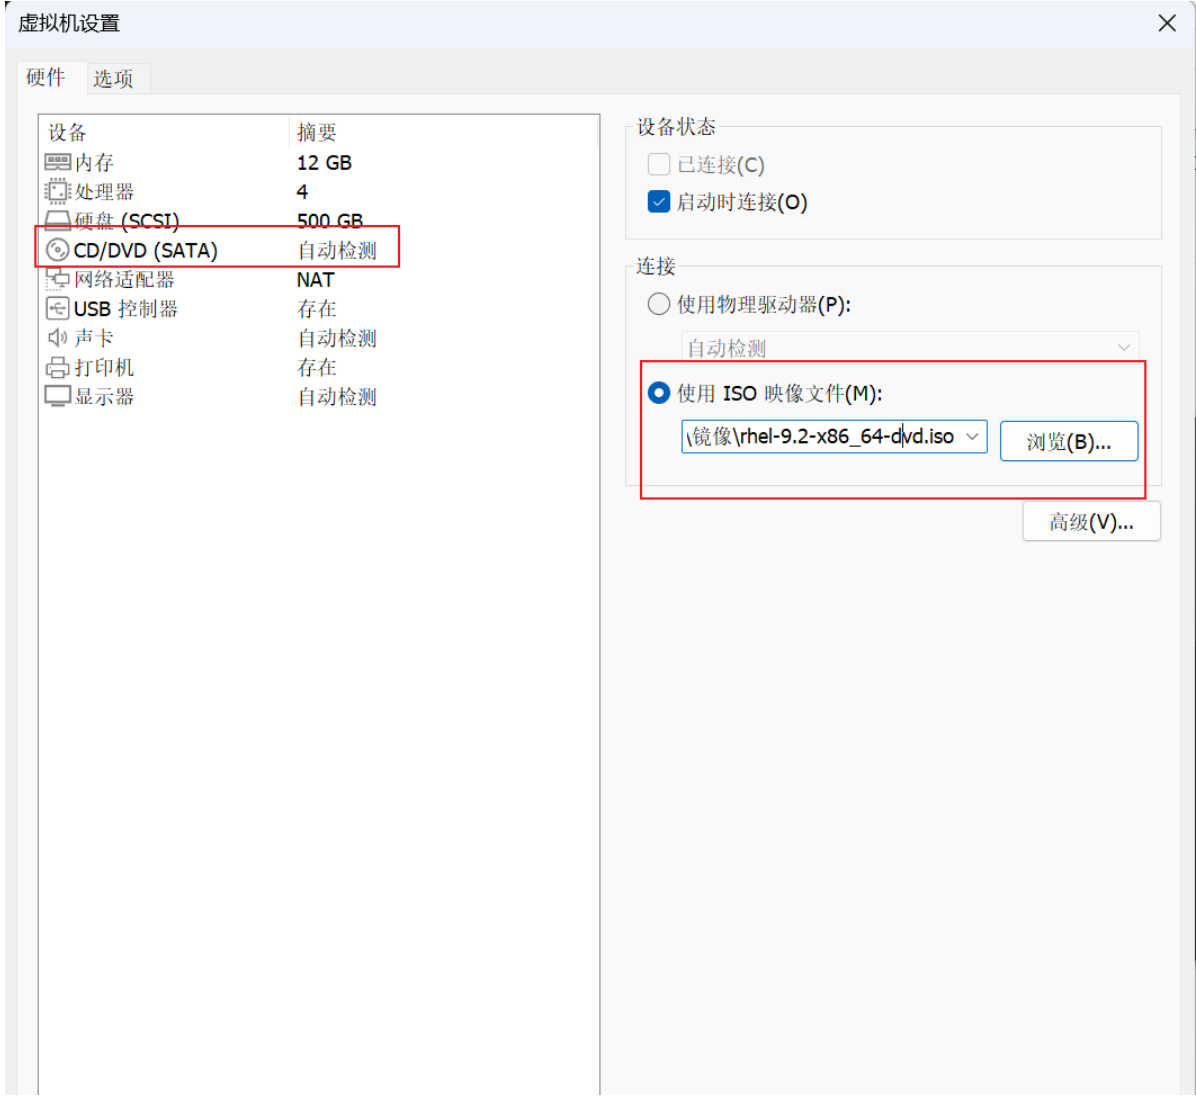
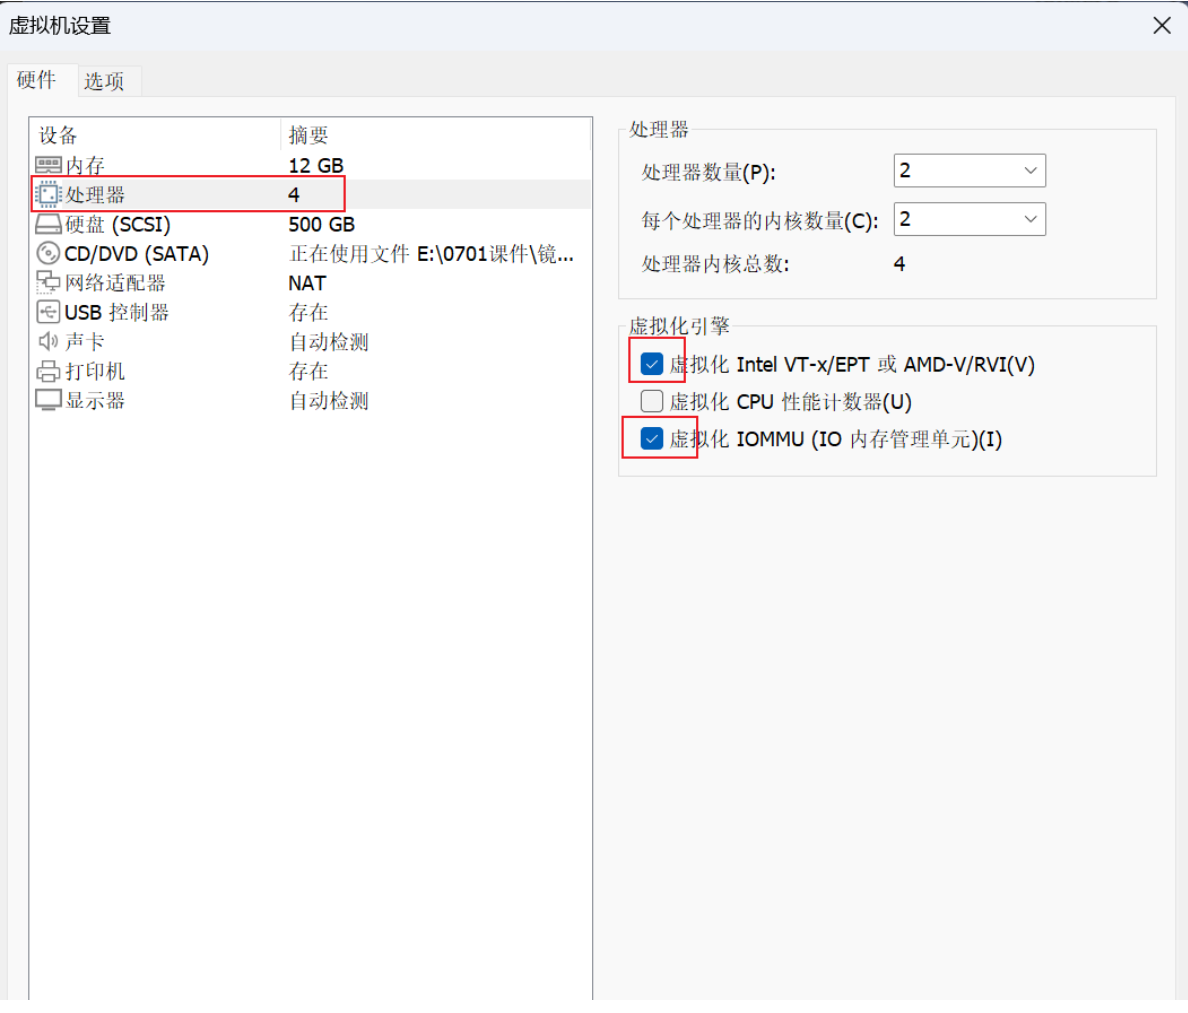
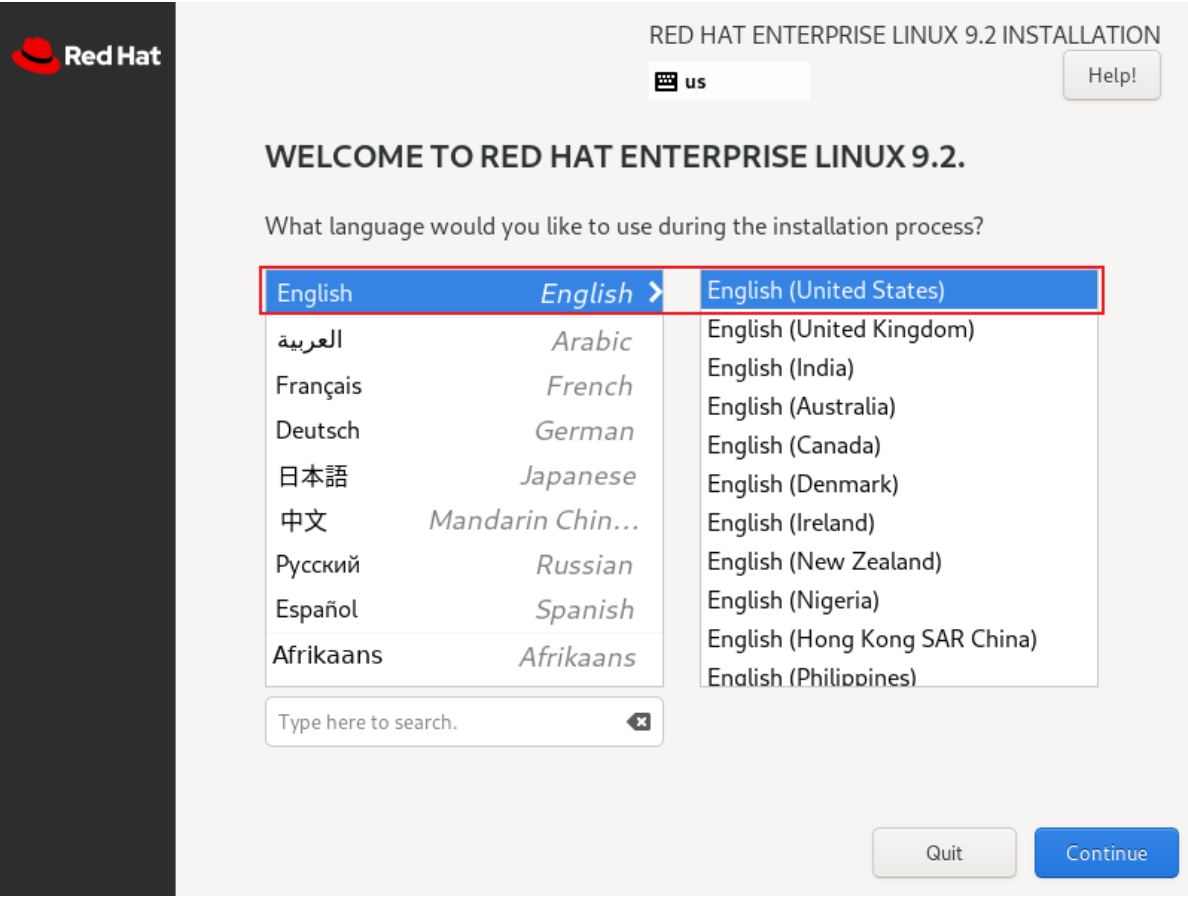
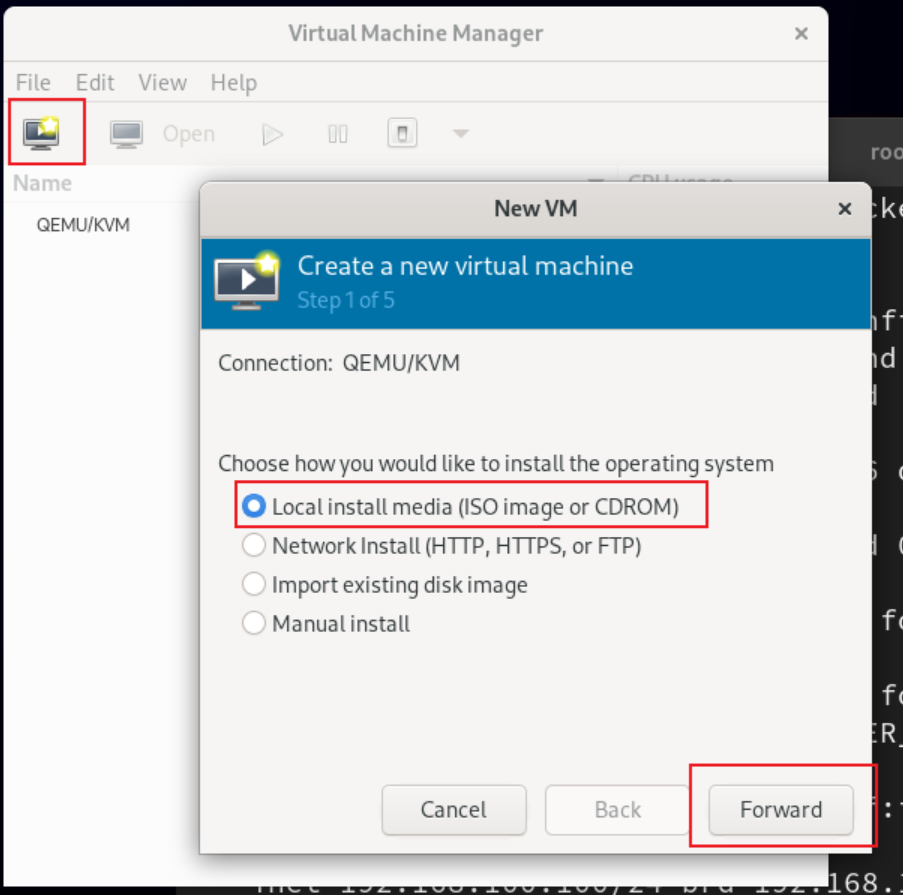
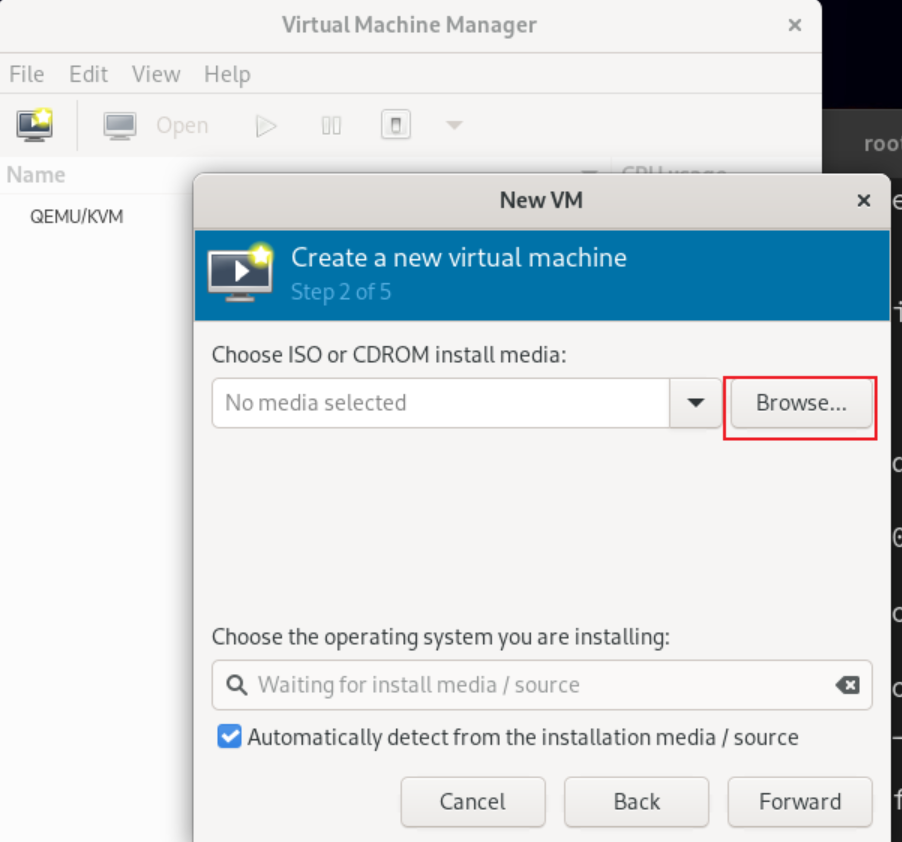
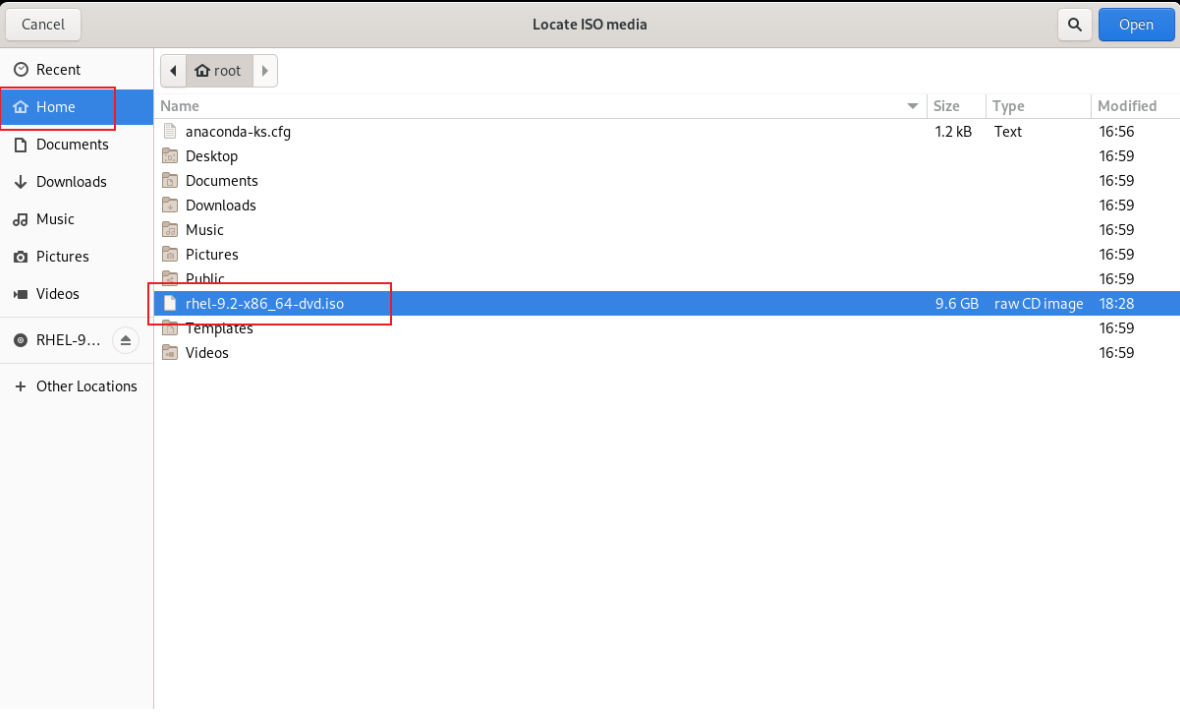
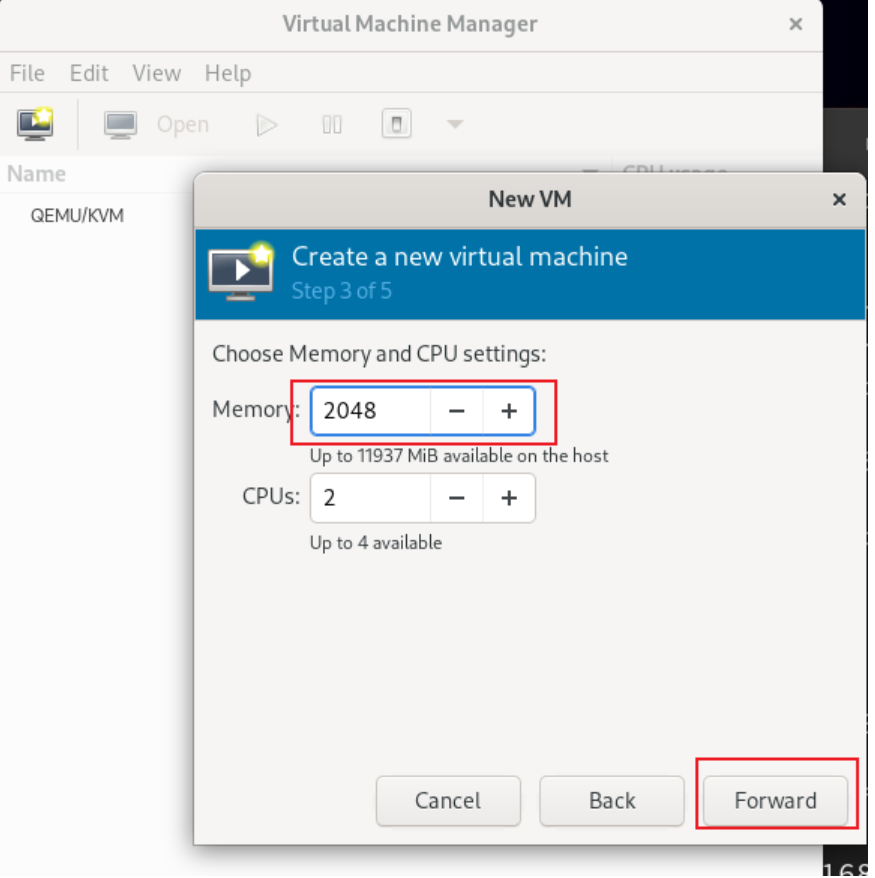
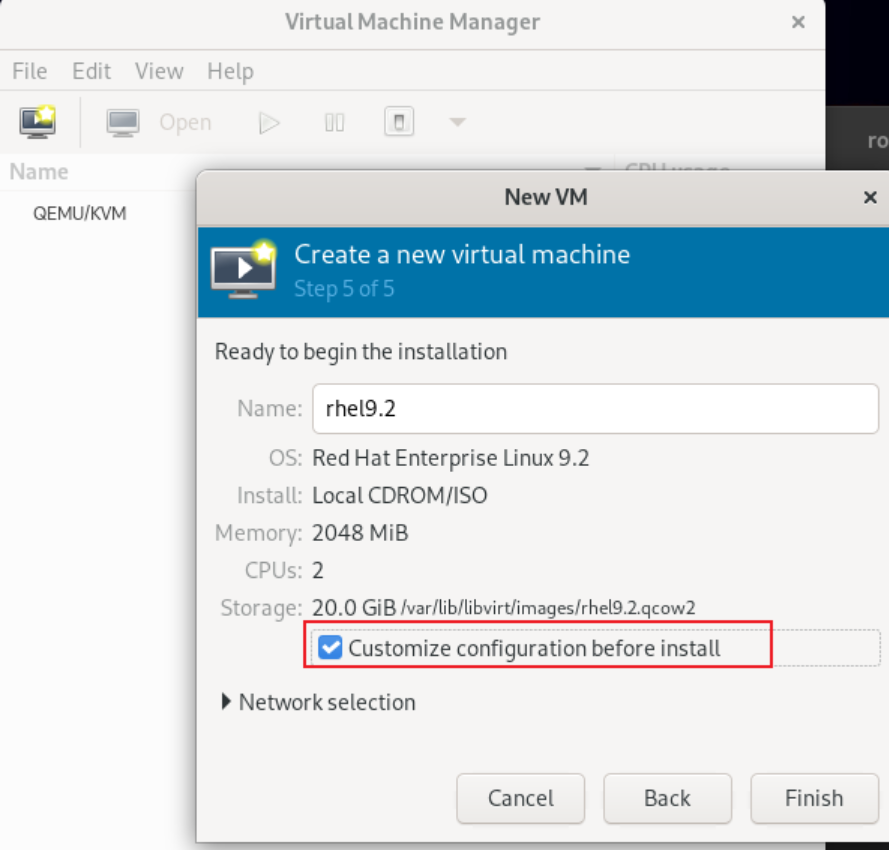
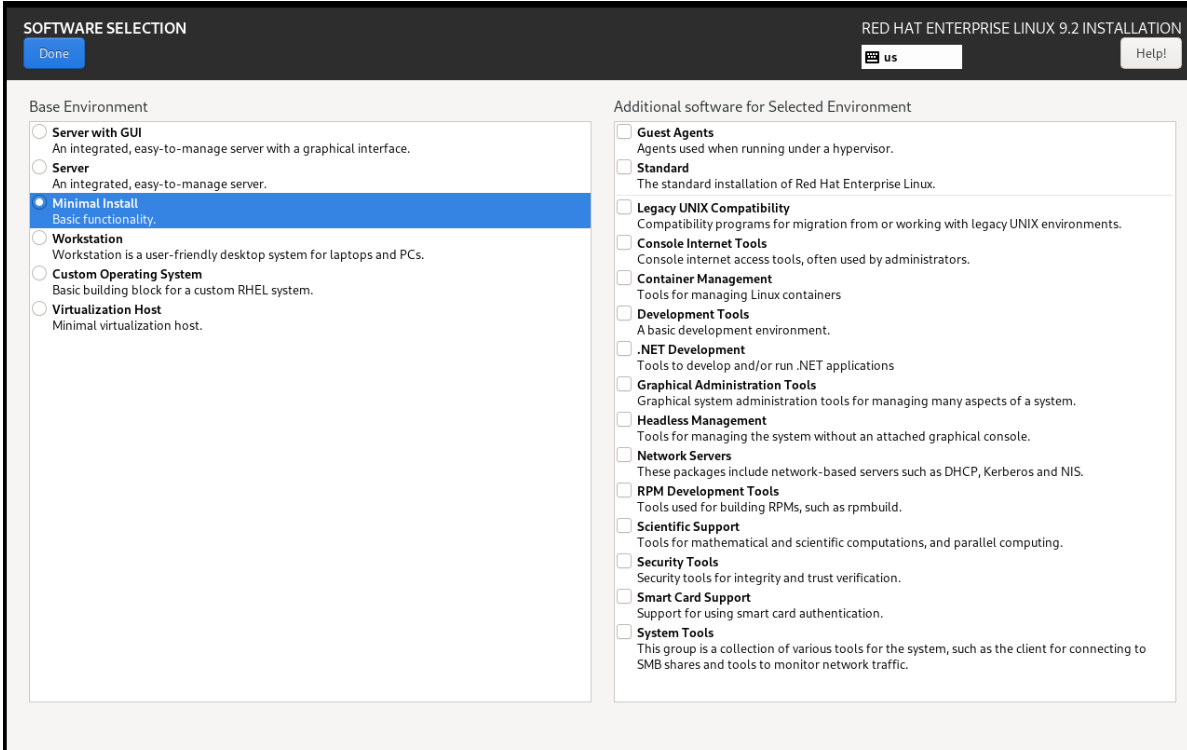
一、安装RHEL9版本虚拟机
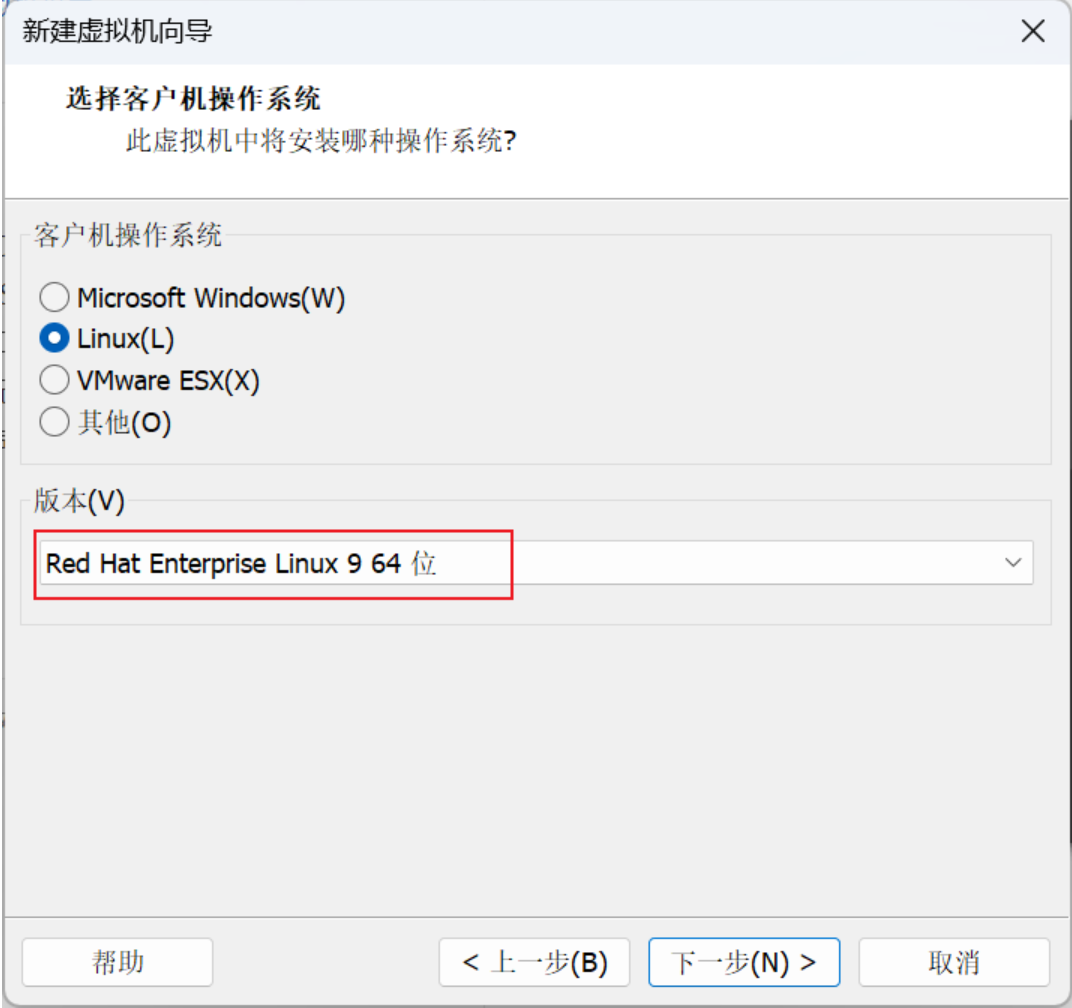
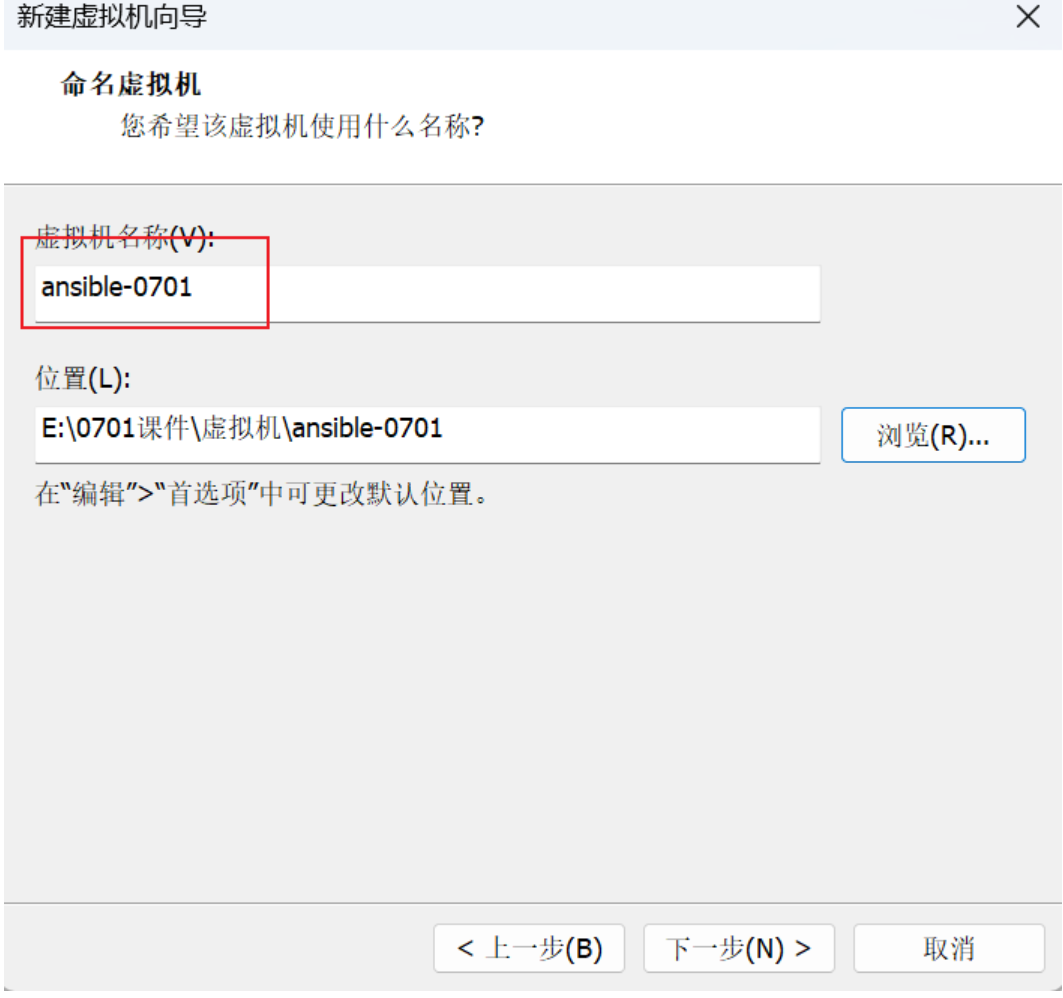
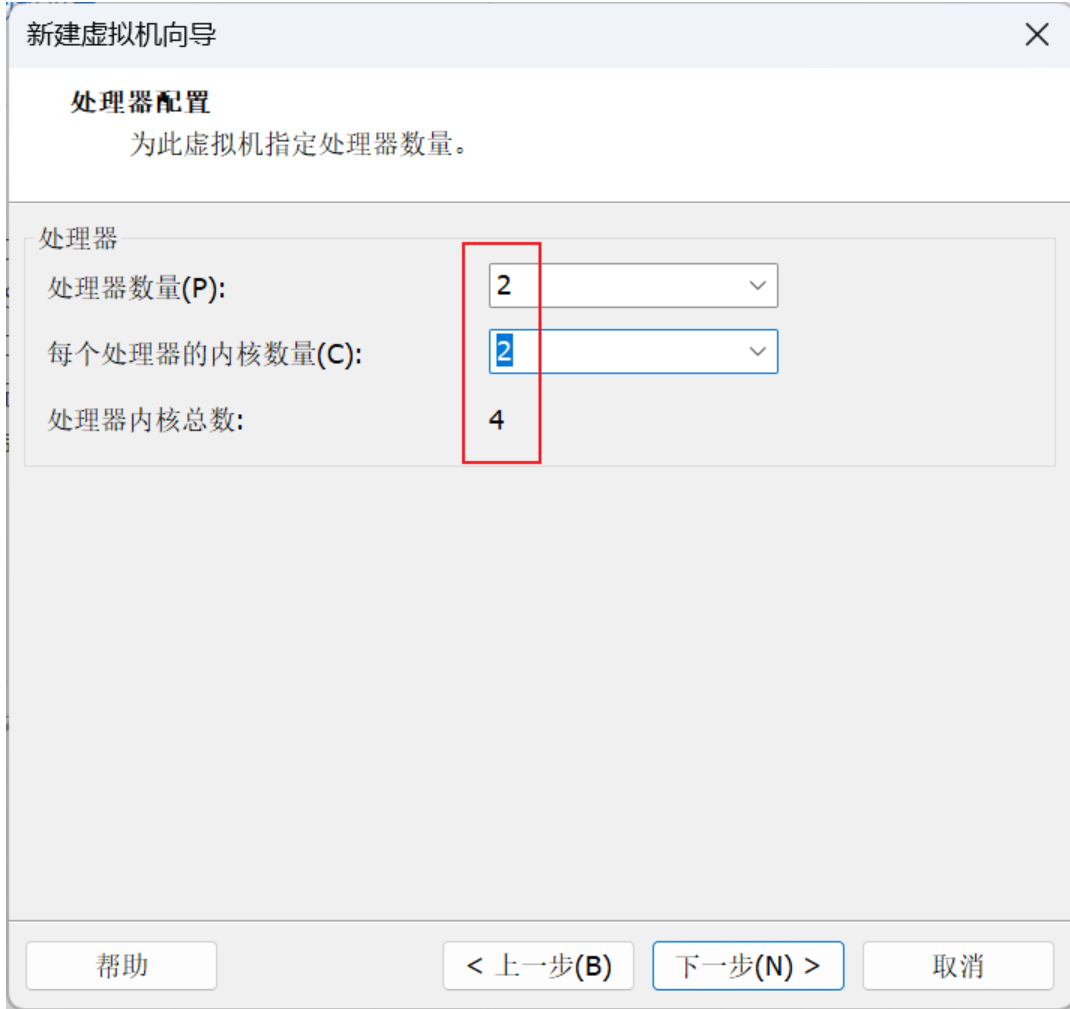

没有特别指明的直接默认
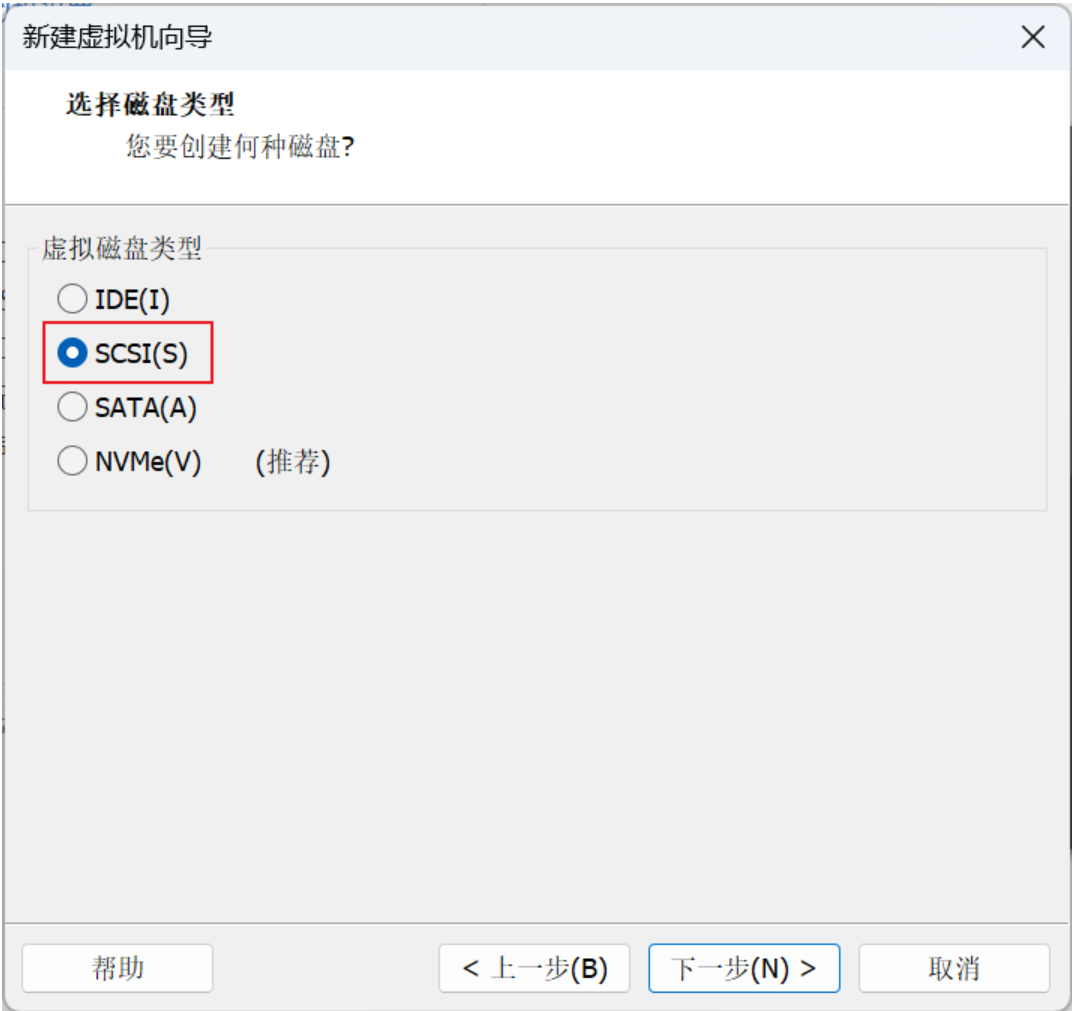
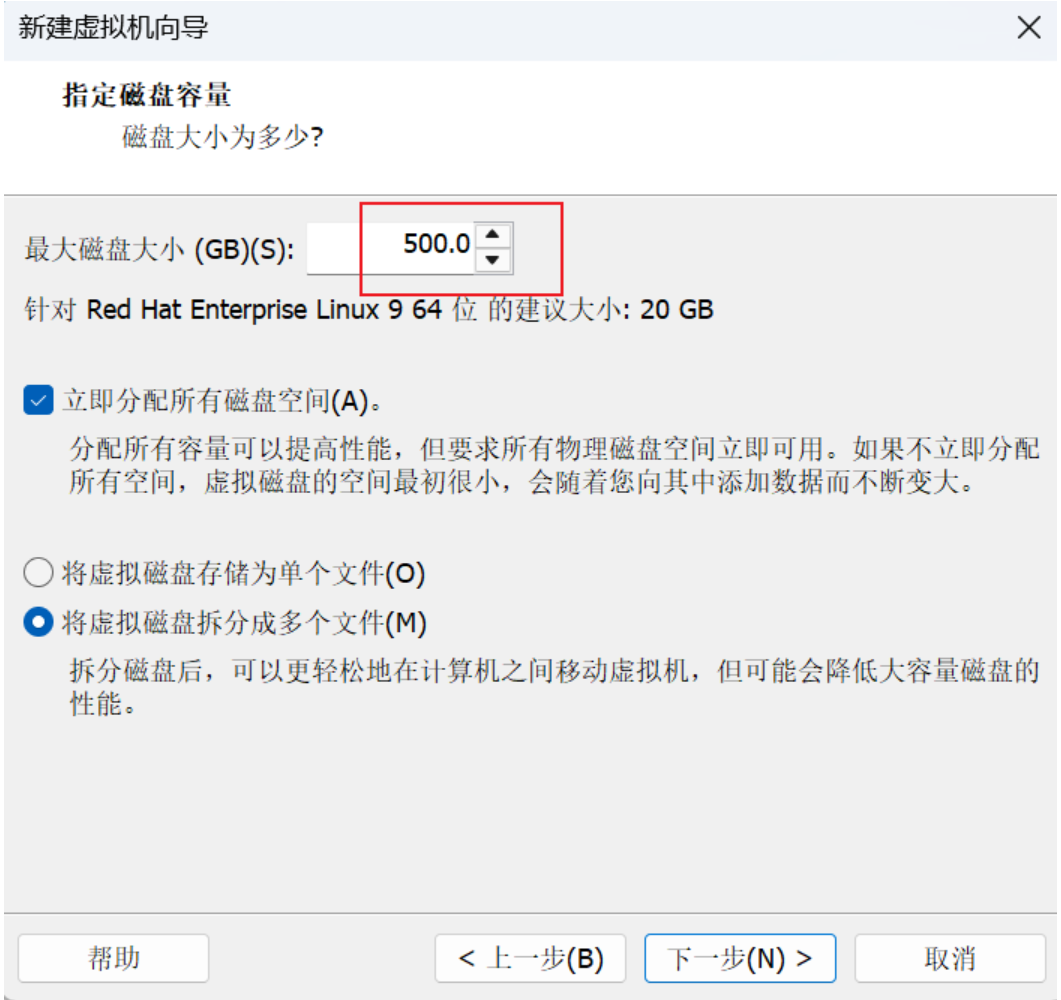
导入镜像
然后开机
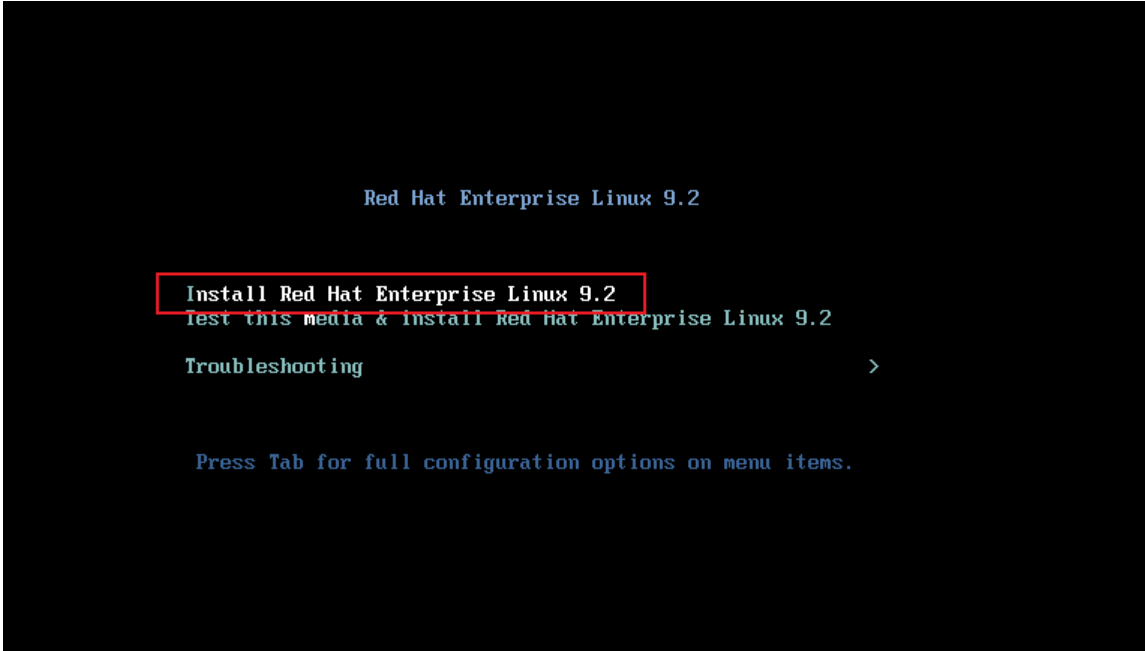
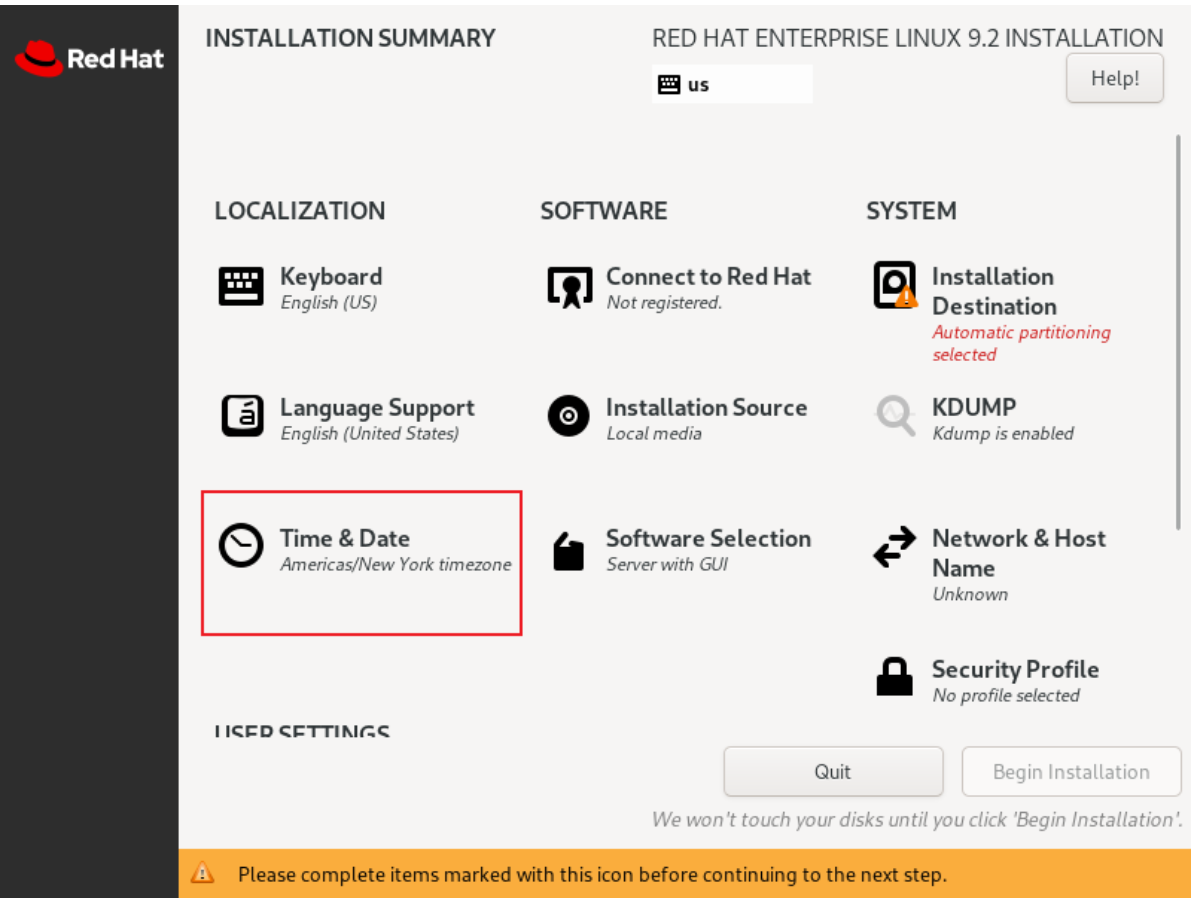

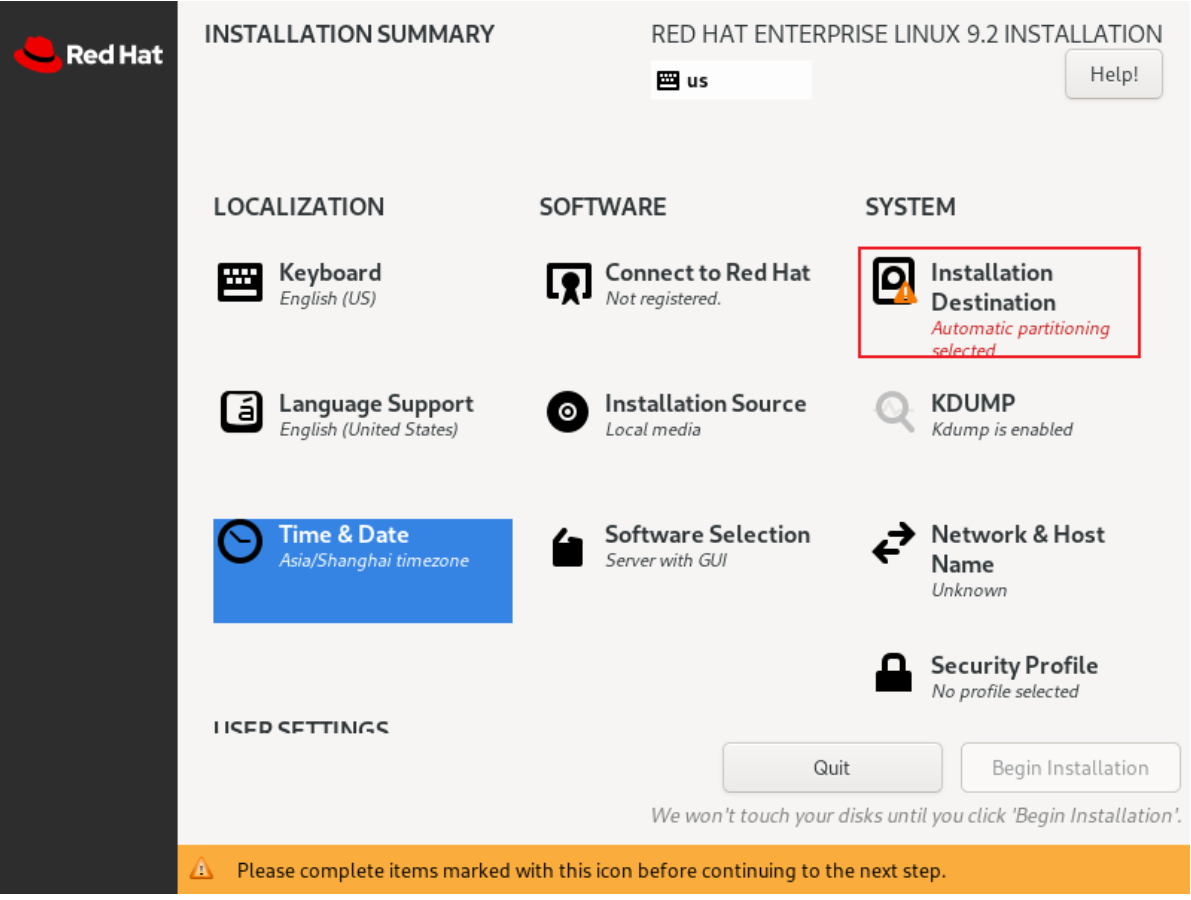
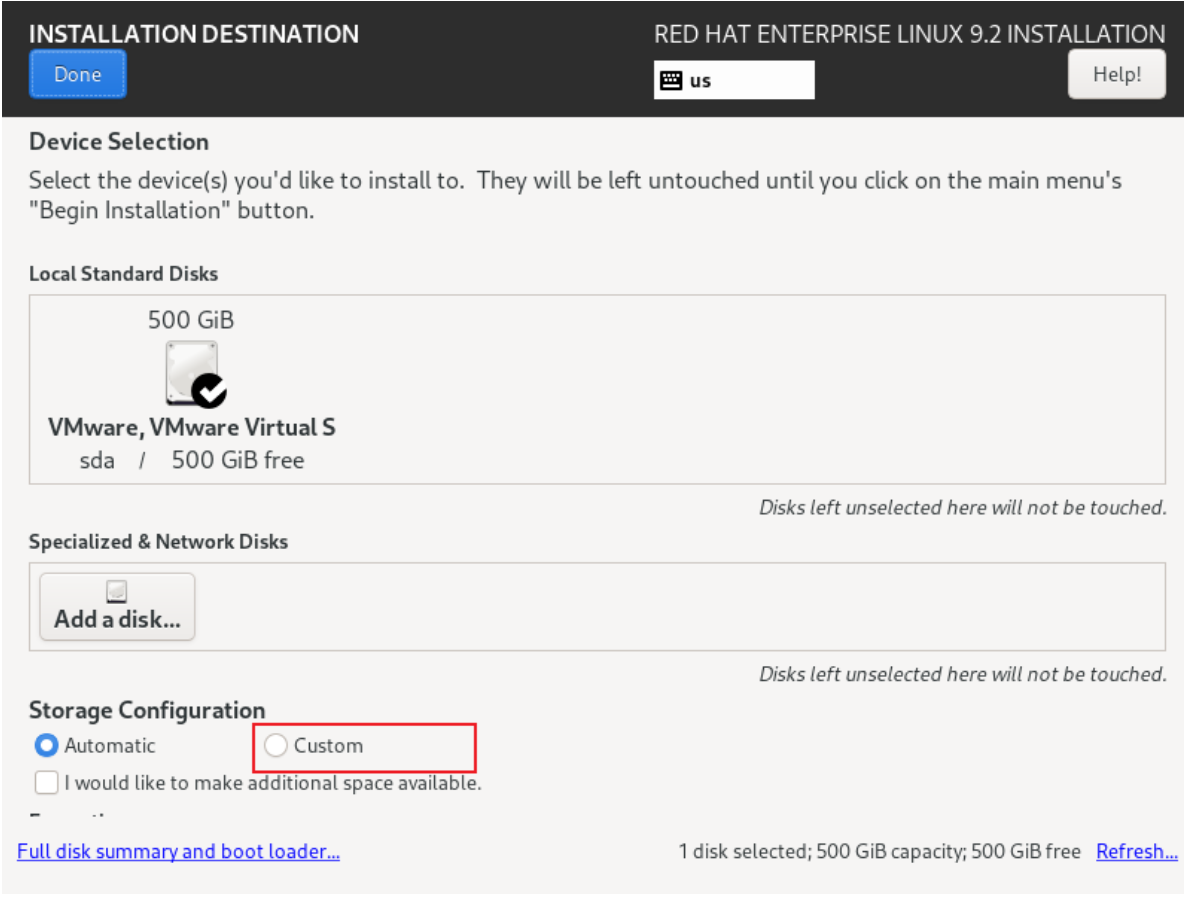
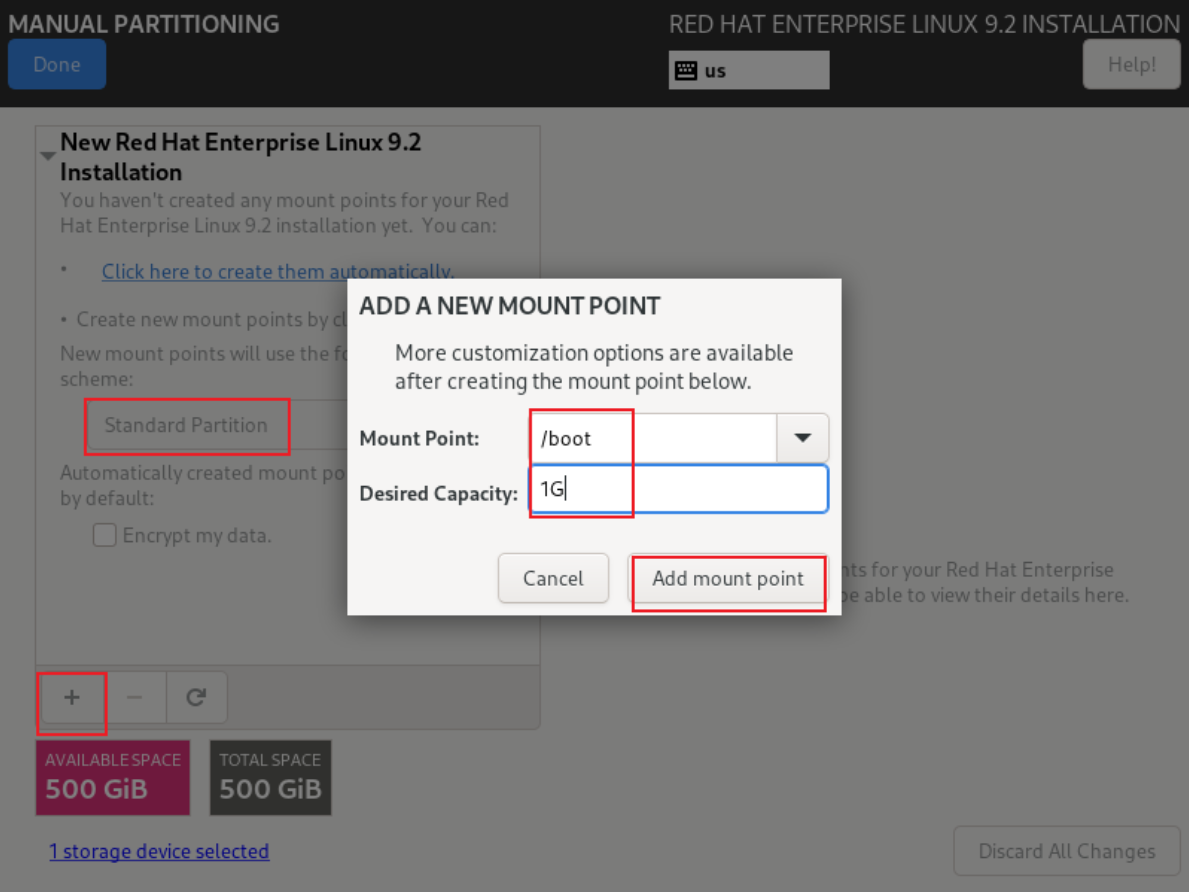
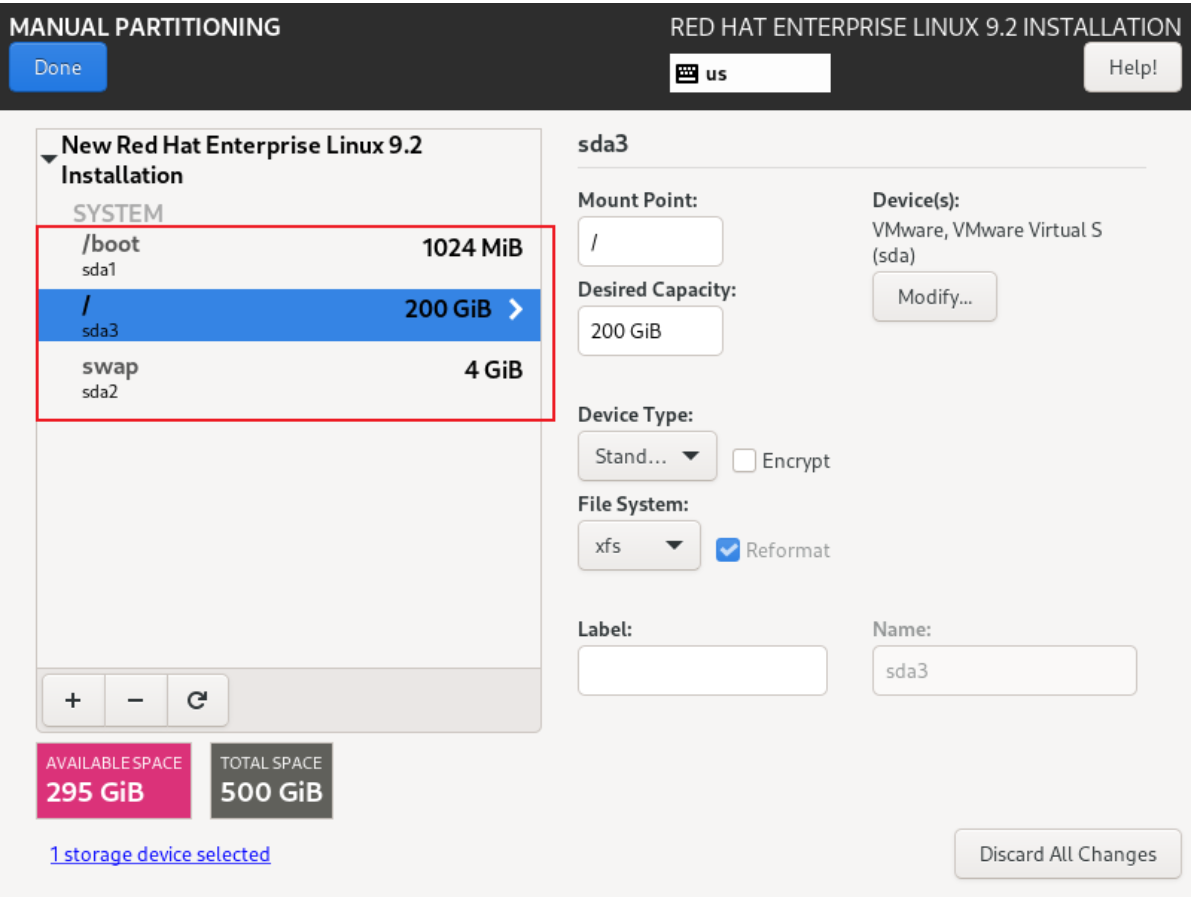
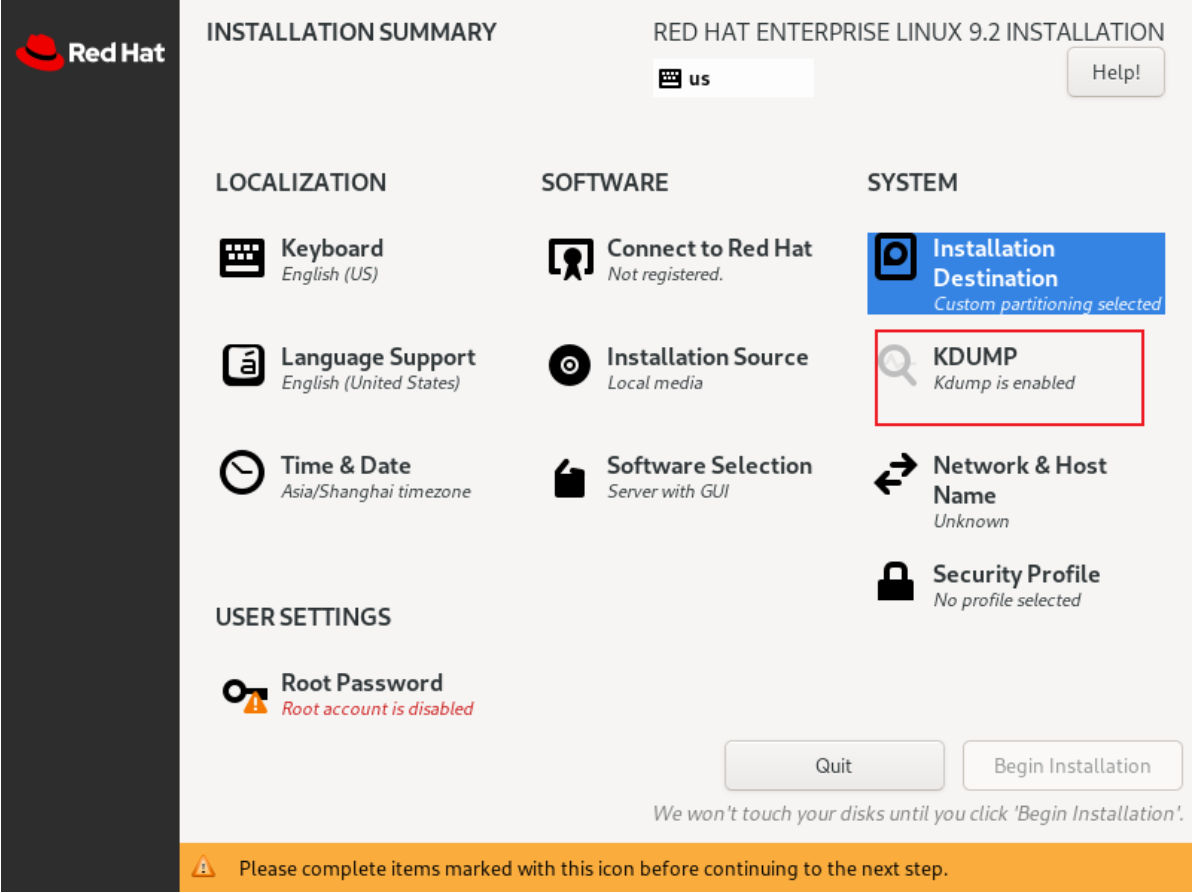
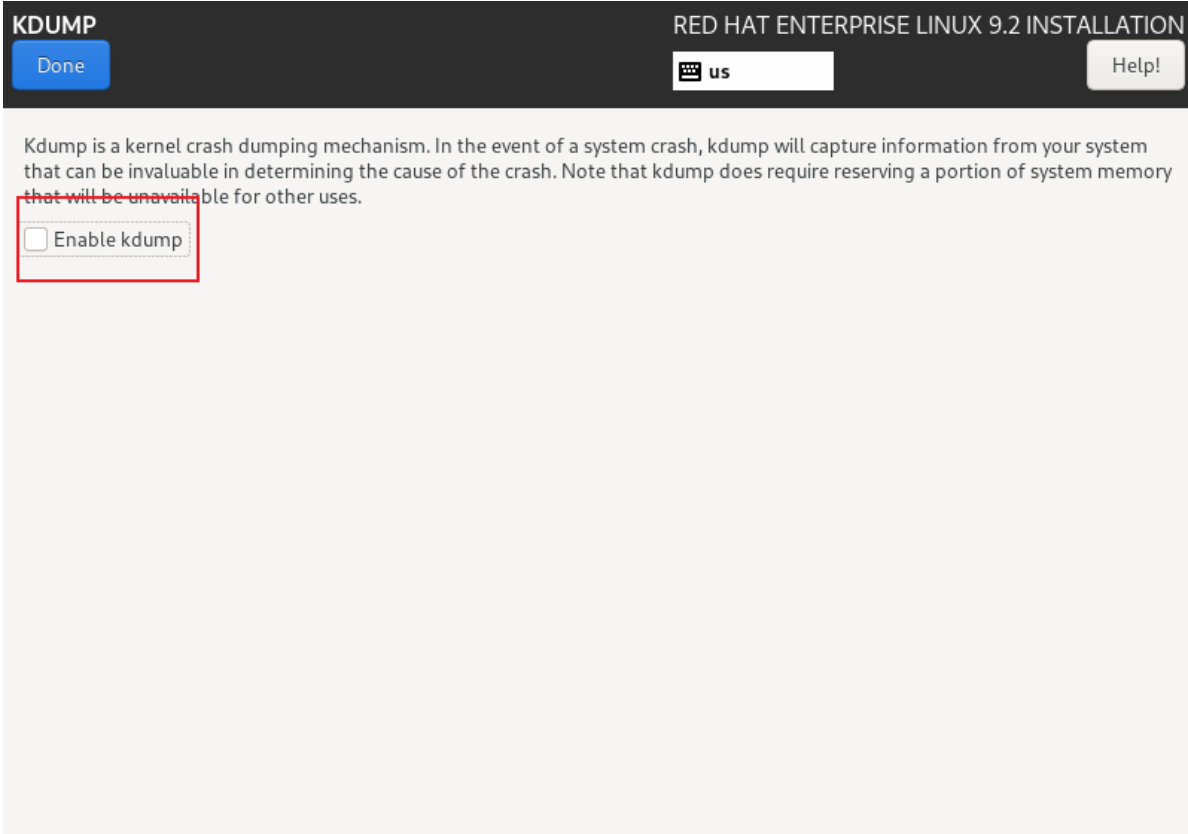
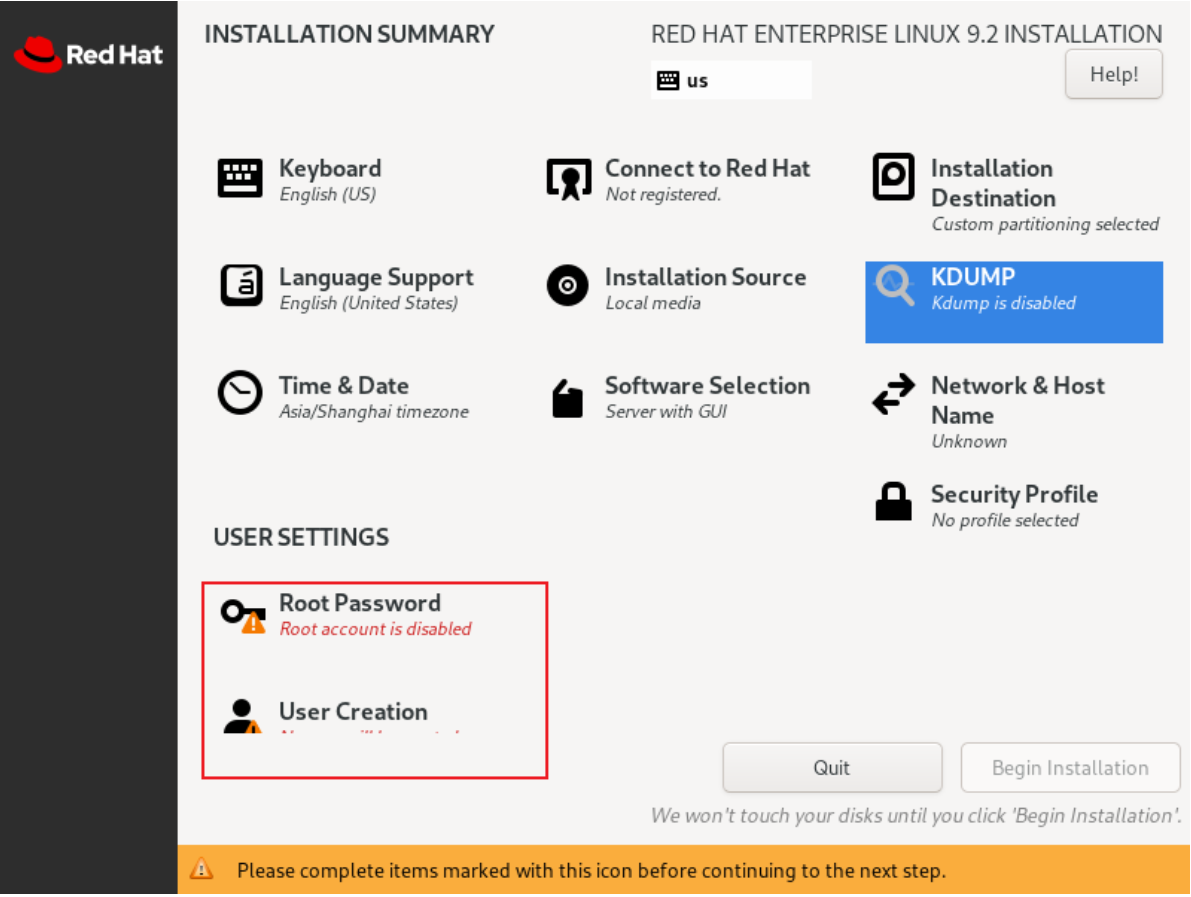
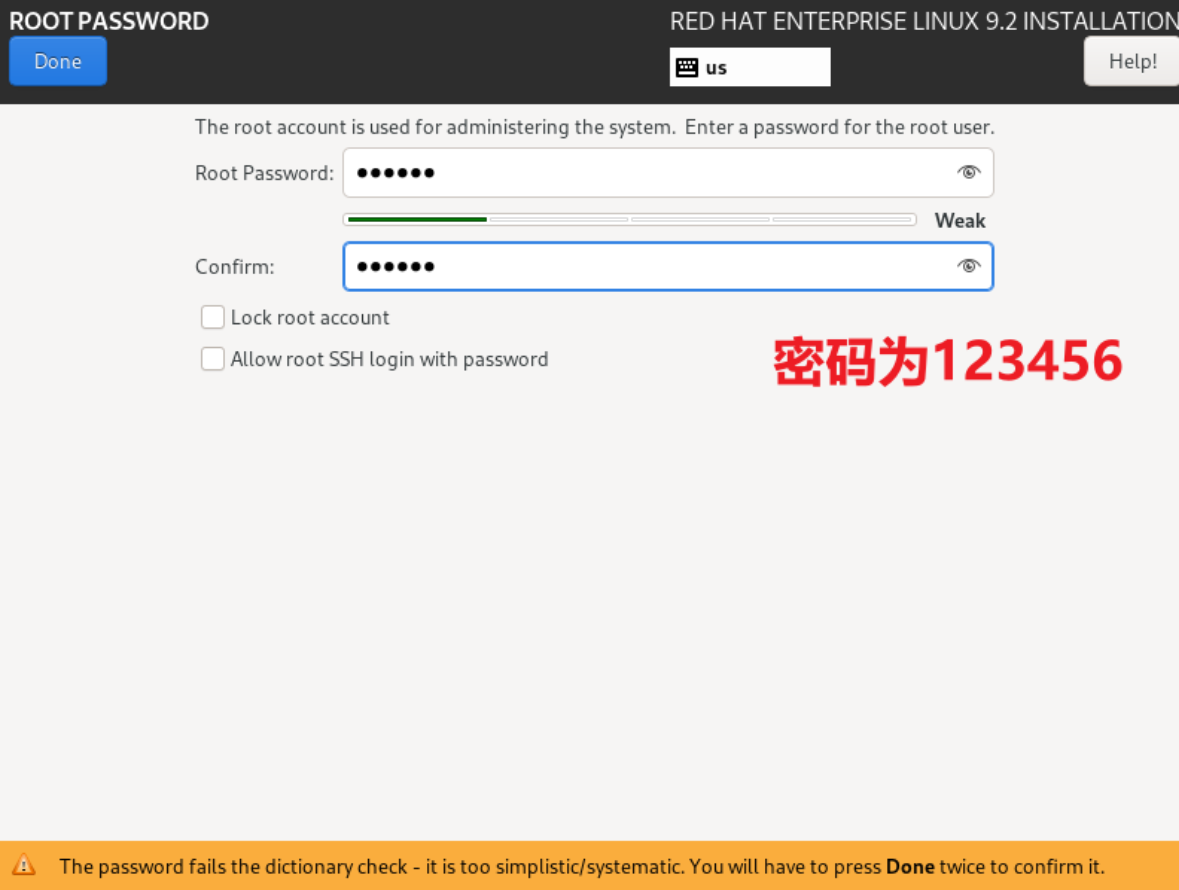
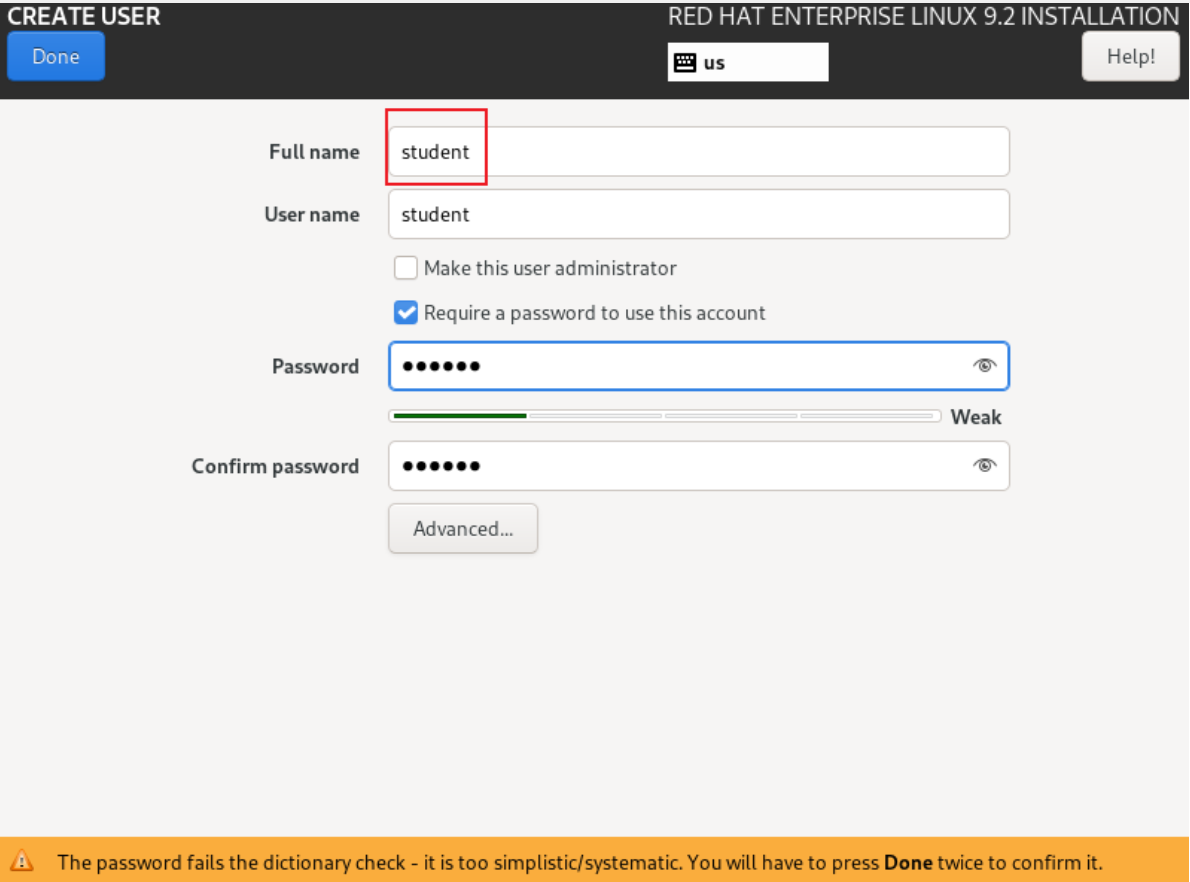
然后开始安装,安装完成之后重启,用root用户登录
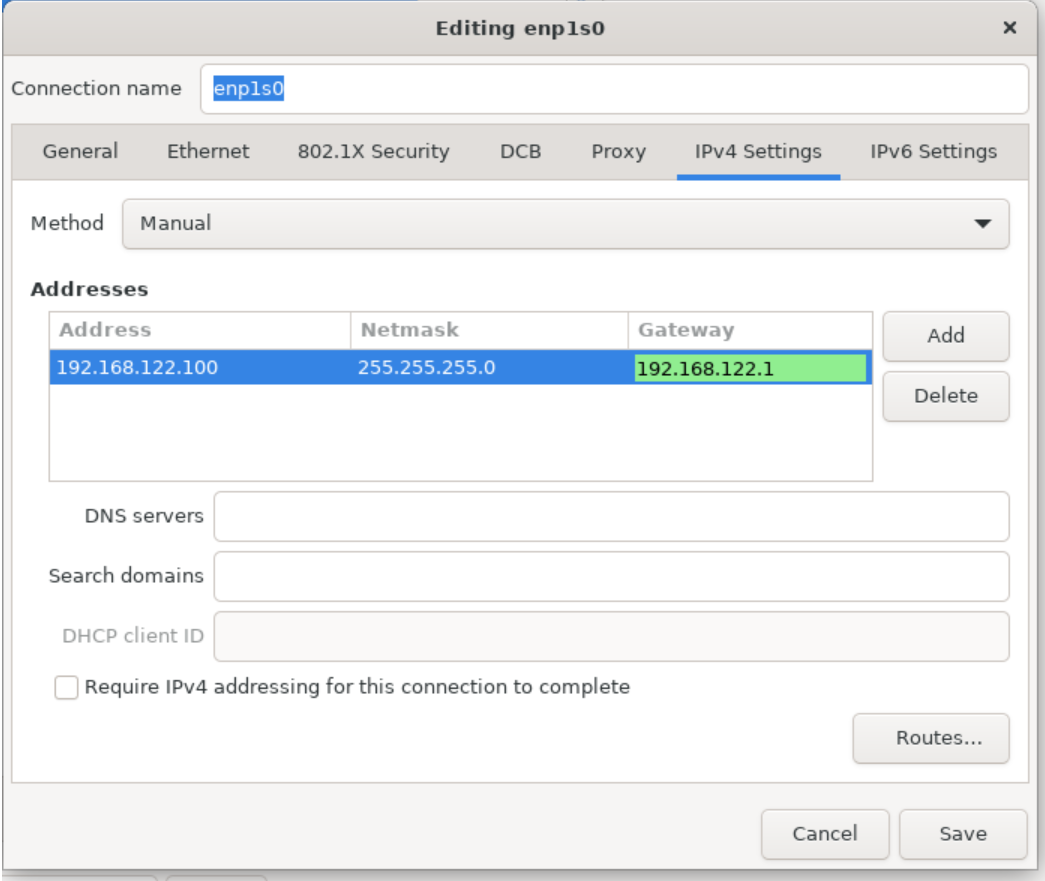
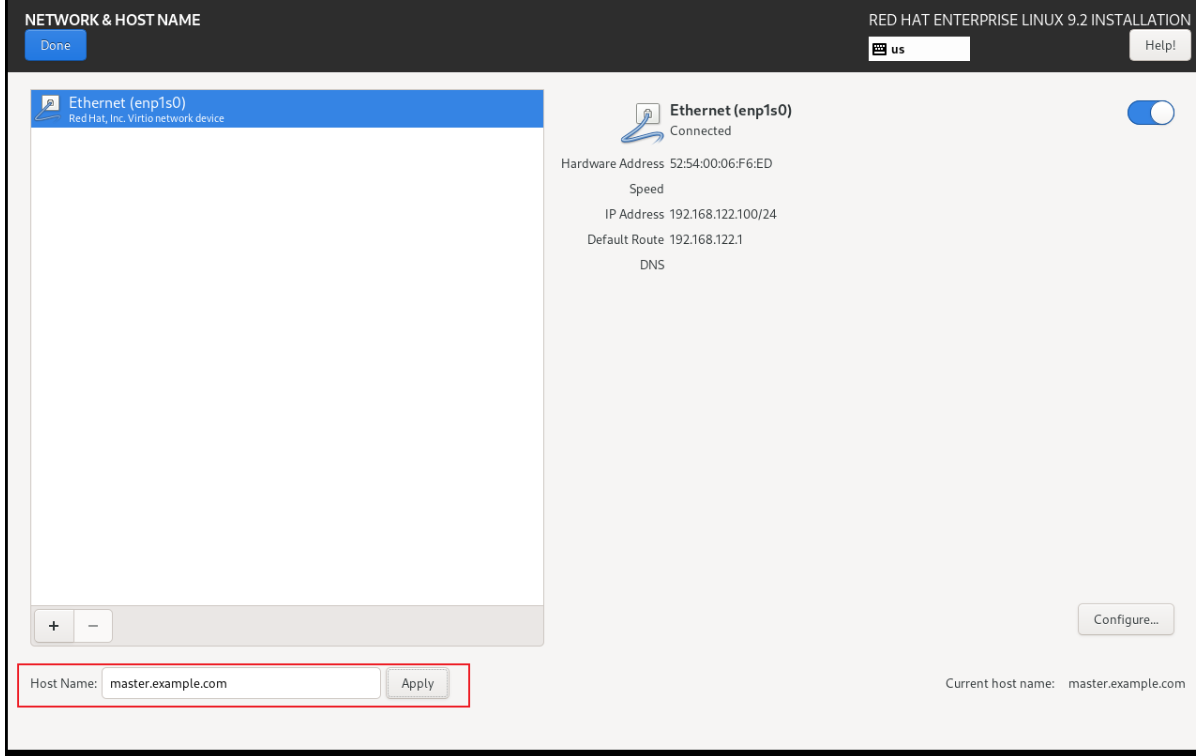
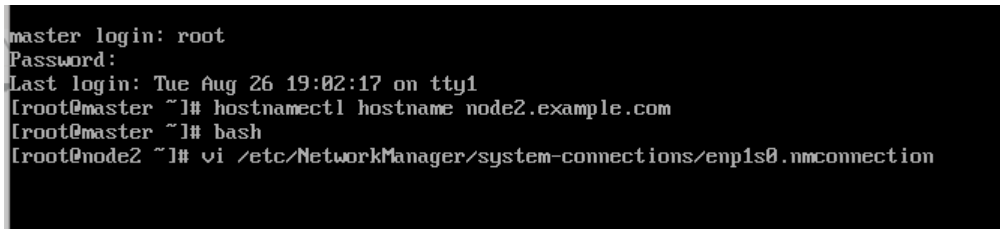
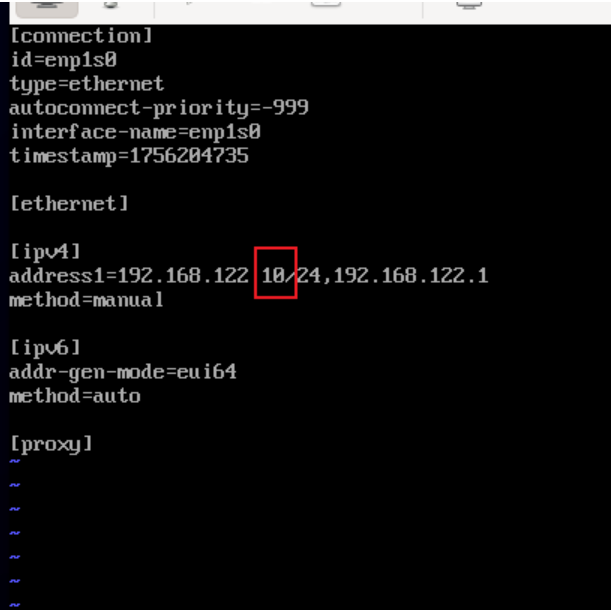
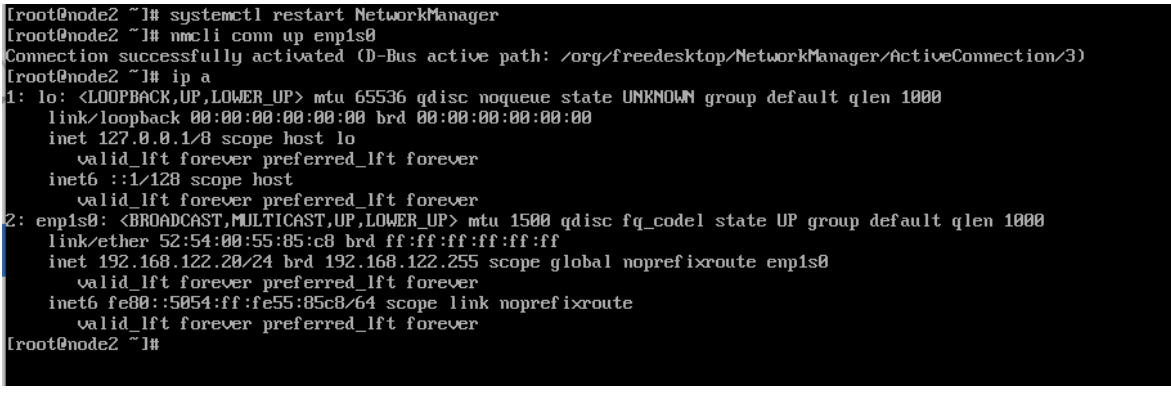
二、在虚拟机中配置IP地址
[root@localhost ~]# hostnamectl hostname ansible.example.com
[root@localhost ~]# bash
[root@ansible ~]# nmcli connection show
NAME    UUID                                  TYPE      DEVICE
lo      b3a08762-cb04-4218-82fc-035bfb994a2d  loopback  lo
ens160  fec9c85e-c7d8-36d8-9fc8-b88af59fbf33  ethernet  --
[root@ansible ~]# nmcli connection modify ens160 ipv4.addresses 192.168.100.100/24 ipv4.gateway 192.168.100.254 ipv4.dns 114.114.114.114 ipv4.method manual connection.autoconnect yes
[root@ansible ~]# nmcli connection up ens160
Connection successfully activated (D-Bus active path: /org/freedesktop/NetworkManager/ActiveConnection/7)
[root@ansible ~]# nmcli connection show
NAME    UUID                                  TYPE      DEVICE
ens160  fec9c85e-c7d8-36d8-9fc8-b88af59fbf33  ethernet  ens160
lo      b3a08762-cb04-4218-82fc-035bfb994a2d  loopback  lo
三、配置本地yum源
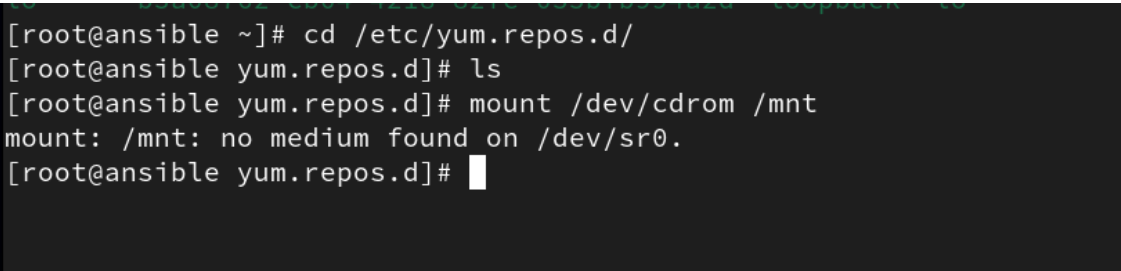
需要连接光驱
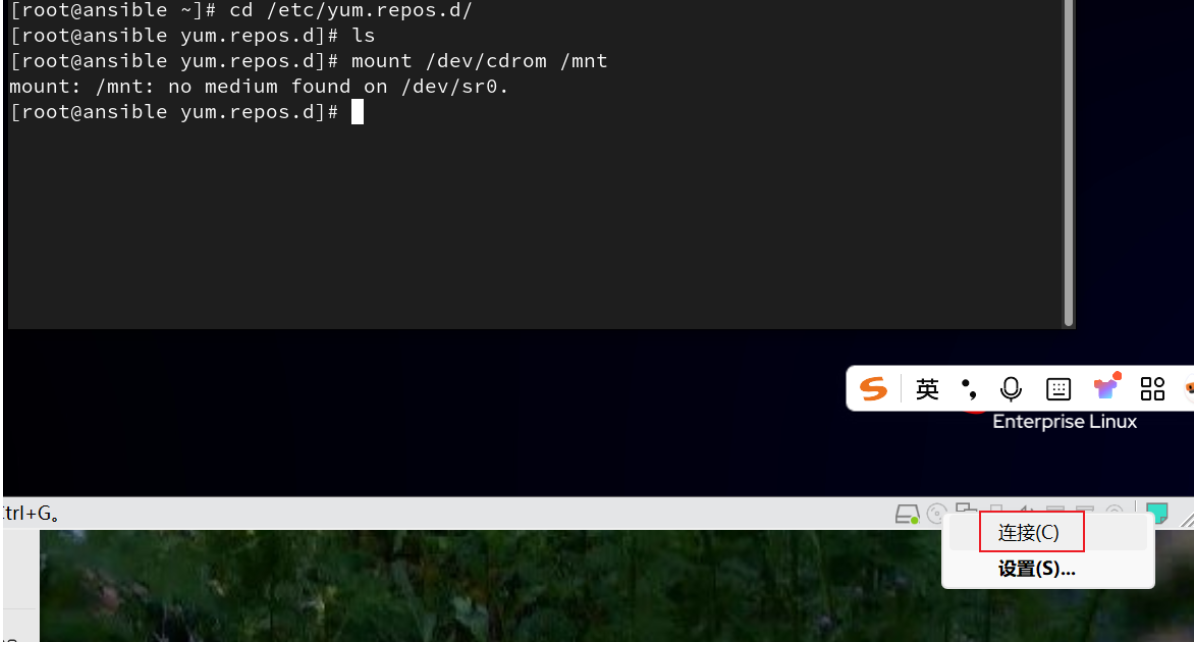

[root@ansible yum.repos.d]# cd /mnt
[root@ansible mnt]# ls
AppStream EULA images RPM-GPG-KEY-redhat-beta
BaseOS extra_files.json isolinux RPM-GPG-KEY-redhat-release
EFI GPL media.repo
[root@ansible mnt]# find / -name repodata
/run/media/root/RHEL-9-2-0-BaseOS-x86_64/AppStream/repodata
/run/media/root/RHEL-9-2-0-BaseOS-x86_64/BaseOS/repodata
/mnt/AppStream/repodata
/mnt/BaseOS/repodata
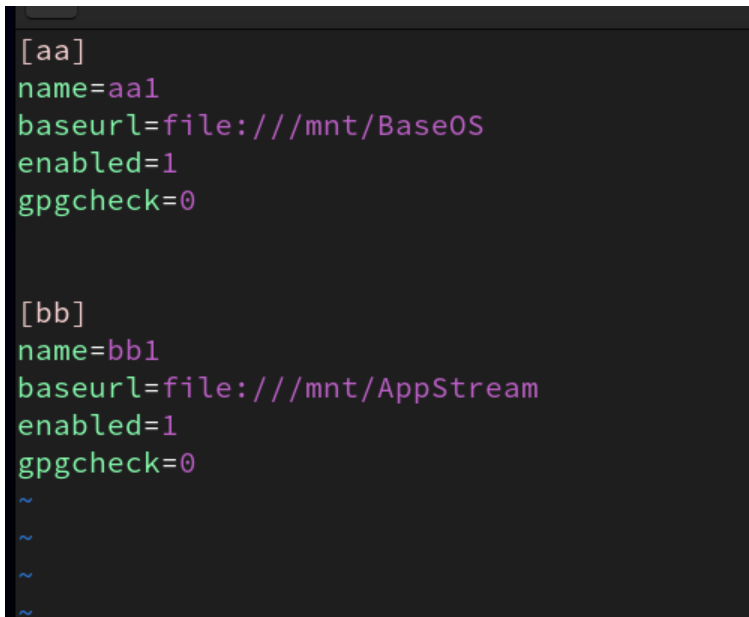
[root@ansible mnt]# vim /etc/yum.repos.d/server.repo
四、安装软件包组,重启libvirtd服务,并设置下次启动生效
[root@ansible ~]# yum -y group install "Virtualization Client" "Virtualization Hypervisor" "Virtualization Tools"
[root@ansible ~]# systemctl restart libvirtd
[root@ansible ~]# systemctl enable libvirtd
Created symlink /etc/systemd/system/multi-user.target.wants/libvirtd.service → /usr/lib/systemd/system/libvirtd.service.
Created symlink /etc/systemd/system/sockets.target.wants/libvirtd.socket → /usr/lib/systemd/system/libvirtd.socket.
Created symlink /etc/systemd/system/sockets.target.wants/libvirtd-ro.socket → /usr/lib/systemd/system/libvirtd-ro.socket.
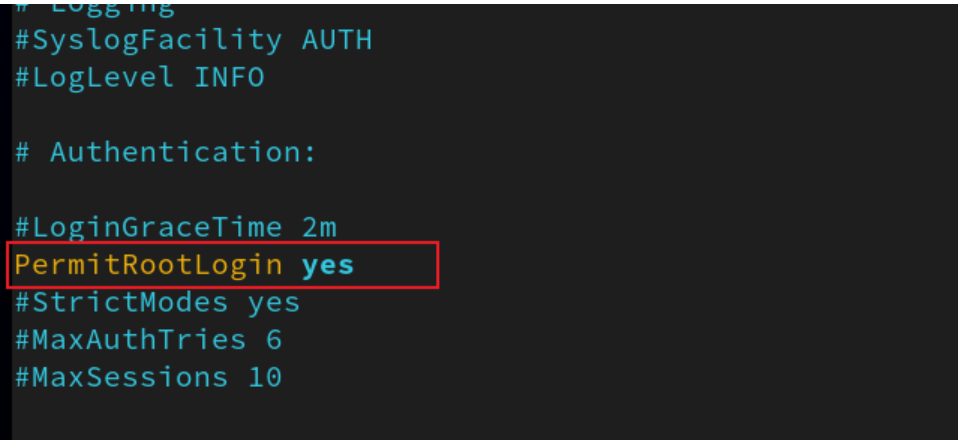
五、让虚拟机可以进行远程连接
[root@ansible ~]# vim /etc/ssh/sshd_config
[root@ansible ~]# systemctl restart sshd
[root@ansible ~]# systemctl enable sshd
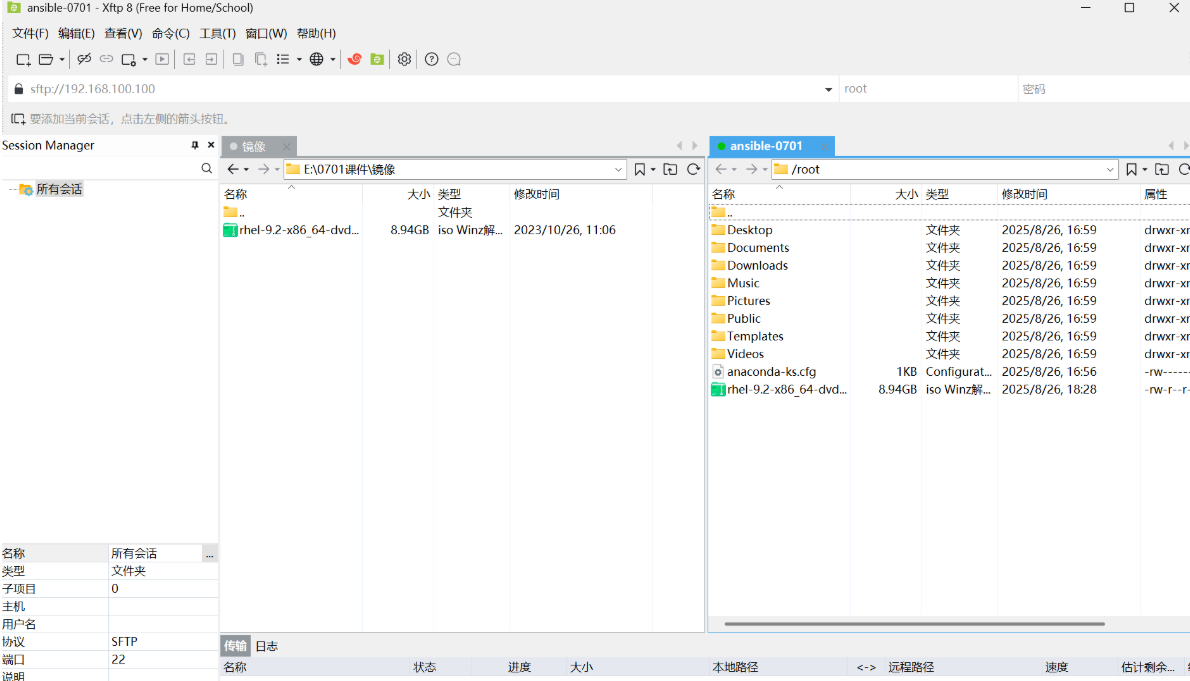
六、4、将本地RHEL9.2镜像上传到虚拟机
[root@ansible ~]# ls
anaconda-ks.cfg  Documents  Music     Public                   Templates
Desktop          Downloads  Pictures  rhel-9.2-x86_64-dvd.iso  Videos
七、在虚拟机中再安装一台虚拟机

八、克隆出来5台+刚刚安装的一台,一起6台主机
所有主机,配置IP的时候注意,要删除网卡配置文件的UUID
192.168.122.100 master.example.com
192.168.122.10 node1.example.com
192.168.122.20 node2.example.com
192.168.122.30 node3.example.com
192.168.122.40 node4.example.com
192.168.122.50 node5.example.com
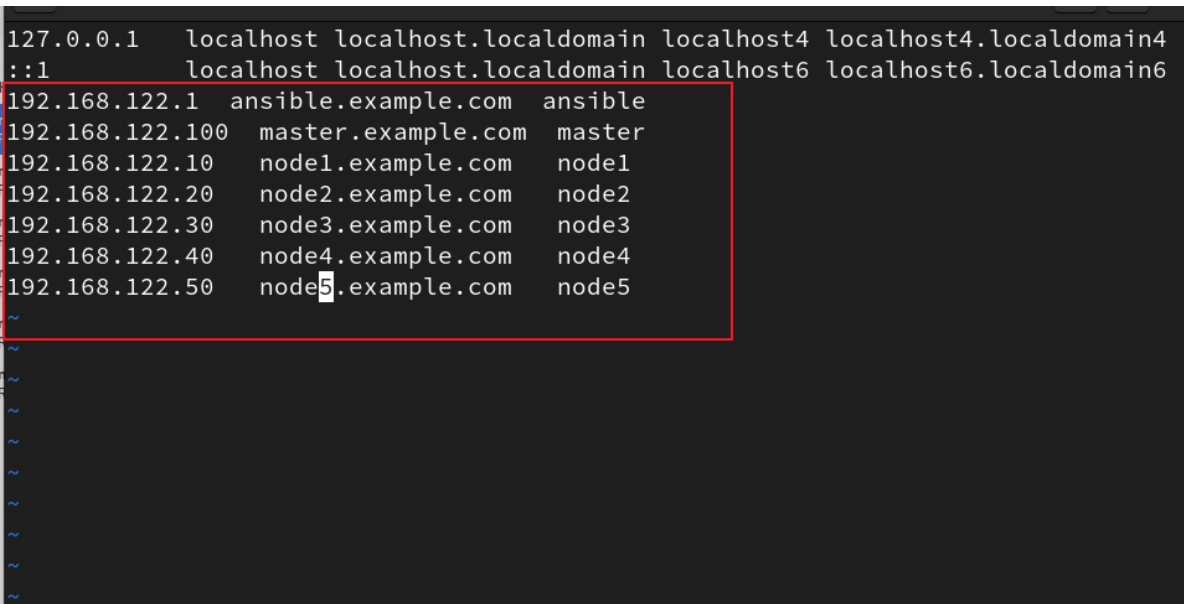
九、所有主机,编辑/etc/hosts
[root@ansible ~]# vim /etc/hosts
将文件发送给master
[root@ansible ~]# scp /etc/hosts root@master:/etc/hosts
The authenticity of host 'master (192.168.122.100)' can't be established.
ED25519 key fingerprint is SHA256:SeY88CrzFNCdL06cUzAp8fkEzSxM7HszUt0C+zebcfs.
This key is not known by any other names
Are you sure you want to continue connecting (yes/no/[fingerprint])? yes
Warning: Permanently added 'master' (ED25519) to the list of known hosts.
root@master's password:
hosts                                                              100%  461   342.5KB/s   00:00
[root@ansible ~]# ssh root@master
root@master's password:
Register this system with Red Hat Insights: insights-client --register
Create an account or view all your systems at https://red.ht/insights-dashboard
Last login: Tue Aug 26 20:05:48 2025
[root@master ~]# cat /etc/hosts
127.0.0.1   localhost localhost.localdomain localhost4 localhost4.localdomain4
::1         localhost localhost.localdomain localhost6 localhost6.localdomain6
192.168.122.1  ansible.example.com  ansible
192.168.122.100  master.example.com  master
192.168.122.10   node1.example.com   node1
192.168.122.20   node2.example.com   node2
192.168.122.30   node3.example.com   node3
192.168.122.40   node4.example.com   node4
192.168.122.50   node5.example.com   node5
每次发送都需要密码比较麻烦所以先做一下免密钥的操作(root和Student都需要做免密钥操作并且受控主机的root和Student用户都需要发送)
root------>root
root------->Student
Student-------->root
Student-------->root
[root@master ~]# ssh-keygen
[root@master ~]# for i in node{1..5}
> do ssh-copy-id -i ~/.ssh/id_rsa.pub root@$i
> done
[root@master ~]# for i in node{1..5}; do ssh-copy-id -i ~/.ssh/id_rsa.pub student@$i; done
[root@master ~]# su - student
Last login: Tue Aug 26 21:30:24 CST 2025 on tty1
[student@master ~]$ ssh-keygen
[student@master ~]$ for i in node{1..5}; do ssh-copy-id -i ~/.ssh/id_rsa.pub root@$i; done
[student@master ~]$ for i in node{1..5}; do ssh-copy-id -i ~/.ssh/id_rsa.pub student@$i; done
将配置文件发送到每台主机
[student@master ~]$ exit
logout
[root@master ~]# for i in node{1..5}
> do scp /etc/hosts root@$i:/etc/hosts
> done
hosts                                                              100%  461   151.7KB/s   00:00
hosts                                                              100%  461   227.7KB/s   00:00
hosts                                                              100%  461   145.8KB/s   00:00
hosts                                                              100%  461   127.6KB/s   00:00
hosts                                                              100%  461    70.2KB/s   00:00
[root@master ~]# ssh root@node1
Register this system with Red Hat Insights: insights-client --register
Create an account or view all your systems at https://red.ht/insights-dashboard
Last login: Tue Aug 26 21:39:40 2025
[root@node1 ~]# cat /etc/hosts
127.0.0.1   localhost localhost.localdomain localhost4 localhost4.localdomain4
::1         localhost localhost.localdomain localhost6 localhost6.localdomain6
192.168.122.1  ansible.example.com  ansible
192.168.122.100  master.example.com  master
192.168.122.10   node1.example.com   node1
192.168.122.20   node2.example.com   node2
192.168.122.30   node3.example.com   node3
192.168.122.40   node4.example.com   node4
192.168.122.50   node5.example.com   node5
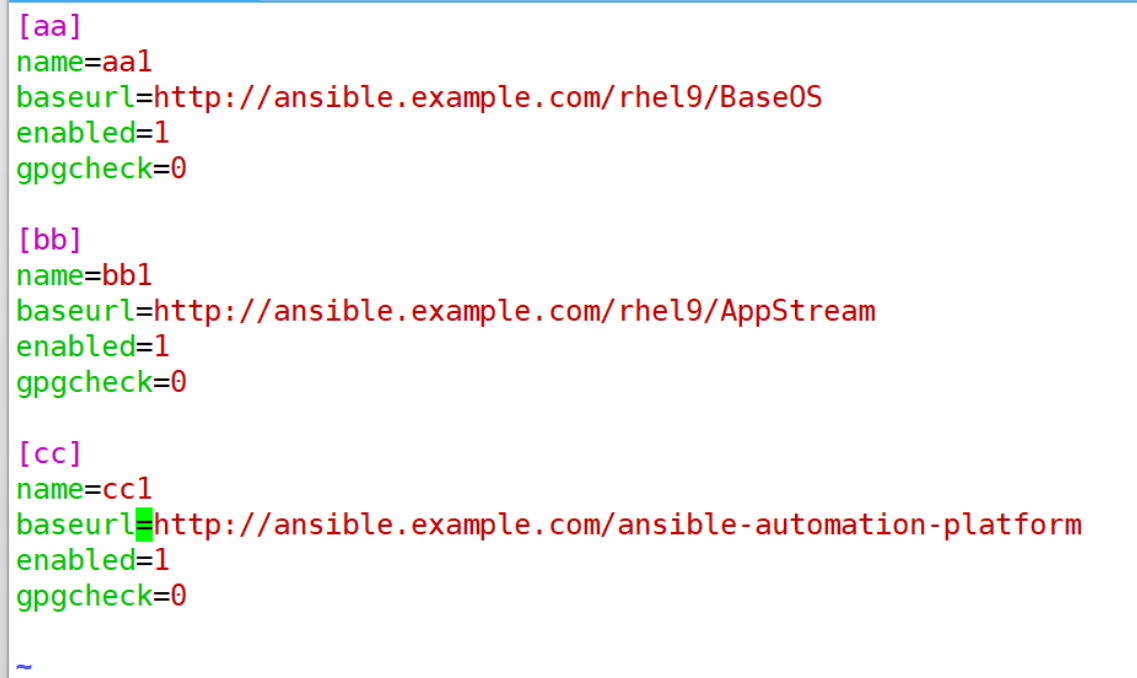
十、配置yum仓库(自己做一个网络源)
在宿主机ansible中配置本地yum仓库,然后安装httpd服务
将包文件上传到/var/www/html/目录下,然后重启httpd服务,并设置下次启动生效
关闭防火墙和selinux
[root@ansible ~]# mount /dev/cdrom /mnt
mount: /mnt: WARNING: source write-protected, mounted read-only.
[root@ansible ~]# yum -y install httpd
[root@ansible ~]# cd /var/www/html
[root@ansible html]# ls
[root@ansible html]# systemctl stop firewalld.service
[root@ansible html]# systemctl disable firewalld.service
Removed "/etc/systemd/system/multi-user.target.wants/firewalld.service".
Removed "/etc/systemd/system/dbus-org.fedoraproject.FirewallD1.service".
[root@ansible html]# setenforce 0
[root@ansible html]# getenforce
Permissive
[root@ansible html]# vim /etc/selinux/config
将文件上传
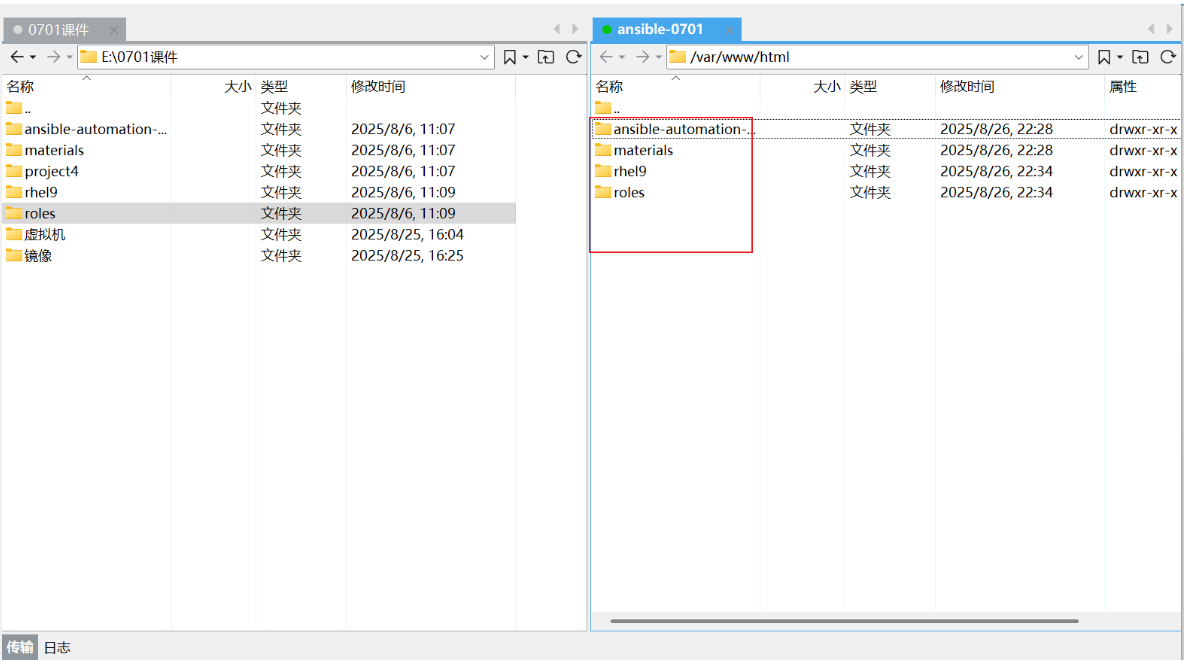
[root@ansible html]# ls
ansible-automation-platform  materials  rhel9  roles
[root@ansible html]# systemctl restart httpd
[root@ansible html]# systemctl enable httpd
Created symlink /etc/systemd/system/multi-user.target.wants/httpd.service → /usr/lib/systemd/system/httpd.service.
[root@ansible html]# cd
[root@ansible ~]#
[root@ansible ~]# ssh root@master
[root@master ~]# cd /etc/yum.repos.d/
[root@master yum.repos.d]# ls
[root@master yum.repos.d]# vi /etc/yum.repos.d/server.repo
[root@master yum.repos.d]# cd
[root@master ~]# yum -y install vim bash-completion net-tools
没测试安装之前应该是黑色字体
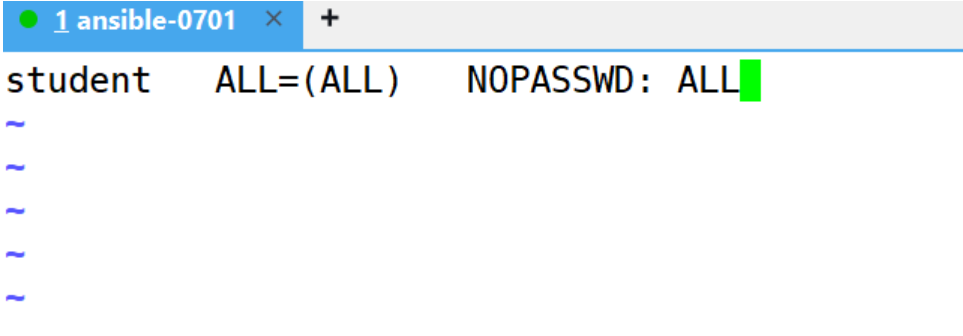
十一、student用户提权
[root@master ~]# vim /etc/sudoers.d/student
[root@master ~]# for i in node{1..5}; do scp /etc/sudoers.d/student root@$i:/etc/sudoers.d/; done
student                                                            100%   36     9.8KB/s   00:00
student                                                            100%   36     9.5KB/s   00:00
student                                                            100%   36    16.6KB/s   00:00
student                                                            100%   36     5.7KB/s   00:00
student                                                            100%   36    16.9KB/s   00:00
十二、安装ansible
[root@master ~]# su - student
Last login: Tue Aug 26 22:13:52 CST 2025 on pts/0
[student@master ~]$ sudo yum -y install ansible-core   ansible-navigator
1、主机清单的位置
[student@master ~]$ pwd
/home/student
[student@master ~]$ mkdir ansible
[student@master ~]$ cd ansible
[student@master ansible]$ pwd
/home/student/ansible
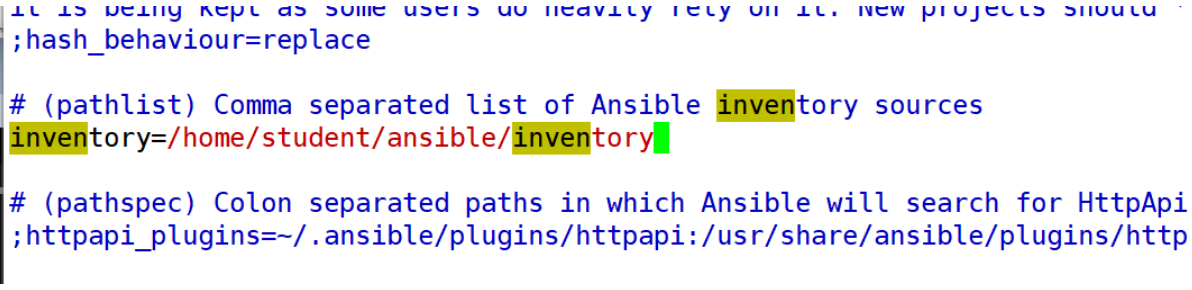
[student@master ansible]$ vim /etc/ansible/ansible.cfg
[student@master ansible]$ ansible-config init --disabled > ansible.cfg
[student@master ansible]$ ls
ansible.cfg
[student@master ansible]$ vim ansible.cfg
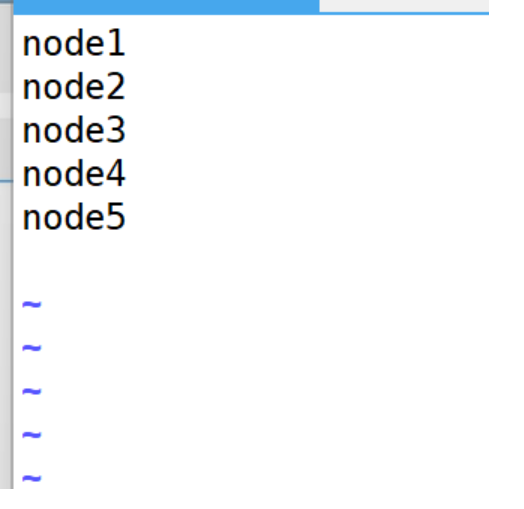
[student@master ansible]$ vim inventory
2、管理ansible的用户
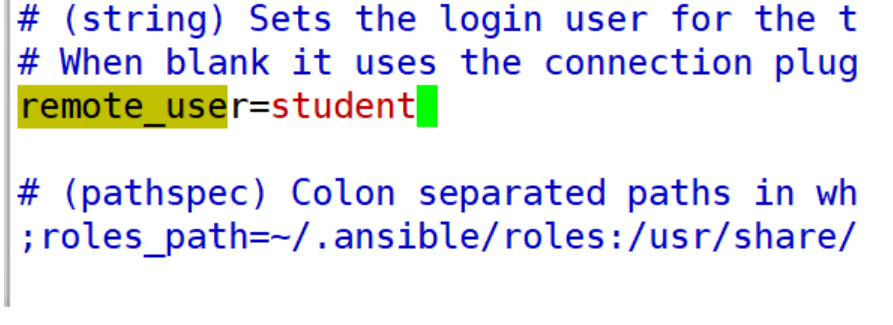
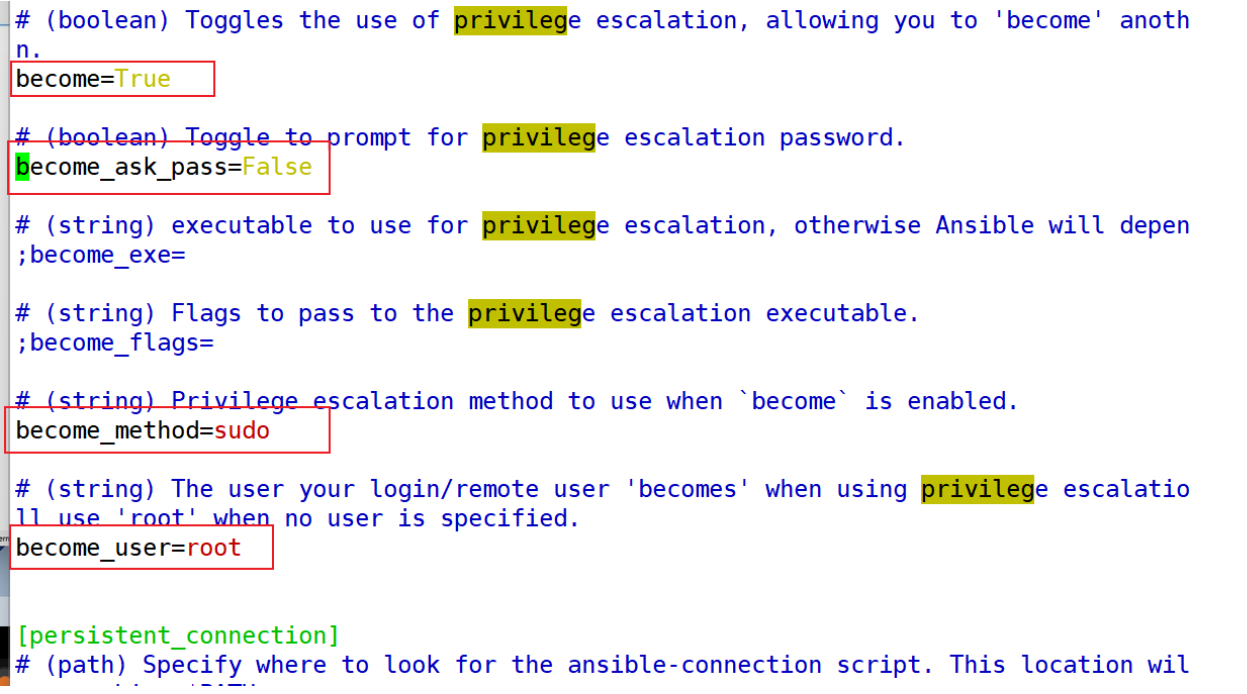
[student@master ansible]$ vim ansible.cfg
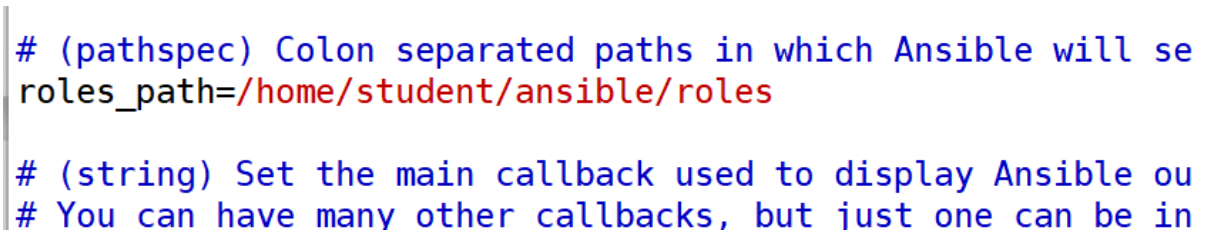
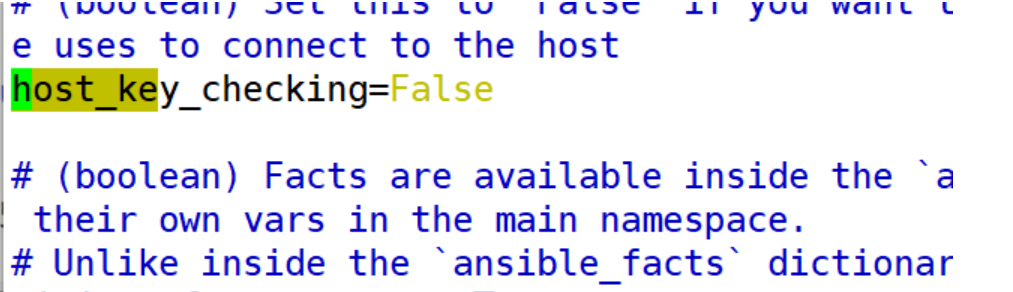
3、角色目录,以及模块和关闭密码检查
[student@master ansible]$ mkdir roles
[student@master ansible]$ vim ansible.cfg
[student@master ansible]$ mkdir collections
[student@master ansible]$ ls
ansible.cfg  collections  inventory  roles

十三、测试
